Section outline

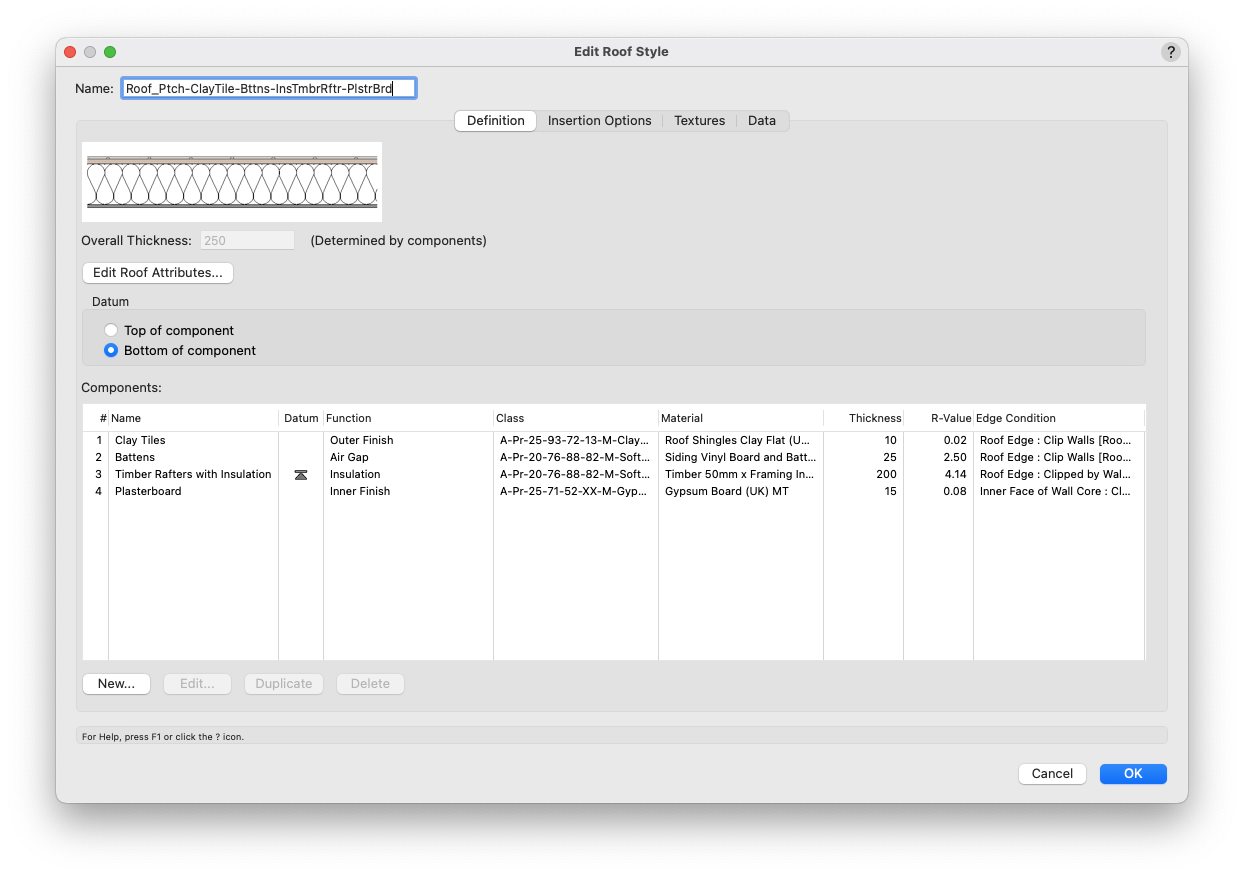
    • The Definition tab of the Roof Style dialogue


    • KEY FEATURES

      At the top, you will see a section diagram of your Roof Style, showing any components you may have added.

      Overall Thickness: This field is determined by component thicknesses. It is automatically calculated and greyed. You must have at least one component for Roof Styles. 

      Edit Roof Attributes

      Roof Attributes: These fields allow you to override the Fill and Pen settings of the roof object overall. In general, click the Make all Attributes by Class button to control the graphics of the roof object by its class.

      Datum: Set whether the datum is the top or bottom of the selected component. The selected component is the one with the icon shown in the Datum column in the table below. You can toggle between the top-of-component and bottom-of-component settings by clicking the icon in the table.

      Components: You can add, edit, duplicate, delete, and sort your components from here. You can edit a row directly by clicking within a cell or by selecting a row and clicking the Edit button below. (Remember: Roofs require at least one component to function.)

    • ADDING COMPONENTS

      Click New to add components to your roof.

      Roof Component Settings

      Definition: Set the component's defining features. At a minimum, it needs a Name and Thickness. If you add a Material, it can pull its graphics and Lambda from there.

      Section Fill, Section Pen, and Texture: The graphic appearance of the component can be
      • set by Style (set Material to None, click Remove by Class Settings, and edit the fields manually),
      • set by Class (select a Class from the Definition dropdown and click Make all Attributes By Class), or
      • set by Material (select a Material in the Definition field).
      Note: When a Material is assigned to a component, the Material's attributes override the Section Fill and Texture. However, you can still change to a different Texture while keeping the Material active.

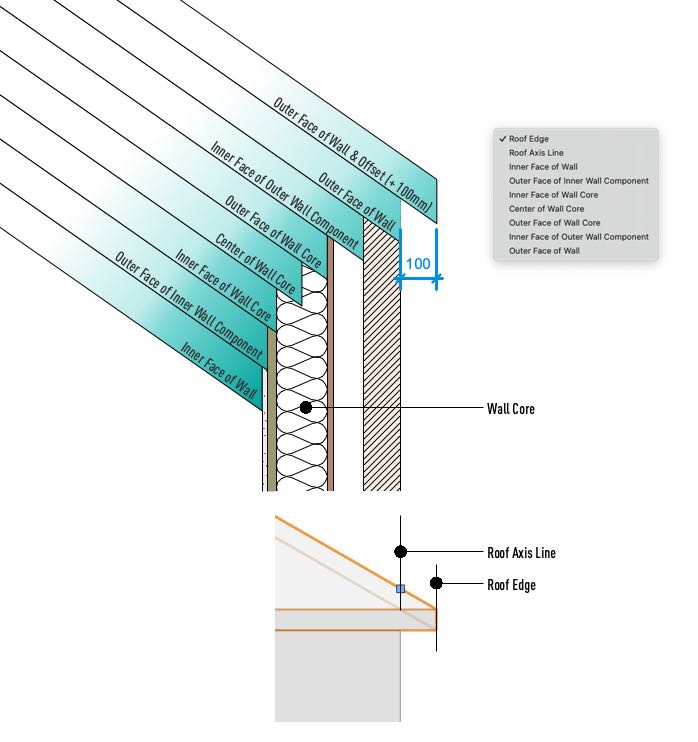
      Edge Condition: Here, you can set a Bound for the Edge Condition of the roof component when the roof has wall associations. You can also apply a Manual Bound and Bound Offset. There is also the Section Fill Change Point dropdown, which allows you to set a location within the associated wall assembly to an alternate section fill. The Alternate Section Fill field becomes active when a change point has been selected. Note: The Alternate Section Fill only affects the component's graphics when viewed in Section.
    • A diagram of the different offset options for roof components relative to a wall object