
Vectorworks University
Search results: 568
Lernen Sie den Befehl Extrusionskörper anlegen kennen. Weitere Inhalte zum Thema "Erste Schritte 3D" finden Sie hier.
Category: Erste Schritte 2024
Requires Approval: No

Lernen Sie das Werkzeug Hohlkörper kennen. Weitere Inhalte zum Thema "Erste Schritte 3D" finden Sie hier.
Category: Erste Schritte 2024
Requires Approval: No


Lernen Sie Linienendzeichen anlegen und verwalten.
Category: Erste Schritte 2024
Requires Approval: No

Erlernen Sie das Zuweisen und Erstellen von Mosaiken.
Category: Erste Schritte 2024
Requires Approval: No

Lernen Sie den Befehl NURBS analysieren kennen. Weitere Inhalte zum Thema "Erste Schritte 3D" finden Sie hier.
Category: Erste Schritte 2024
Requires Approval: No

Lernen Sie den Befehl NURBS bearbeiten kennen. Weitere Inhalte zum Thema "Erste Schritte 3D" finden Sie hier.
Category: Erste Schritte 2024
Requires Approval: No

Lernen Sie den Befehl Nurbsverrundung anlegen kennen. Weitere Inhalte zum Thema "Erste Schritte 3D" finden Sie hier.
Category: Erste Schritte 2024
Requires Approval: No
Lernen Sie den Befehl Pfadkörper anlegen kennen. Weitere Inhalte zum Thema "Erste Schritte 3D" finden Sie hier.
Category: Erste Schritte 2024
Requires Approval: No

Lernen Sie das Werkzeug Projektion kennen. Weitere Inhalte zum Thema "Erste Schritte 3D" finden Sie hier.
Category: Erste Schritte 2024
Requires Approval: No
Lernen Sie den Befehl Rotationskörper anlegen kennen. Weitere Inhalte zum Thema "Erste Schritte 3D" finden Sie hier.
Category: Erste Schritte 2024
Requires Approval: No


Lernen Sie das Werkzeug Verformen kennen. Weitere Inhalte zum Thema "Erste Schritte 3D" finden Sie hier.
Category: Erste Schritte 2024
Requires Approval: No


Lernen Sie den Befehl Vollkörper bearbeiten kennen. Weitere Inhalte zum Thema "Erste Schritte 3D" finden Sie hier
Category: Erste Schritte 2024
Requires Approval: No
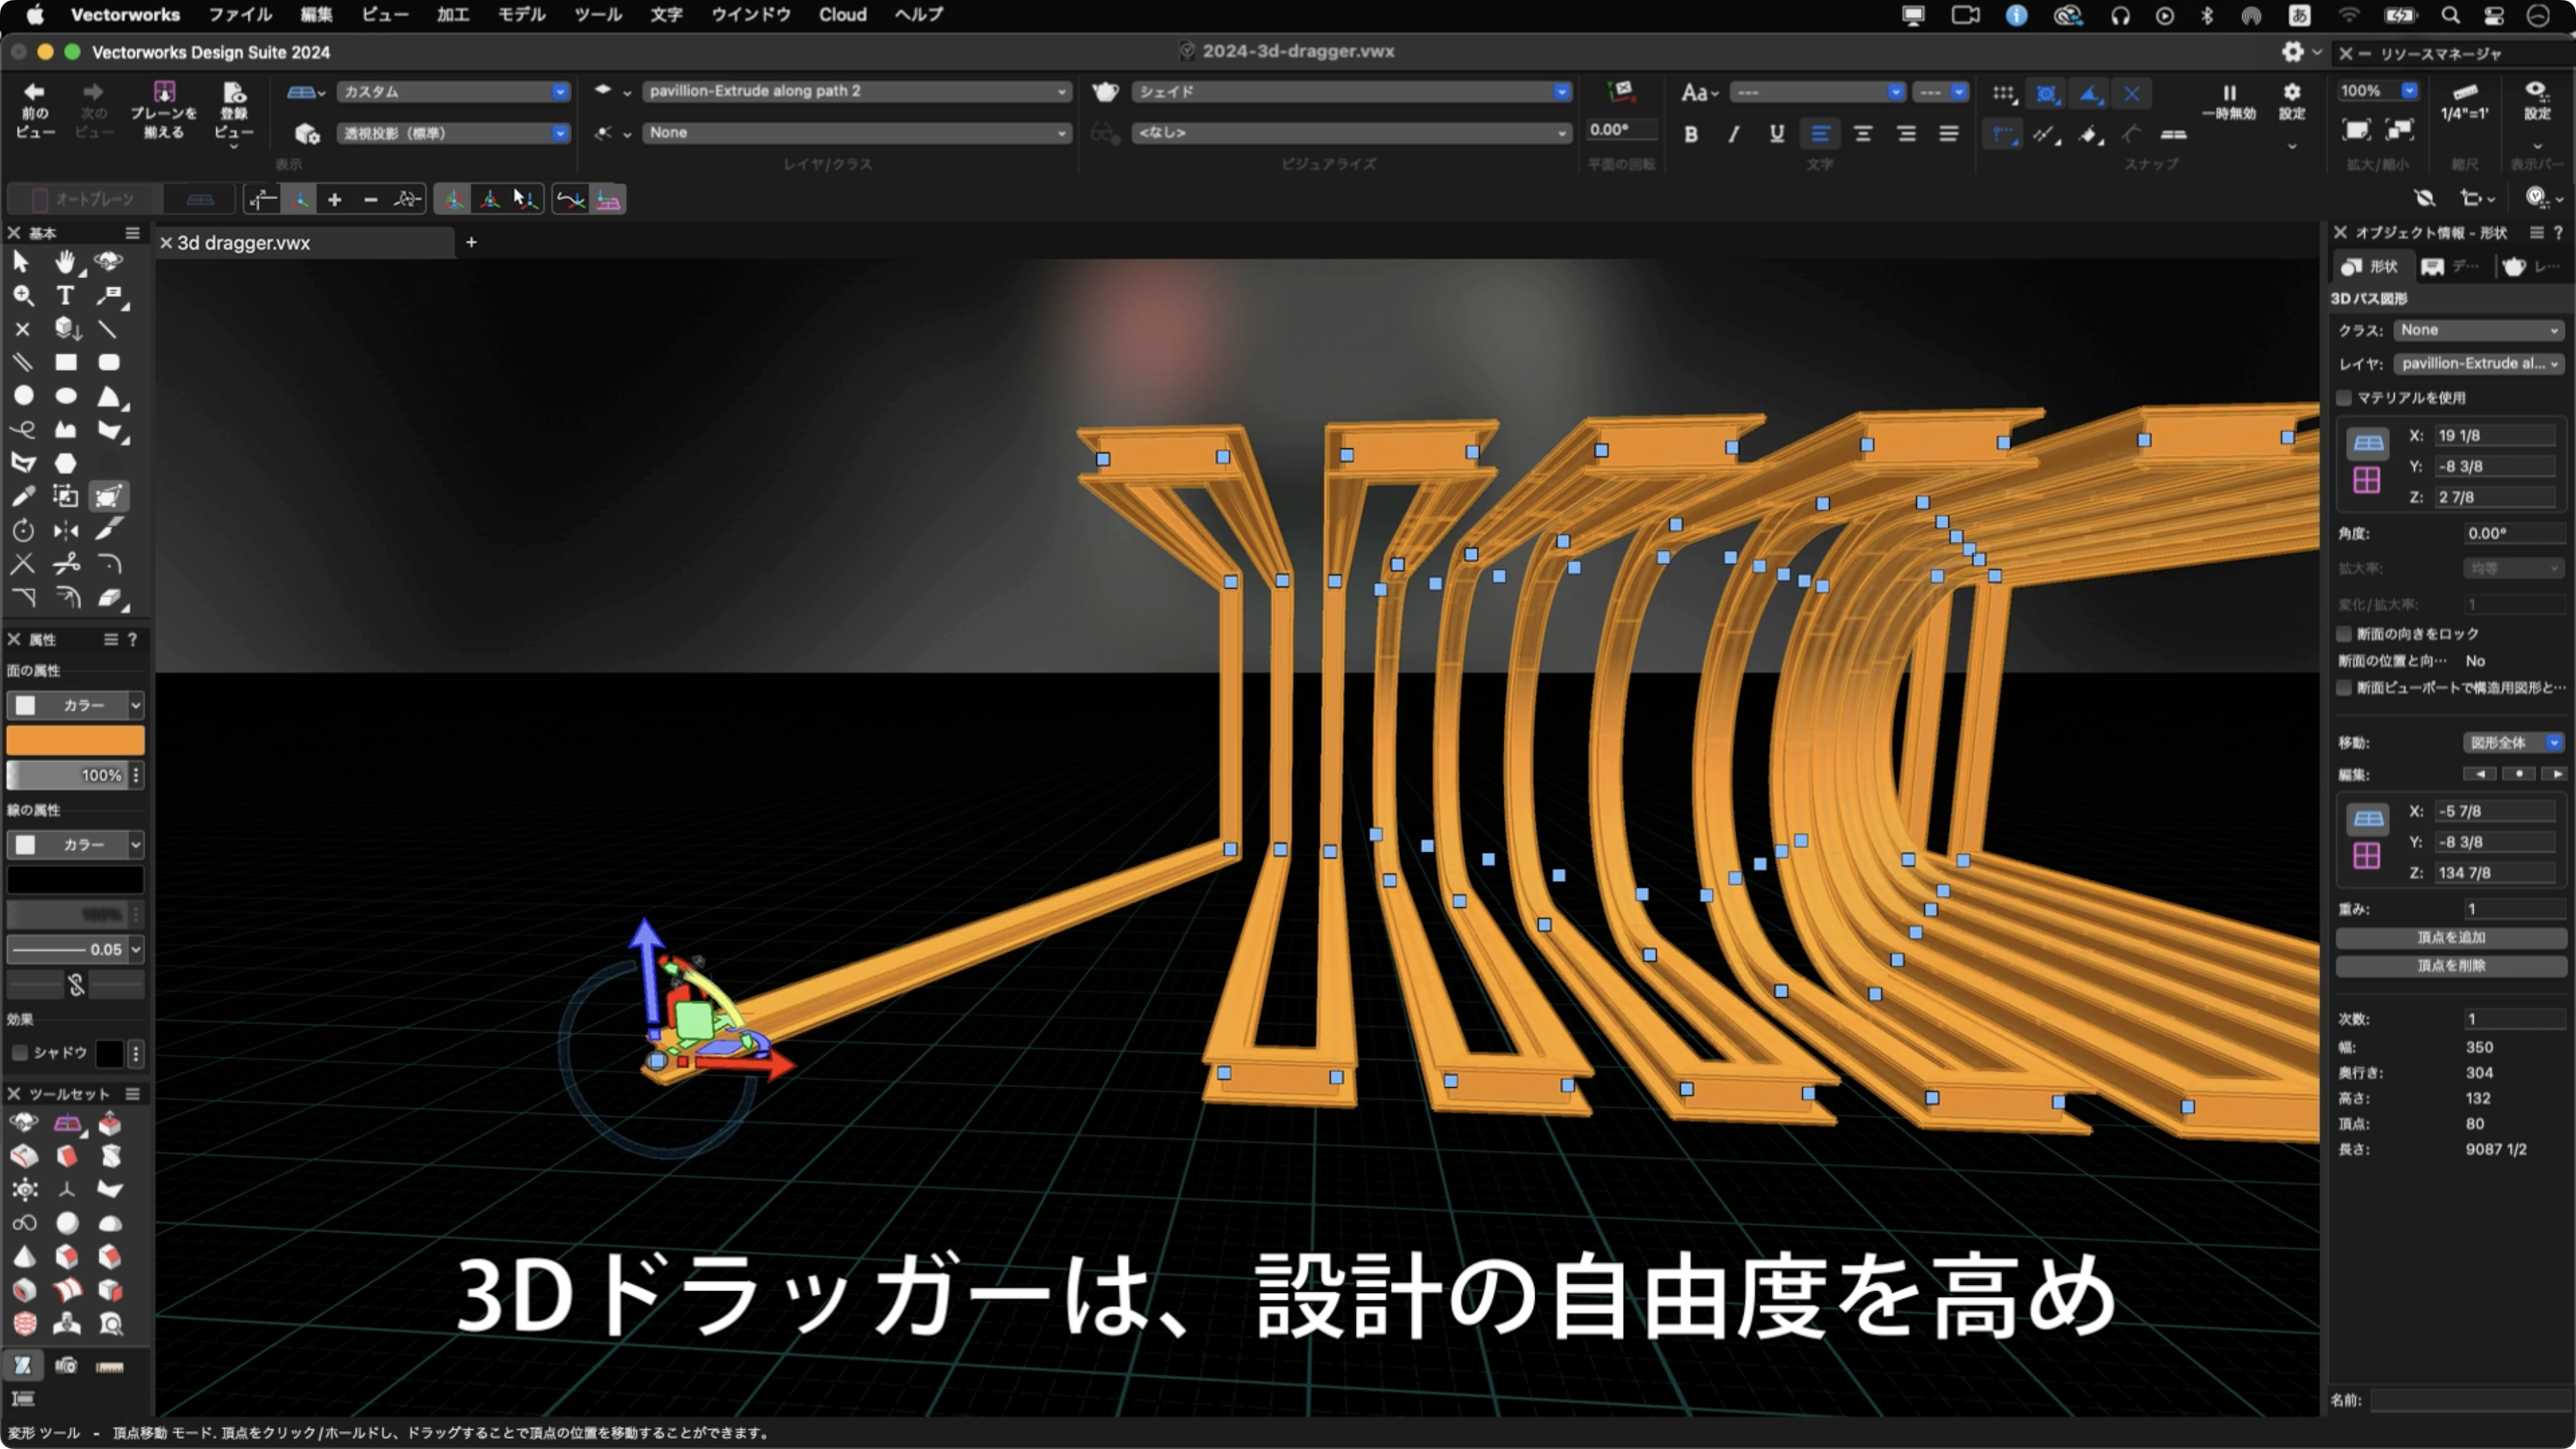
モデルの変形がより自由に。新しい3Dドラッガーは、常に選択したオブジェクトの前に 表示され、簡単にアクセスできます。また、変形、回転、スケールのためのハンドルに よって、選択したオブジェクトを包括的かつ直感的に変形できます。スナップの無効化 や平面、補助的な回転オプションの追加など、スムーズなモデリング作業に必要な コントロールが提供されています。
Category: All Industries
Requires Approval: No
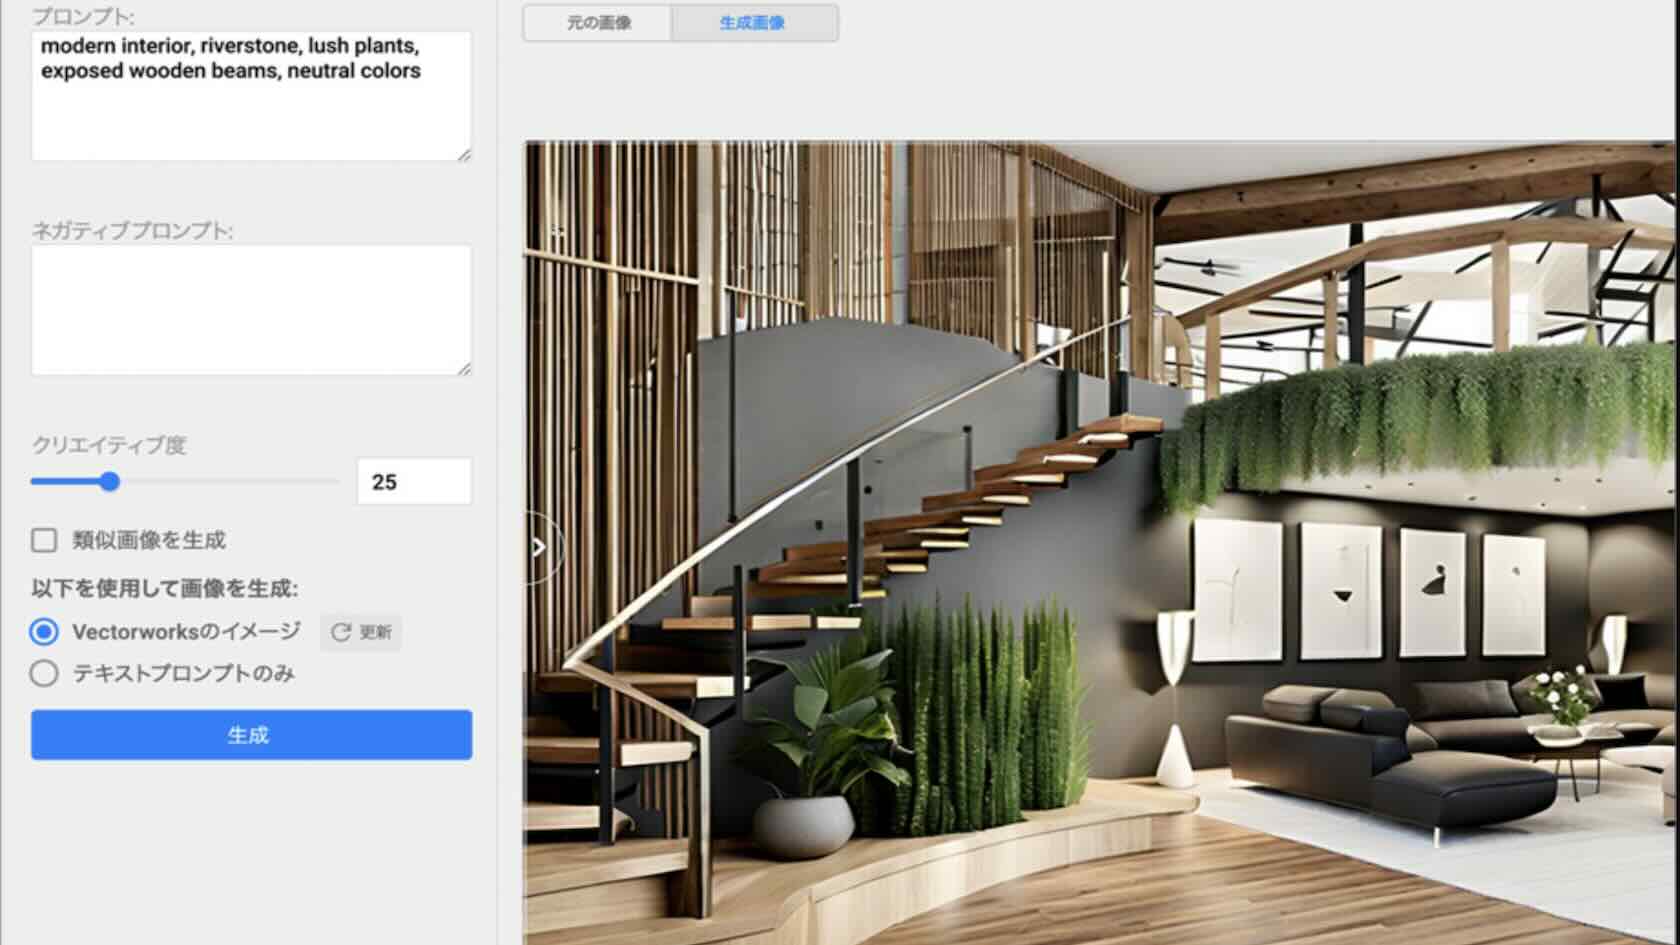
VectorworksのパワーとStable DiffusionによるAI画像生成のスピードを組み合わせることができます。
Vectorworksのインターフェイスで直接利用でき、Vectorworks Cloud Servicesを使用することで、インストール不要で中断のないワークフローを実現しました。デザインのどの段階でも、Vectorworksモデルを使用してイラストレーションコンセプトを素早く発想したり、洗練されたイメージを作成できます。より多くの選択肢をより速く検討する能力を強化することで、デザインに集中し、さらに多くの仕事を獲得できます。
※ご利用にはService Select契約かサブスクリプションが必要になります。
Category: All Industries
Requires Approval: No
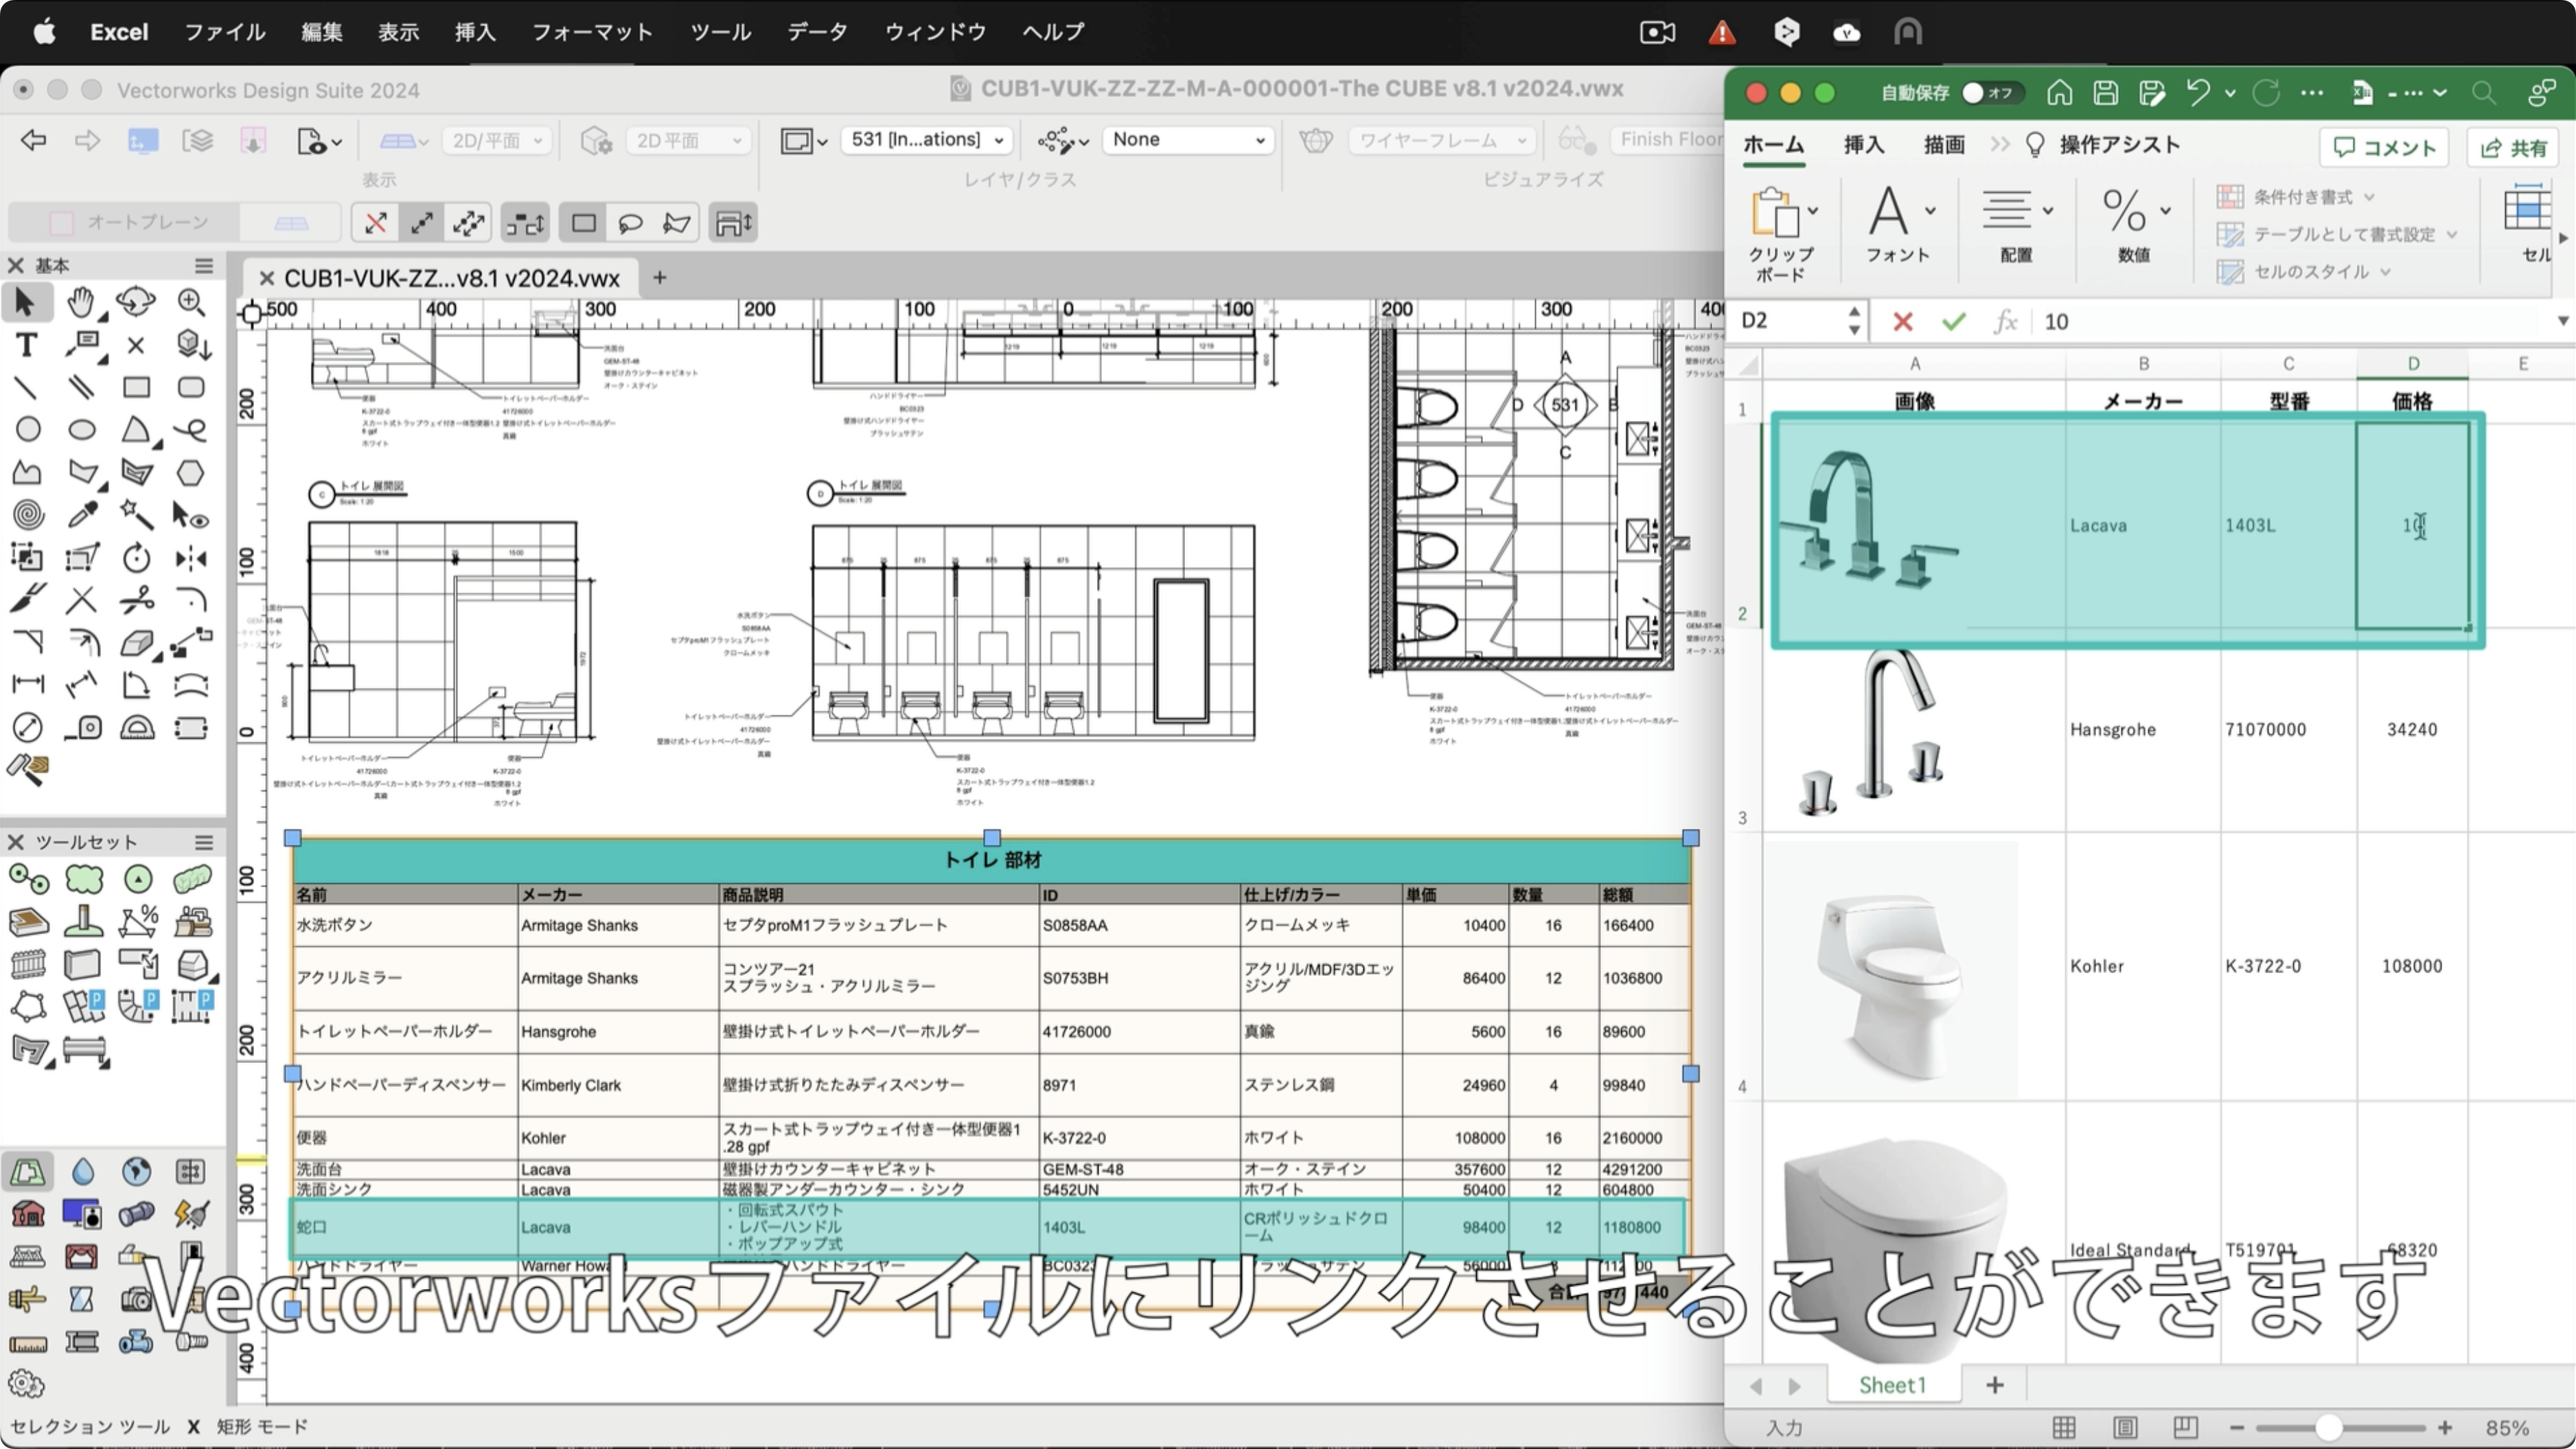
見積り、分析、材料仕様書などのExcelファイルに保存された外部データへの接続性が向上 しました。新しいExcel参照機能により、Vectorworksで新しい参照を作成し、参照された ファイルを自動的に更新することができます。変更のたびにExcelファイルを再取り込み する必要がなくなり、時間を節約できます。さらに、Vectorworks上での修正をExcelに 反映することも可能です。
Category: All Industries
Requires Approval: No
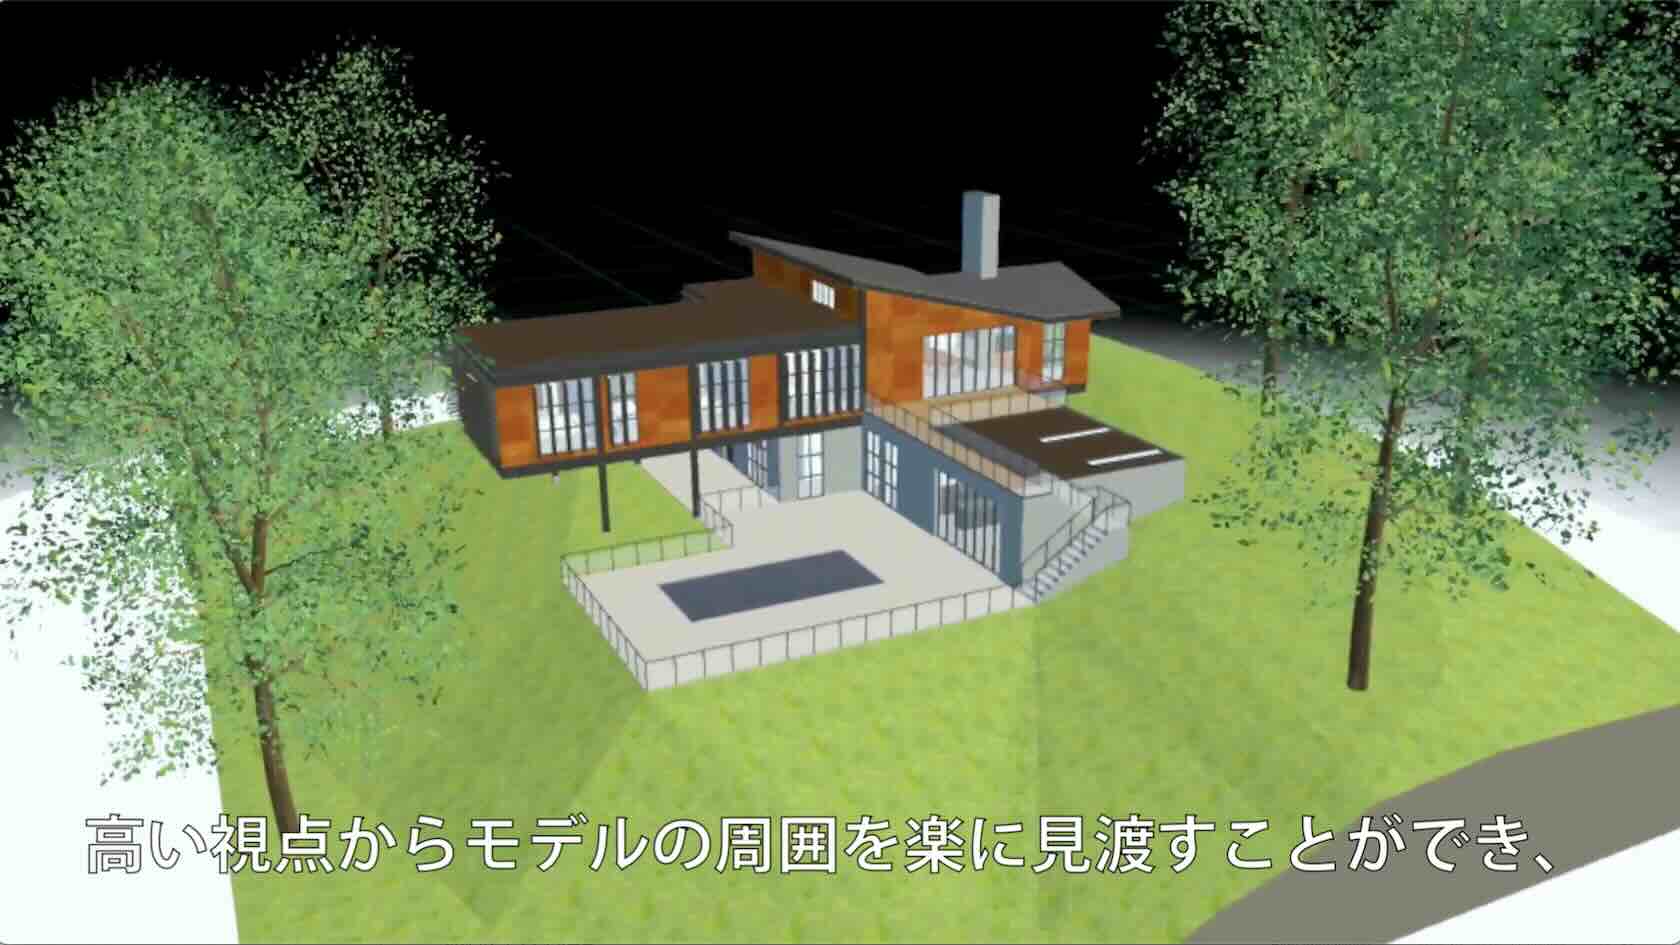
Meta Quest 2以降のヘッドセット用に作成されたVRビューアアプリ「Vectorworks Odyssey」を使って、没入感のある3D環境で設計を探求しましょう。設計者とプロジェクトパートナーは、バーチャルリアリティでデザインを体験できます。ドールハウスモードや没入ビューオプションを使用すれば、鳥瞰ビューやウォークスルーによって初期コンセプトにより良いコンテキストを提供し、フィードバックを得ることができます。
Category: All Industries
Requires Approval: No
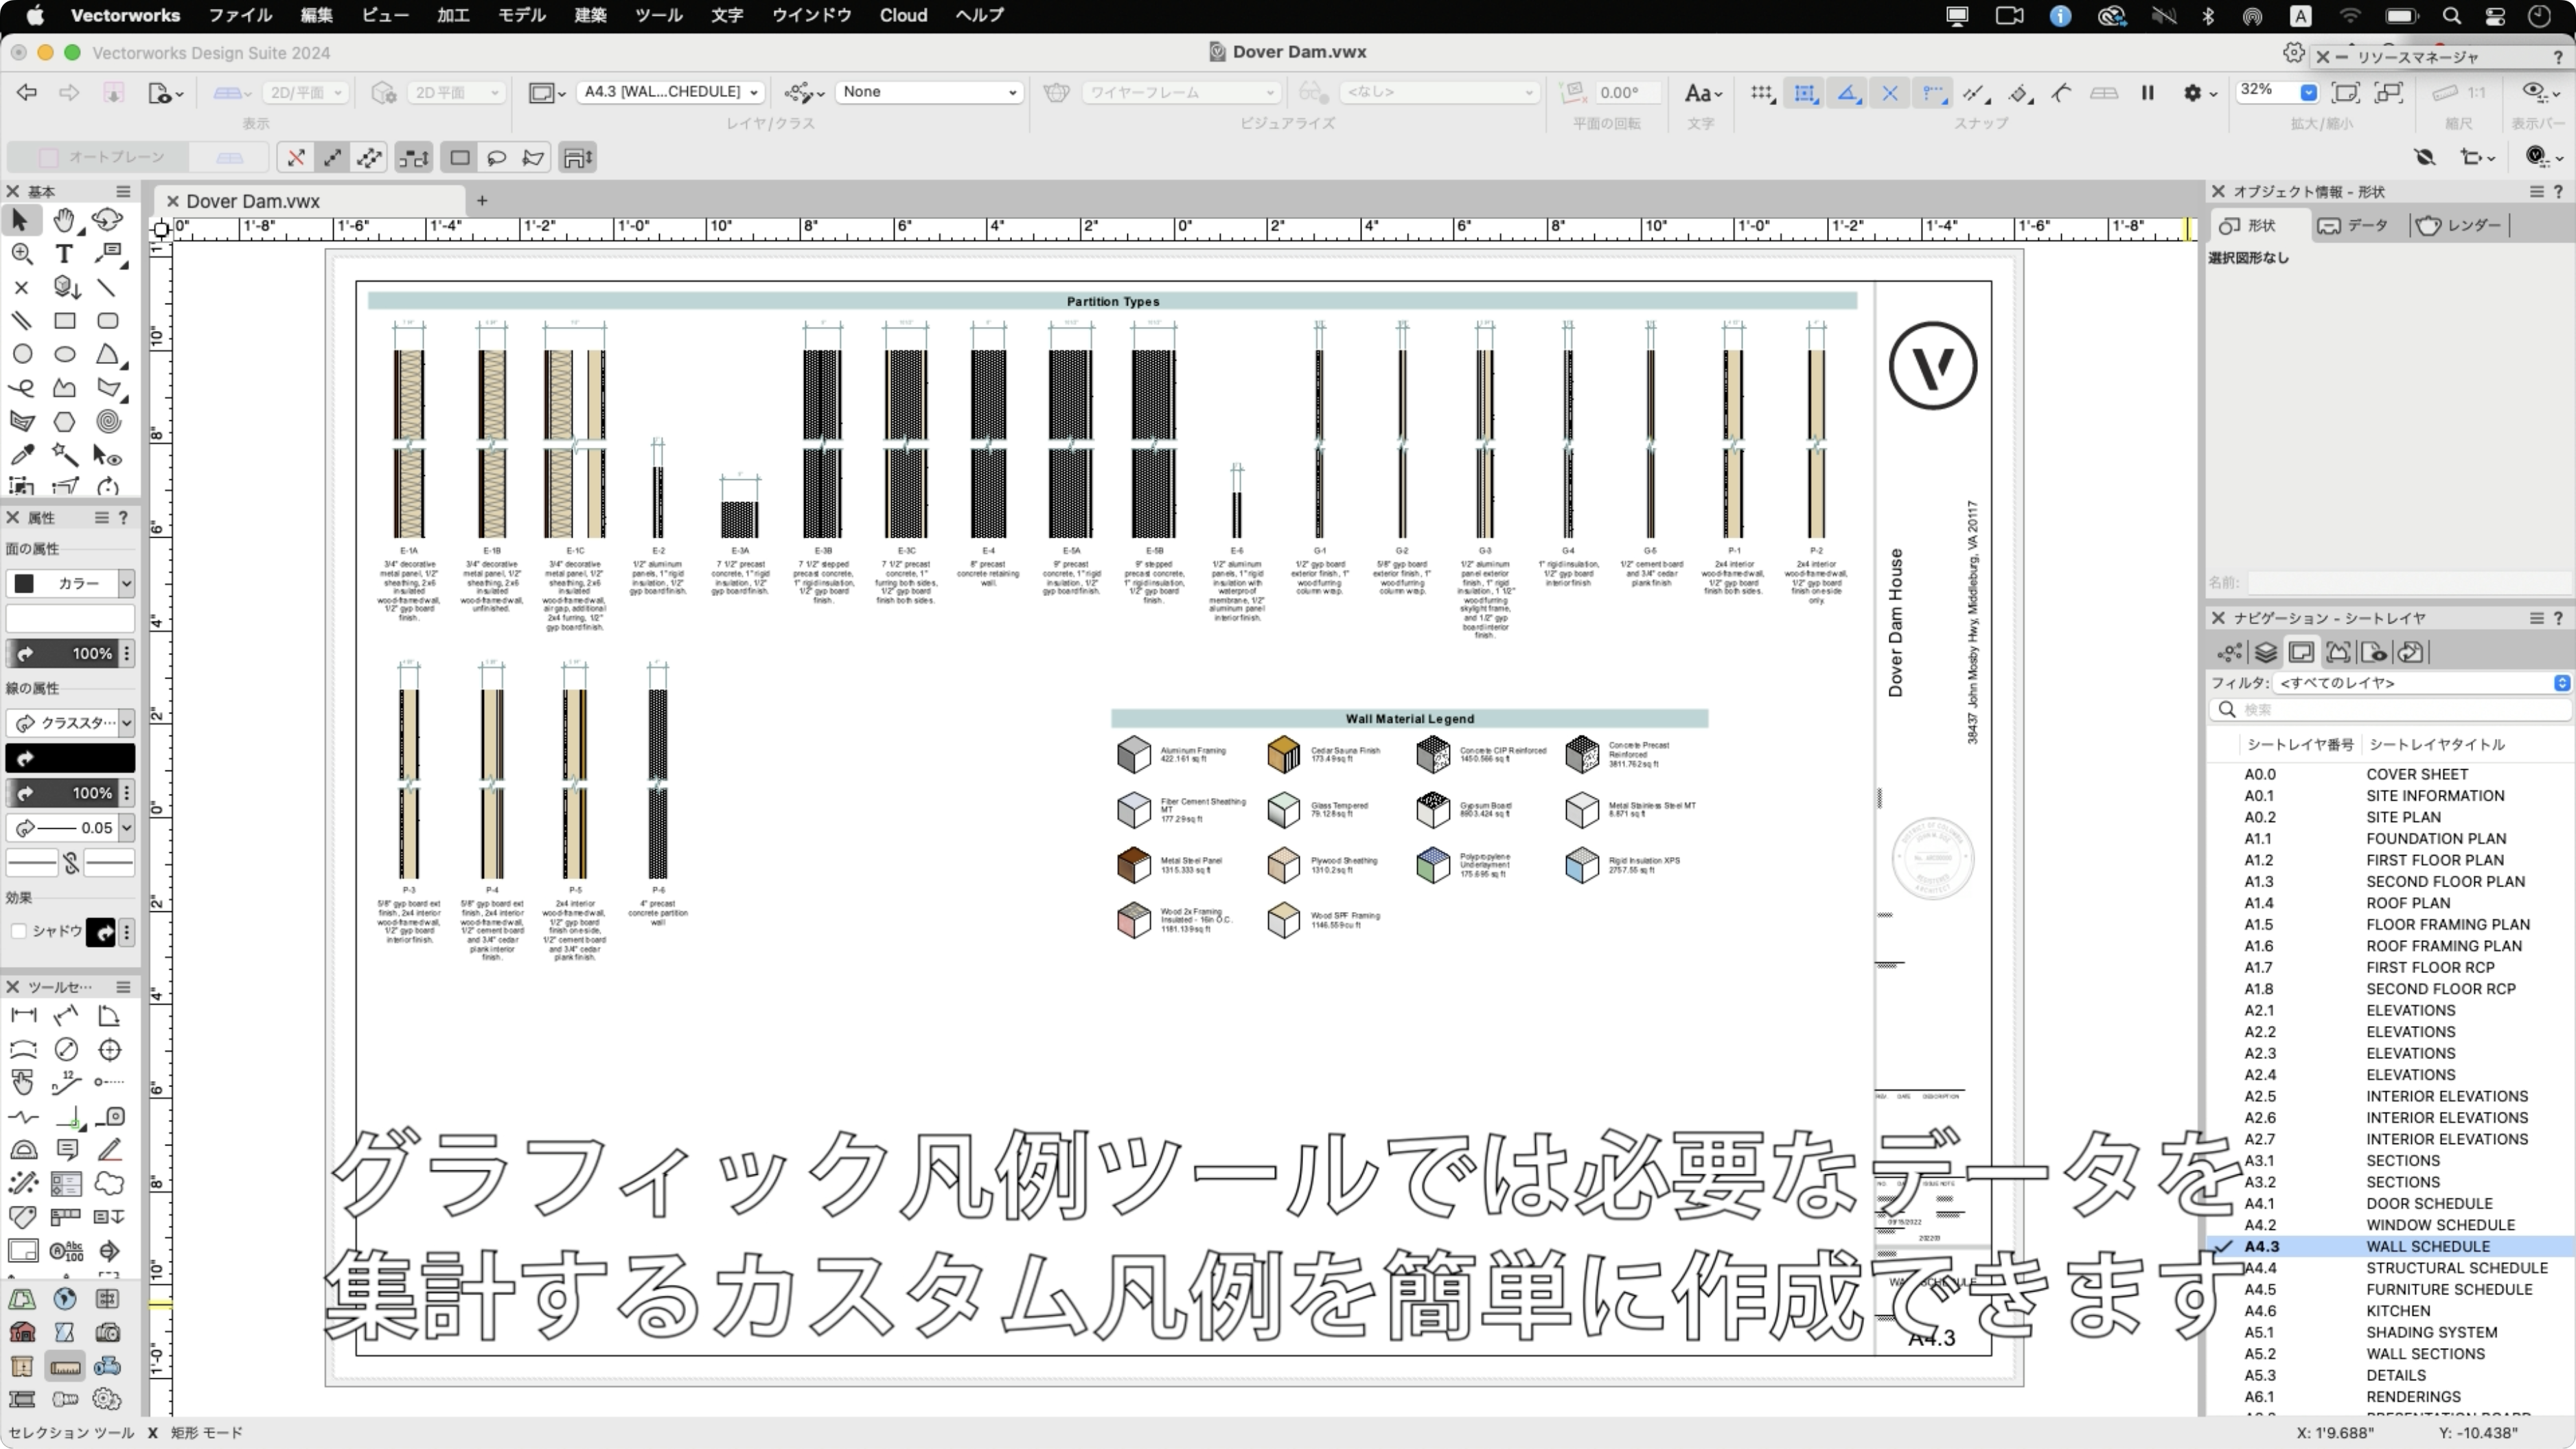
グラフィック凡例がさらにカスタマイズ可能になり、ワークフローが強化されます。画像 の整列、拡大縮小、寸法の変更、動的テキストのカスタマイズがより簡単になりました。 また、並べ替えやクラス表示の変更もプレビューできます。
Category: Buildings
Requires Approval: No
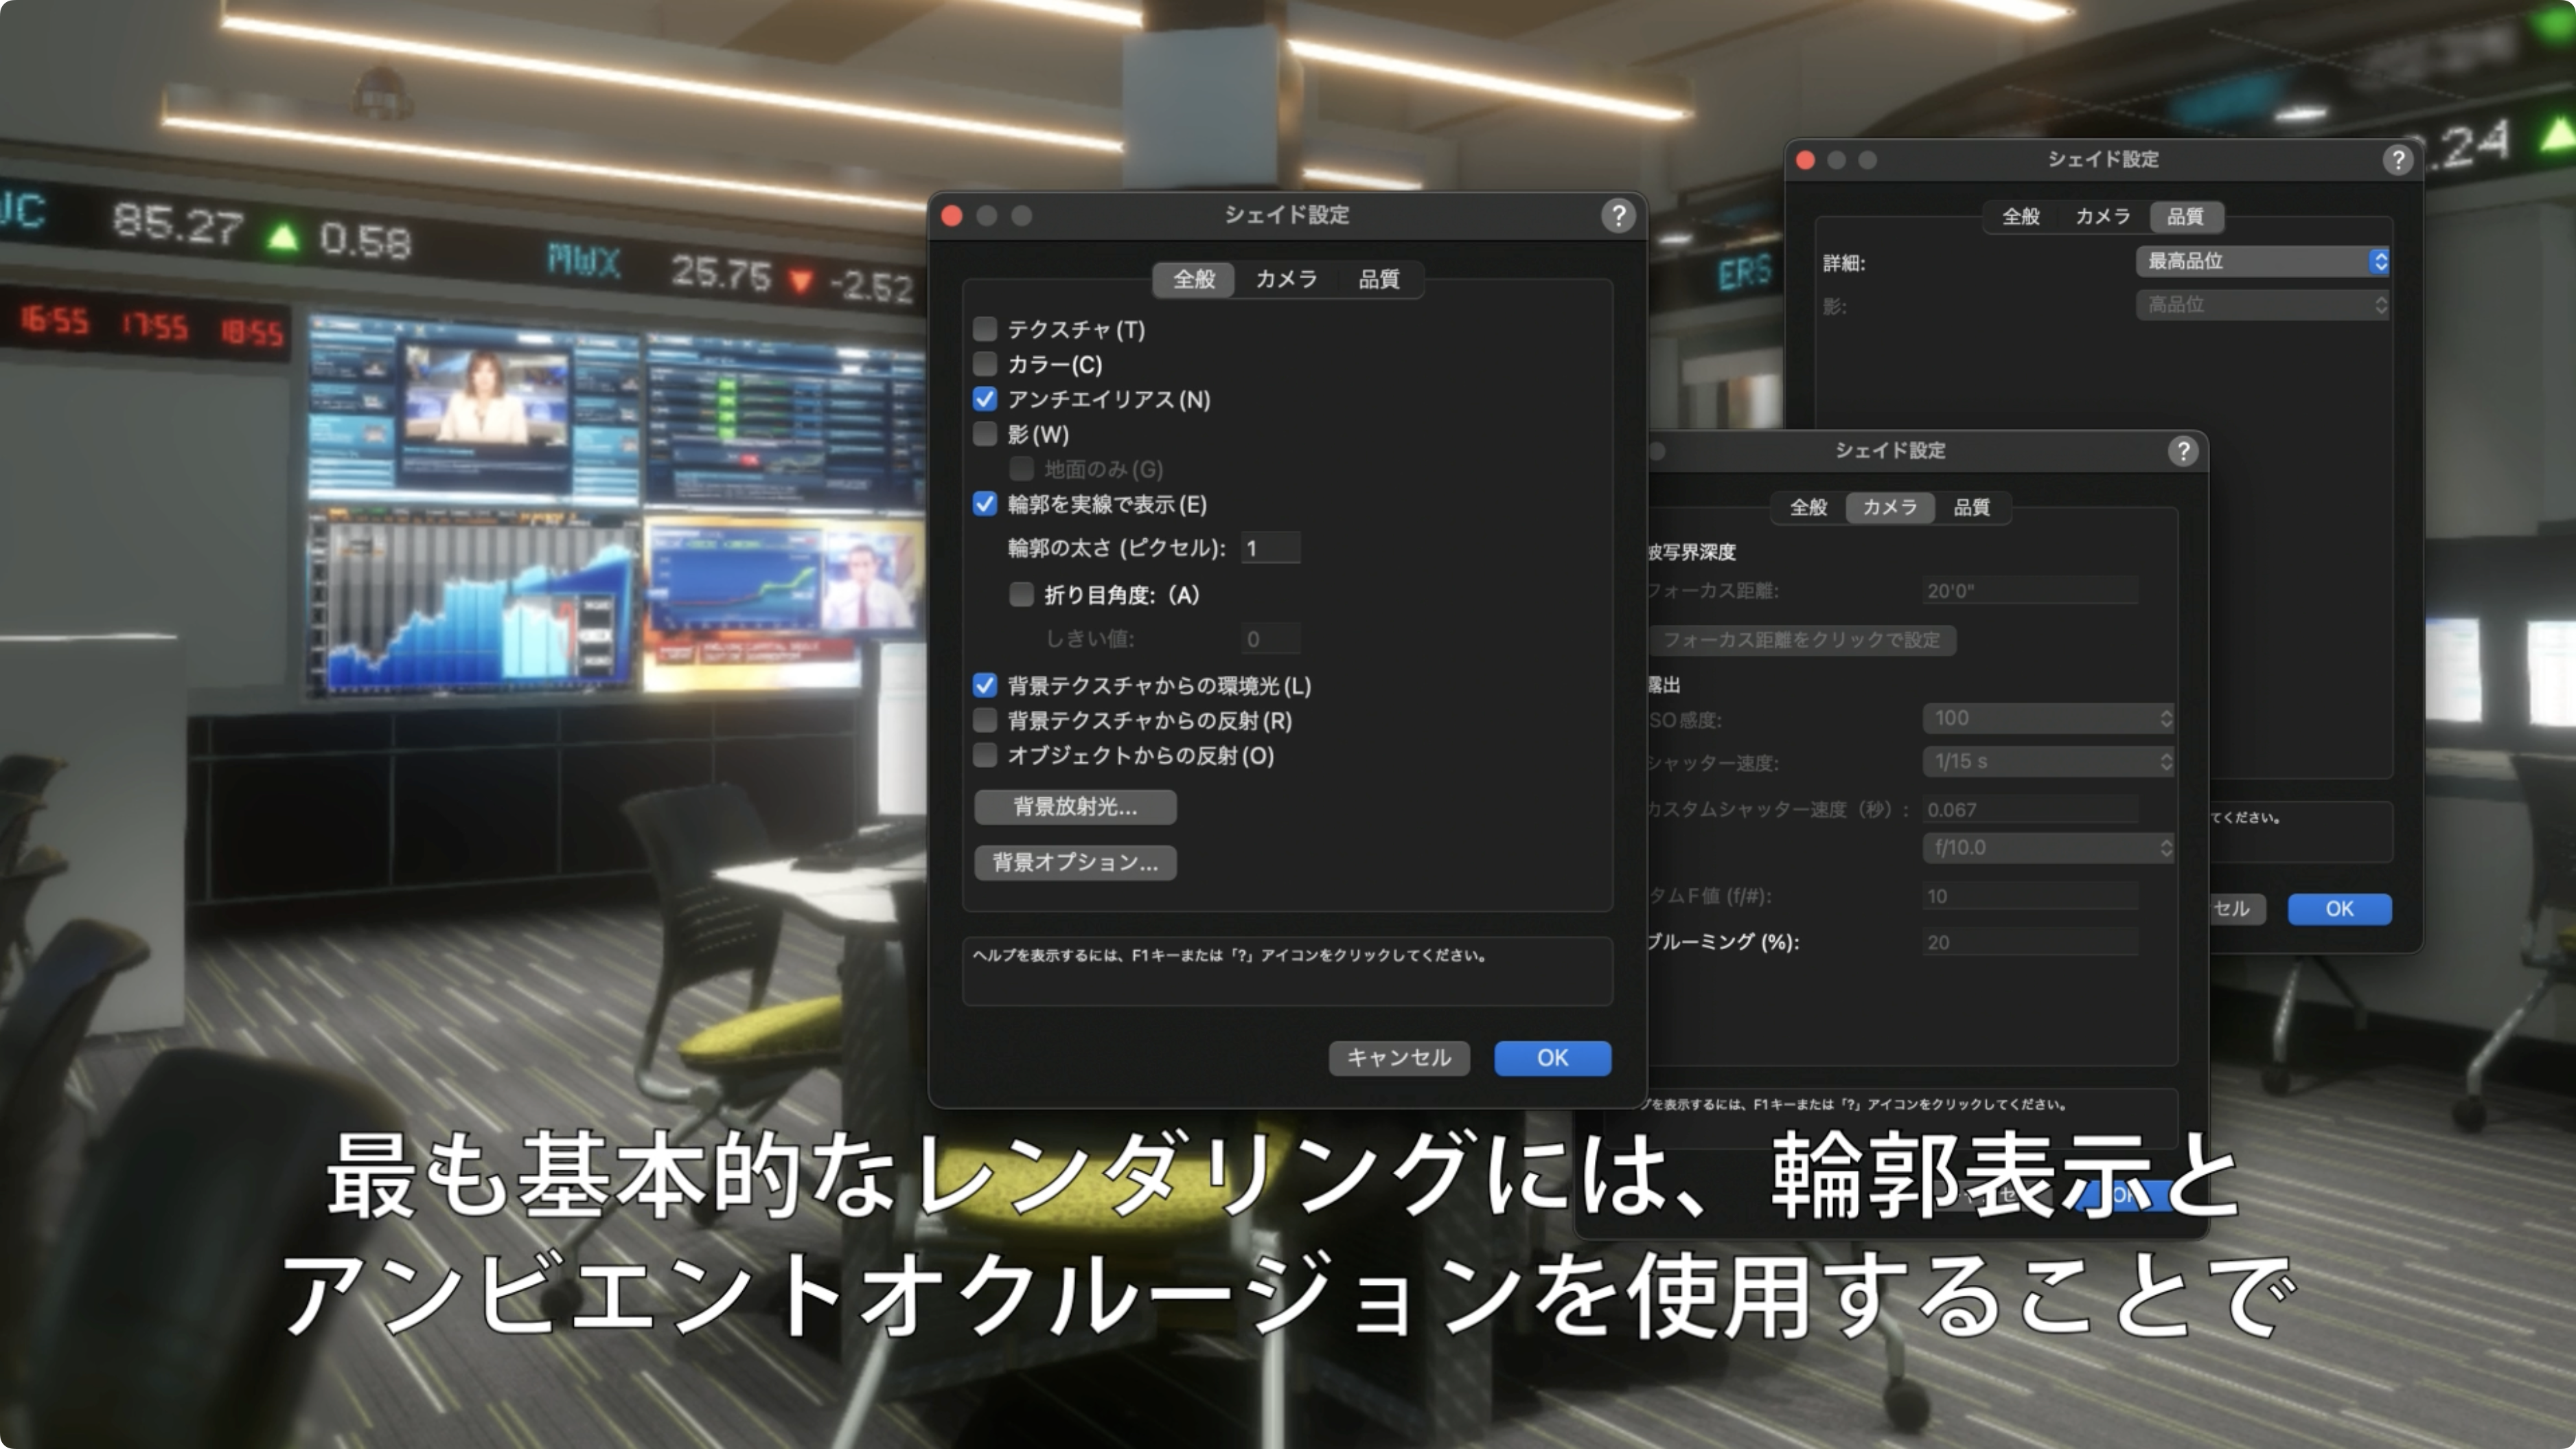
シェイドレンダリングの改善により、デザインプロセスの早い段階でより高いレベルのリアリティを獲得 できます。リアルタイム処理で無制限の影を活用し、その場でデザインを確実に評価し、光源、カメラ、 テクスチャの設定をすばやく決定することで、より優れたビジュアルをより迅速に作成できます。
Category: All Industries
Requires Approval: No
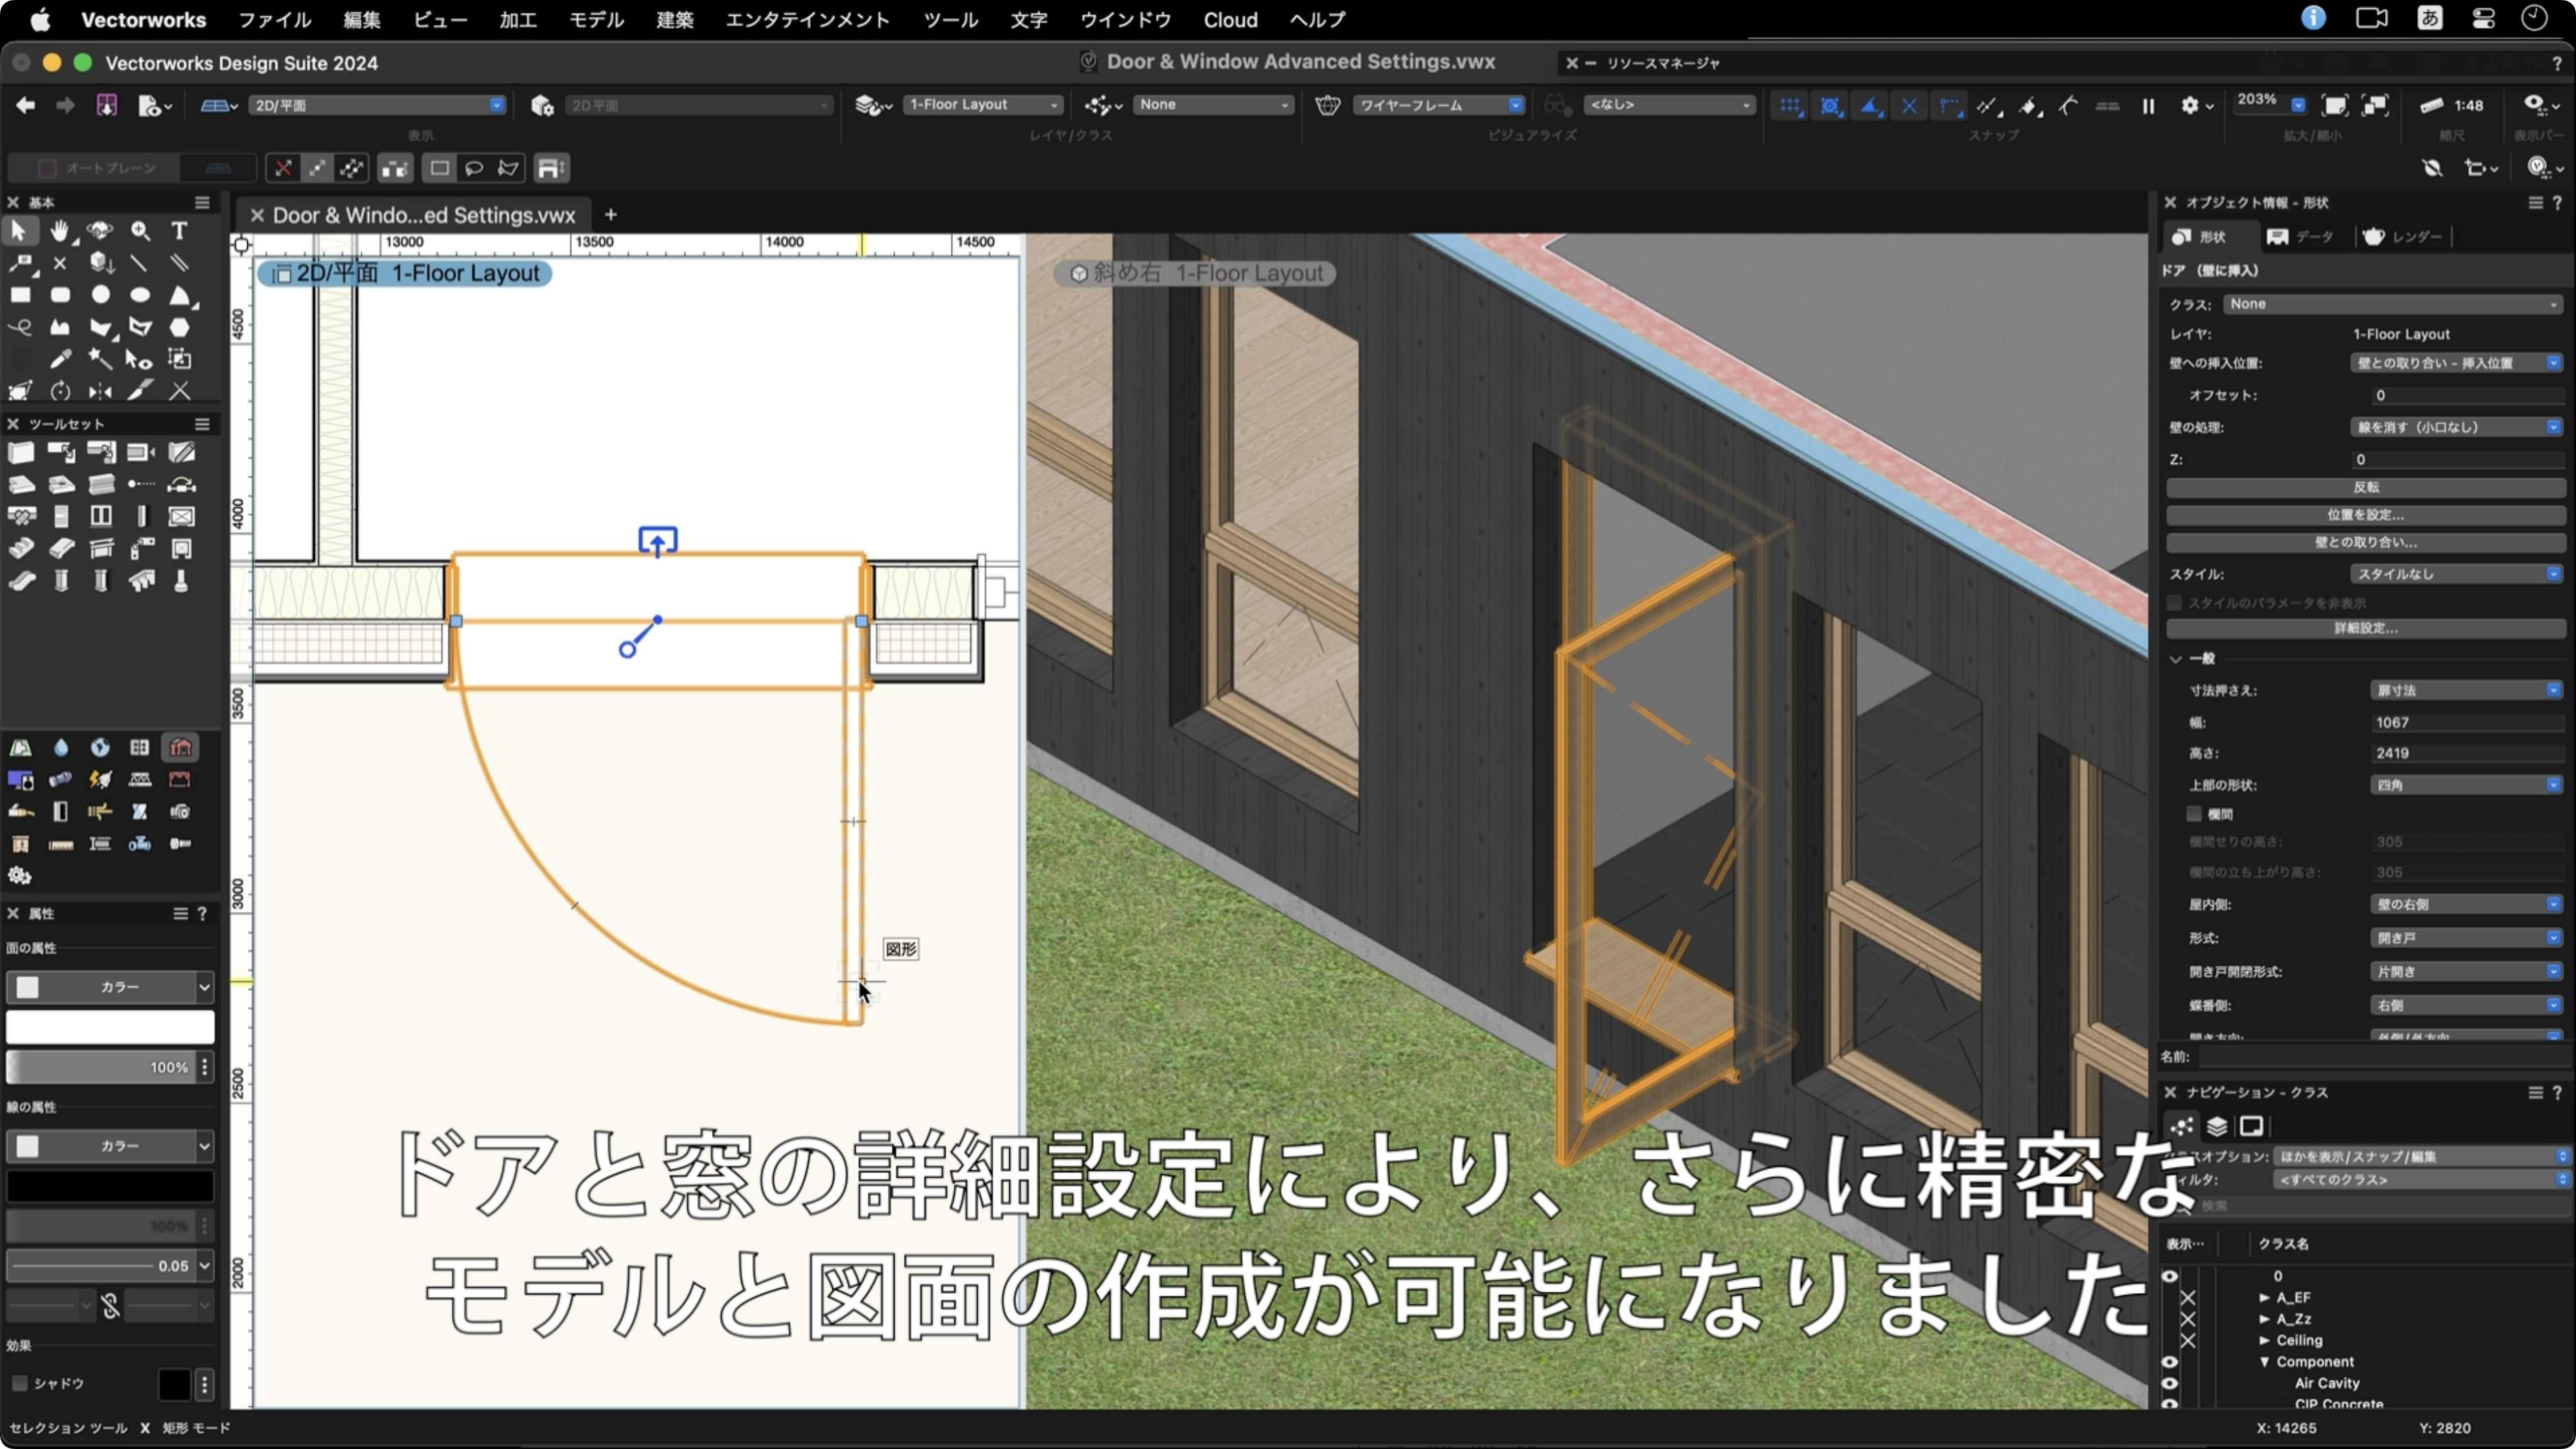
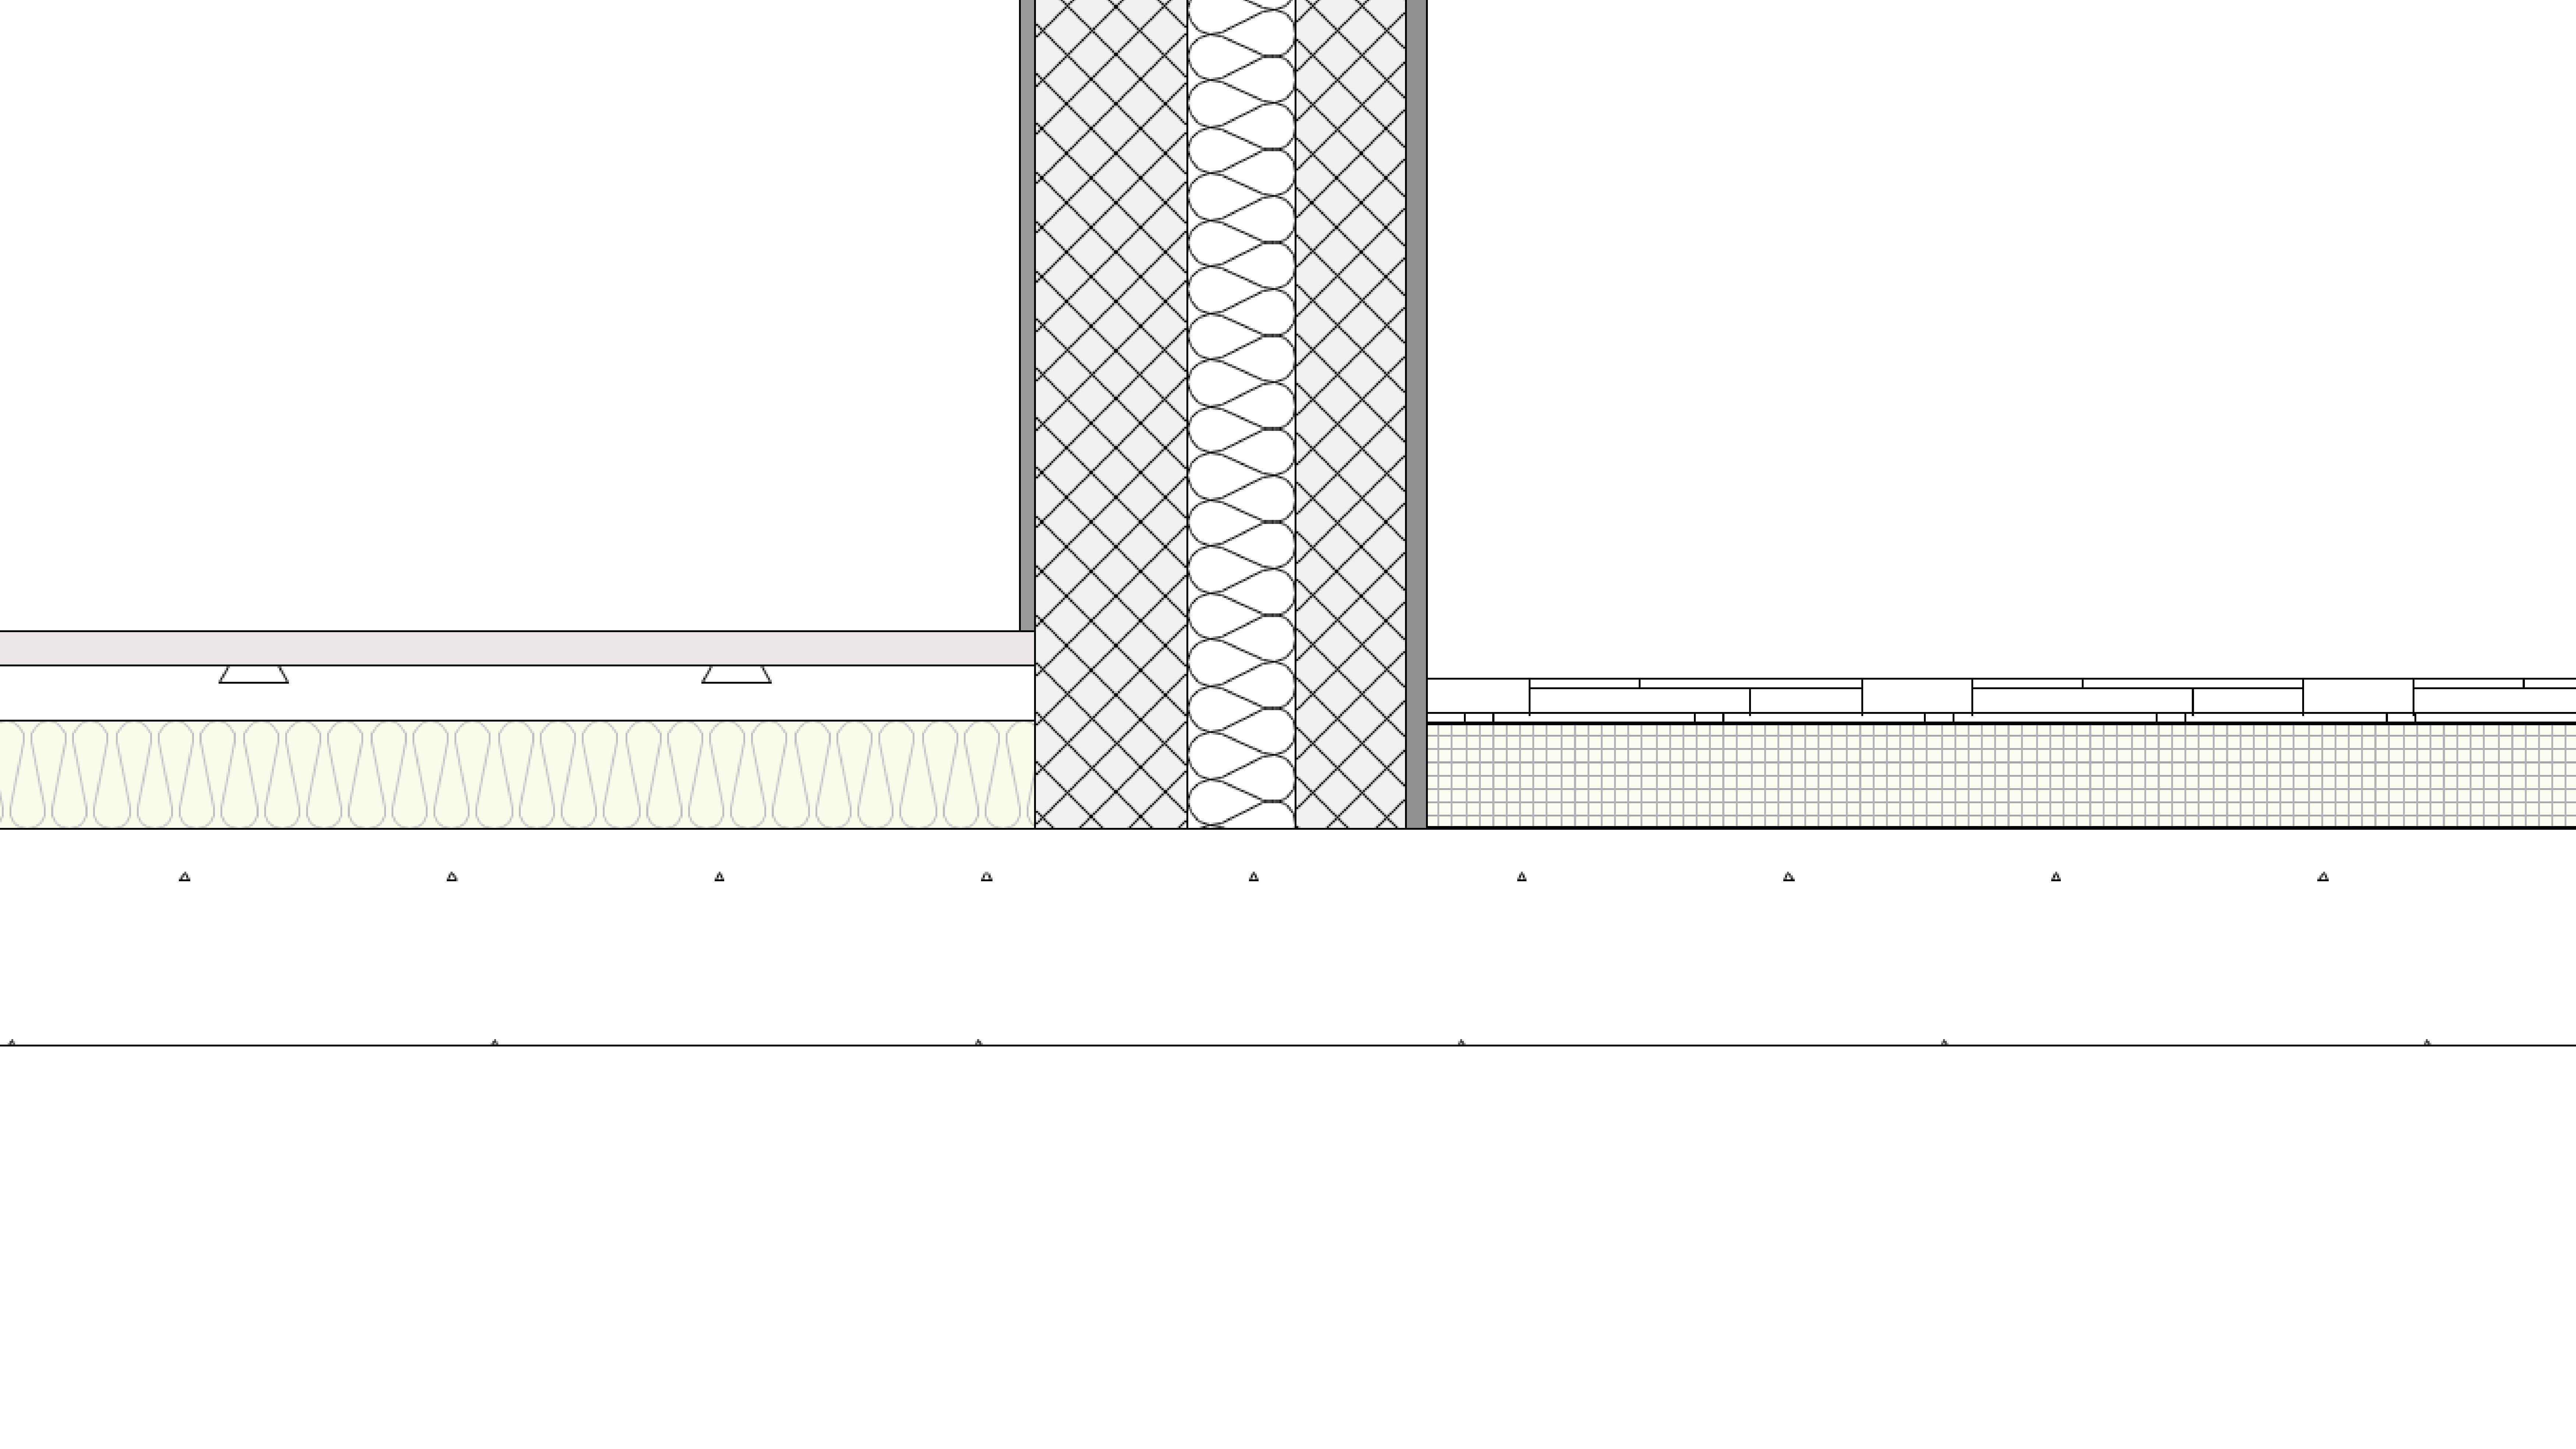
詳細な形状により、壁との取り合いにおける沓ズリと窓台がさらに適切に表現されるようになりました。また、開き方向を制御するオプションが増え、ドアや窓の周囲の隙間は、開口部の上下左右それぞれで制御できます。標準化されたドア吊り元により、 さらに精確な形状と業界標準をサポートするデータが得られます。
Category: Buildings
Requires Approval: No
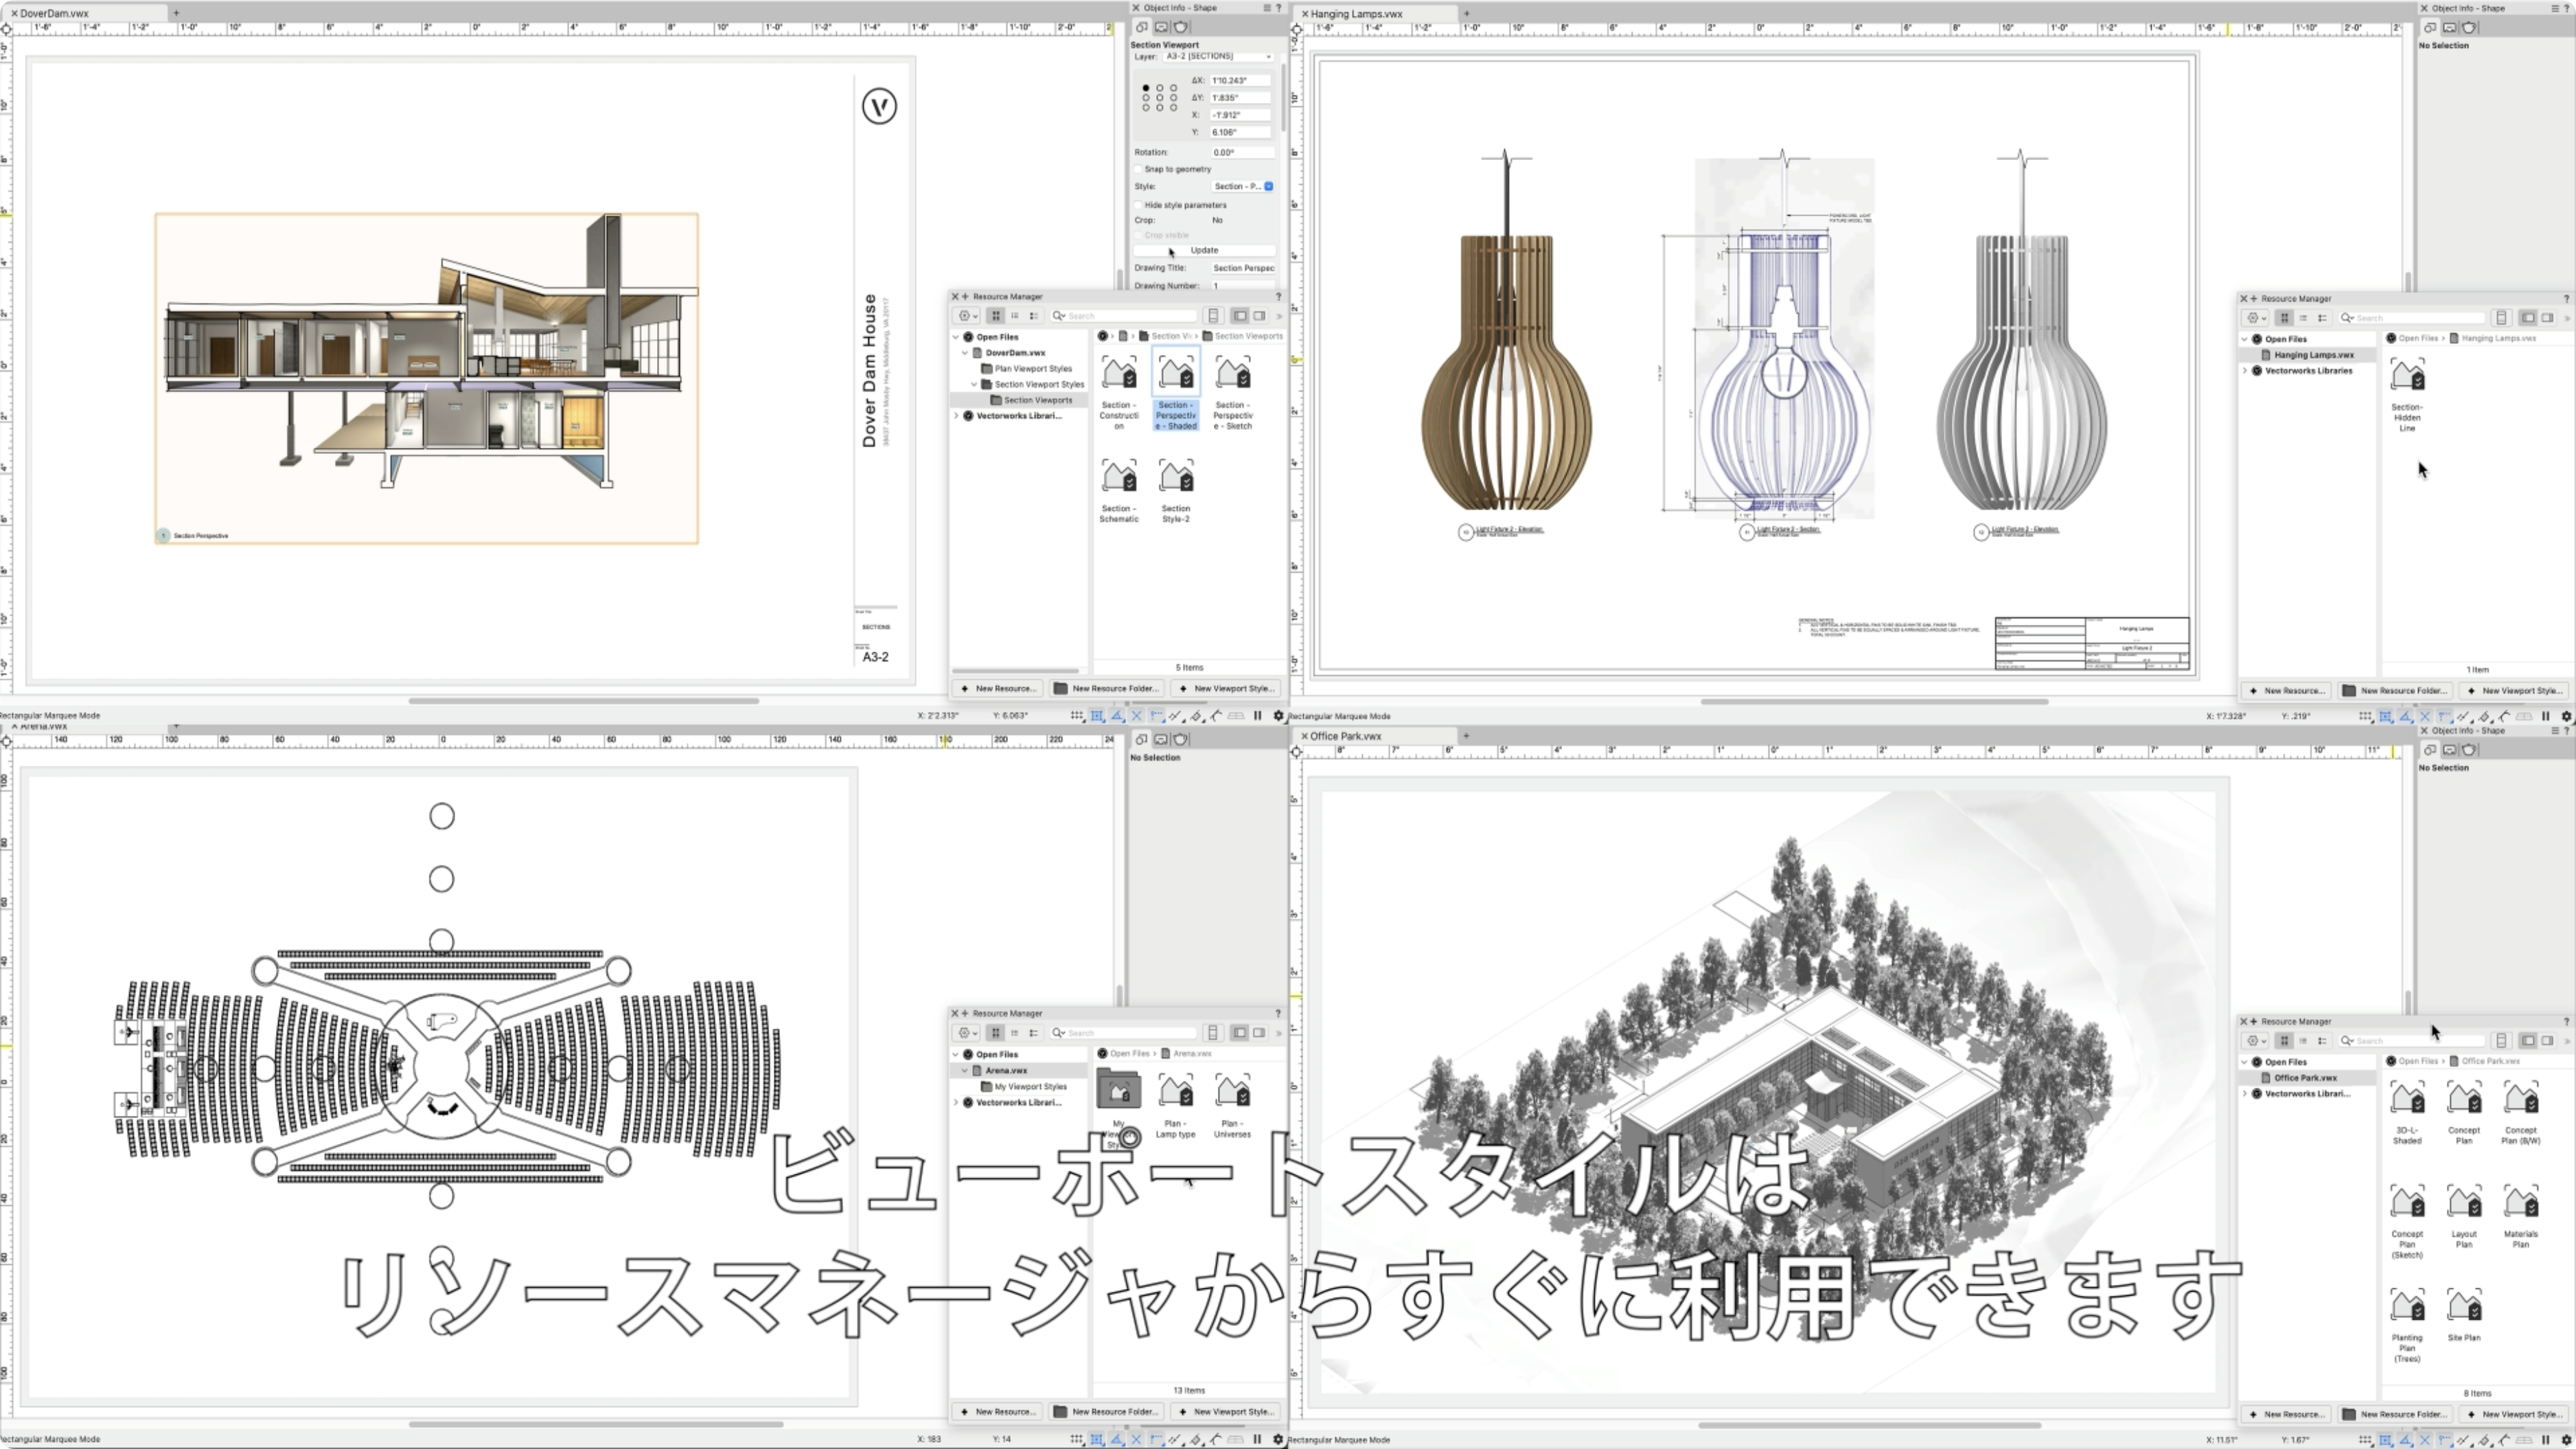
Vectorworks 2024の新しいビューポートスタイルでは、ビューポー トのカスタム設定をスタイルとして保存でき、ビューポートやプロ ジェクトファイル間で簡単に移行できます。ビューポート設定を複製 する手間を省き、エラーを回避できます。
Category: All Industries
Requires Approval: No
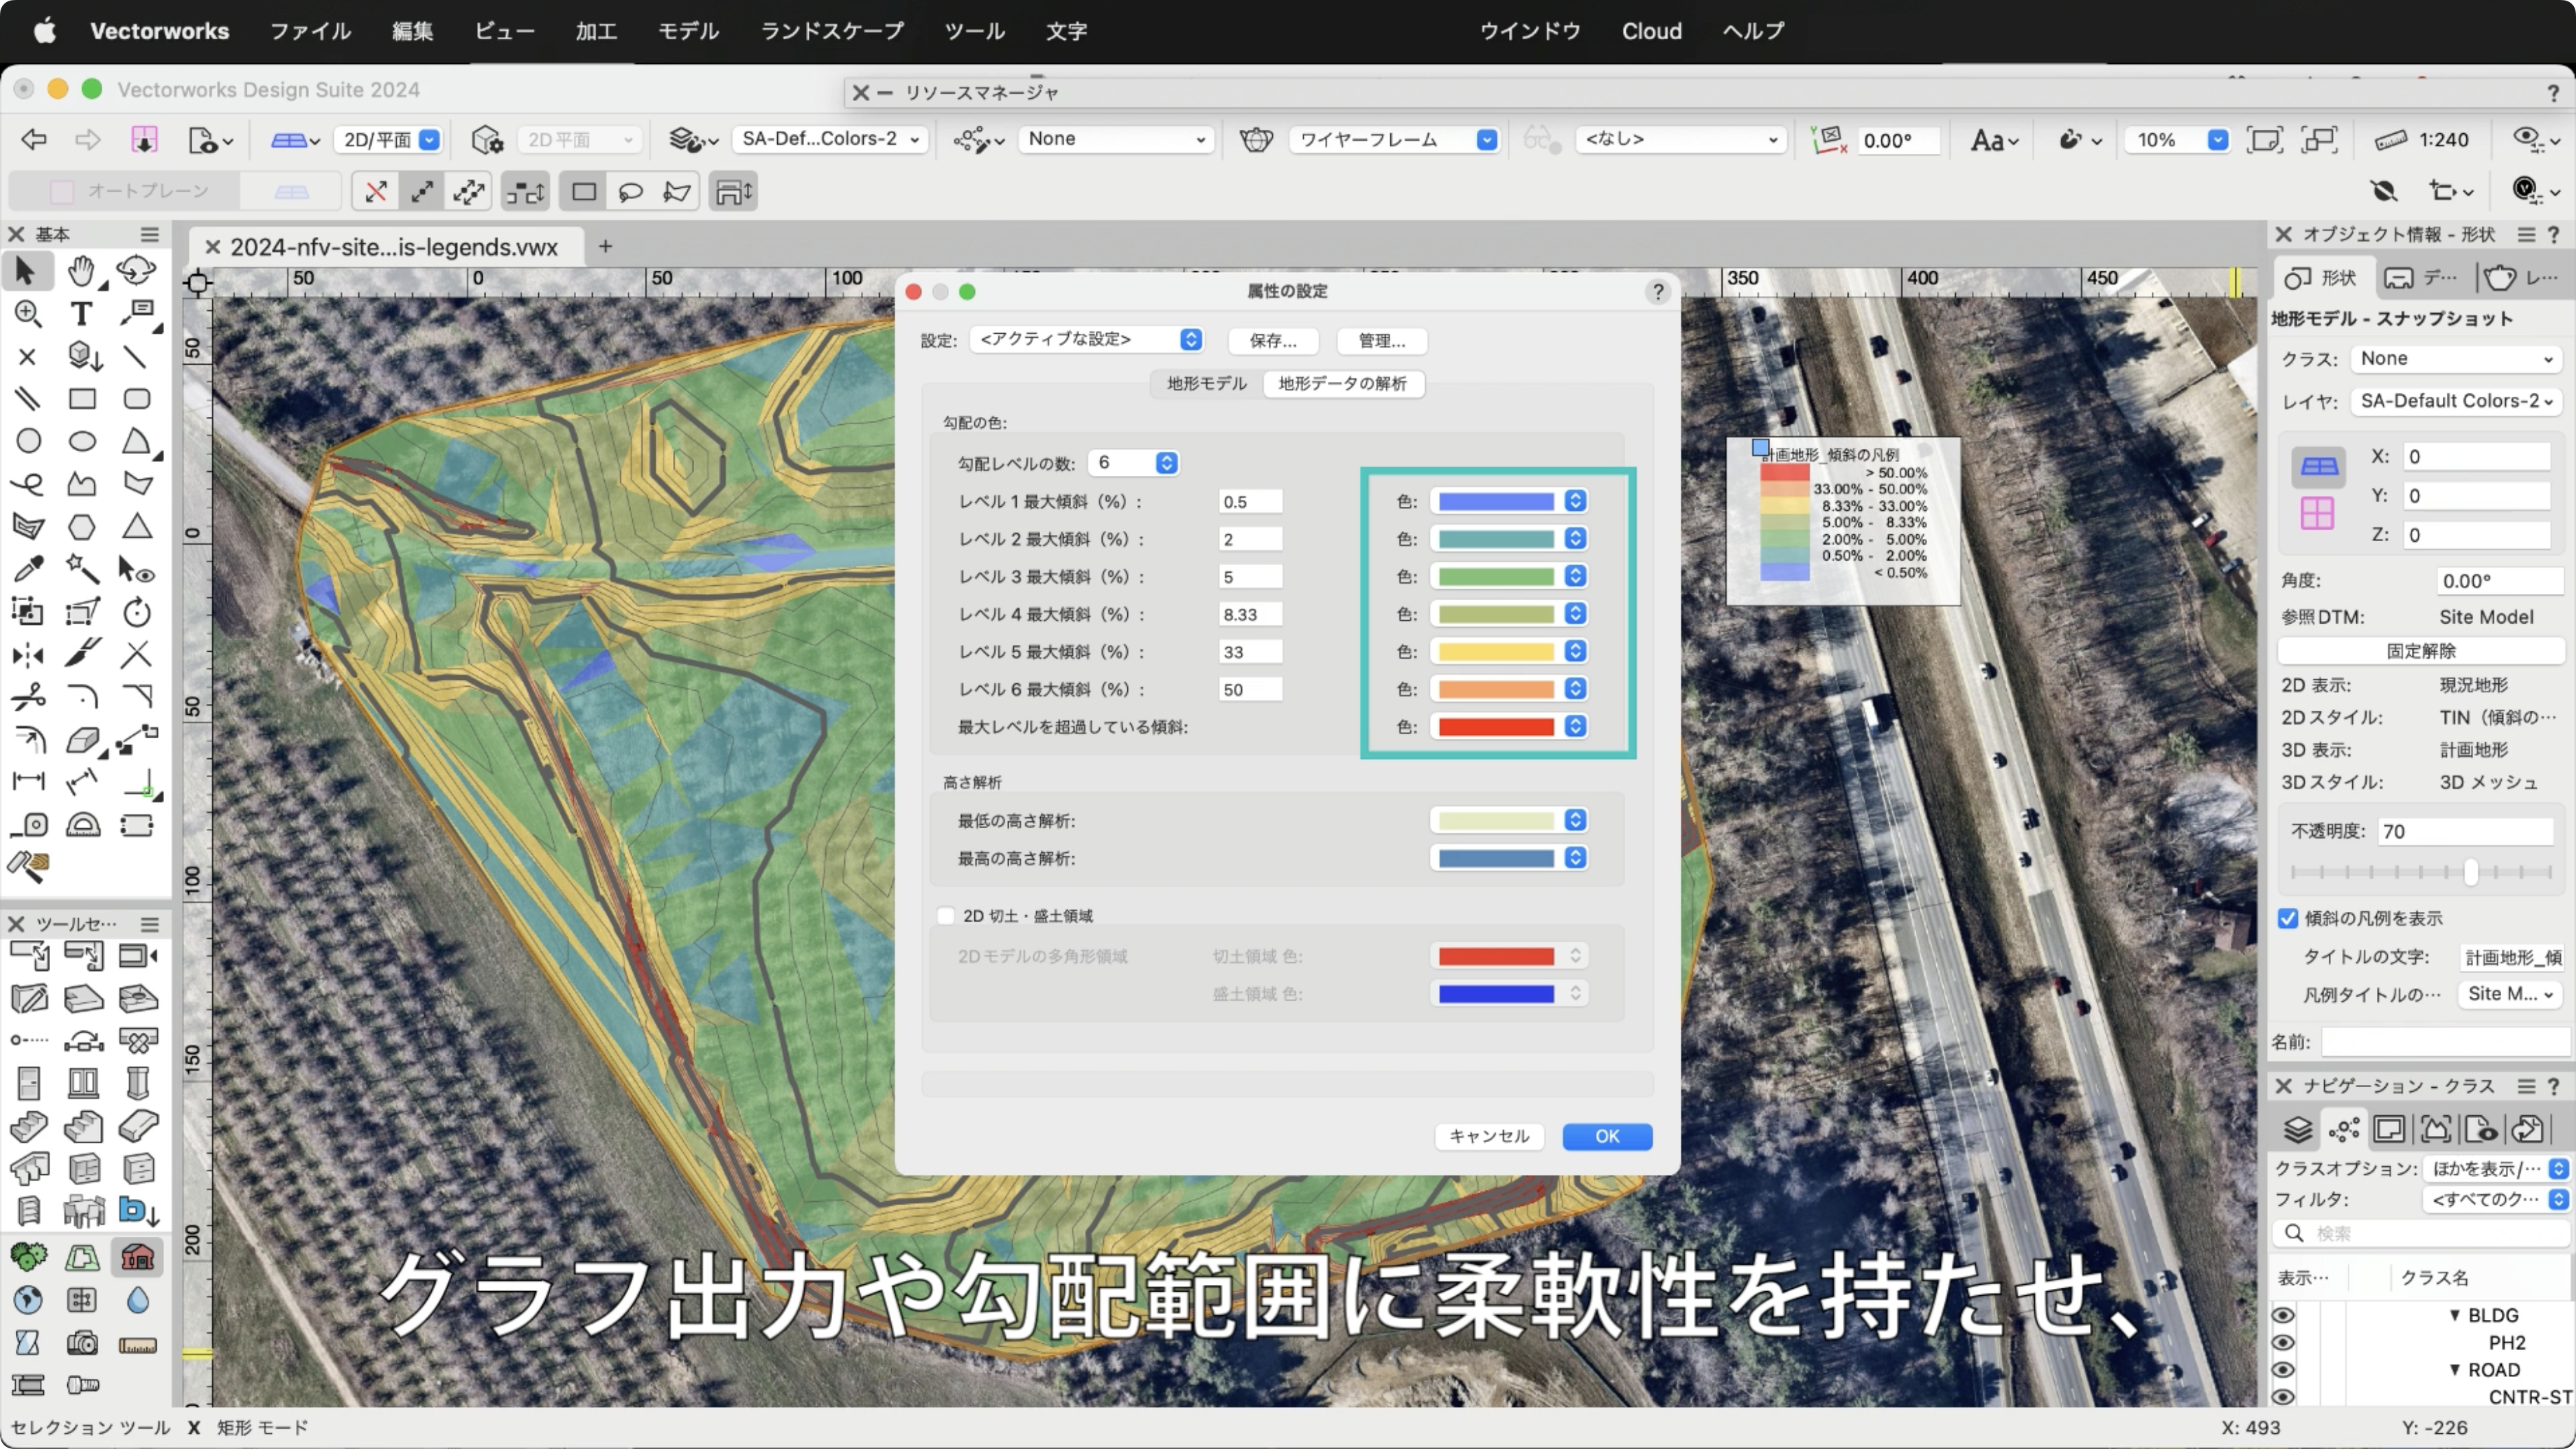
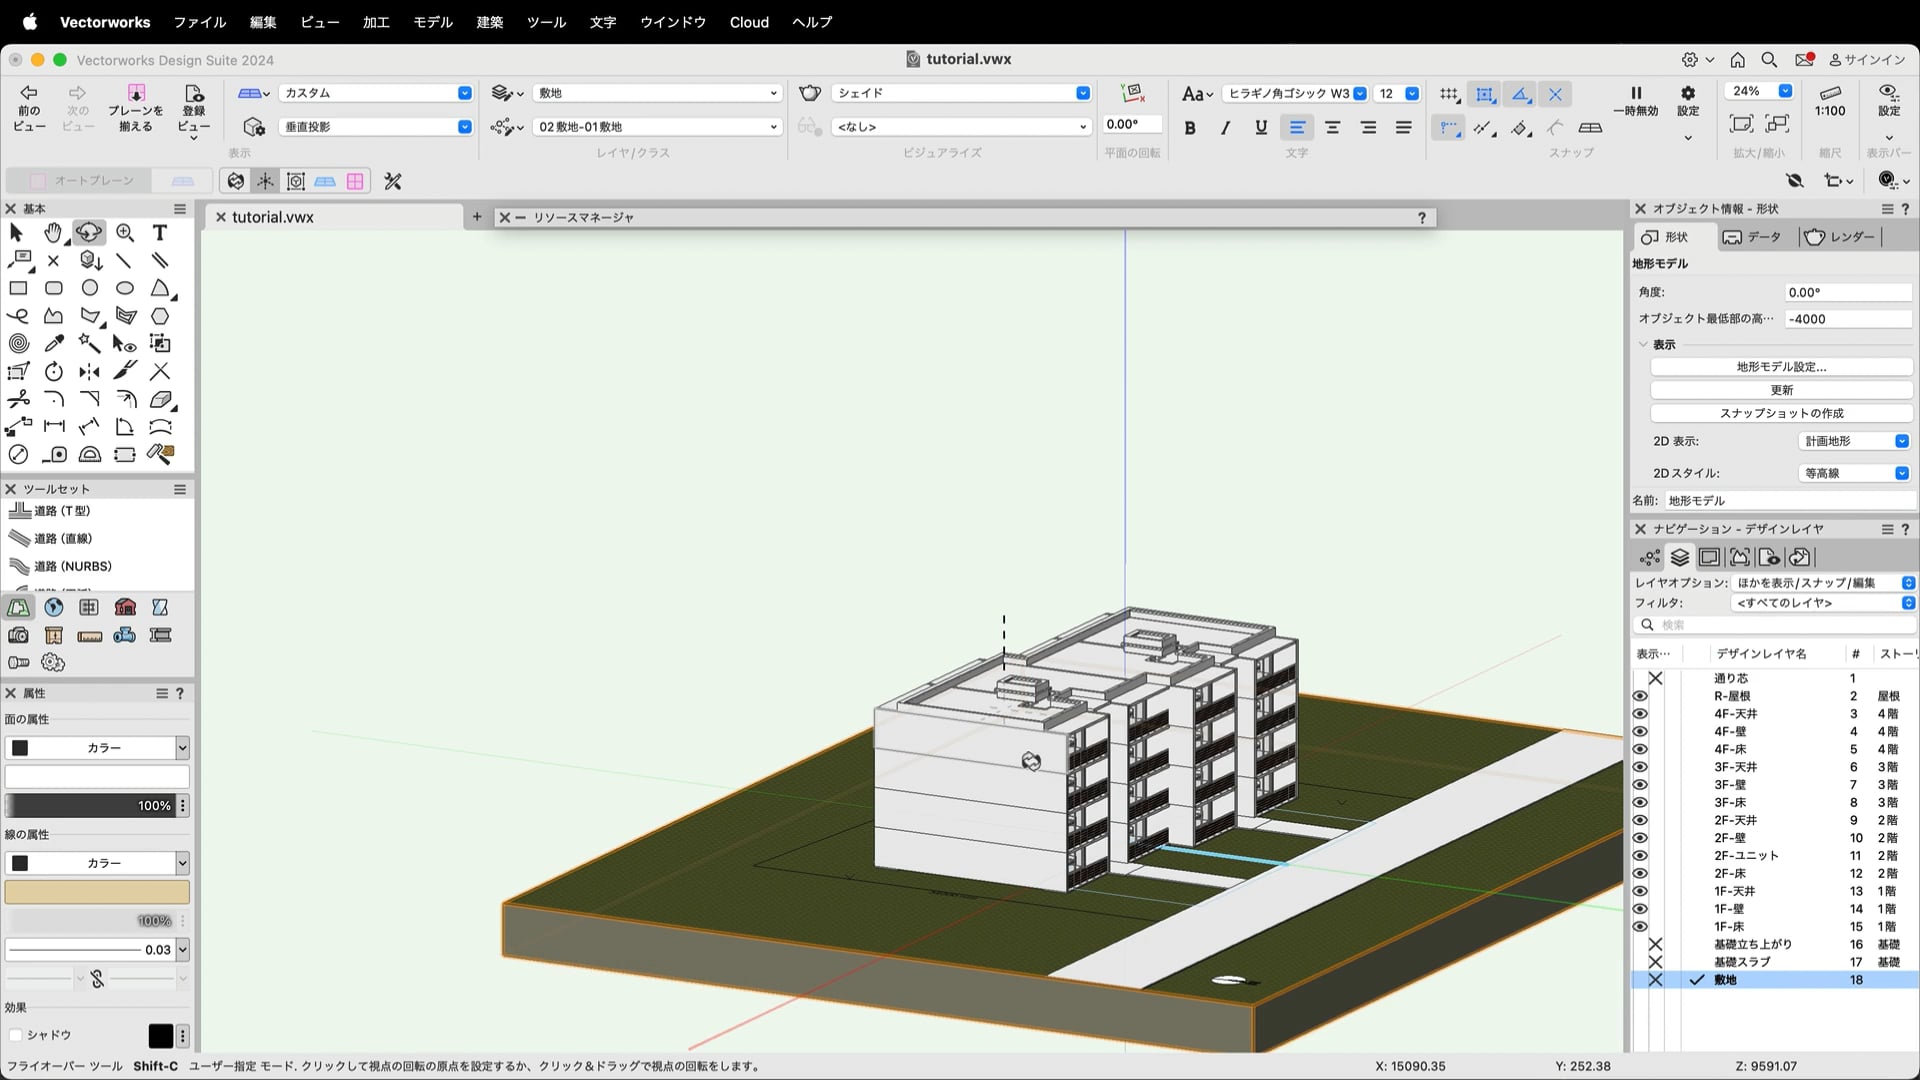
新しい凡例により、地形モデルスナップショットのグラフィカルな出力のコントロールが 向上し、これまでよりも注釈を理解しやすくなりました。カスタマイズ可能なカラースケール により、勾配範囲と標高の関連情報が提供されます。追加設定により、カスタマイズ 可能な地形モデルデータを表示できるため、参照や比較分析に最適です。データを 簡単に視覚化し、設計上の意思決定を効果的に行うことができます。
Category: Landscapes
Requires Approval: No

壁ツールの改善により、直線と曲線の壁モードをシームレスに切り替えることができるようになりました。また、挿入されたオブジェクトに関連する壁構成要素の回り込みに 対し、複数の構成を適用できるようになったため、クリエイティブなフローを維持できます。必要な柔軟性をより少ないクリック数で提供することで、シンプルなワークフローが時間を節約します。
Category: Buildings
Requires Approval: No
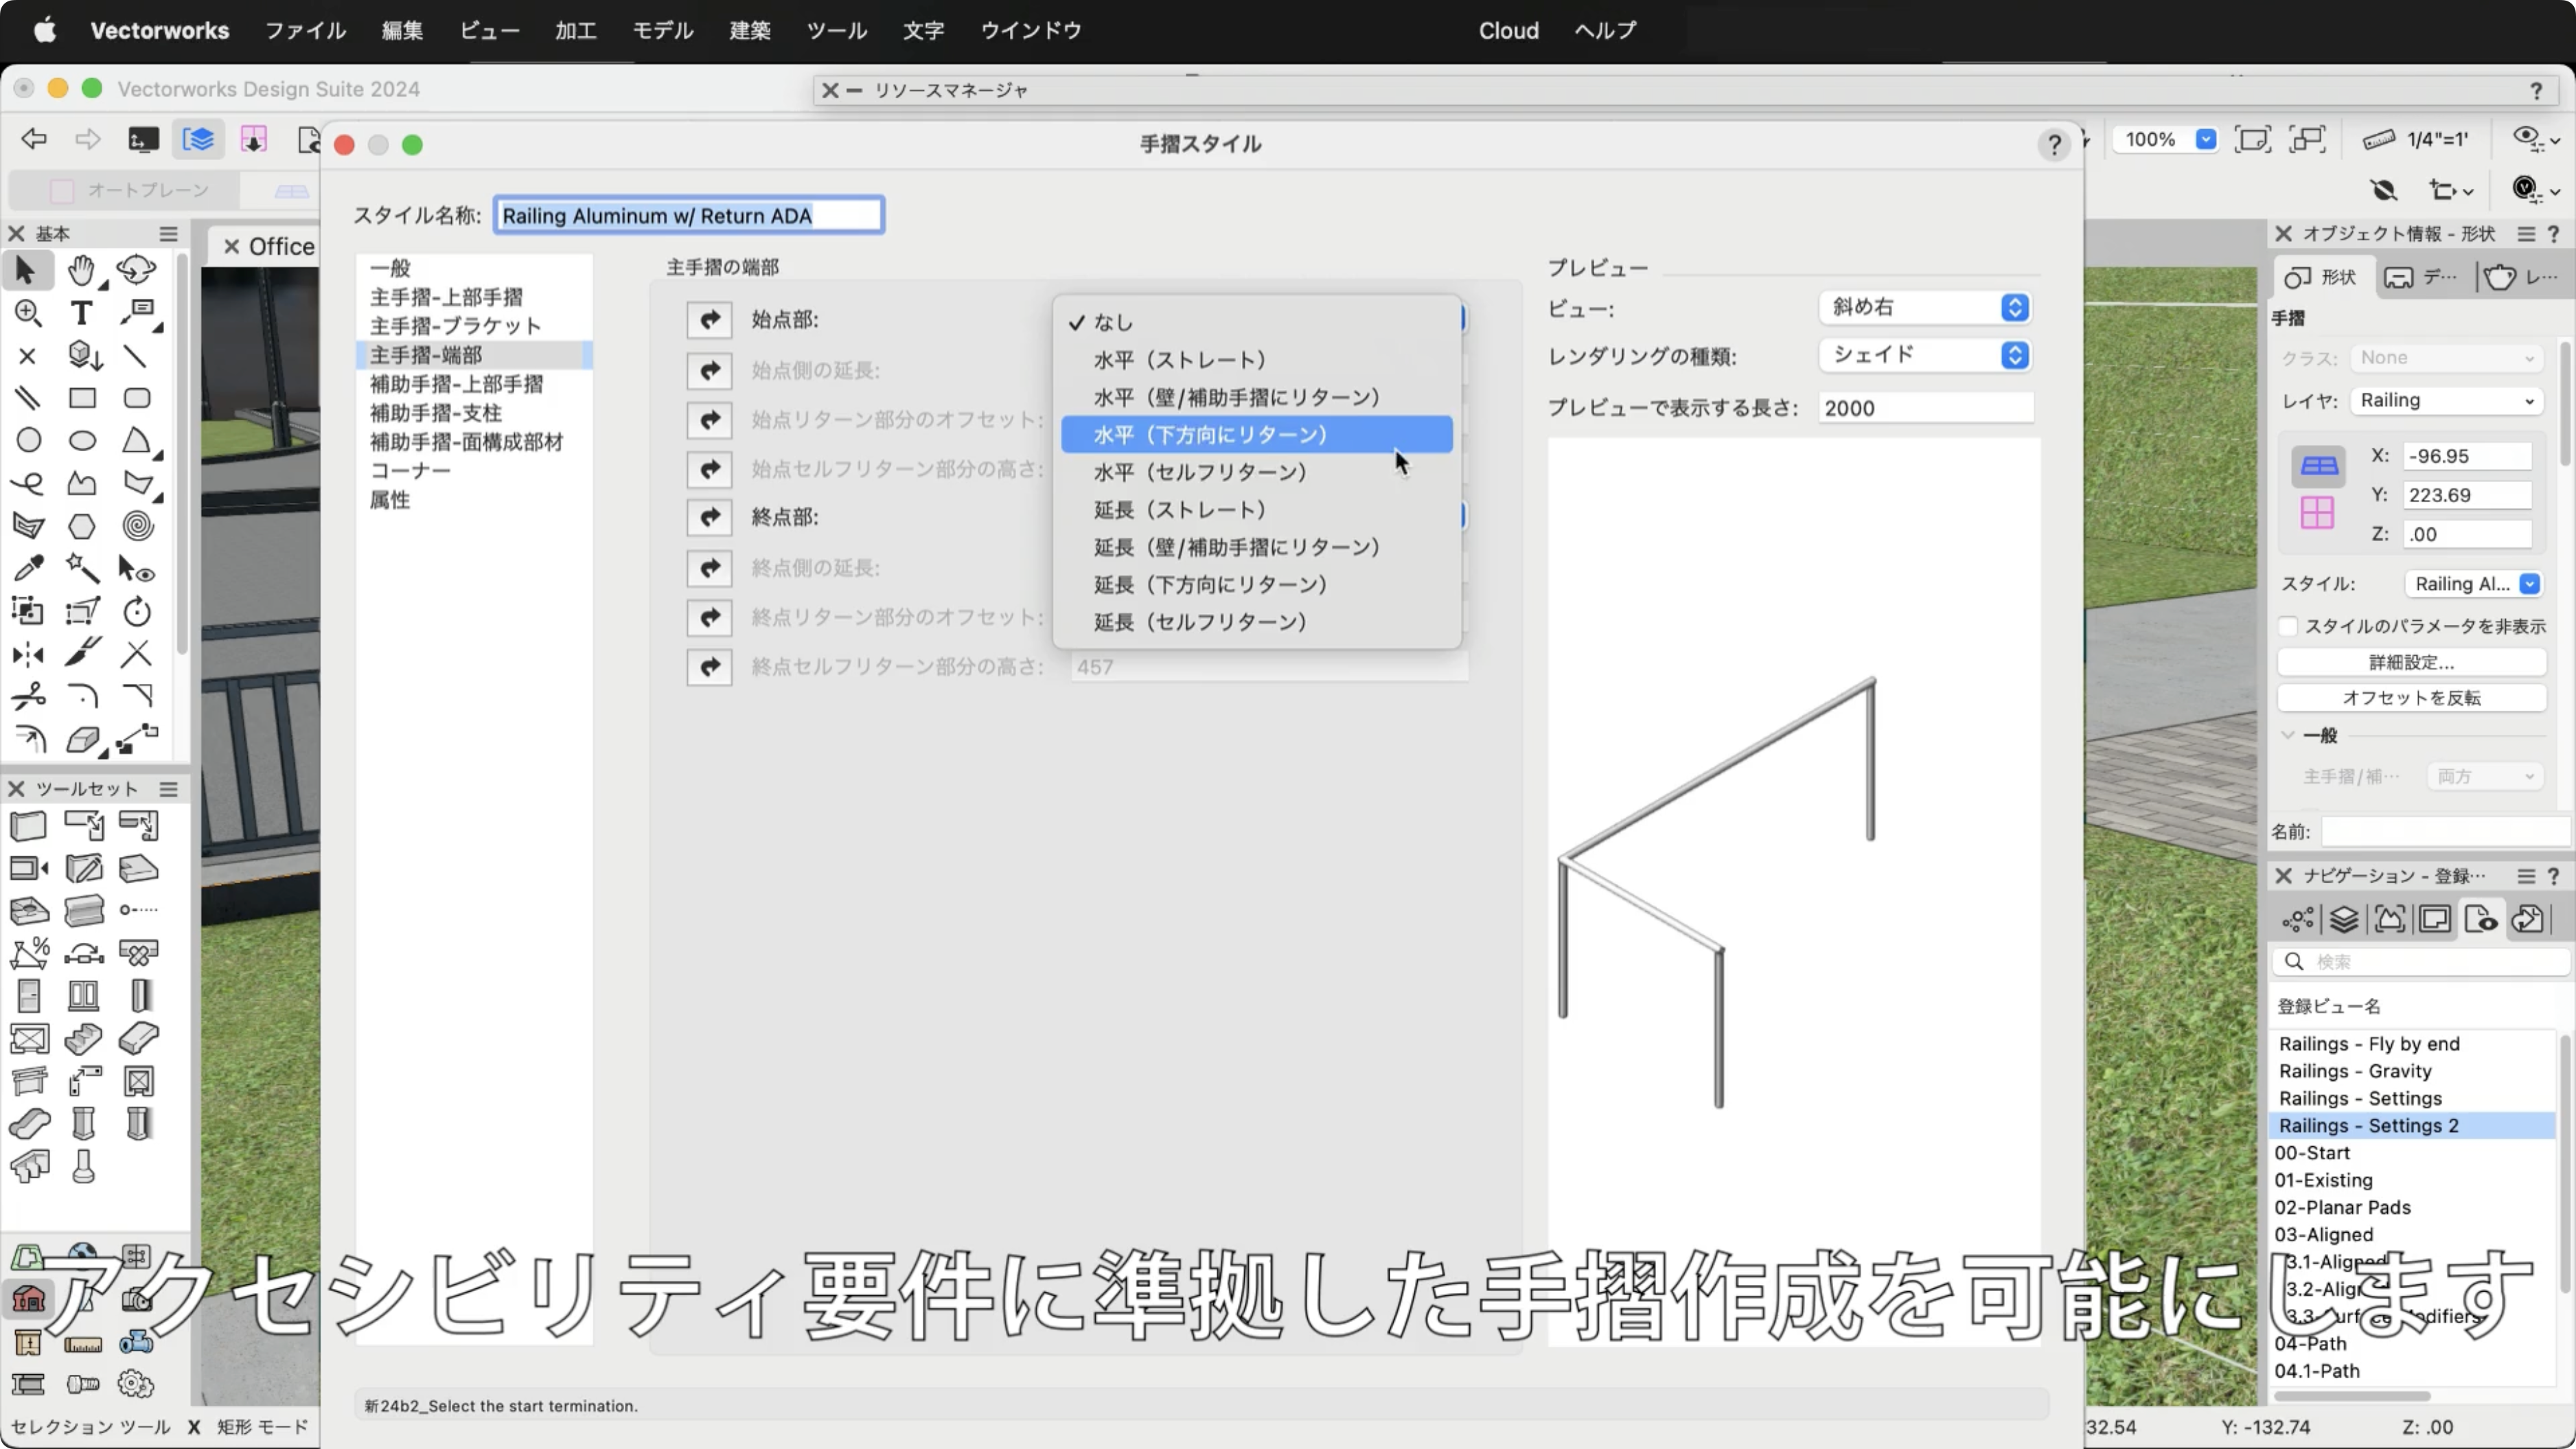
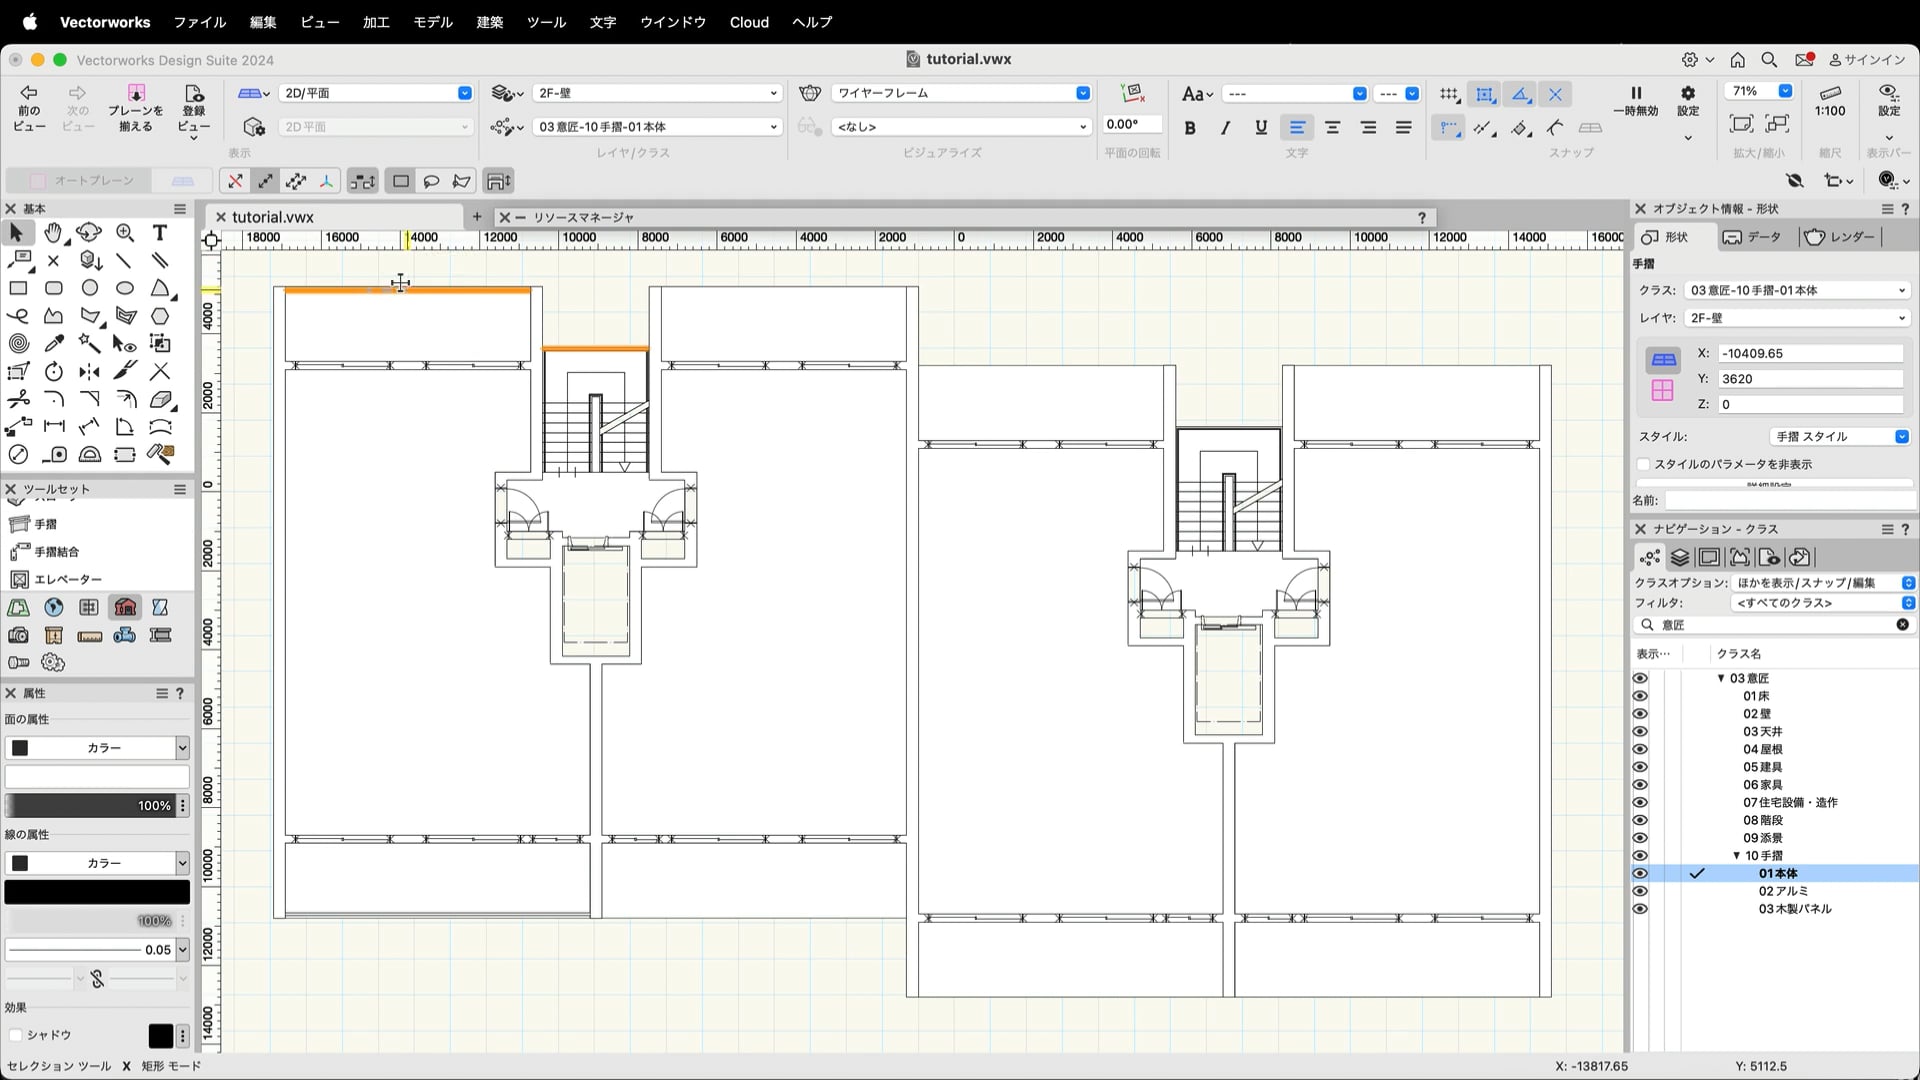
手摺の改善によって柔軟性と精度が向上し、より詳細な構成を設定できるようになりました。 スタイルとして保存したり、スラブ、階段、地形モデルなどのオブジェクトに追従するなど、 多くのモデリングオプションが含まれ、ワークフローが効率的になります。手摺ツールは、 各種基準を満たすために必要な詳細設定もサポートします。
Category: Buildings
Requires Approval: No
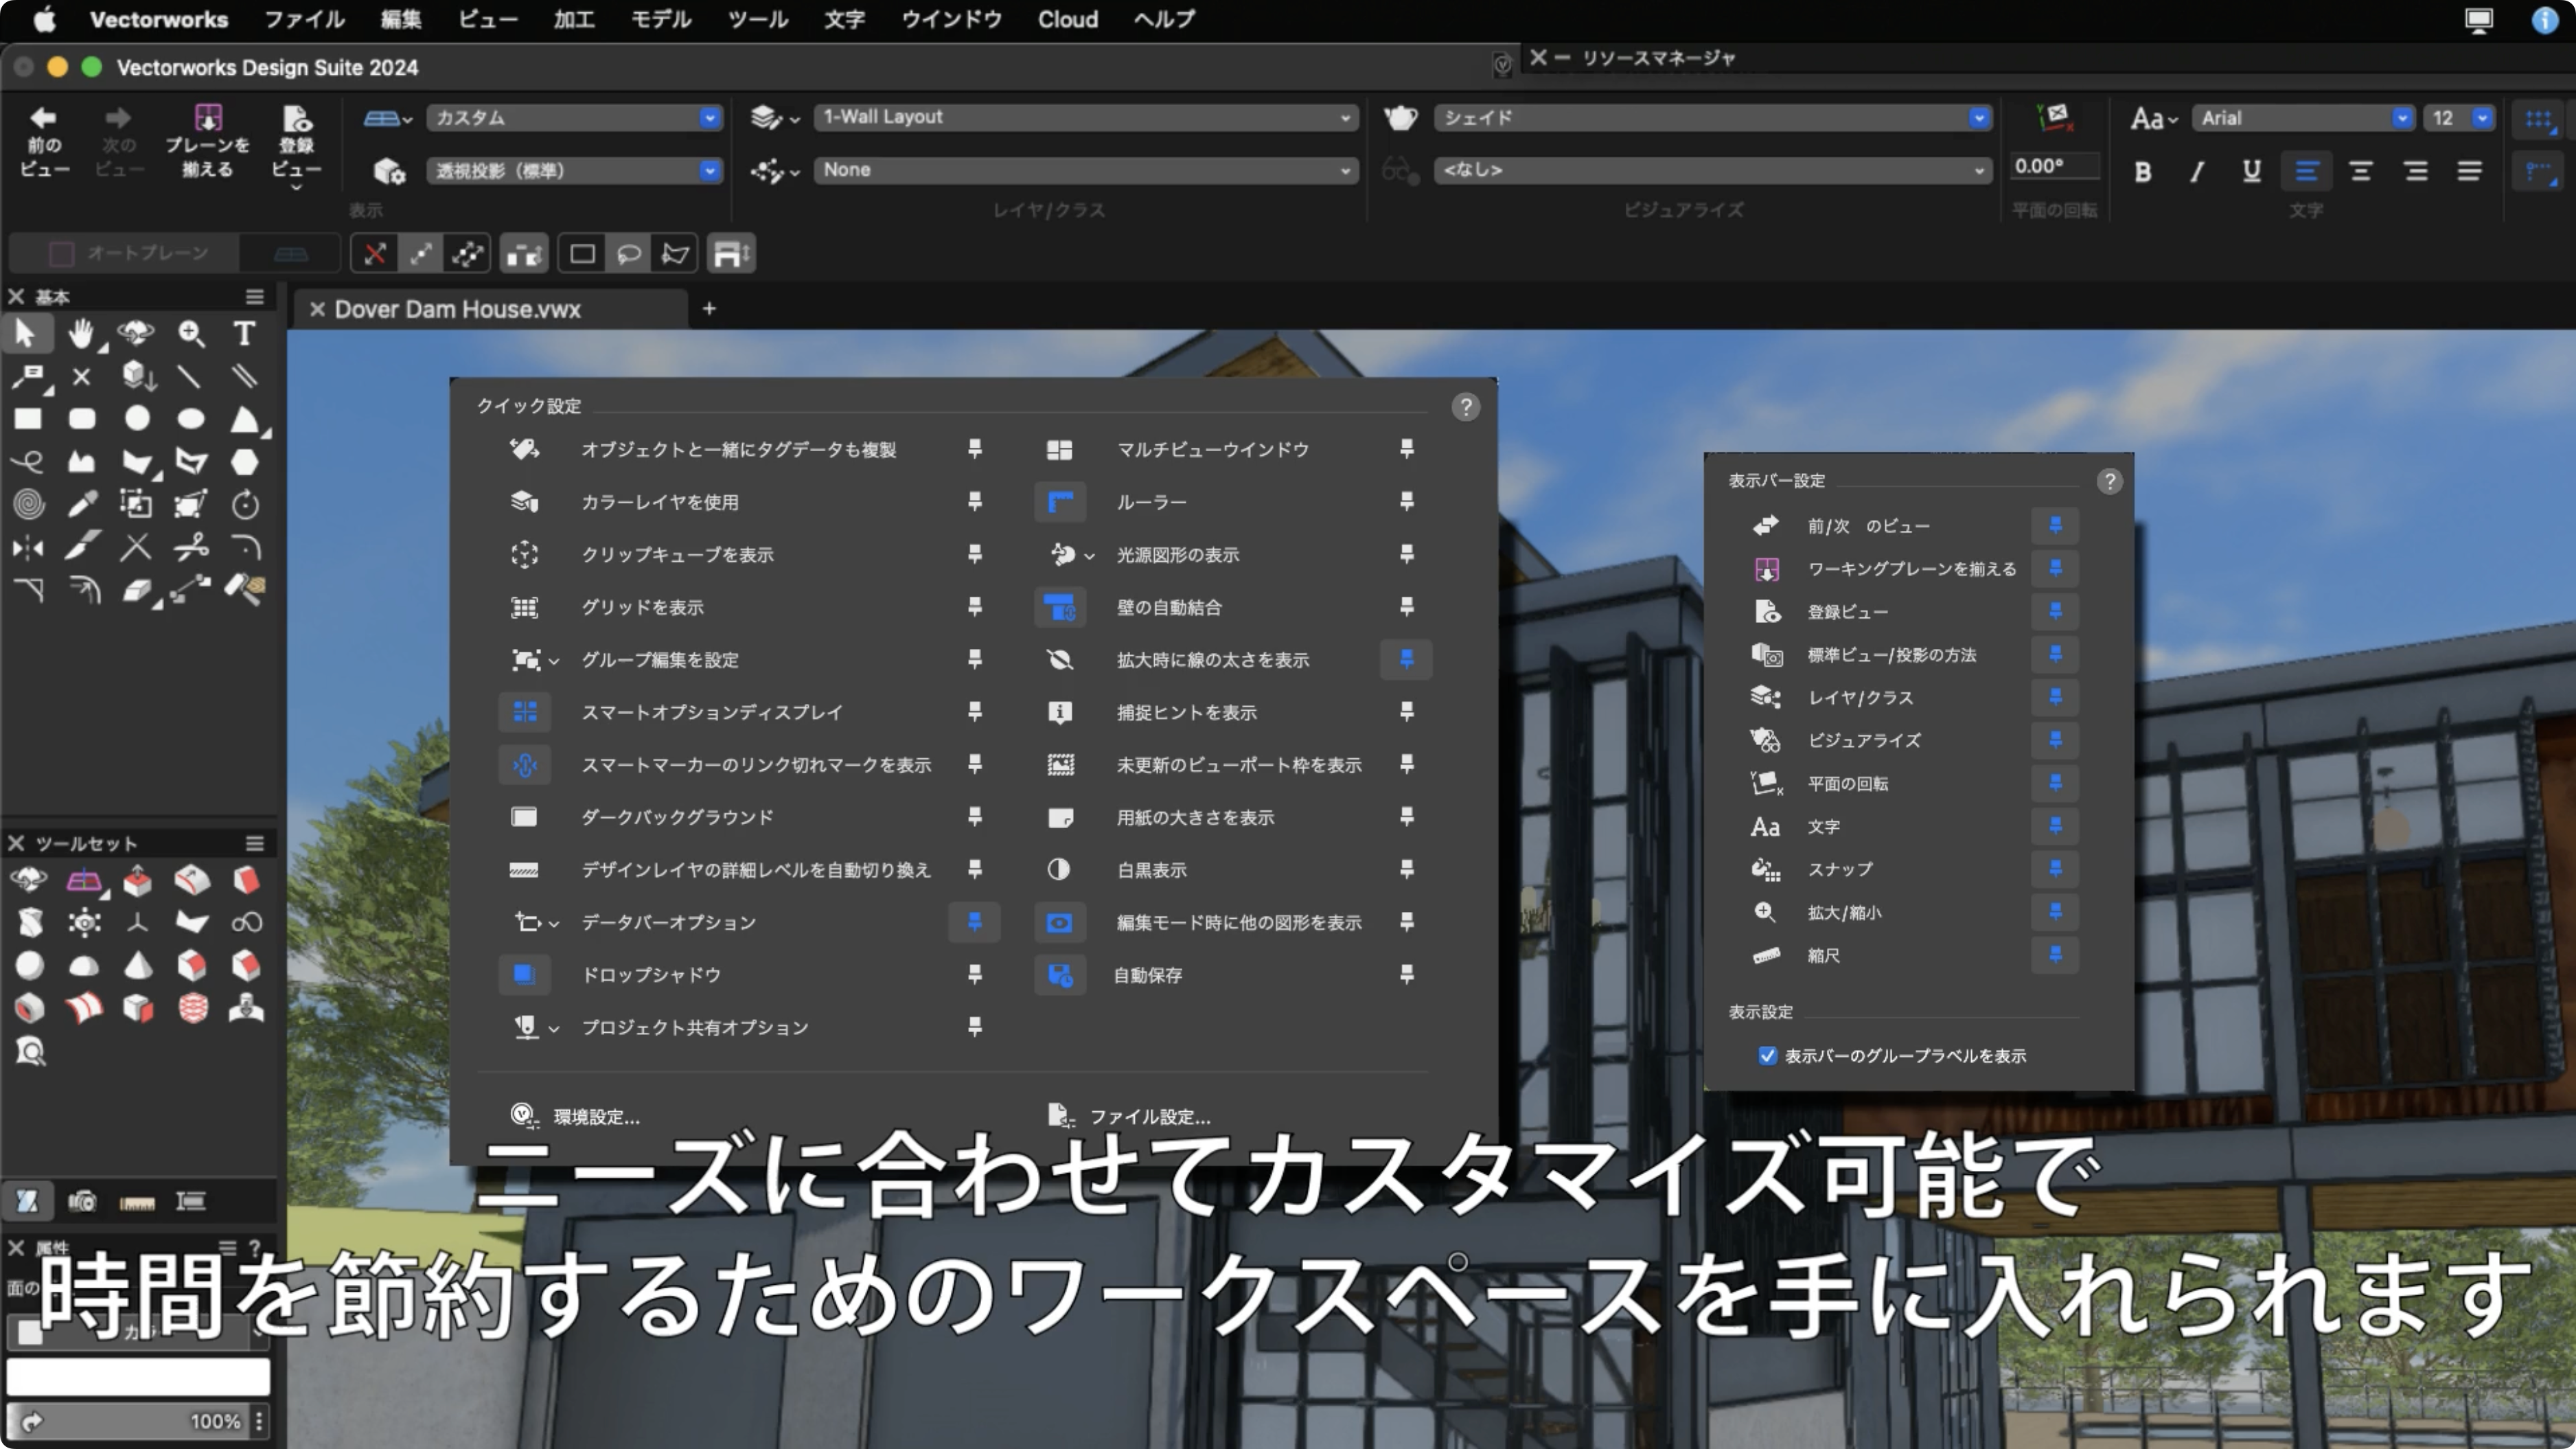
ユーザーインターフェイスが刷新され、Vectorworksでの作業がより効率的に、よりカスタマ イズしやすくなりました。再編成された表示バーとツールバーにより、さまざまなツールが 最前面に表示されるため、必要なものを配置し整理できます。また、これまでのMacに加え てWindowsでもダークモードが利用できるようになりました。
Category: All Industries
Requires Approval: No
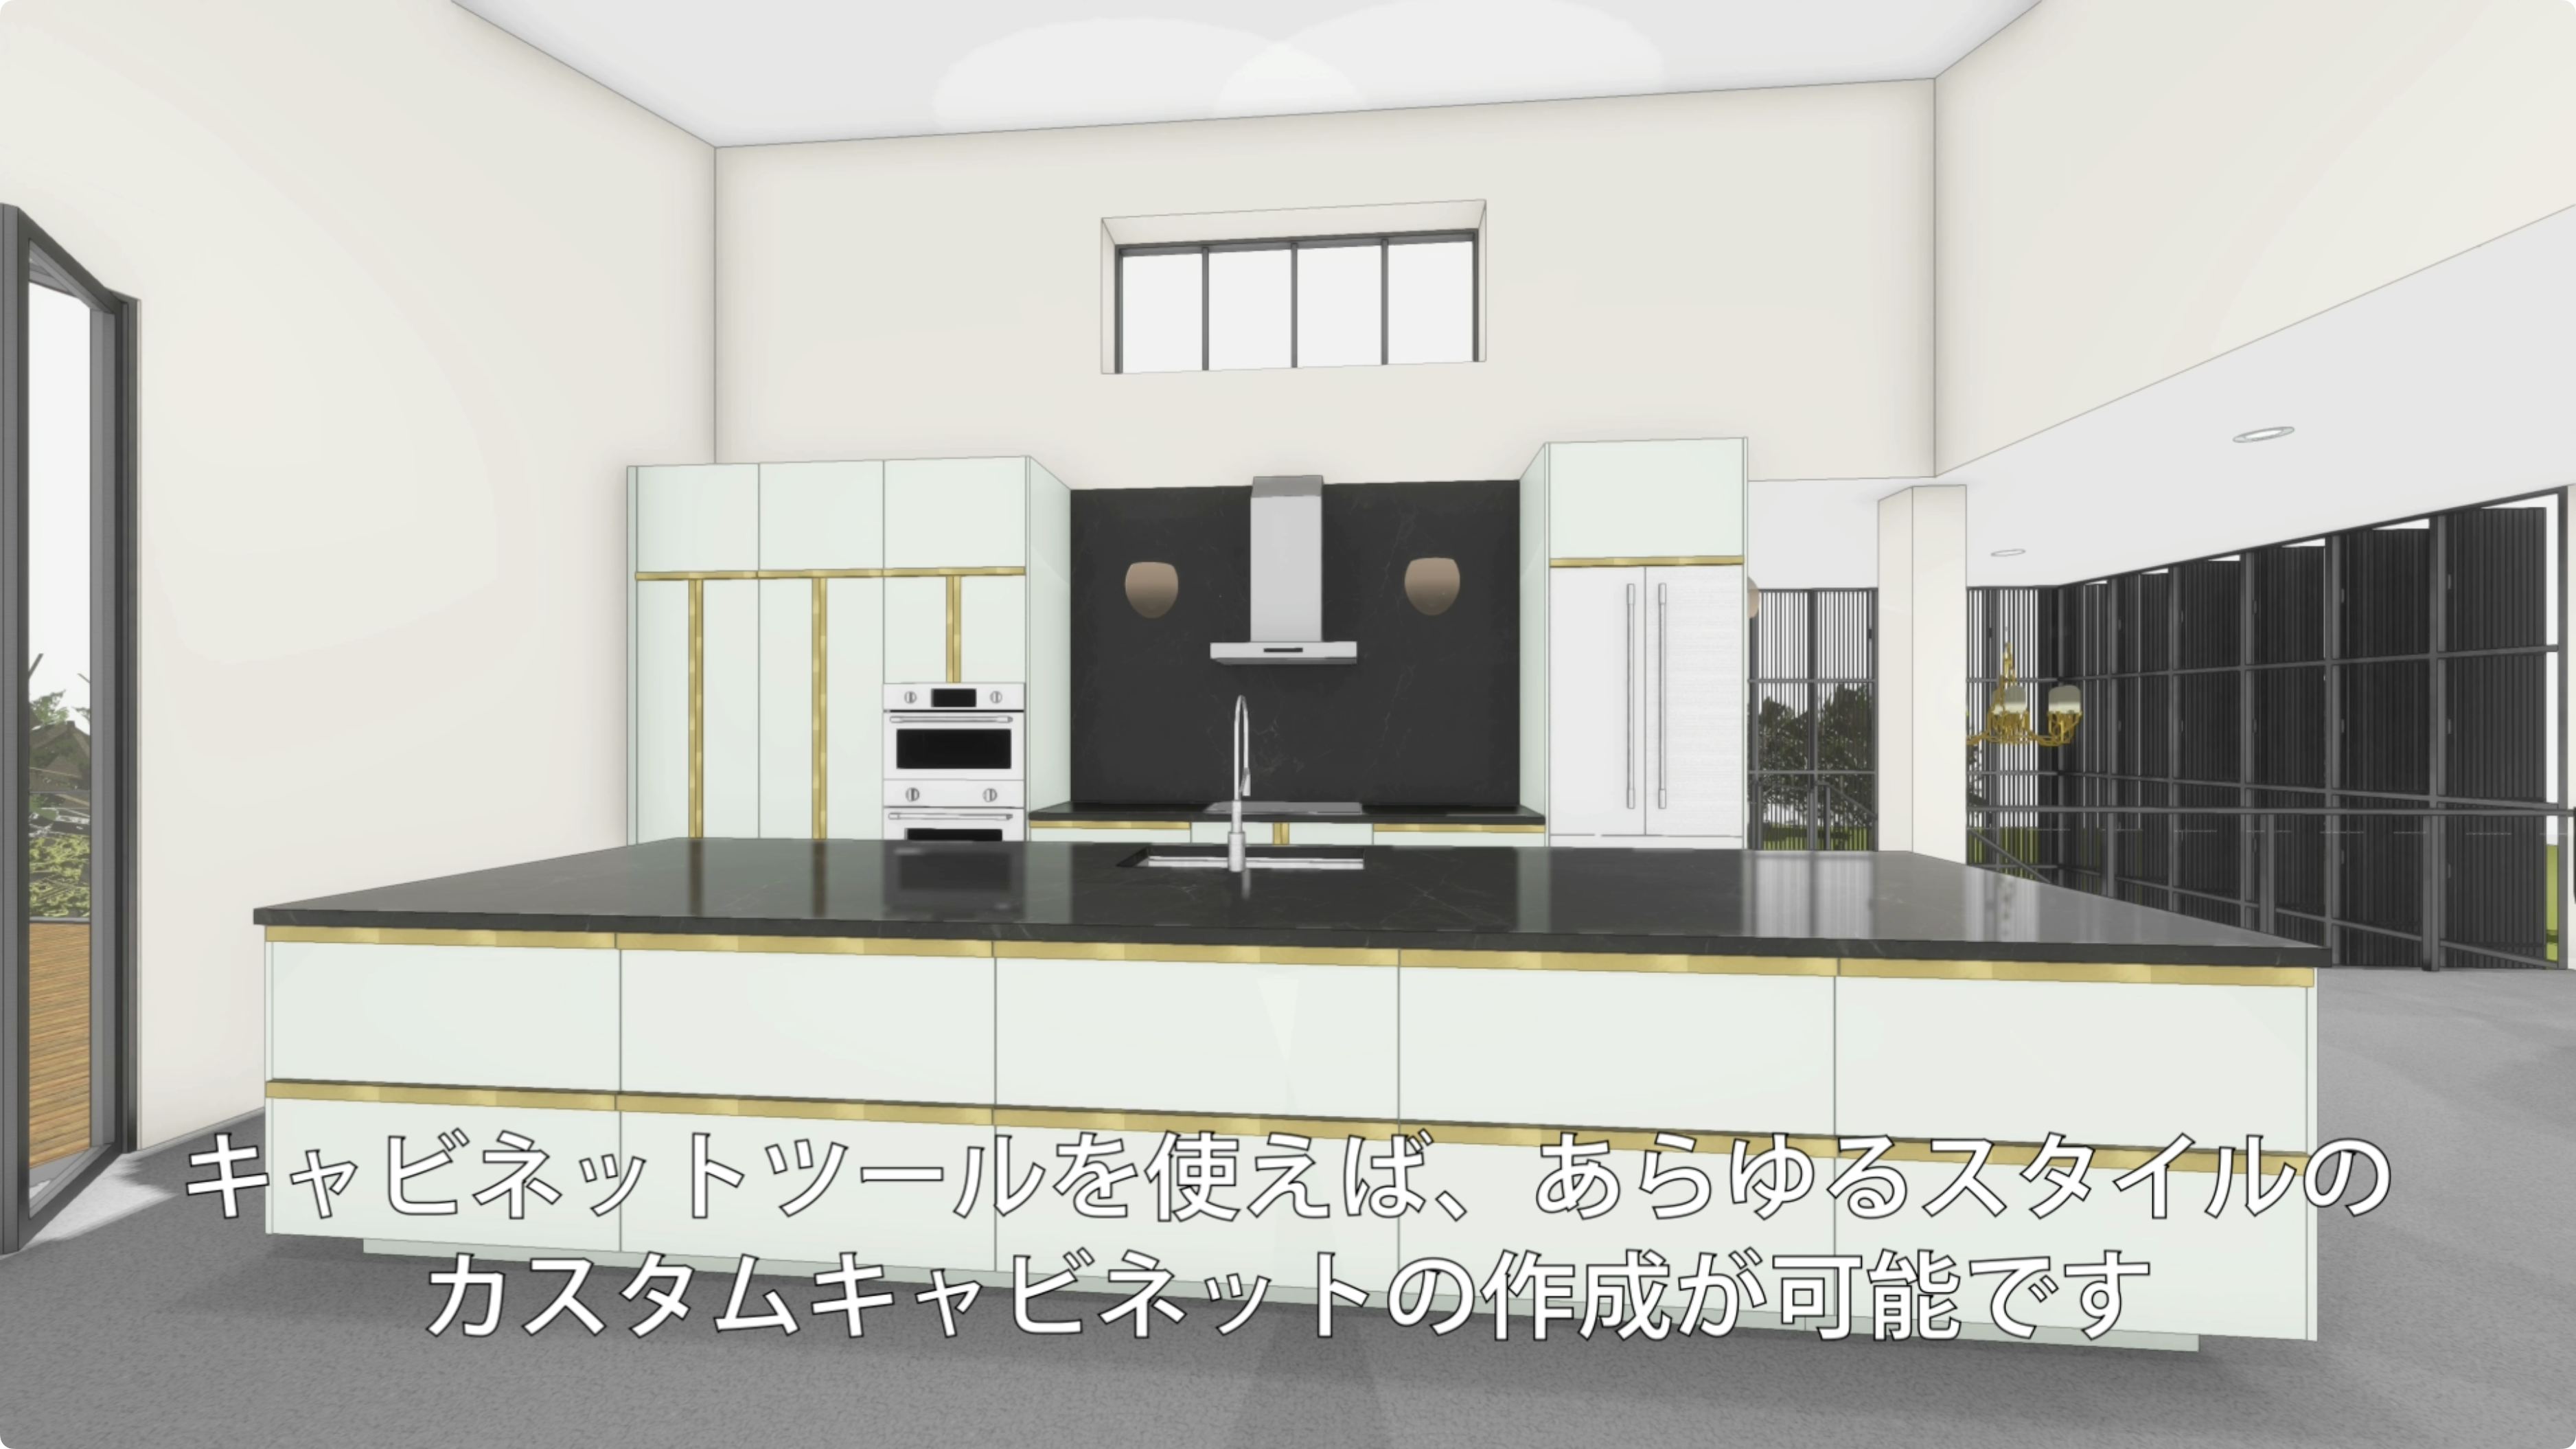
思い描くキッチンやバスルームのデザインを、新しいパラメトリックなキャビネットツールでより簡単に実現します。構成をカスタマイズしたり、より多くのメーカーの人気キャビネットスタイルをオブジェクト化できます。あらゆる空間の造り付けキャビ ネットをレイアウトしてデザインし、よりリアルなビジュアライゼーションと精確な図面の作成が可能です。
Category: Buildings
Requires Approval: No
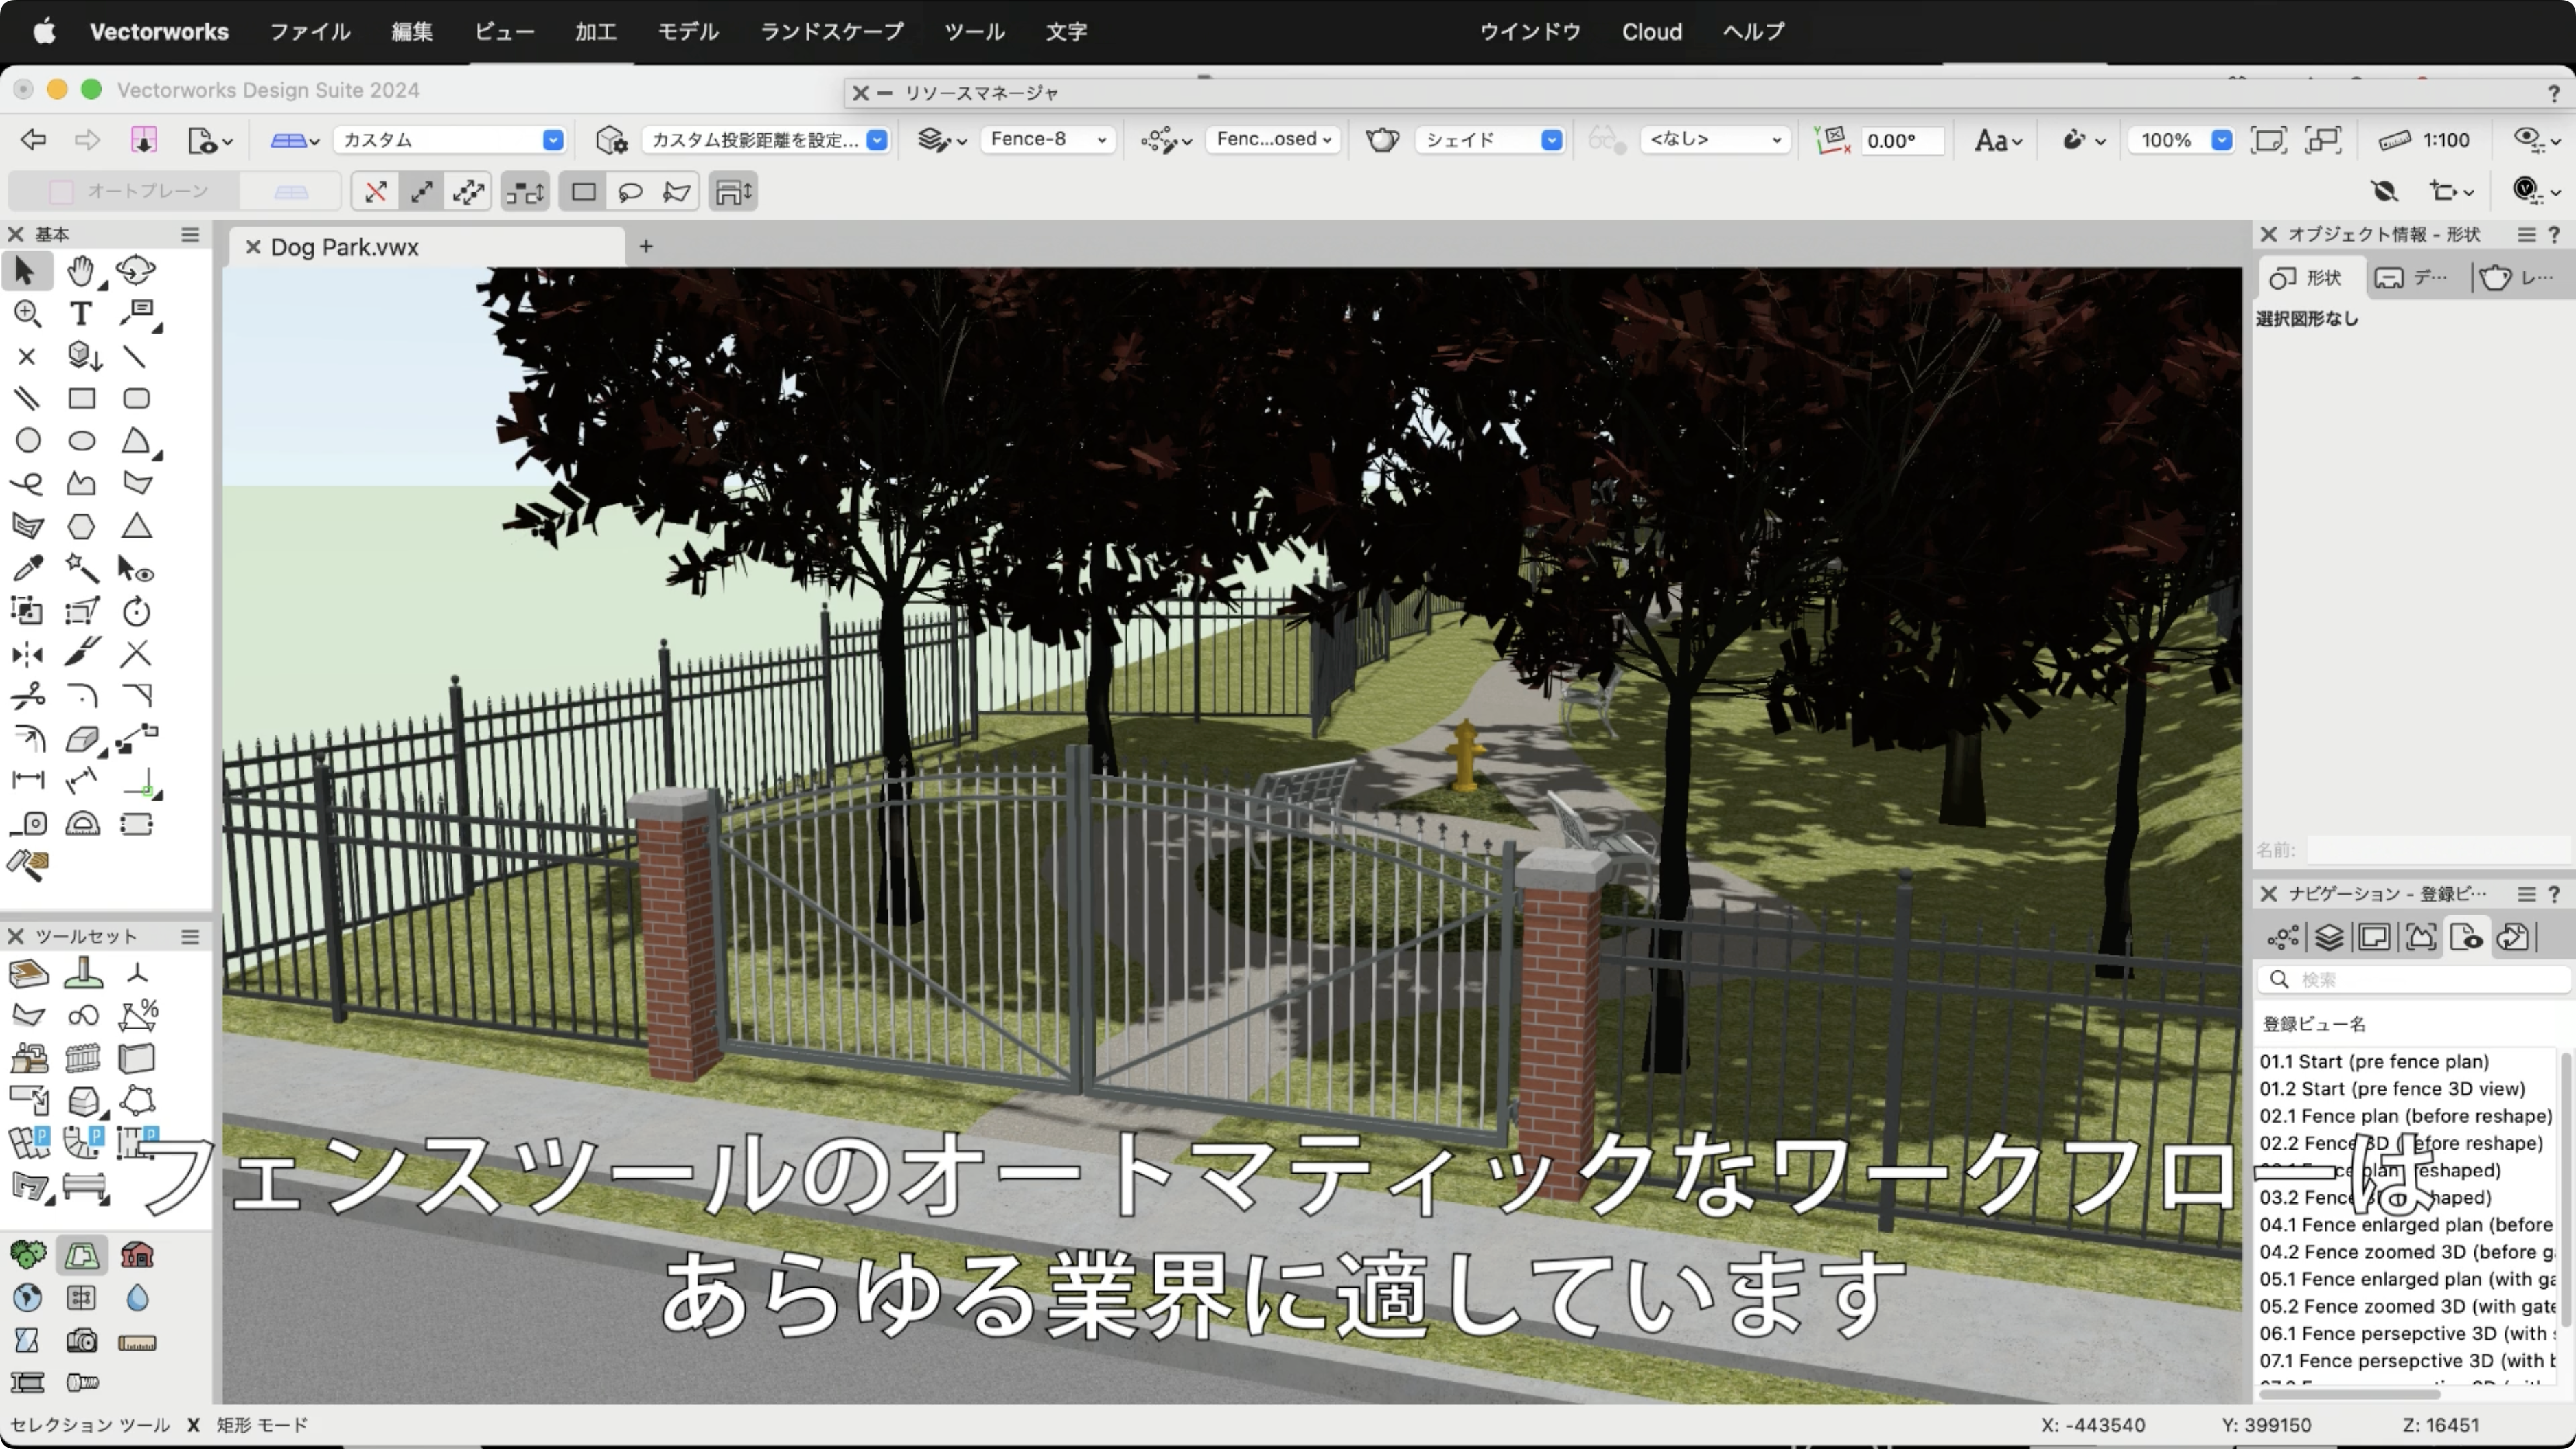
新しいフェンスツールの登場です。シンプルで詳細な表現に最適化されたフェンスツール は、統合された支柱、門扉、そして傾斜や段差などの地形適合オプションをサポート しています。精確な材料レポートにより、2Dおよび3Dでの設計時間を大幅に短縮し、 材料仕様のエラーを減らします。
Category: Landscapes
Requires Approval: No
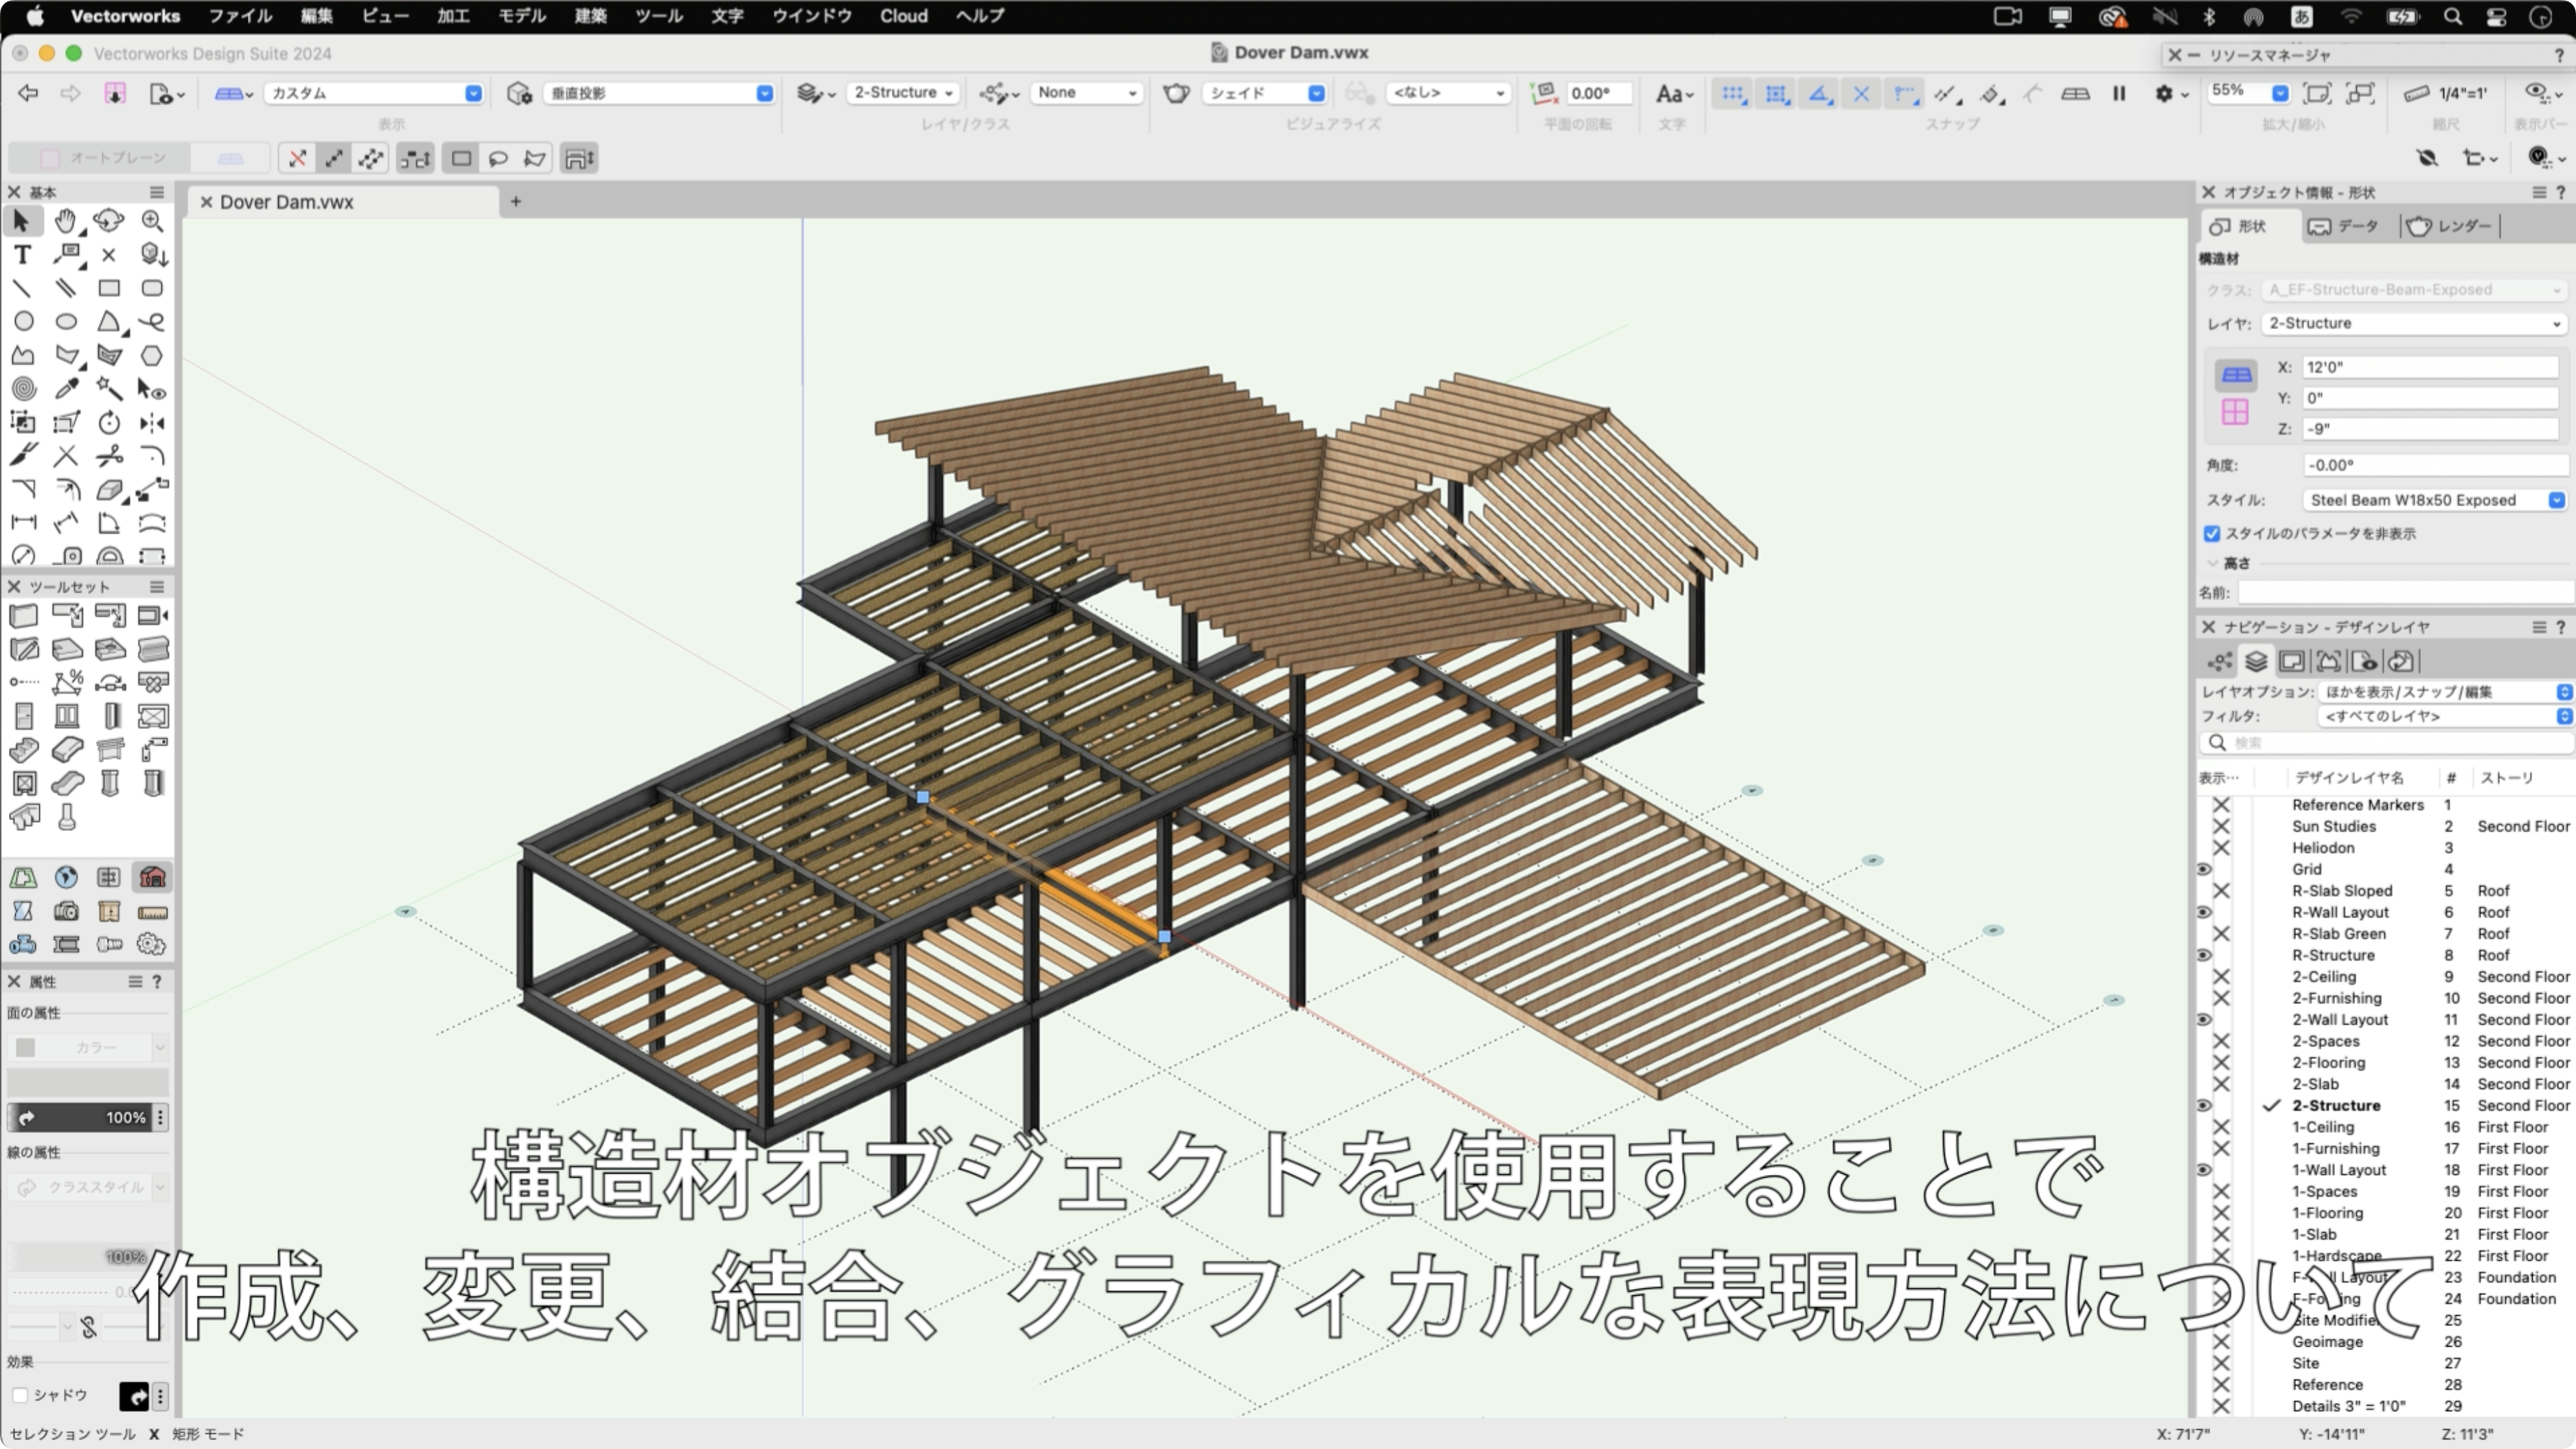
構造材ツールの改良により、設計と図面化のプロセスを合理化できます。スタイルおよび インスタンスごとの2D・3D属性、マテリアル、形状、サイズなどのパラメータをより細かく 制御できます。また、自動結合のコントロールと図形からオブジェクトを作成コマンドの サポートにより、構造材を使用した設計の時間を短縮できます。
Category: Buildings
Requires Approval: No
操作環境を設定し、データを開きます。データはこちらよりダウンロードできます。
https://www.vectorworks.co.jp/seminar/dl/tutorial_Architect.zip
※リンクが反応しない場合は、アドレスバーに直接コピーペーストしてダウンロードしてください
※この動画は、Vectorworks Architect 2024で収録しています。バージョンの違いにより機能や設定方法、一部名称が異なる場合がございます。あらかじめご了承ください。
Category: Buildings
Requires Approval: No
壁芯を作成してから壁を作成し、そこにスペースを配置する手順でモデルの作成を行います。
※この動画は、Vectorworks Architect 2024で収録しています。バージョンの違いにより機能や設定方法、一部名称が異なる場合がございます。あらかじめご了承ください。
Category: Buildings
Requires Approval: No
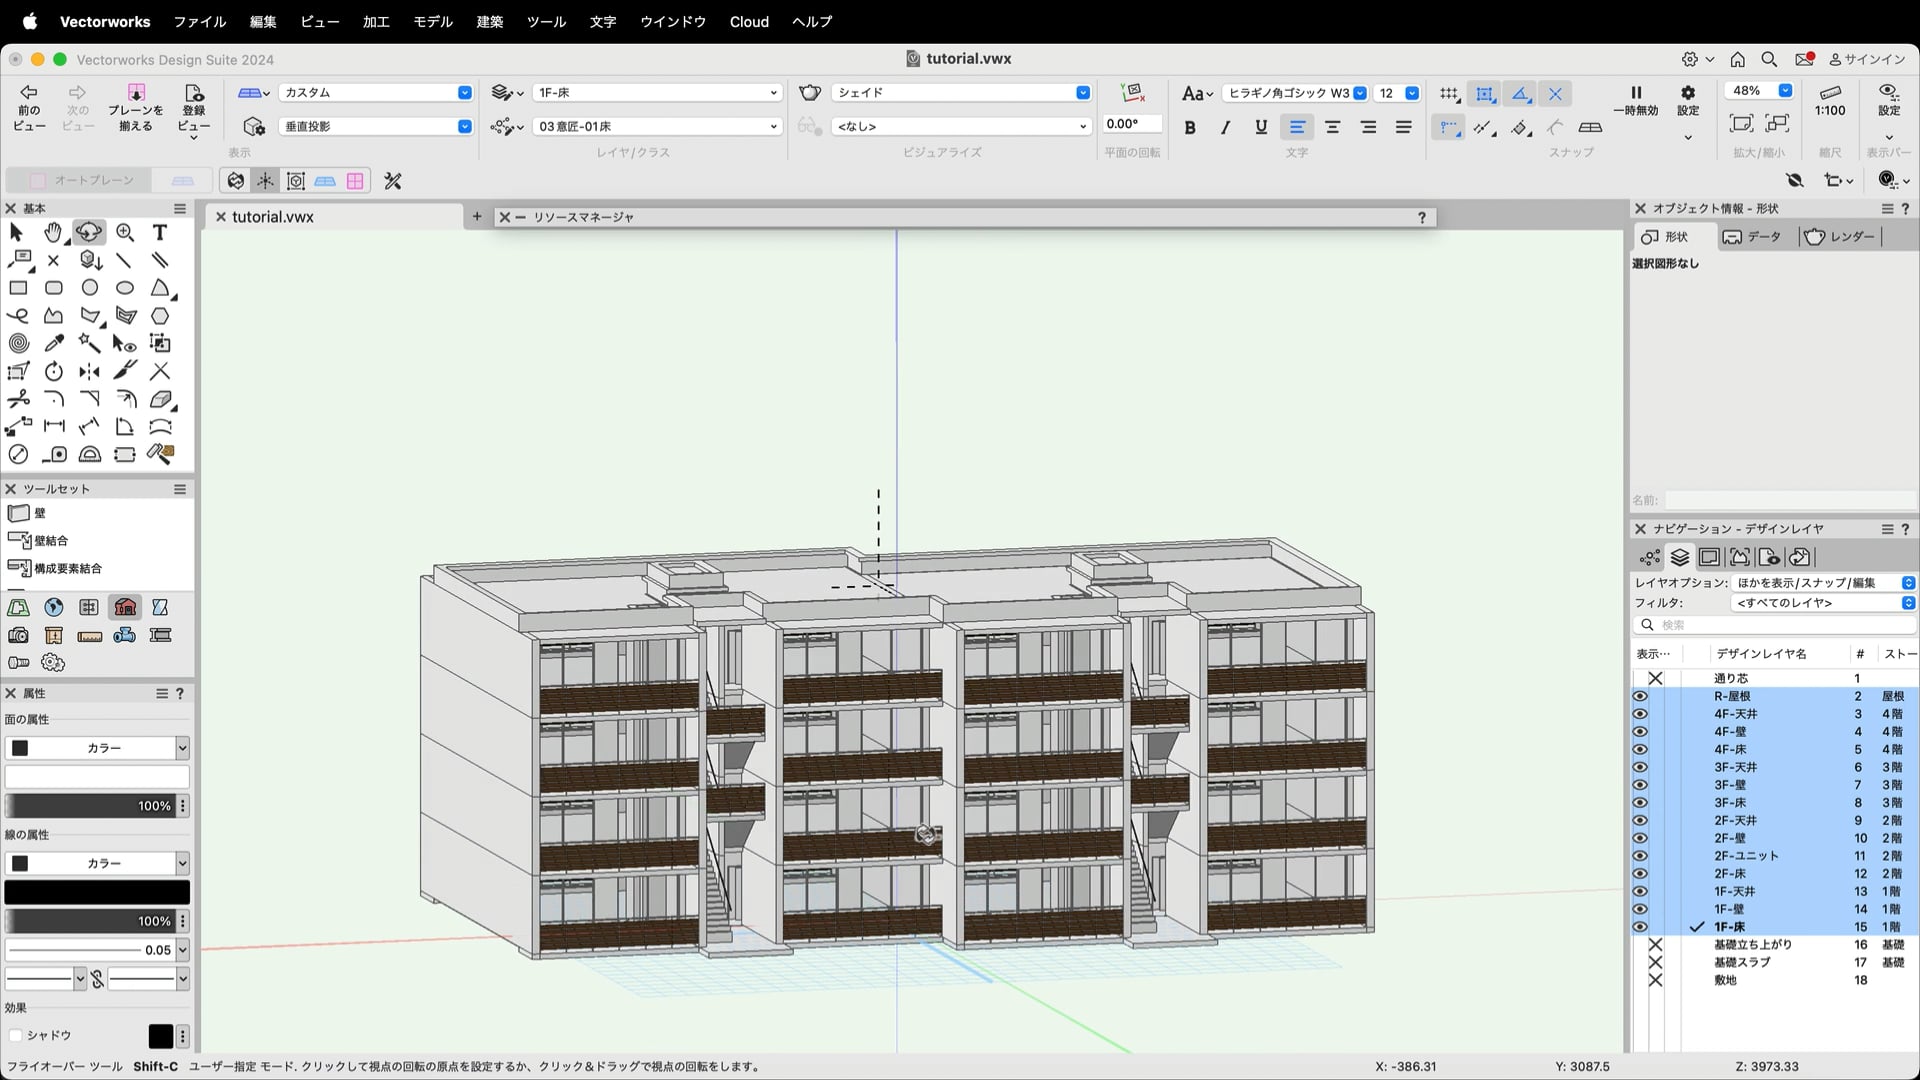
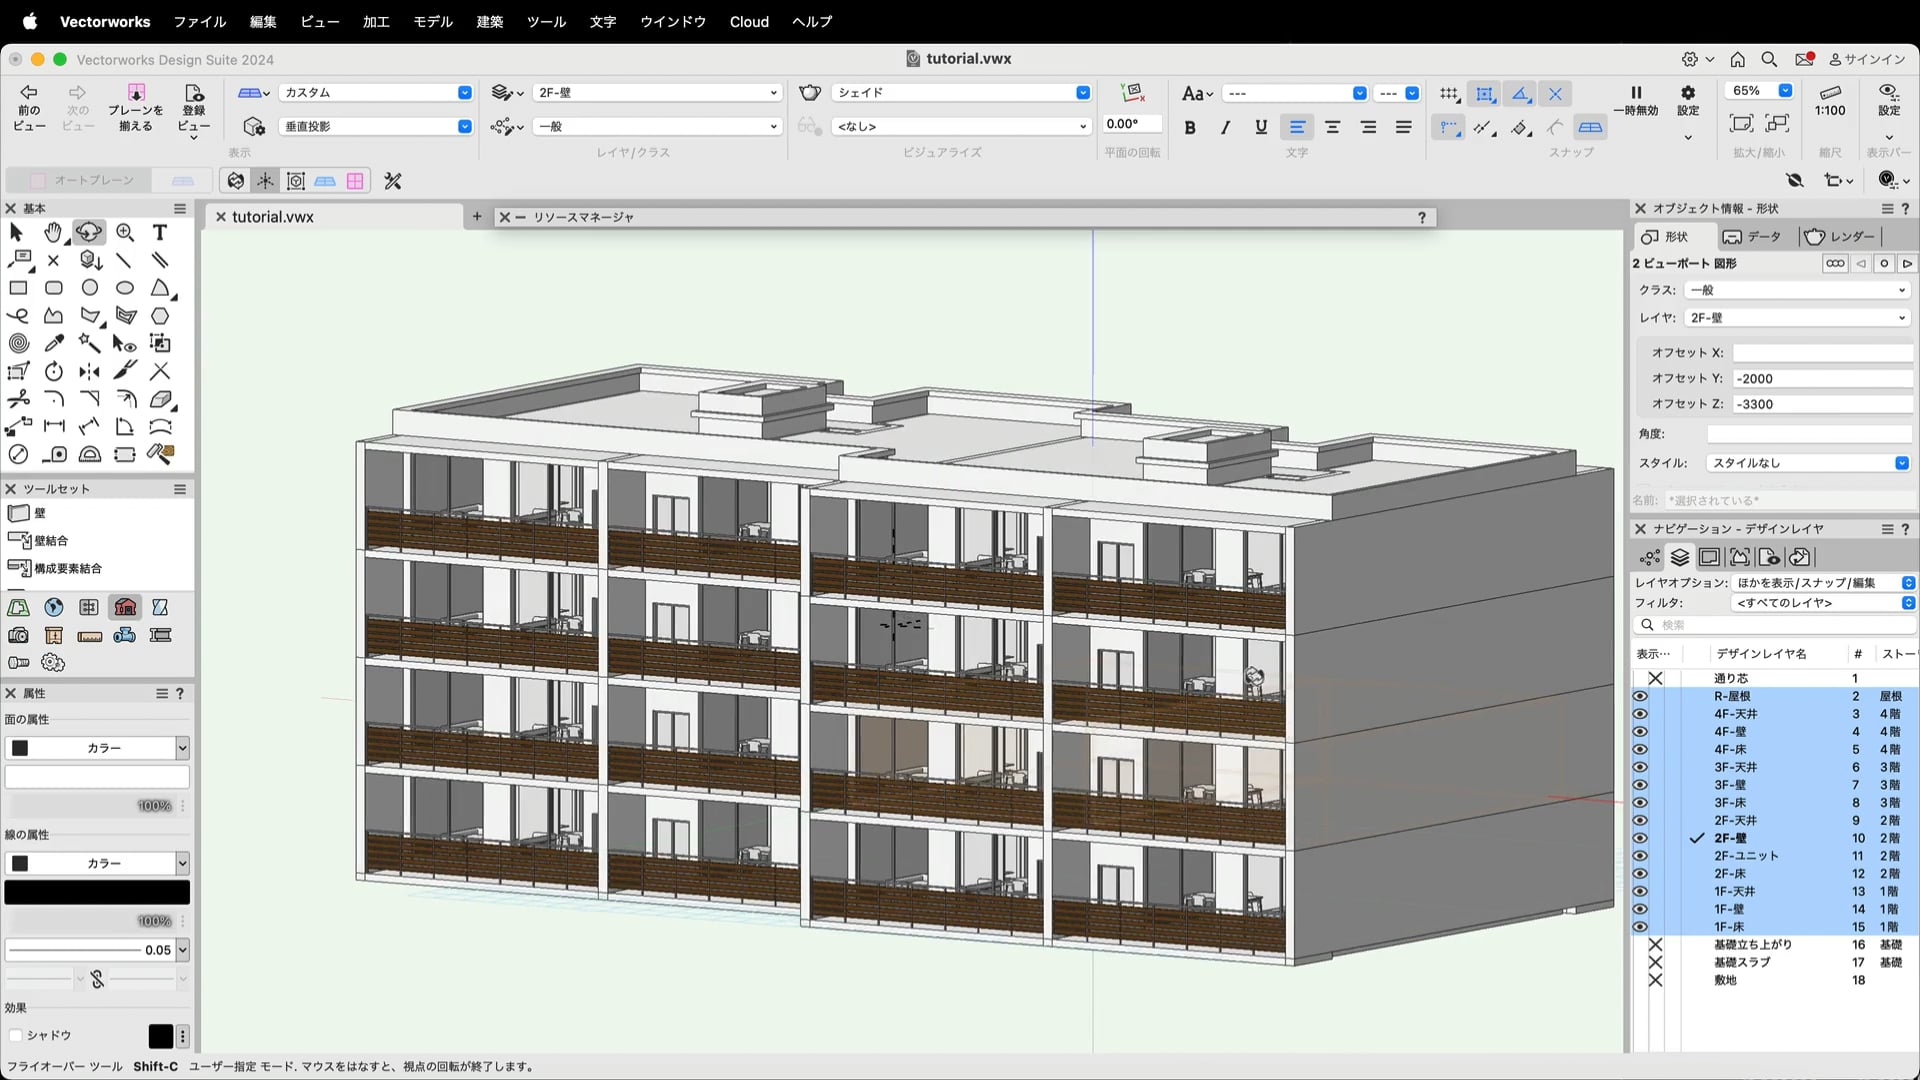
2Fを基準階として、各階にデザインレイヤビューポートを作成します。
※この動画は、Vectorworks Architect 2024で収録しています。バージョンの違いにより機能や設定方法、一部名称が異なる場合がございます。あらかじめご了承ください。
Category: Buildings
Requires Approval: No
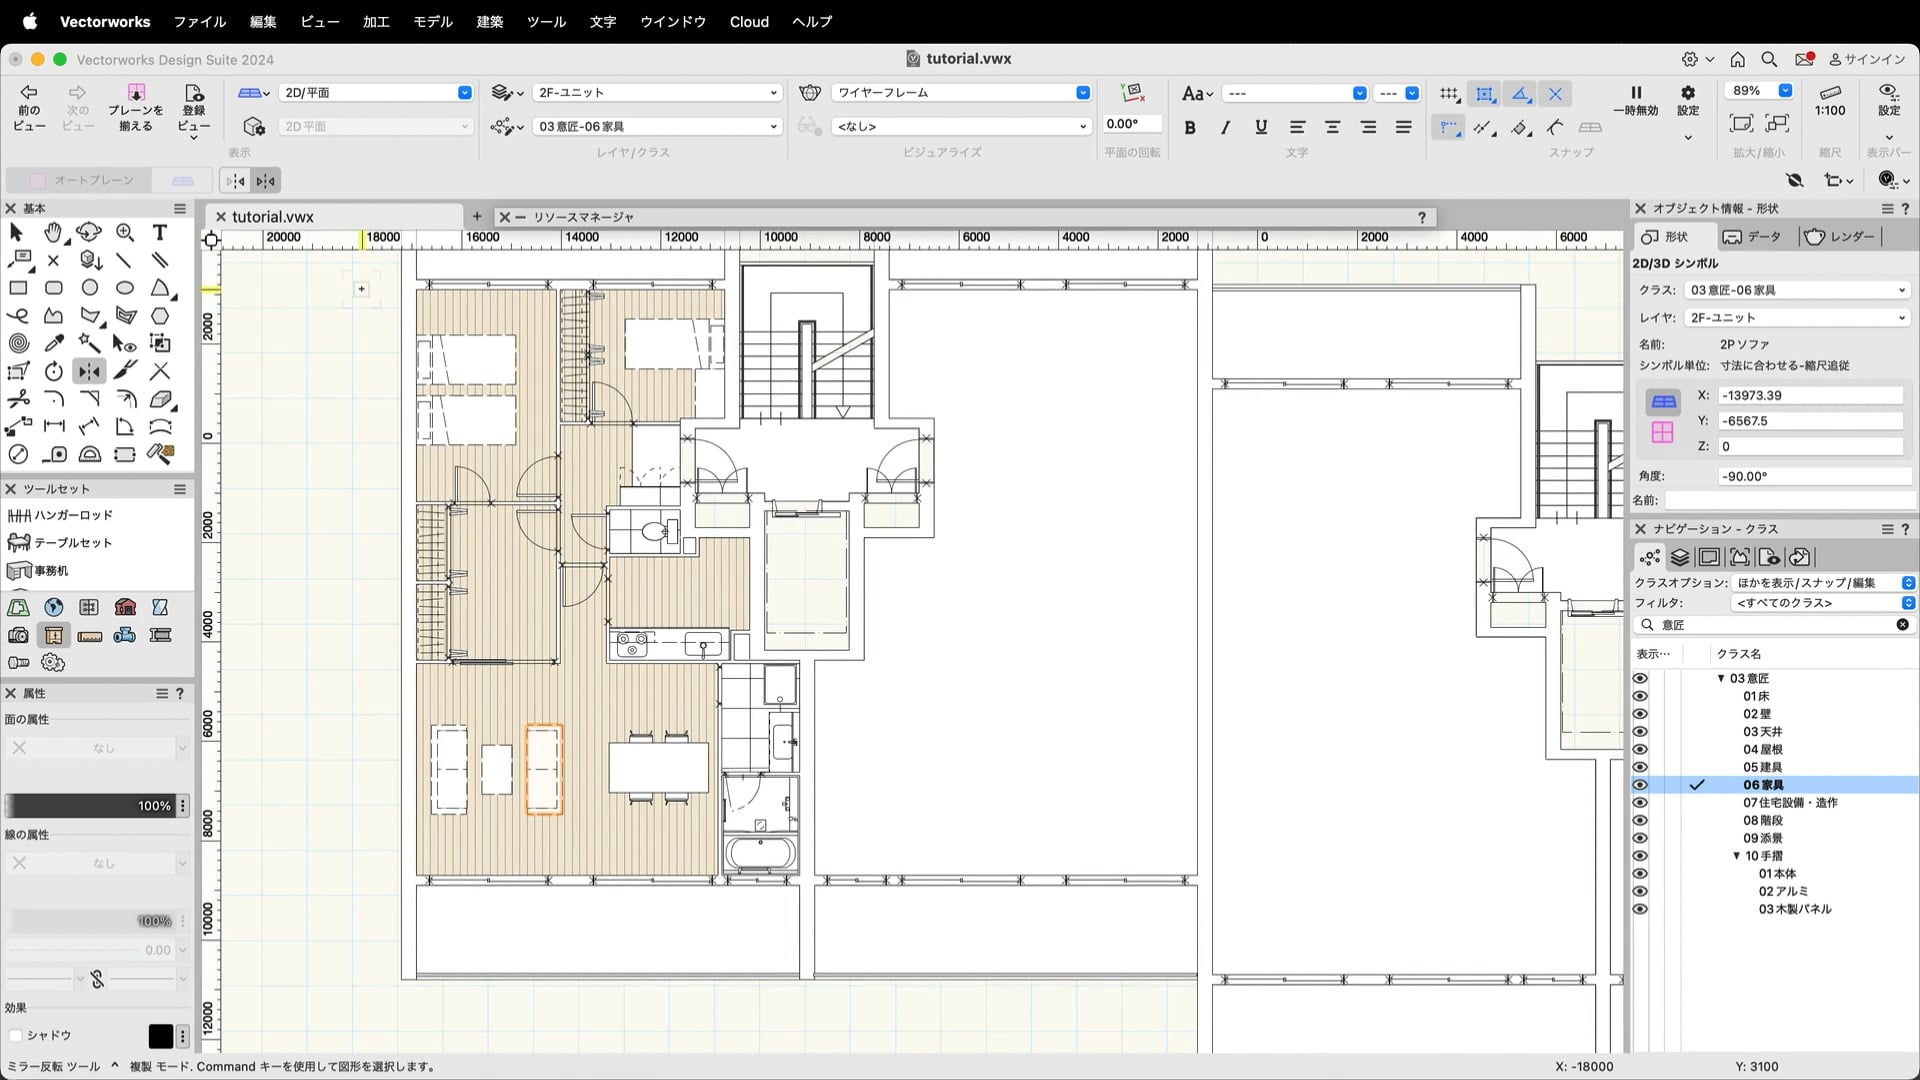
第1章で作成した建物モデルをベースに住戸ユニットを作成します。
※この動画は、Vectorworks Architect 2024で収録しています。バージョンの違いにより機能や設定方法、一部名称が異なる場合がございます。あらかじめご了承ください。
Category: Buildings
Requires Approval: No
作成した住戸ユニットを1F〜4Fにビューポートで表示します。
※この動画は、Vectorworks Architect 2024で収録しています。バージョンの違いにより機能や設定方法、一部名称が異なる場合がございます。あらかじめご了承ください。
Category: Buildings
Requires Approval: No
地形モデルや道路などの外構を作成します。
※この動画は、Vectorworks Architect 2024で収録しています。バージョンの違いにより機能や設定方法、一部名称が異なる場合がございます。あらかじめご了承ください。
Category: Buildings
Requires Approval: No

太陽光を配置し、光と影の表現を確認します。
※この動画は、Vectorworks Architect 2024で収録しています。バージョンの違いにより機能や設定方法、一部名称が異なる場合がございます。あらかじめご了承ください。
Category: Buildings
Requires Approval: No

第1章から作成してきたデータから平面図、立面図、断面図、室内展開図、外観パースを作成します。
※この動画は、Vectorworks Architect 2024で収録しています。バージョンの違いにより機能や設定方法、一部名称が異なる場合がございます。あらかじめご了承ください。
Category: Buildings
Requires Approval: No

操作環境やファイルサイズなどを設定し、データを取り込みます。データはこちらよりダウンロードできます。
https://www.vectorworks.co.jp/seminar/dl/tutorial_Landmark.zip
※この動画は、Vectorworks Landmark 2024で収録しています。バージョンの違いにより機能や設定方法、一部名称が異なる場合がございます。あらかじめご了承ください。
Category: Landscapes
Requires Approval: No

等高線から現況の地形を作成し、宅地造成します。
※この動画は、Vectorworks Landmark 2024で収録しています。バージョンの違いにより機能や設定方法、一部名称が異なる場合がございます。あらかじめご了承ください。
Category: Landscapes
Requires Approval: No

階数と屋根で設定するシンプルな建物を作成します。
※この動画は、Vectorworks Landmark 2024で収録しています。バージョンの違いにより機能や設定方法、一部名称が異なる場合がございます。あらかじめご了承ください。
Category: Landscapes
Requires Approval: No

道路中心線から前面道路を作成します。
※この動画は、Vectorworks Landmark 2024で収録しています。バージョンの違いにより機能や設定方法、一部名称が異なる場合がございます。あらかじめご了承ください。
Category: Landscapes
Requires Approval: No

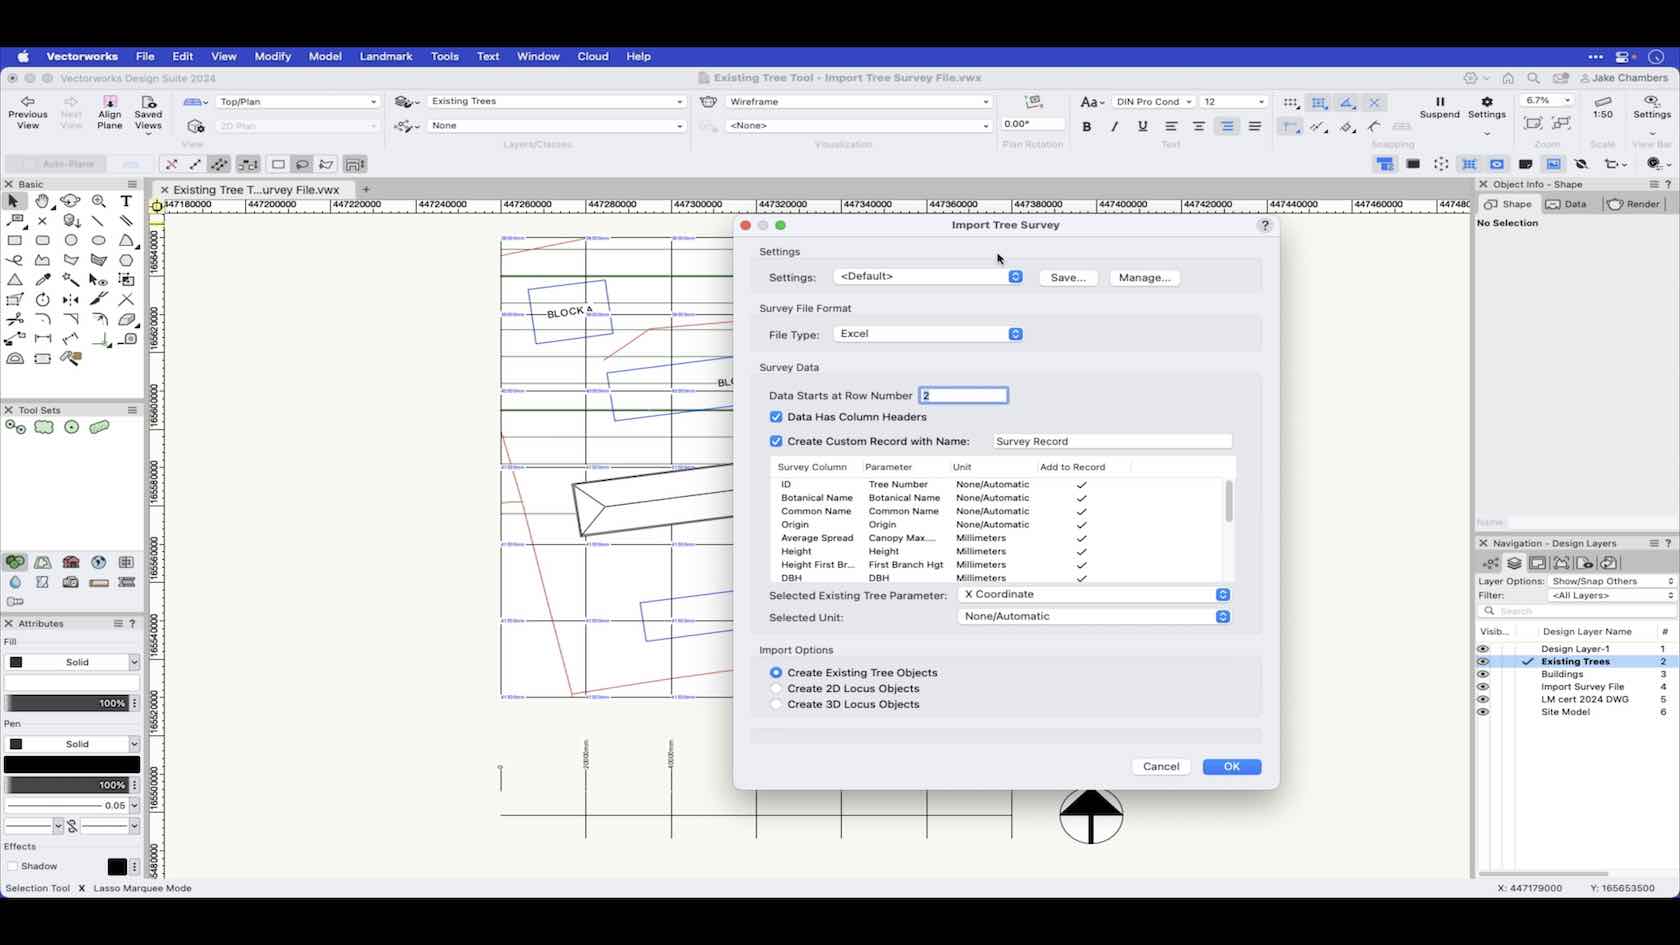
既存の樹木に関する調査データを取り込み、図形にします。
※この動画は、Vectorworks Landmark 2024で収録しています。バージョンの違いにより機能や設定方法、一部名称が異なる場合がございます。あらかじめご了承ください。
Category: Landscapes
Requires Approval: No

新しいレイヤに舗装面を描画します。
※この動画は、Vectorworks Landmark 2024で収録しています。バージョンの違いにより機能や設定方法、一部名称が異なる場合がございます。あらかじめご了承ください。
Category: Landscapes
Requires Approval: No

芝生と土の割り付けを行います。
※この動画は、Vectorworks Landmark 2024で収録しています。バージョンの違いにより機能や設定方法、一部名称が異なる場合がございます。あらかじめご了承ください。
Category: Landscapes
Requires Approval: No

フェンスやベンチ、街灯など必要なアイテムを配置します。
※この動画は、Vectorworks Landmark 2024で収録しています。バージョンの違いにより機能や設定方法、一部名称が異なる場合がございます。あらかじめご了承ください。
Category: Landscapes
Requires Approval: No

単植とエリア指定、それぞれの方法で植栽を配置します。
※この動画は、Vectorworks Landmark 2024で収録しています。バージョンの違いにより機能や設定方法、一部名称が異なる場合がございます。あらかじめご了承ください。
Category: Landscapes
Requires Approval: No

ドリップラインを描画します。
※この動画は、Vectorworks Landmark 2024で収録しています。バージョンの違いにより機能や設定方法、一部名称が異なる場合がございます。あらかじめご了承ください。
Category: Landscapes
Requires Approval: No

全体の平面図を作成します。
※この動画は、Vectorworks Landmark 2024で収録しています。バージョンの違いにより機能や設定方法、一部名称が異なる場合がございます。あらかじめご了承ください。
Category: Landscapes
Requires Approval: No

写真付きの植物配置図を作成します。※植物の画像データを用意してください。
※この動画は、Vectorworks Landmark 2024で収録しています。バージョンの違いにより機能や設定方法、一部名称が異なる場合がございます。あらかじめご了承ください。
Category: Landscapes
Requires Approval: No

配置したベンチの三面図を作成します。
※この動画は、Vectorworks Landmark 2024で収録しています。バージョンの違いにより機能や設定方法、一部名称が異なる場合がございます。あらかじめご了承ください。
Category: Landscapes
Requires Approval: No

舗装面の断面図を作成します。
※この動画は、Vectorworks Landmark 2024で収録しています。バージョンの違いにより機能や設定方法、一部名称が異なる場合がございます。あらかじめご了承ください。
Category: Landscapes
Requires Approval: No

プレゼンテーションに必要な3Dパースを作成します。
※この動画は、Vectorworks Landmark 2024で収録しています。バージョンの違いにより機能や設定方法、一部名称が異なる場合がございます。あらかじめご了承ください。
Category: Landscapes
Requires Approval: No

ワークシートの機能を使って、樹木表を作成します。
※この動画は、Vectorworks Landmark 2024で収録しています。バージョンの違いにより機能や設定方法、一部名称が異なる場合がございます。あらかじめご了承ください。
Category: Landscapes
Requires Approval: No
The annual Sales Kick-off is an opportunity for the direct sales team to get together, review the previous year, and enjoy some time together, planning for the year ahead, and celebrating success.
This course includes all the speaker content and a number of quizzes for you to enjoy. Have fun!
- Manager: Samuel Griffith
- Manager: Jasmine Mullany
- Manager: Tamsin Slatter
Category: Vectorworks Customer Skills Academy
Requires Approval: No
In this course you will have the ability to practise your understanding of creating 2D geometry within Vectorworks.
Category: Skill
Requires Approval: No

In this guided practise you will test your understanding of the 3D tools you have been introduced to.
Category: Skill
Requires Approval: No

Unlock the full potential of MVR (My Virtual Rig).
Join A.J. Pen, CEO and designer at Penlight, and witness a real-world application of the designer’s use of MVR files for Sublime’s 2024 summer tour — from collaborating on festival stages to exporting to MA3 using MVR.
Pen will also provide tips for drafting in Vectorworks,
sharing how a more refined process can lead to a more successful MVR export.
Category: Entertainment
Requires Approval: No

Lernen Sie die Werkzeuge Abfasen 3D und Abschrägen kennen. Weitere Inhalte zum Thema "Erste Schritte 3D" finden Sie hier.
Category: Erste Schritte 2024
Requires Approval: No
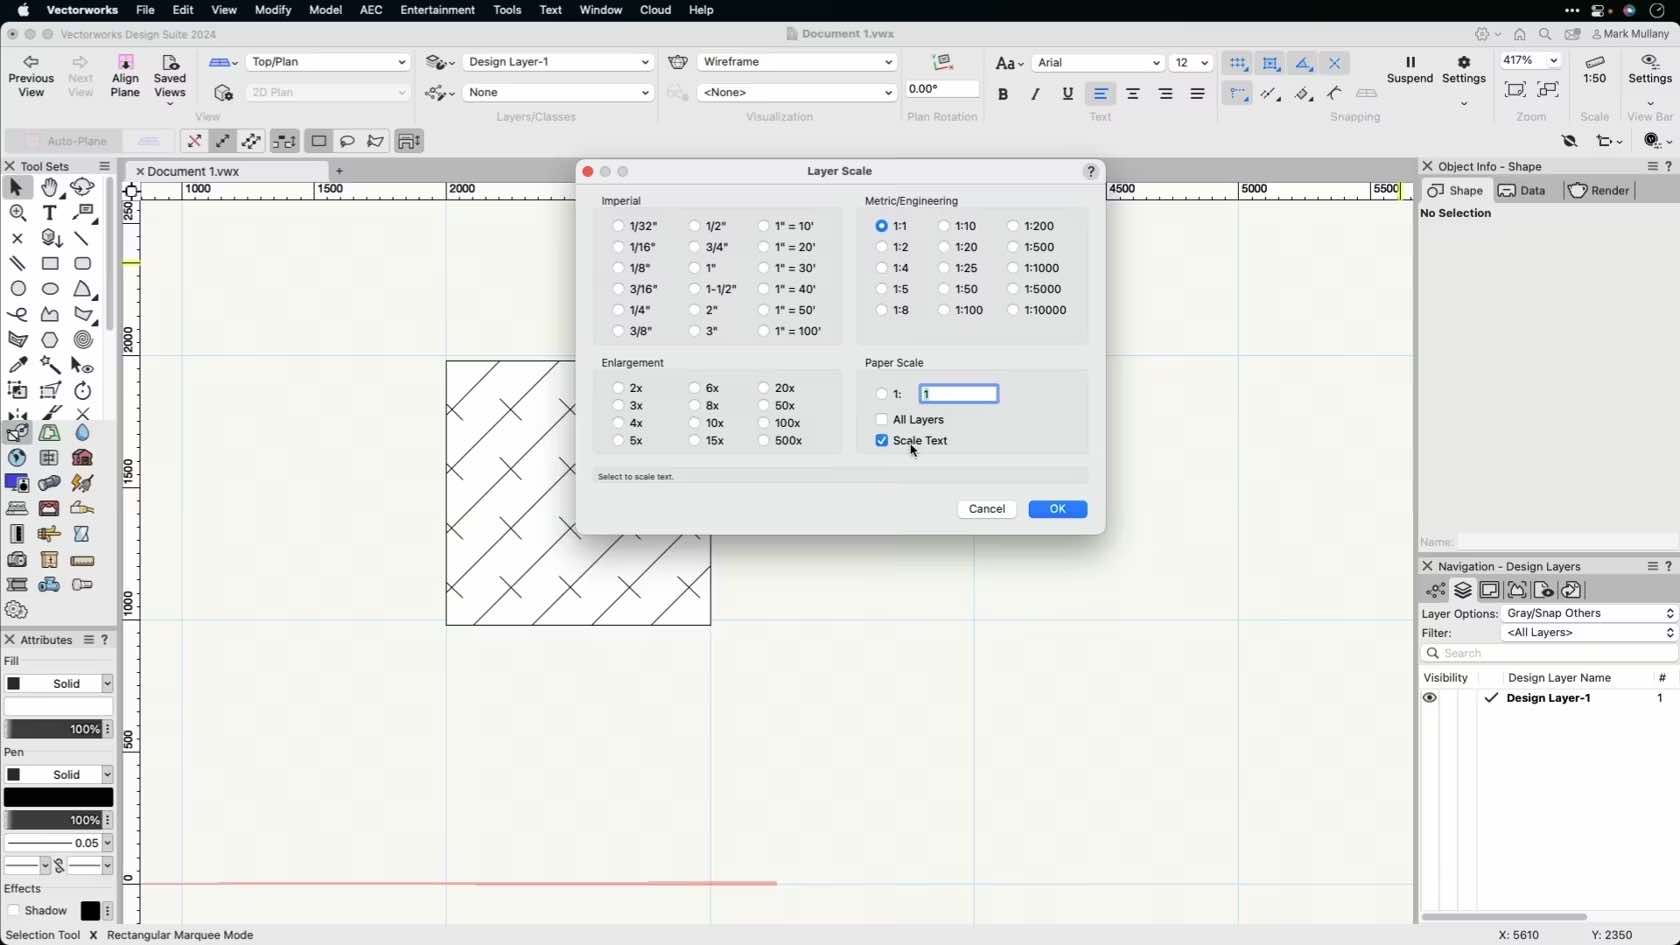
In this video, we will discuss layer scale in Vectorworks. We will explore how to adjust the design layer scale.
Category: Skill
Requires Approval: No
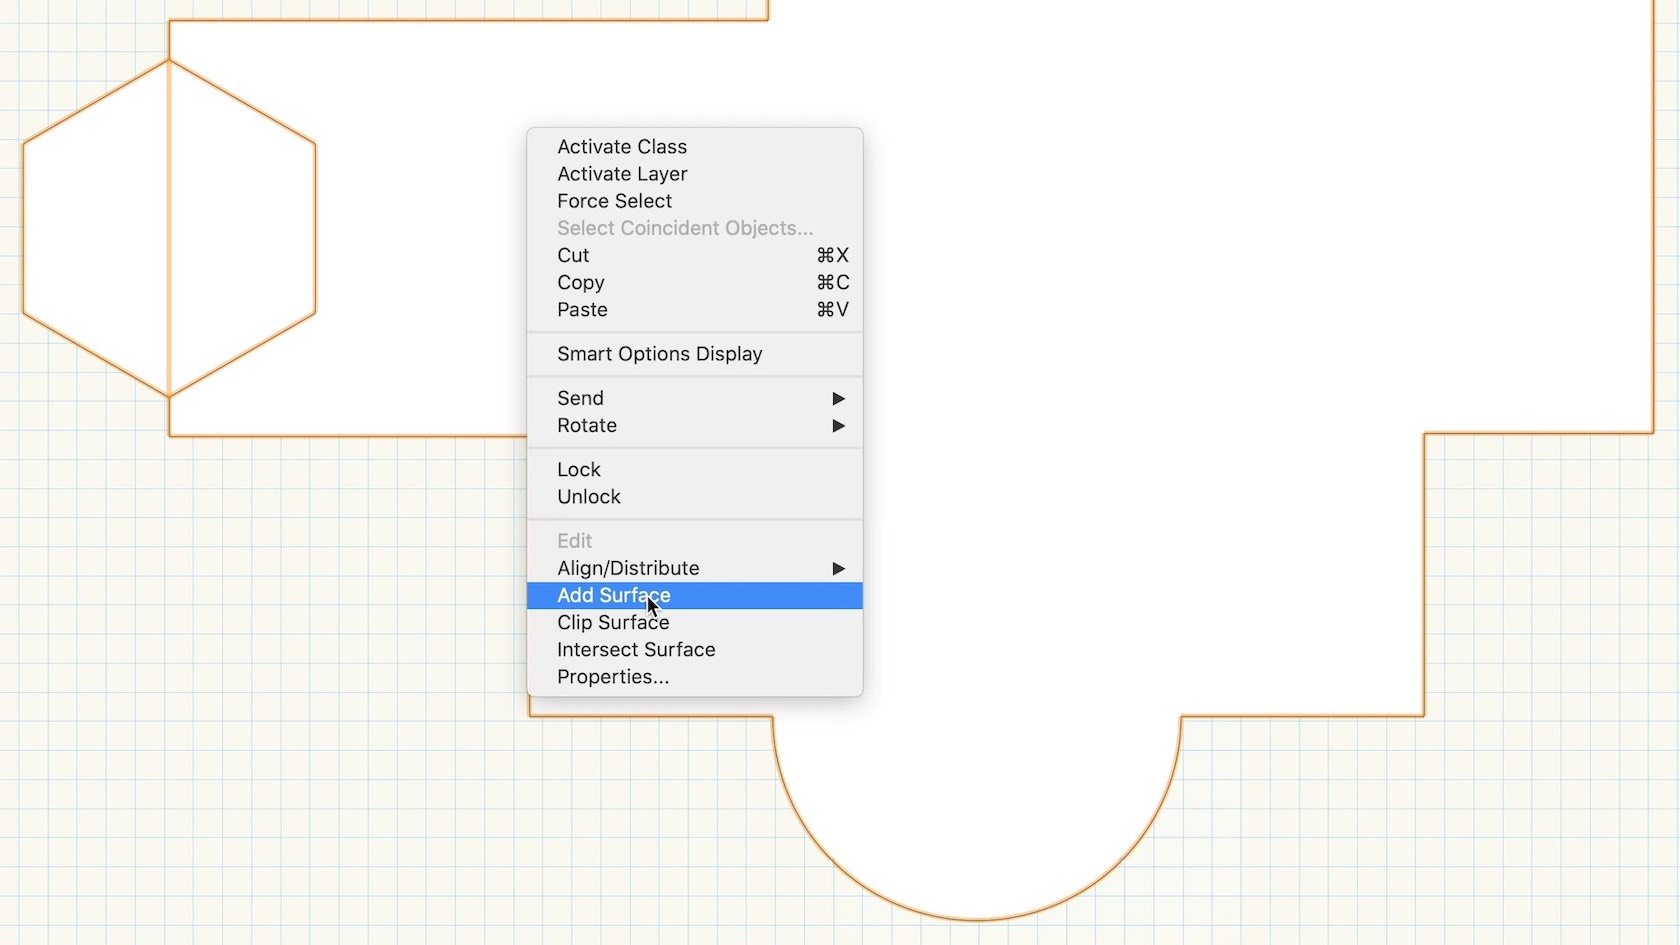
In this video, we will explore how to combine multiple surface objects together to create a single shape by using the Add Surface command.
Category: Skill
Requires Approval: No
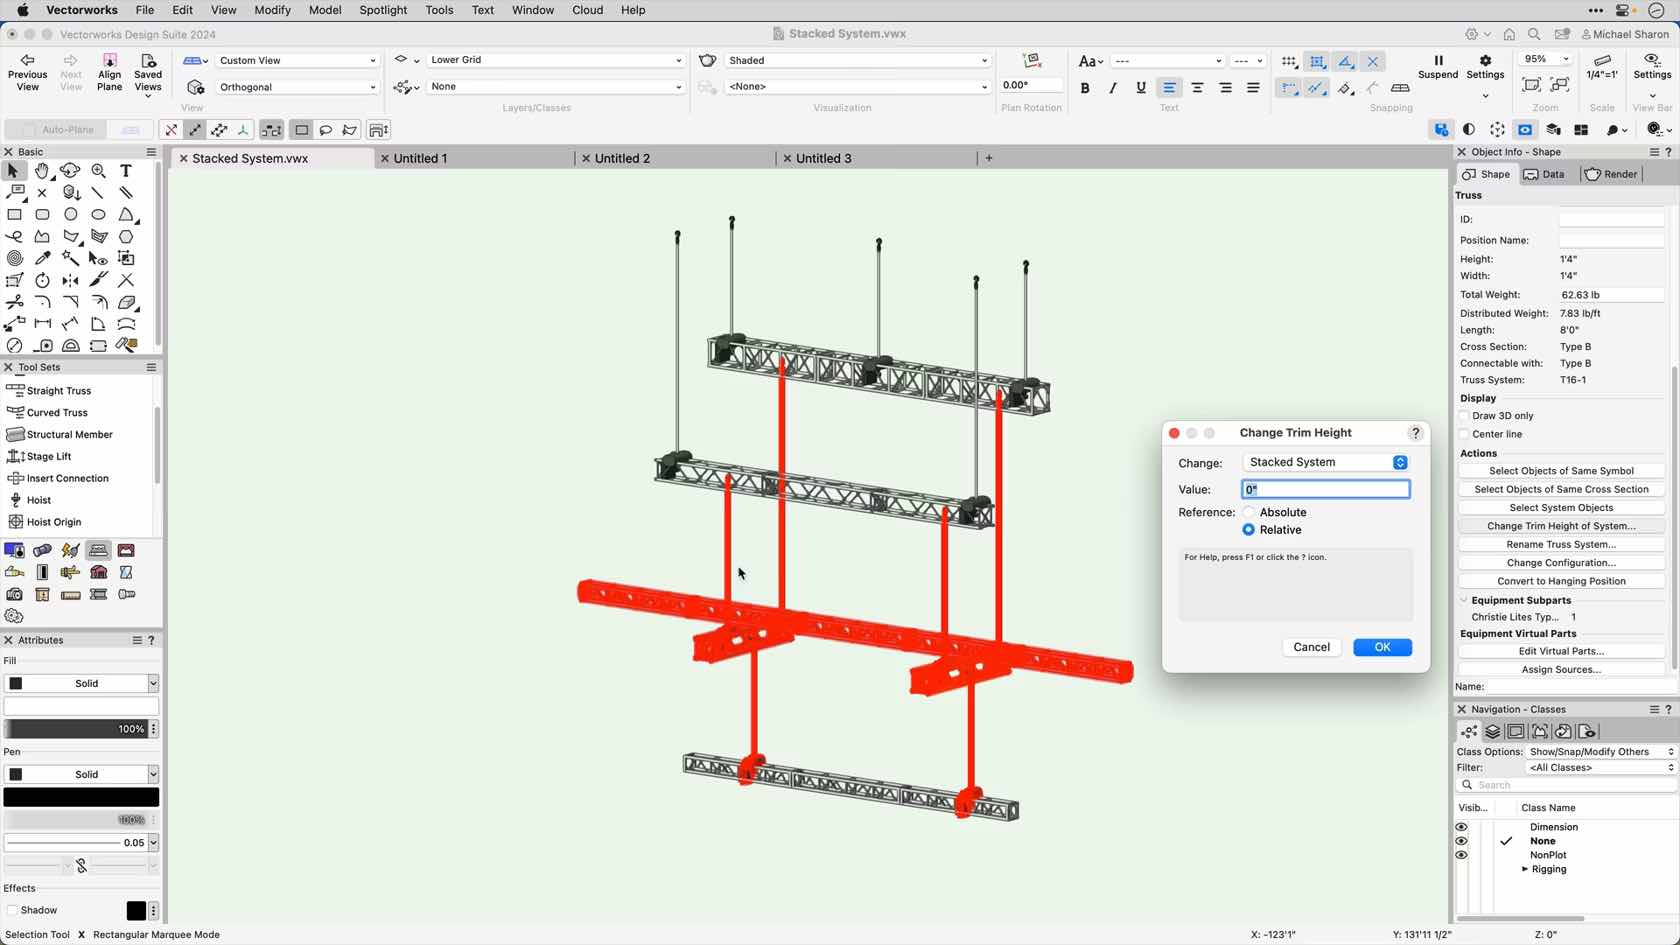
This video will cover how to change the trim heights of rigging objects.
Category: Chapter 4 Hoists
Requires Approval: No
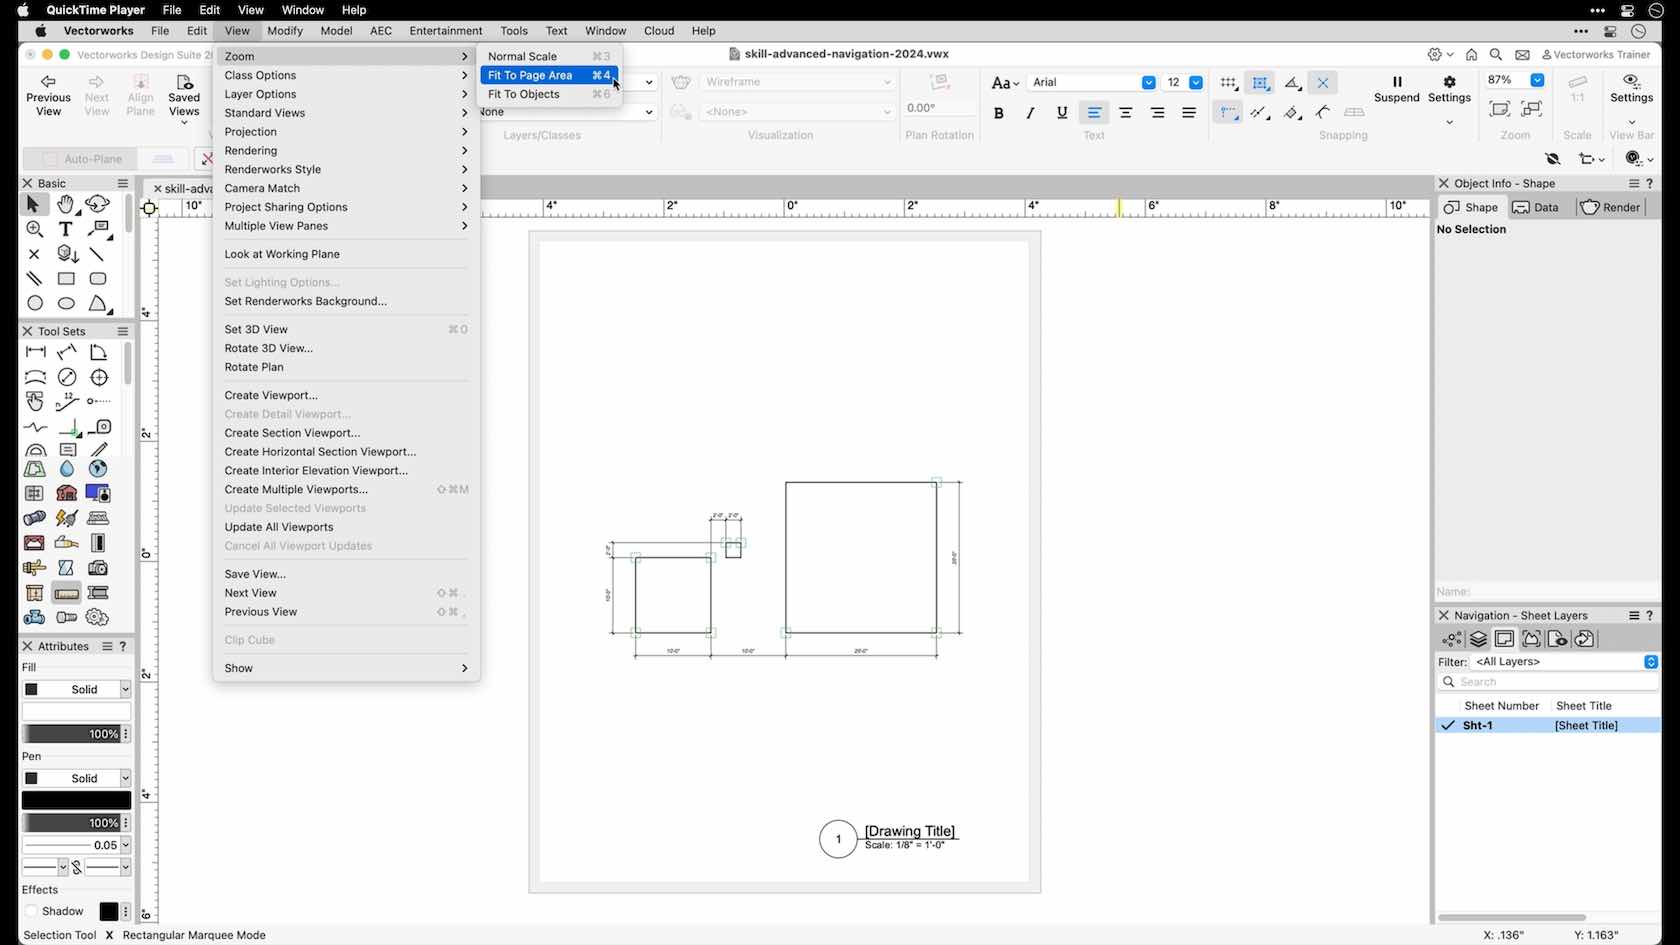
In this video, we will explore advanced navigation techniques including fit to page, fit to objects, and rotated plan.
Category: Skill
Requires Approval: No

Combine the strength of Vectorworks with the speed of AI image generation powered by Stable Diffusion. Directly available within the Vectorworks interface, this experimental feature uses Vectorworks Cloud Services for a zero-install, uninterrupted workflow to quickly ideate illustrative concepts or create refined images using your Vectorworks models at any stage of design.
Category: All Industries
Requires Approval: No

Lernen Sie die Funktion An Arbeitsebene ausrichten kennen. Weitere Inhalte zum Thema "Erste Schritte 3D" finden Sie hier.
Category: Erste Schritte 2024
Requires Approval: No
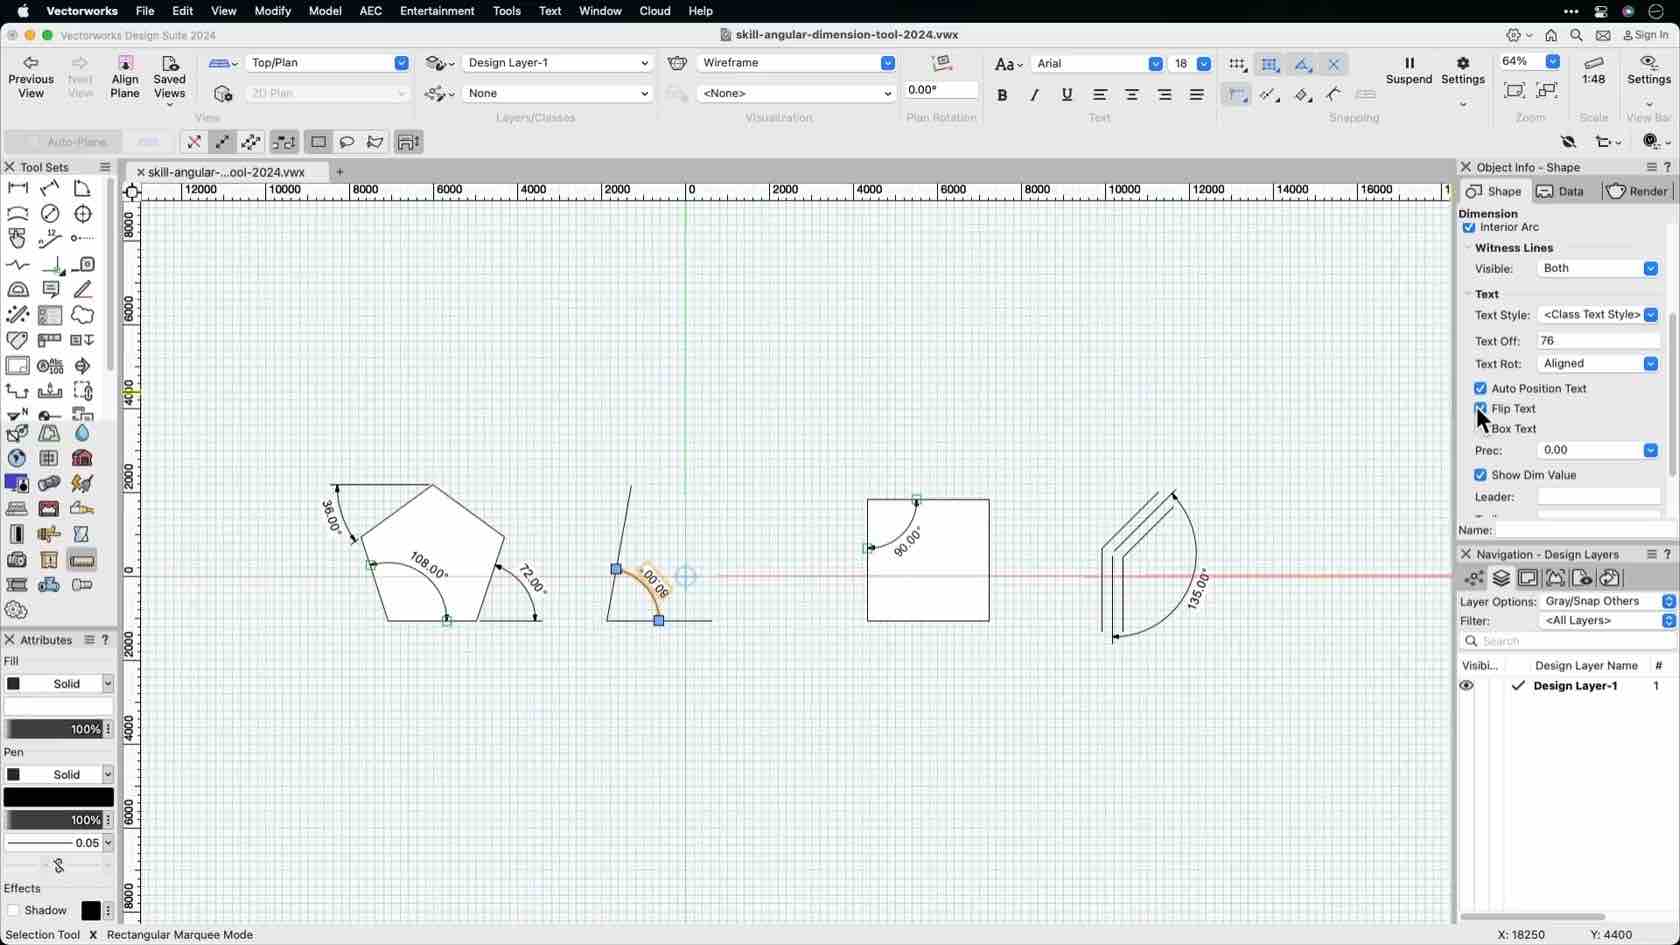
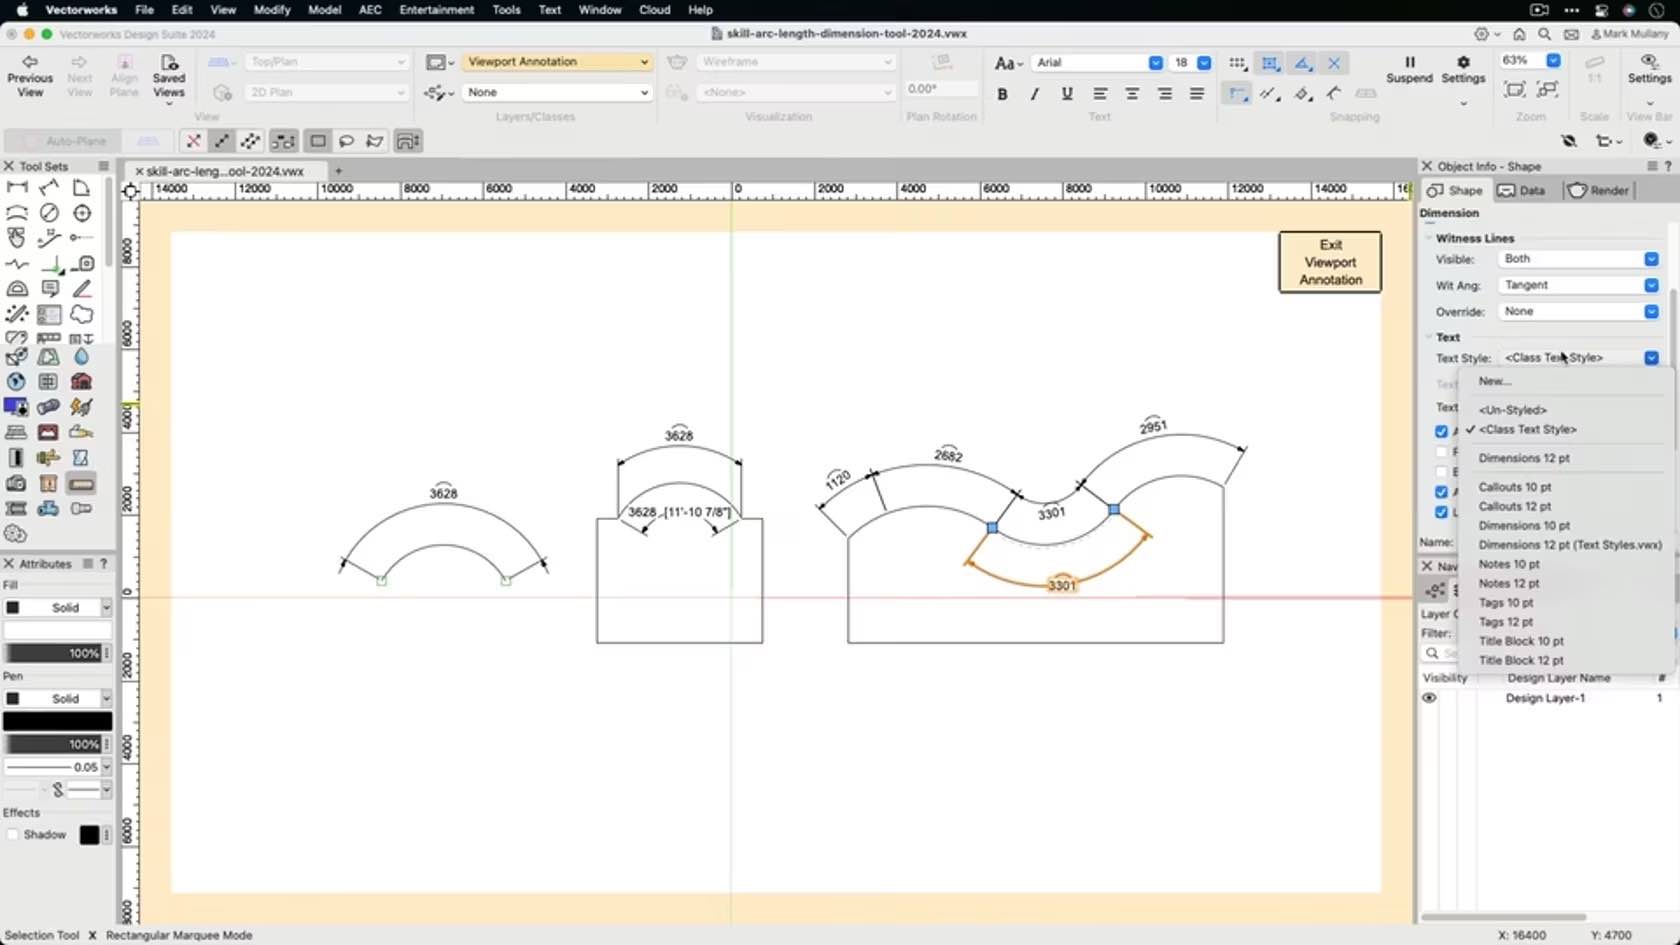
In this video, we will explore how to use the Angular Dimension tool to dimension drawings.
Category: Skill
Requires Approval: No

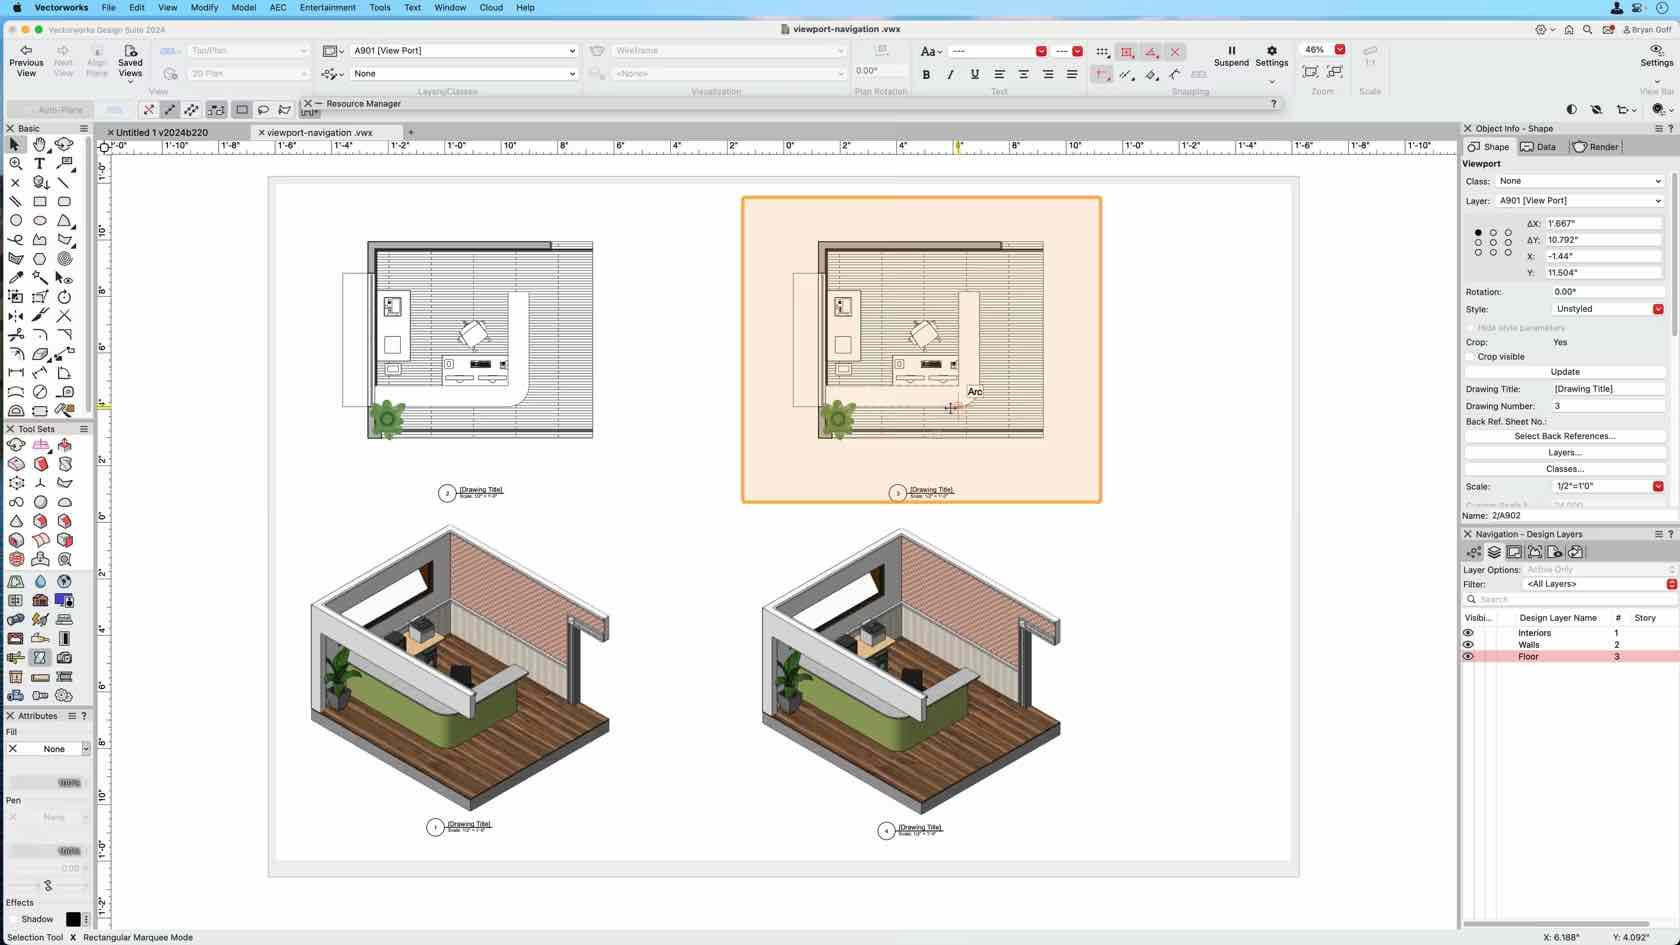
Entdecken Sie die verschiedenen Möglichkeiten, schnell und effizient aktuelle Ansichten Ihrer 2D- und 3D-Planungen aufzurufen und darin zu navigieren.
Category: Erste Schritte 2024
Requires Approval: No
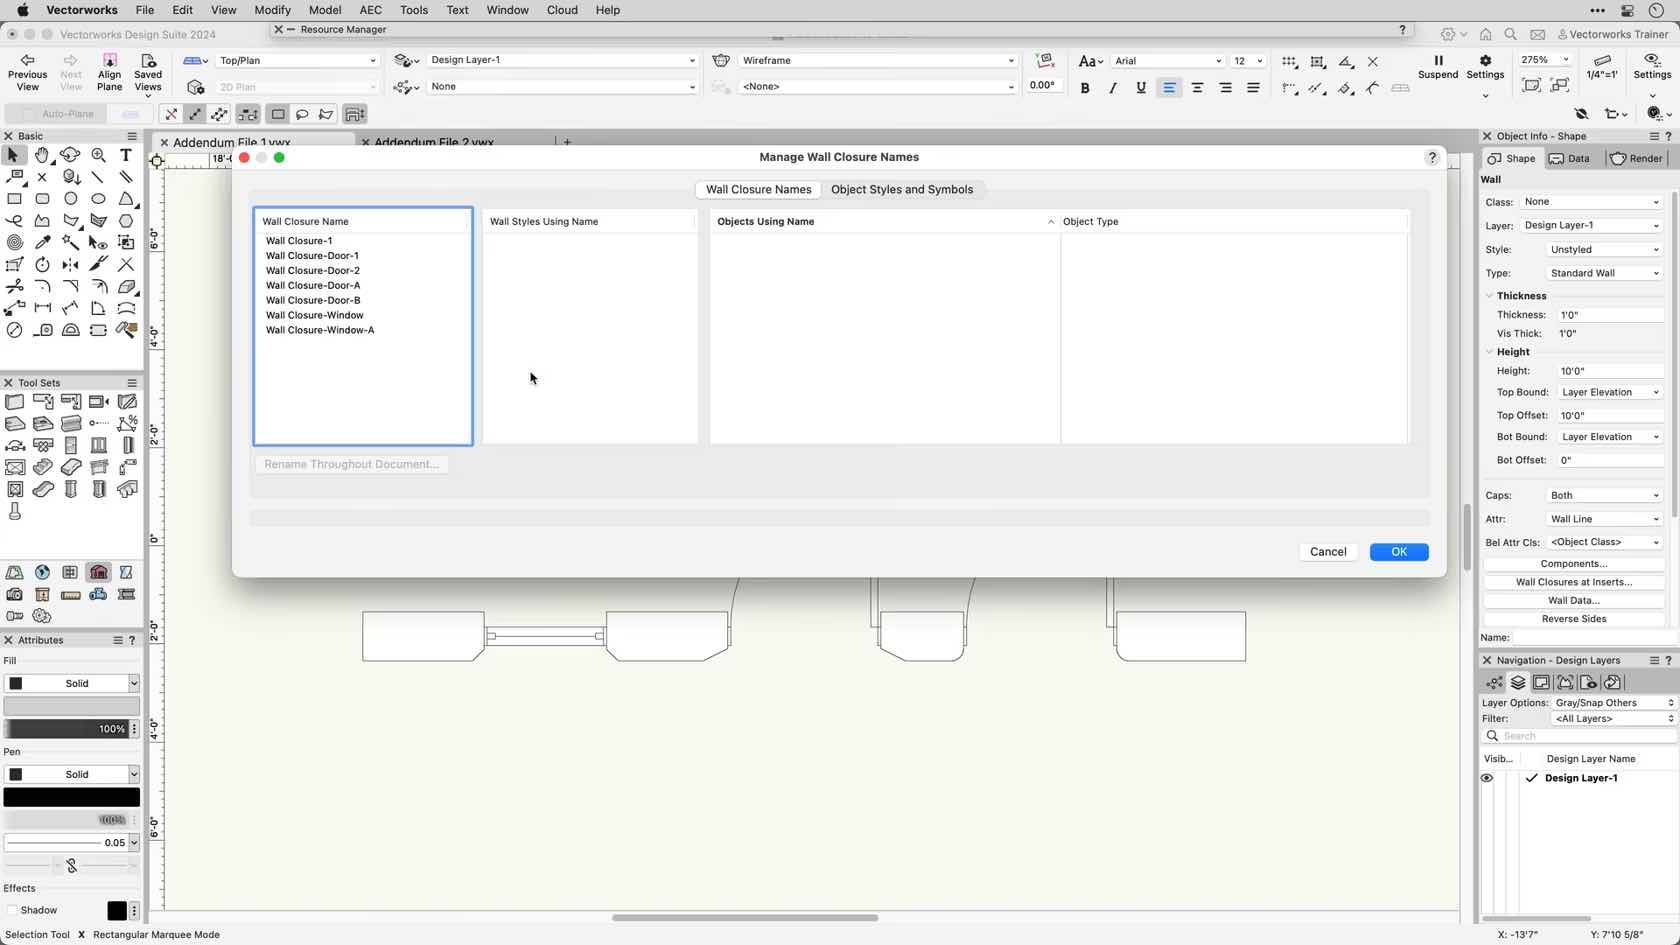
Explore the Apply Closure Settings to Wall and Manage Wall Closure Names commands.
Category: Skill
Requires Approval: No
Lernen Sie das Werkzeug Arbeitsebene kennen. Weitere Inhalte zum Thema "Erste Schritte 3D" finden Sie hier.
Category: Erste Schritte 2024
Requires Approval: No
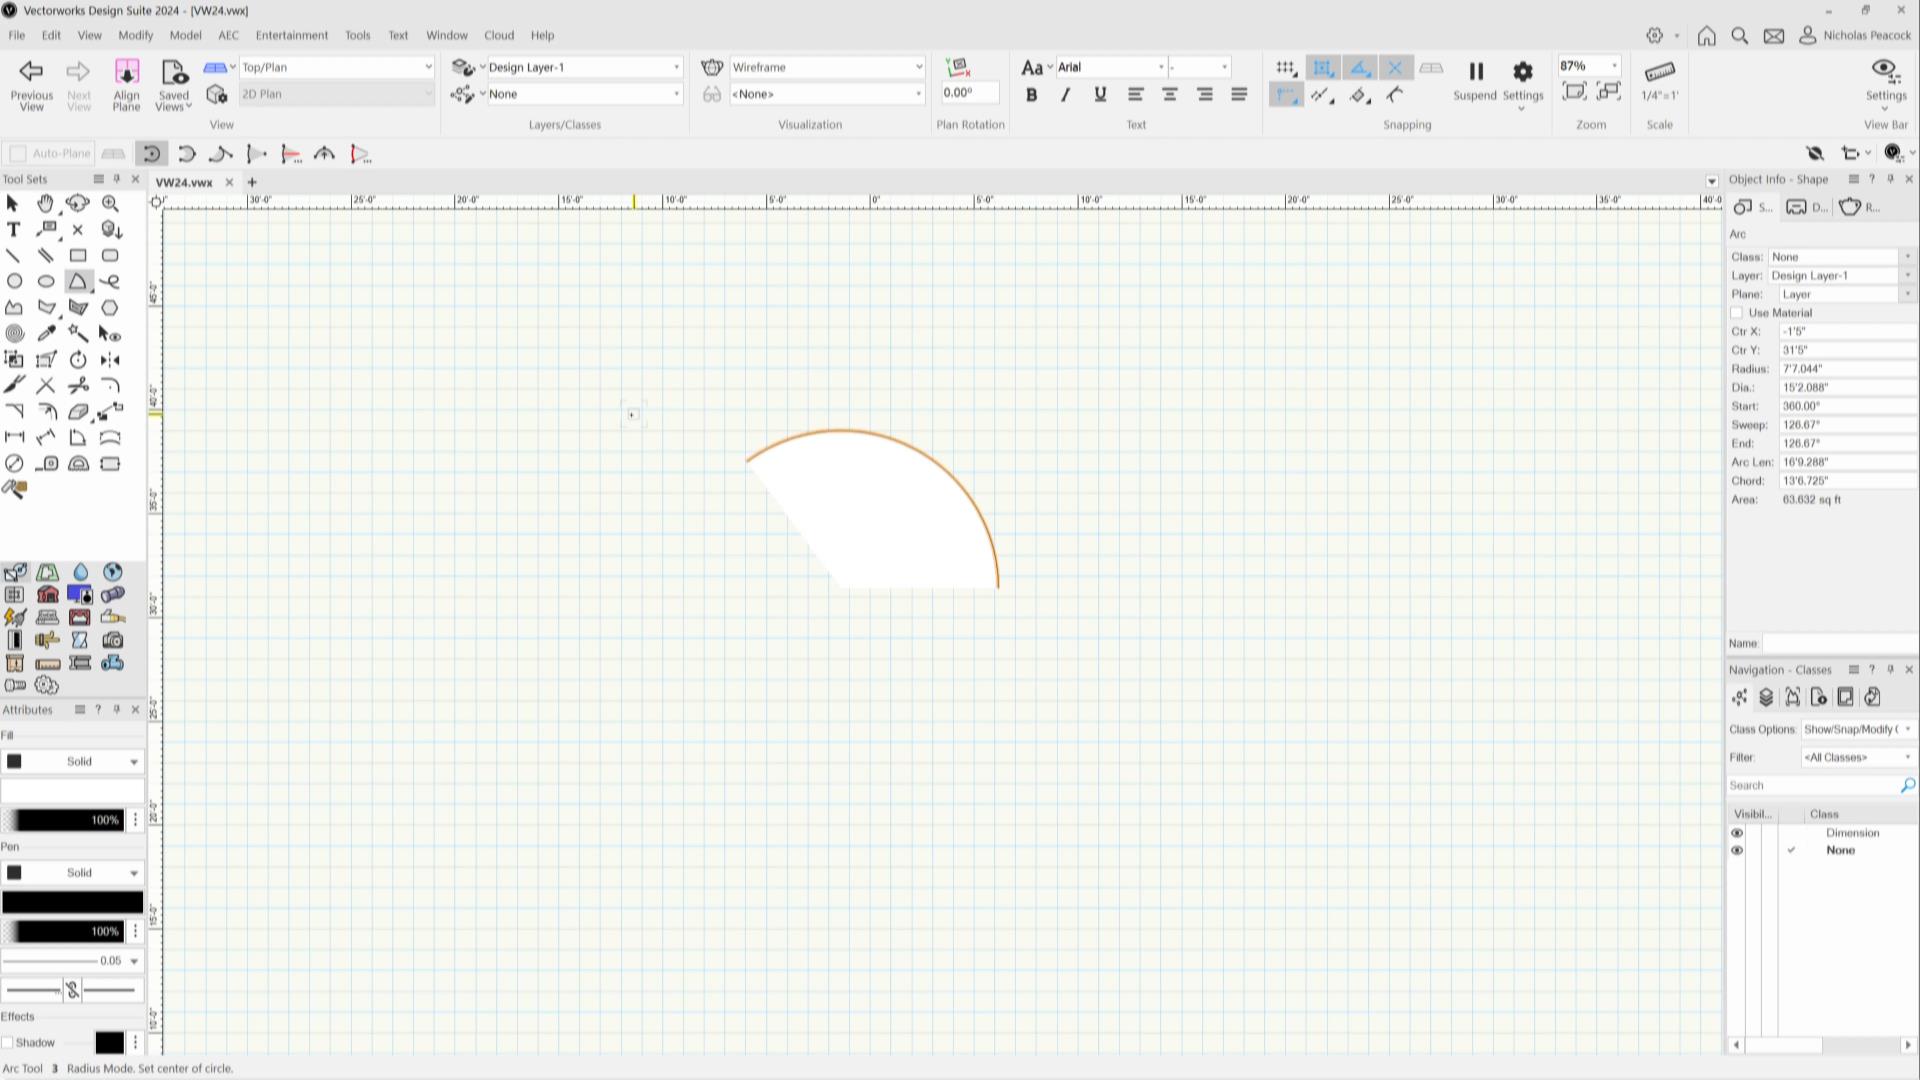
In this video, we will demonstrate how to accurately draw arcs with various drawing modes in Vectorworks.
Category: Skill
Requires Approval: No

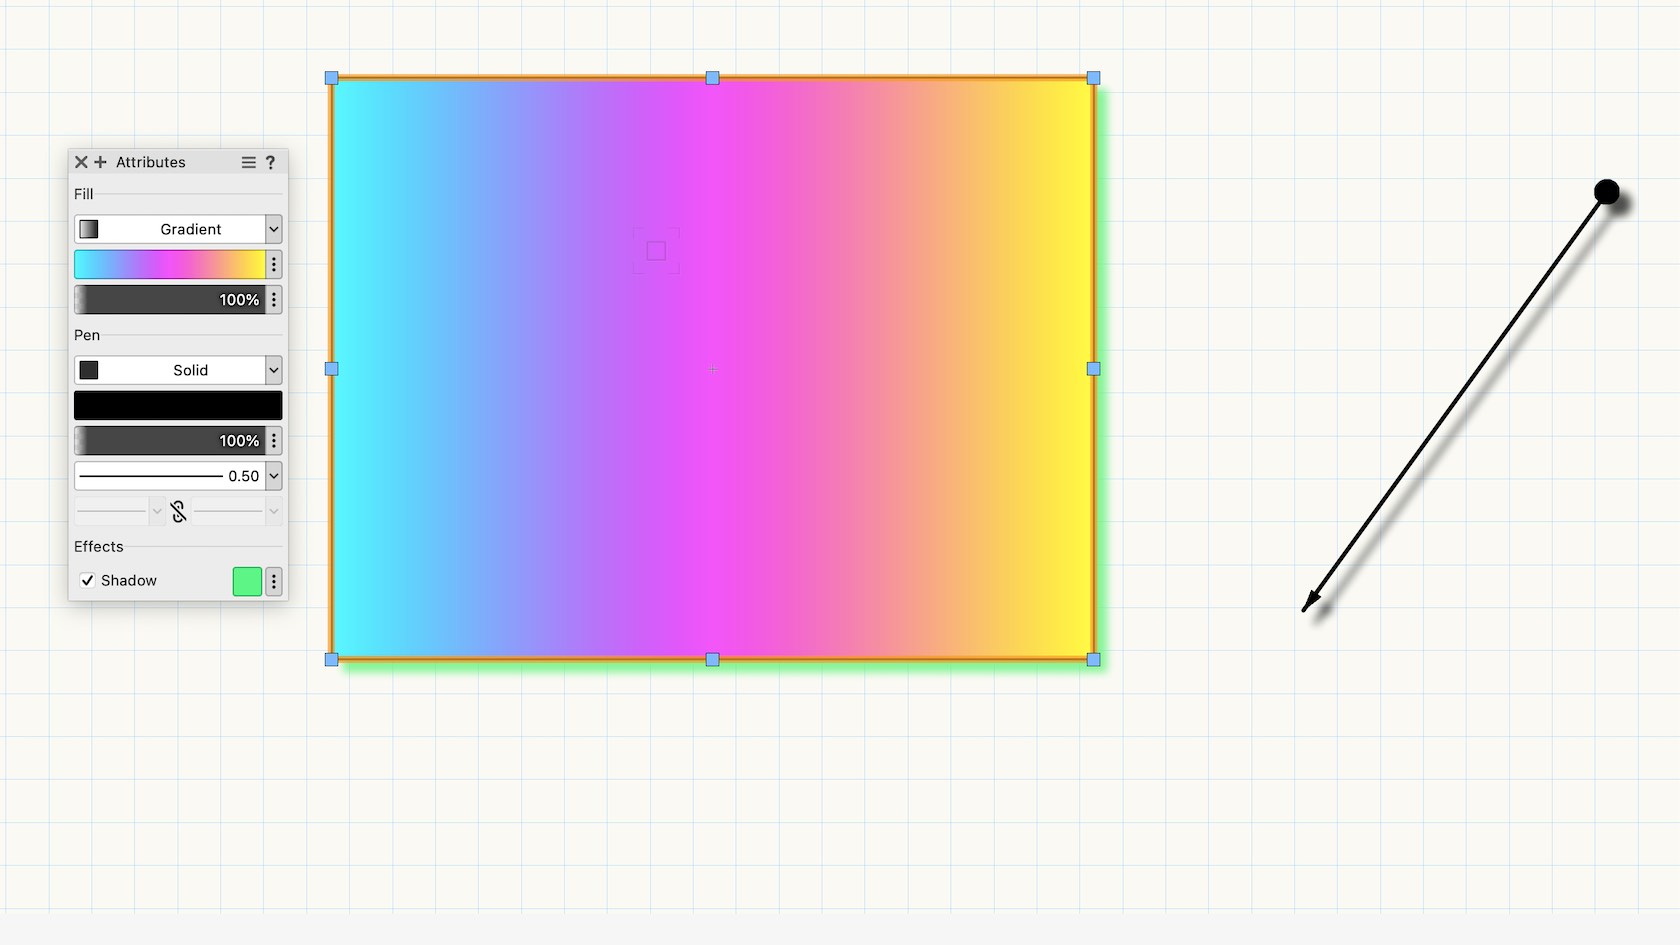
Learn how to use the attribute mapping tool to adjust tiles, associative hatches, gradient and image fills on 2D objects.
Category: Skill
Requires Approval: No
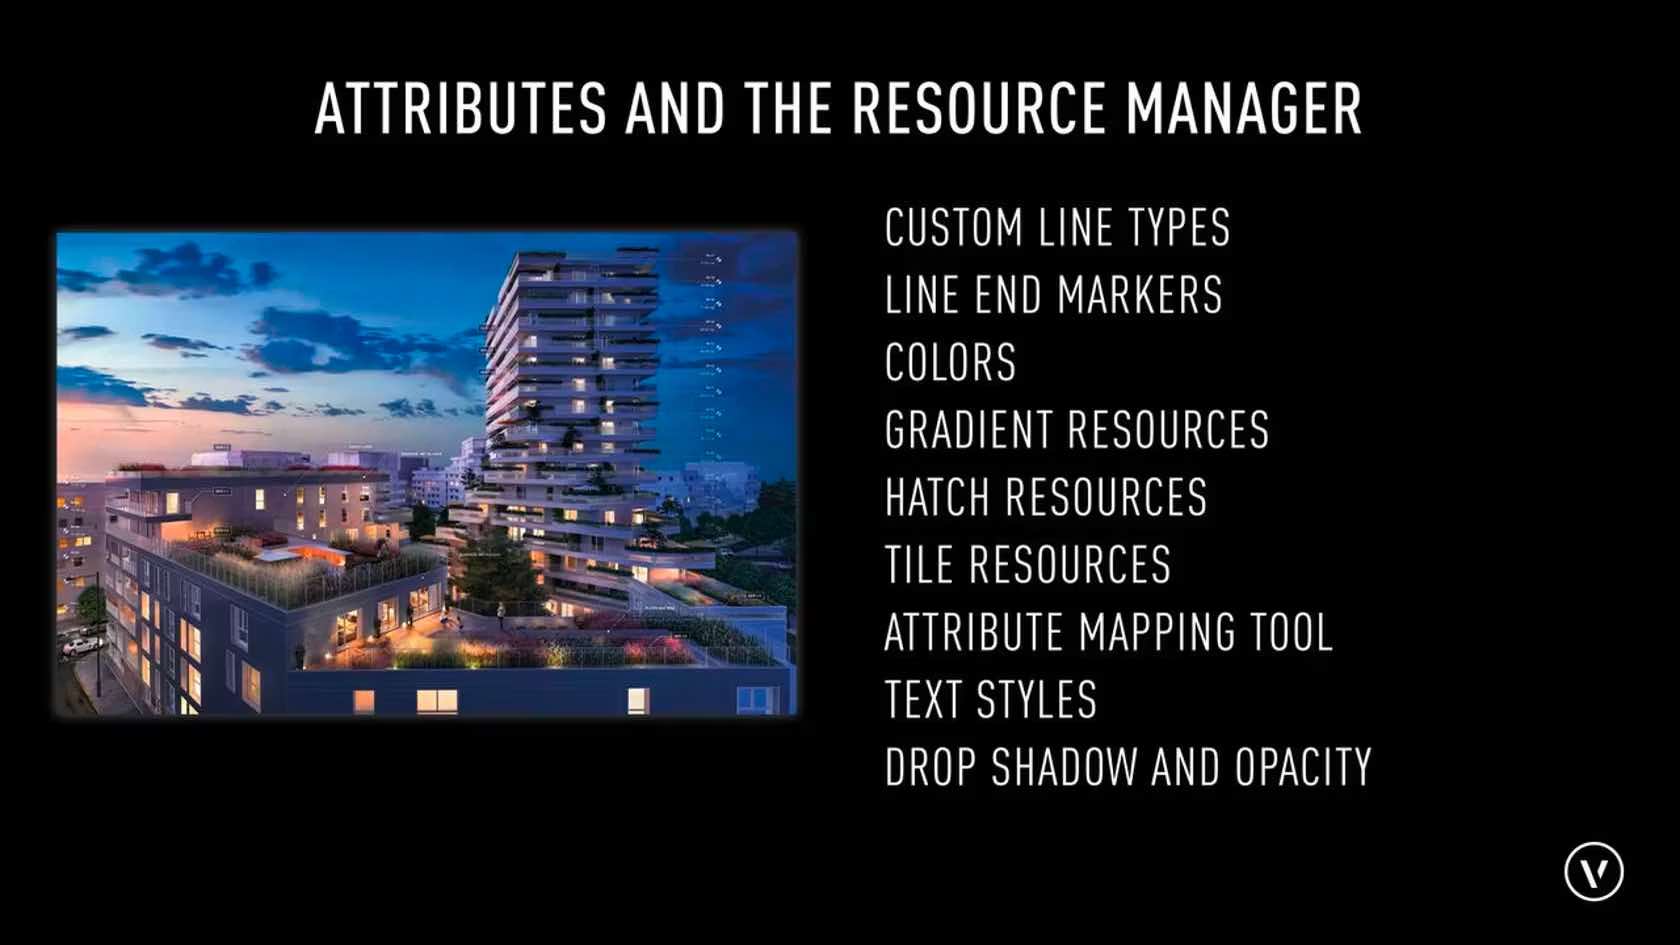
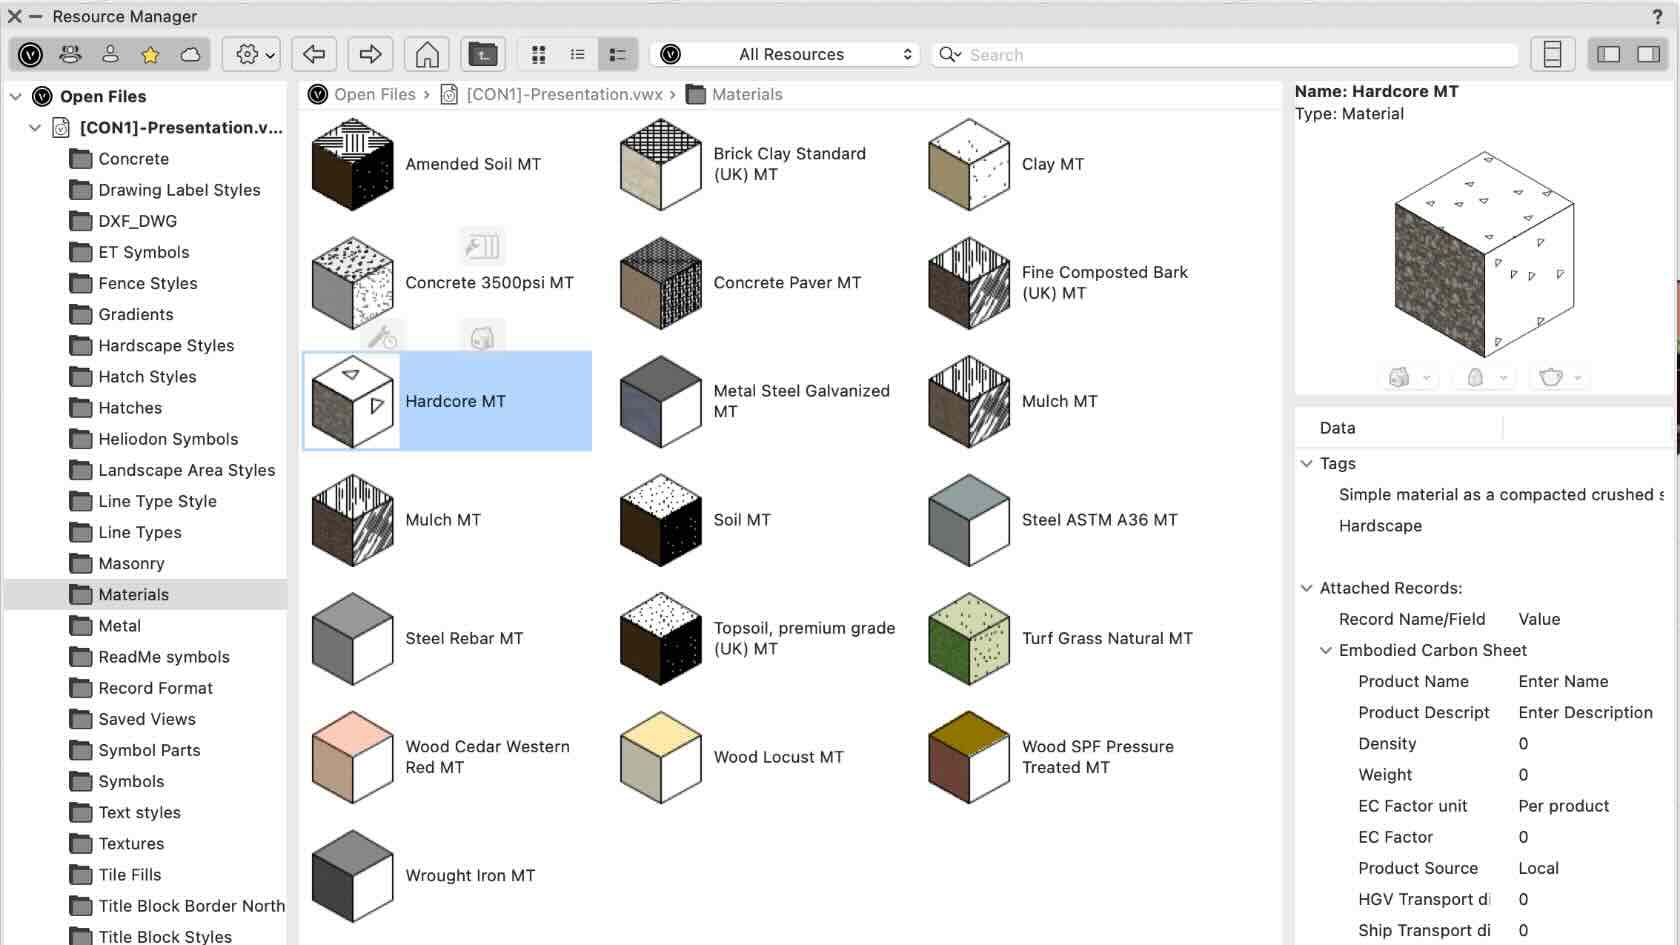
In this section we will explore the Resource Manager and different types of resources.
Category: Skill
Requires Approval: No
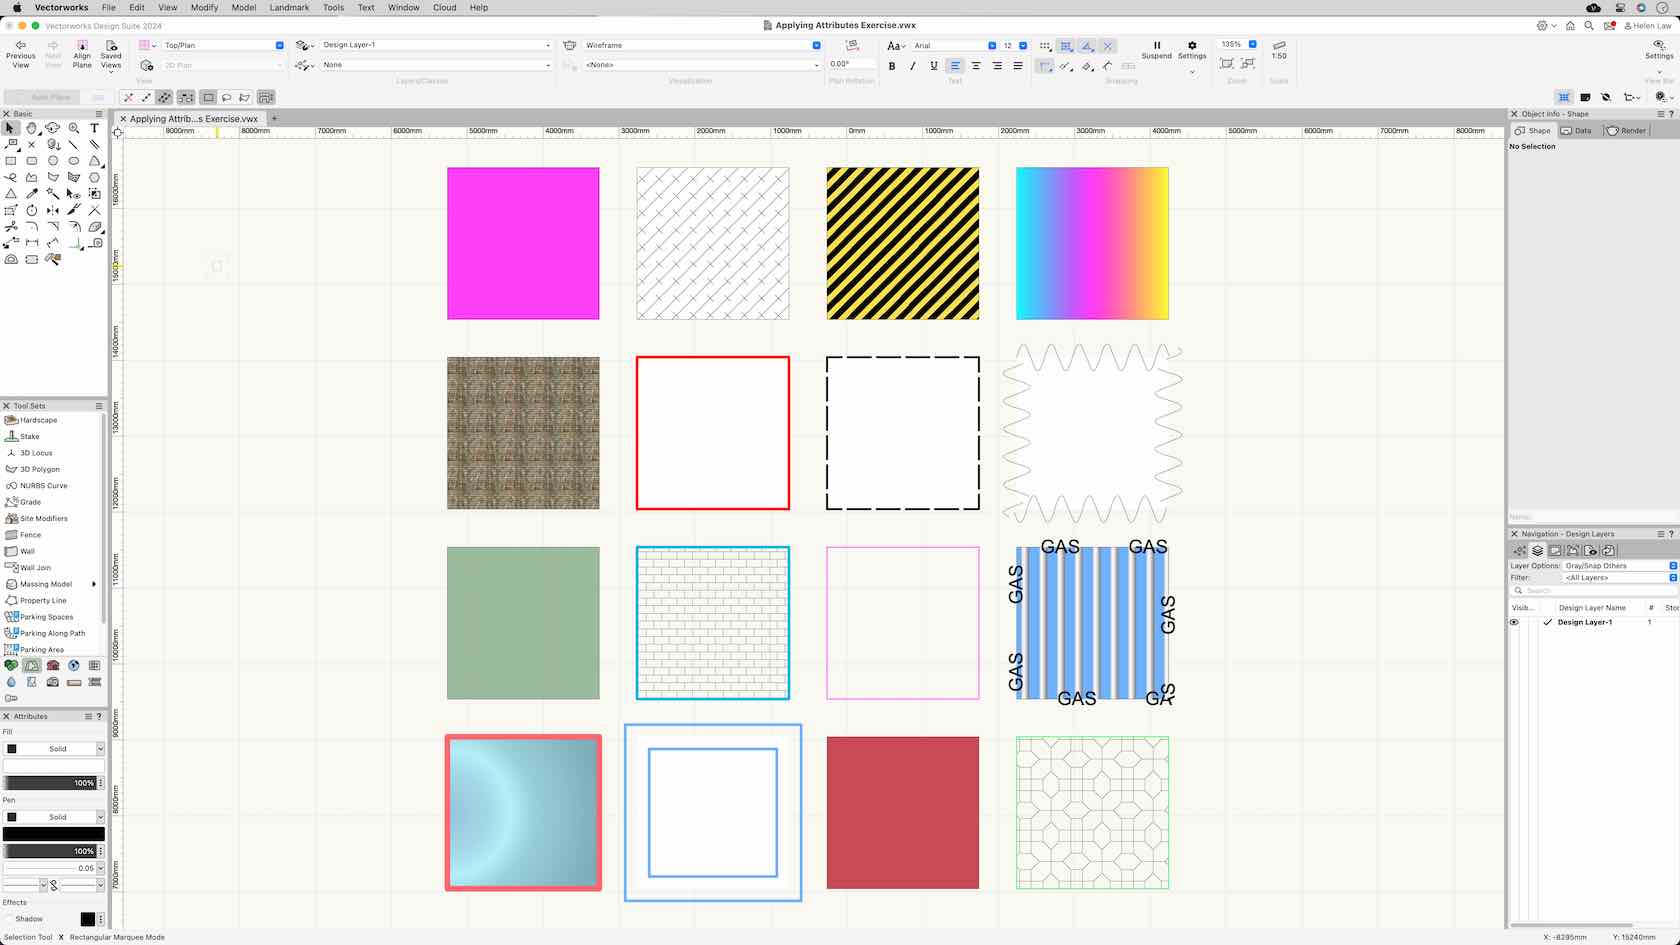
It this challenge you will apply the skills you have learnt about the different attribute types in Vectorworks.
Category: Skill
Requires Approval: No
In this video, we will explore the Attributes Palette in Vectorworks. We will explore the settings and options found in the palette.
Category: Skill
Requires Approval: No
Participants will add audio and video elements to the design. We will
explore options to add televisions, video screens, video cameras, led
screens, and speakers into the production design.
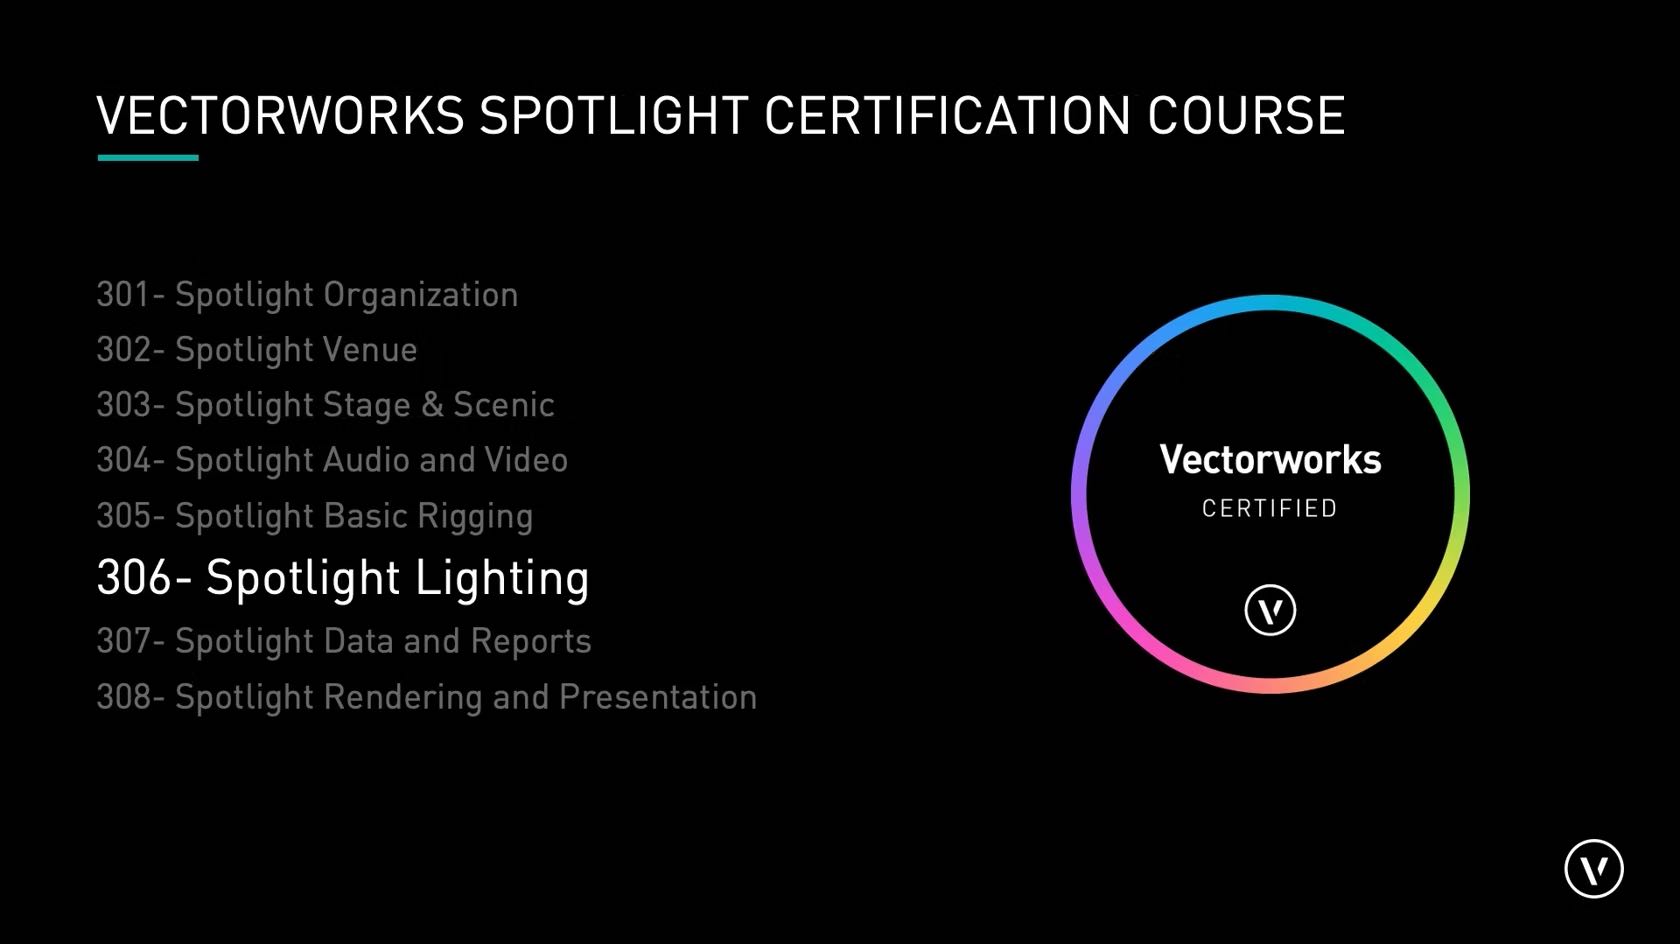
Category: Spotlight Certification 2024
Requires Approval: No
Lernen Sie das Werkzeug Ausrichten 3D kennen. Weitere Inhalte zum Thema "Erste Schritte 3D" finden Sie hier.
Category: Erste Schritte 2024
Requires Approval: No
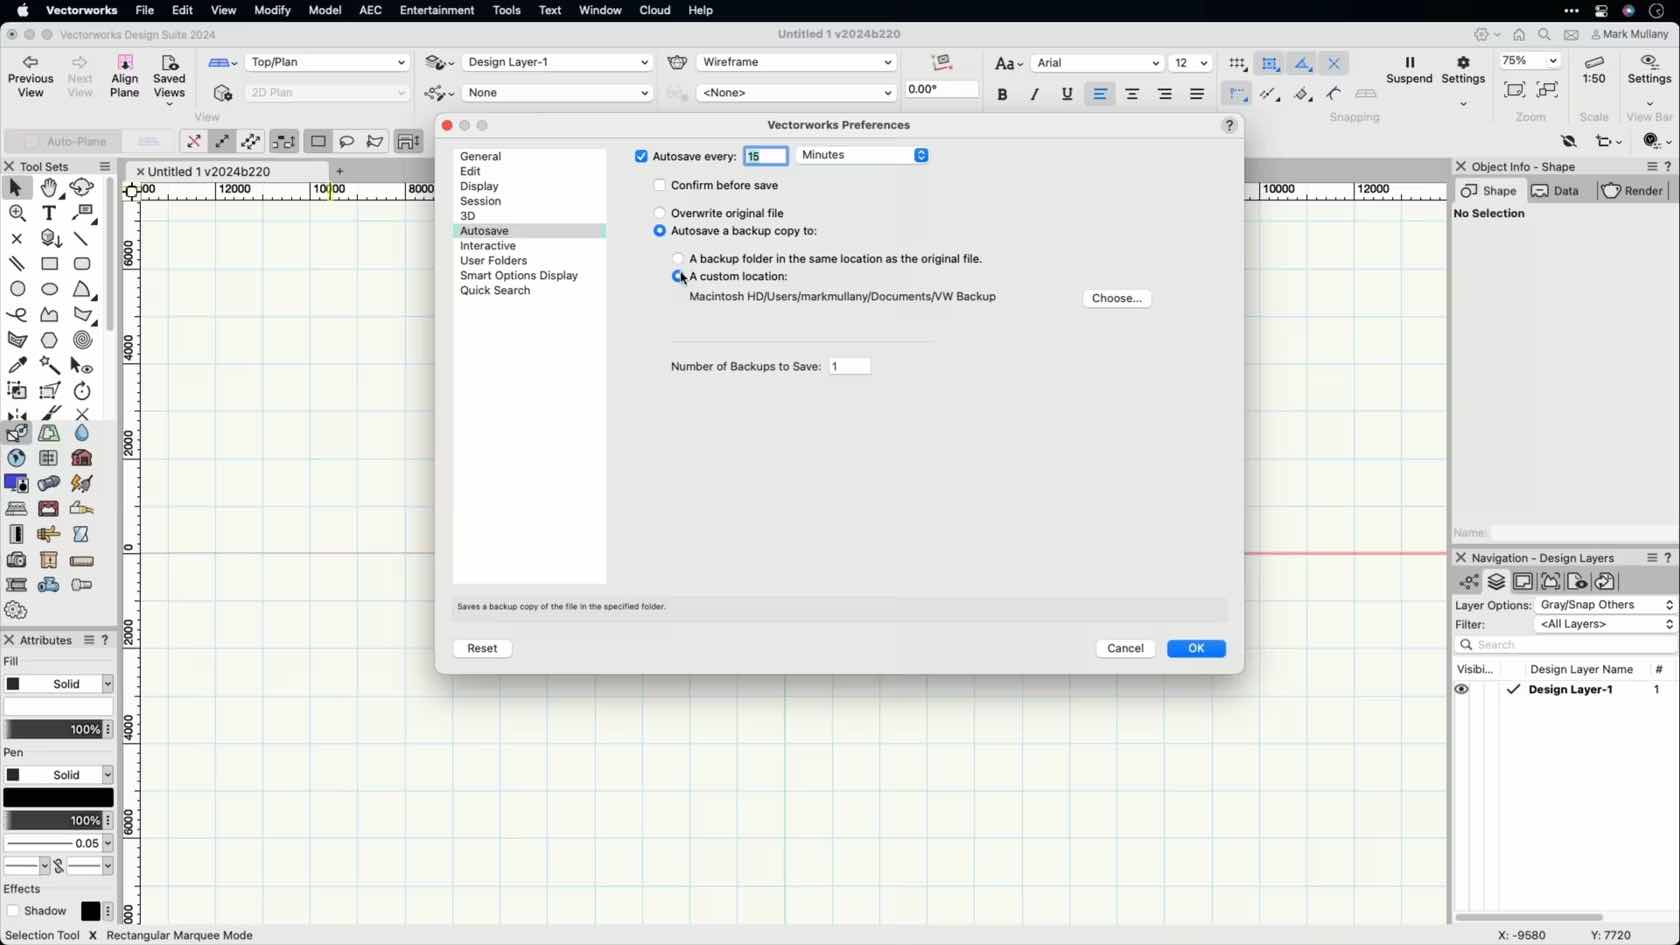
In this video, we will discuss the Autosave functionality in Vectorworks and how to set it up to best support your workflow.
Category: Skill
Requires Approval: No
This course demonstrates 3D views and Perspective, OpenGL, Wireframe, Hidden Line, background and foreground Rendering.
Category: Skill
Requires Approval: No
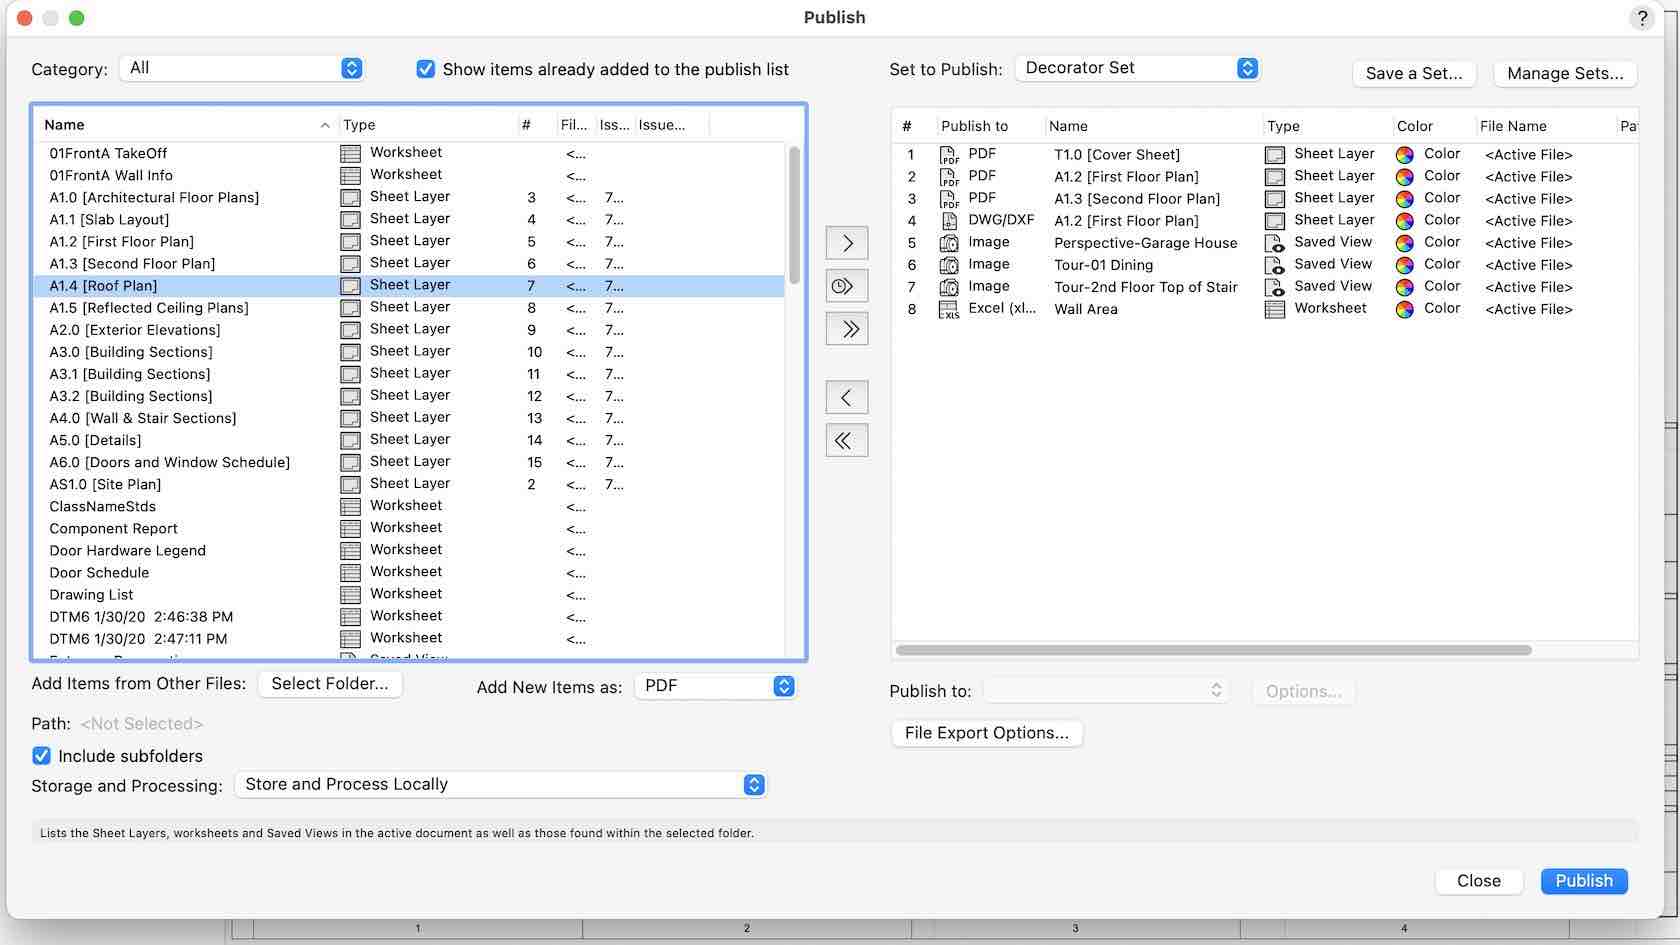
This video demonstrates how to use the publish command to export documents from multiple files, create drawing sets, develop worksheets, and coordinate with consultants.
Category: Skill
Requires Approval: No

Lernen Sie die verschiedenen/wichtigsten Bestandteile der Benutzeroberfläche/Programmoberfläche kennen.
Category: Erste Schritte 2024
Requires Approval: No

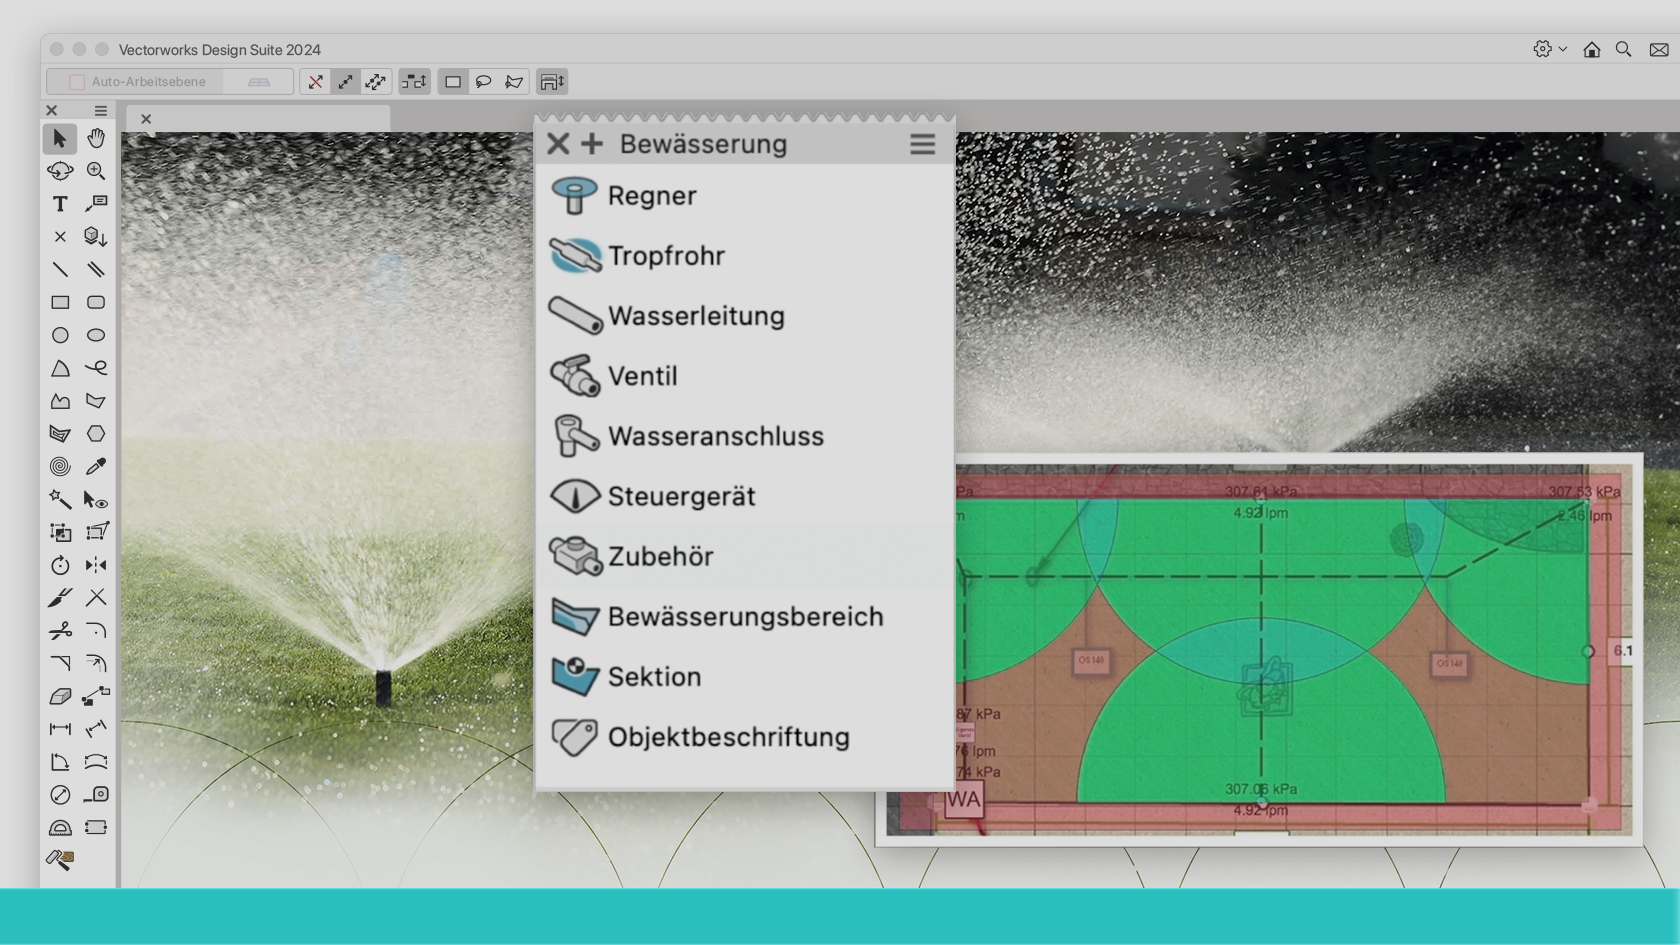
Vectorworks bietet eine Vielzahl an Werkzeugen für die effiziente Bewässerungsplanung. Dabei kann man auf eine ganze Reihe von Herstellerprodukten zurückgreifen, etwa von Rainbird, Hunter Industries, Toro oder Irritroll. Verknüpft mit den entsprechenden Informationen lassen sich auch genaue Kalkulationen durchführen. Fabio Häuselmann (EFZ Landschaftsarchitektur) vermittelt Ihnen anhand praktischer Beispiele in rund einer halben Stunde den korrekten Einsatz von Regnern, Wasserleitungen, Steuergeräten sowie Tropfrohren und Ventilen. Dieses Webinar richtet sich an alle, die Außenräume planen.
(Für Version 2024)
Category: Featured
Requires Approval: No

Erlernen Sie den Einsatz von Bildern und Bildfüllungen.
Category: Erste Schritte 2024
Requires Approval: No

Mit dem Datenmanager in Vectorworks behalten Sie die vollständige Kontrolle über alle Objektdaten, egal, ob es sich um Objektmaße, Daten in eigenen Datenbanken oder IFC-Daten handelt. In der dreiteiligen Webinar-Serie zum Thema „BIM-Datenmanagement mit Vectorworks” vermittelt BIM-Consultant Viktor Frank Wissen zur Arbeit mit dem Datenmanager.
Im ersten Teil der Webinar-Serie dreht es sich um Grundlagenwissen zu Daten sowie ihrer Eingabe und Verwendung in Vectorworks.
(Für Version 2024)
Category: Featured
Requires Approval: No

In der dreiteiligen Webinar-Serie zum Thema „BIM-Datenmanagement mit Vectorworks” vermittelt BIM-Consultant Viktor Frank Wissen zur Arbeit mit dem Datenmanager.
Der zweite Teil der Webinarreihe vermittelt Grundlagen zum IFC-Schema, der Funktionsweise und Oberfläche des Datenmanagers sowie erste Zuweisungen und das Anlegen von Datensets im Datenmanager. Auch erste IFC-Exporte und die Kontrolle in einer Prüfsoftware sind Bestandteil dieses Webinars.
(Für Version 2024)
Category: Featured
Requires Approval: No
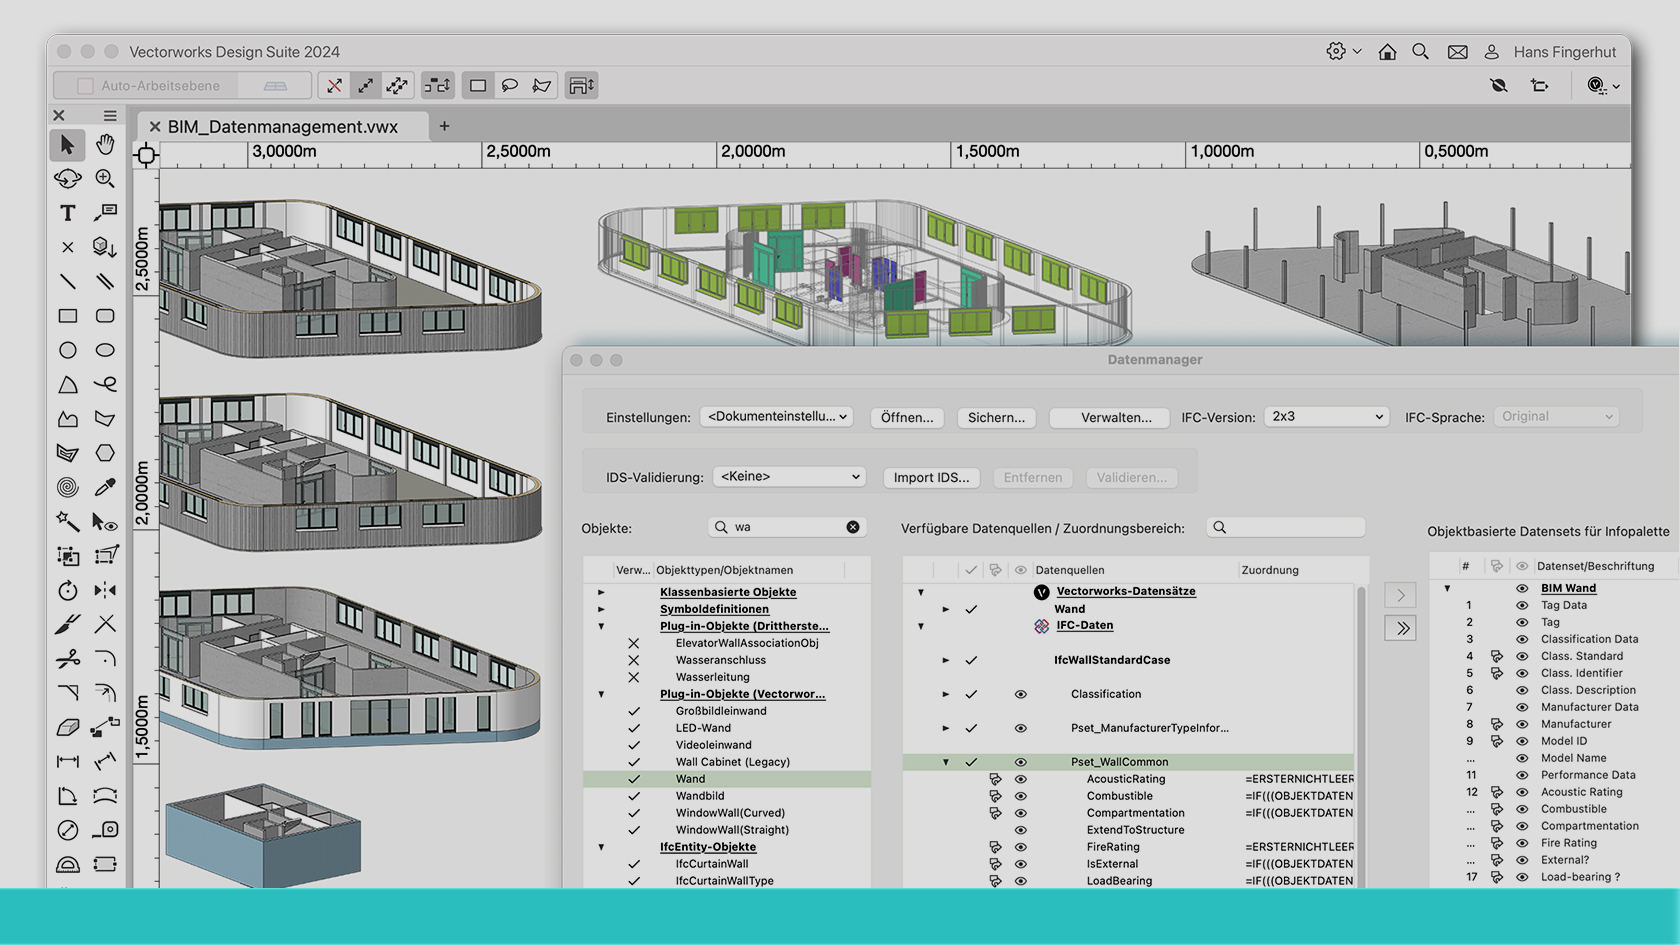
In der dreiteiligen Webinar-Serie zum Thema „BIM-Datenmanagement mit Vectorworks” vermittelt BIM-Consultant Viktor Frank Wissen zur Arbeit mit dem Datenmanager.
Der dritte Teil der Webinarreihe gibt Einblick in erweiterte Funktionen und Zuweisungen im Datenmanager. Es werden die vielfältigen Möglichkeiten des Datenmanagers näher beleuchtet.
(Für Version 2024)
Category: Featured
Requires Approval: No
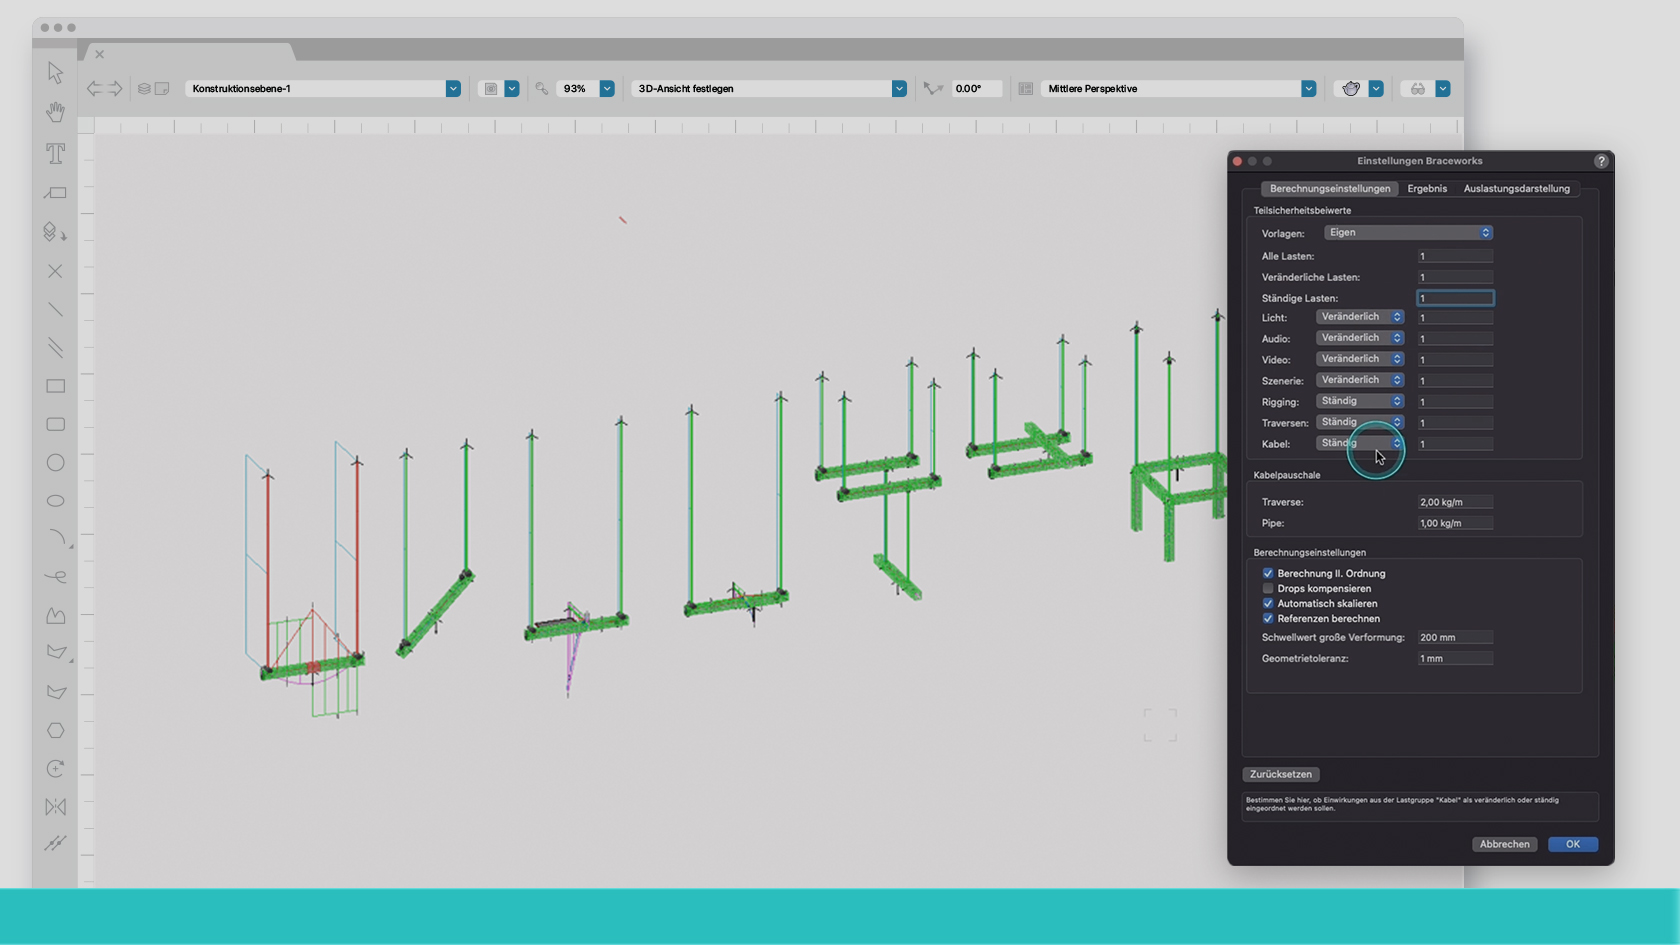
Mit dem Statik-Modul Braceworks in Vectorworks kannst Du in wenigen Schritten die Realisierbarkeit Deines Systems prüfen und so die Dimensionierung Deiner Einsatzmittel besser bemessen. Du kannst beispielsweise Überlastungen von tragenden Elementen vorab erkennen und entsprechende Anpassungen vornehmen. Zeitaufwändige Kommunikations- und Bearbeitungsschleifen fallen dadurch weg und das Ingenieurbüro kann die Datei direkt in sein System übernehmen.
In diesem Webinar bemessen wir gemeinsam einen Workflow zur Realisierbarkeit eines Systems, um die daraus resultierenden Belastungen der Hängepunkten zu ermitteln. Anhand eines Beispielkonstrukts werden wir zudem auf ein paar gesonderte Themen eingehen.
(Für Version 2024)
Category: Featured
Requires Approval: No

This video will run Braceworks calculations on a full sized system.
Category: Part 2 Braceworks
Requires Approval: No
This video examines the forces involved with bridles.
Category: Part 2 Braceworks
Requires Approval: No
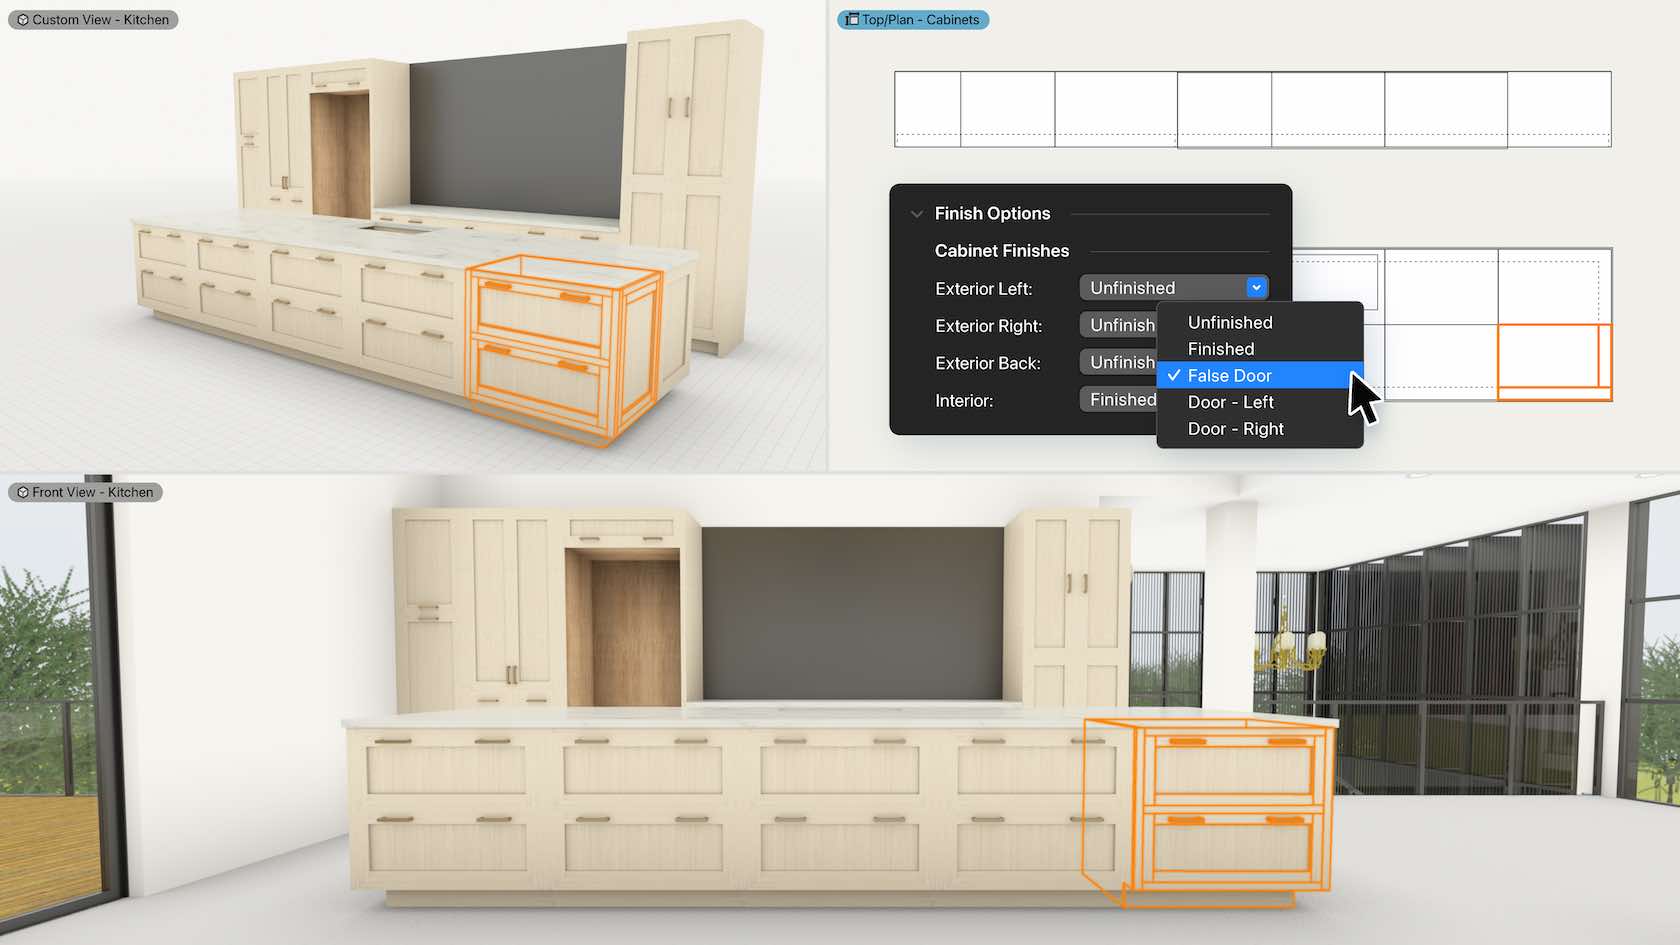
Designing that dream kitchen or bathroom just got easier with the new parametric cabinets. You can create and customize configurations or easily replicate popular cabinet styles from more manufacturers. Layout and design built-in cabinetry for any space, creating more realistic visualization and more accurate documentation.
Category: Interiors
Requires Approval: No
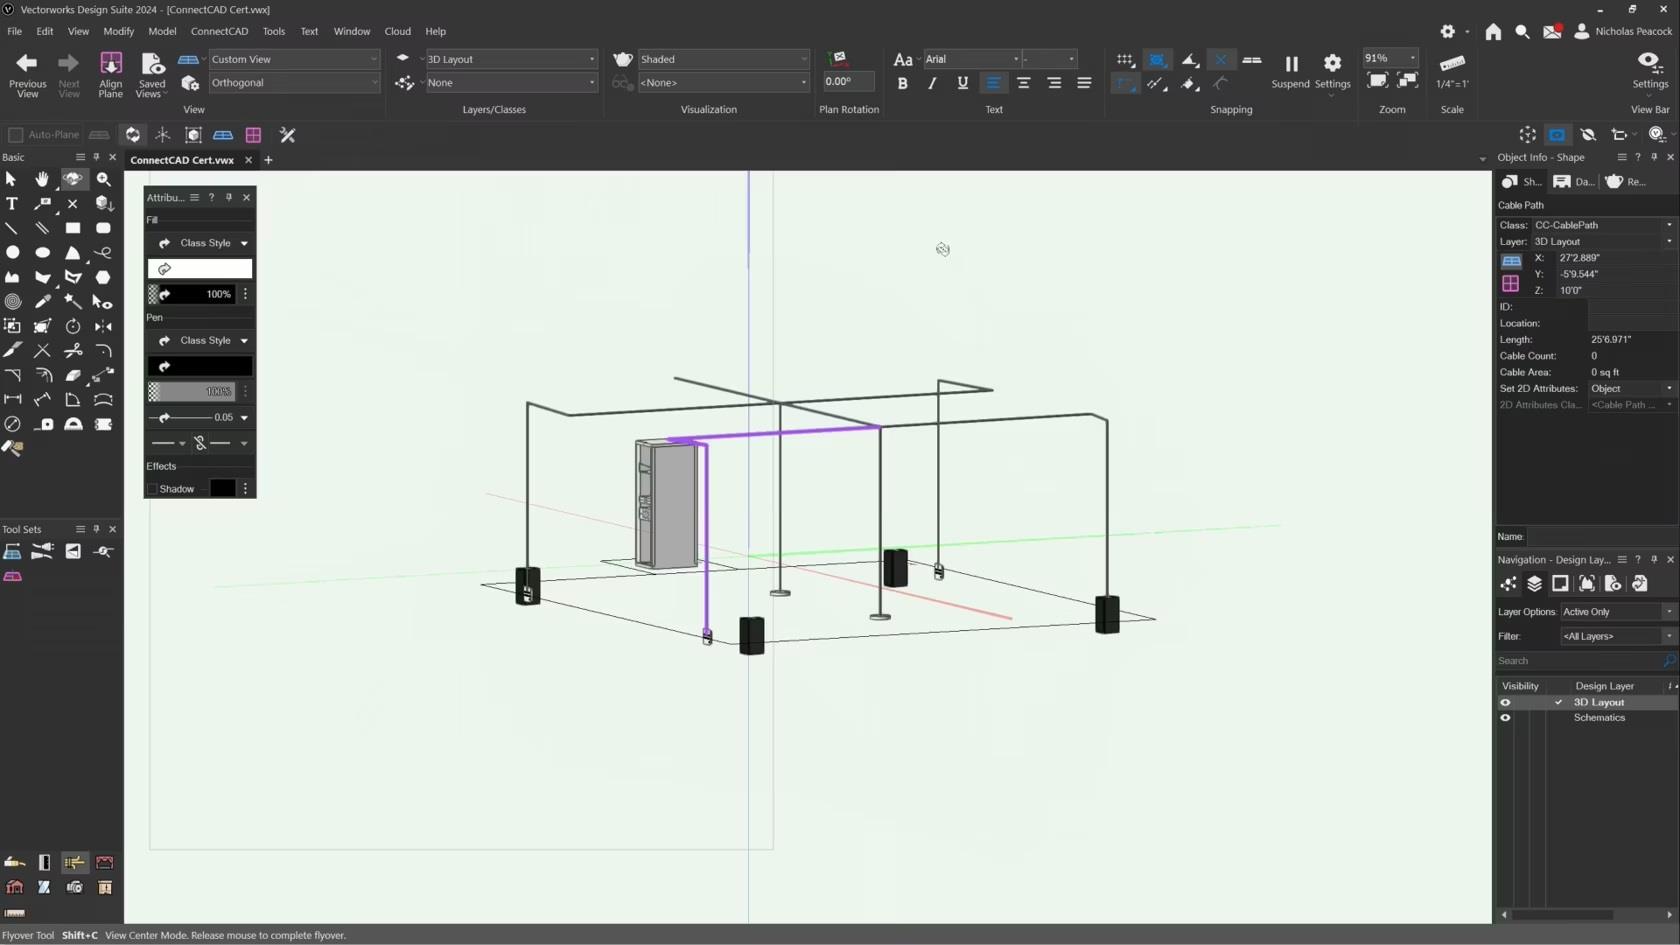
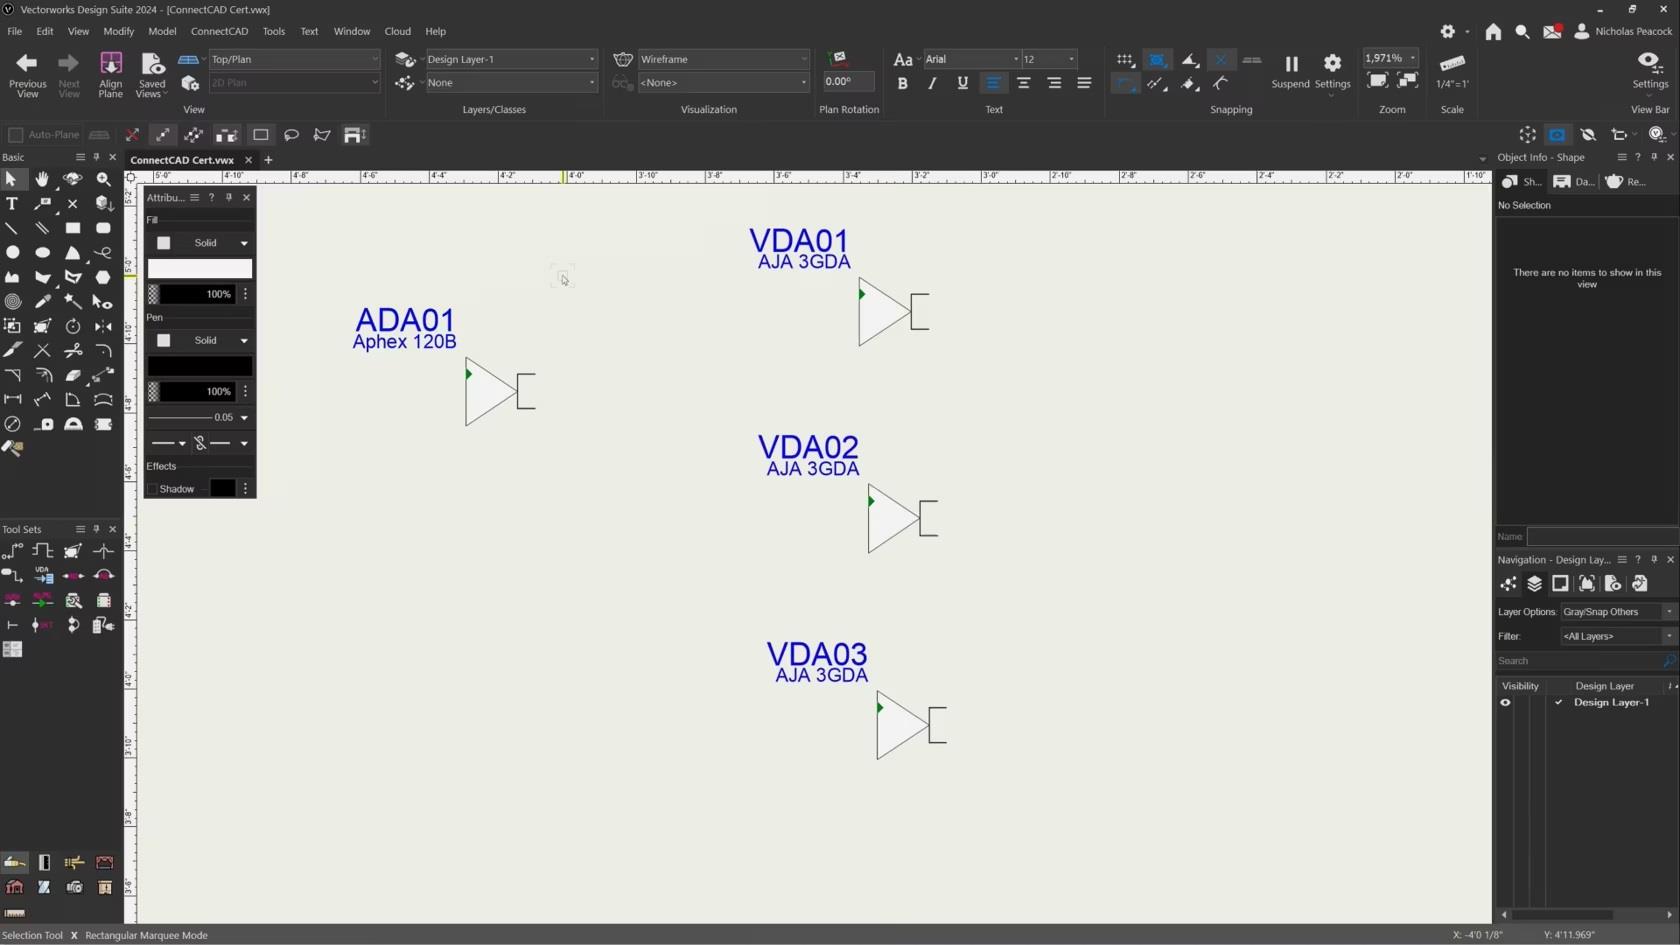
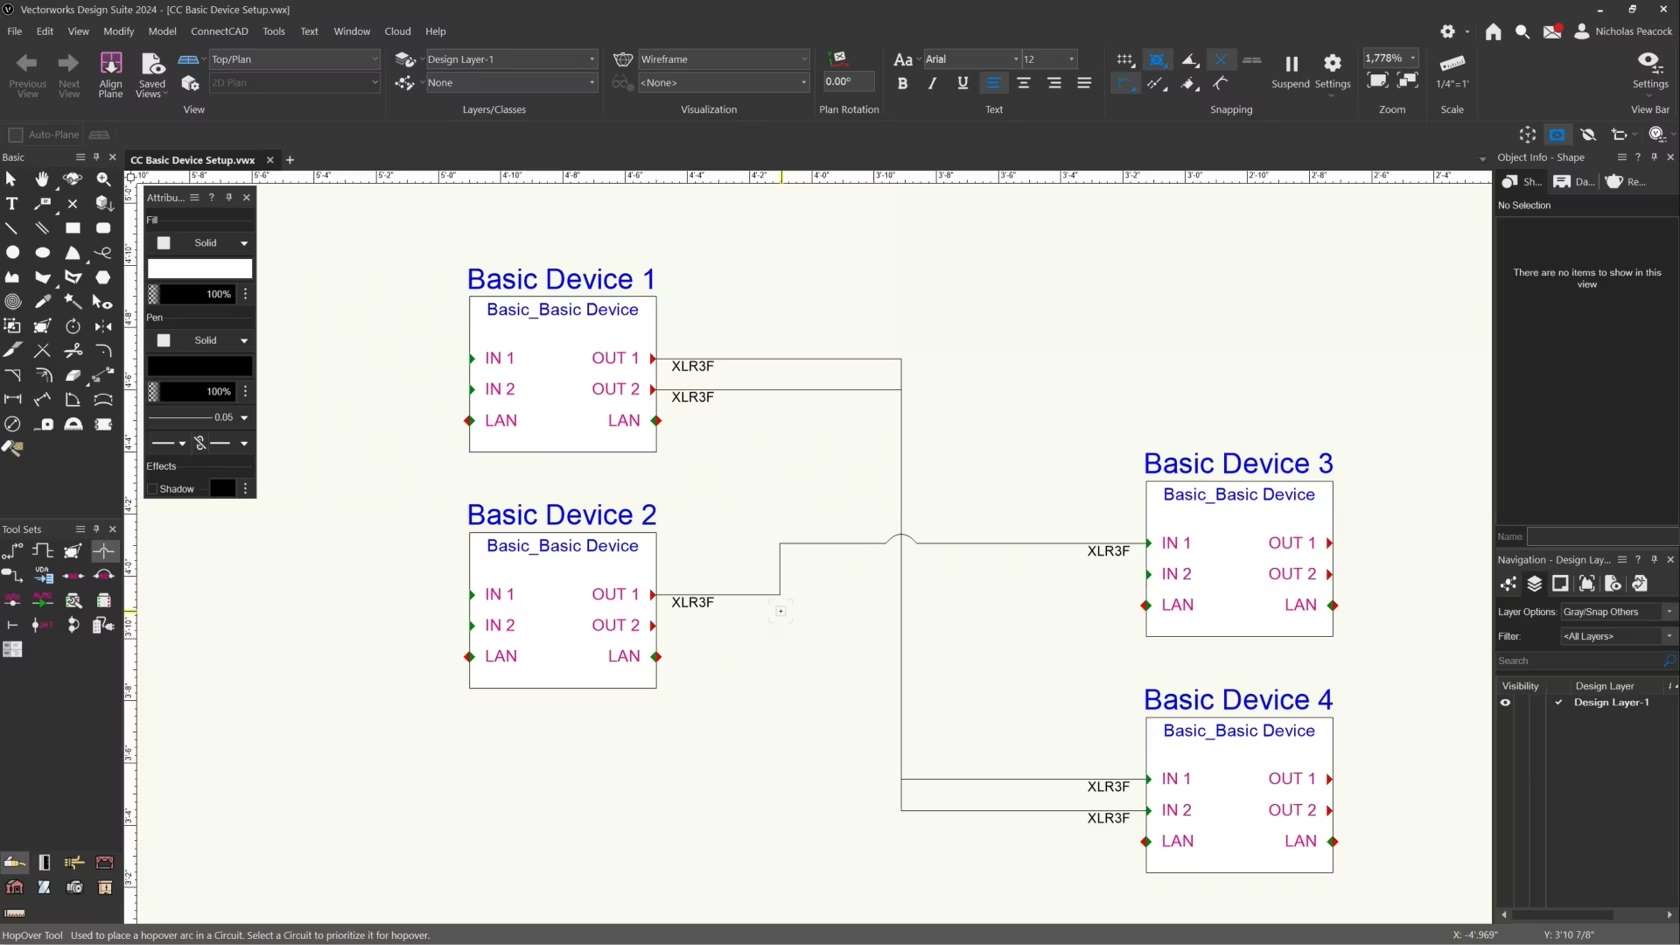
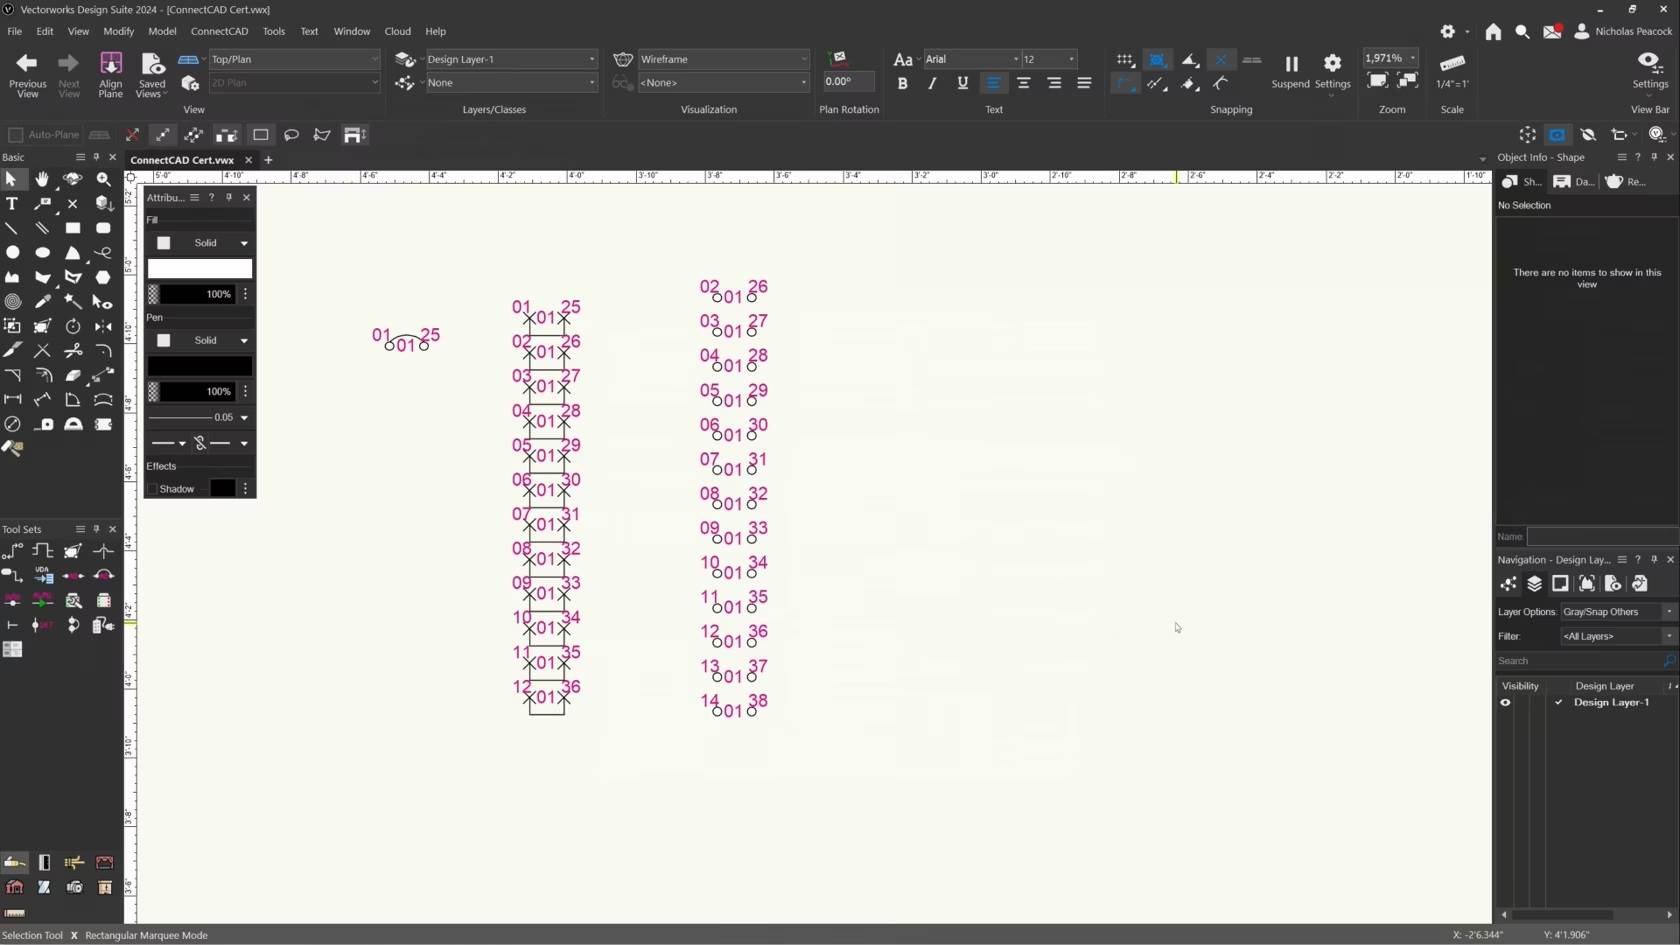
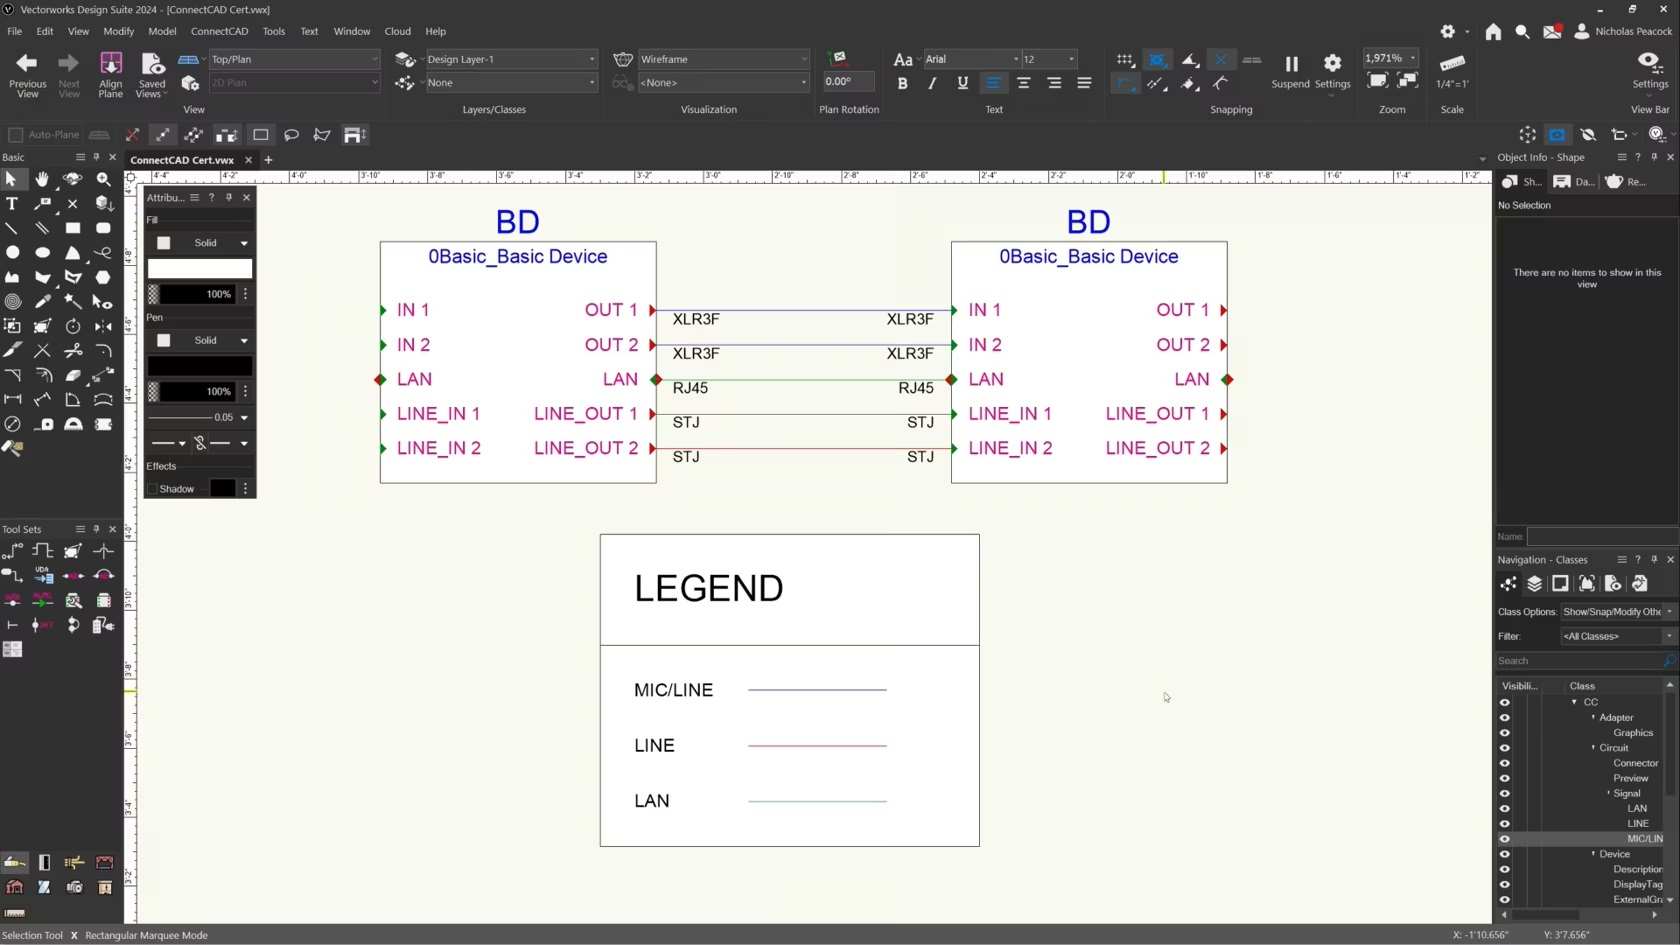
In this video, we will cover the basics of the Cable Route Tool.
Category: (2024) Skill
Requires Approval: No

This lesson combines the tools and commands from the skill videos and seeks to teach you the concepts and workflows behind cable routes.
Category: 2024 ConnectCAD Certification
Requires Approval: No

An exercise to test your knowledge and practice what you have learned.
Category: 2024 ConnectCAD Certification
Requires Approval: No
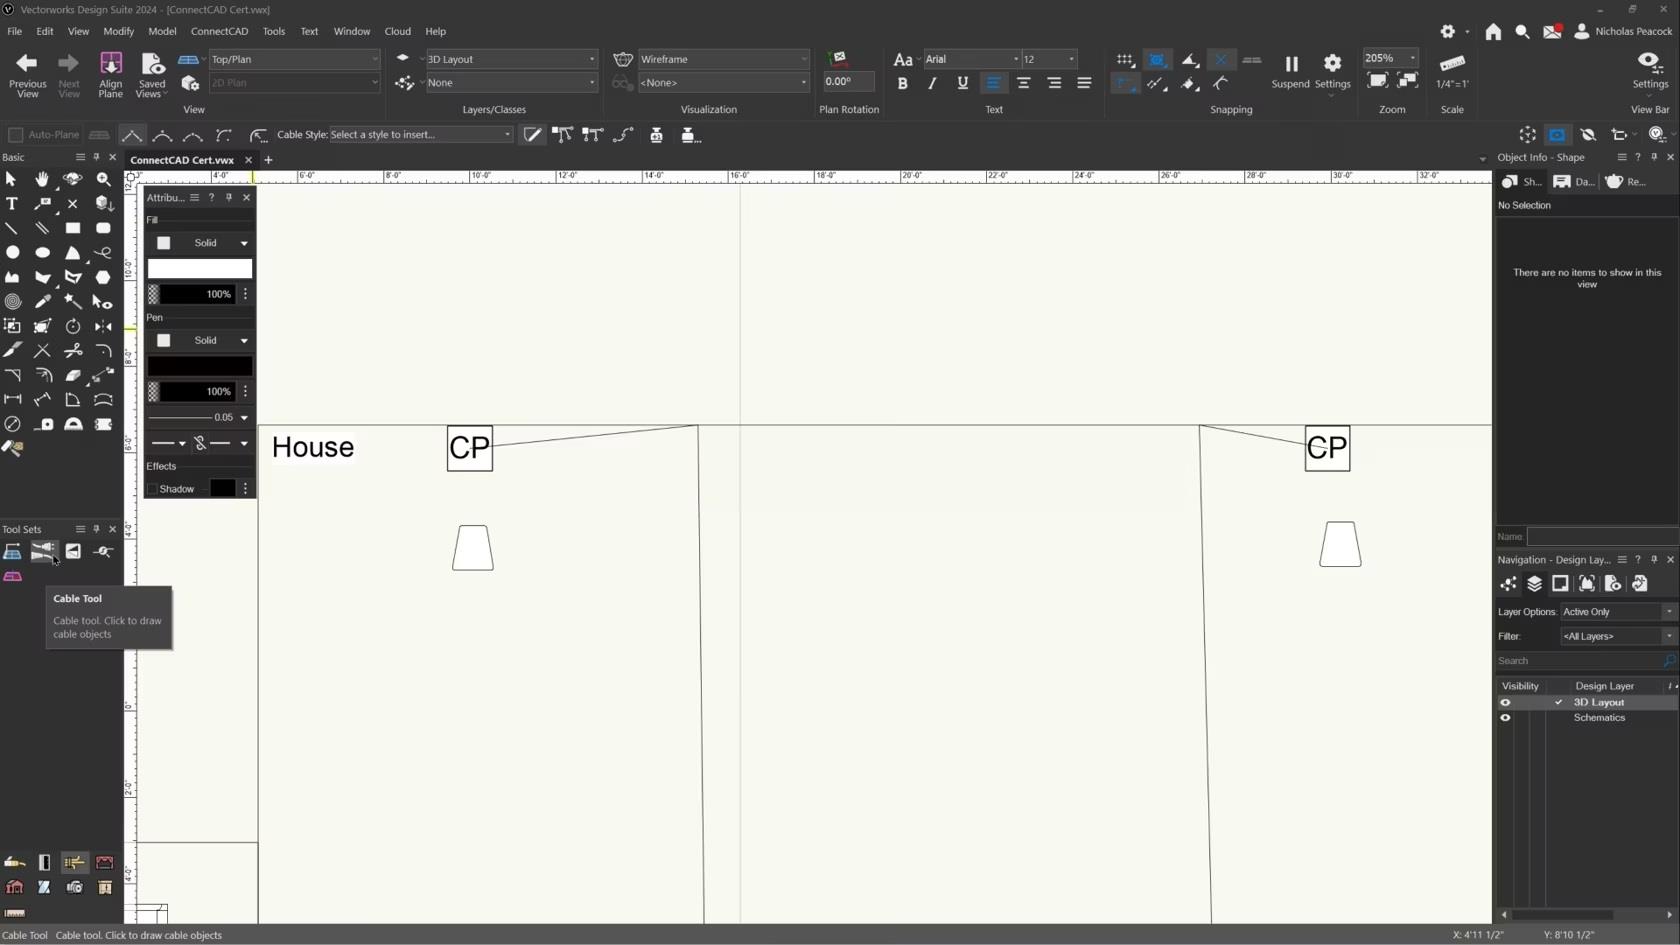
In this video, we will cover the basics of the Cable Tool.
Category: (2024) Skill
Requires Approval: No
Lernen Sie das Arbeiten mit Vectorworks Landschaft in kurzer Zeit kennen: Im deutschsprachigen Raum nutzt die Mehrheit der Betriebe in der grünen Branche das CAD mit den spezialisierten Funktionen. Fabio Häuselmann (EFZ Landschaftsarchitektur) und Oliver Fechner (Dipl.-Ing. Landschaftsarchitektur FH) vermitteln Ihnen anhand praktischer Beispiele die ersten Schritte: Wie man die eigene Bürostruktur aufbaut und immer wieder nutzt und wie man effizient die wichtigsten Werkzeuge einsetzt. Melden Sie sich kostenlos an zu diesen kurzweiligen 30 Minuten.
(Für Version 2024)
Category: Featured
Requires Approval: No
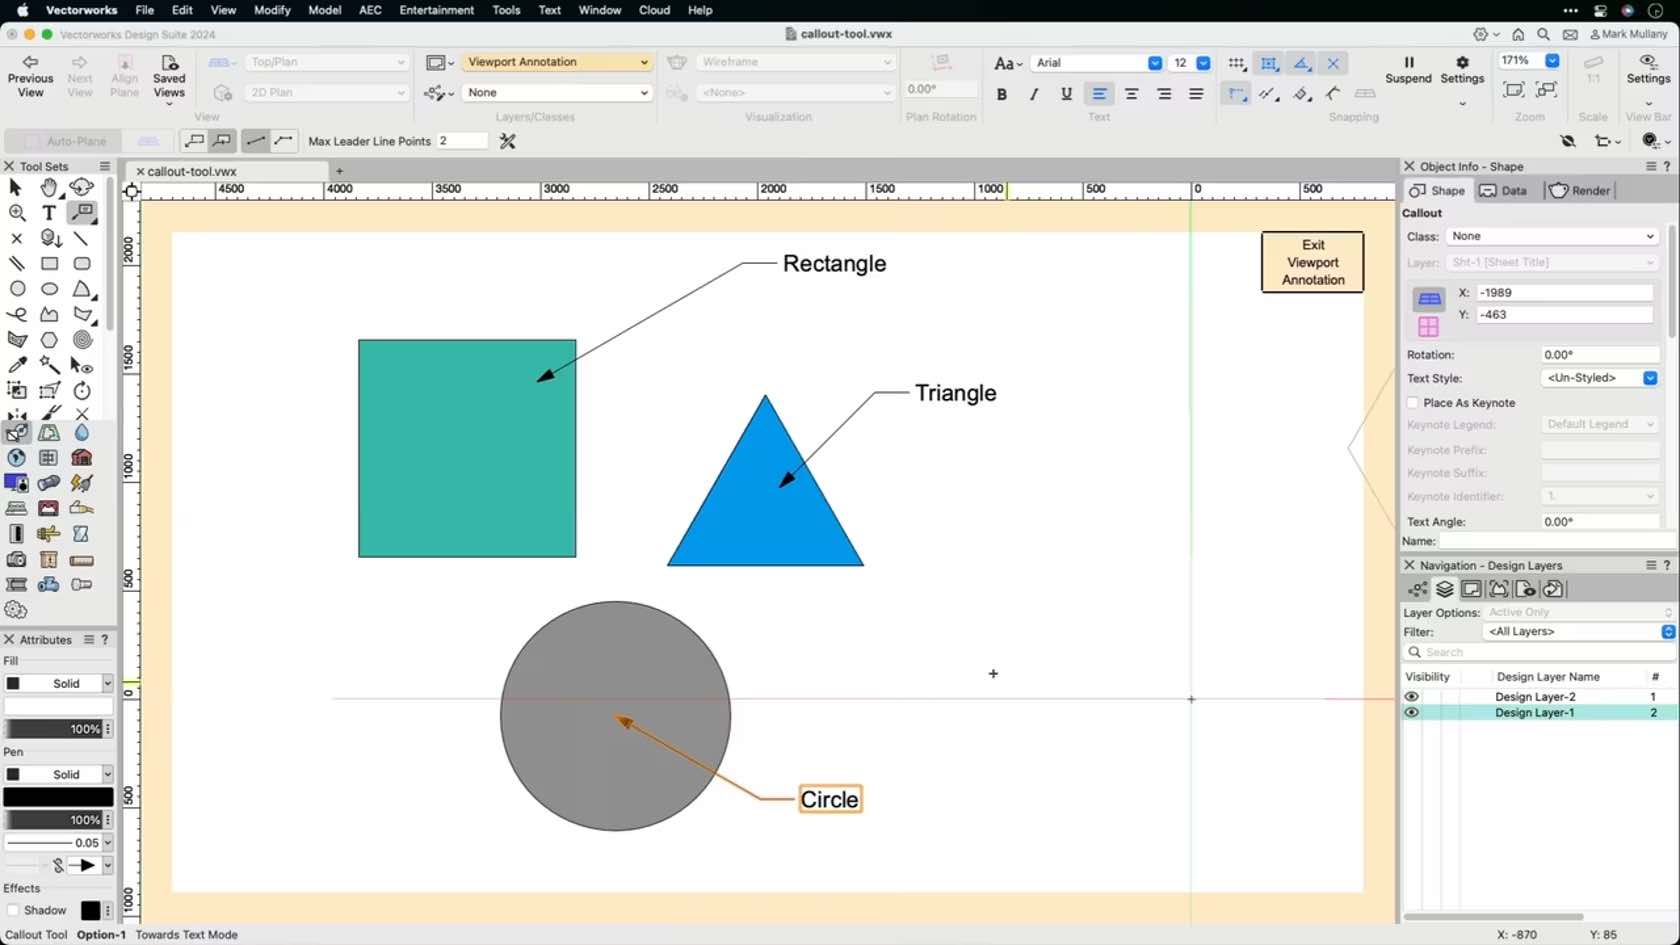
This video will review at the Callout tool used to annotate your drawings.
Category: Skill
Requires Approval: No
In this video, we will demonstrate the three modifying modes of the Chamfer tool as well as explore the Chamfer tool Entry Options.
Category: Skill
Requires Approval: No
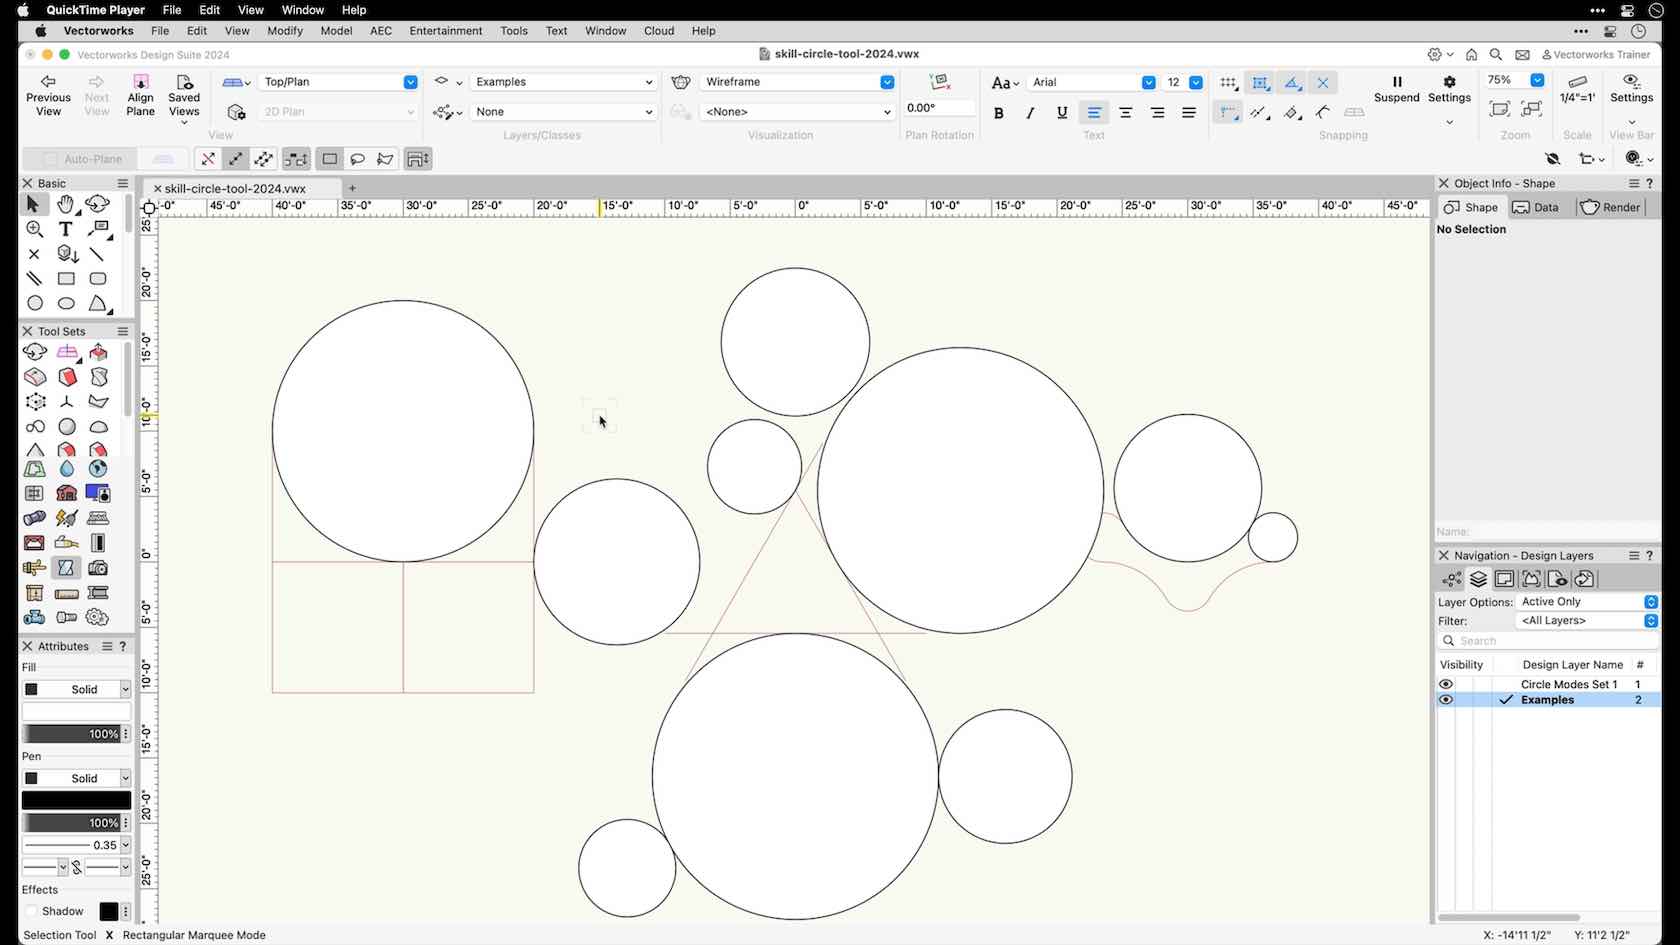
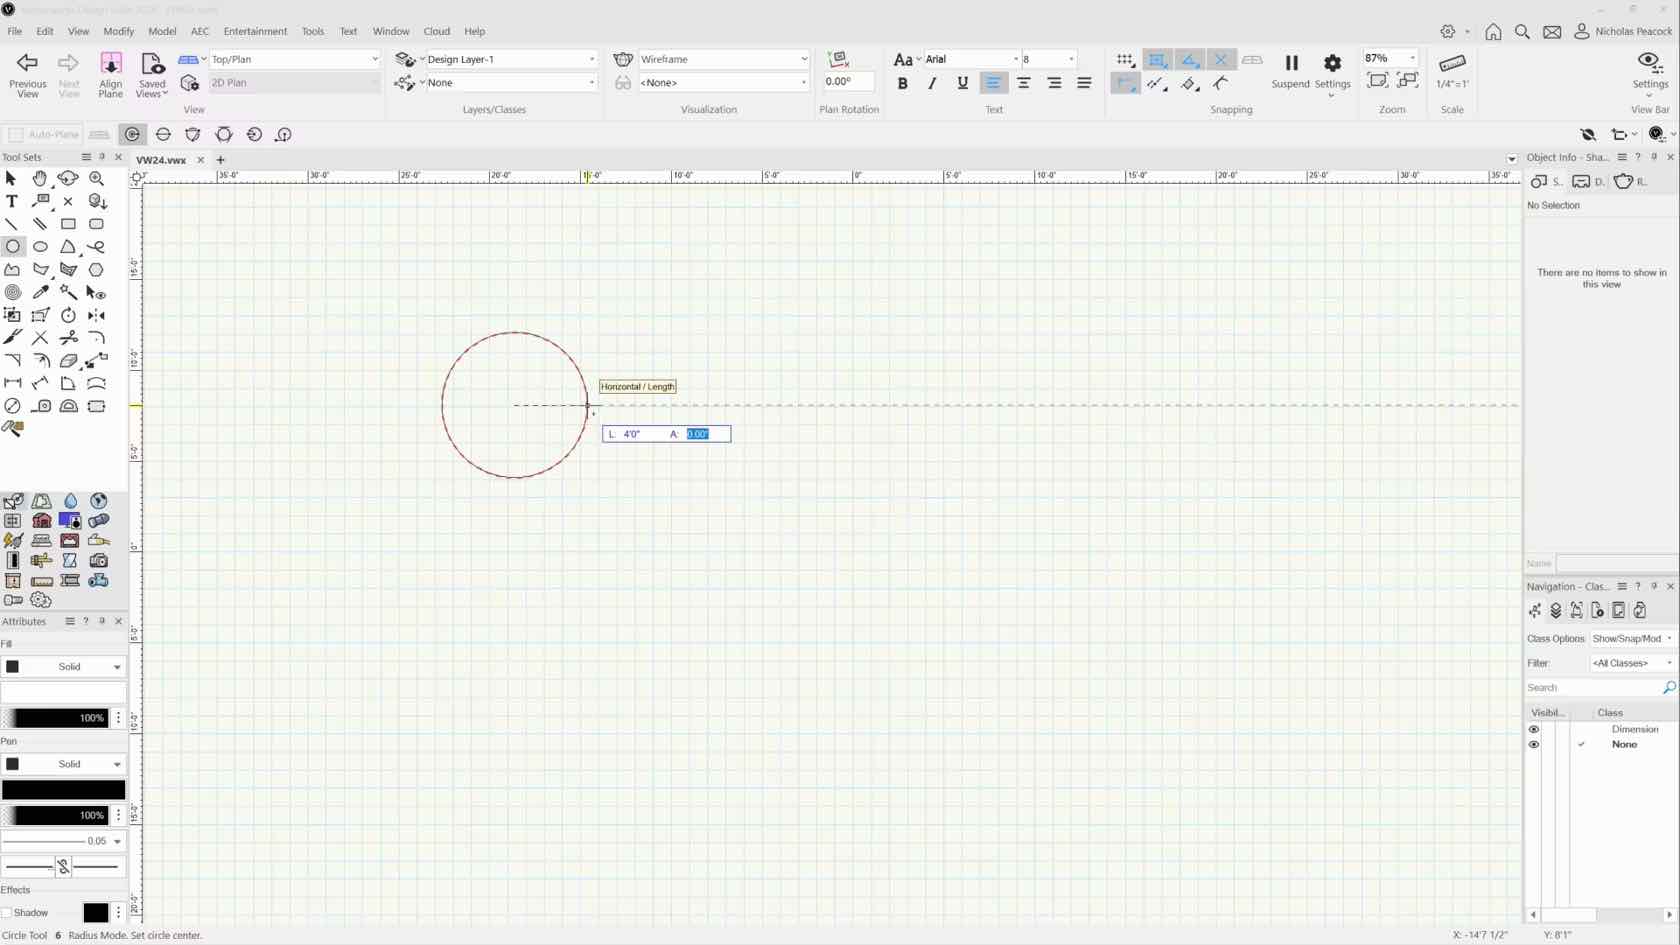
In this video, we will explore the Circle tool and its drawing modes.
Category: Skill
Requires Approval: No
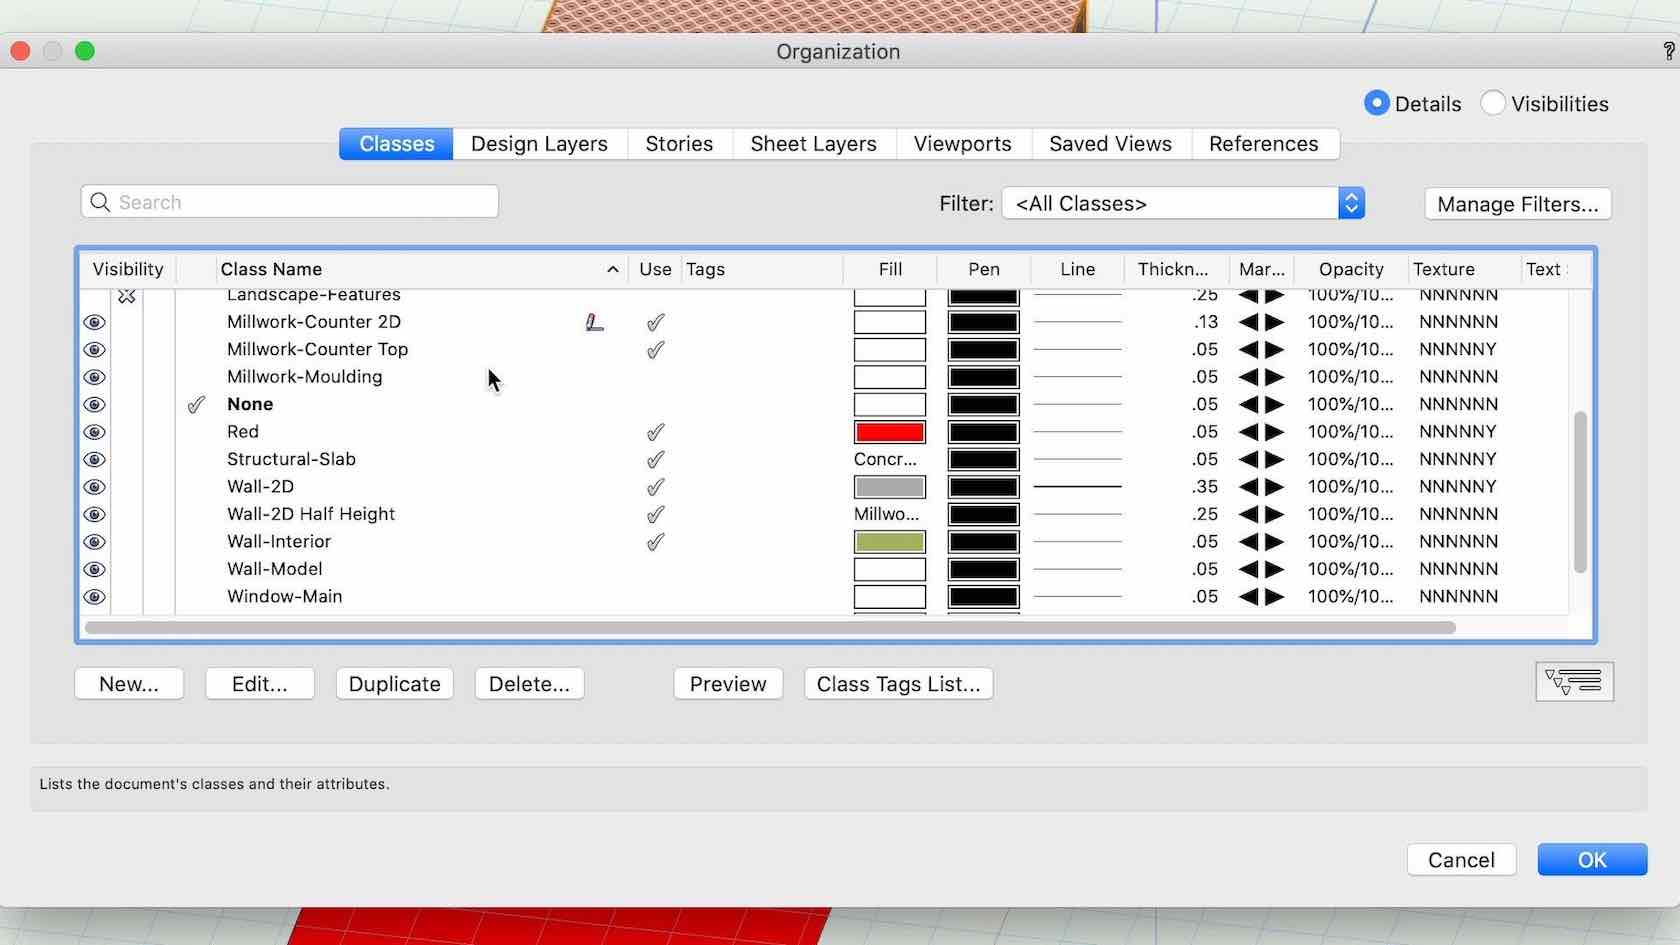
This video demonstrates how to configure objects to use class attributes.
Category: Skill
Requires Approval: No
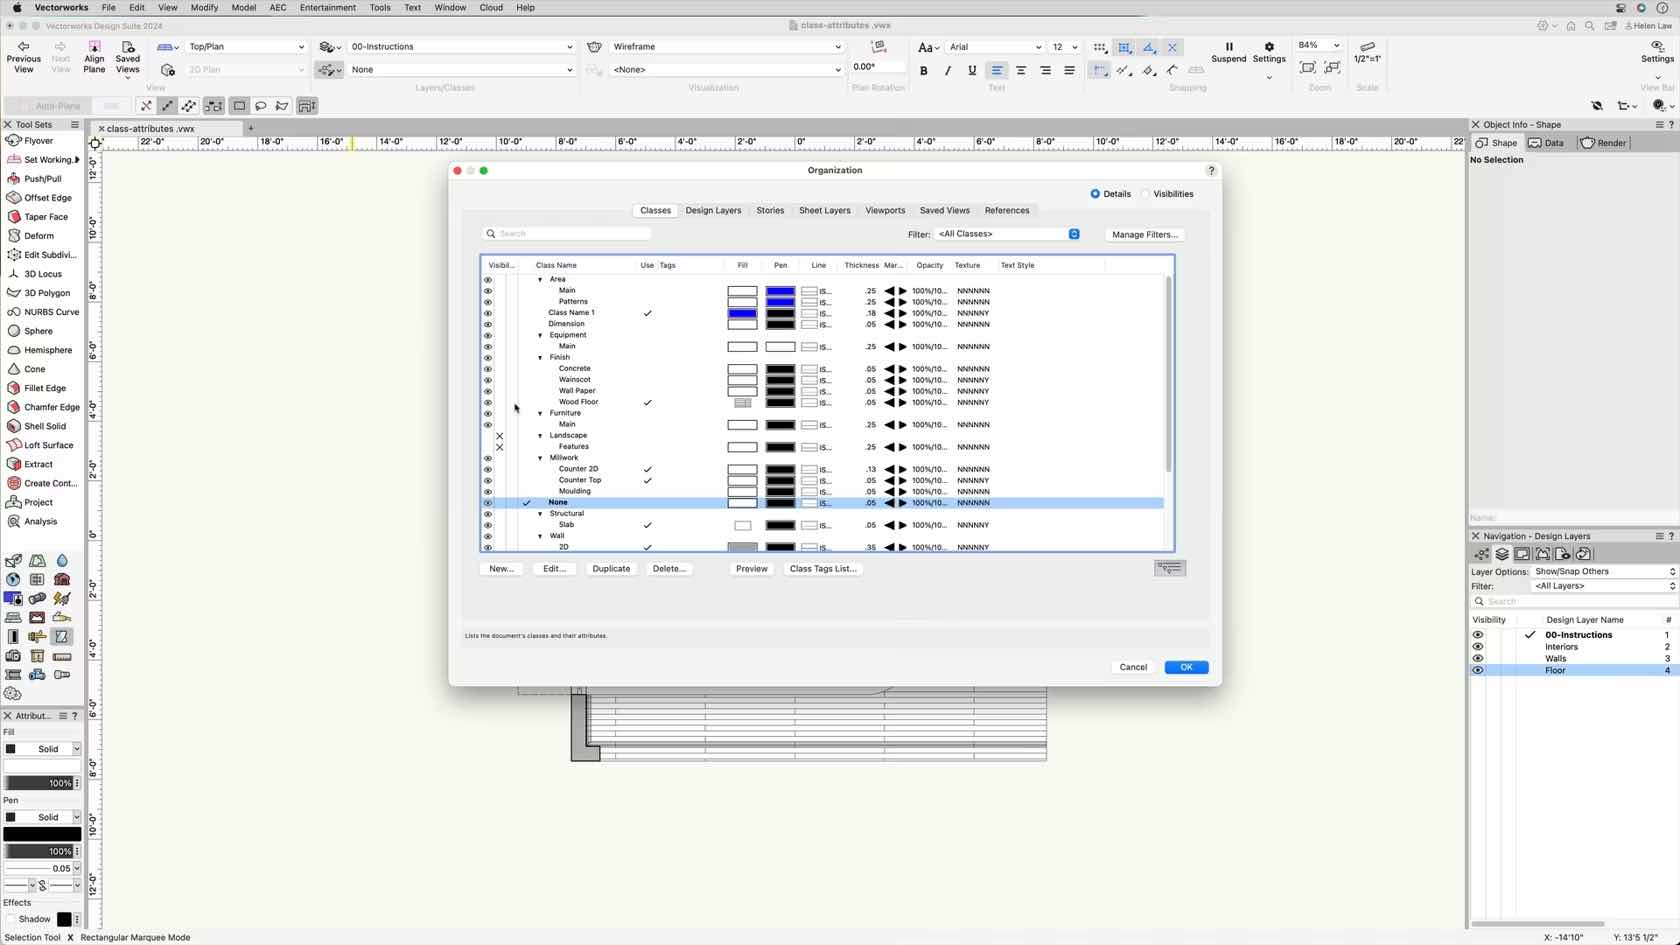
This video demonstrates different ways to adjust class visibilities and set global class options to improve workflows.
Category: Skill
Requires Approval: No
In this video, we will explore the different clicking behaviors that are present in Vectorworks software.
Category: Skill
Requires Approval: No
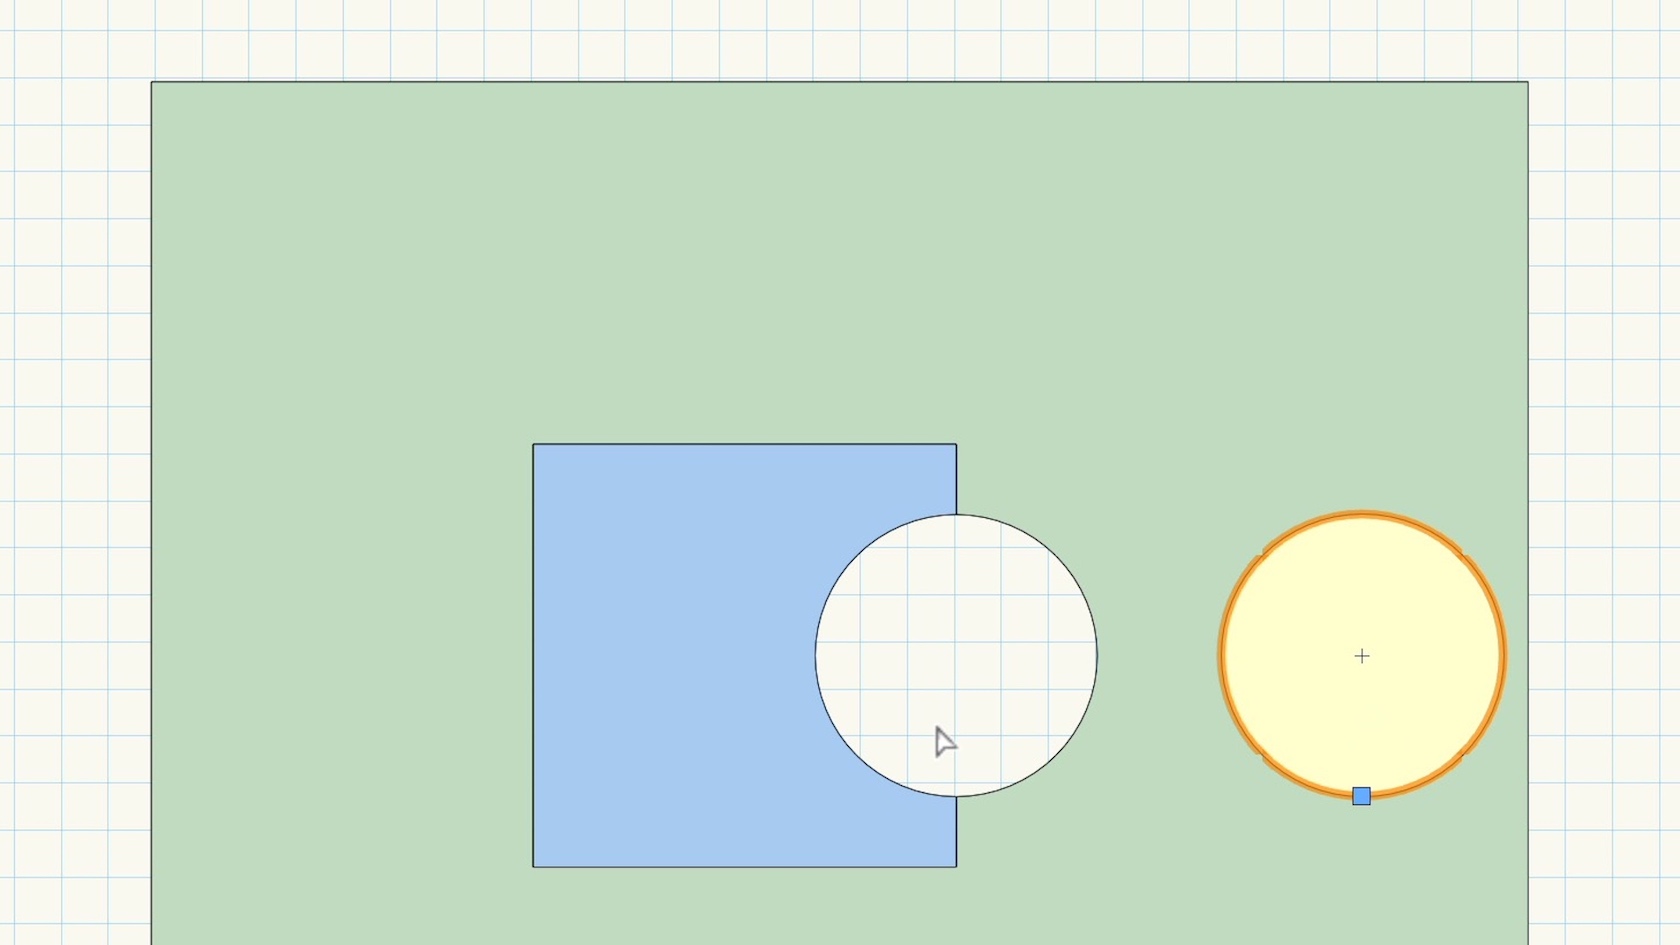
Explore how to clip geometry from overlapping objects to create a desired shape.
Category: Skill
Requires Approval: No
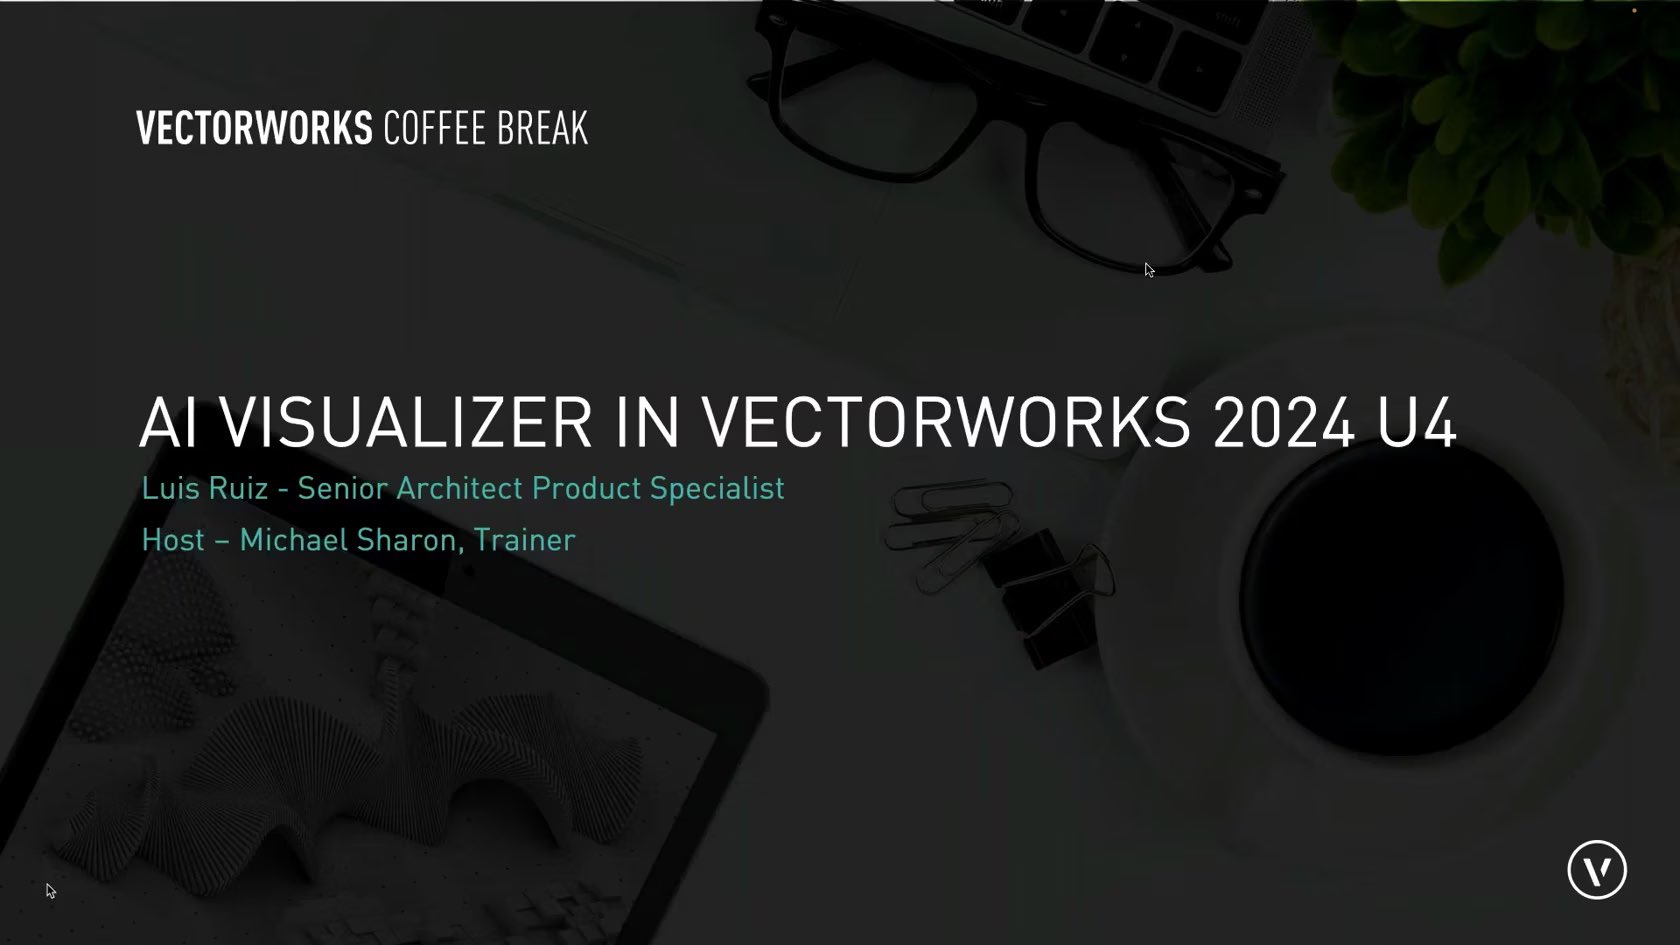
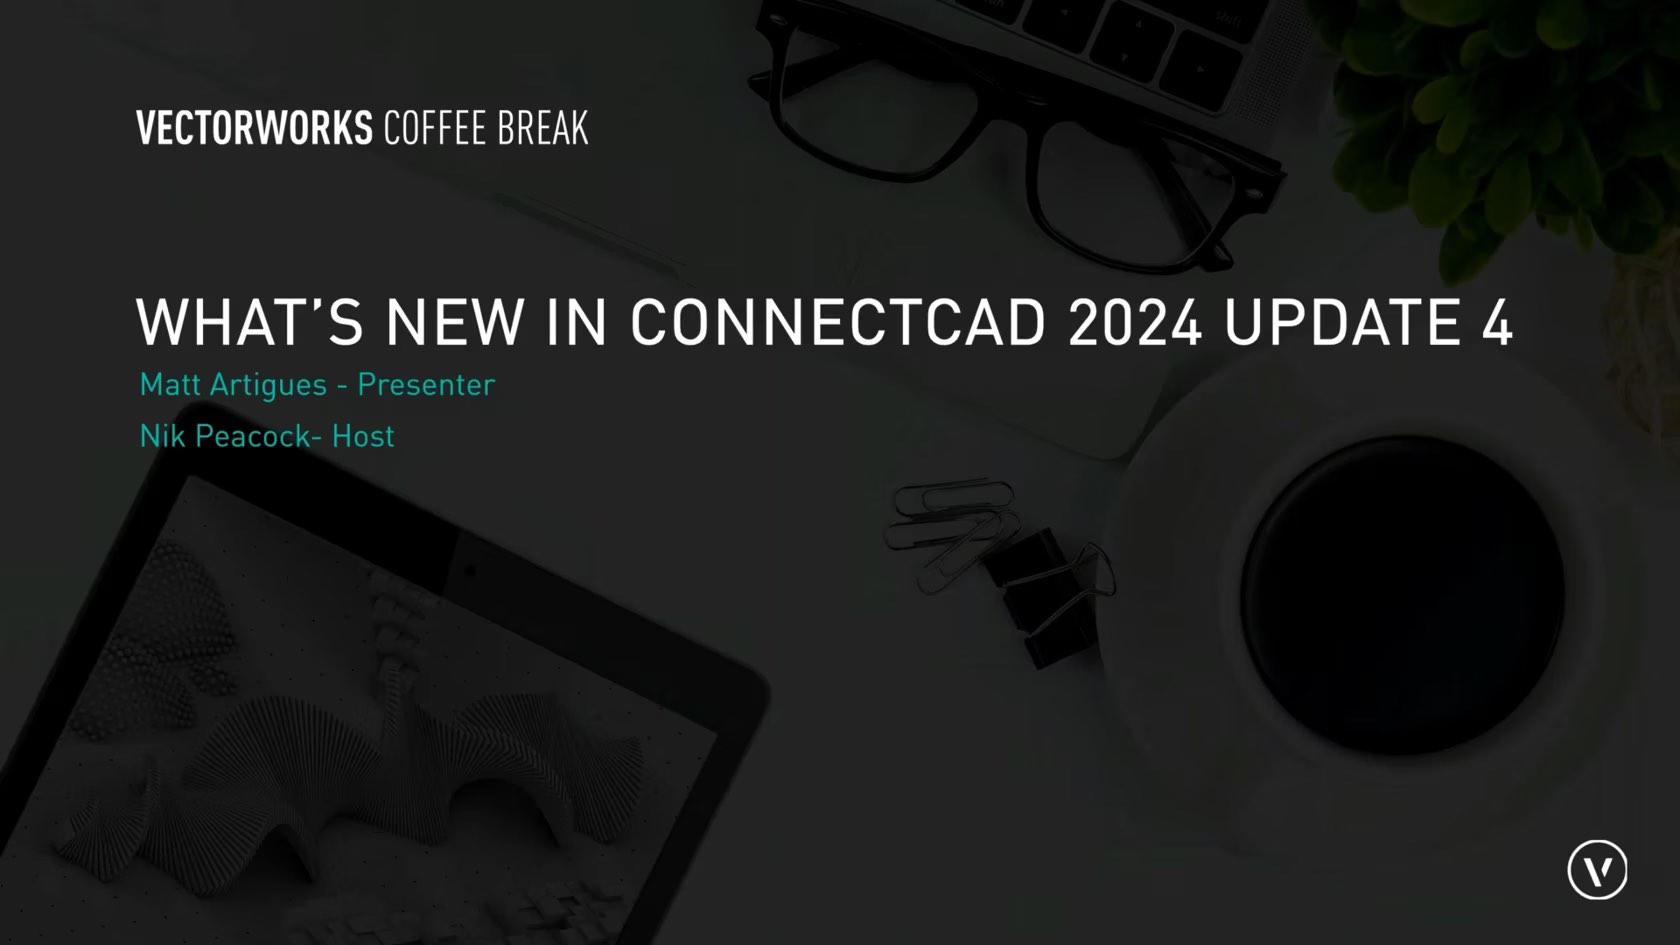
In this Coffee Break, Luis Ruiz gives an introduction to the AI Image generator in 2024 Update
4. He'll demonstrate how to use it, and show some of the amazing images
you can create.
Category: Live Session
Requires Approval: No

Annotations are essential for design communication. They provide additional information to the drawings and help clarify design intent. Vectorworks offers several features that make annotating tasks more efficient. This webinar will focus on when, where, and why to use them.
Category: Live Session
Requires Approval: No
Join Luka Stefanovic, Senior Architecture Industry Specialist, as he shares the latest in BIM Collaboration in Vectorworks 2024 Update 4.
Category: Live Session
Requires Approval: No

Join us as we look at the basics of creating worksheets and the data we can use to pull reports.
Category: Live Session
Requires Approval: No
By adding or utilizing data that is attached to an object in Vectorworks, you can use the Data Visualization feature in Vectorworks to assign colour schemes to easily display the data criteria.
Join us as we show you how to use Data Visualization in your projects.
Category: Live Session
Requires Approval: No

To get in the holiday spirit, we'll use Vectorworks to model a gingerbread house, complete with candy canes and gumdrops!
Category: Live Session
Requires Approval: No
Join Iskra Nikolova, our Quality Assurance Manager, as she delves into the world of Vectorworks Odyssey and Apple's Room Plan Framework, two innovative tools designed to enhance your design experience.
Category: Live Session
Requires Approval: No
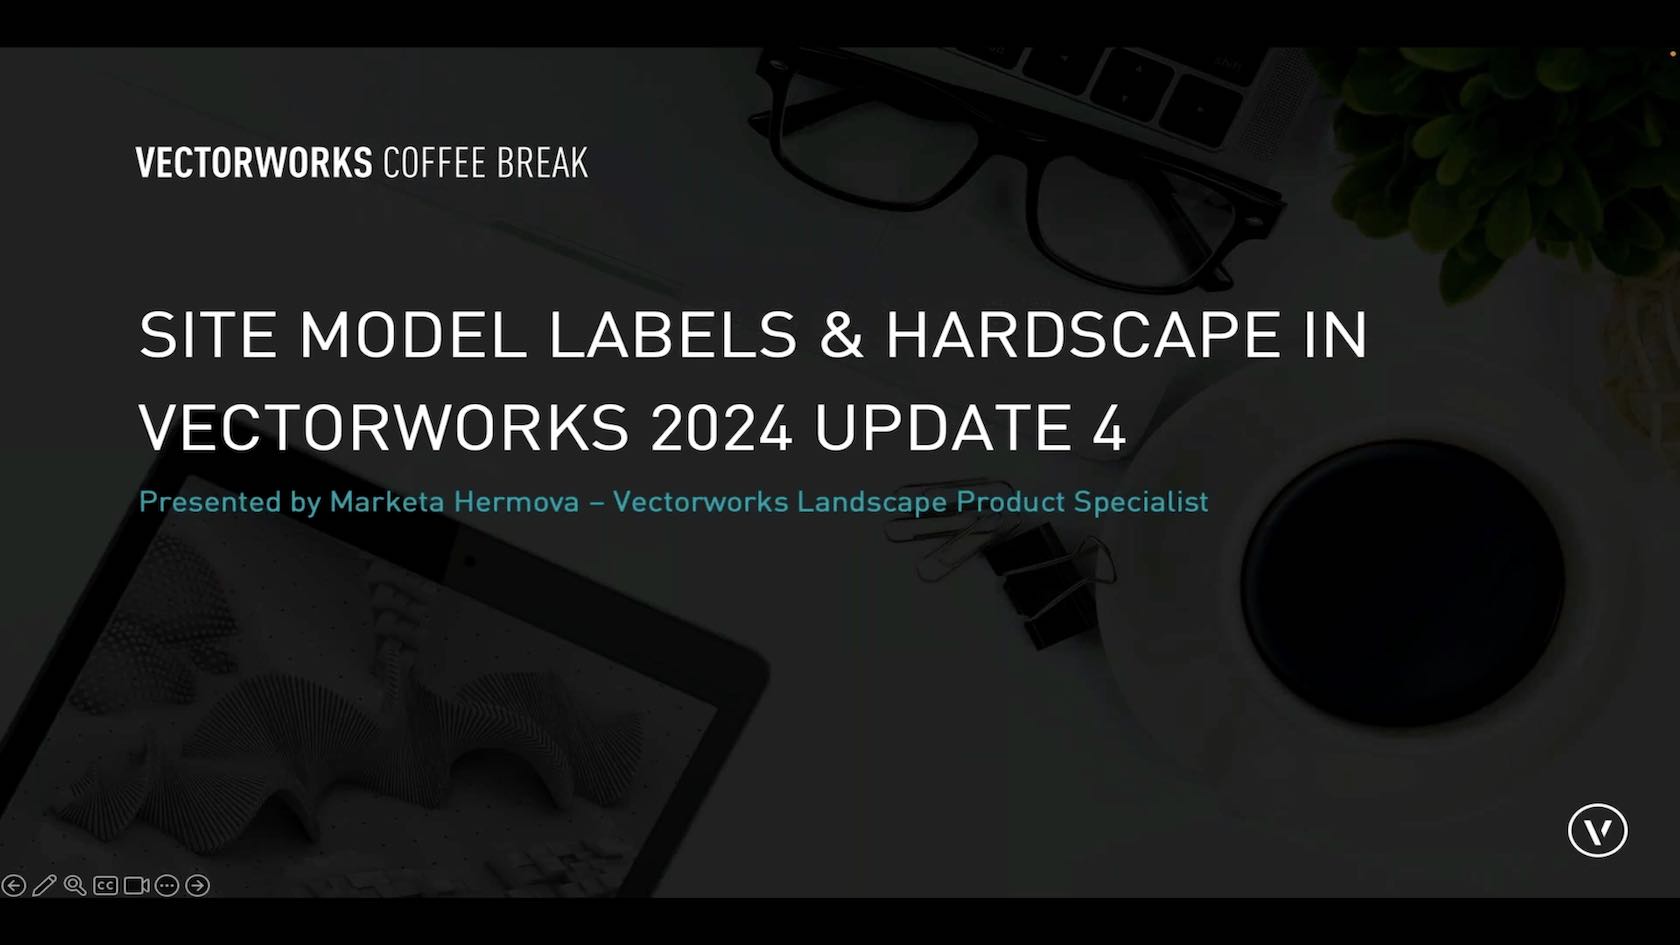
Join Market Hermova, our Landscape Product Specialist, as she provides insights into the latest developments and advancements in the Site Model and Hardscape Tool in Vectorworks 2024 Update 4.
Category: Live Session
Requires Approval: No
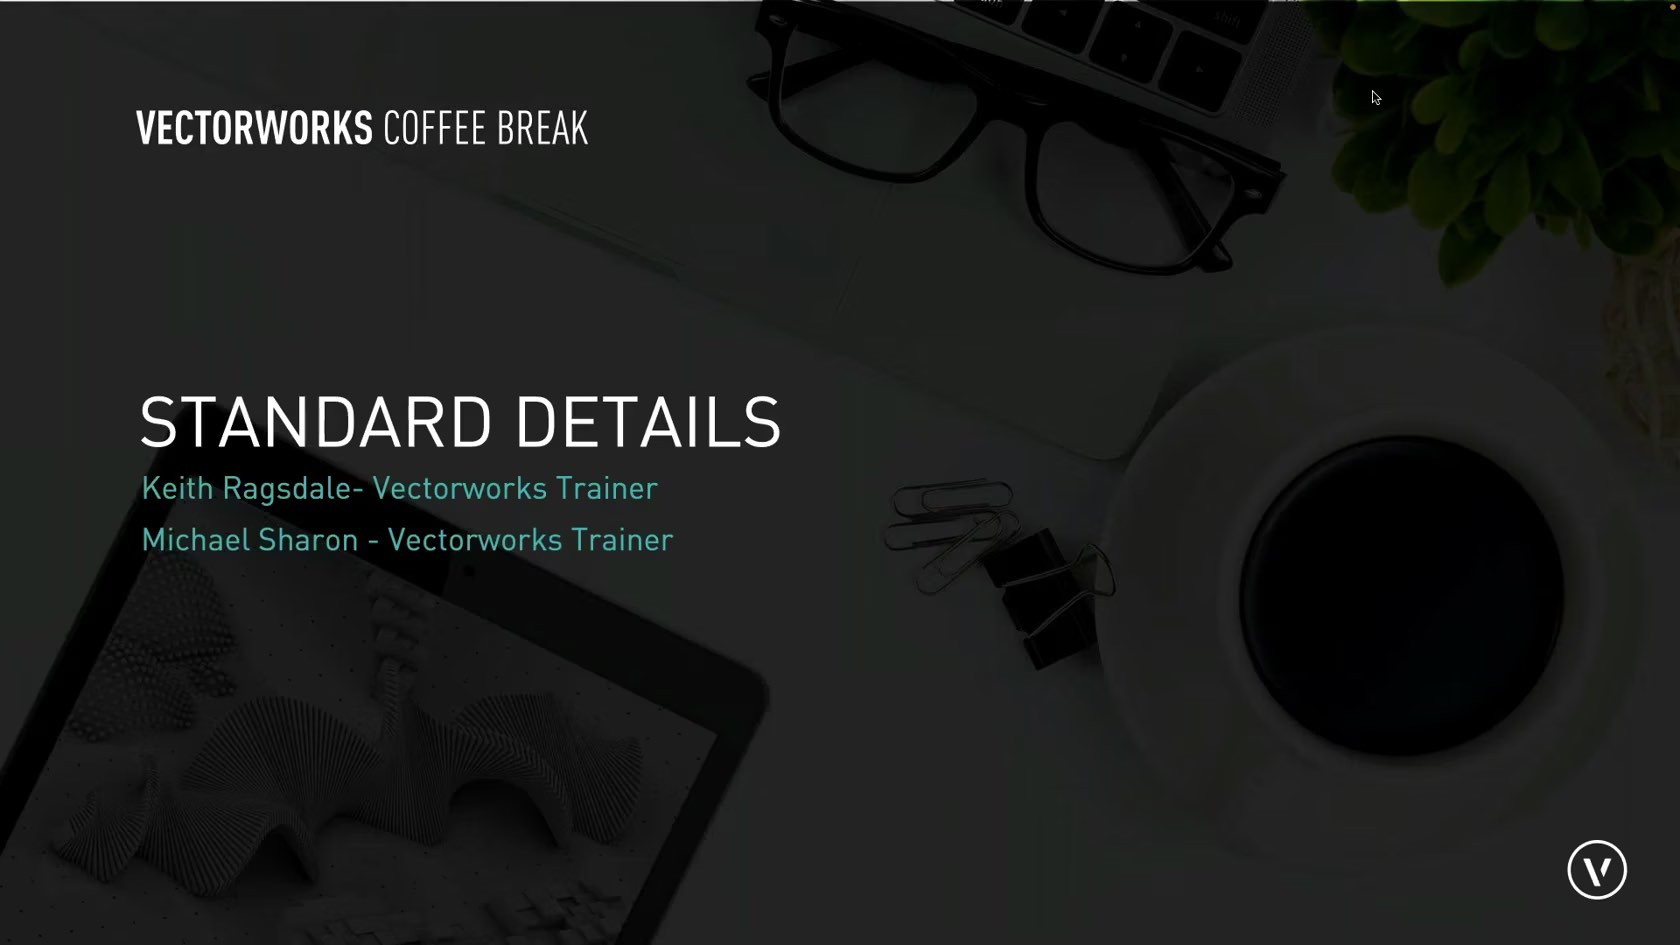
Join us as we look at tips for creating standard details to use in your documentation.
Category: Live Session
Requires Approval: No
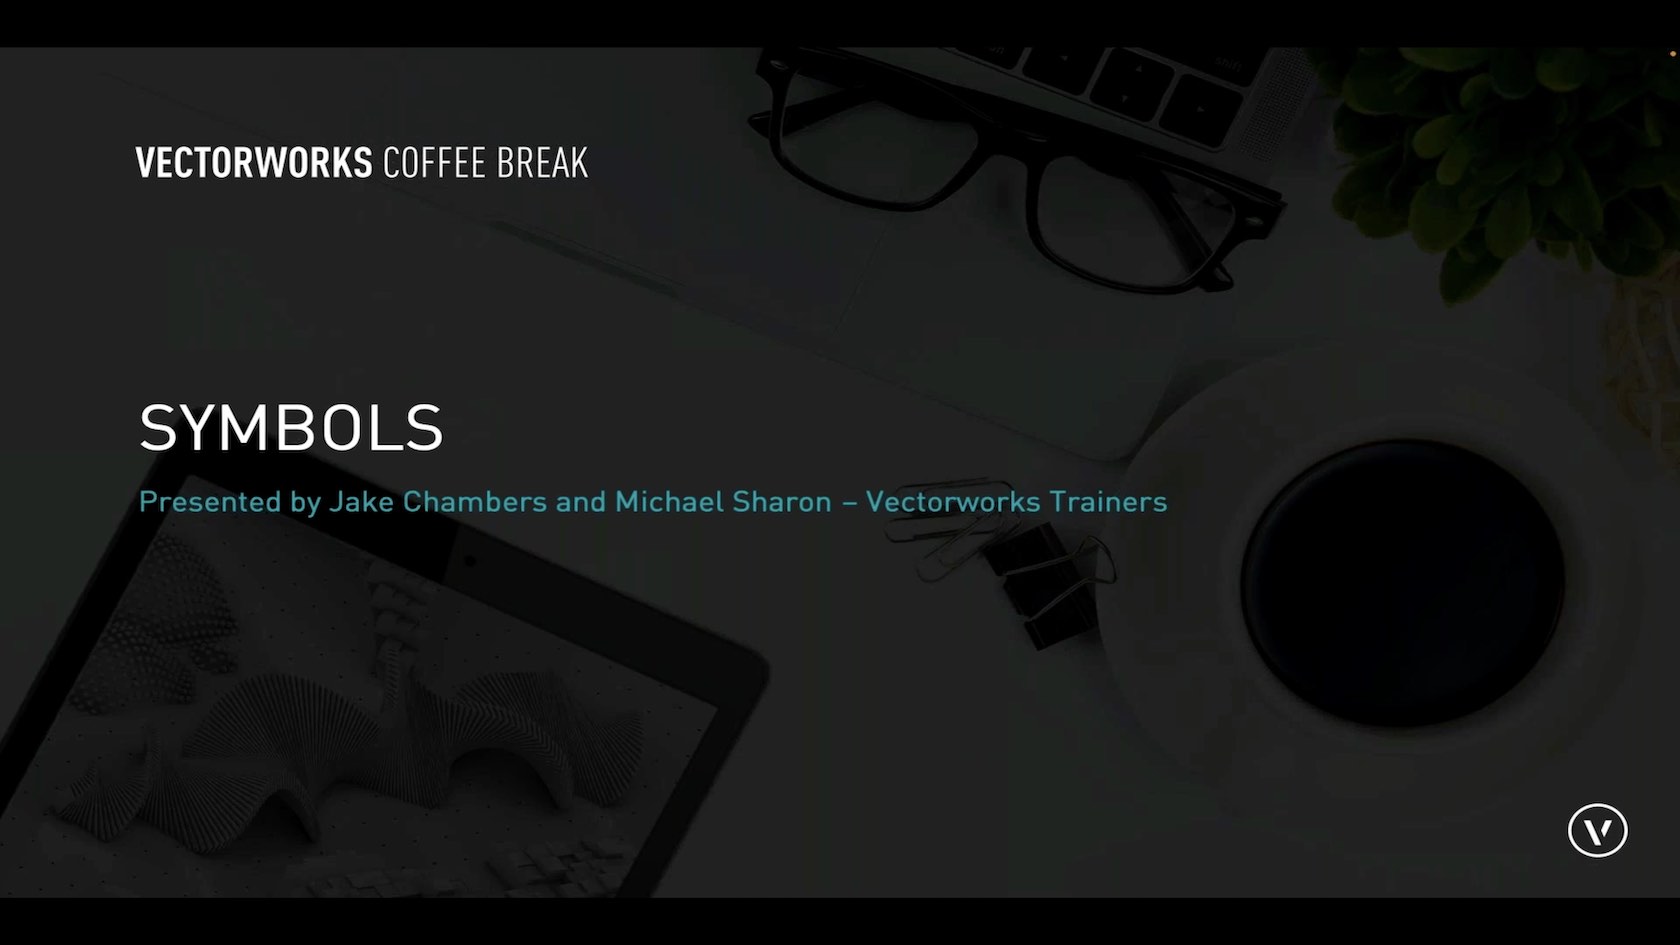
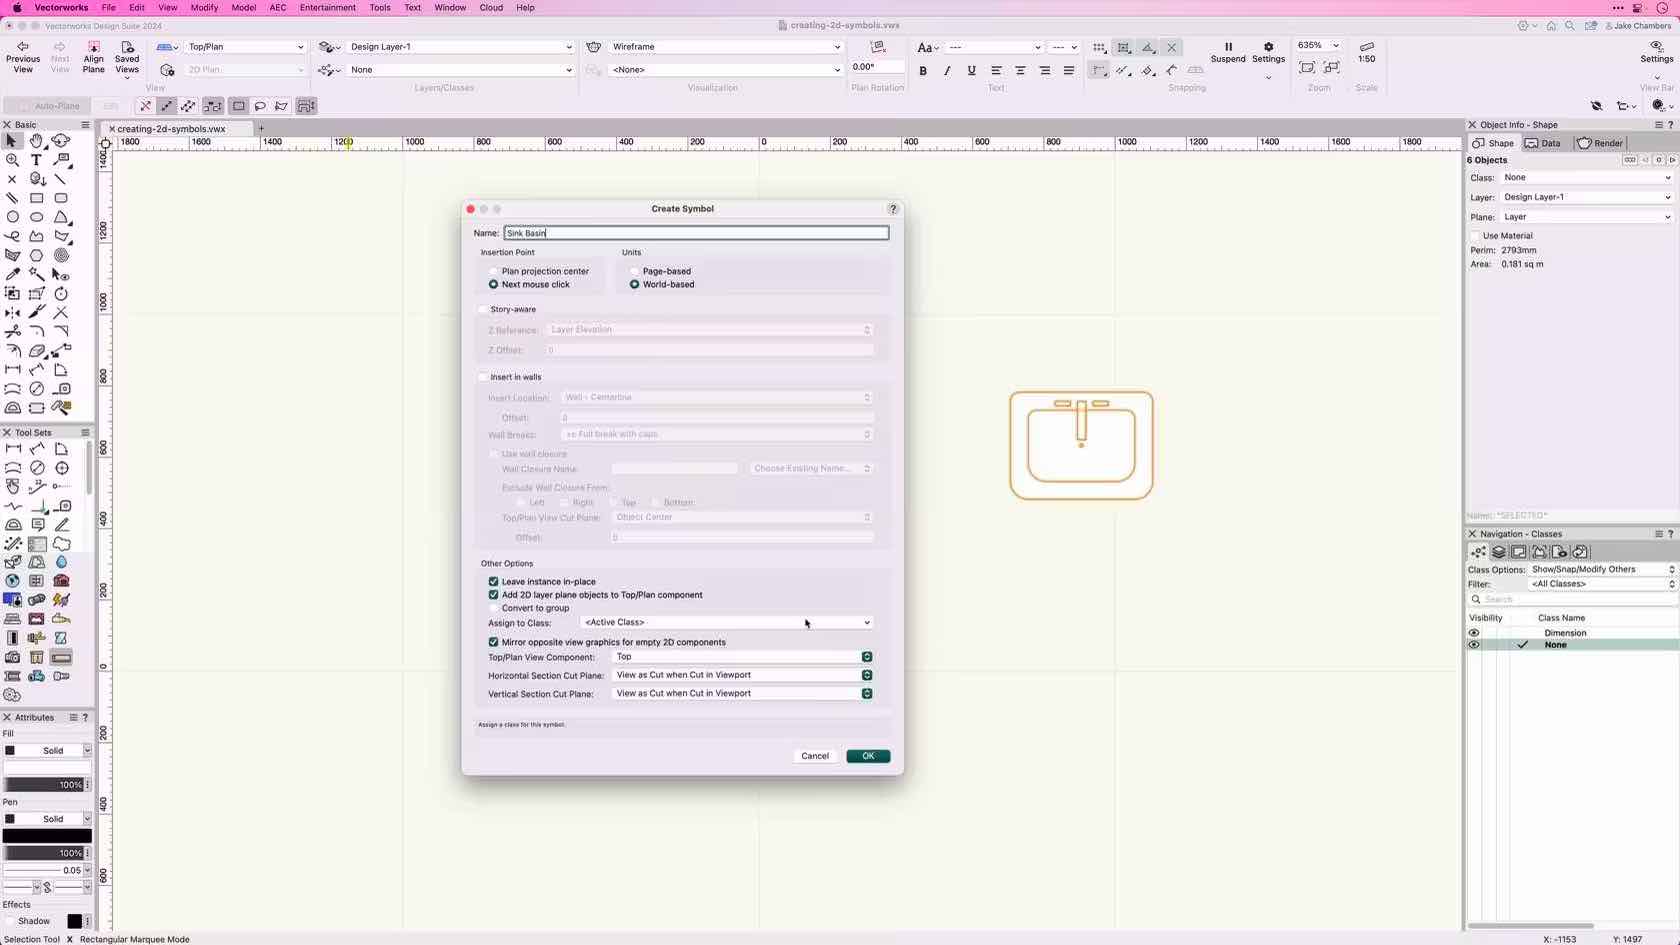
Symbols in Vectorworks allow you to save objects for reuse again in the future, saving you time and effort to re create what you have already drawn or modeled. Symbols can be either 2D, 3D or Hybrid, but what does this mean and whats page based vs world based.
In this coffee break we will delve into symbols and highlight the benefits of incorporating them into your workflow.
Category: Live Session
Requires Approval: No
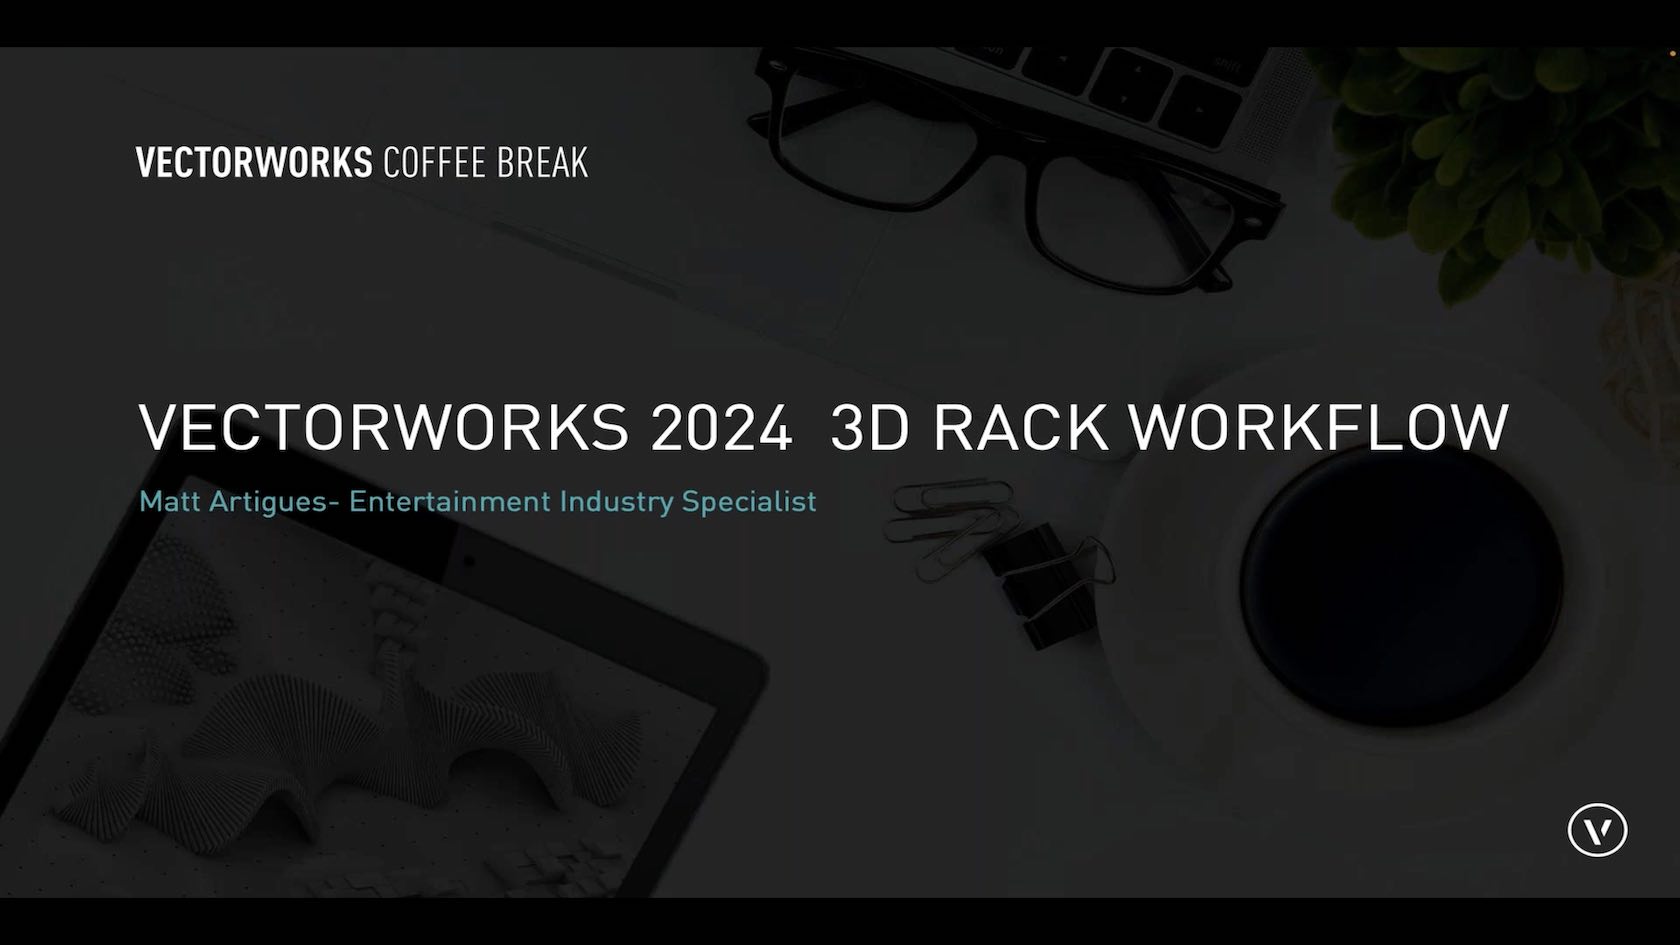
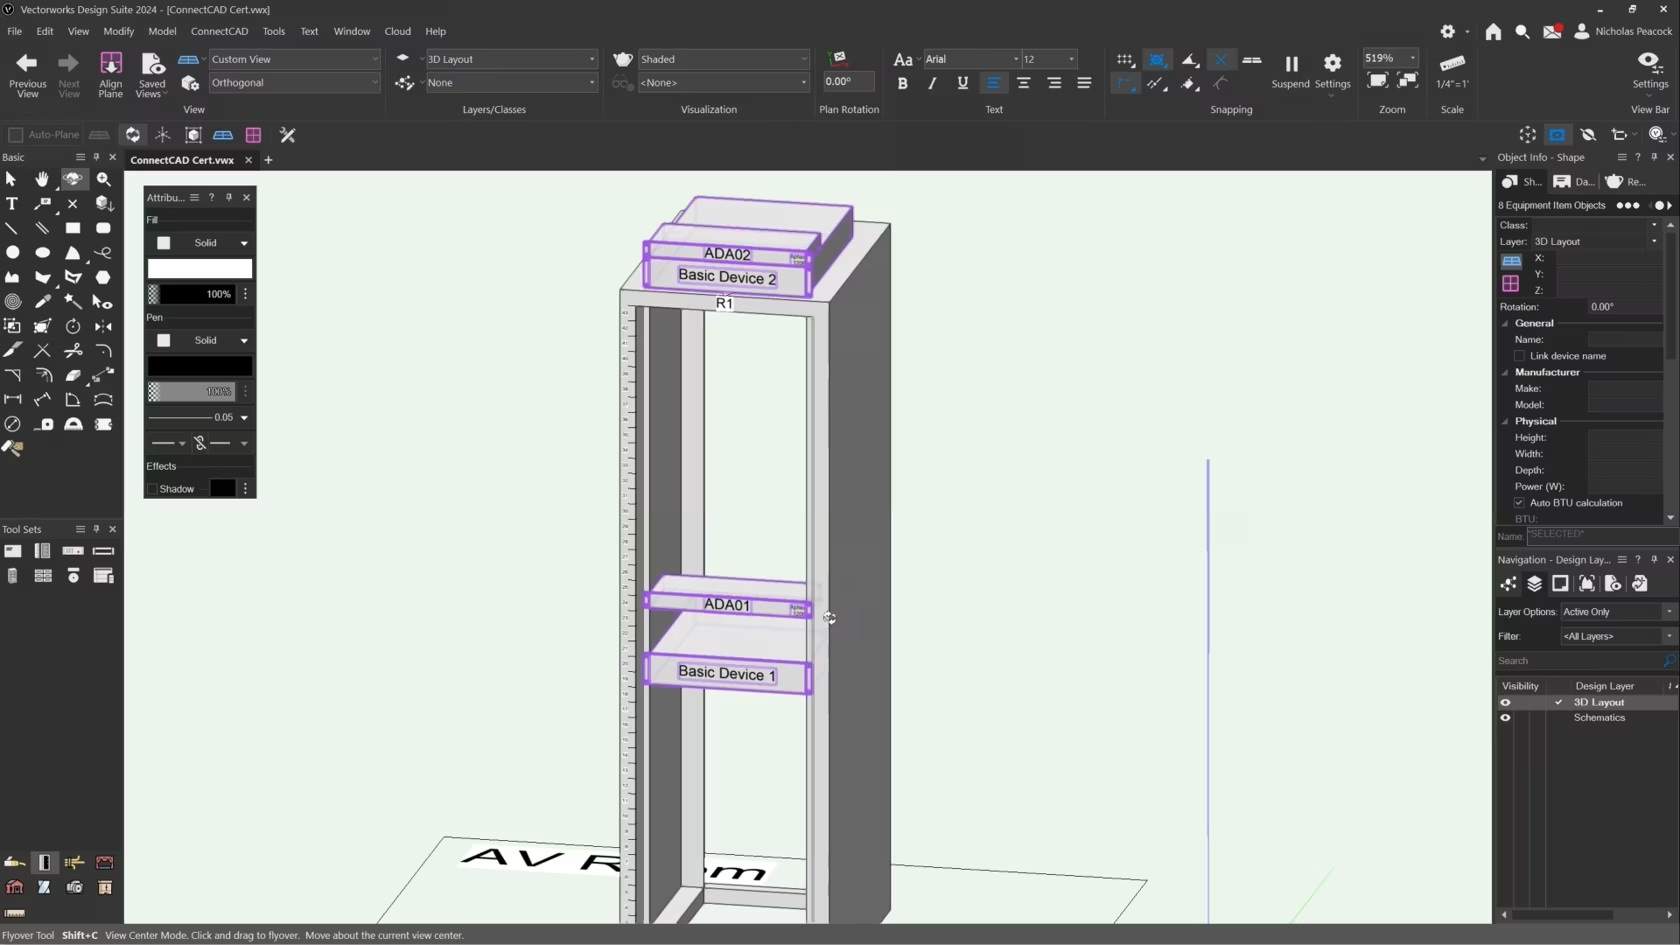
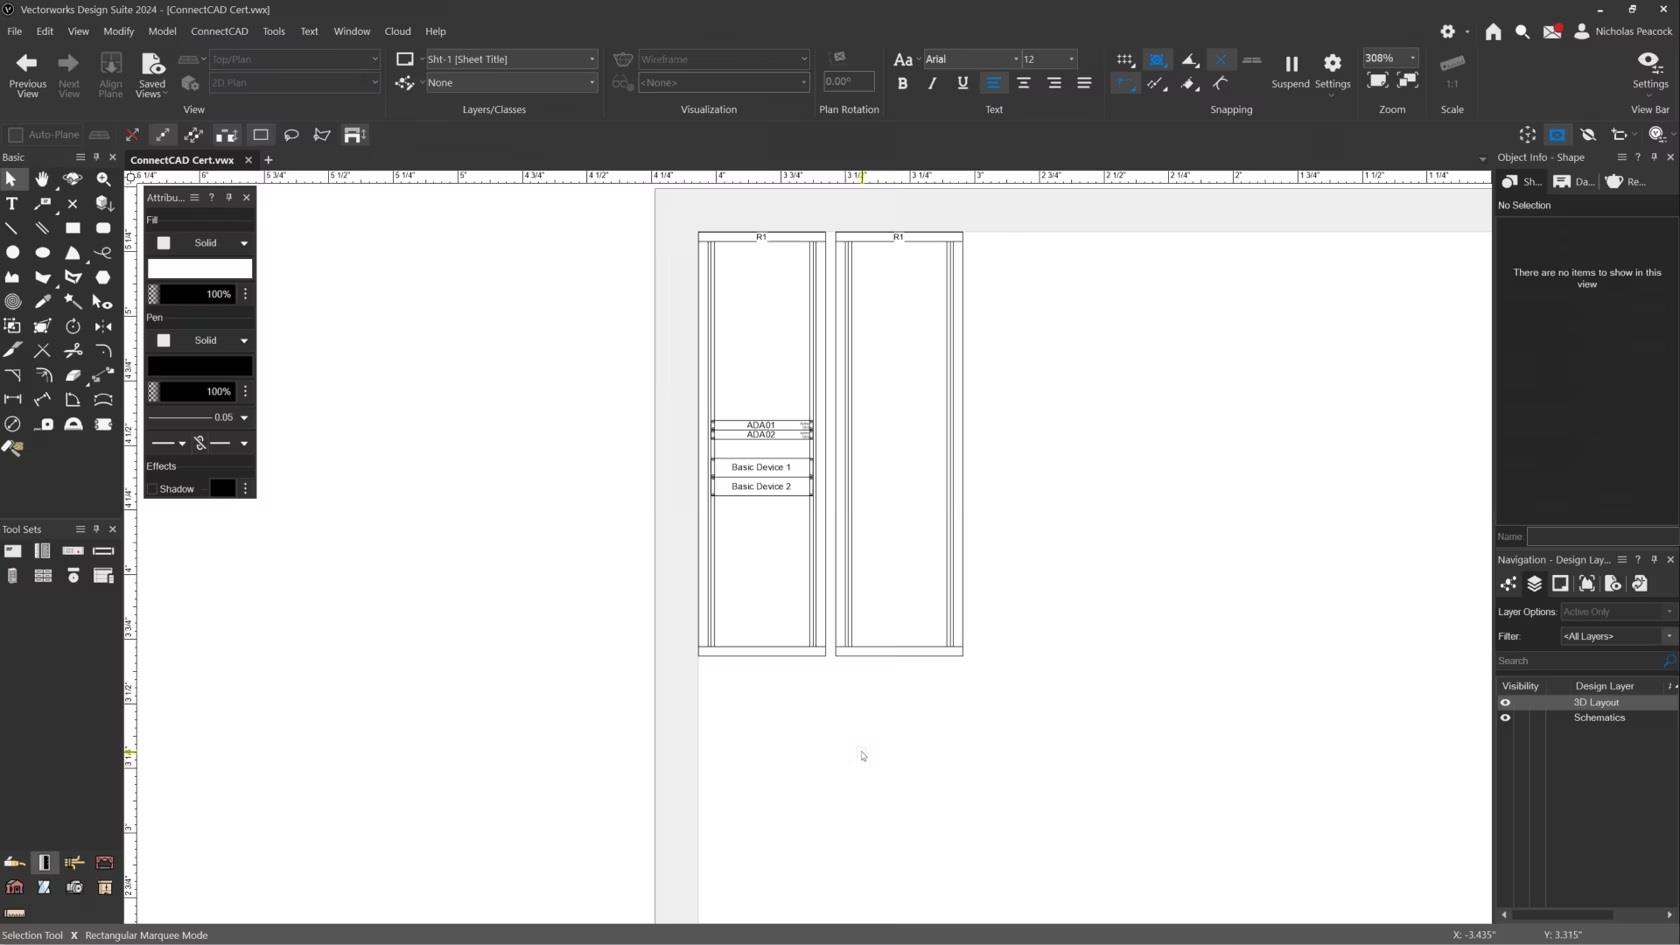
Join Matt Artigues (Entertainment industry Specialist) as he discusses the new 3D Rack Workflow. In the latest version, you can quickly design and edit equipment racks in 3D, and required 2D objects will be created automatically. You'll lessen your workload while creating the views you need, all through a more user-friendly interface.
Category: Live Session
Requires Approval: No
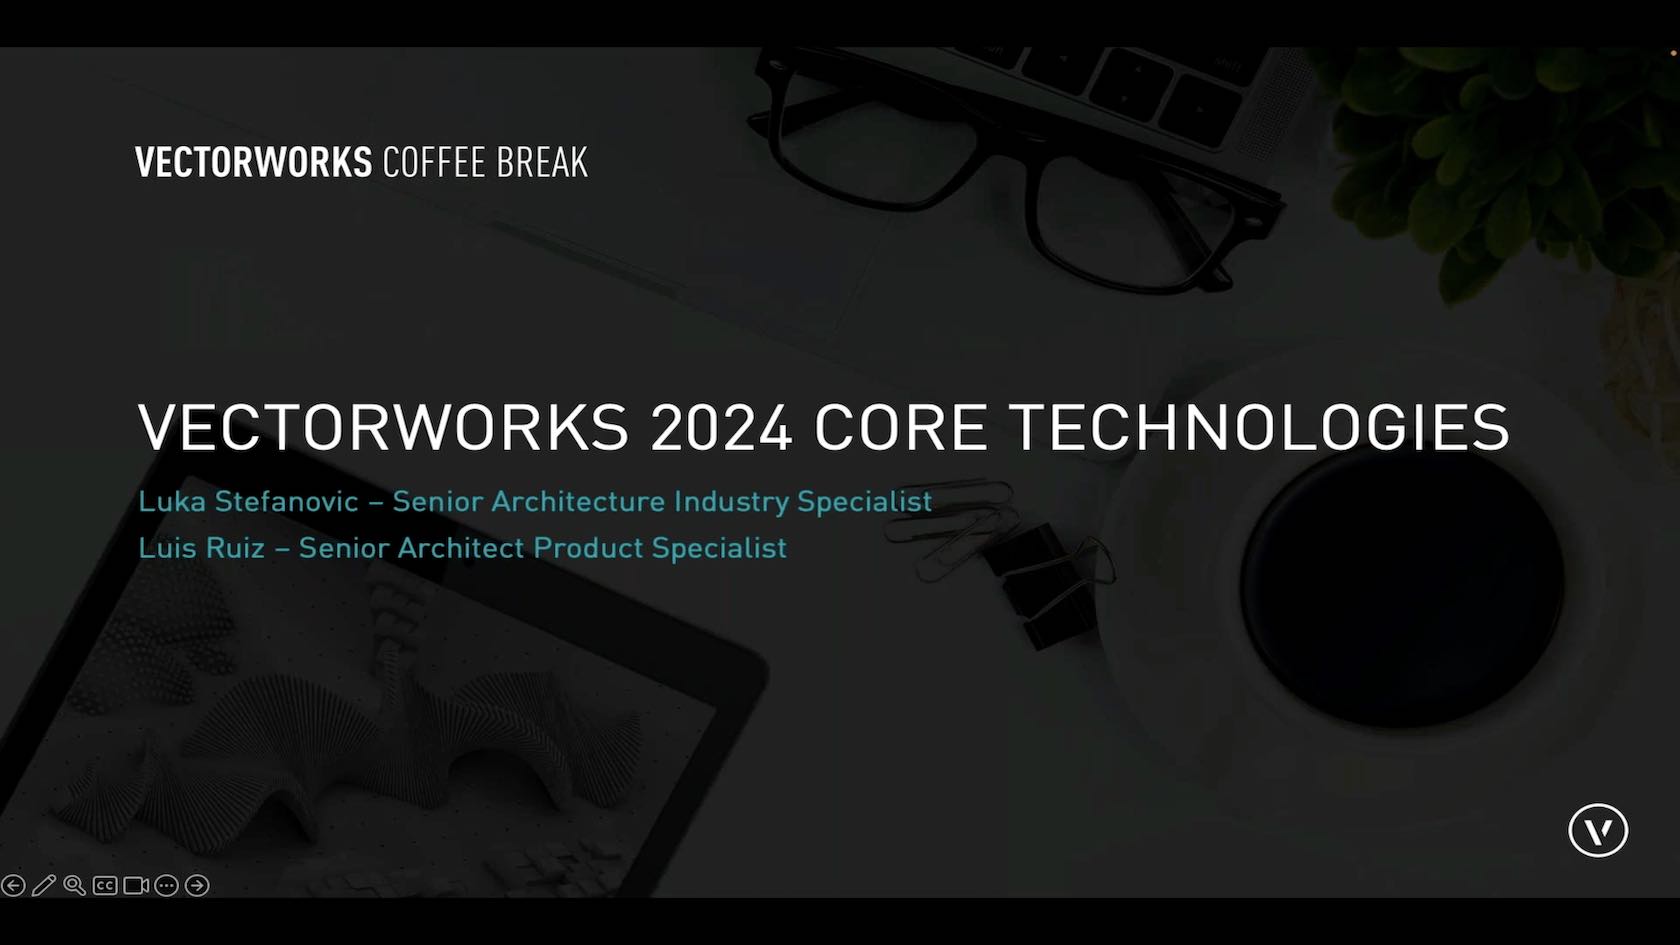
Join Luka Stefanovic and Luis Ruiz ( Senior Architecture Industry Specialist) as they cover multiple new Core Technologies updates in Vectorworks 2024.
Category: Live Session
Requires Approval: No

Join Sarah Barrett, Senior Architecture Industry Specialist as she talks more about our continuous development to enhance customer workflows and improvements to the Graphic Legend tool.
Category: Live Session
Requires Approval: No
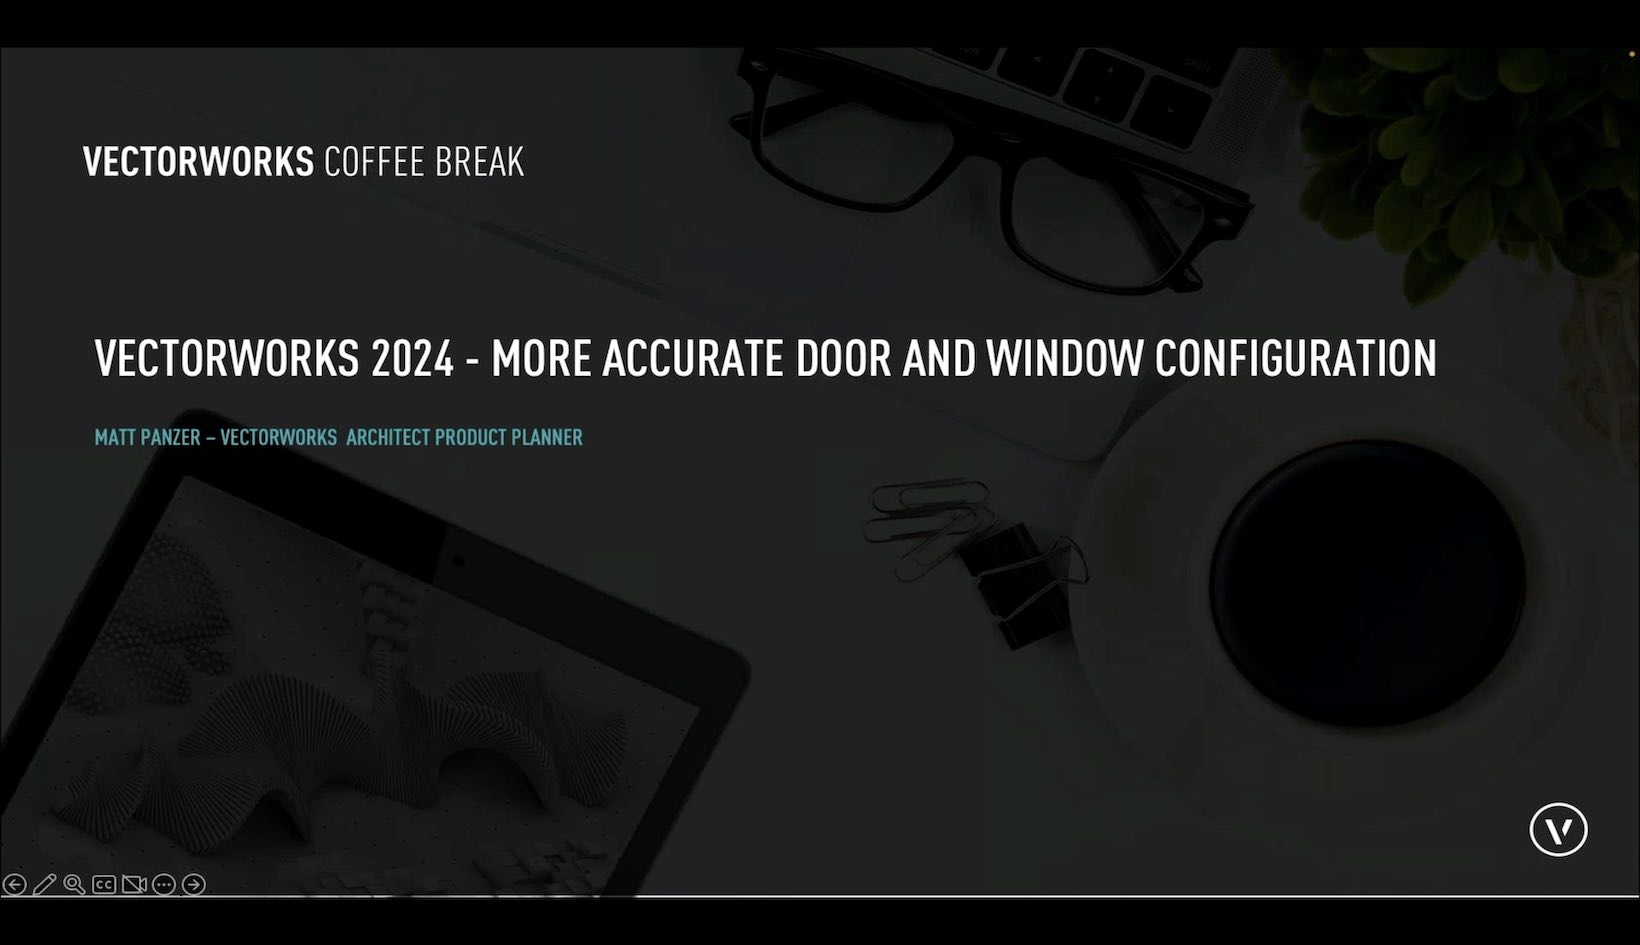
Join Matt Panzer (Architect Product Planner) as he covers improved geometry for thresholds and sills, so they'll better fit with wall closures. You'll also see more options to control interior and exterior conditions, gaps around doors and windows can be controlled for each side of the opening, and door handling has been standardized to allow for more accurate geometry and data that supports industry standards.
Category: Live Session
Requires Approval: No

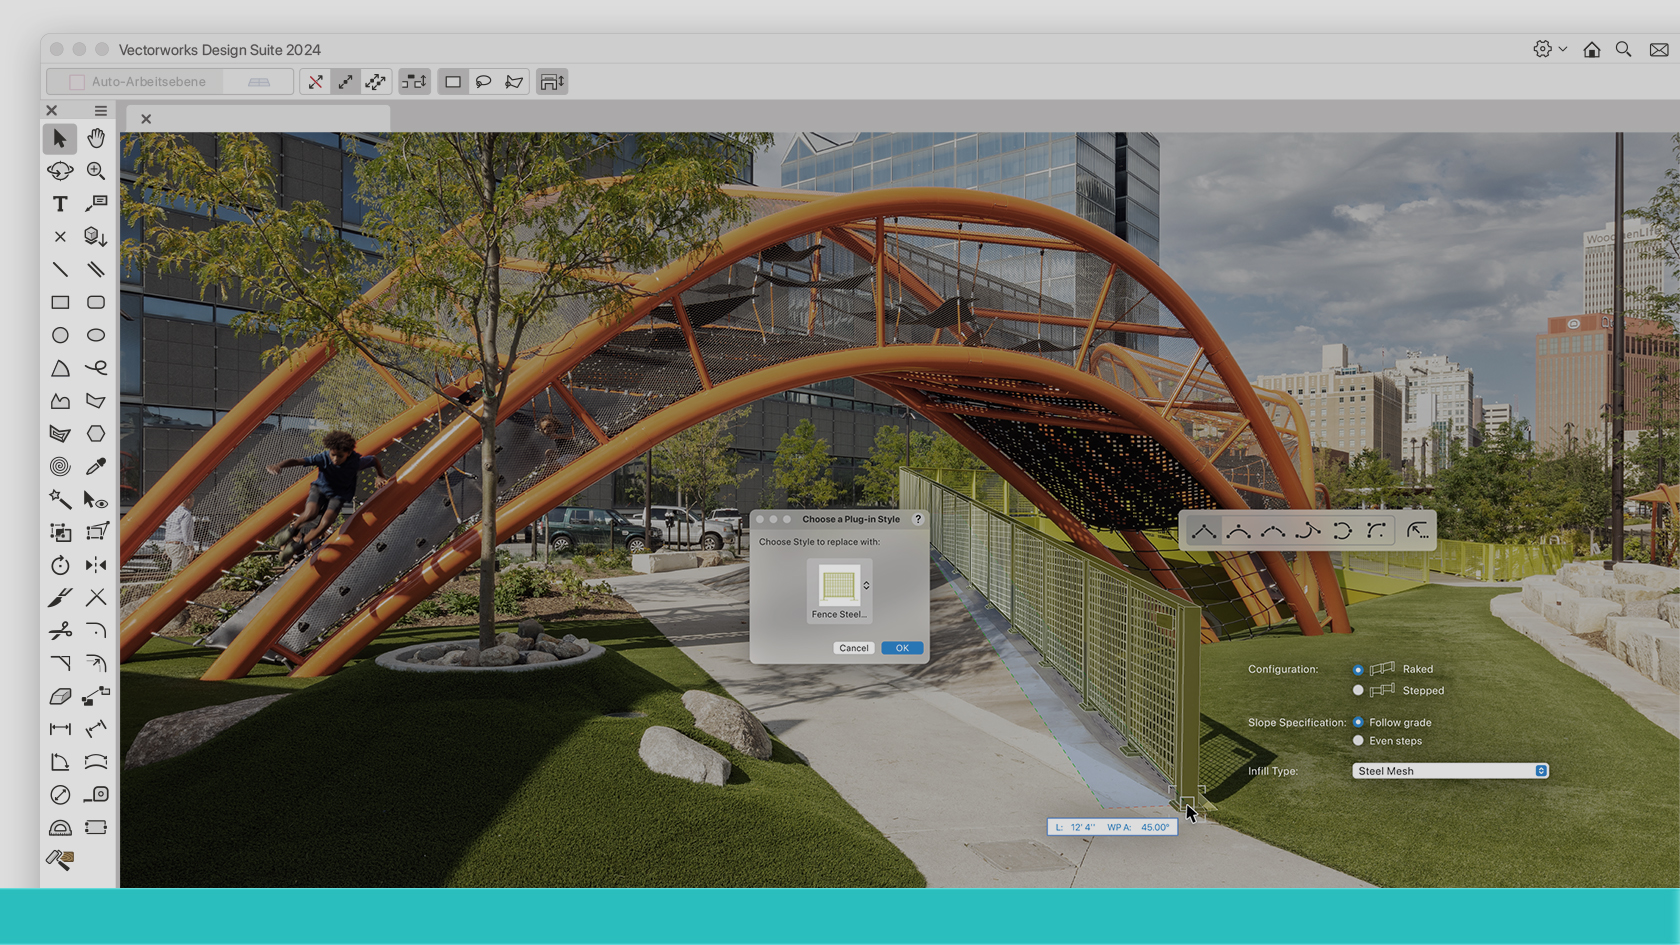
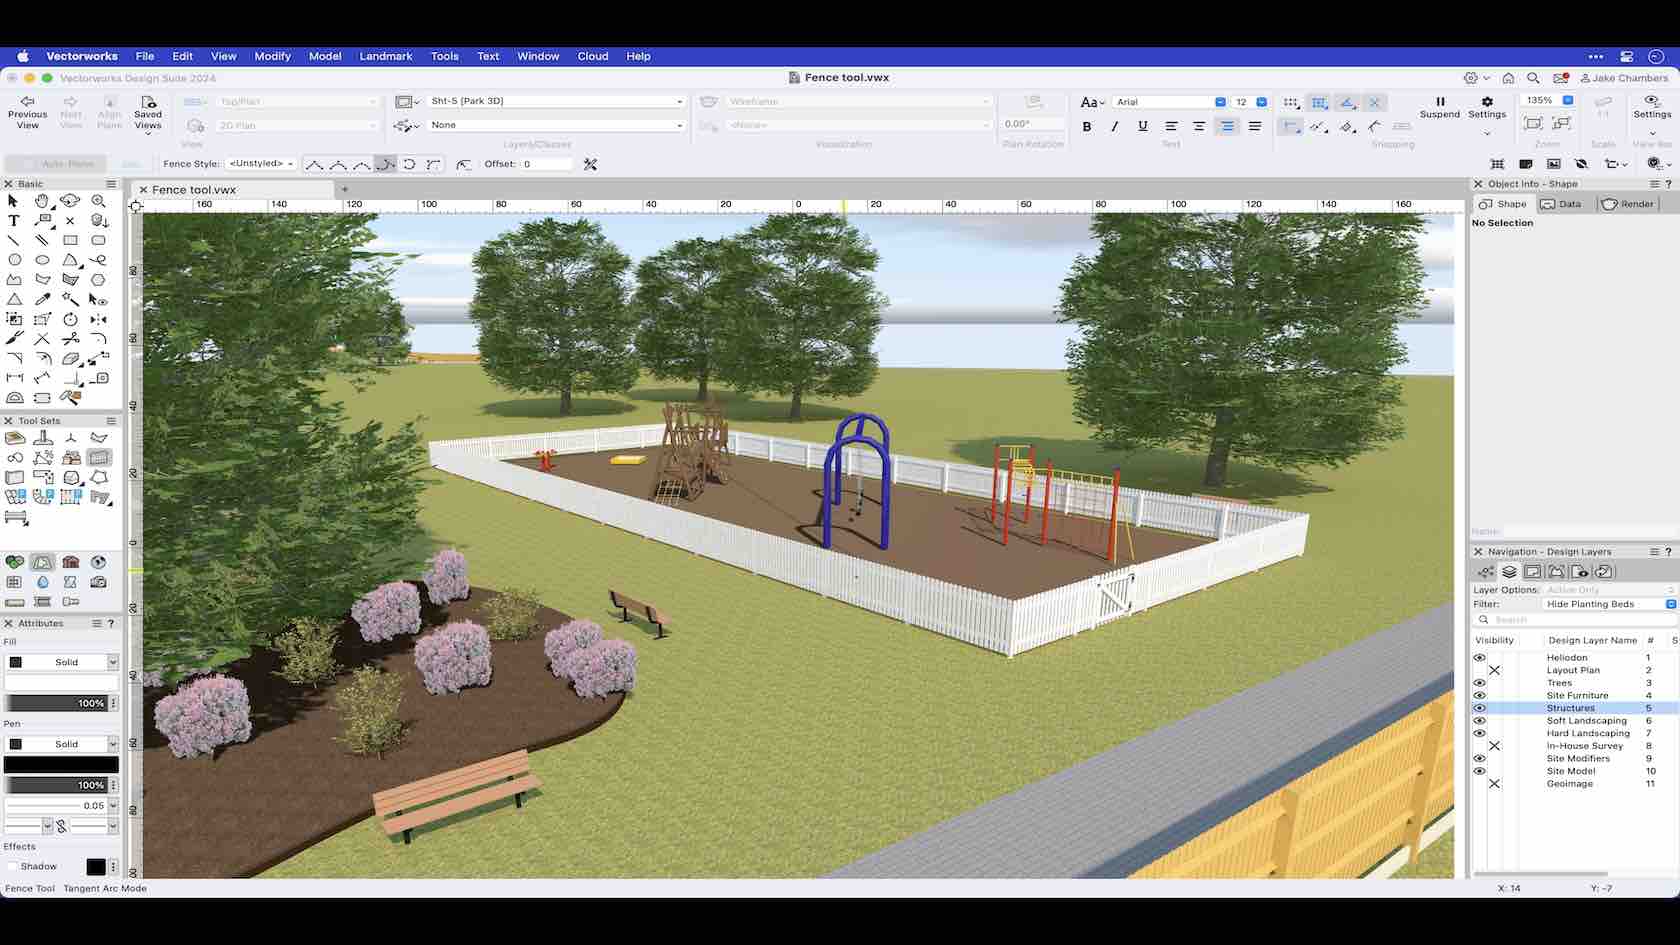
Join Katarina Ollikainen ( Vectorworks Landmark Planner) in discussing the new, automated Fence Tool. Optimized for simplified and detailed representations, the fence tool supports integrated posts, gates and terrain-conforming options like racked or panel/stepped. The Fence tool will save you significant time while designing in 2D and 3D, and also allow for accurate material reporting, reducing the chance for errors in material specifications.
Category: Live Session
Requires Approval: No
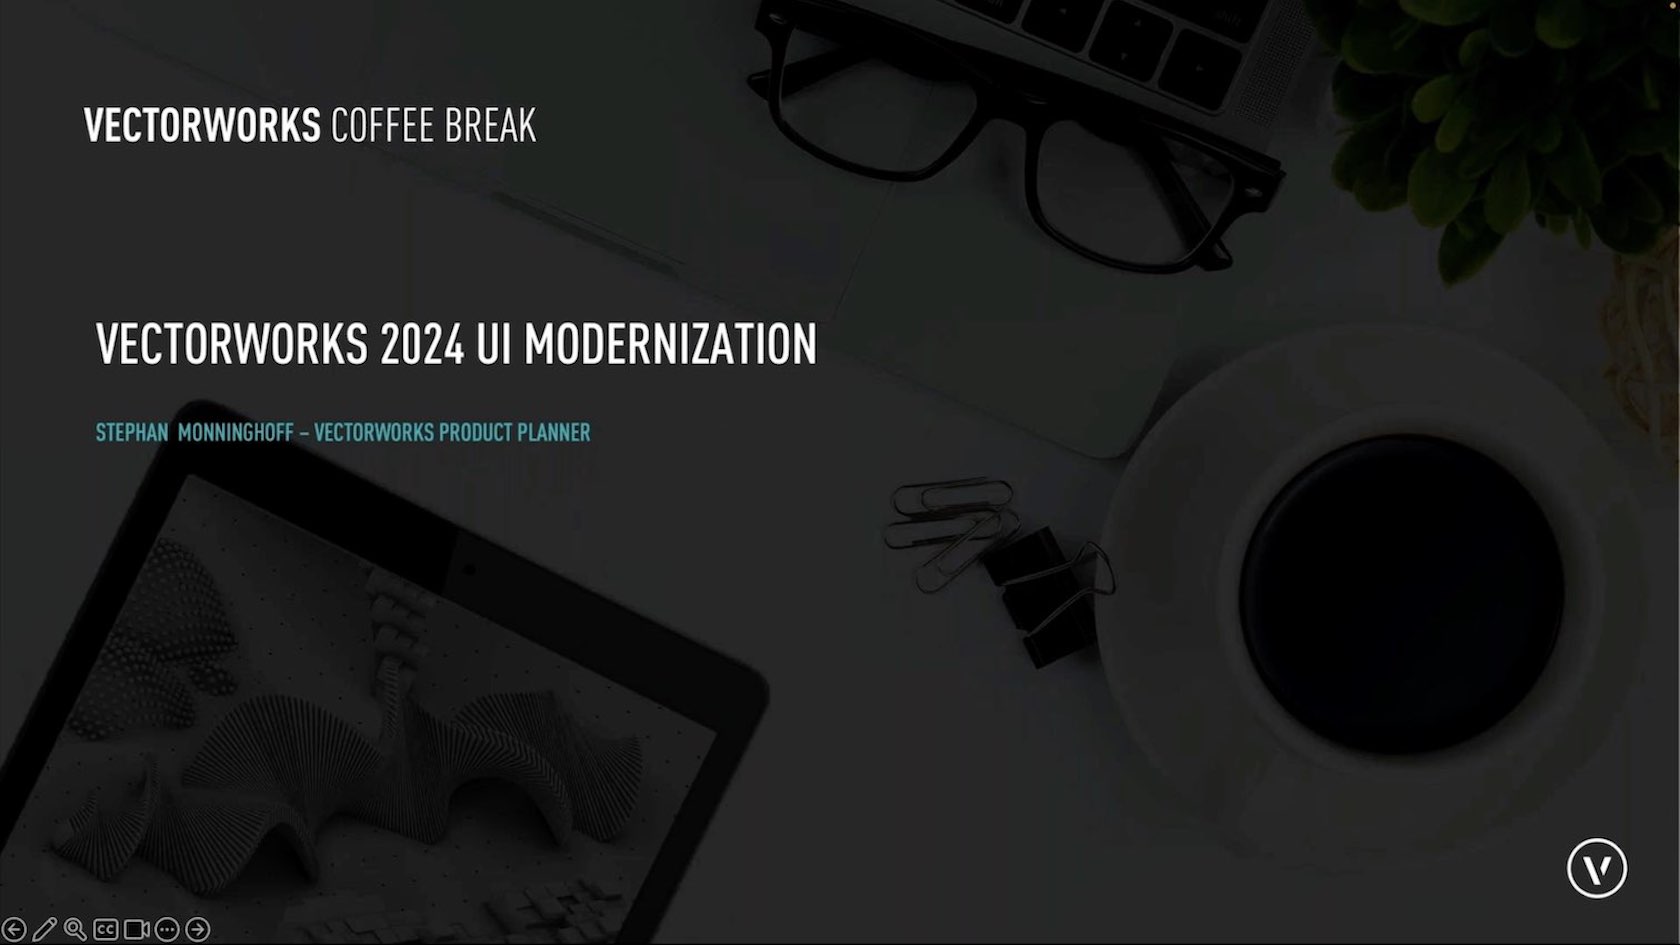
Join Stephan Monninghoof ( Vectorworks Product Planner) as he covers all the updates in the user interface that will make working in Vectorworks more efficient and easier to customize. The reorganized View and Mode bars bring a wide range of tools to the forefront, so you can decide how to organize and have everything you need right where you need it. And for our night owls, Dark Mode is now available on both Windows and Mac.
Category: Live Session
Requires Approval: No

Join Mike Groves, Global Training Manager, as he guides you around Vectorworks University, where you can expand your skills and knowledge of Vectorworks.
Category: Live Session
Requires Approval: No
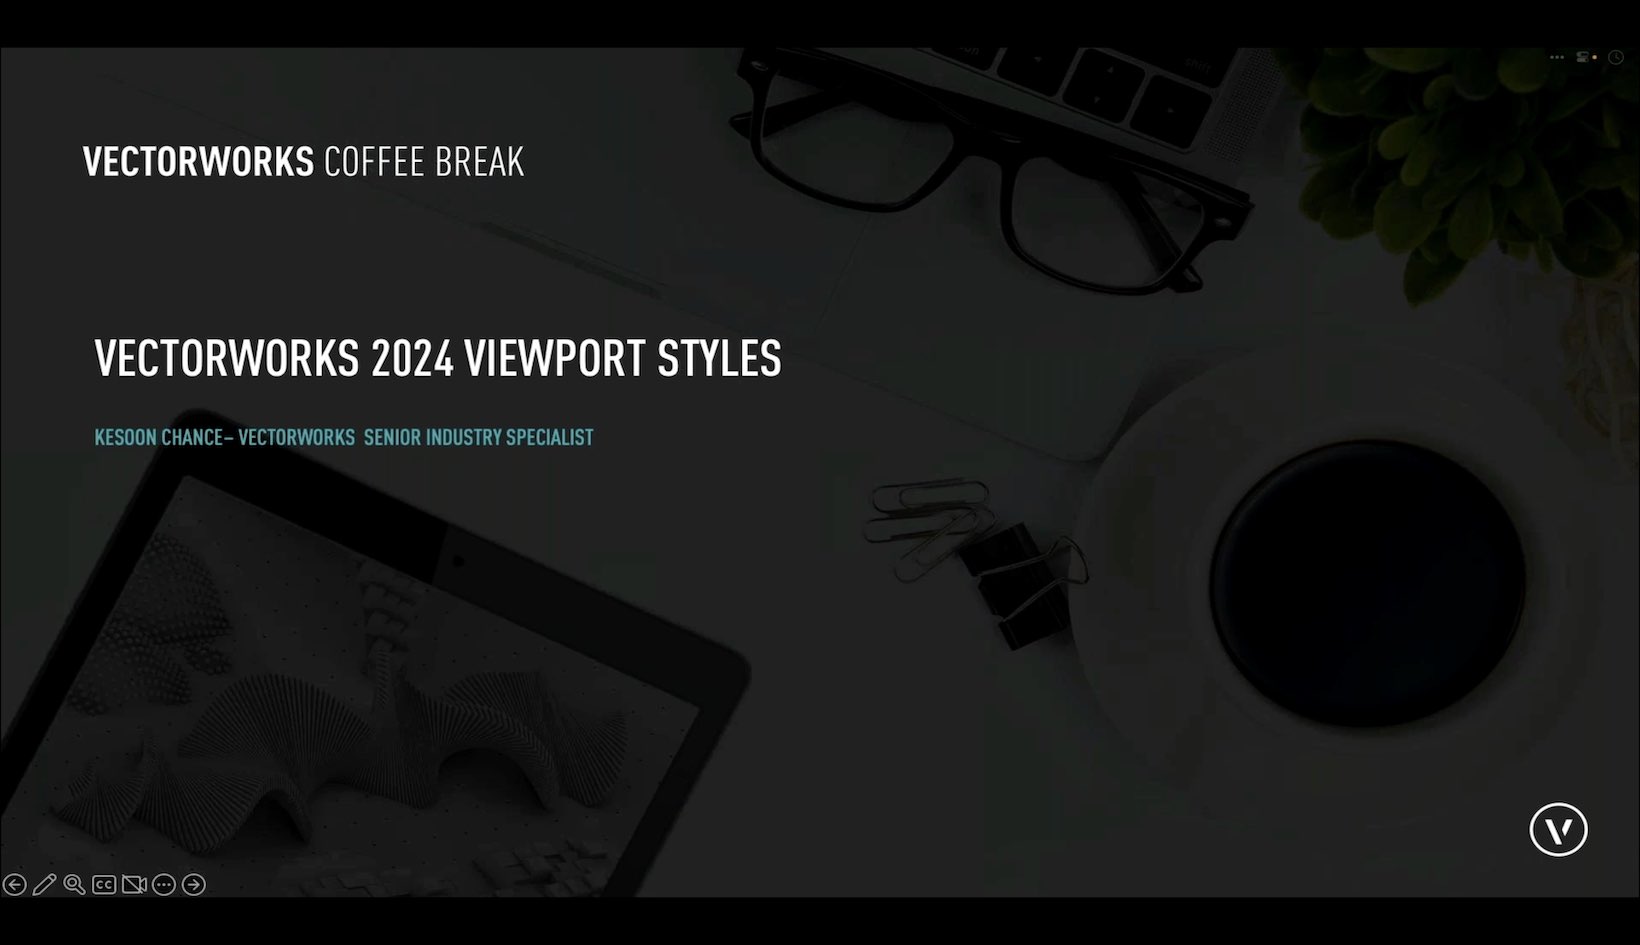
Join Kesoon Chance, Senior Interior Architecture Industry Specialist as she covers the new Viewport Styles feature in Vectorworks 2024.
Category: Live Session
Requires Approval: No
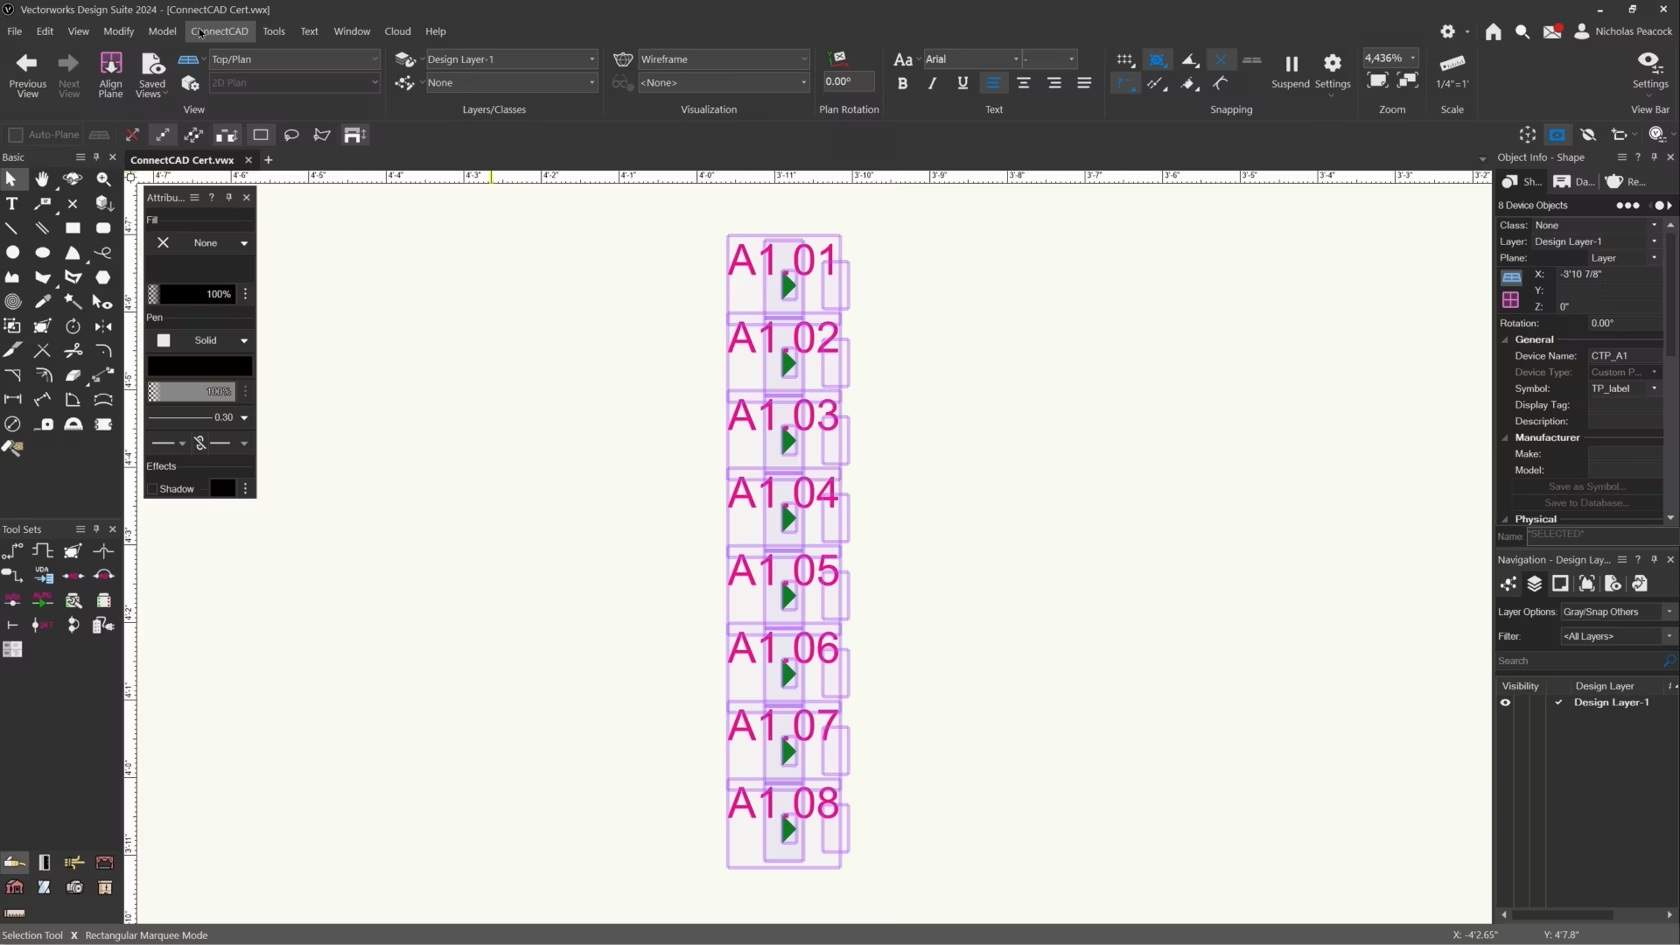
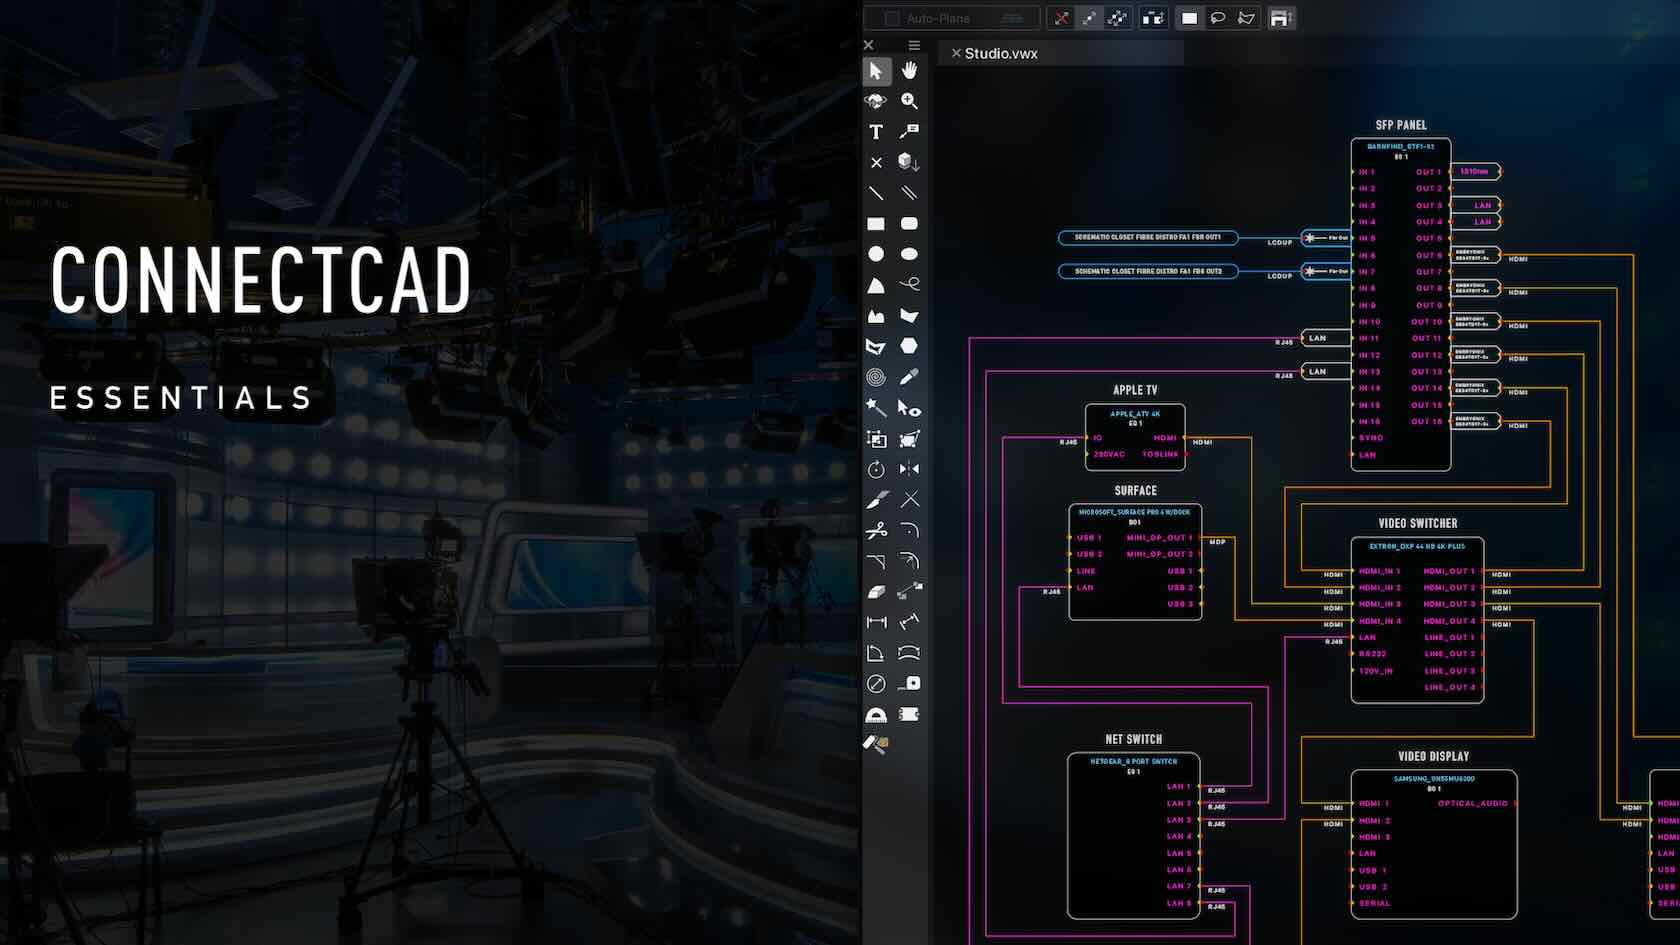
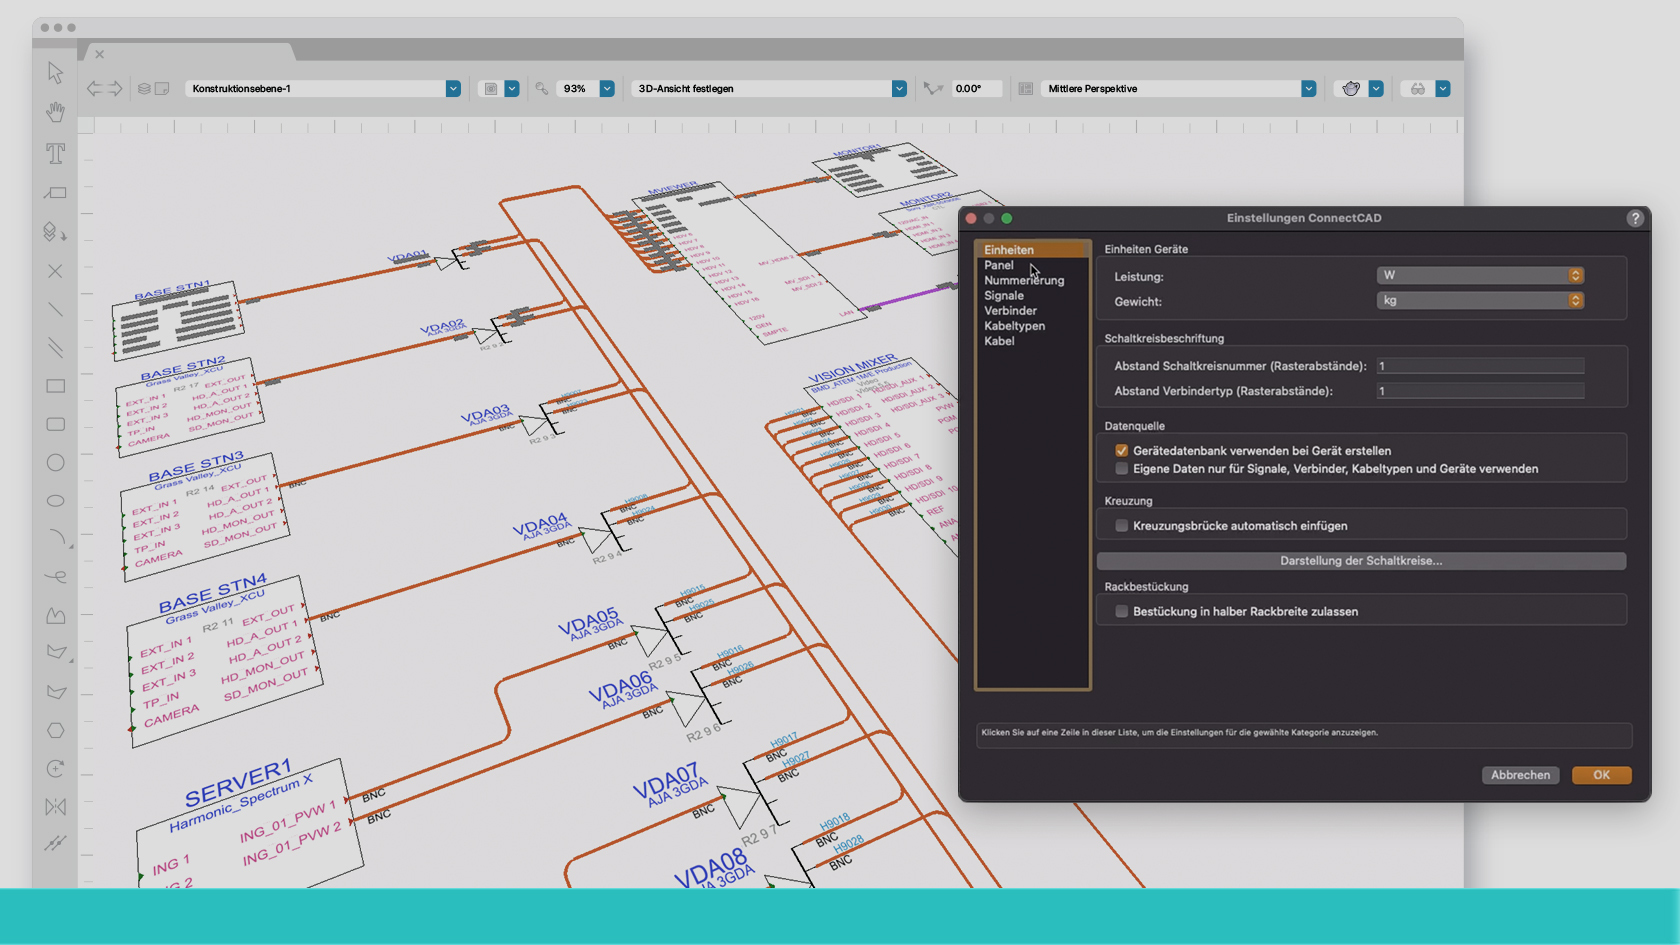
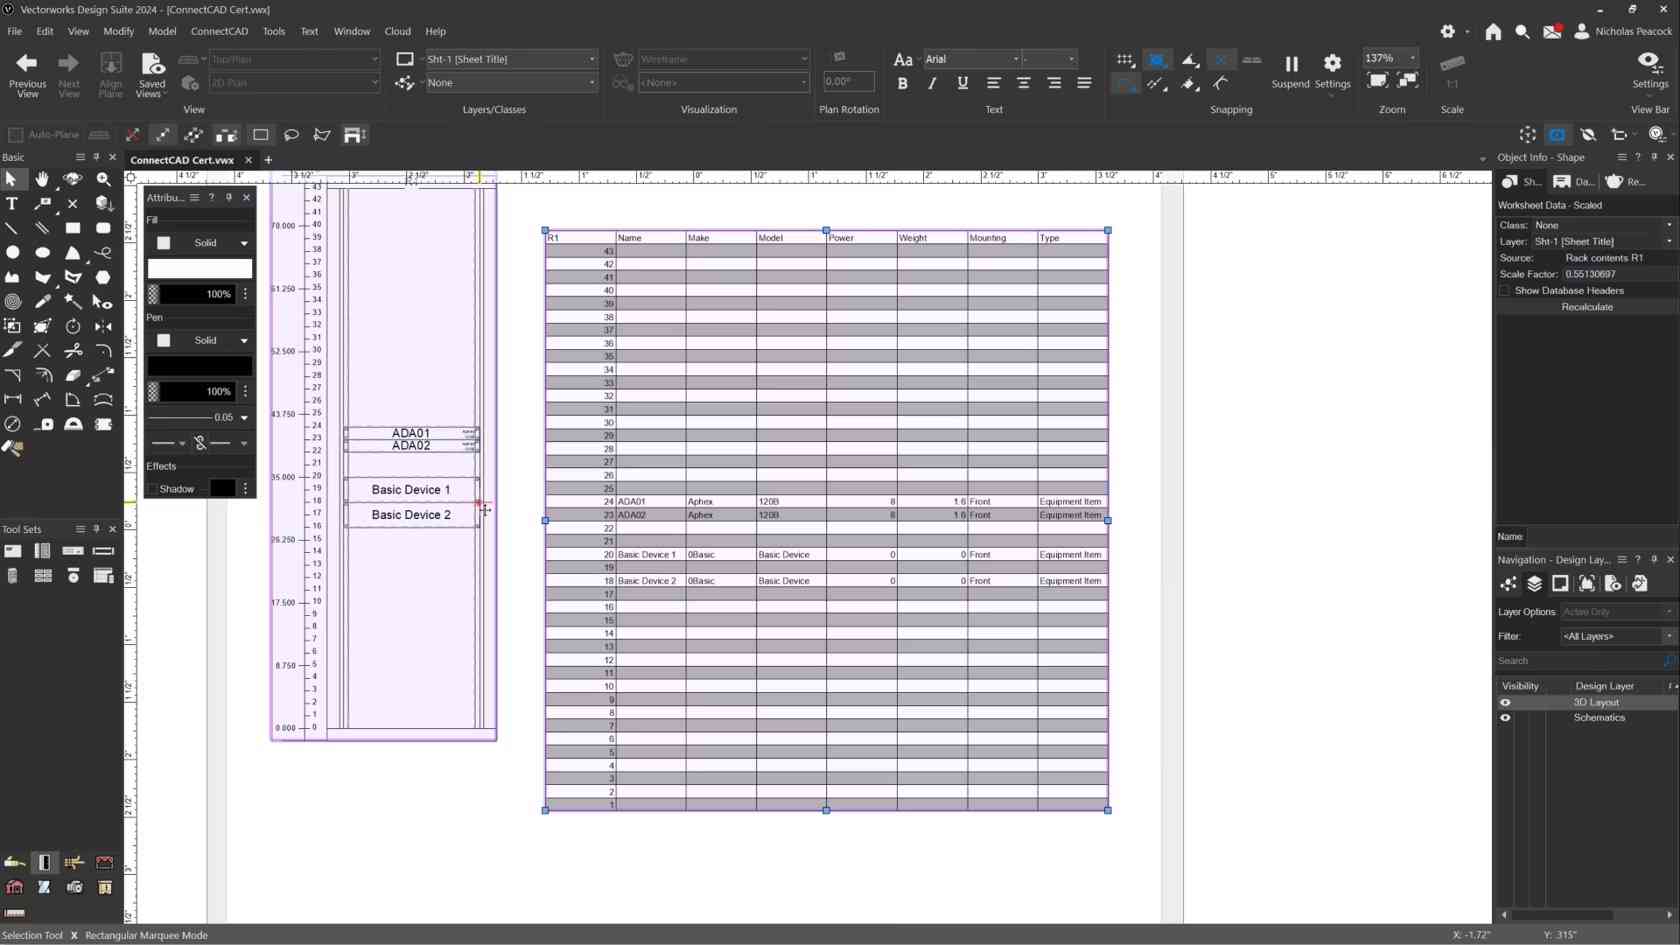
ConnectCAD
stands as an indispensable tool for systems integrators, serving as the
backbone of seamless integration projects. With its intuitive interface
and robust functionalities, ConnectCAD empowers integrators to plan and
execute complex systems meticulously and with unparalleled precision.
Join us as we delve into the advantages and triumphs of Update 4 for
Vectorworks 2024. Discover the enhanced capabilities of Schematic Tools,
the newfound flexibility in renumbering ConnectCAD items, and the
transformative changes to Layout tools, promising a significant boost in
workflow speed and connectivity.
Category: Live Session
Requires Approval: No
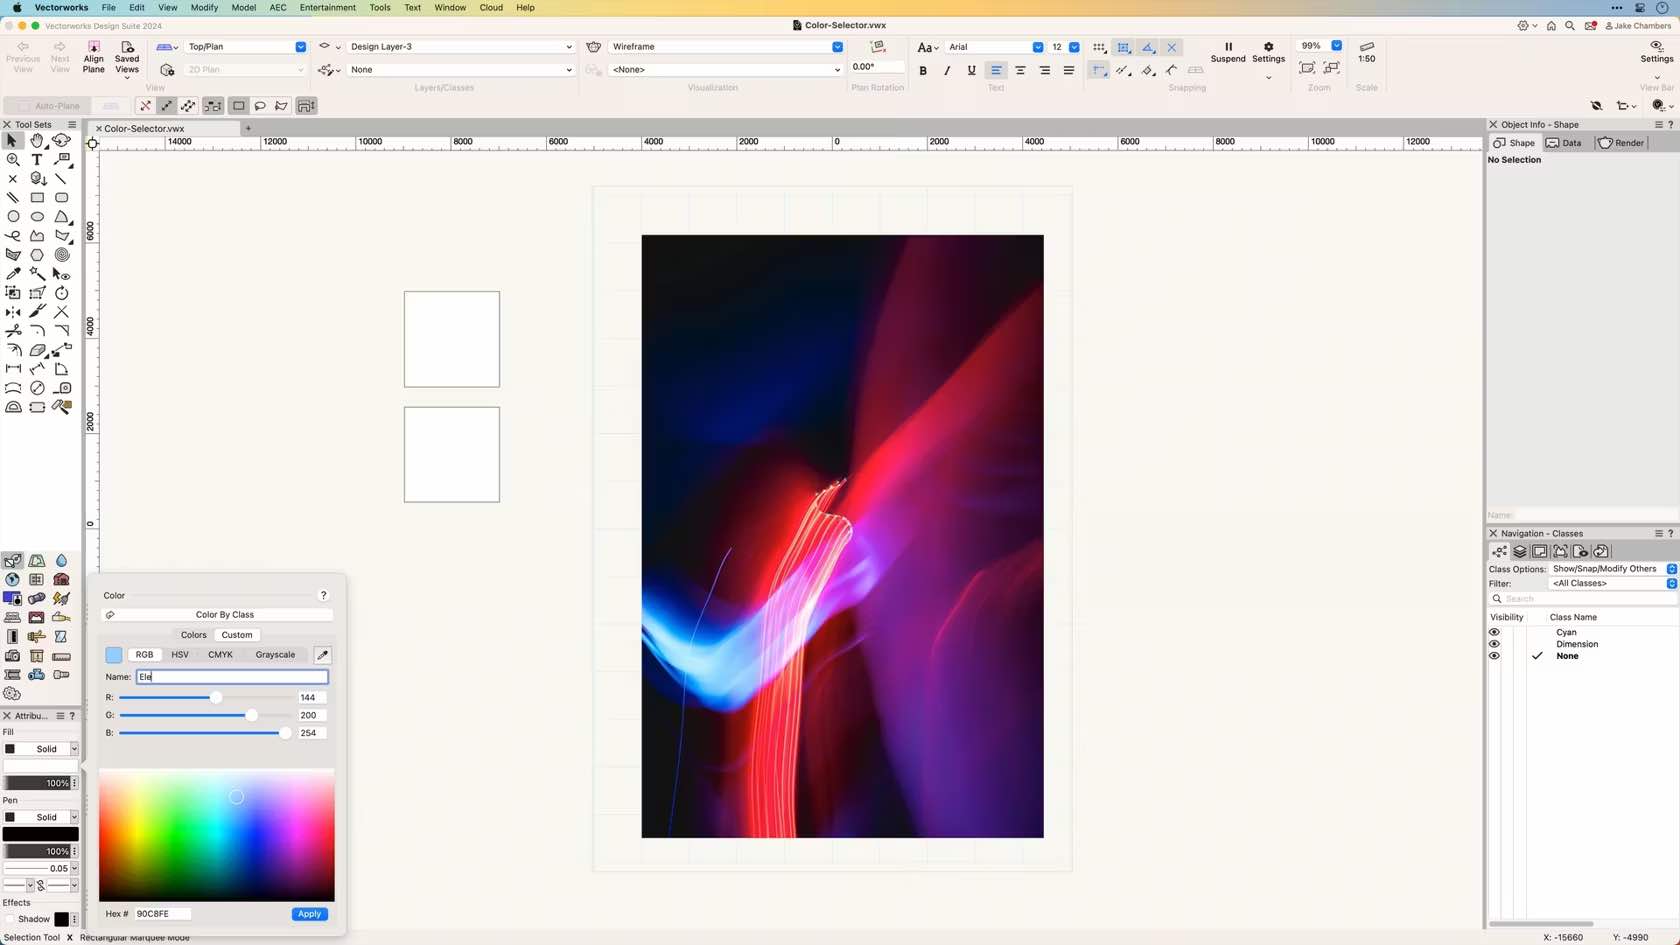
This course demonstrates how to select and apply colors to objects and navigate the Color Selector in the Attributes palette.
Category: Skill
Requires Approval: No
In this video, we will cover the basics of the Combine/Split Panels Commands.
Category: (2024) Skill
Requires Approval: No
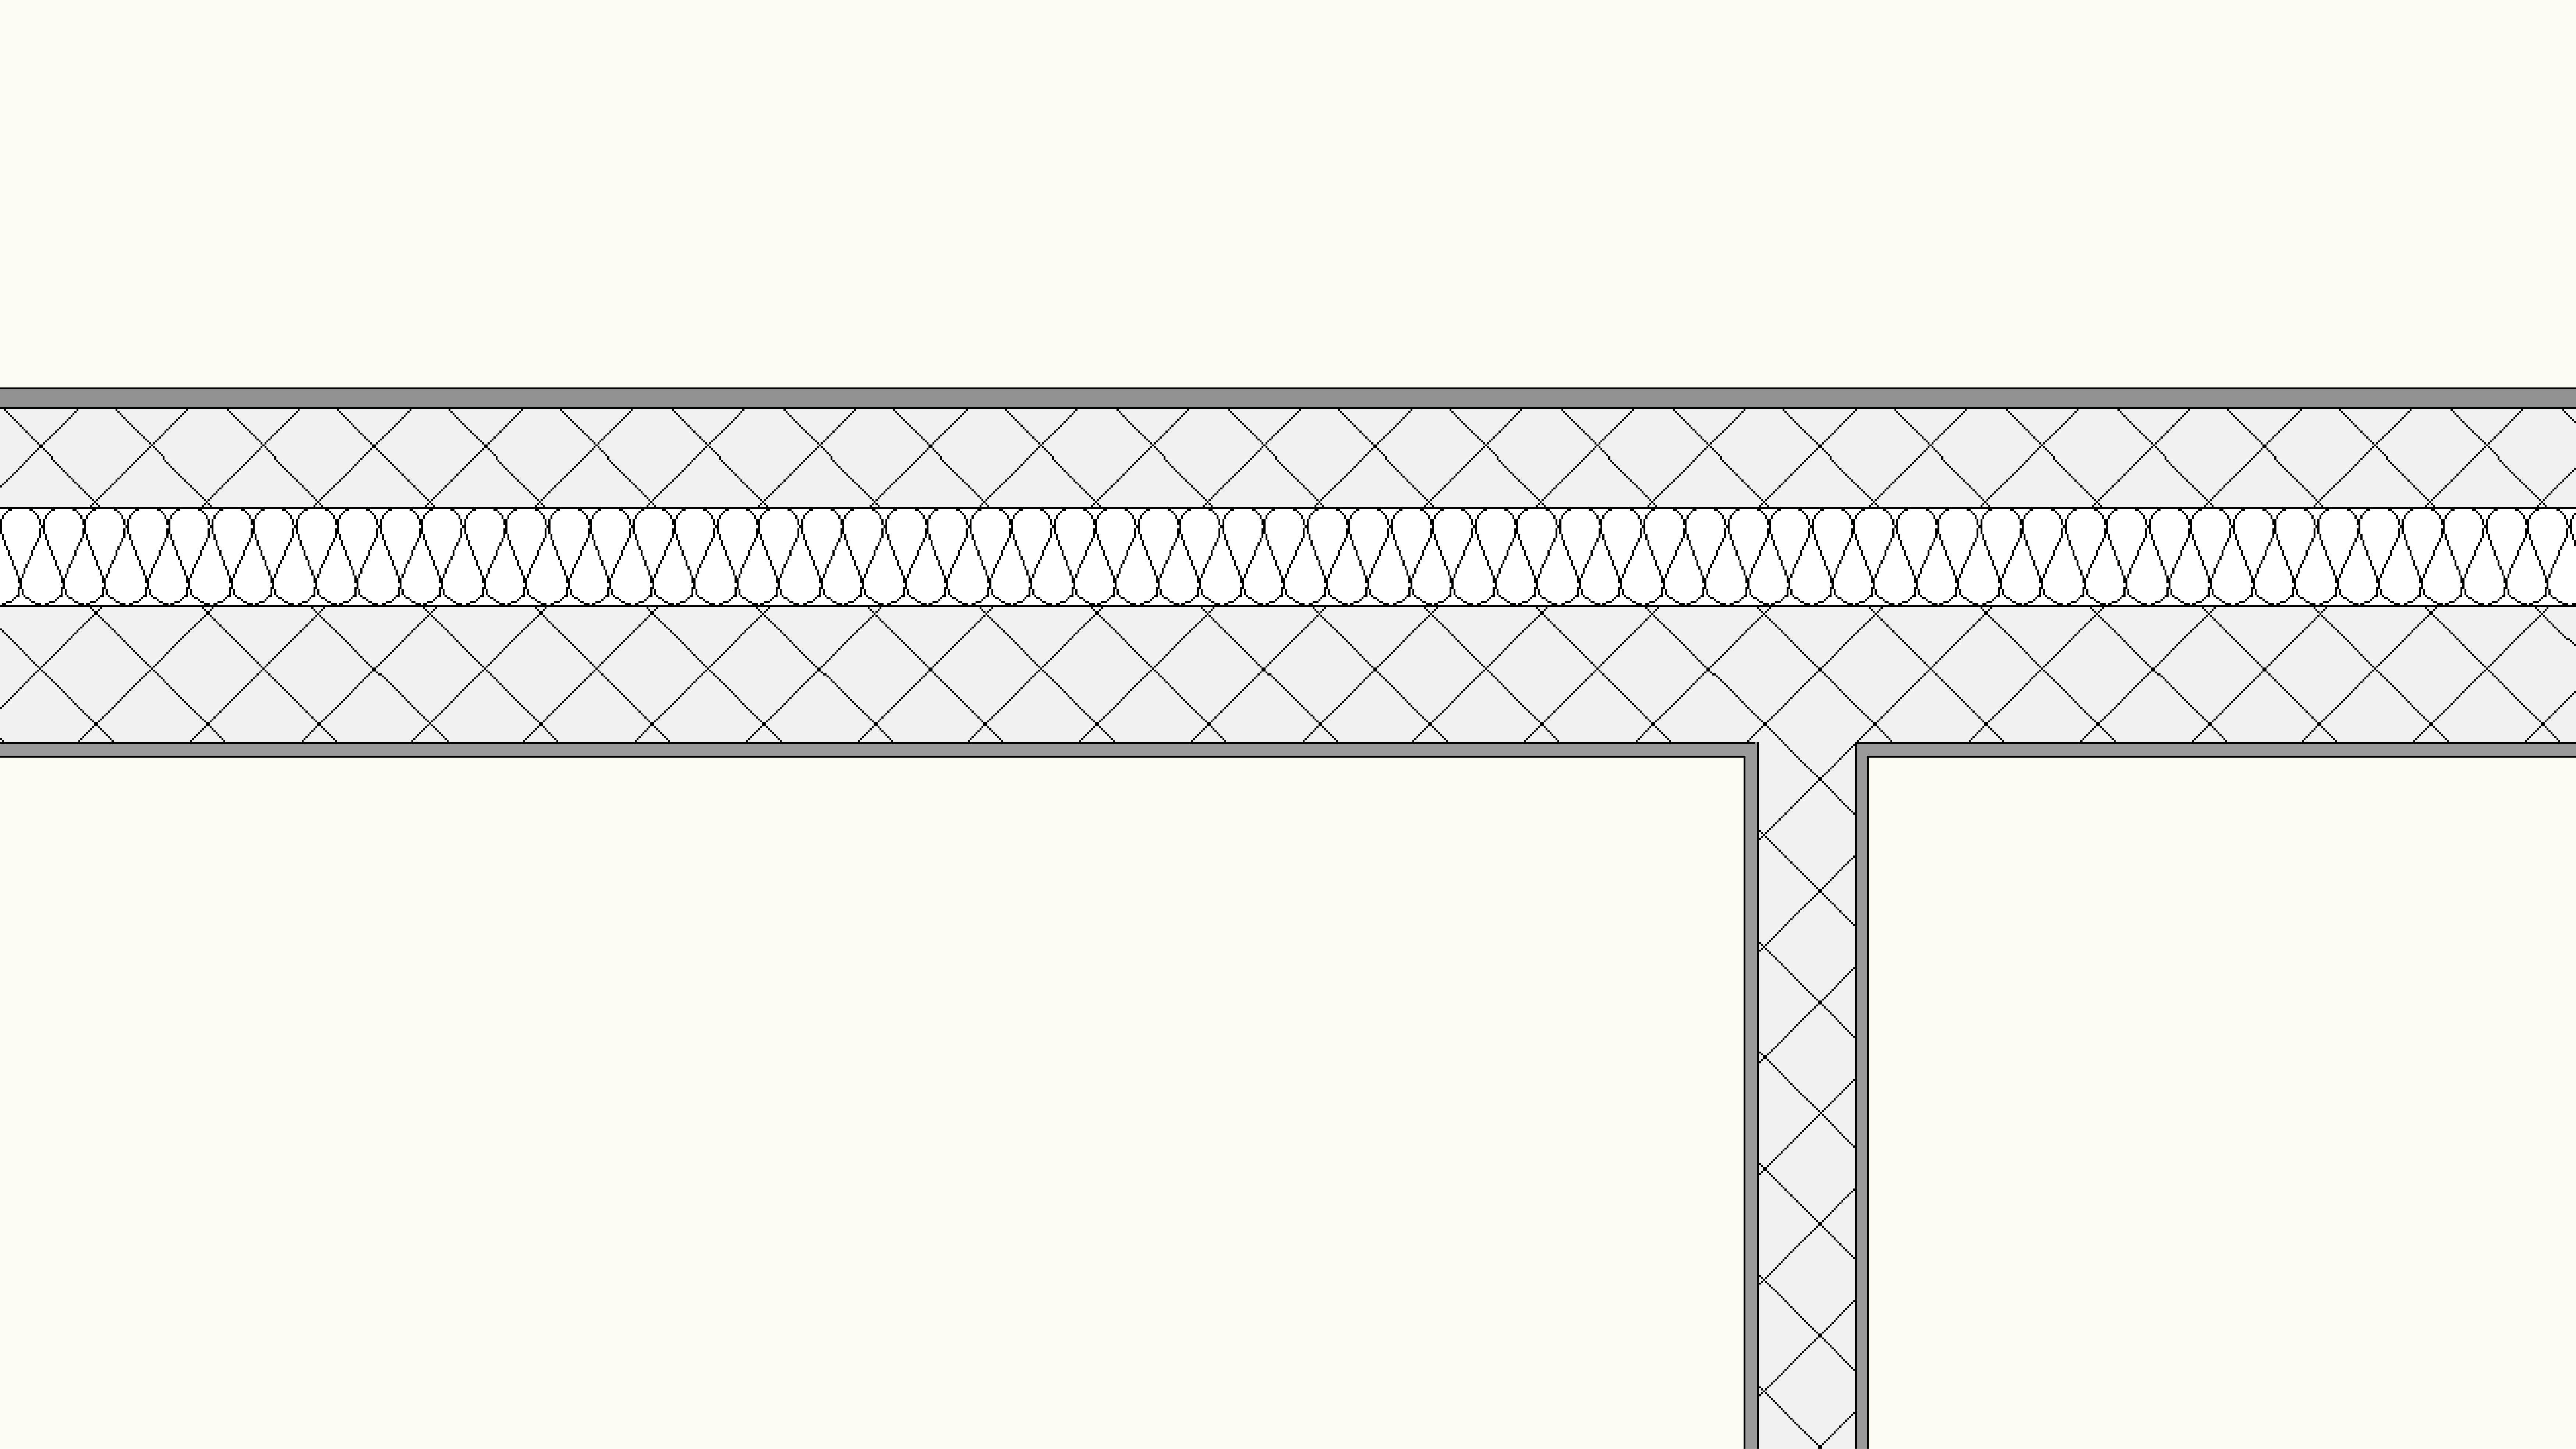
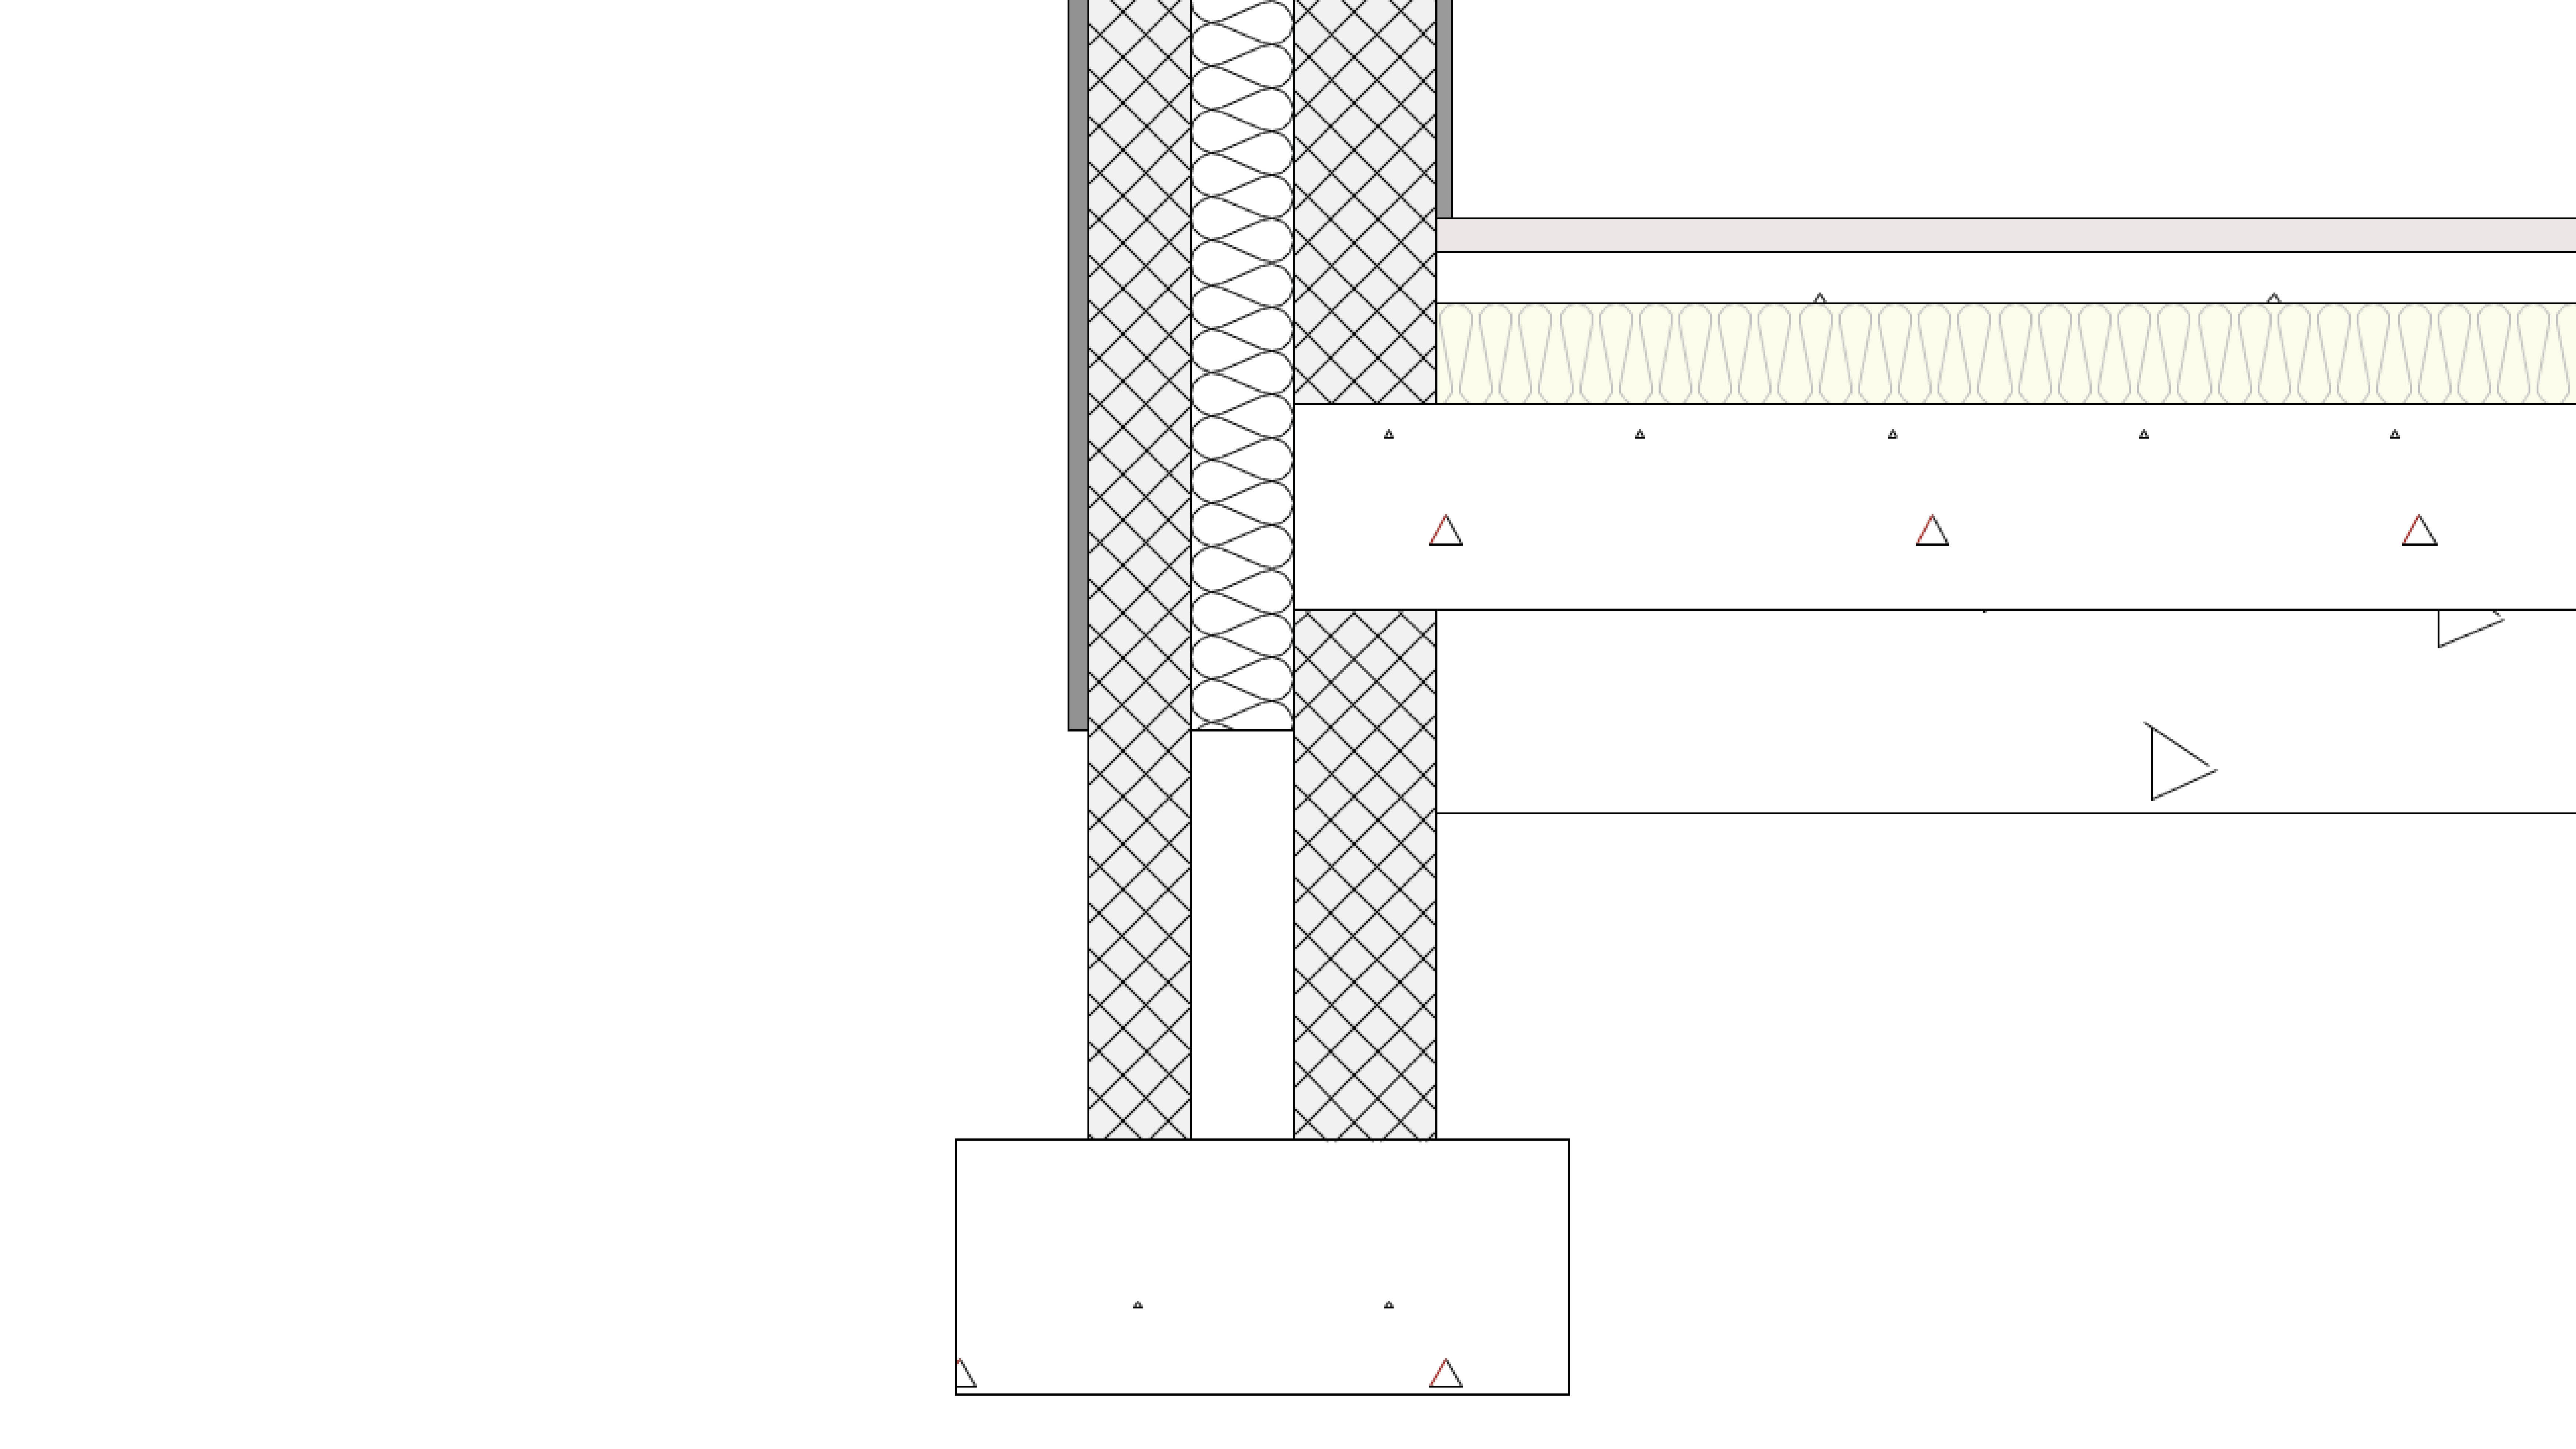
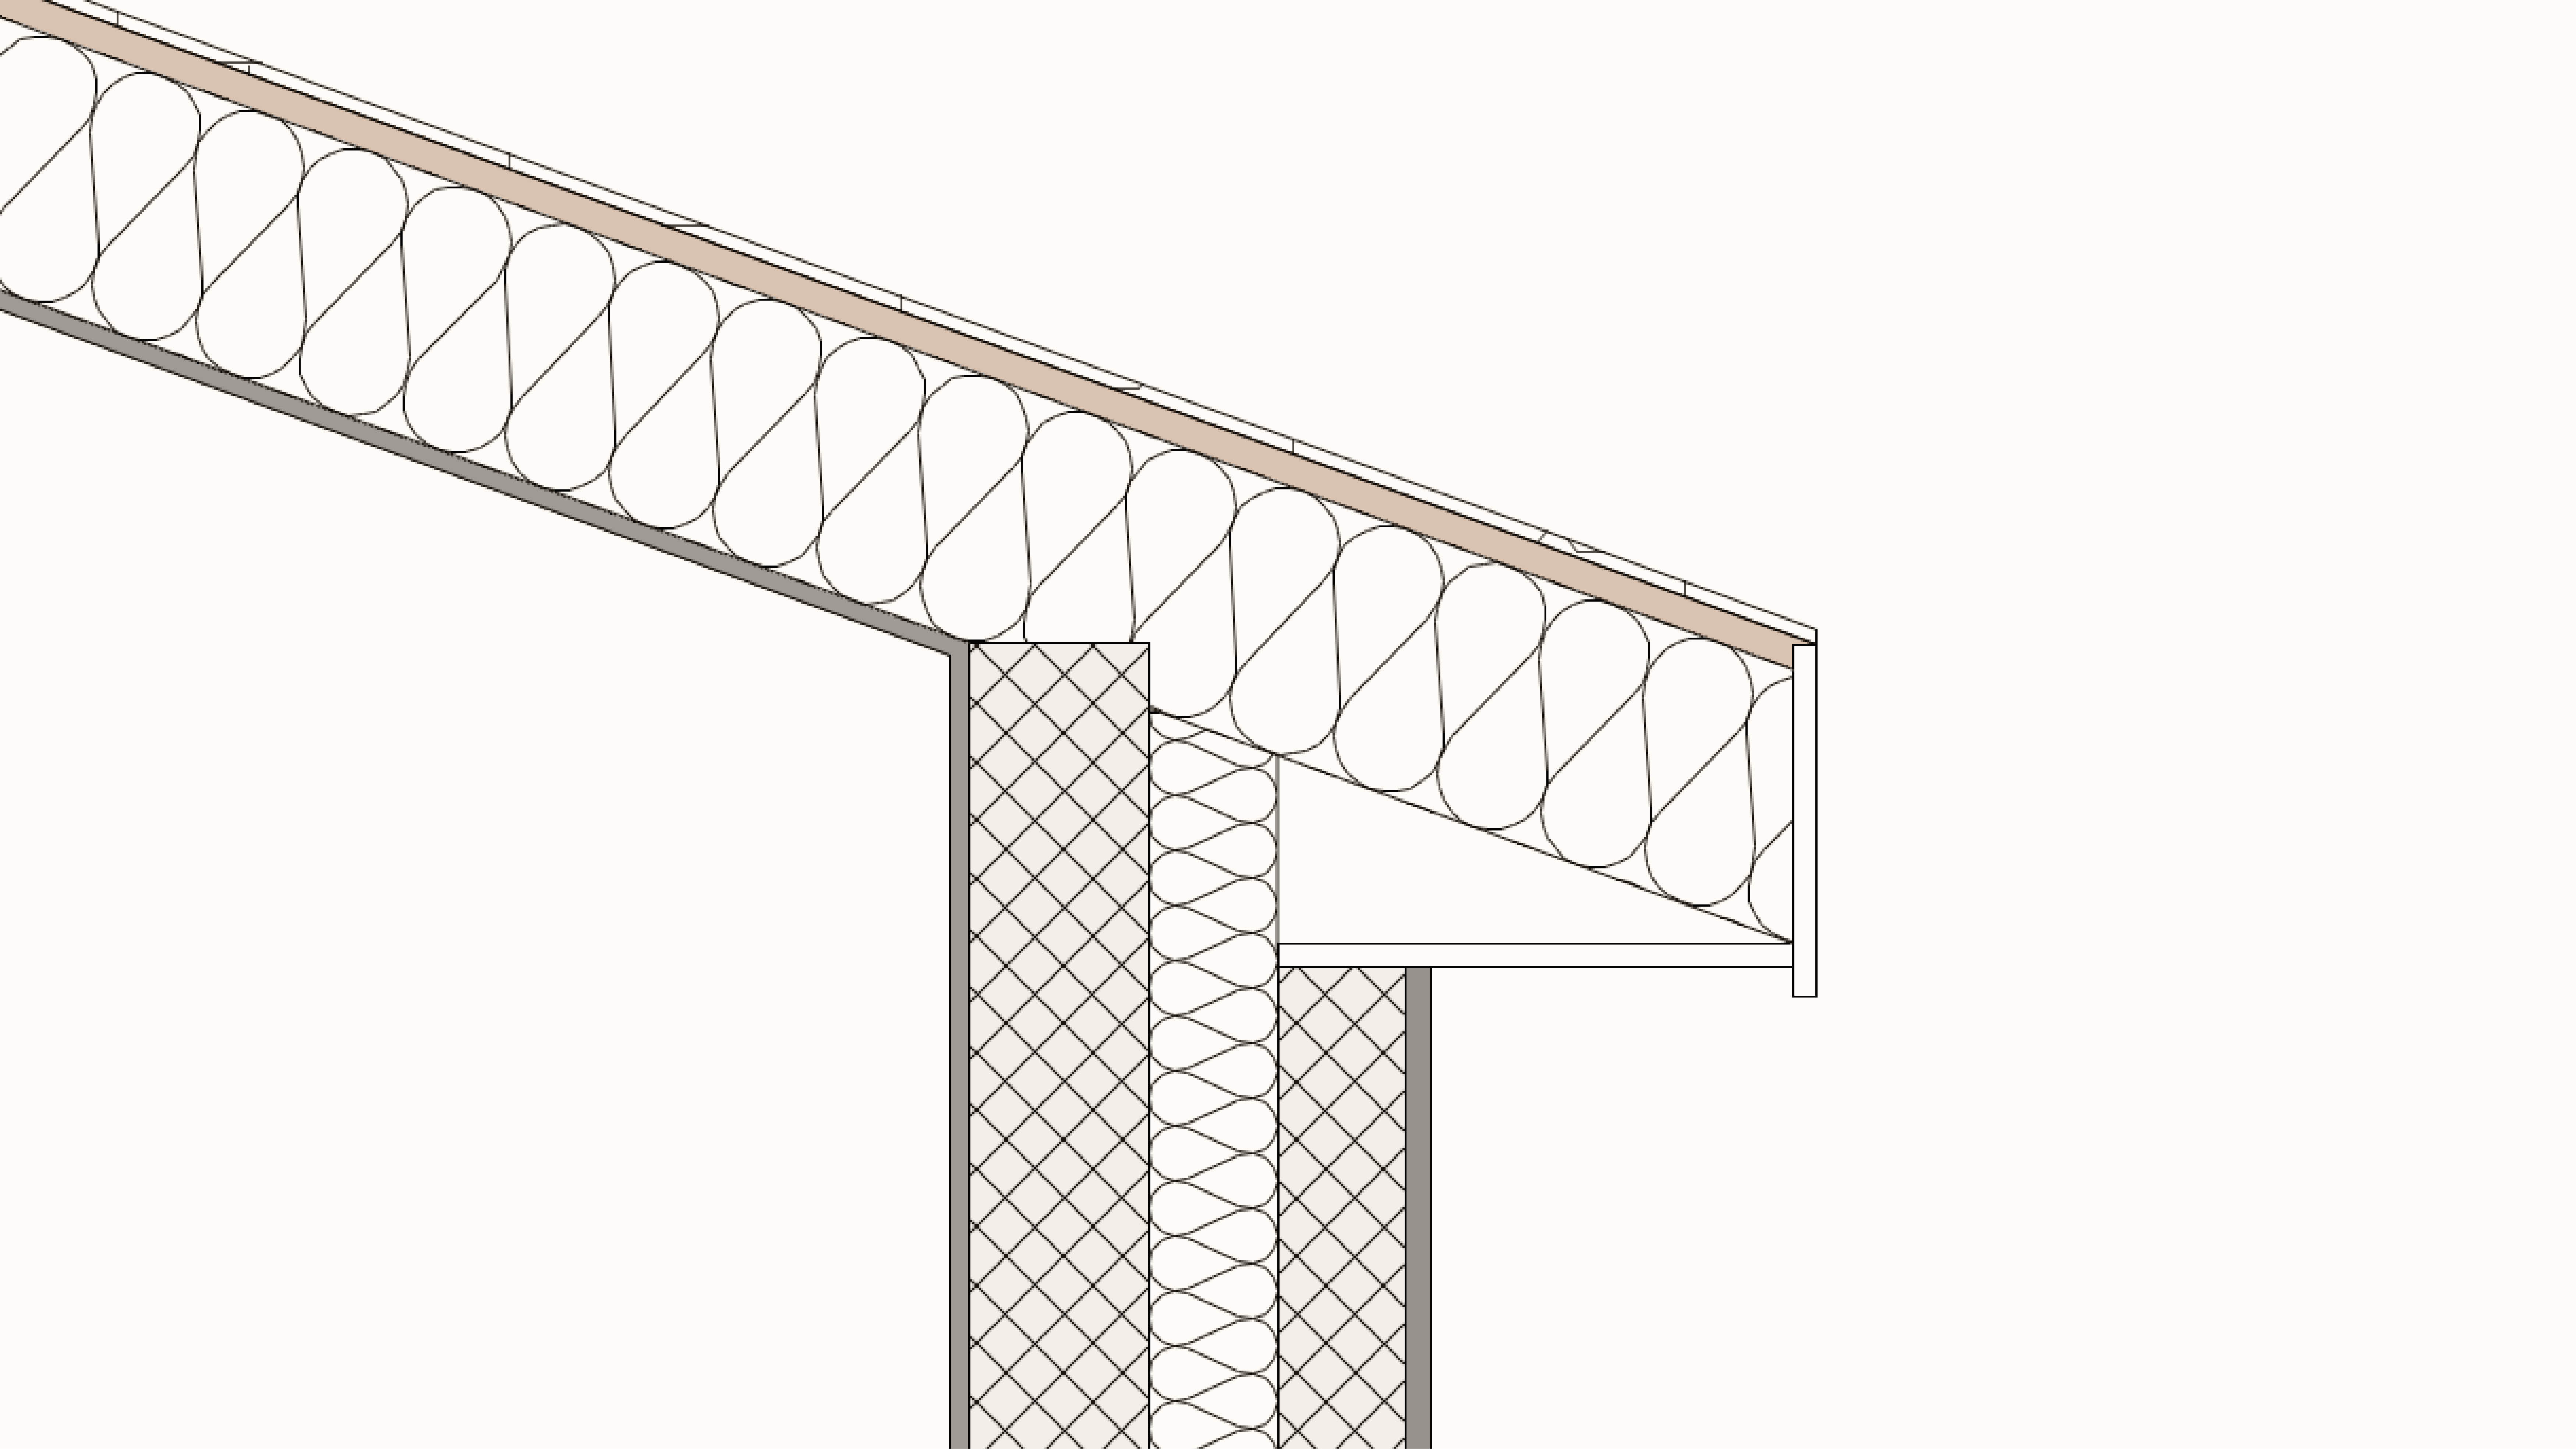
Component slabs are used to show details of floor constructions. Different components can even be set to sit at different depths in your wall!
The slab tool lets you generate a 2D/3D hybrid object which is a little like the wall tool on its side. Slabs are used to represent any type of flooring not just those traditionally thought of as ‘slabs’. For instance, you can use the slab tool for a timber floor too. Slabs can have components and data and can interact with walls saving you time on your sections!
The slab tool lets you generate a 2D/3D hybrid object which is a little like the wall tool on its side. Slabs are used to represent any type of flooring not just those traditionally thought of as ‘slabs’. For instance, you can use the slab tool for a timber floor too. Slabs can have components and data and can interact with walls saving you time on your sections!
Category: Architect Certification 2024
Requires Approval: No
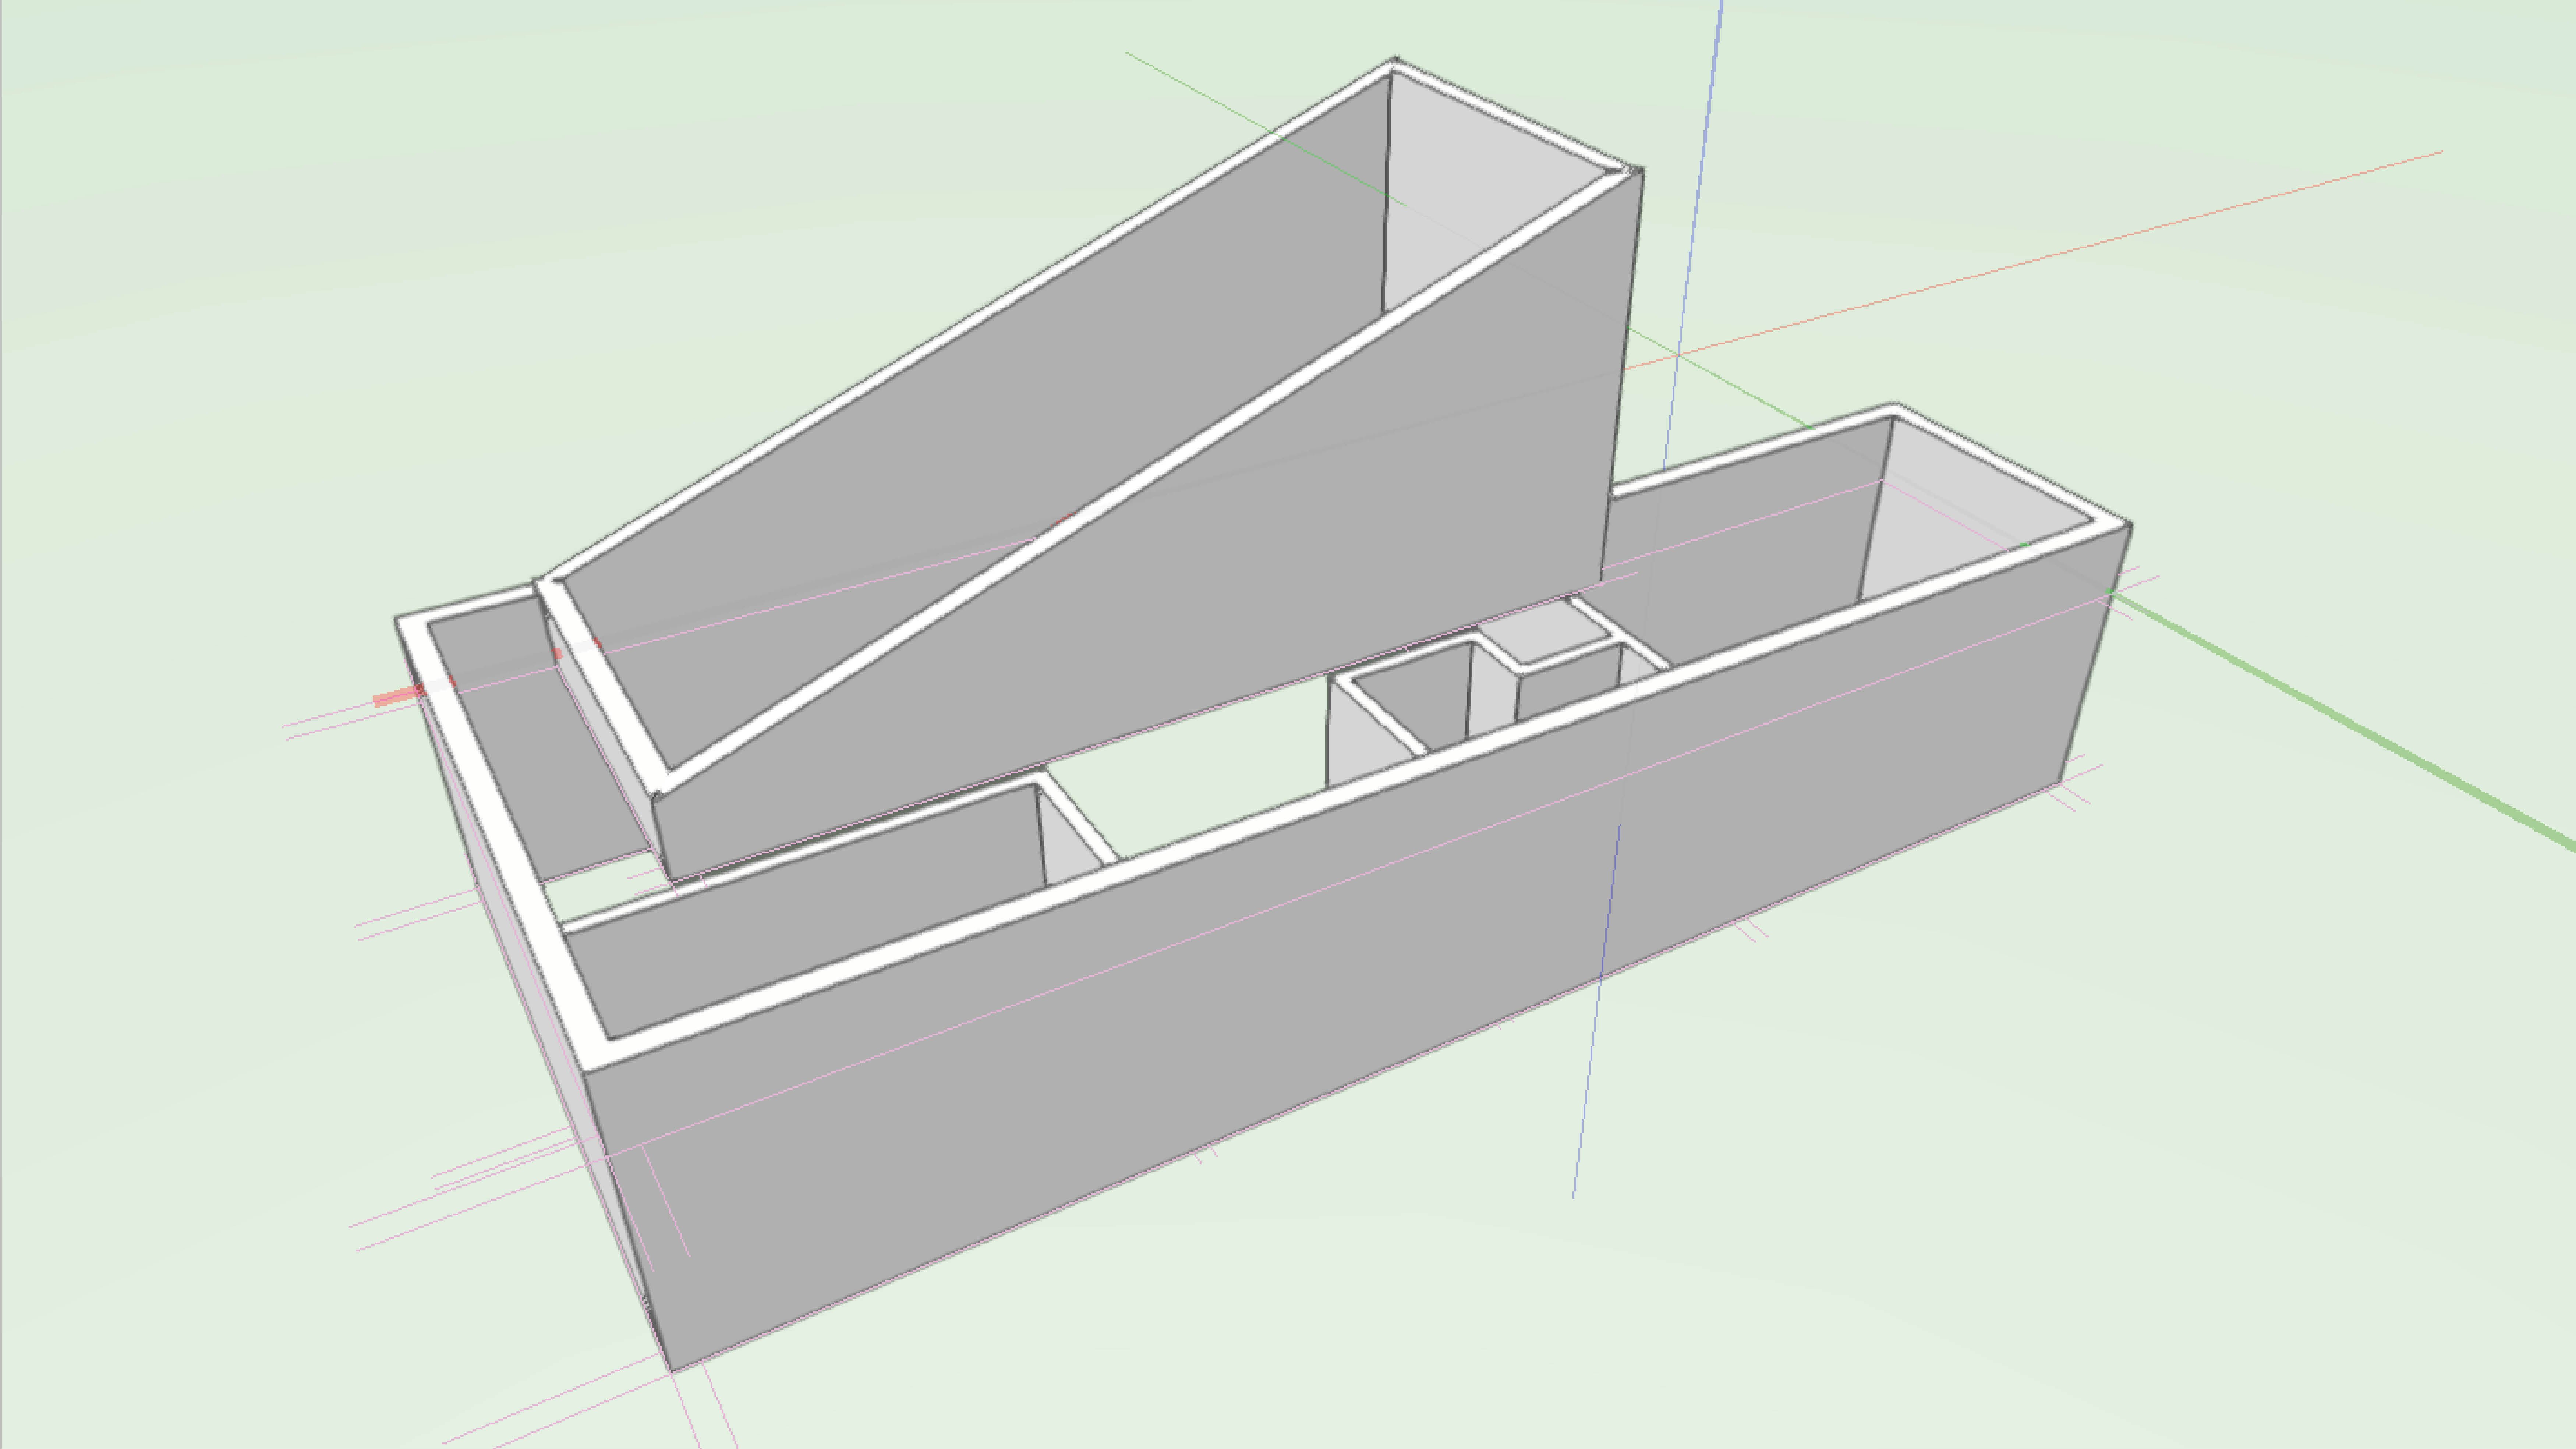
Component walls are an evolution of concept walls. They have detailed information of the build up of the wall so they can be used to build from!
The Wall tool makes both 2D and 3D very easy. In 2D they give you a nice simple plan drawing while automatically generating 3D walls at the same time. They react to having windows and doors placed in them without the need for tedious trimming and connecting of lines.
The Wall tool makes both 2D and 3D very easy. In 2D they give you a nice simple plan drawing while automatically generating 3D walls at the same time. They react to having windows and doors placed in them without the need for tedious trimming and connecting of lines.
Category: Architect Certification 2024
Requires Approval: No
Explore how to combine multiple objects into a single object using the Compose command.
Category: Skill
Requires Approval: No

In this section we will sketch out the building concept with Vectorworks Architectural tools. Using a hybrid workflow, we will create walls, floors, and roofs that create 2D plans and a 3D model simultaneously!
We can then take our Concept model and develop it further in later sections
Category: Architect Certification 2024
Requires Approval: No
People tend to like roofs - they keep the rain out! Vectorworks can create roofs in several ways. If you can draw your roof in plan and you know the angles then you can do it!
Category: Architect Certification 2024
Requires Approval: No
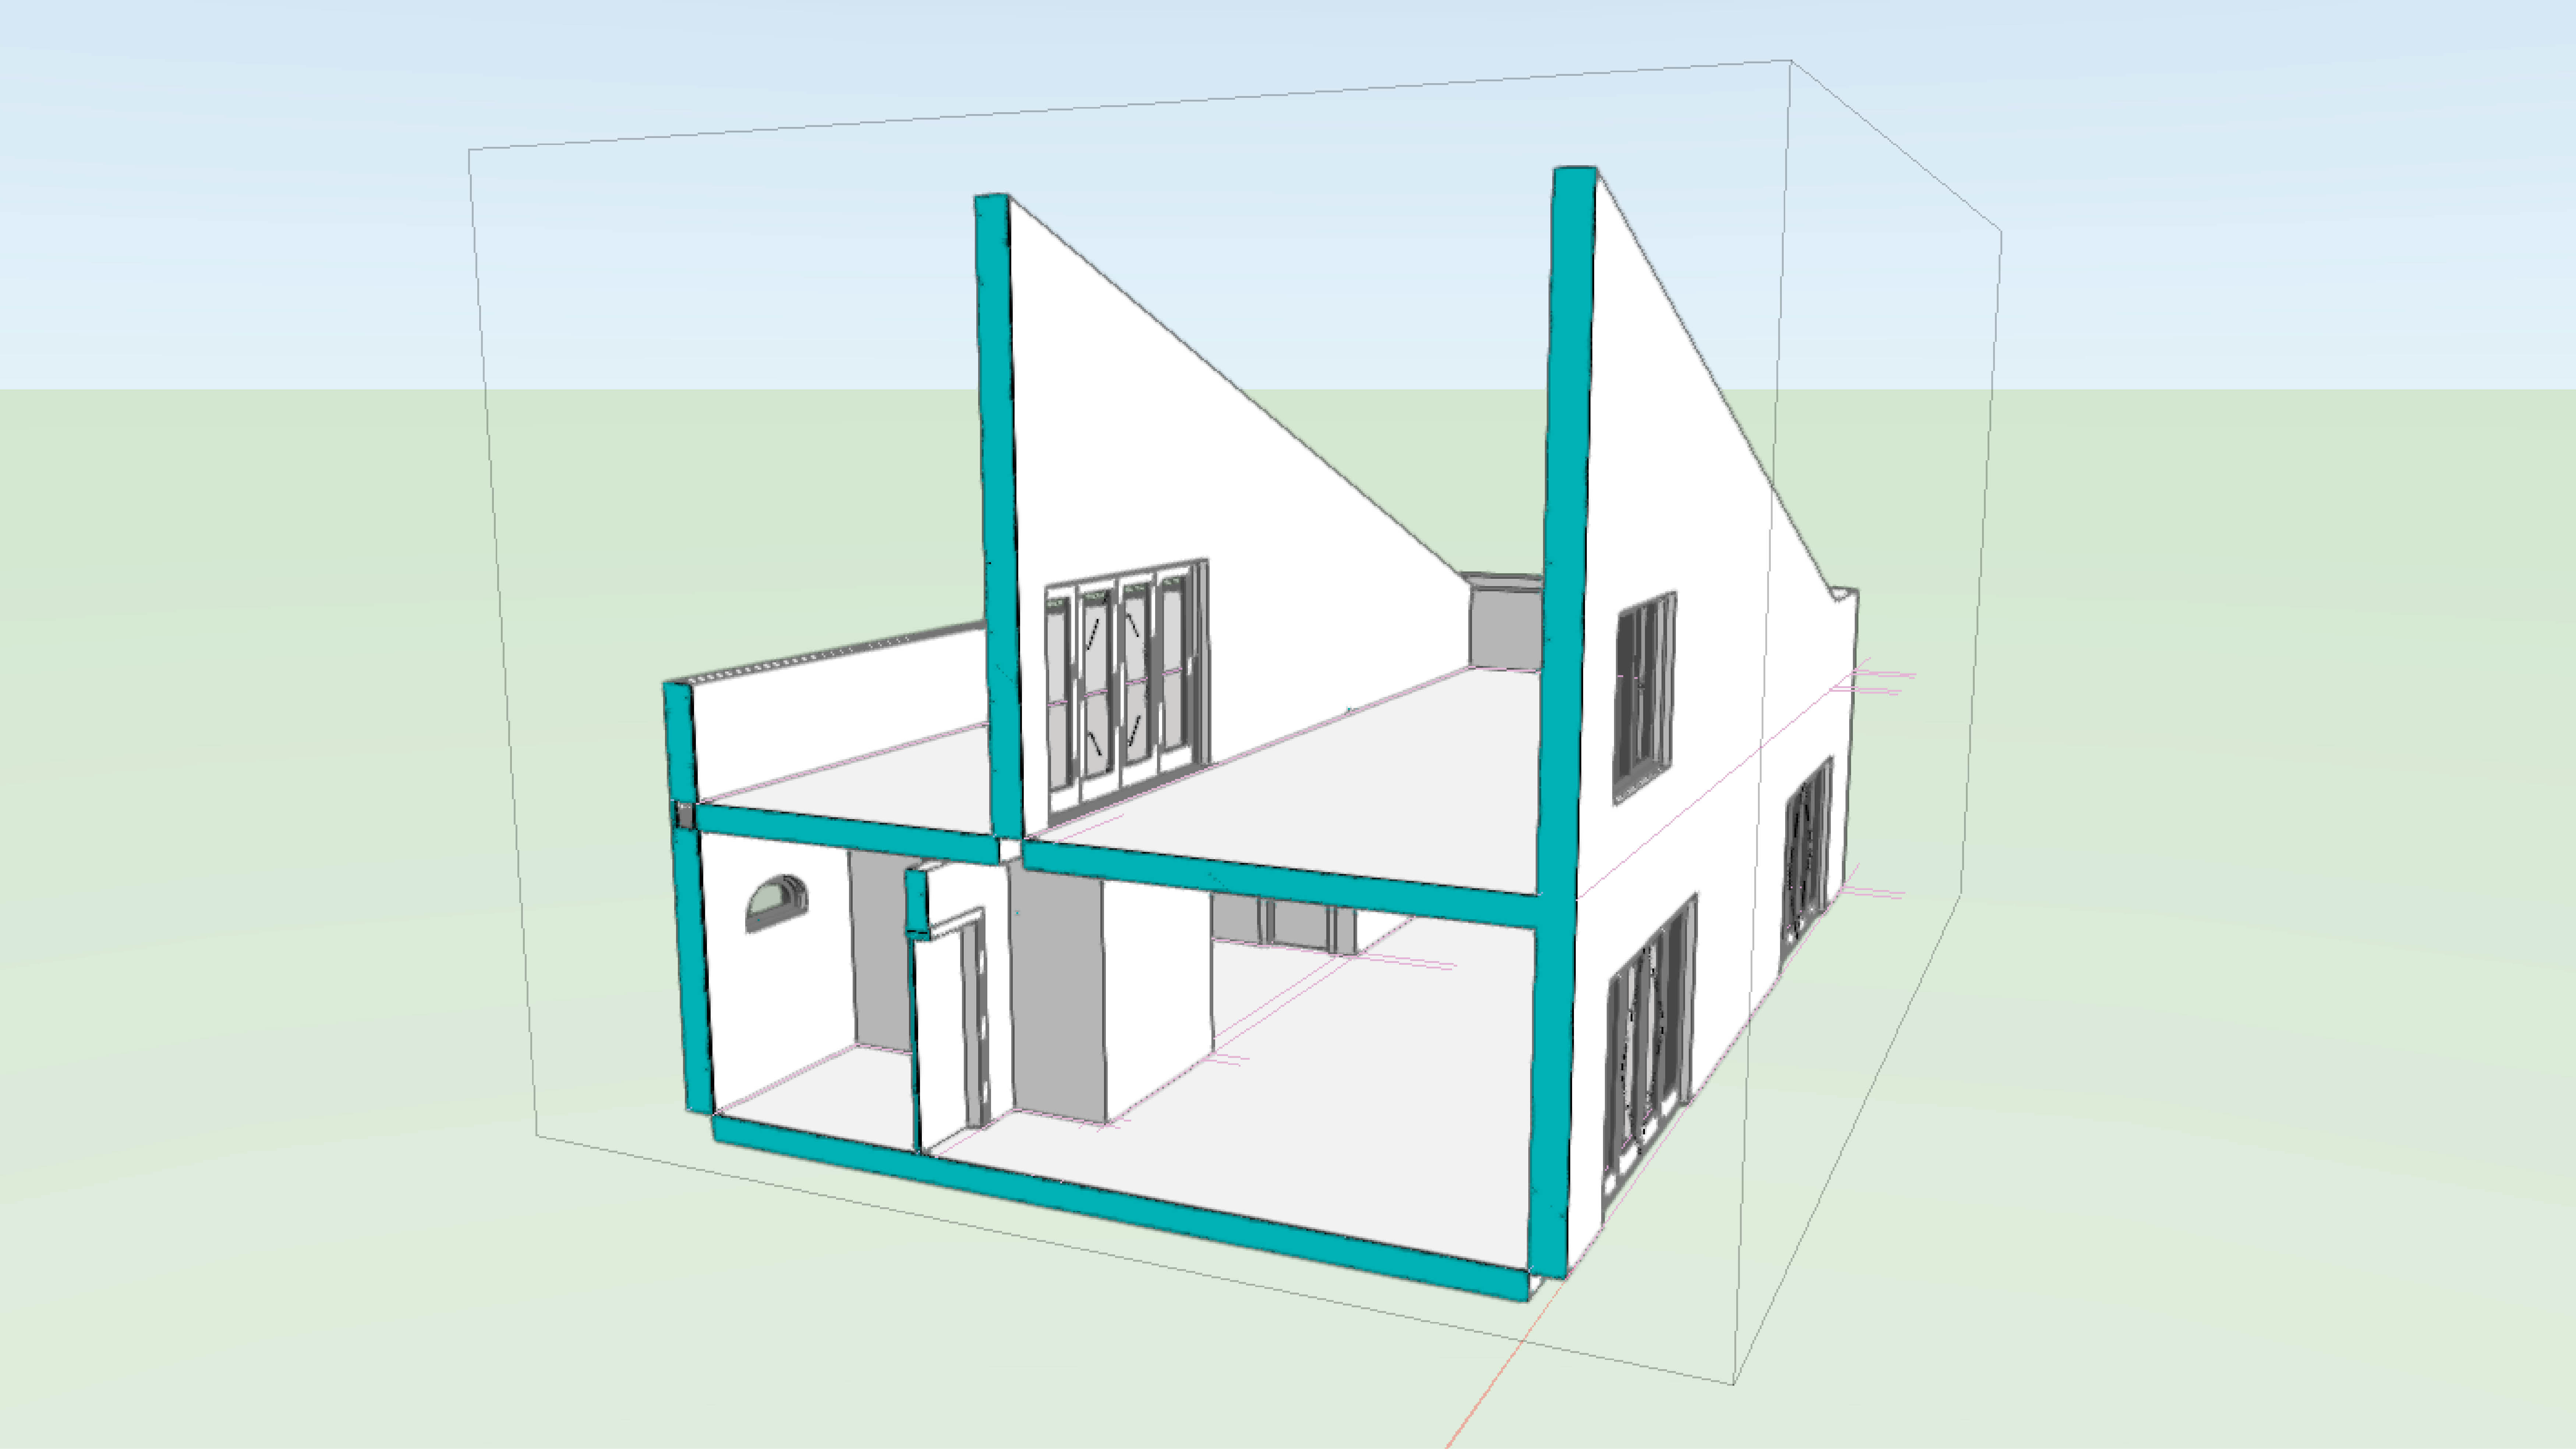
Slabs are used to create floors in Vectorworks. They are easy to make and give your clients something to stand on!
The slab tool lets you generate a 2D/3D hybrid object which is a little like the wall tool on its side. Slabs are used to represent any type of flooring not just those traditionally thought of as ‘slabs’. Concept slabs will typically not have much detail but can be replaced later on in a project!
The slab tool lets you generate a 2D/3D hybrid object which is a little like the wall tool on its side. Slabs are used to represent any type of flooring not just those traditionally thought of as ‘slabs’. Concept slabs will typically not have much detail but can be replaced later on in a project!
Category: Architect Certification 2024
Requires Approval: No
In this module we will look at sketching out a building using some concept wall styles
Category: Architect Certification 2024
Requires Approval: No
In this video, we will cover the basics of the Connect Selected Command.
Category: (2024) Skill
Requires Approval: No
In this video, we will cover the basics of the Connect Tool.
Category: (2024) Skill
Requires Approval: No

Put your ConnectCAD knowledge to the test and achieve your ConnectCAD Professional Certification
This exam evaluates participants knowledge of ConnectCAD tools, commands, and concepts. To prepare for this exam, it is recommended that participants first complete the ConnectCAD Professional Certification class. After successfully completing this exam with a score of 80% or higher, participants will earn the ConnectCAD Professional Certification. The certification will be valid for 3 years.
ⓘ
You have 3 attempts with each purchase
If you fail all 3 attempts you will need to repurchase the exam
You may take time to review or attend training between attempts
You may have Vectorworks open while taking the exam
You must finish each attempt within the stated time period or the answers you have given will be submitted and considered an attempt, even if you have not answered any questions - do not start an attempt unless you intend on finishing it
Good luck!
Category: 2024 ConnectCAD Certification
Requires Approval: Yes
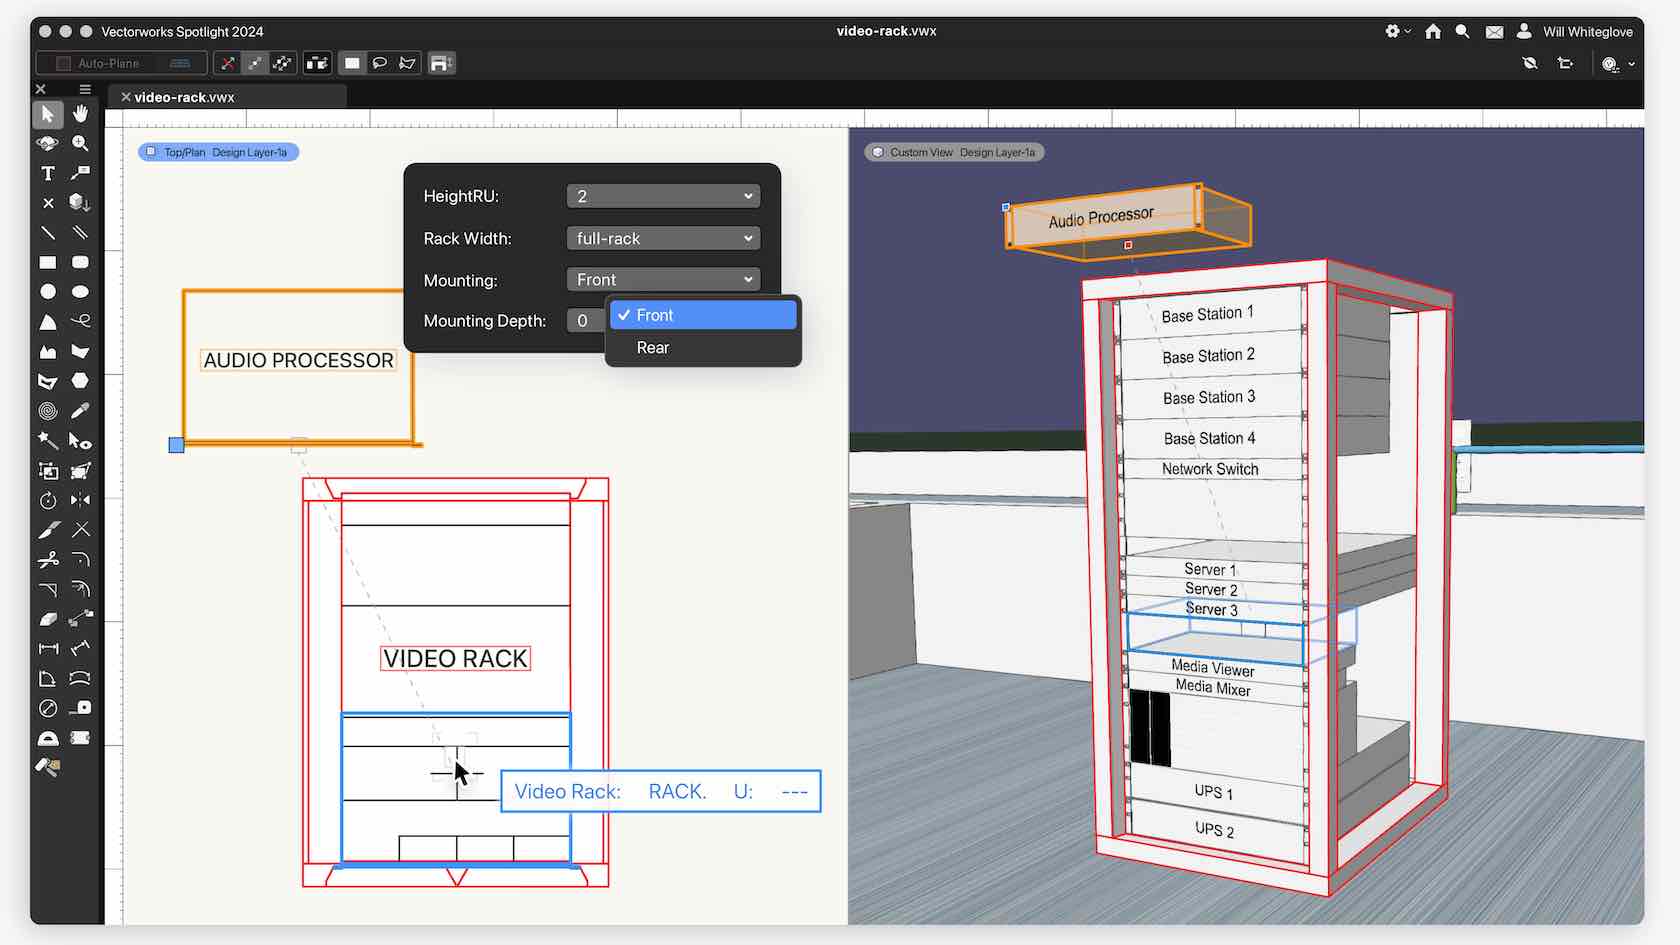
Design faster with the new unified 3D Rack workflow. In the latest version, you'll be able to quickly design and edit equipment racks in 3D, which will automatically create the required 2D objects. You'll lessen your workload while still creating the views you need all through a more user-friendly interface.
Category: Entertainment
Requires Approval: No

Welcome to the ConnectCAD Certification course. Please watch this short video with a message from the trainer.
Category: 2024 ConnectCAD Certification
Requires Approval: No

This lesson combines the tools and commands from the skill videos and seeks to teach you the concepts and workflows behind data and reports.
Category: 2024 ConnectCAD Certification
Requires Approval: No

An exercise to test your knowledge and practice what you have learned.
Category: 2024 ConnectCAD Certification
Requires Approval: No
Familiarize yourself with the basic tools and concepts of the ConnectCAD module. In this seminar, you will understand the basics of creating a schematic drawing; including devices, sockets, and circuits. Input data into your devices and create 3D equipment items both inside and out of a rack. This seminar is beginner level for this module and is primarily for an introduction to the basic concepts and workflow within ConnectCAD.
Category: Live Session
Requires Approval: No
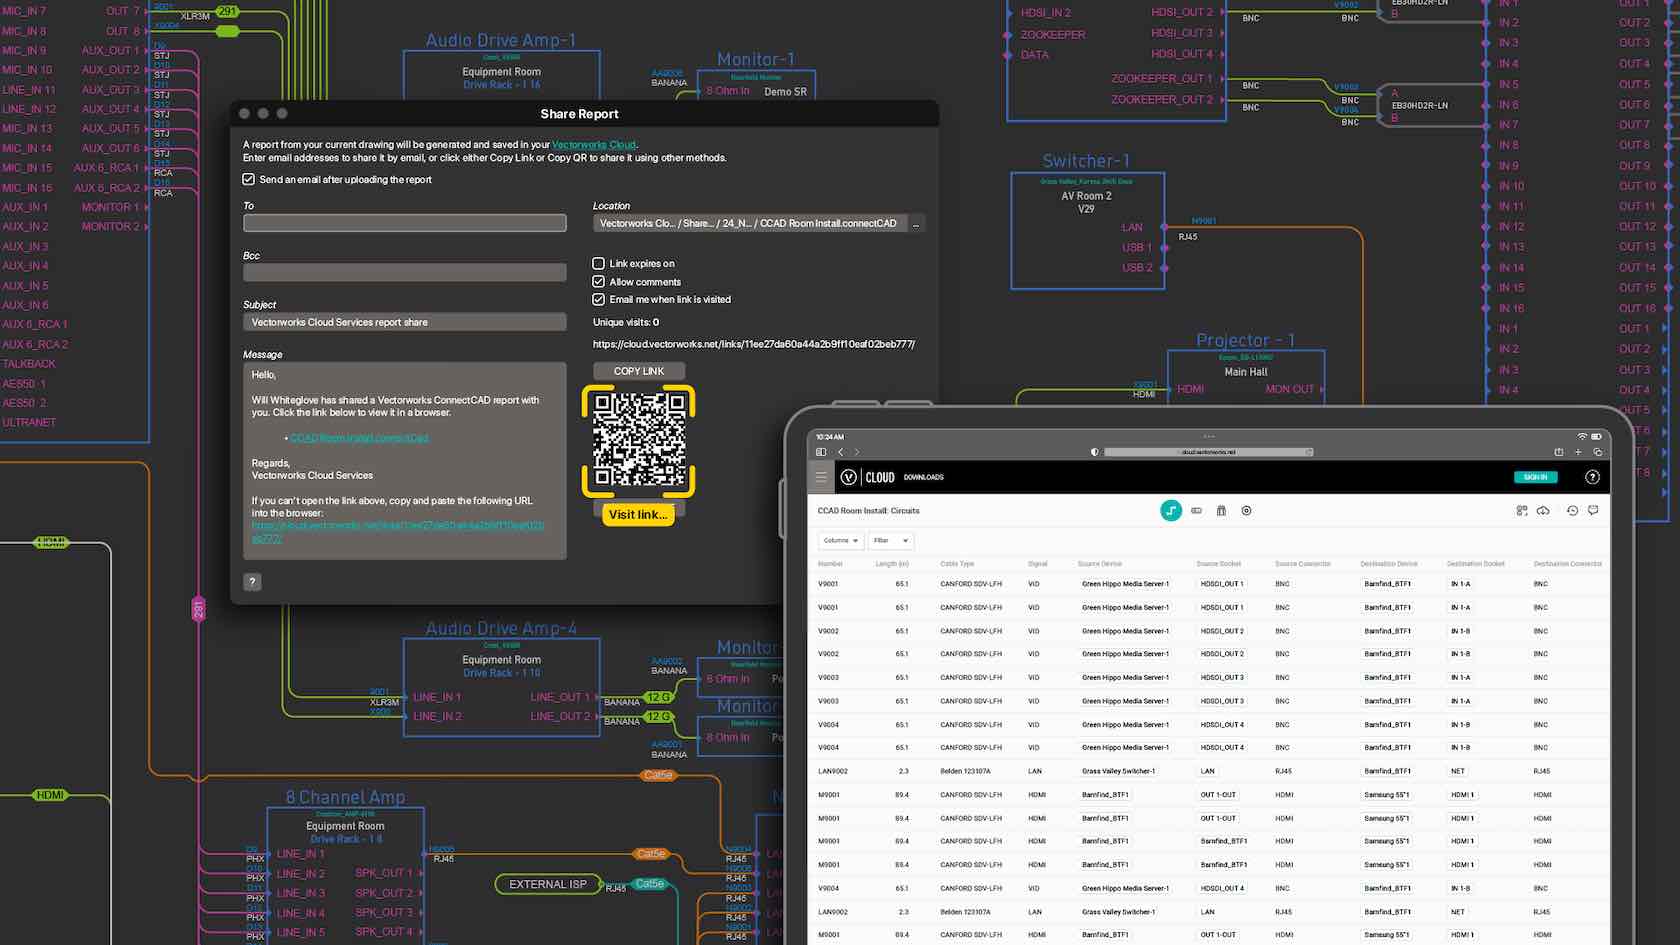
Gone are the days of relying on third-party applications and printed paperwork to view project data. With the new Share Reports command, you'll be able to upload design data to Vectorworks Cloud Services as a configurable worksheet so it can be viewed in a web browser on any device to effortlessly keep your project partners and install team up to date.
Category: Entertainment
Requires Approval: No
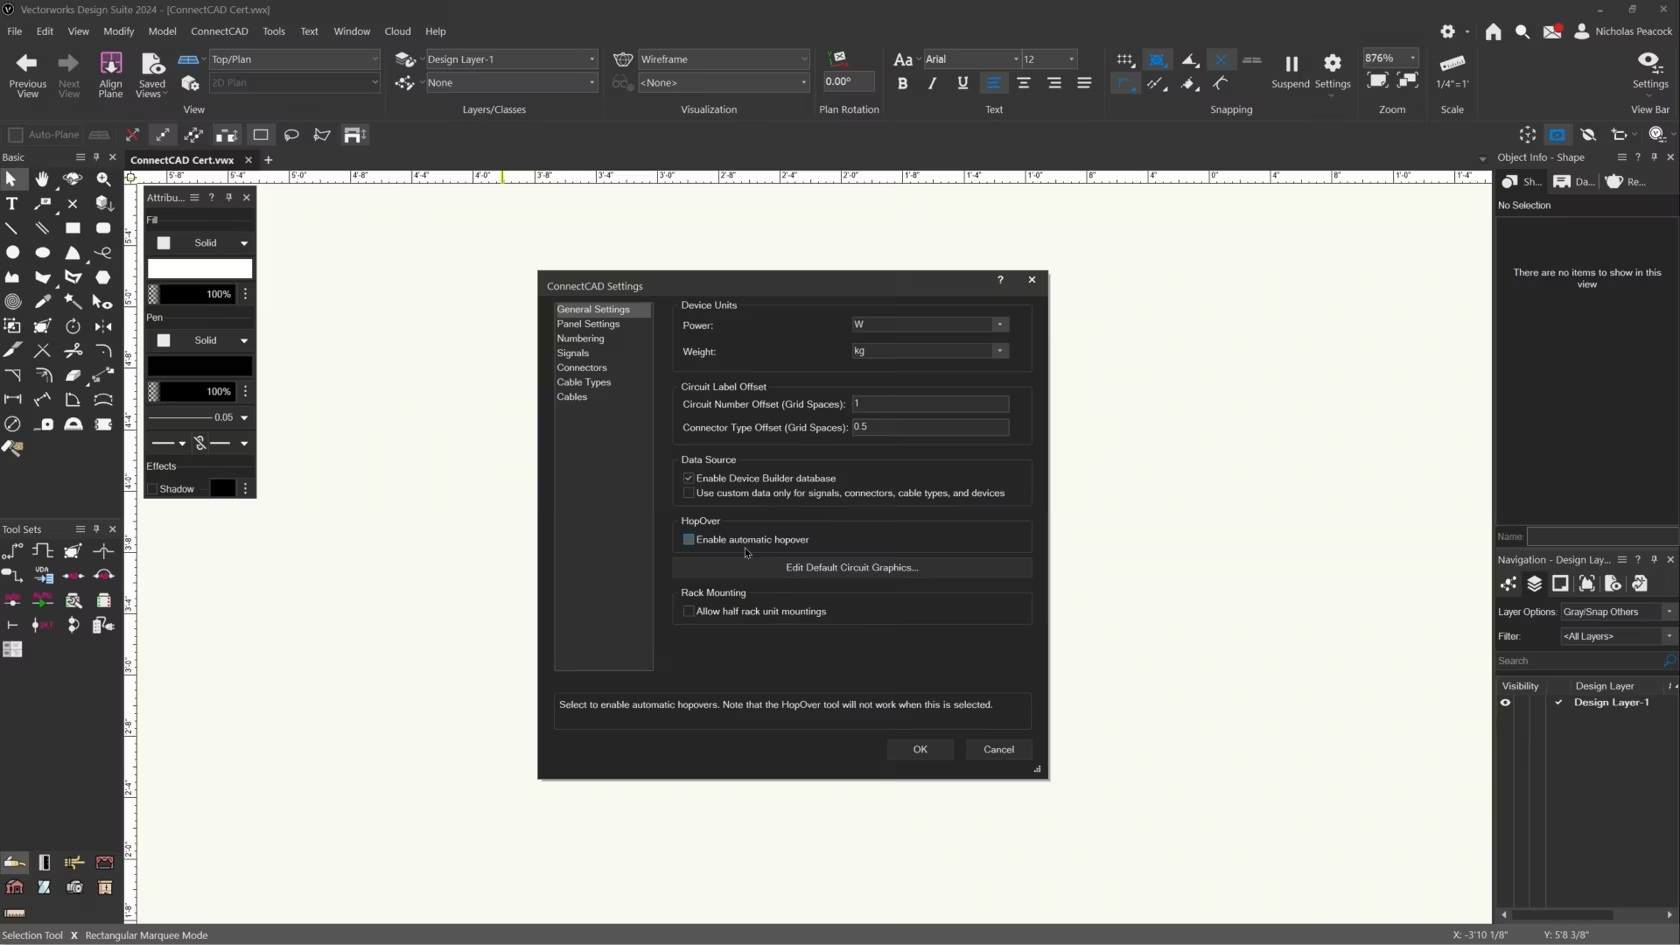
In this video, we will cover the basics of the ConnectCAD Settings dialogue.
Category: (2024) Skill
Requires Approval: No
This video will introduce us to the correct way to connect loads to our rigging objects.
Category: Non Current Material
Requires Approval: No
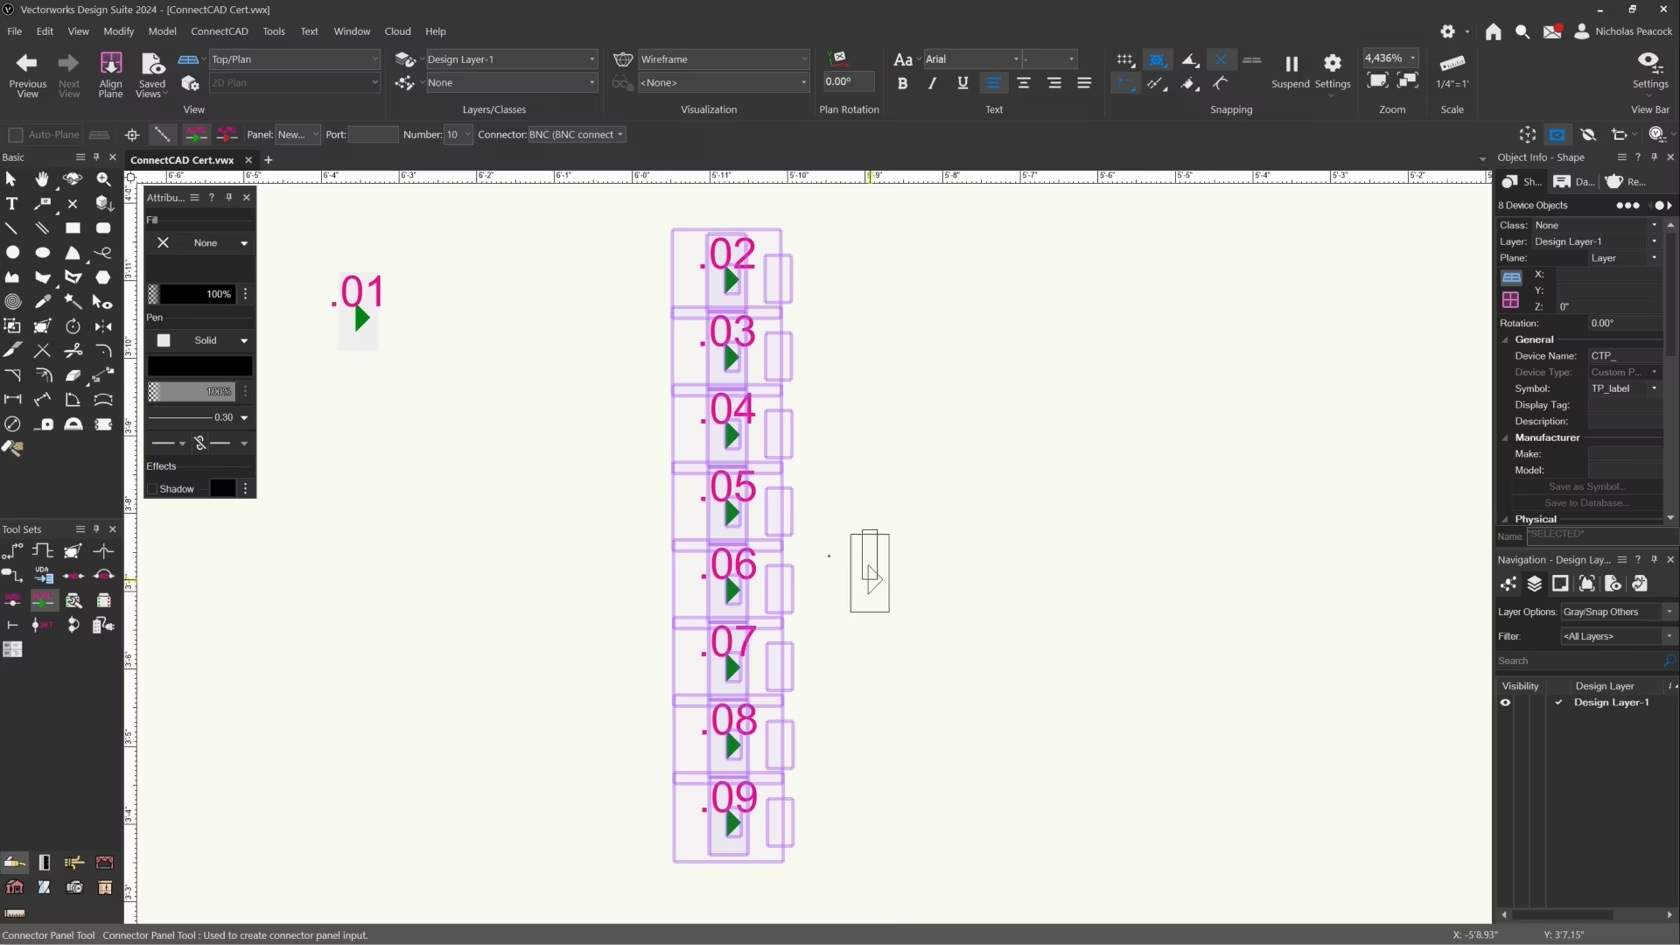
In this video, we will cover the basics of the Connector Panel Tool.
Category: (2024) Skill
Requires Approval: No
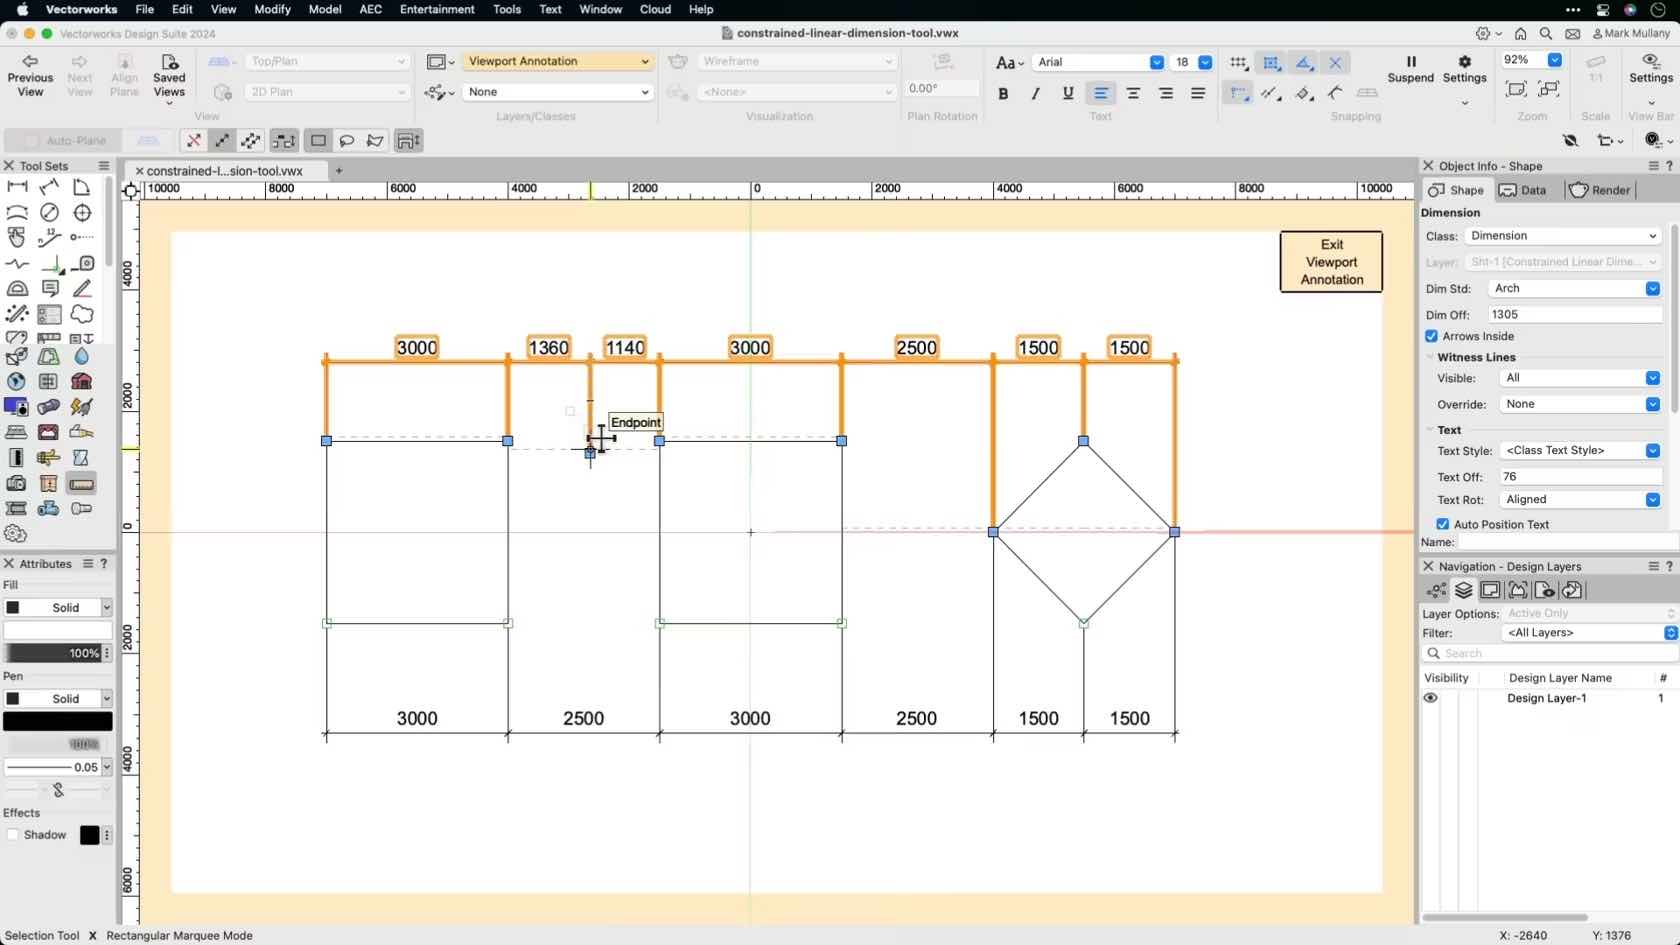
This video will demonstrate how to use the Constrained Linear Dimension tool to dimension drawings.
Category: Skill
Requires Approval: No
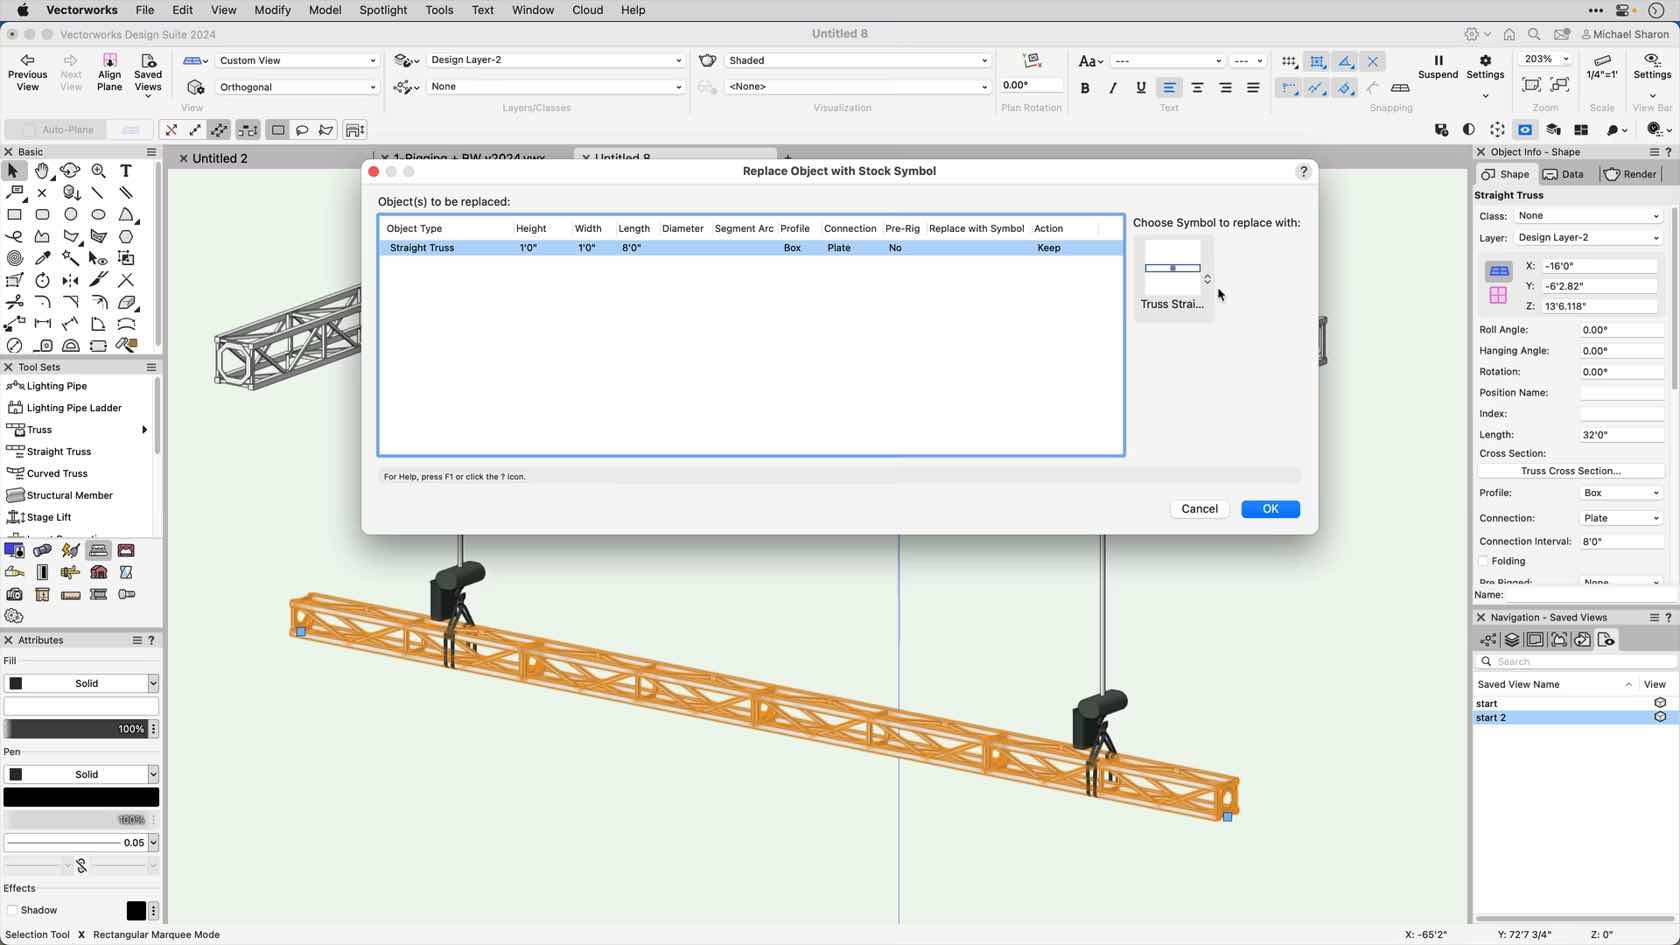
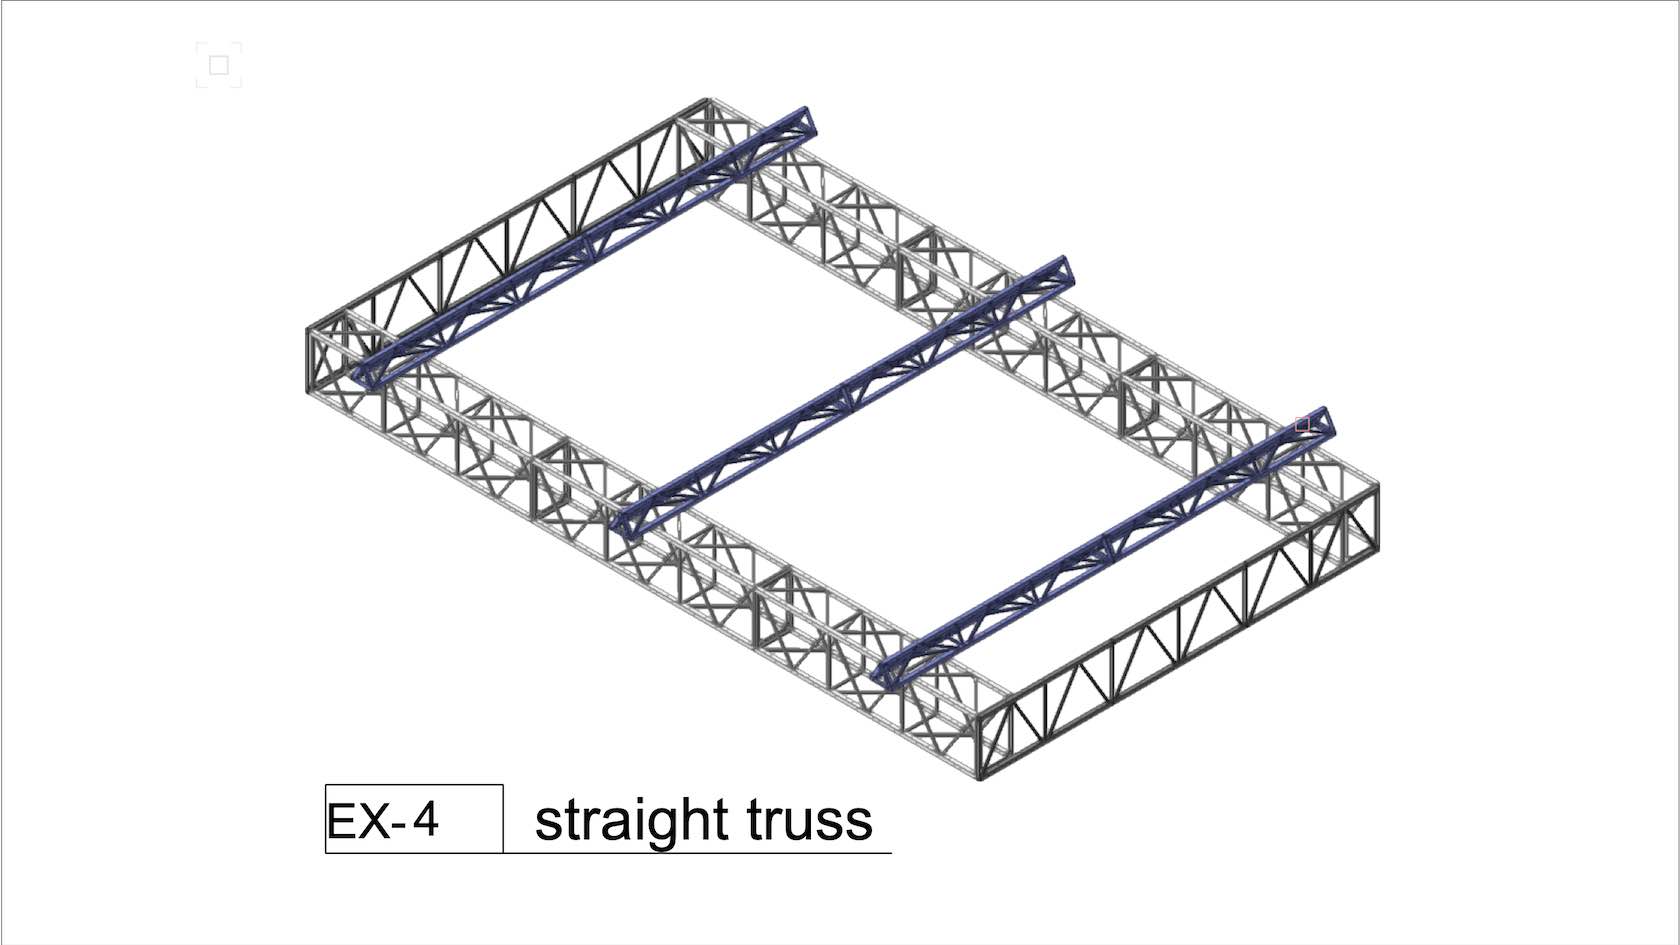
This short video will show us how to convert a straight truss object to a symbol based, truss object.
Category: CHAPTER 2
Requires Approval: No
This video will demonstrate how to use the various copy and paste commands within Vectorworks.
Category: Skill
Requires Approval: No
This course demonstrates how to create and edit design layers.
Category: Skill
Requires Approval: No
In this video, we will cover the basics of the Create Equipment Command.
Category: (2024) Skill
Requires Approval: No
In this video, we will cover the basics of the Create Rack Elevation command.
Category: (2024) Skill
Requires Approval: No
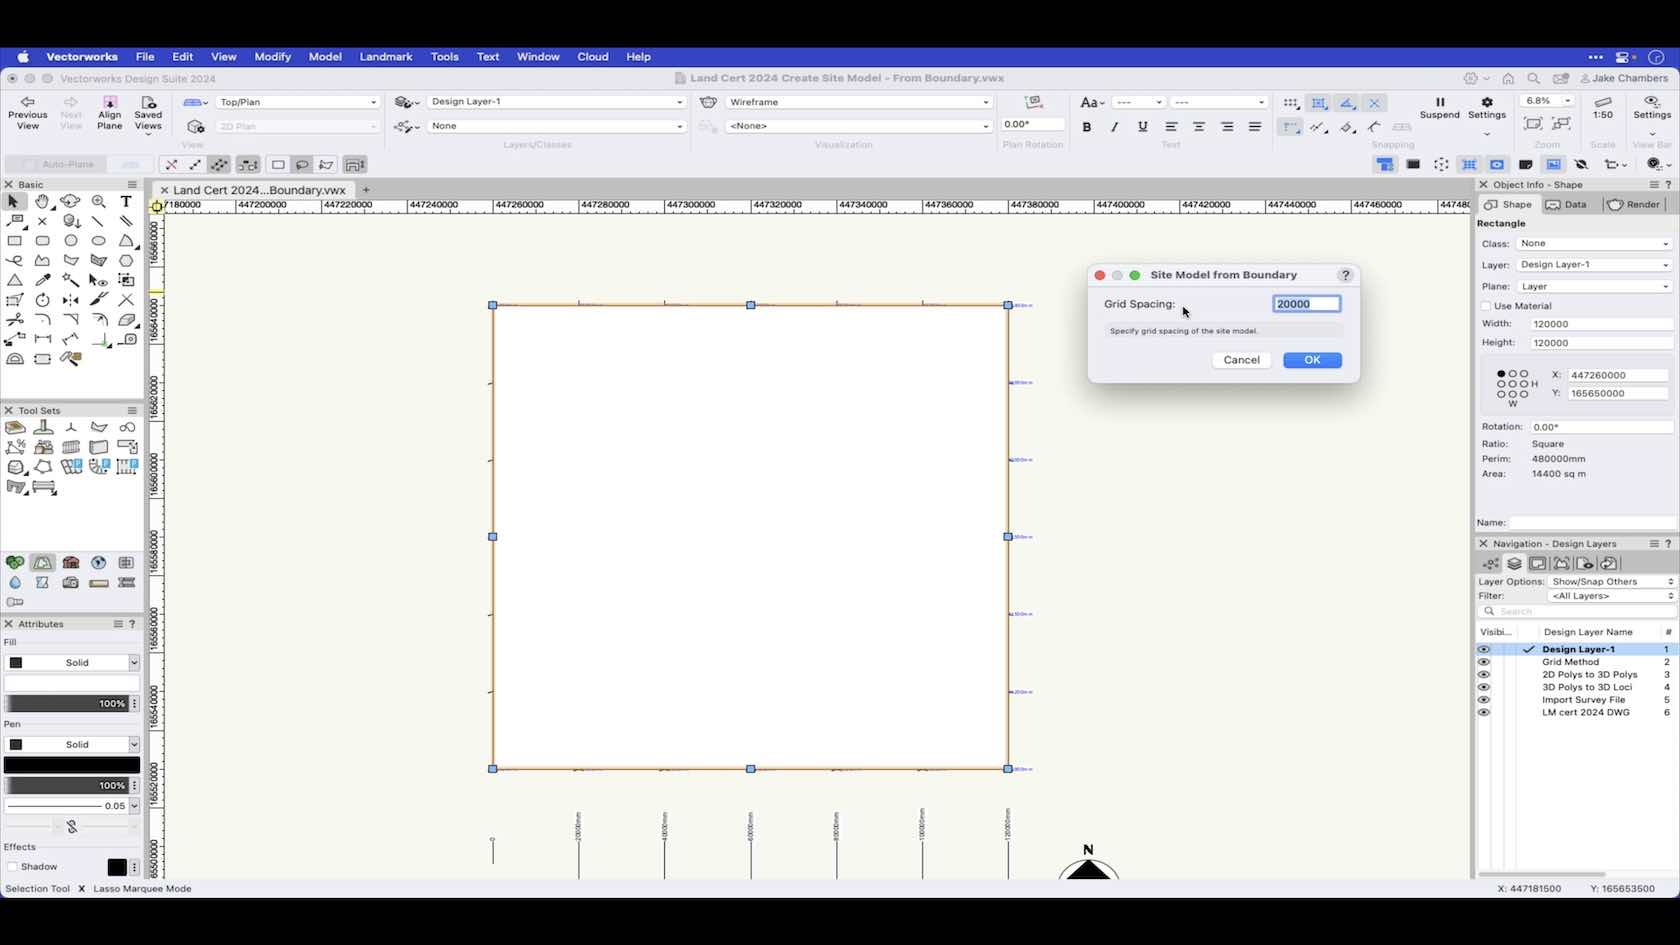
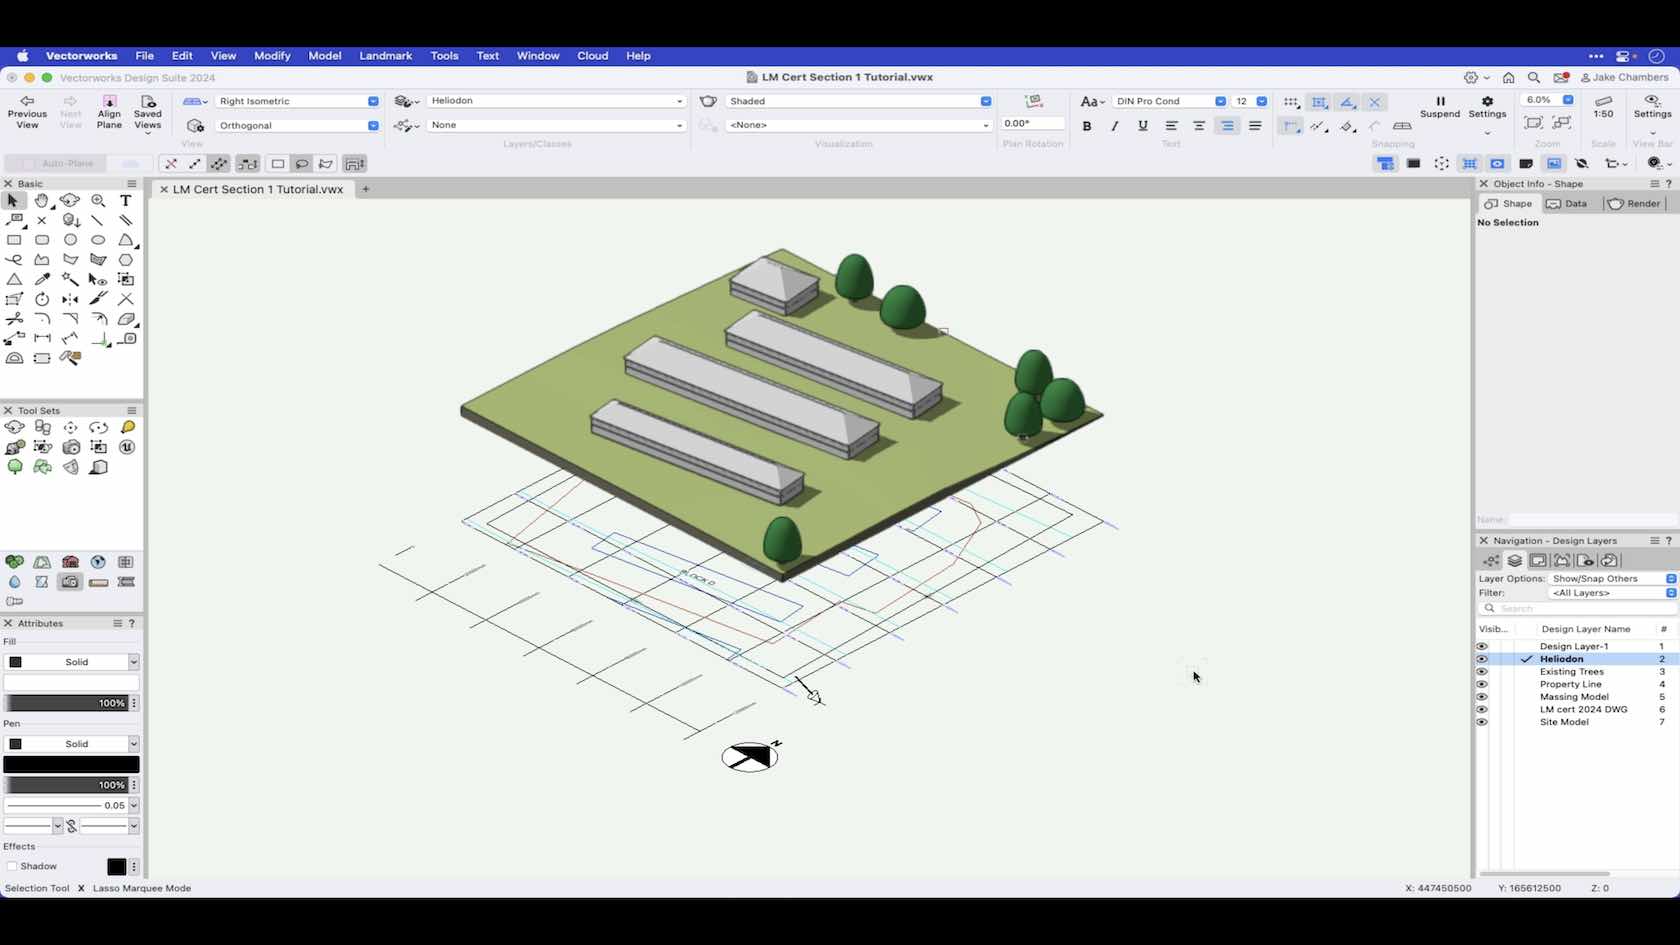
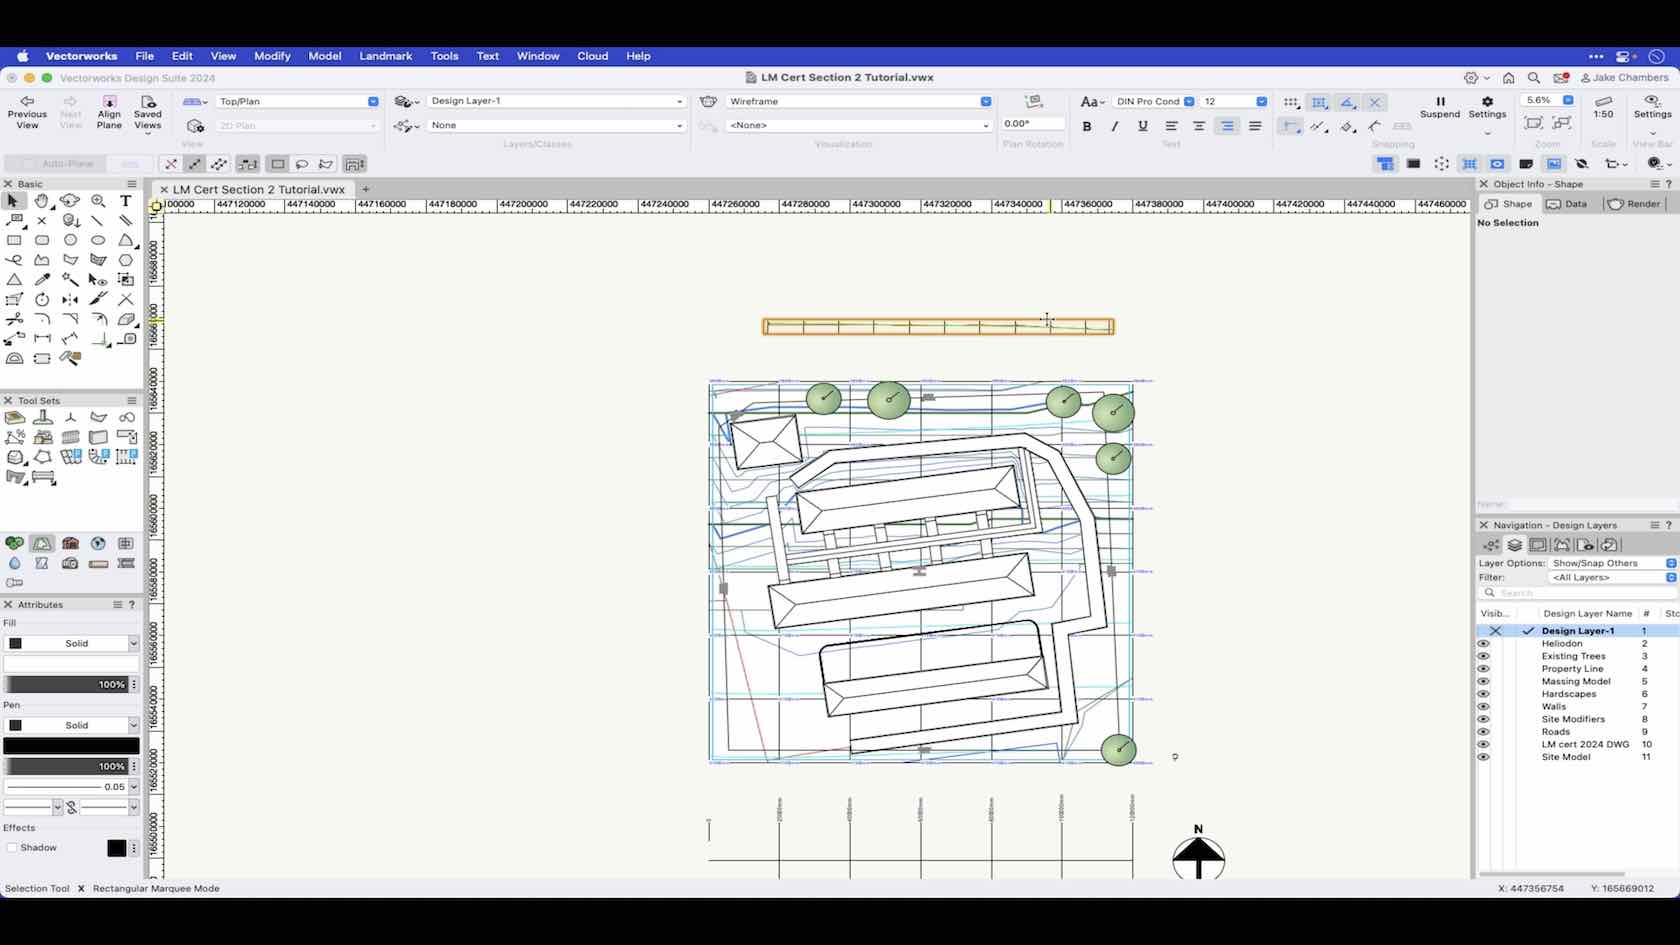
In this video we look at how to create a site model from a boundary.
Category: Landmark 2024 Certificaiton
Requires Approval: No
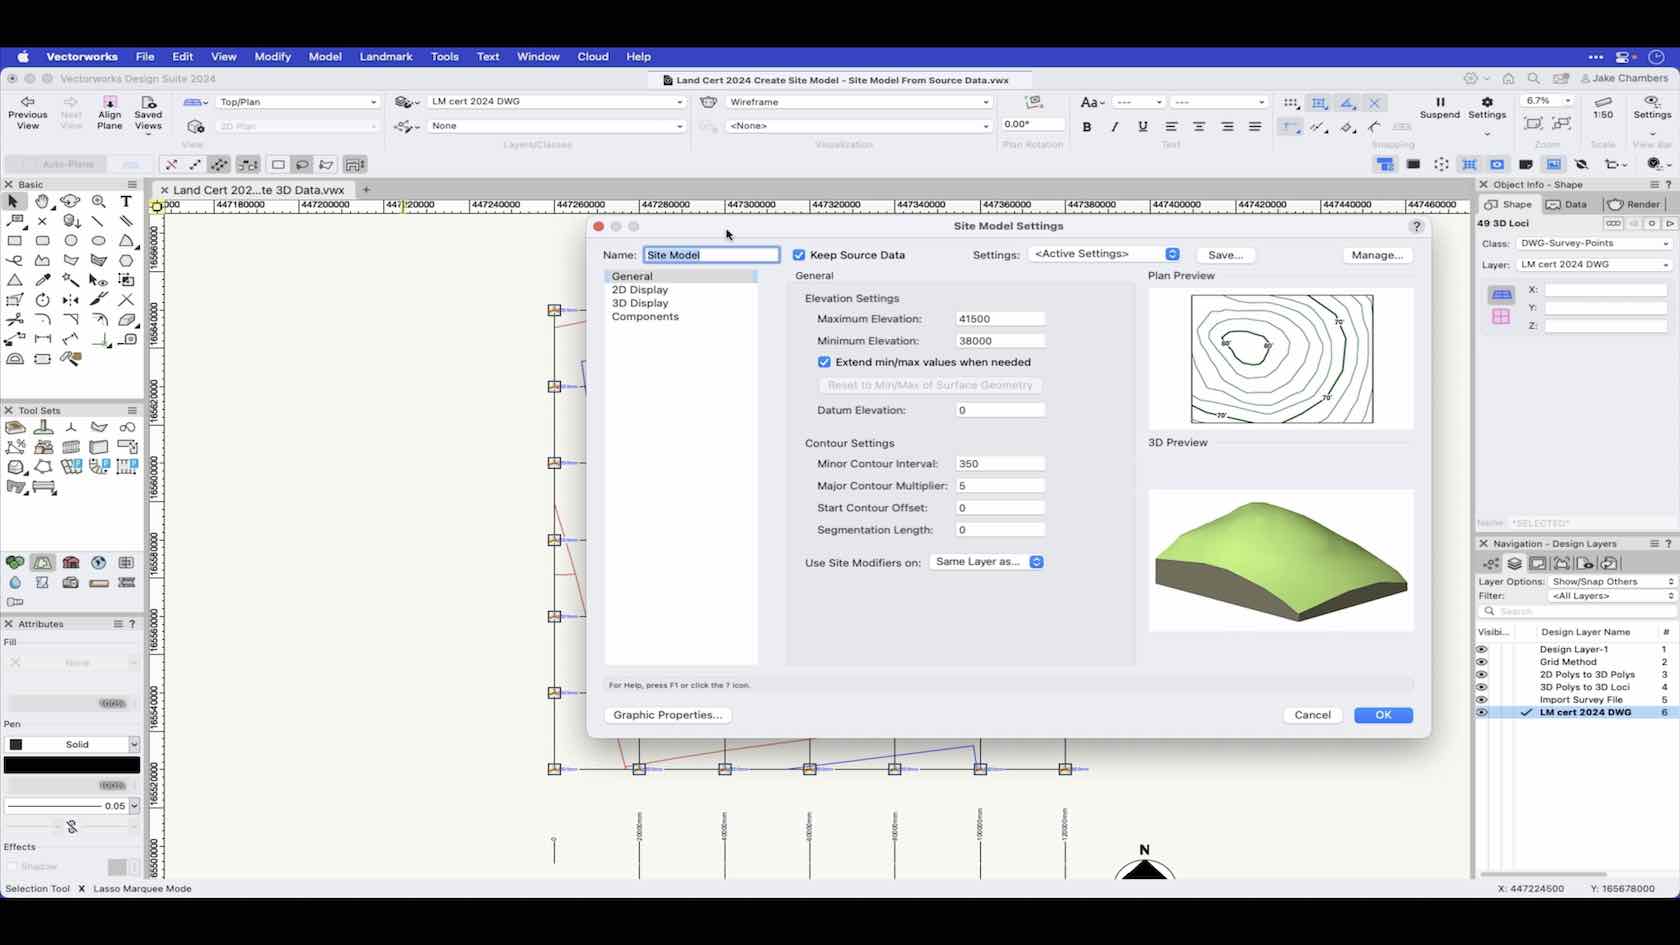
In this video we will look at creating a site model from source data. Source data can come from imported DWG files, survey files or manually entered data within Vectorworks.
Category: Landmark 2024 Certificaiton
Requires Approval: No
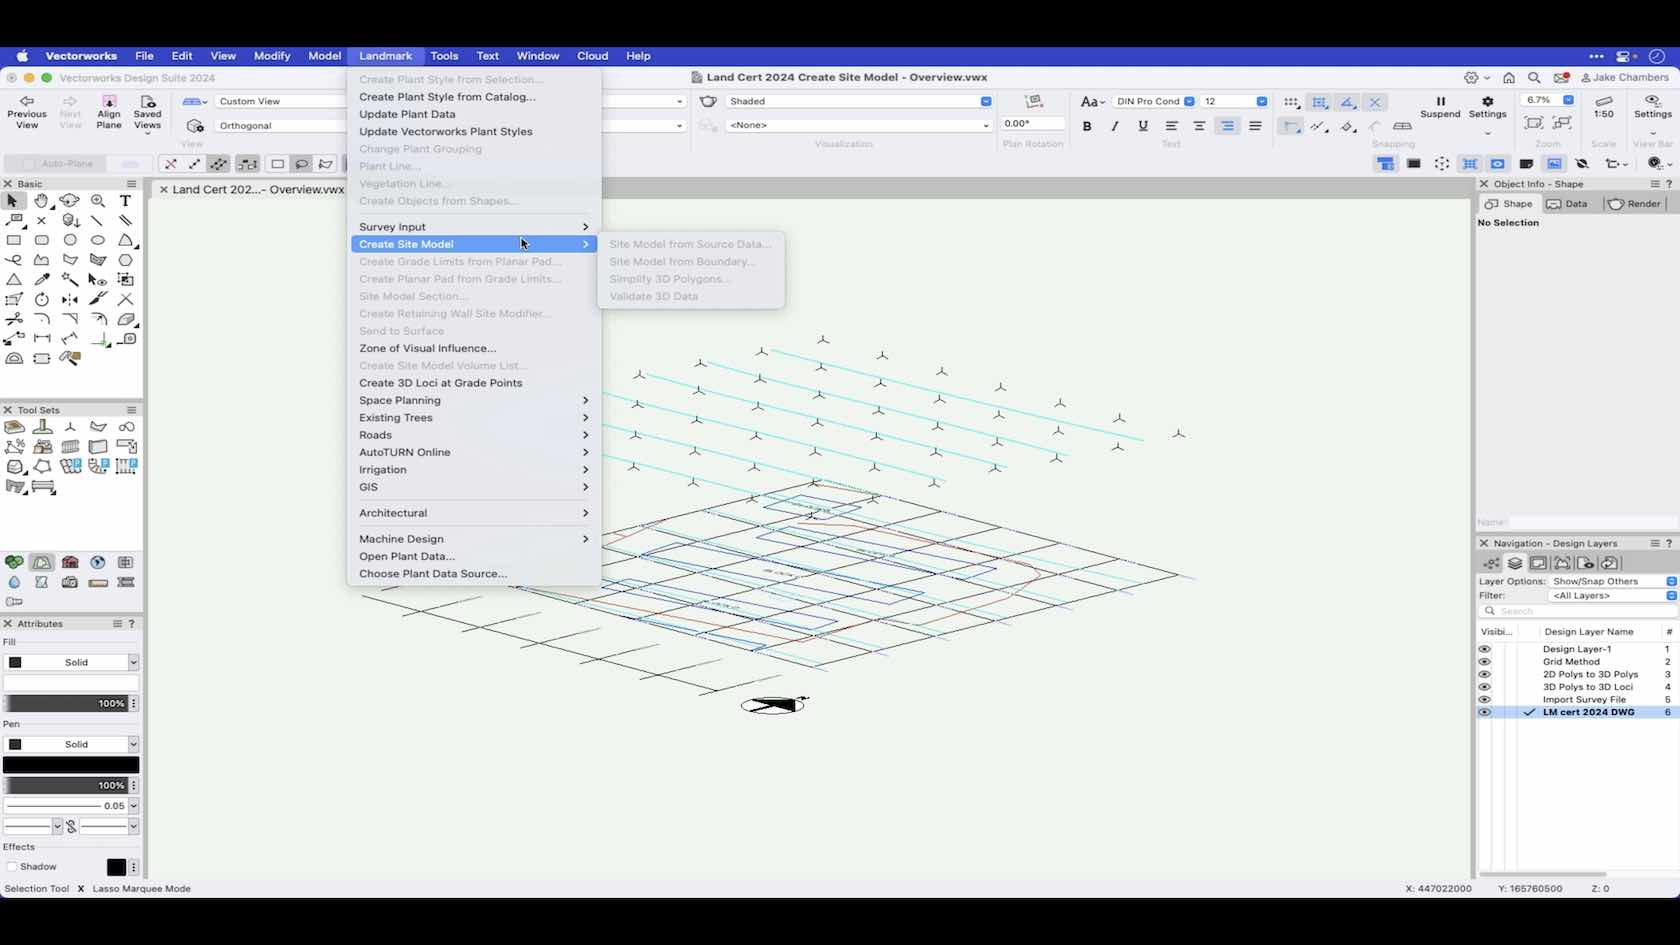
An overview of the various ways to create a site model.
Category: Landmark 2024 Certificaiton
Requires Approval: No
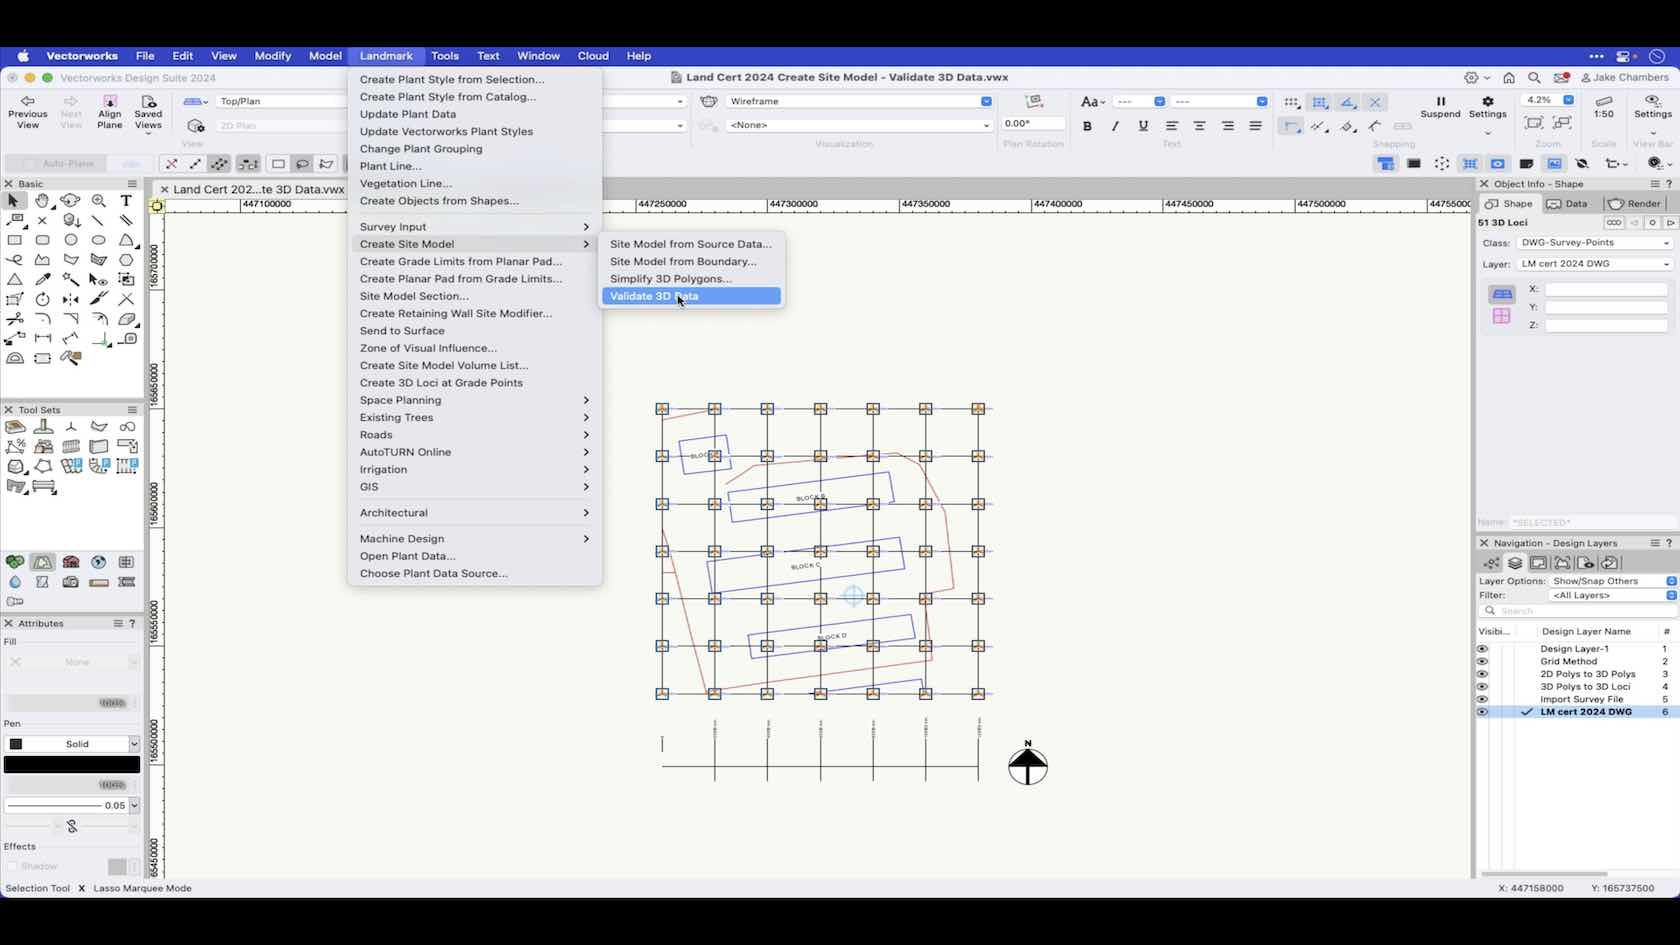
In this video we take a look at how you can run a check on your source data to check for errors before creating a site model.
Category: Landmark 2024 Certificaiton
Requires Approval: No
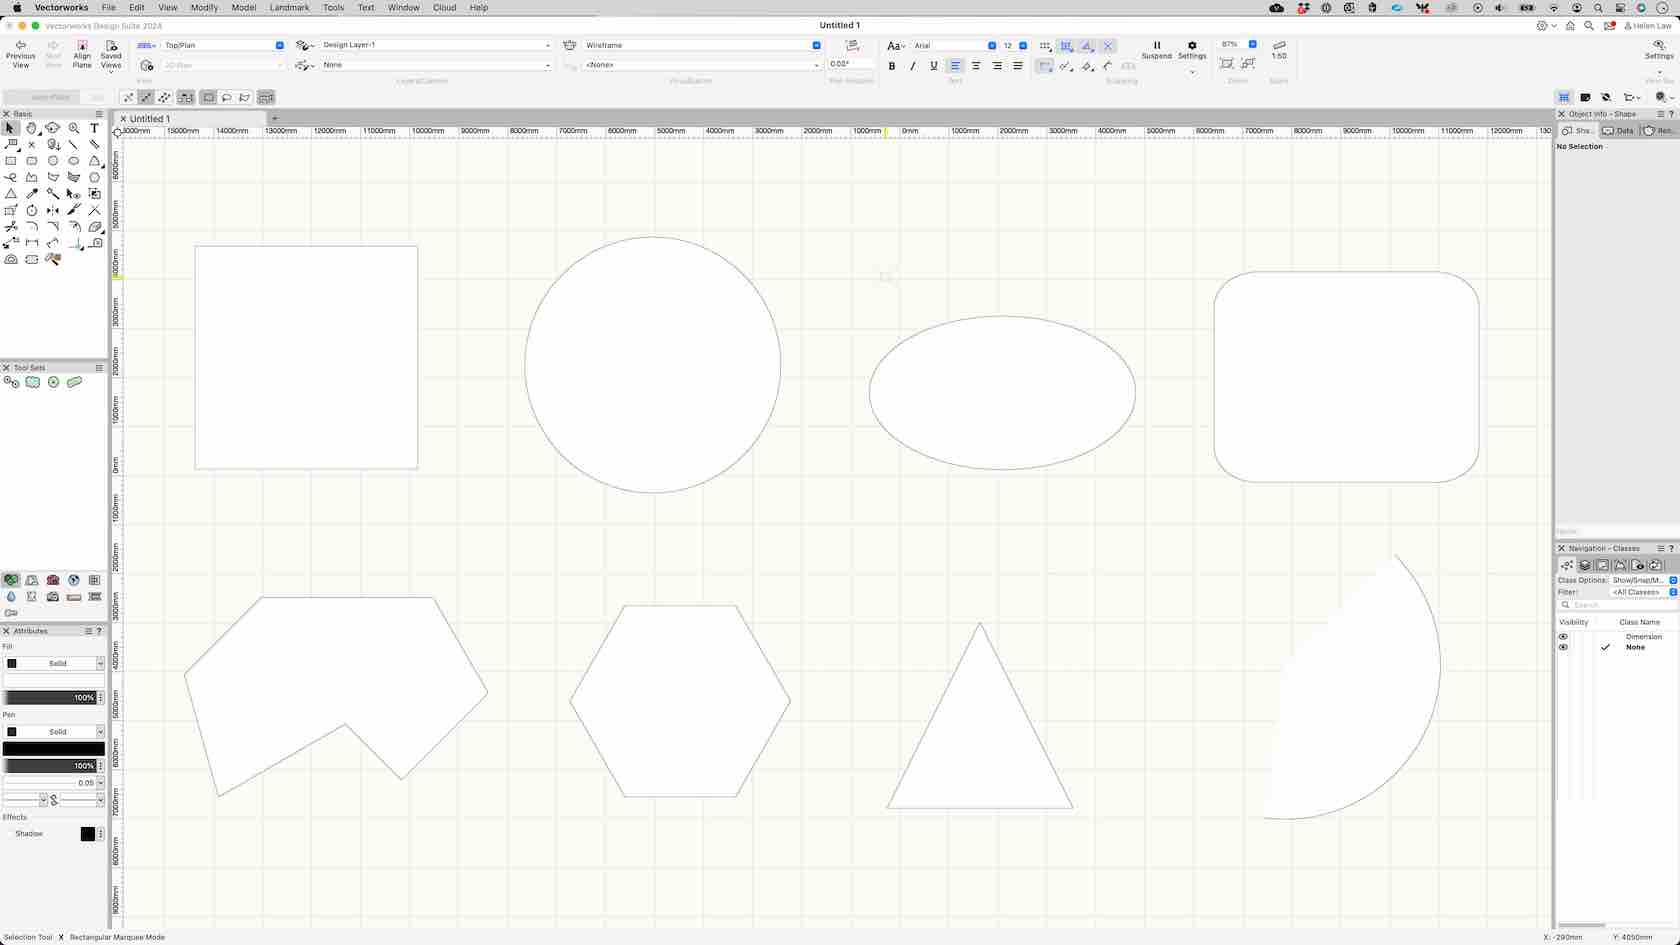
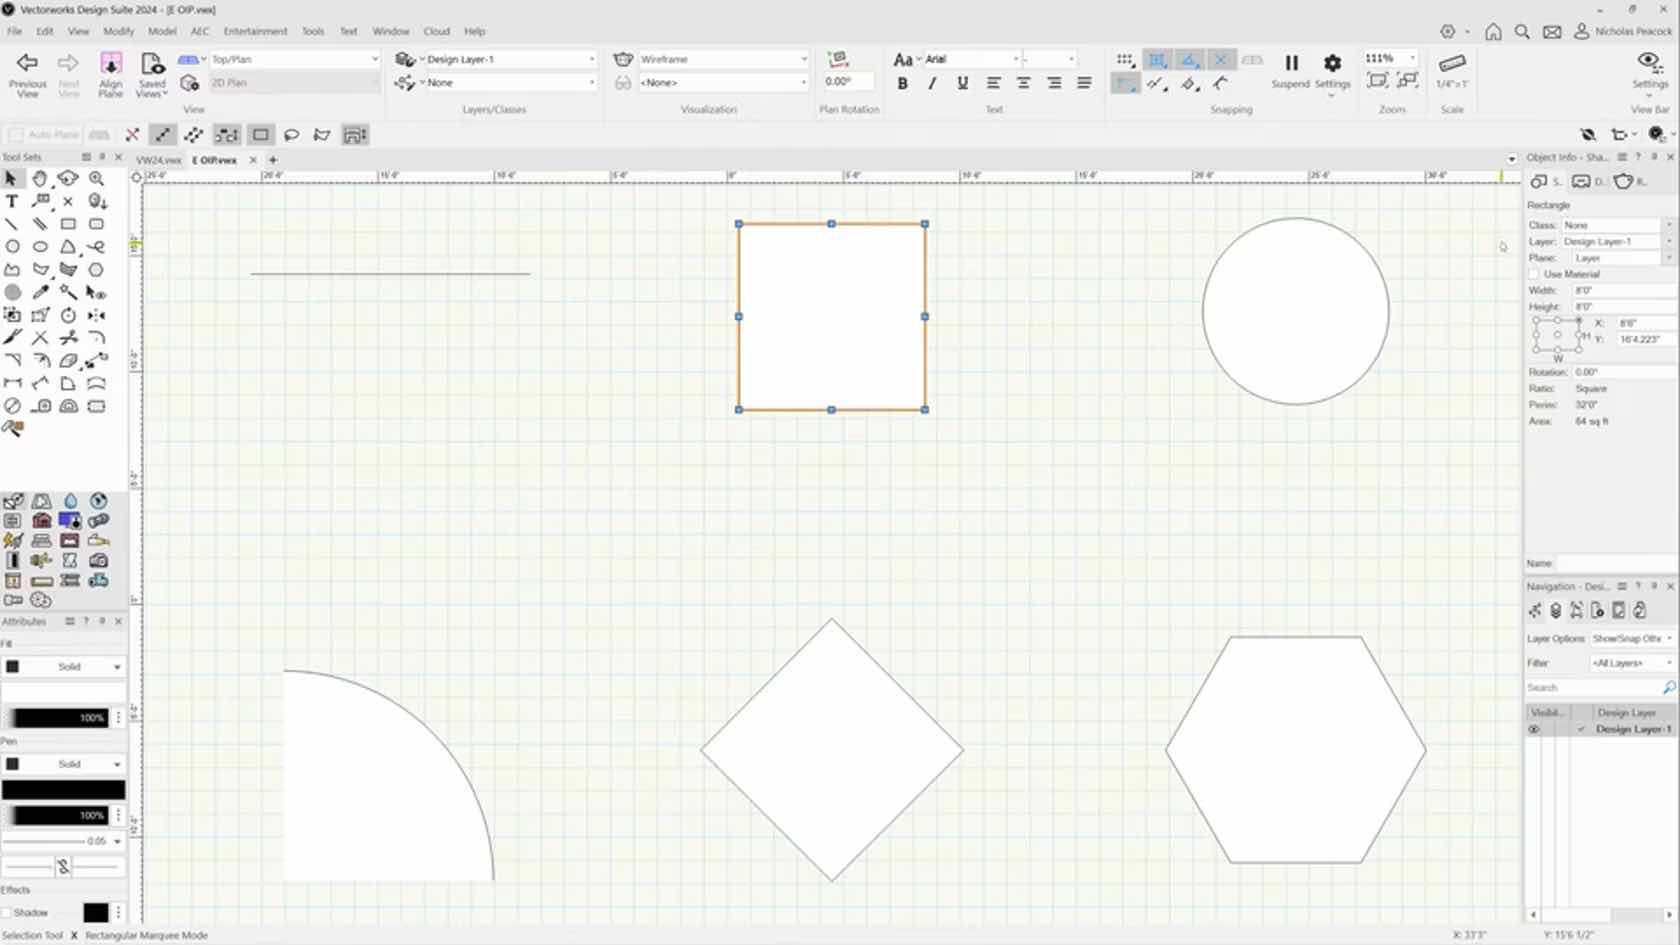
Here we will be covering how to draw Lines, Rectangles, Circle, Ovals, Arcs, Polygons, Polylines, Rounded Rectangles, 2D Locus Points, and working with tools such as the text and selection tools.
Category: Skill
Requires Approval: No
This course demonstrates the different ways to create and edit classes.
Category: Skill
Requires Approval: No
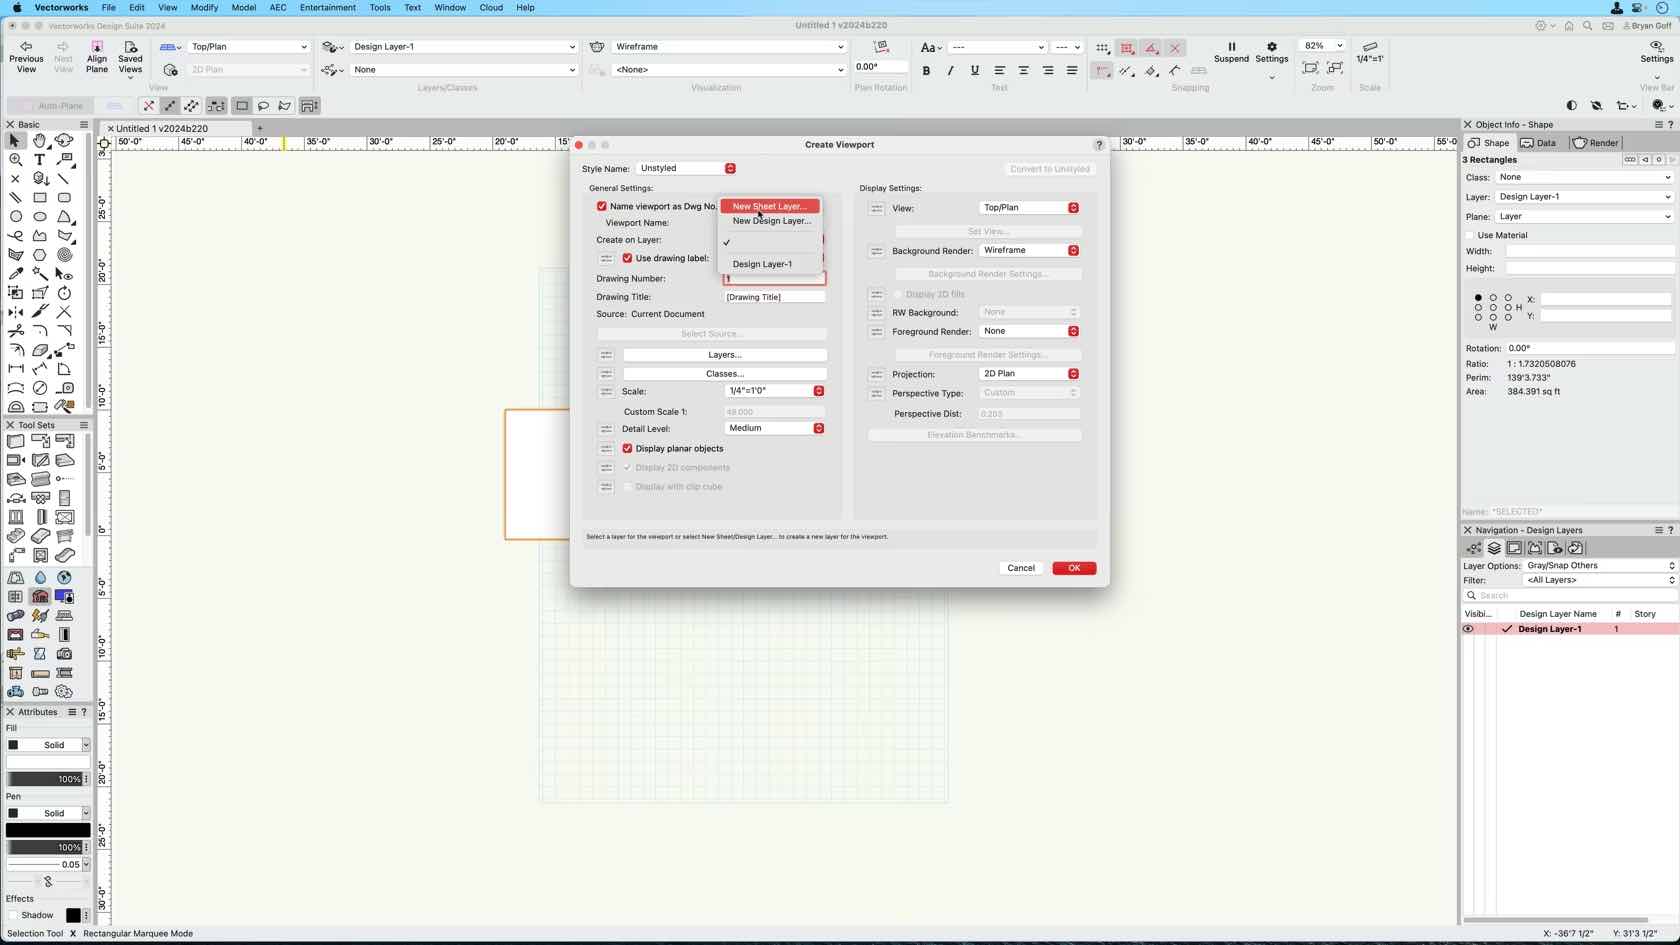
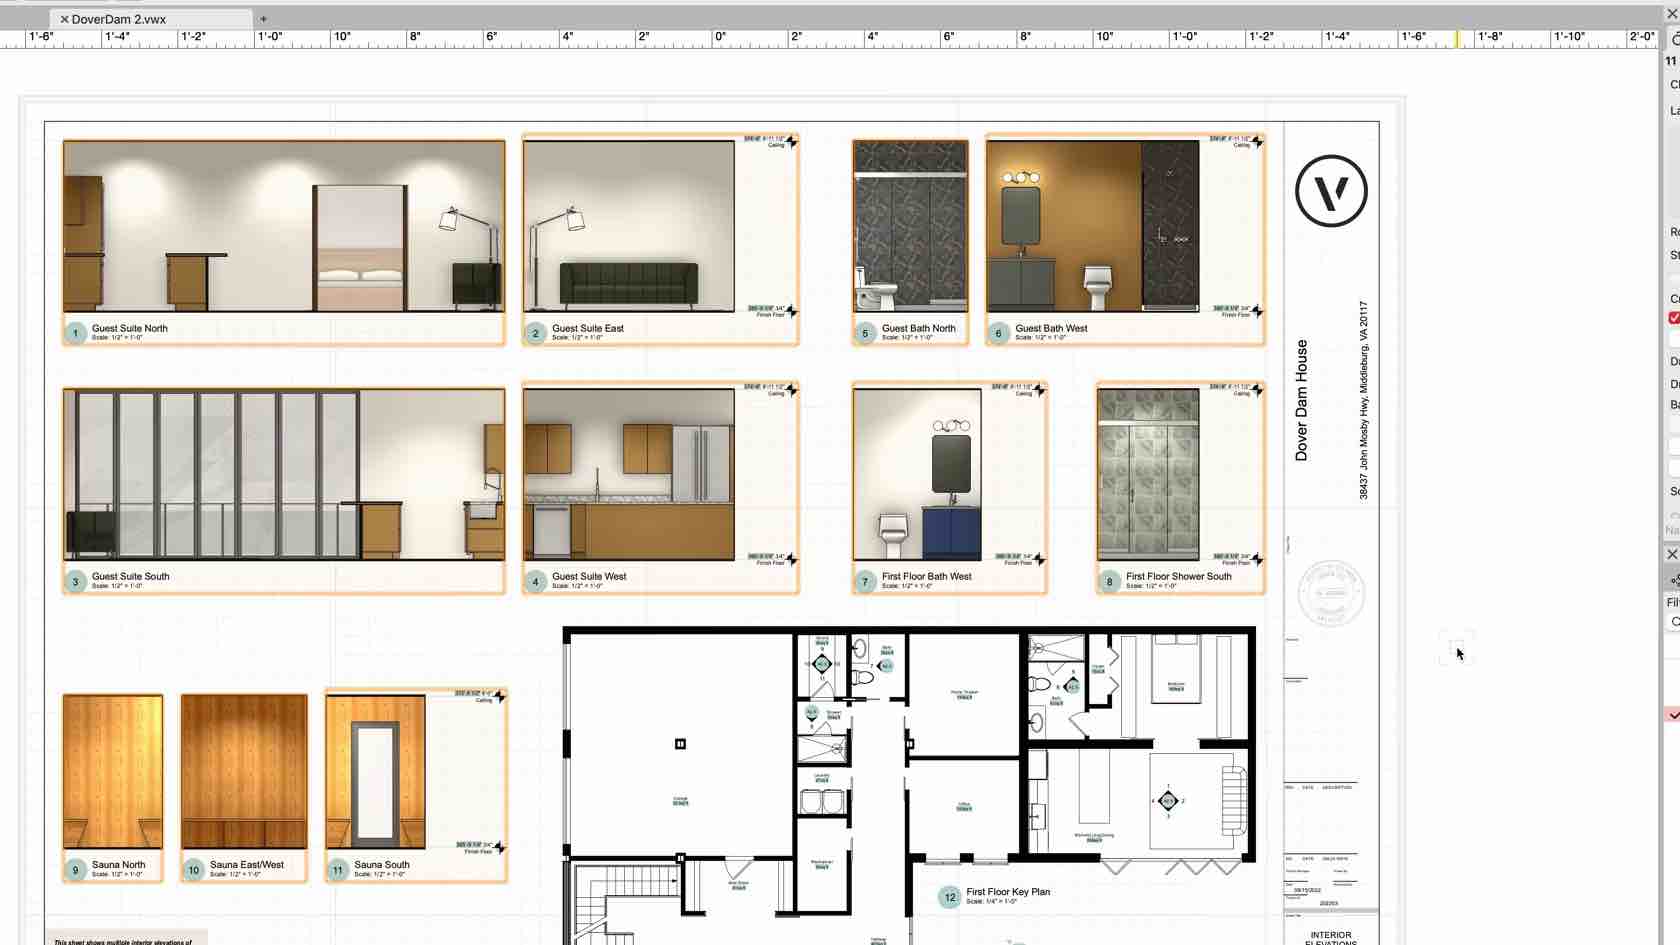
This course demonstrates how to create a basic top/plan viewport.
Category: Skill
Requires Approval: No

Curtain walls are an option of the Wall Style dialogue.
Walls, as with most building shell tools can be styled. Styled objects save you time as you can preset most of the options and in the case of curtain walls means you can have your common curtain wall arrangements, with all the associated graphics and data pre-styled.
Category: Skill
Requires Approval: No
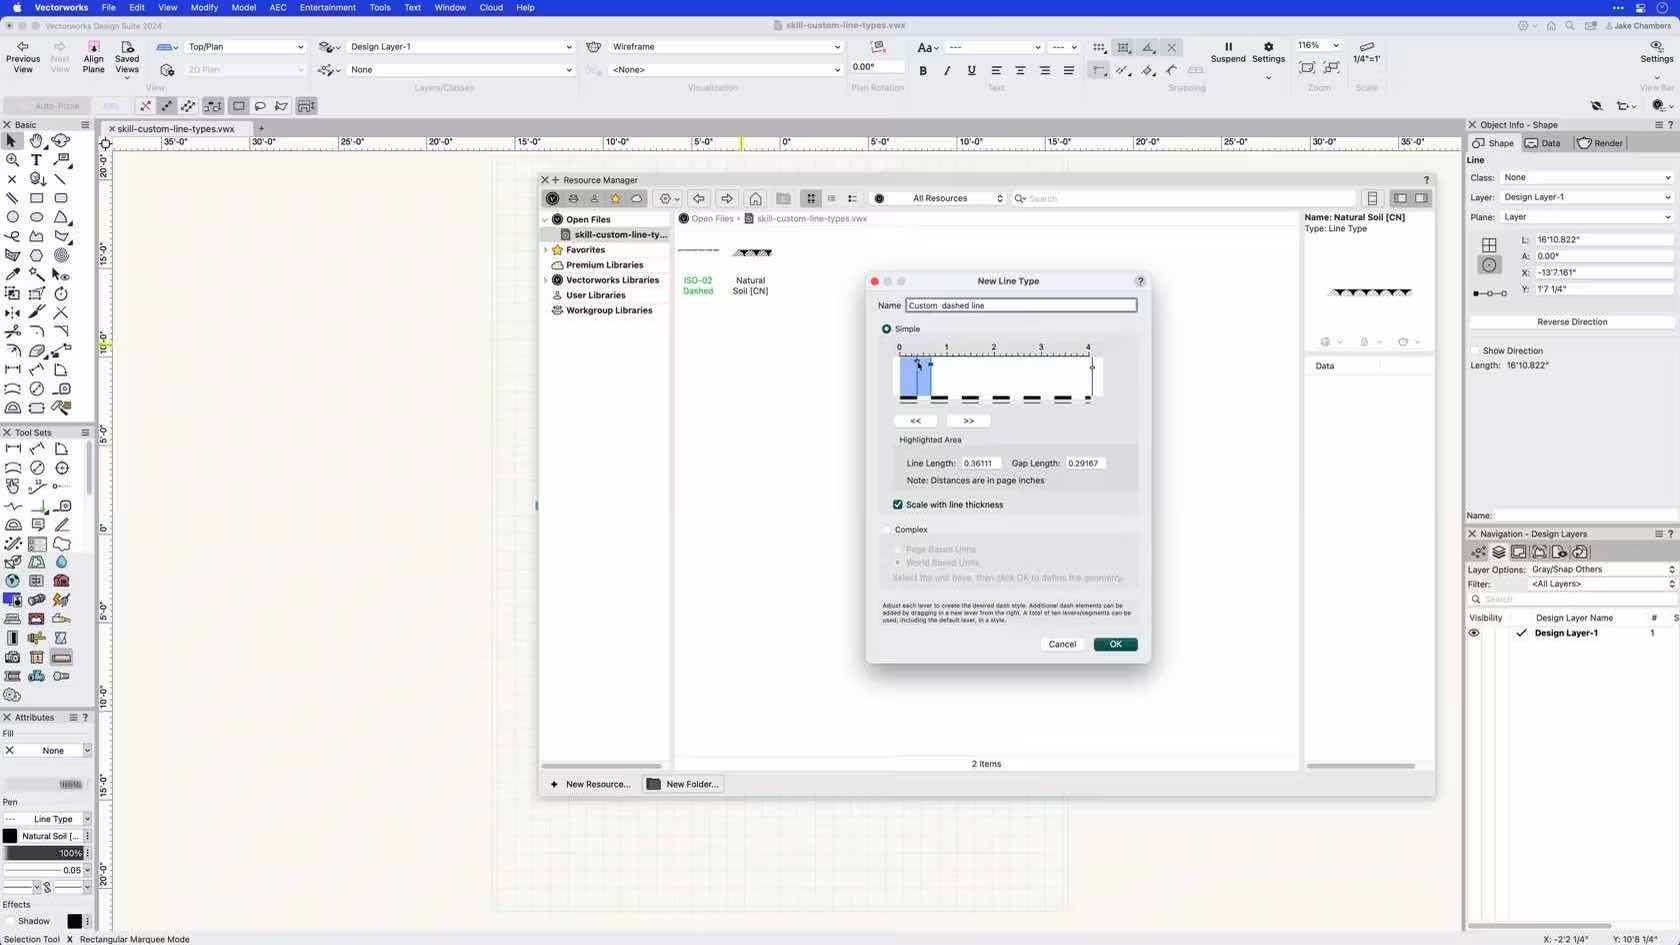
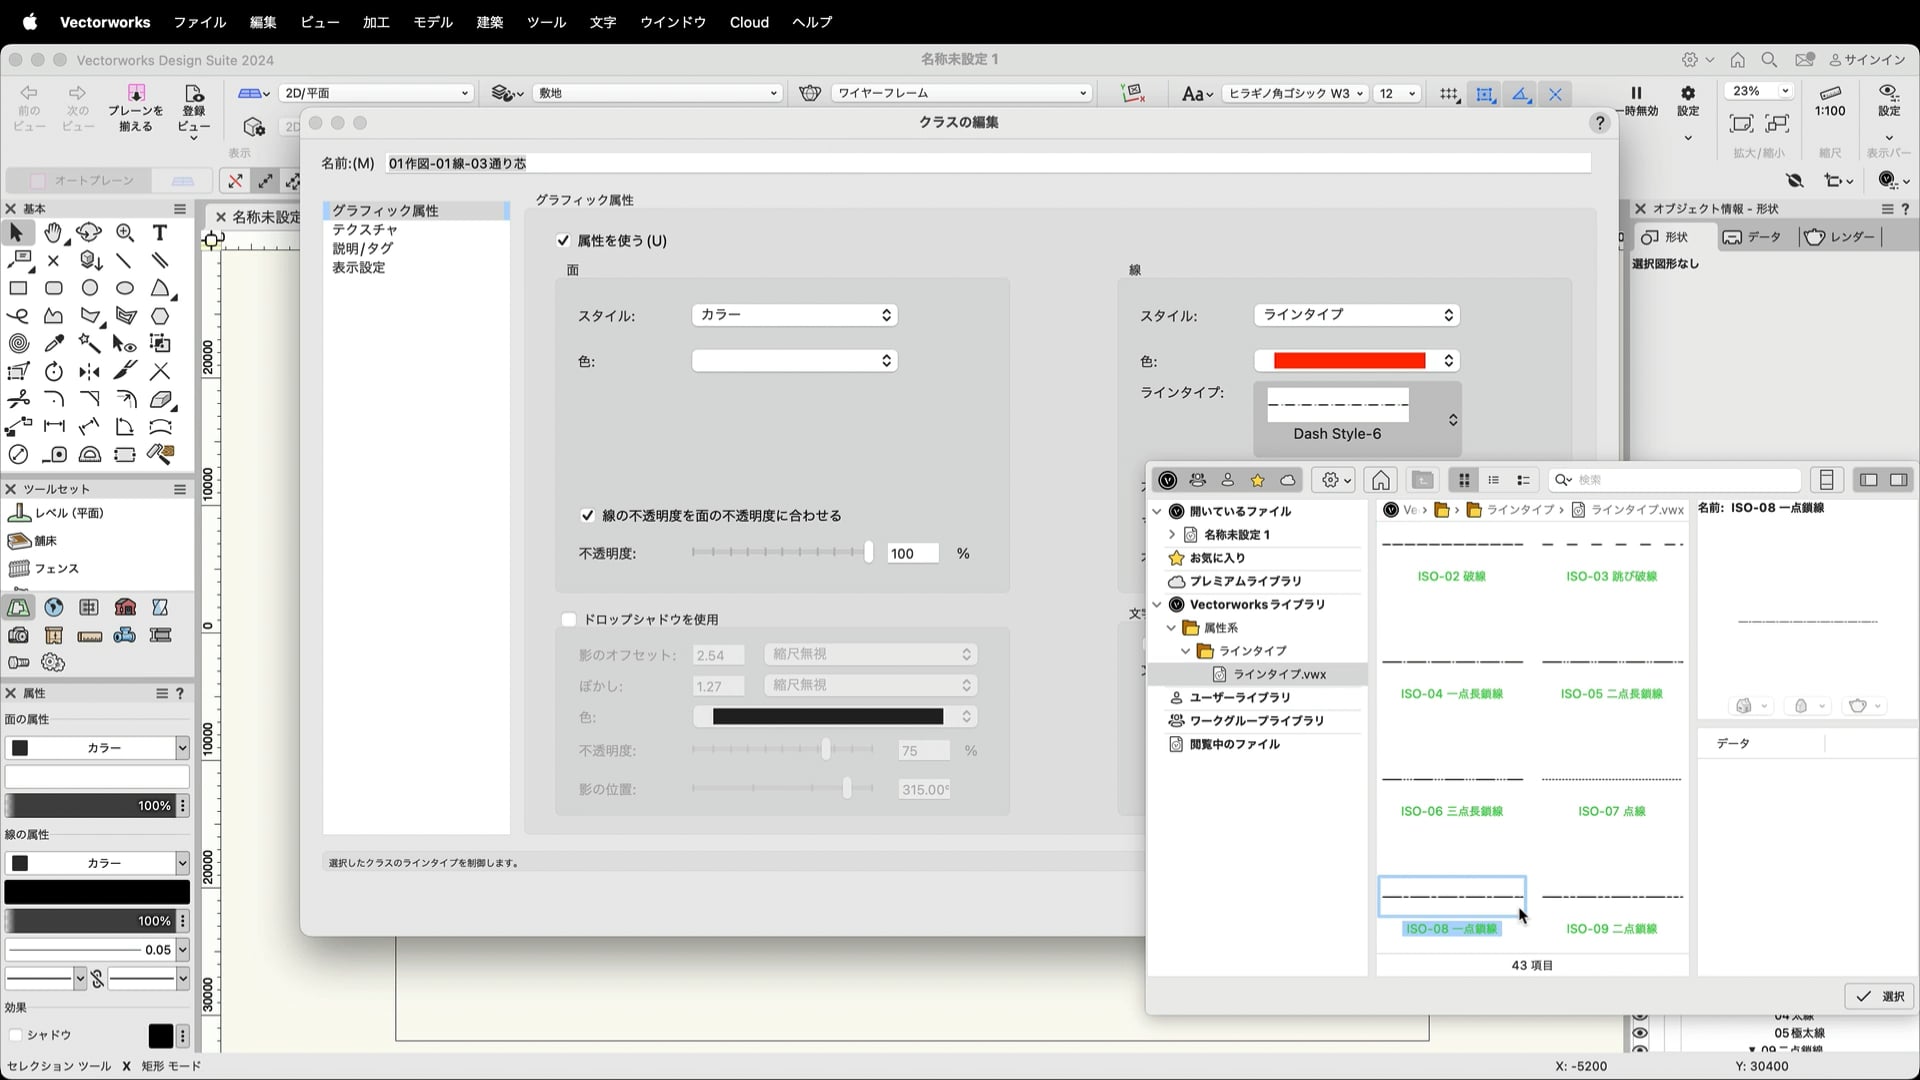
In this course you will learn how to create a resource called Line Types.
Category: Skill
Requires Approval: No

Vectorworks allows you to attach data to anything you like — this is done through records. You can then run reports and schedules on this data!
Regardless of your industry, it is always handy to know how many of certain things you have and to have other associated data about those objects. This could be a plant schedule, a door schedule or a lighting schedule or a report on anything at all. Intelligent use of Records can make all this very easy. In fact, many of the industry objects come with their own records and data attached.
Regardless of your industry, it is always handy to know how many of certain things you have and to have other associated data about those objects. This could be a plant schedule, a door schedule or a lighting schedule or a report on anything at all. Intelligent use of Records can make all this very easy. In fact, many of the industry objects come with their own records and data attached.
Category: Architect Certification 2024
Requires Approval: No
Participants will begin to unlock data from the model. We will learn how
to make instrument schedules, hoist reports, custom worksheets, and
equipment counts. We will also explore Data Tags and Data Visualization.
Category: Spotlight Certification 2024
Requires Approval: No

When creating documentation, architects and designers need to label drawing elements. In a BIM workflow, modeled objects contain data, and that data can be visualized using smart labels. In Vectorworks, any object’s data can be labeled using the Data Tag tool. In this course, you will learn how harness the power of Data Tags in Vectorworks software, to not only report data, but also push data to objects and giving you an intuitive way to append data in your designs.
Category: Workflow
Requires Approval: No
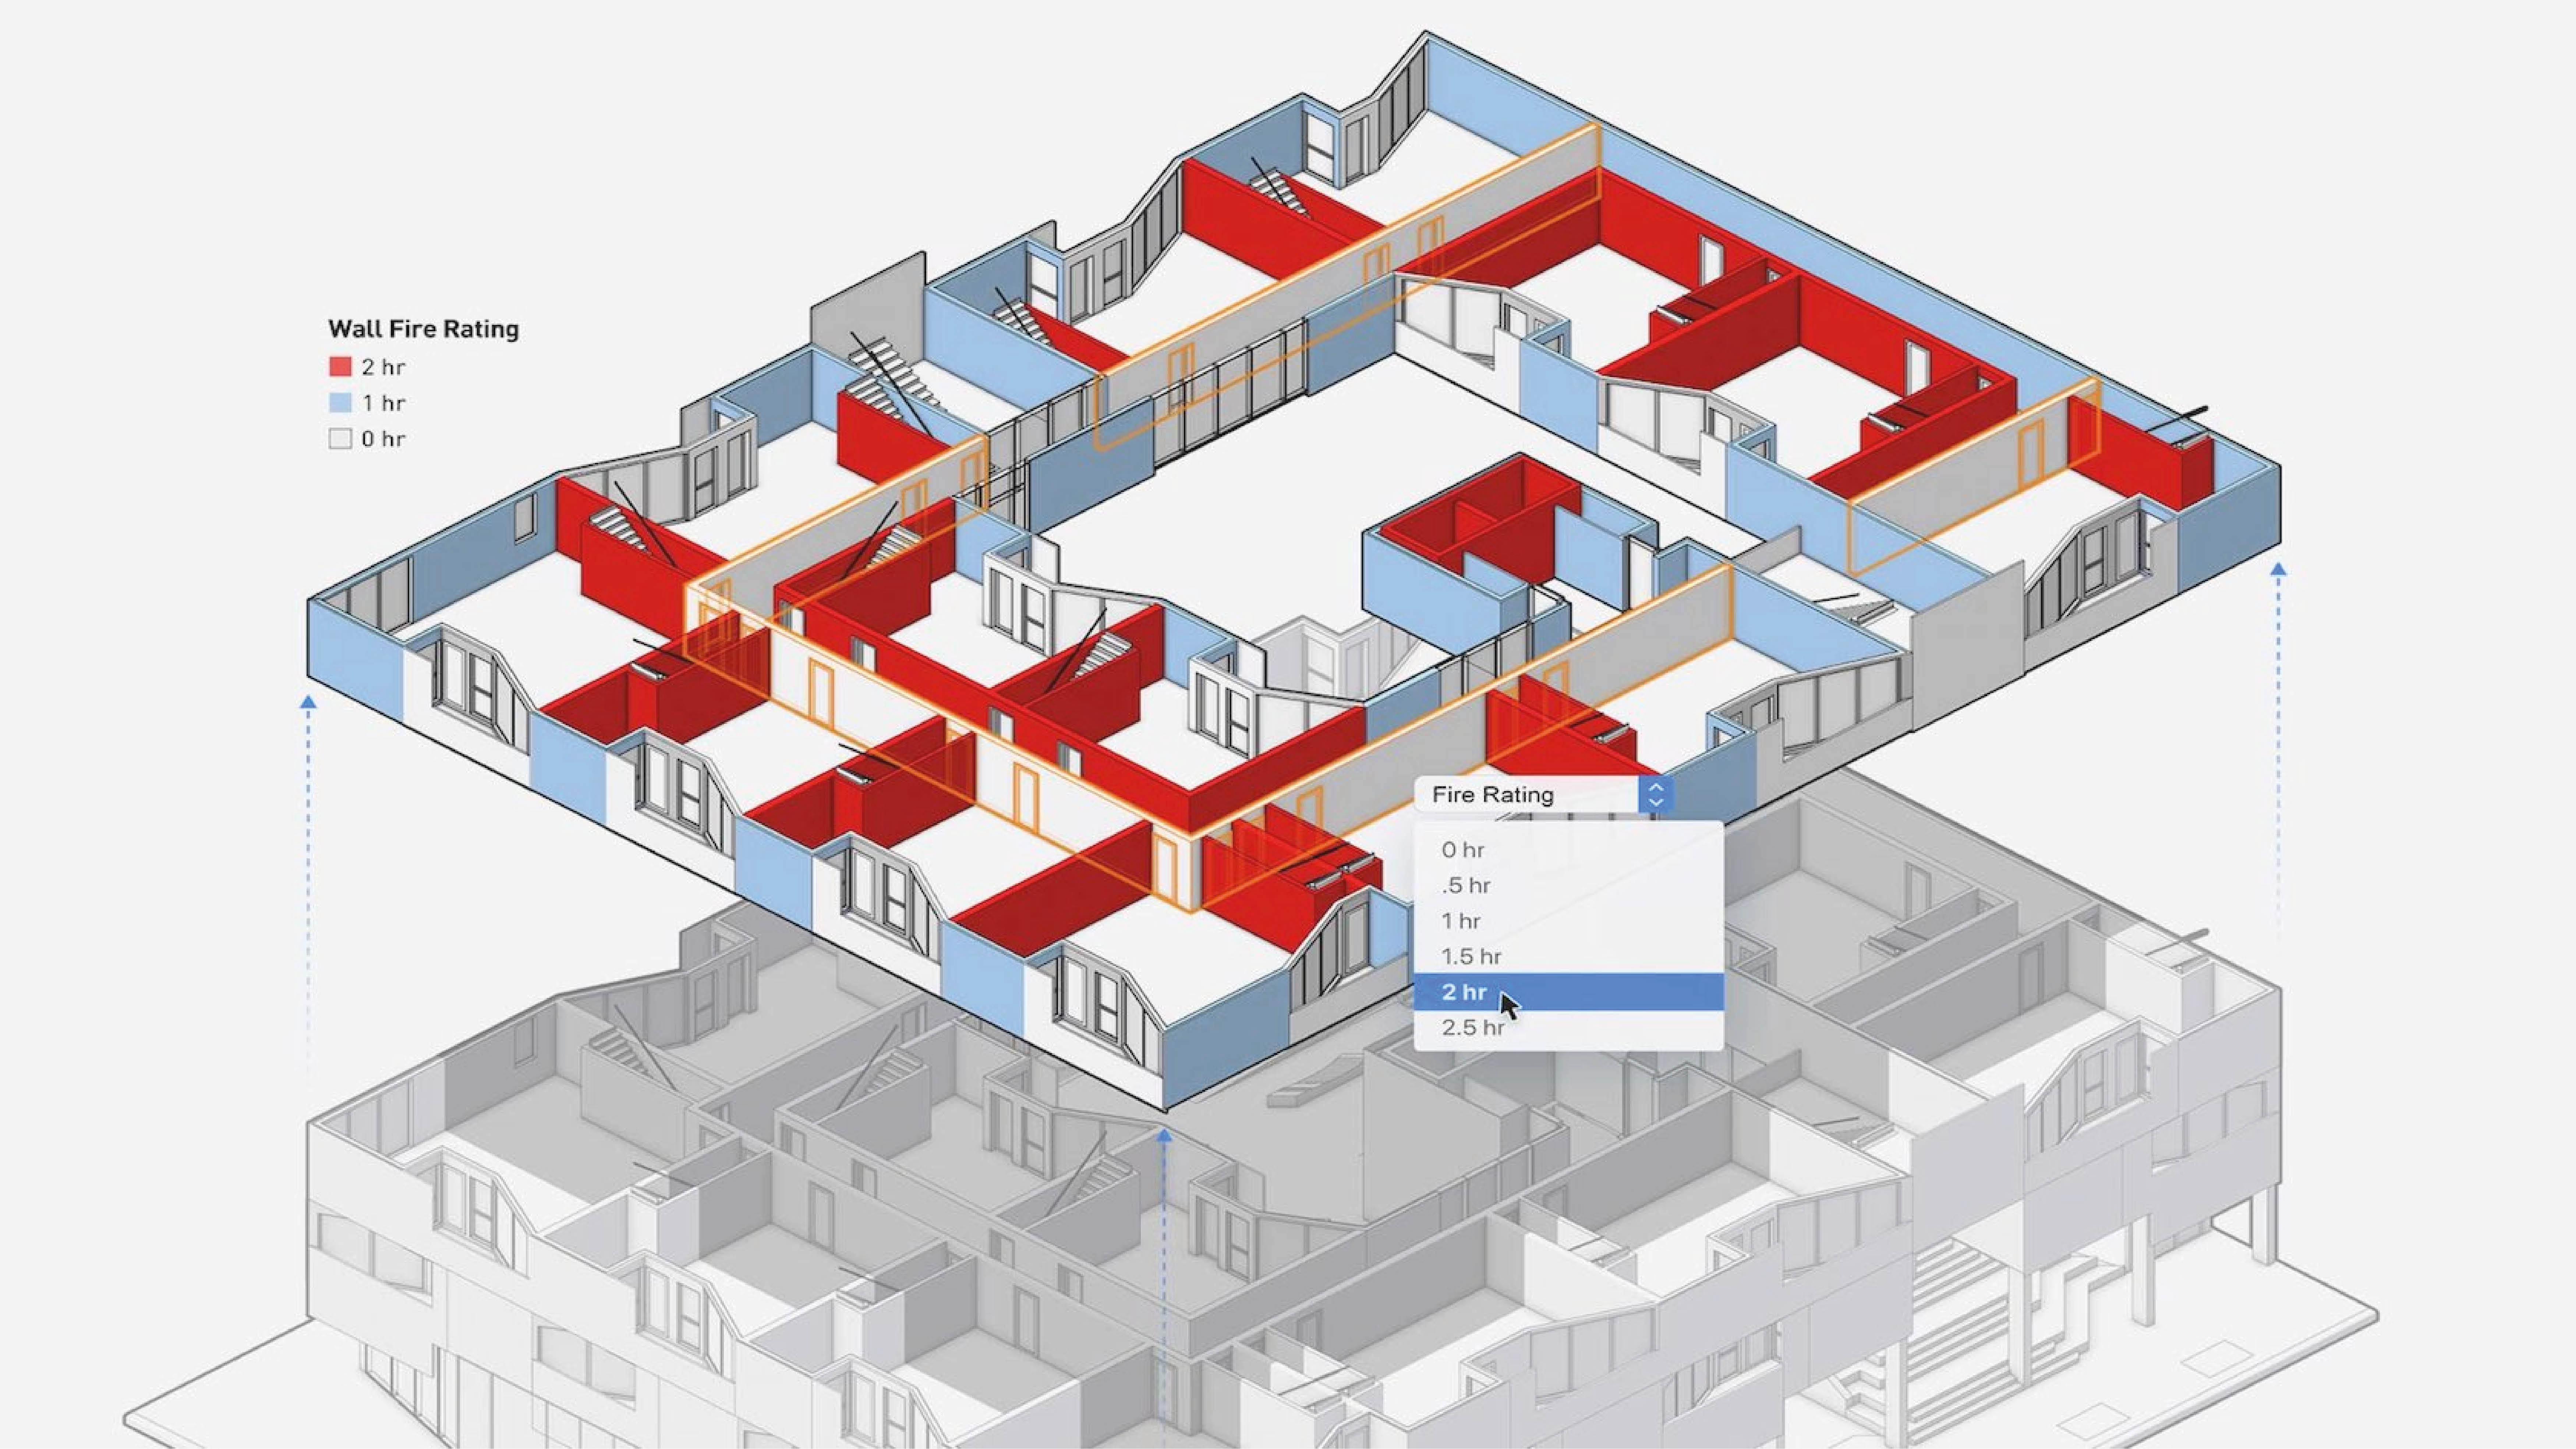
Vectorworks brings data visualization to the live design environment.
Quickly change objects’ attributes using data parameters that allow you to view everything from errors to the impacts of your decisions — all while you’re designing. And because it’s in the live design environment, you can edit an object’s data as you’re designing and see the impact of those changes; for example, you can have doors turn red when they lack fire protection. You will also experience greater efficiency in your process by being able to visualize data for error/quality checking and work validation.
Data visualization can be applied directly to the model or via a viewport, a viewport will even produce a key for you!
Category: Architect Certification 2024
Requires Approval: No

This worldwide series of events is tailor-made for architects, interior designers, landscape professionals and site designers, and entertainment design professionals. Re-visit sessions from industry leaders and design enthusiasts for inspiring stories, and presentations.
Category: Live Session
Requires Approval: No

This worldwide series of events is tailor-made for architects, interior designers, landscape professionals and site designers, and entertainment design professionals. Re-visit sessions from industry leaders and design enthusiasts for inspiring stories, and presentations, plus get excited for Vectorworks senior leadership's exploration of what’s new in Vectorworks 2024.
Category: Live Session
Requires Approval: No

Ignite your imagination, explore the latest tools, and learn from Vectorworks leaders and industry peers. This worldwide series of events is tailor-made for architects, interior designers, landscape professionals and site designers, and entertainment design professionals. Re-visit sessions from industry leaders and design enthusiasts for inspiring stories, and presentations.
Category: Live Session
Requires Approval: No

Detail viewports are great for drawing coordination. They let you mark an area on any viewport that you wish to look at in greater detail!
Often in a project, you will want a closer look at a particular area or part of your project to show it in greater detail. Detail viewports allows you to create a visible crop on another viewport which then automatically tracks to the detail itself even if it is on a different sheet!
Often in a project, you will want a closer look at a particular area or part of your project to show it in greater detail. Detail viewports allows you to create a visible crop on another viewport which then automatically tracks to the detail itself even if it is on a different sheet!
Category: Architect Certification 2024
Requires Approval: No
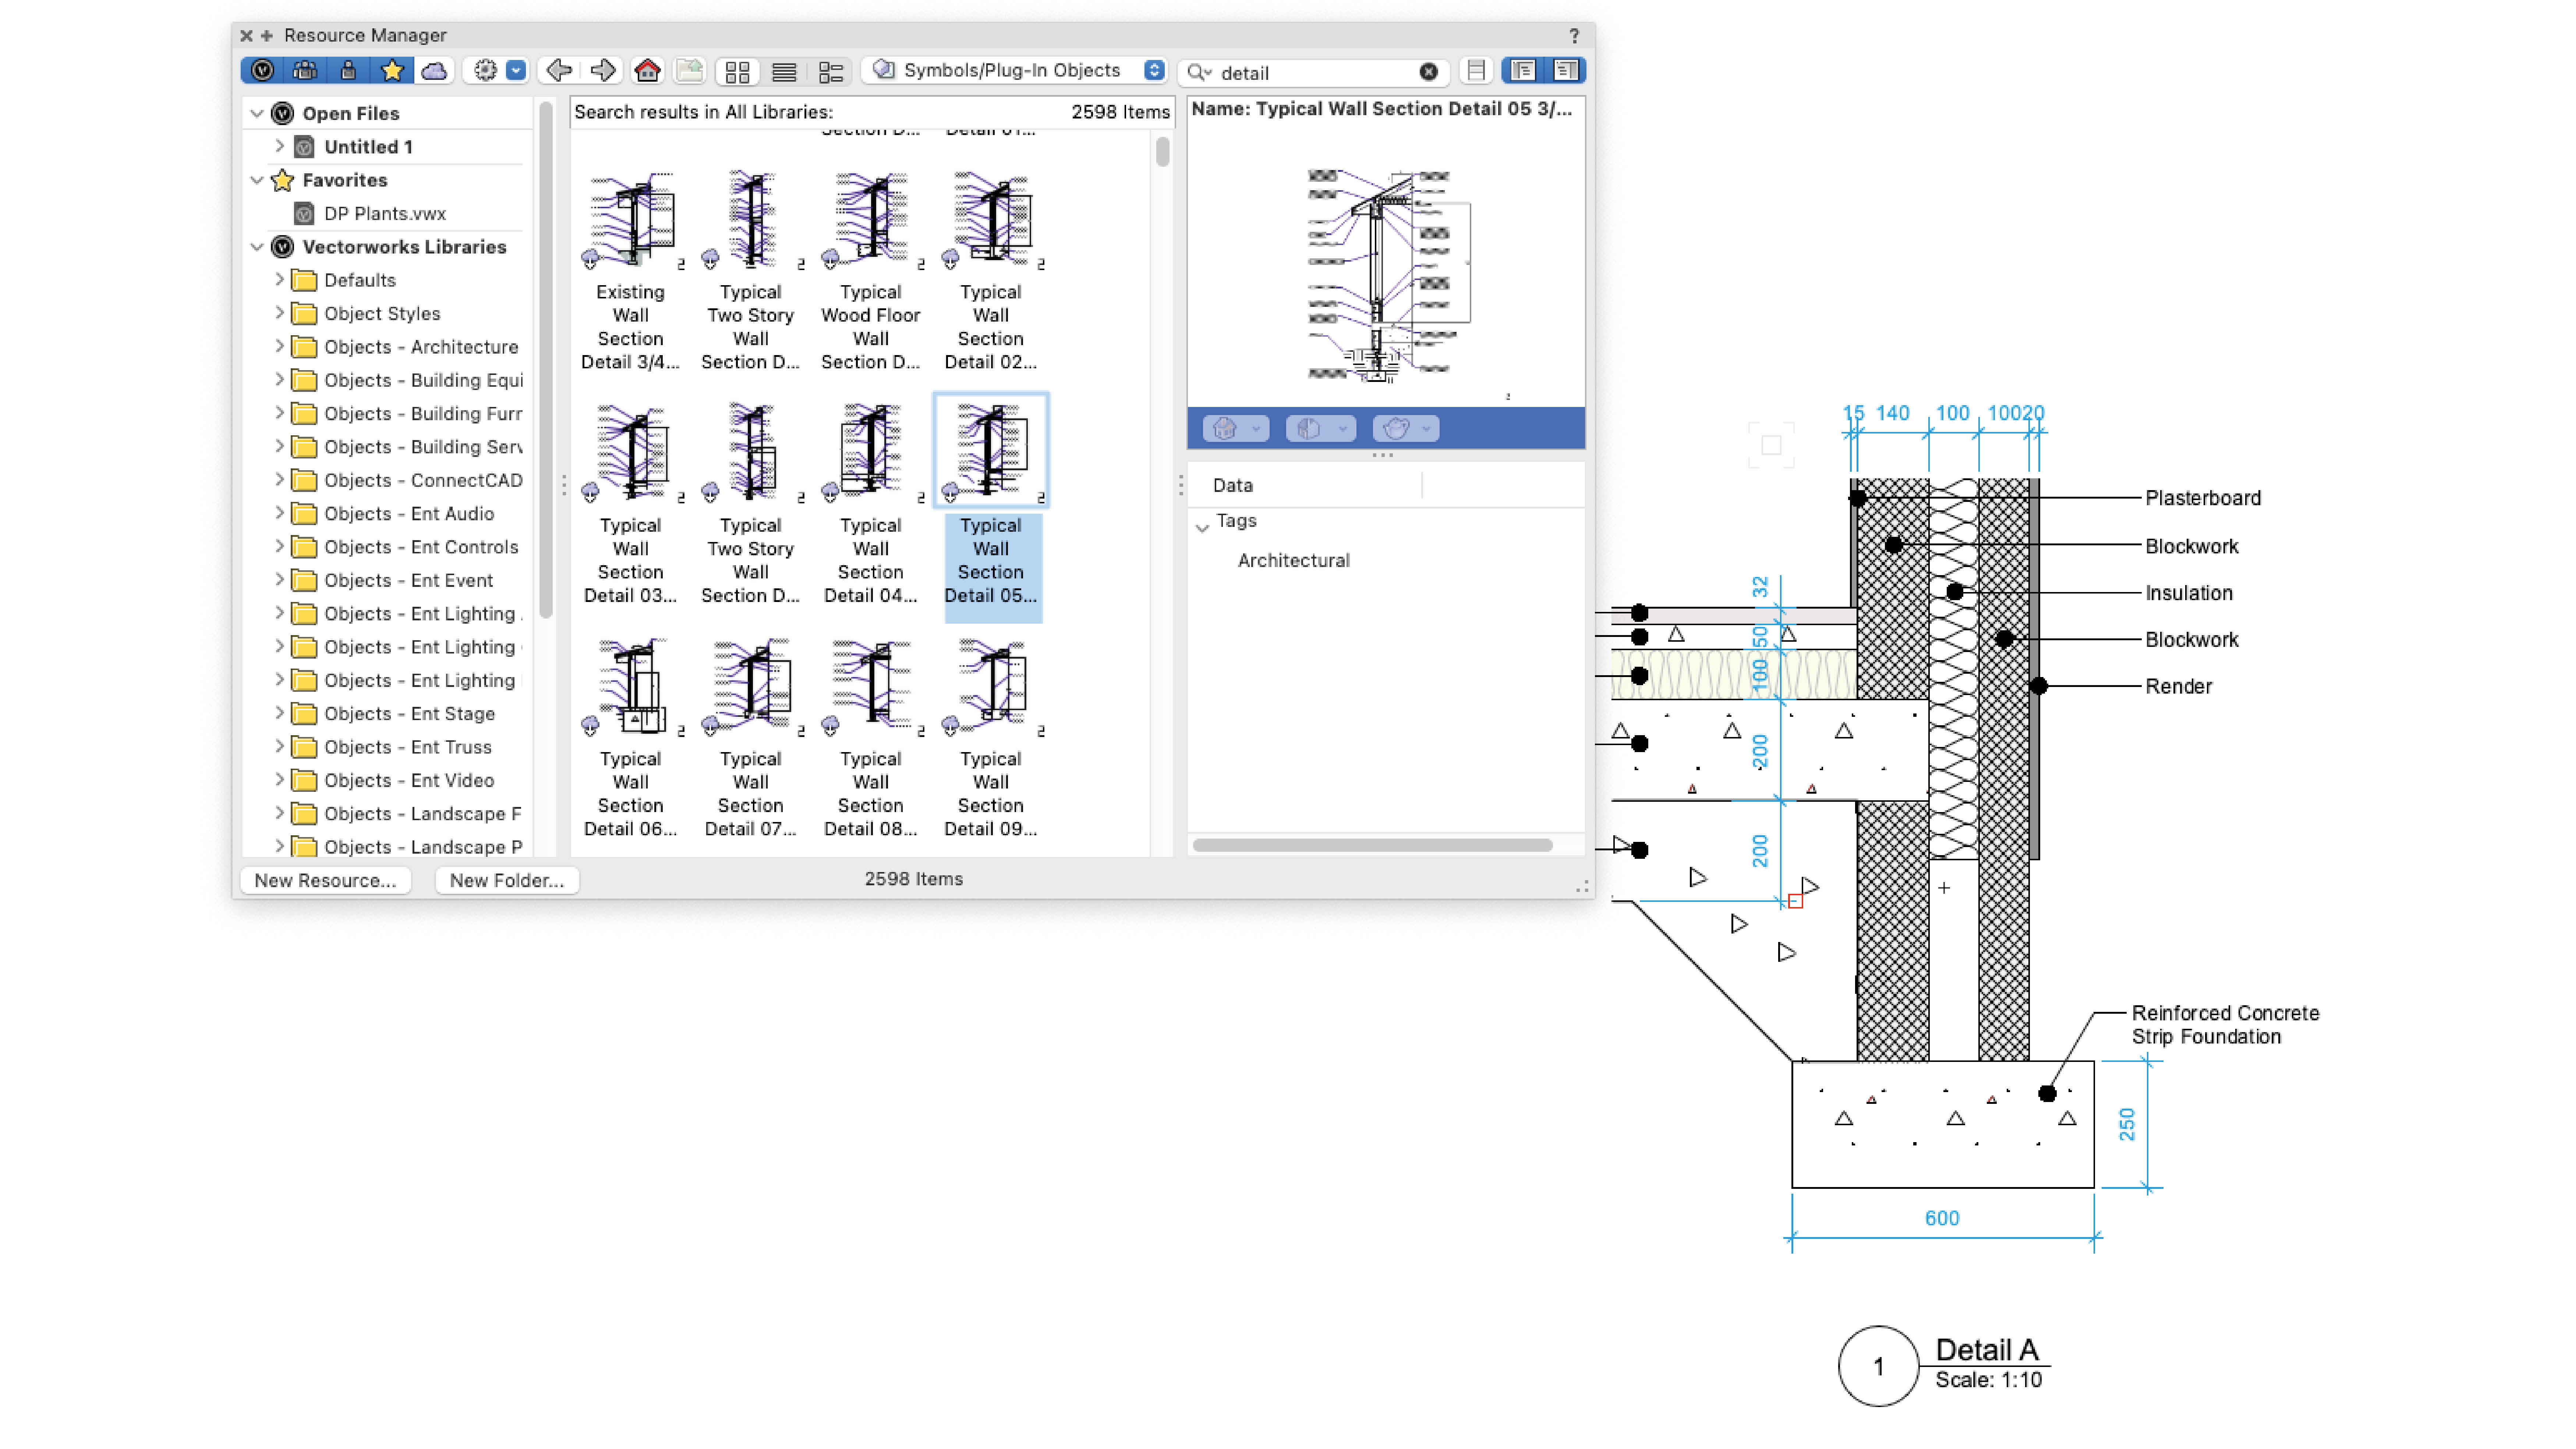
There is a common misconception, particularly with BIM models, that you need to draw or model everything as built right down to the wall ties and screws. This is thankfully not the case! The AEC standards recommend modelling to a 1:50 scale with detailing done pretty much in the traditional manner. You do however have the added benefit of being able to use your model to get you started!
It is also perfectly acceptable to have traditional 2D generic details that you can save in your Libraries and reuse from project to project.
It is also perfectly acceptable to have traditional 2D generic details that you can save in your Libraries and reuse from project to project.
Category: Architect Certification 2024
Requires Approval: No
In this session, we will begin developing our concept model by attending more carefully to its materials and methods of construction. Therefore, we will explore how to add components to your Walls, Slabs, and Roofs and control their components' interactions, much of which can be automated using Stories and Levels.
Adding specificity to the material assemblies of your building components allows you to extract a reasonable level of detail for larger-scale plans and sections, but remember: the tools are there to help you, not restrict you; if you want something different, you can always model it—a custom wall, slab, or roof, for example—using the 3D Modeling tool set.
Adding specificity to the material assemblies of your building components allows you to extract a reasonable level of detail for larger-scale plans and sections, but remember: the tools are there to help you, not restrict you; if you want something different, you can always model it—a custom wall, slab, or roof, for example—using the 3D Modeling tool set.
Category: Architect Certification 2024
Requires Approval: No
In this session, we will continue developing our model. After adding stairs, we will explore a number of features that allow us to embed more information about our project into the model. These features include Data Tags, both Pre-formatted and Custom Reports for Door and Window Schedules, and Symbols with 2D Components and Detail Levels.
Category: Architect Certification 2024
Requires Approval: No
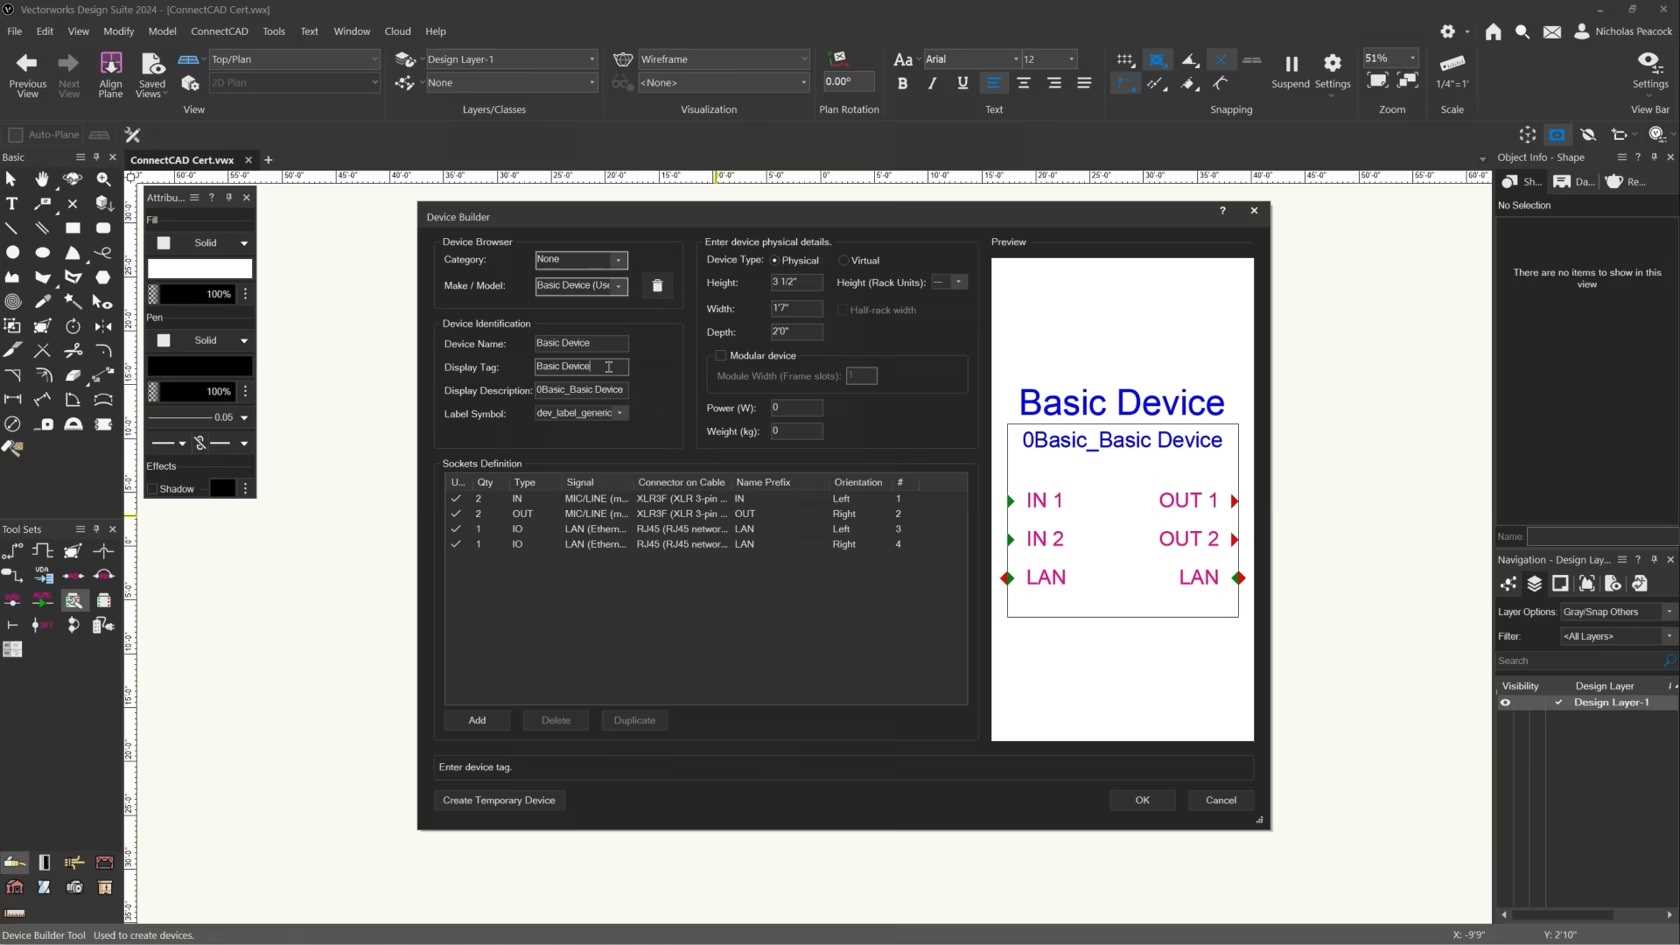
In this video, we will cover the basics of the Device Builder Tool.
Category: (2024) Skill
Requires Approval: No
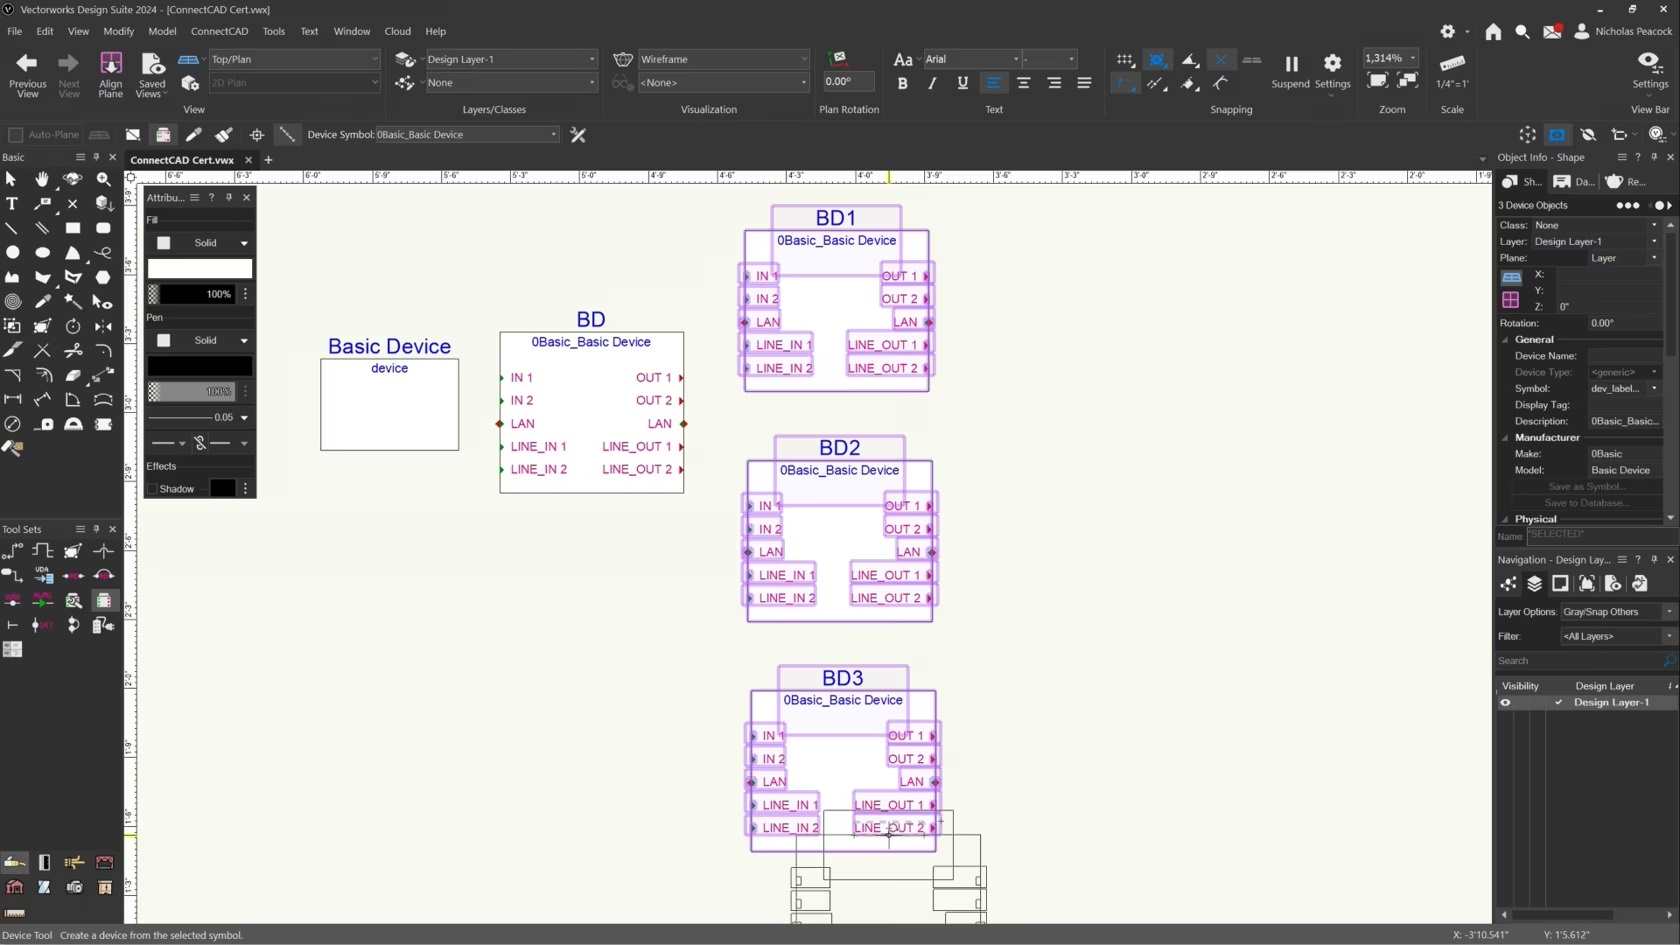
In this video, we will cover the basics of the Device Tool.
Category: (2024) Skill
Requires Approval: No

This lesson combines the tools and commands from the skill videos and seeks to teach you the concepts and workflows behind devices and their connections.
Category: 2024 ConnectCAD Certification
Requires Approval: No

An exercise to test your knowledge and practice what you have learned.
Category: 2024 ConnectCAD Certification
Requires Approval: No
Seit über 30 Jahren löst Dominique Corpataux Vectorworks-Aufgaben, wenn es brenzlig wird. Er ist für die Planungsarbeit das, was Henry Ford für den Automobilbau war, und wenn Sie ihm noch nie dabei zugesehen haben, was in Vectorworks mit ein paar einfachen Tricks alles möglich ist, sollten Sie das jetzt schleunigst nachholen. Natürlich erreichen Sie Ihr Ziel in Vectorworks auch so, nur erst viele, viele, viele Mausklicks später. Ein Webinar von knackigen 30 Minuten, das nicht nur Neulingen Stunden um Stunden Zeit spart.
Die zu diesem Webinar gehörende Datei „Tastenkürzel Vectorworks 2024" können Sie sich hier herunterladen.
(Für Version 2024)
Category: Featured
Requires Approval: No
In this video, we will cover the basics of the Distribution Amplifier Tool.
Category: (2024) Skill
Requires Approval: No

In this video, we will discuss unit settings in Vectorworks. This includes the default units used throughout the project and the option for dual dimensions to display a dimension in two separate units.
Category: Skill
Requires Approval: No

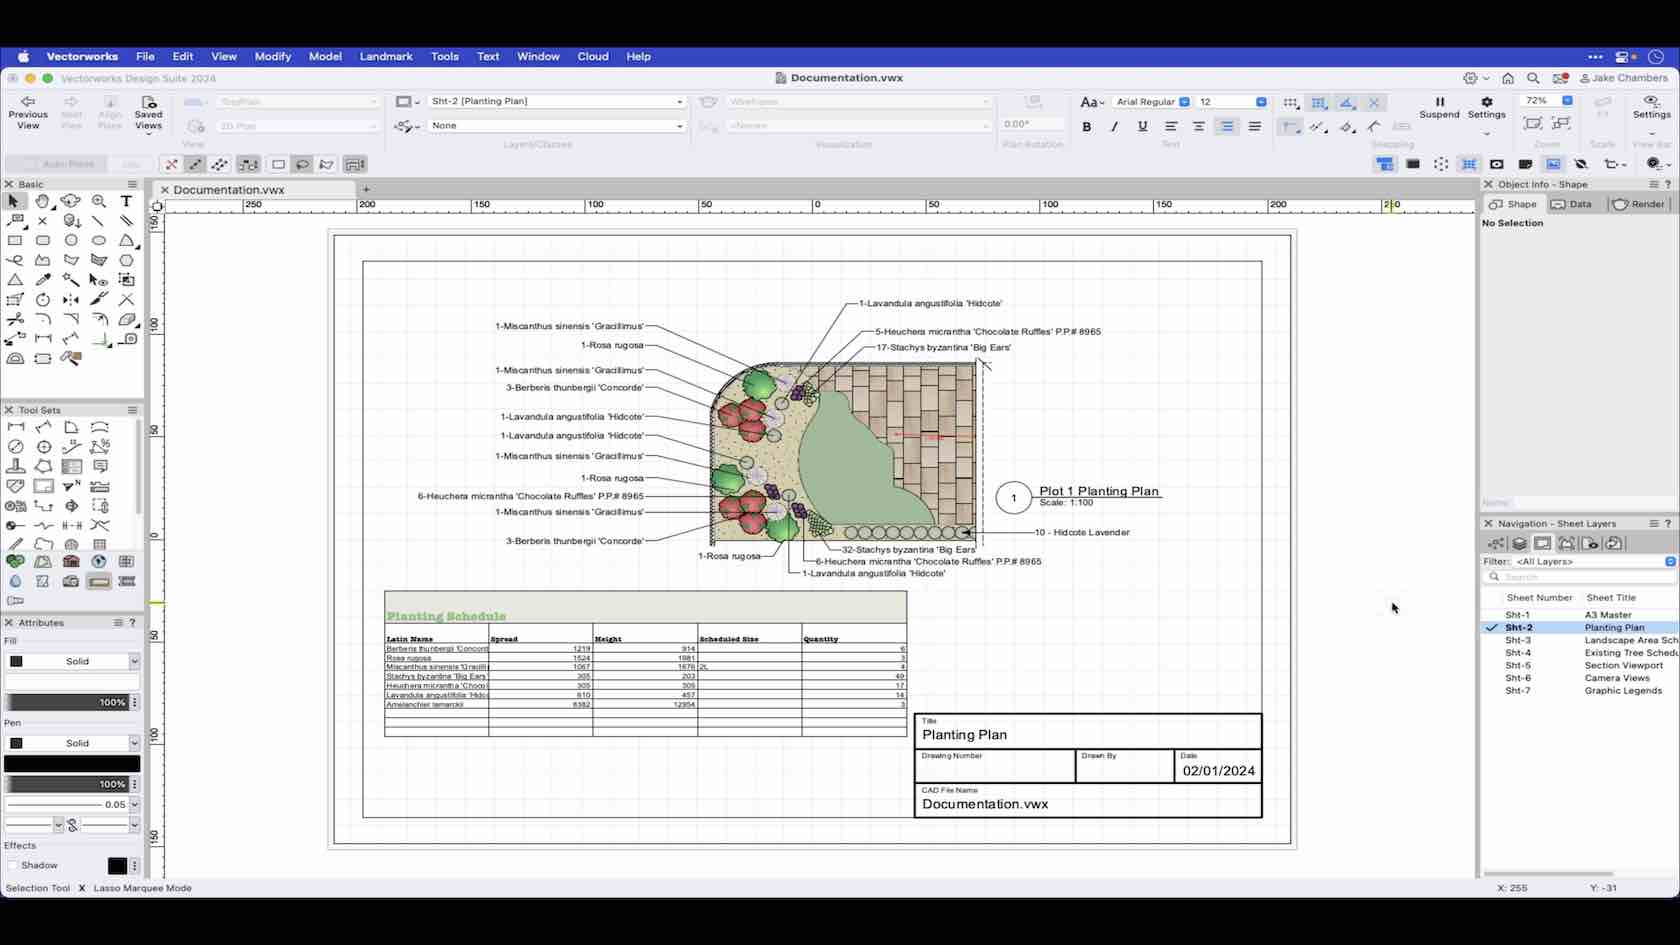
This video demonstrates a few basic processes for documenting your design, from labelling planting plans with Data tags to creating a rendered view using the camera tool.
Category: Landmark 2024 Certificaiton
Requires Approval: No
Here are links to resources to help with your documentation.
Category: CHAPTER 6 DOCUMENTATION
Requires Approval: No
Strukturierte Dokumente erleichtern Ihren Planungsprozess. Lernen Sie die verschiedenen Möglichkeiten, Ihre Zeichenobjekte zu organisieren kennen.
Category: Erste Schritte 2024
Requires Approval: No
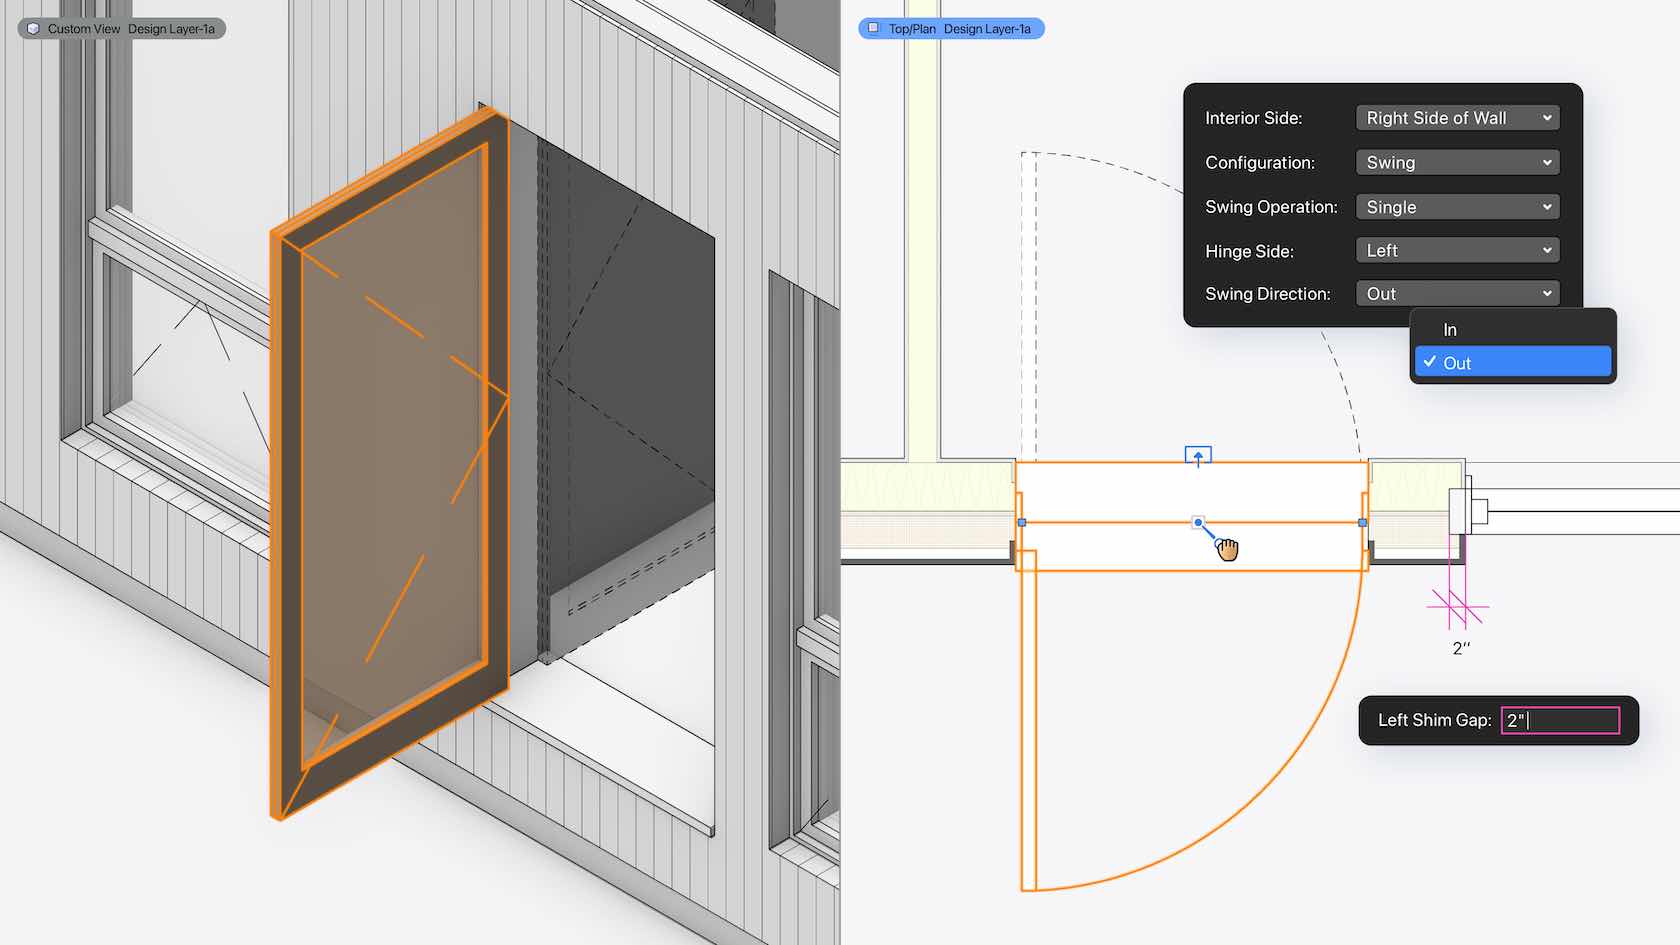
Thresholds and sills are now better represented within wall closures thanks to more detailed geometry. Plus, you have more options to control interior and exterior conditions; gaps around doors and windows can be controlled for each side of the opening. Standardized door handing allows for more accurate geometry and data that support industry standards.
Category: Buildings
Requires Approval: No
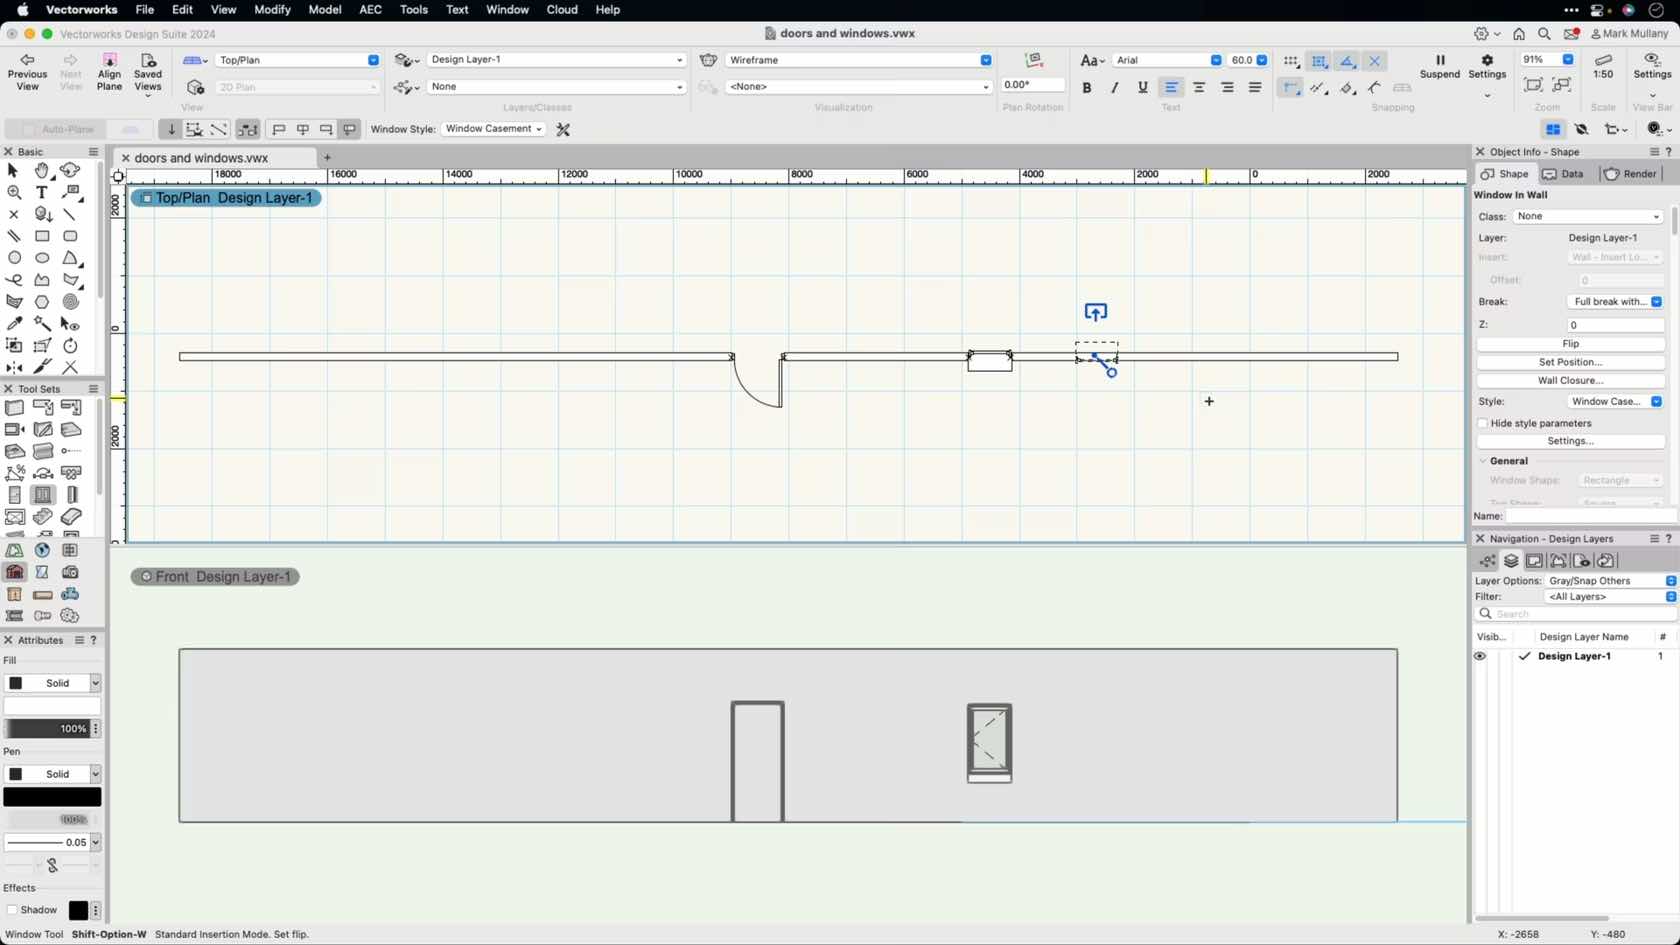
Doors and windows have very similar modes and placement methods. This session will take you through the commonly used modes for placing both doors and windows as well as the differences between these tools.
Category: Skill
Requires Approval: No
The door and window tools automatically generate 2D and 3D geometry to your specifications and they interact correctly with wall objects. They cut their own holes in walls and walls heal up when a door or window is removed!
Category: Architect Certification 2024
Requires Approval: No
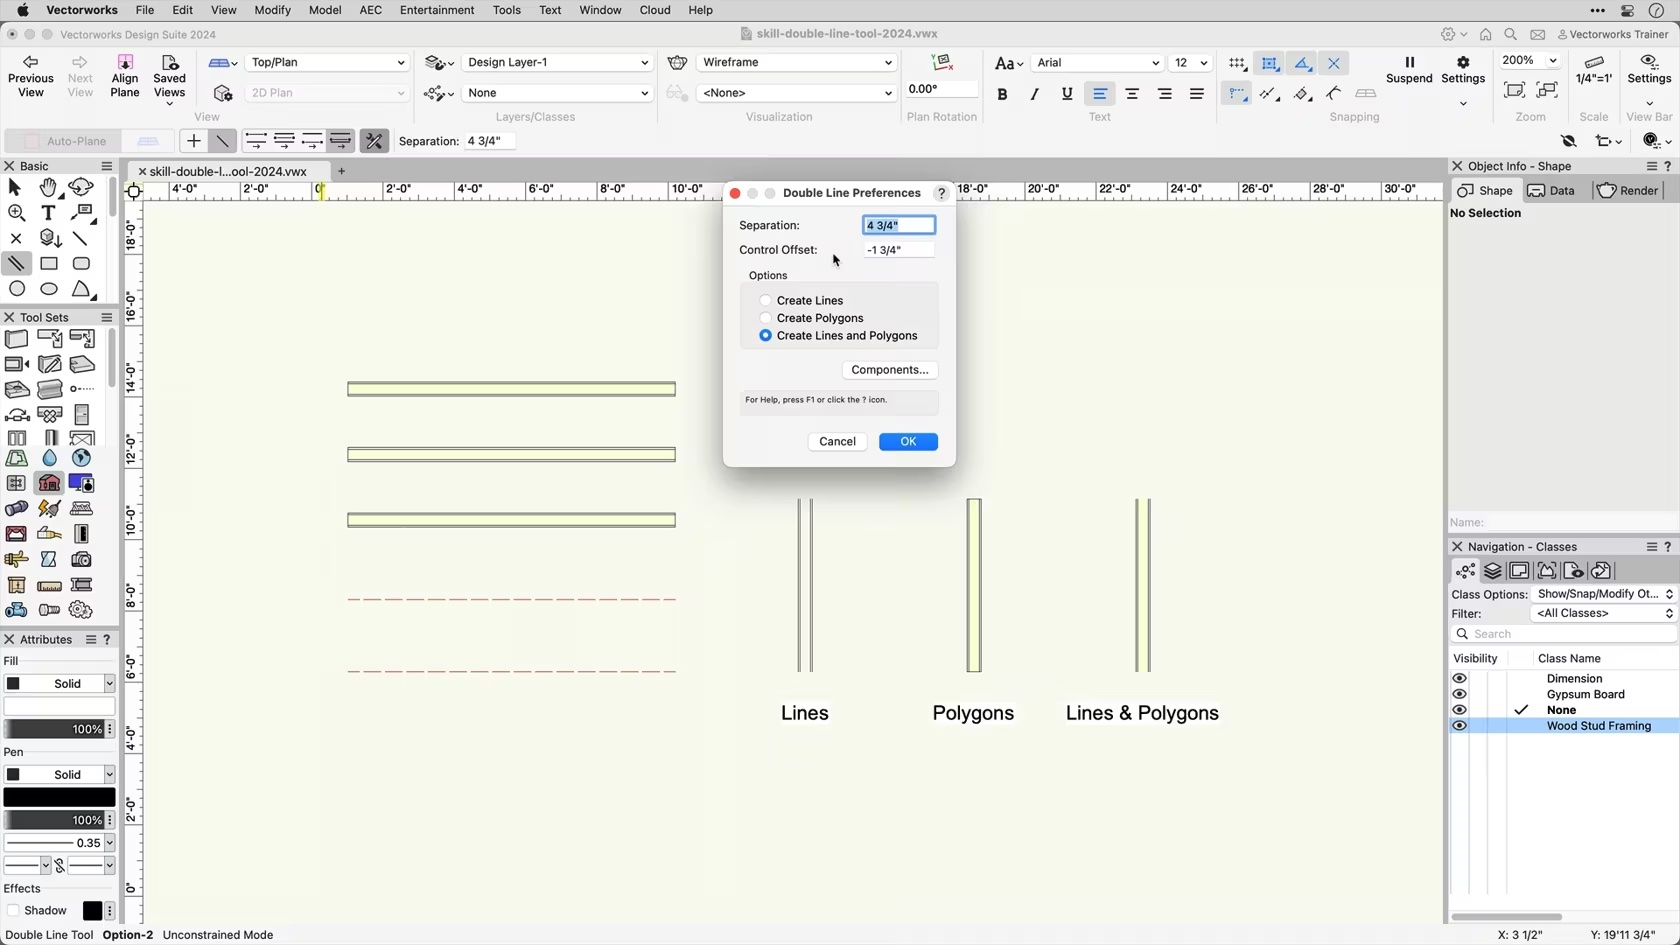
In this course, we will gain an understanding of the Double Line Tool and its various modes.
Category: Skill
Requires Approval: No
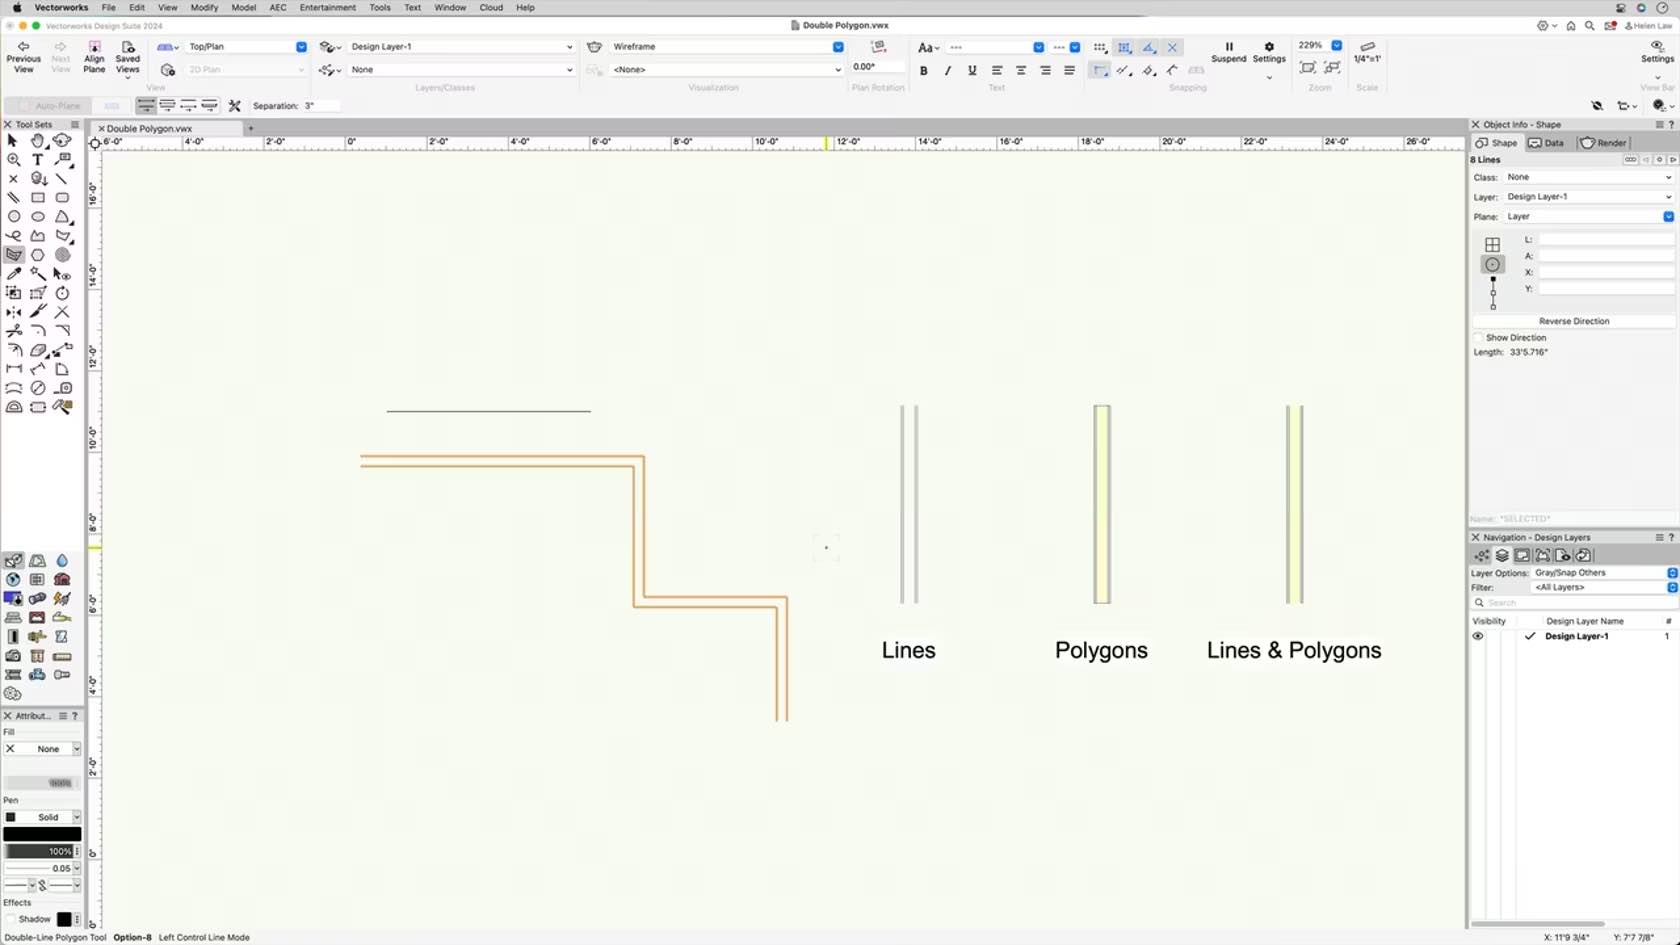
In this course, we will learn the clicking behavior and drawing modes of the Double Polygon Tool.
Category: Skill
Requires Approval: No
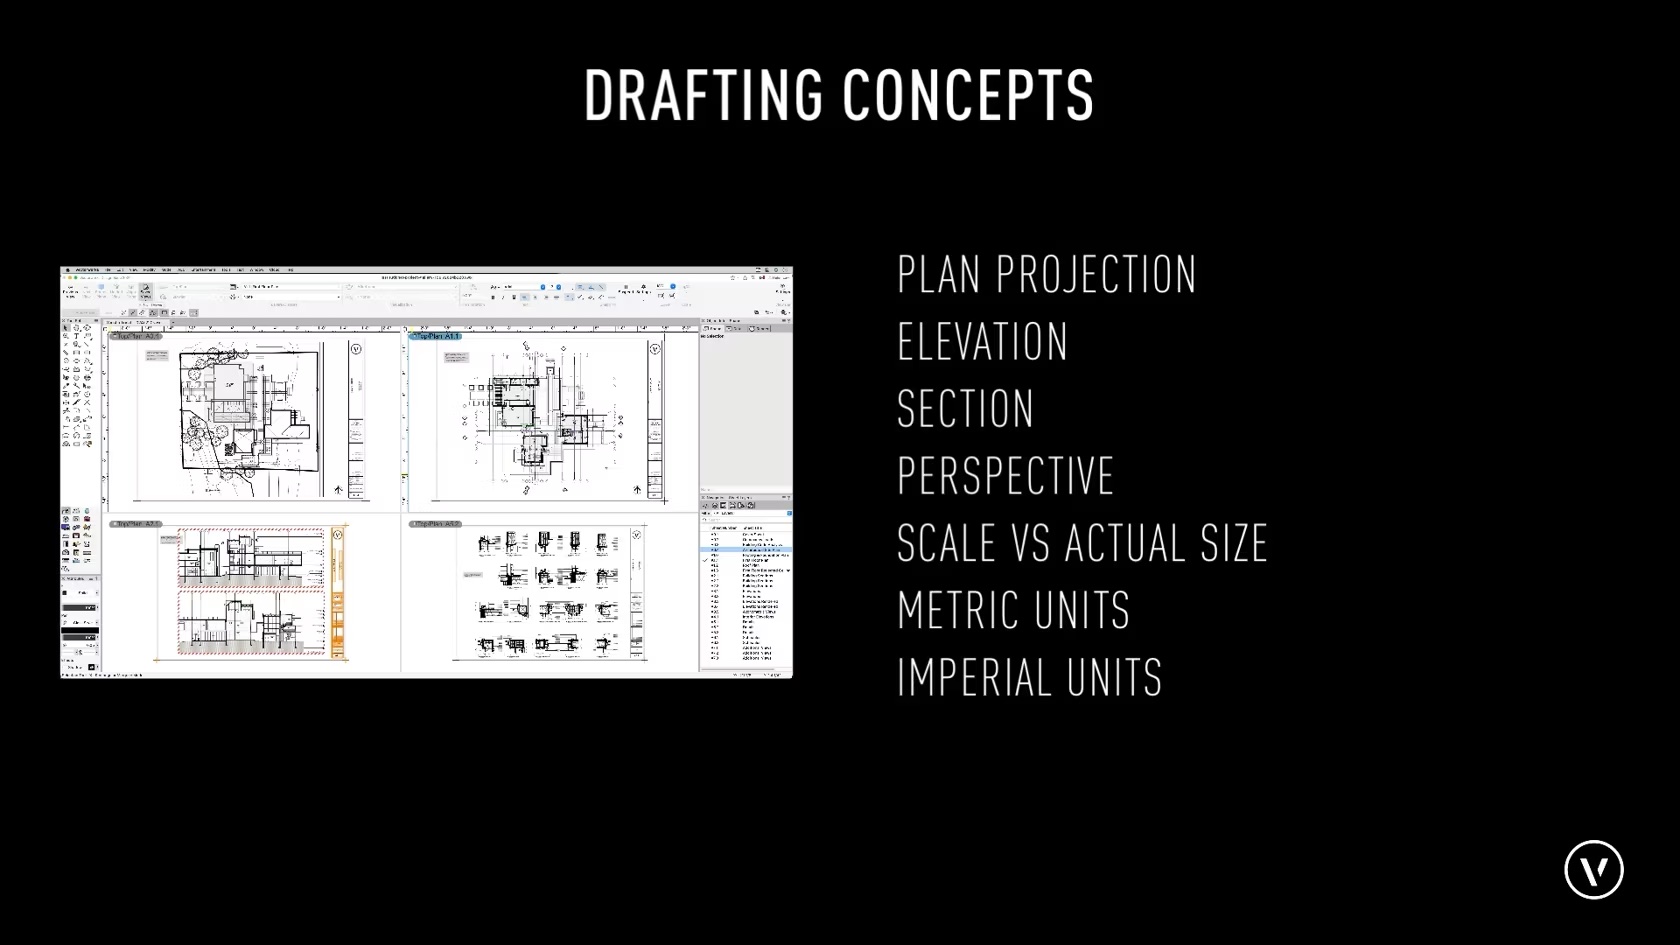
Before taking this course it is good to have a basic understanding of drafting concepts, such as plan projection, elevation, section and perspective views. Be able to Distinguish the difference between scale vs. actual size, and drawing units such as Metric and imperial units. You will also want to identify the difference between Cartesian Coordinates X and Y, Z values vs a Polar coordinate system using length and angle. It is also useful to have a good grasp on basic Geometric terminology such as angle, circle, perpendicular, parallel, area, cube, cone and sphere. Although understanding these concepts to their fullest extents is not necessary for this course these are general concepts that will be used as you work with Vectorworks.
Category: Skill
Requires Approval: No
This course will take a look at how to use the drag and duplicate.
Category: Skill
Requires Approval: No
In this video, we will be discussing the overall drawing area in Vectorworks and the default items found within it.
Category: Skill
Requires Approval: No
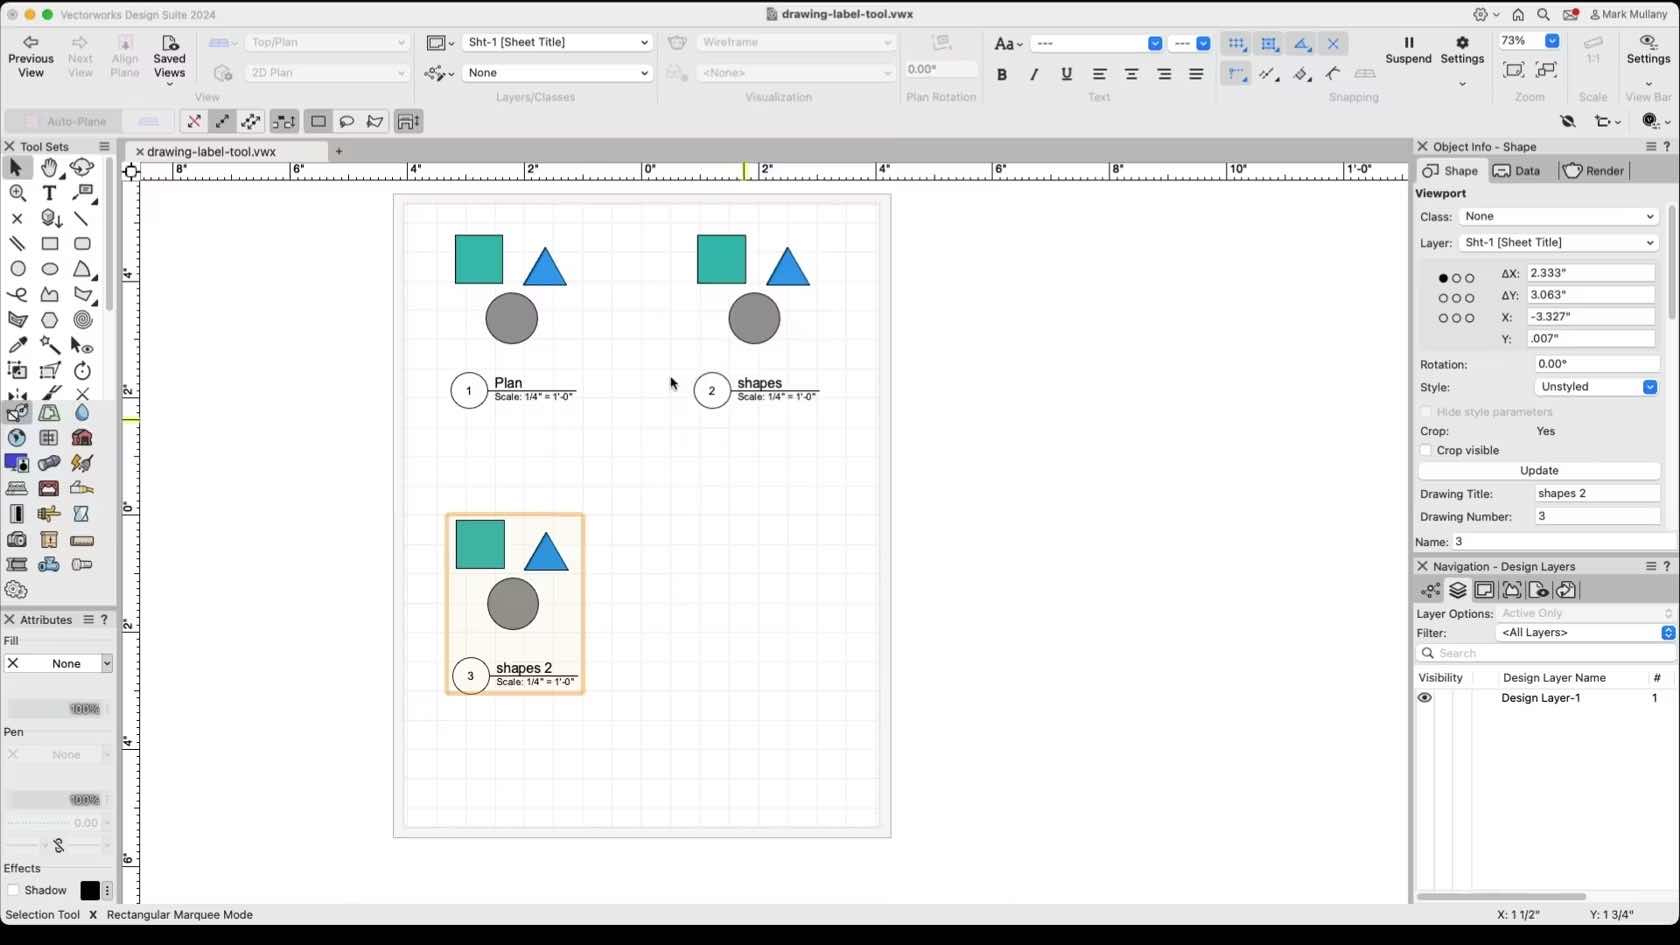
This course will look at the Drawing Label Tool, how to add them to viewports, edit them, and create your own styles.
Category: Skill
Requires Approval: No
In this video, we will cover the basics of the Drop Point Tool.
Category: (2024) Skill
Requires Approval: No
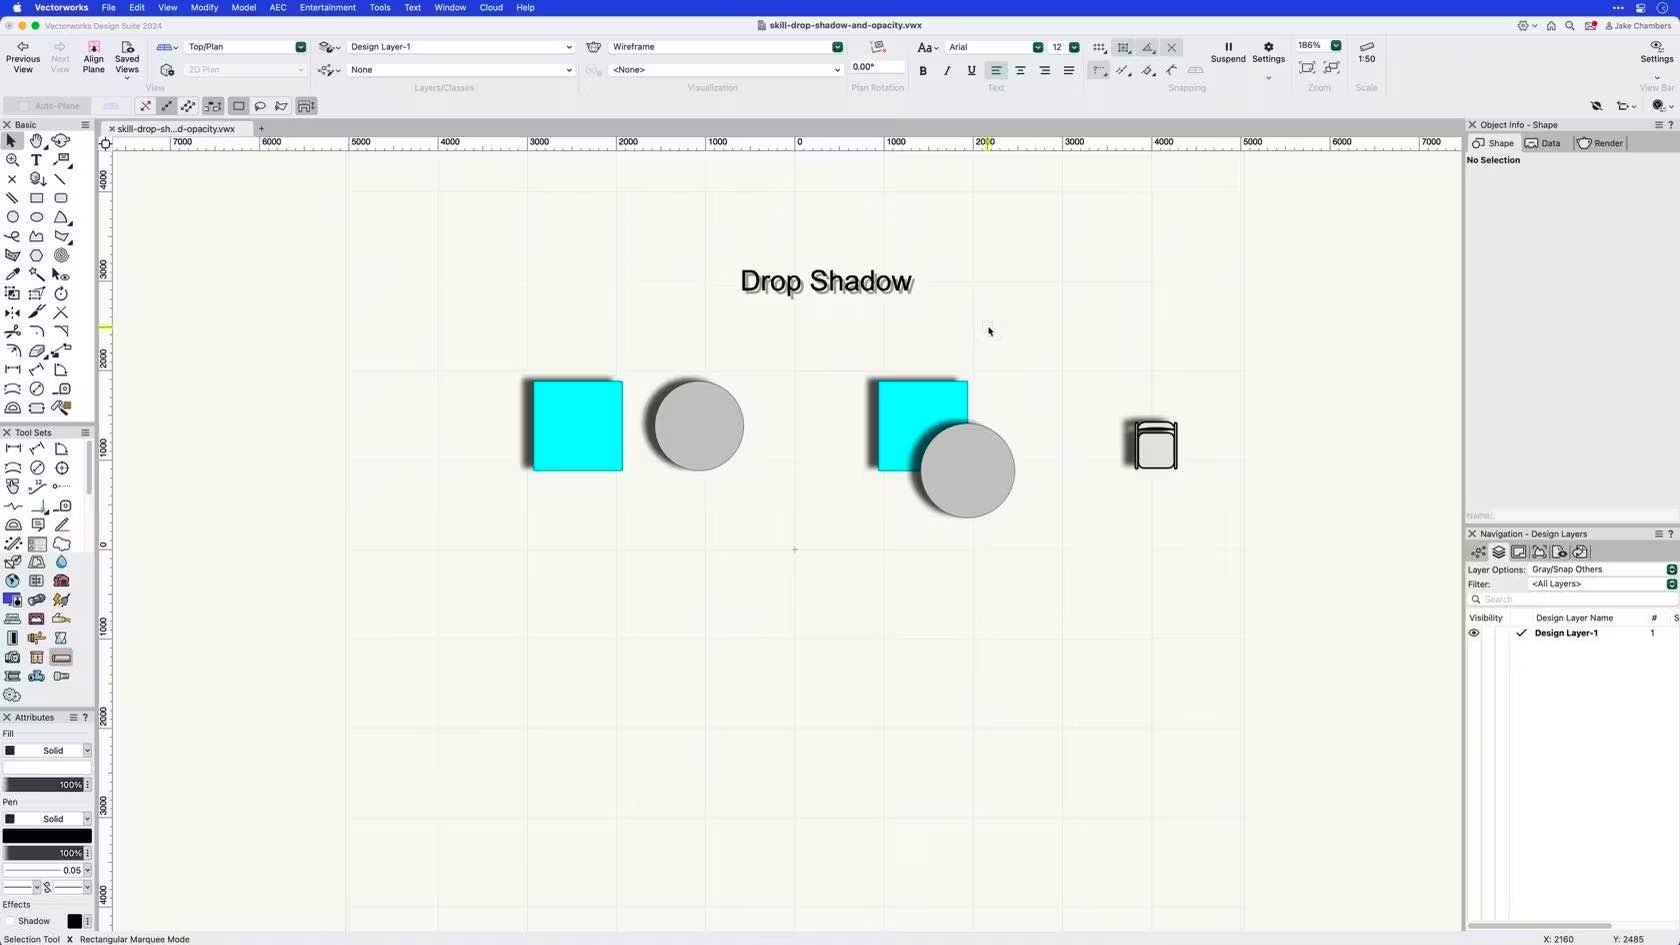
Learn how to use apply and edit drop shadows and opacity to 2D objects.
Category: Skill
Requires Approval: No
Erlernen Sie die Druckausgabe Ihres Layouts sowie PDF-Dateien zu exportieren.
Category: Erste Schritte 2024
Requires Approval: No
Lernen Sie das Werkzeug Drücken/Ziehen kennen. Weitere Inhalte zum Thema "Erste Schritte 3D" finden Sie hier.
Category: Erste Schritte 2024
Requires Approval: No
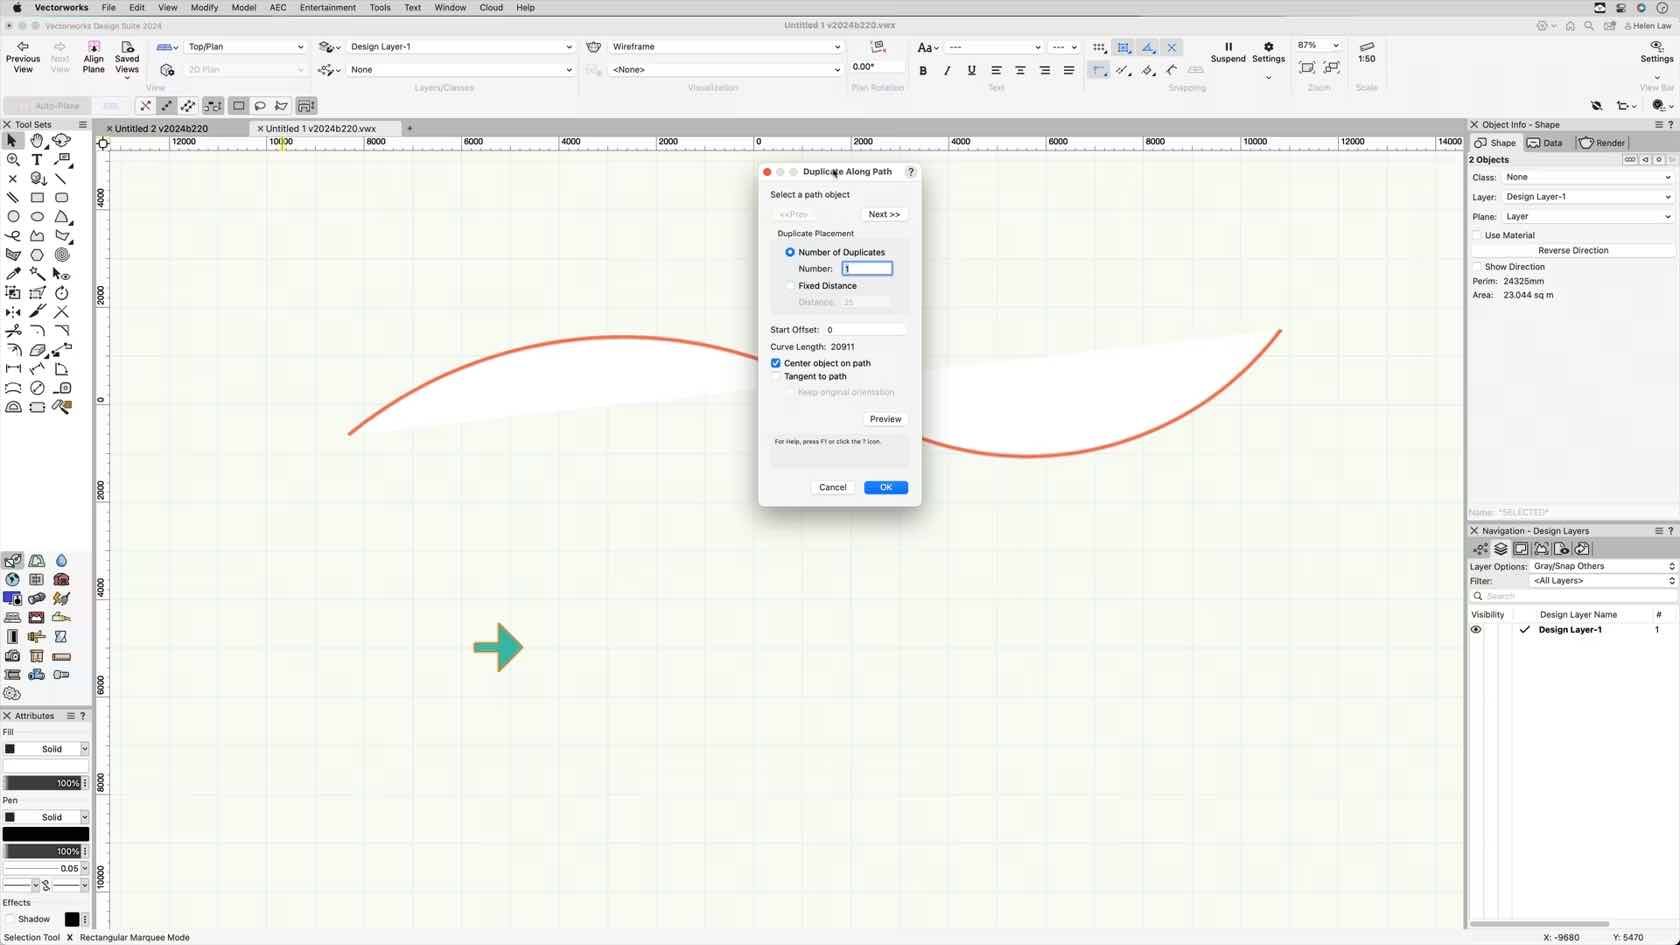
This course will take a look at how to use the Duplicate Along Path command with 2D and 3D objects.
Category: Skill
Requires Approval: No
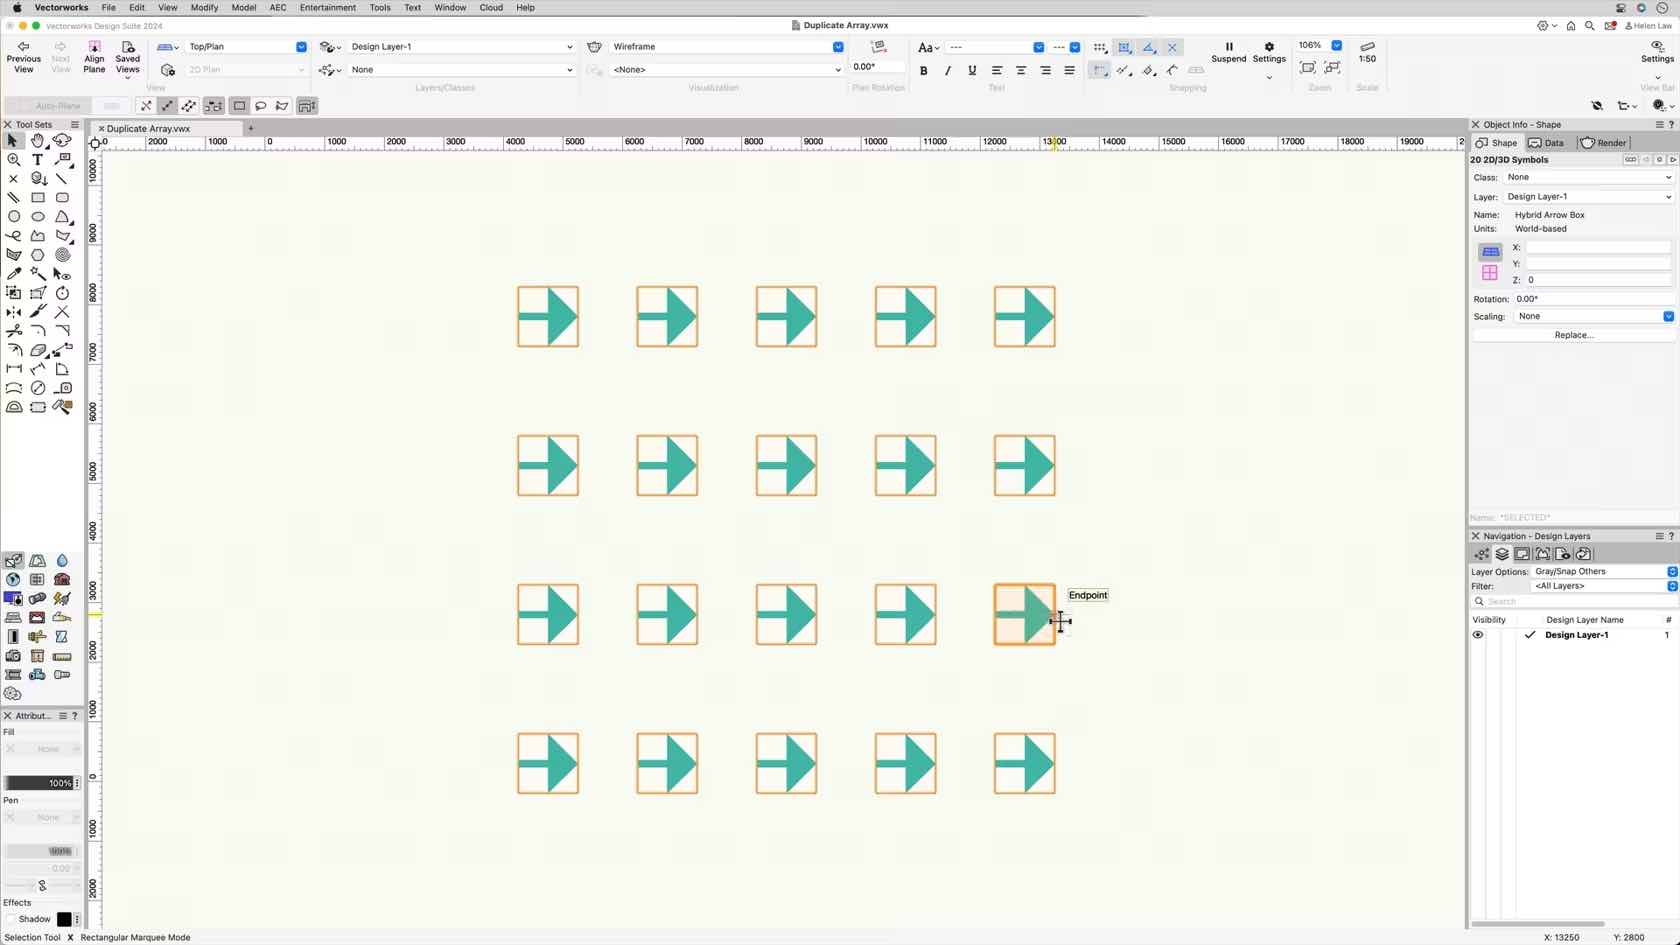
This course will take a look at how to use the Duplicate Array command to create linear, rectangular and circular arrays in 2D and 3D.
Category: Skill
Requires Approval: No
This course will take a look at how to use the duplicate command.
Category: Skill
Requires Approval: No
This course demonstrates how to duplicate a basic viewport and change class, layer, and scale settings to create different types of drawings from a 2D/3D model.
Category: Skill
Requires Approval: No
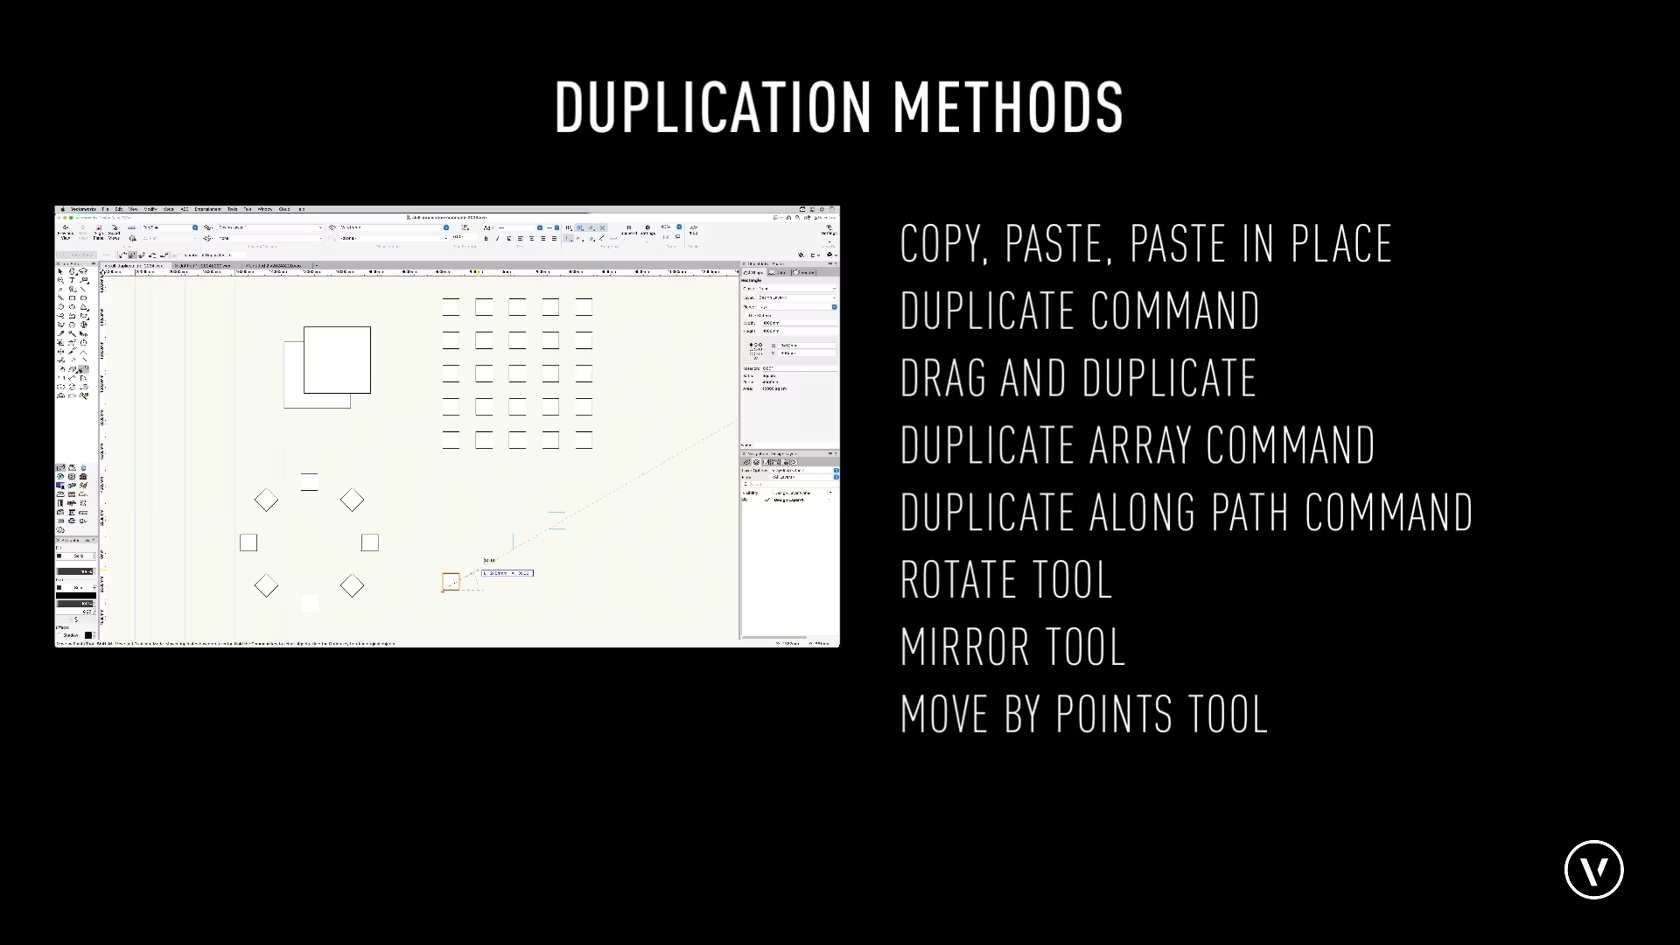
This course provides an overview of the key tools and commands used when duplicating objects.
Category: Skill
Requires Approval: No
Das Filtern erleichtert das Arbeiten in umfangreichen Dokumentstrukturen. Lernen Sie den effektiven Einsatz von Filterfunktionen kennen.
Category: Erste Schritte 2024
Requires Approval: No
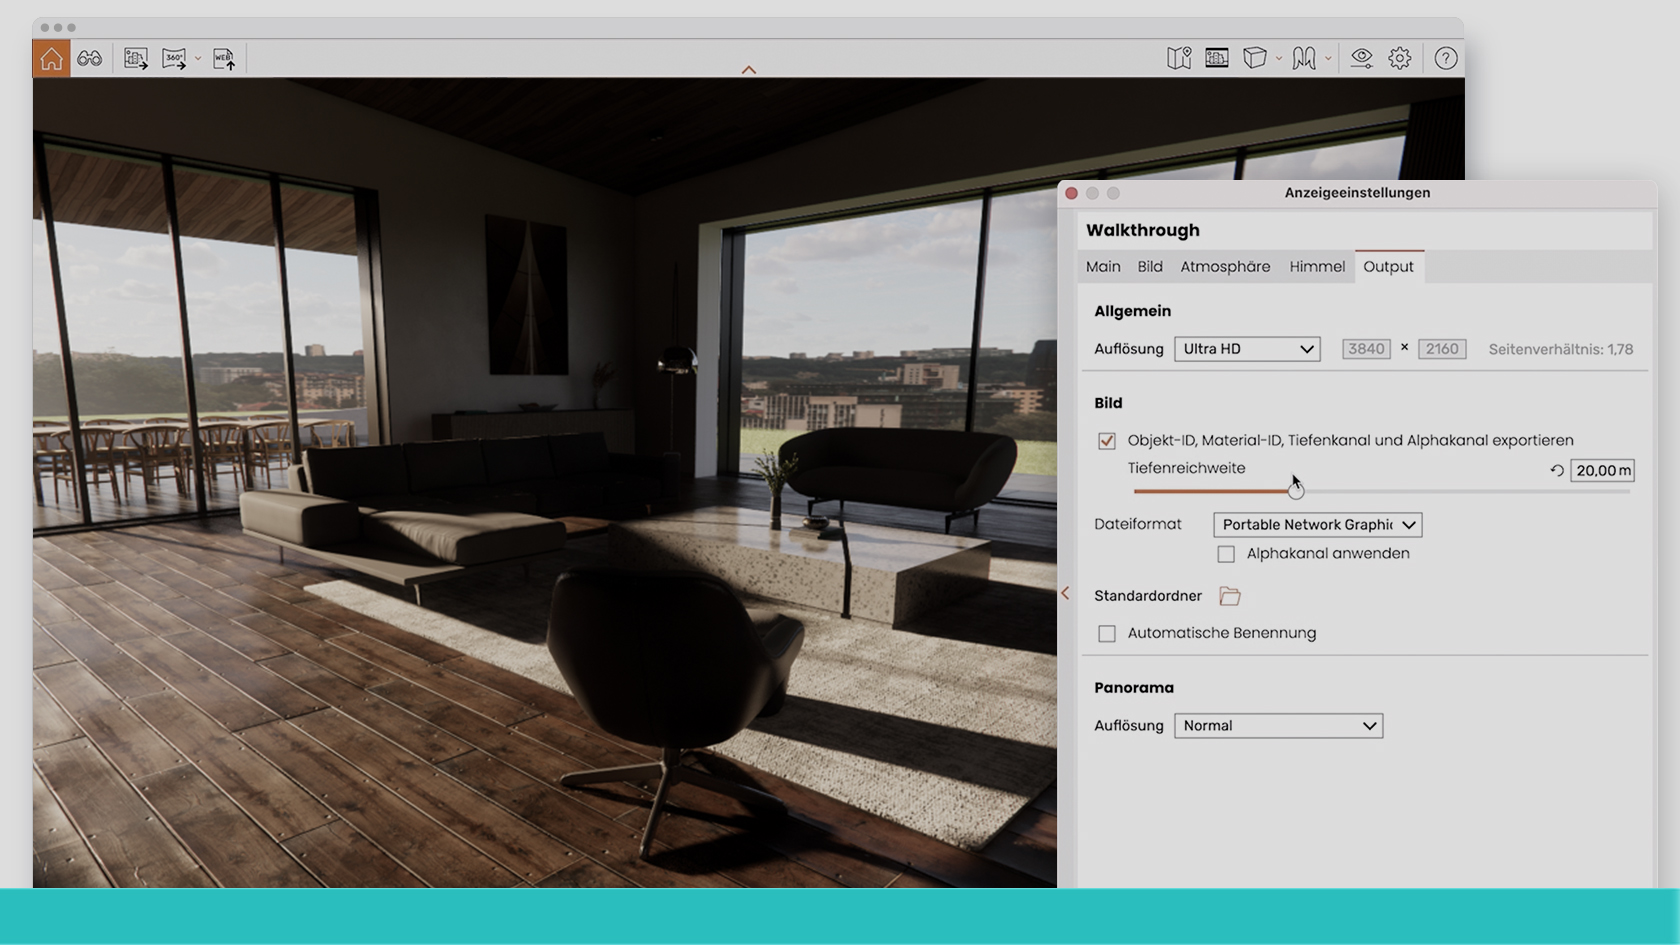
In diesem Best-Practice-Webinar erfahren Sie, wie Sie Ihr Vectorworks-Modell in Enscape visualisieren und es in Echtzeit betrachten. Beleben Sie Ihre Szene zusätzlich mithilfe von Enscape 3D-Assets und verfeinern Sie Ihre Texturen mit dem Material-Editor. Außerdem kann ihr Modell auch direkt als Bild, Panorama oder Web Standalone mit Partnern und Kund:innen geteilt werden.
(Für Version 2024)
Category: Featured
Requires Approval: No
In this video, we will take our first look at the layout and functionality of the Object Info Palette.
Category: Skill
Requires Approval: No

Lernen Sie den Unterschied zwischen Konstruktions- und Layoutebenen kennen.
Category: Erste Schritte 2024
Requires Approval: No

Lernen Sie den effizienten Umgang mit Klassen kennen.
Category: Erste Schritte 2024
Requires Approval: No

A recent article by the American Society of Landscape Architects shares that, in landscapes, approximately 75% of emissions stem from embodied carbon generated through the extraction, manufacturing, transportation, and installation of landscape materials.
Join landscape industry expert Marketa Hermova for an enlightening webinar on estimating embodied carbon and utilizing tools that empower you to make impactful design choices regarding material and product specifications. This session will also showcase how you can actively tackle a landscape project's carbon footprint through workflows highlighted in a project case study.
To receive 1 APLD CEU, please make sure to login and complete the quiz after watching our webinar.
Category: Landscapes
Requires Approval: No
Practice what you have learned from the previous sessions and take your learning deeper through self-selected enrichment activities.
Category: Architect Certification 2024
Requires Approval: No

This lesson combines the tools and commands from the skill videos and seeks to teach you the concepts and workflows behind equipment and racks
Category: 2024 ConnectCAD Certification
Requires Approval: No

An exercise to test your knowledge and practice what you have learned.
Category: 2024 ConnectCAD Certification
Requires Approval: No
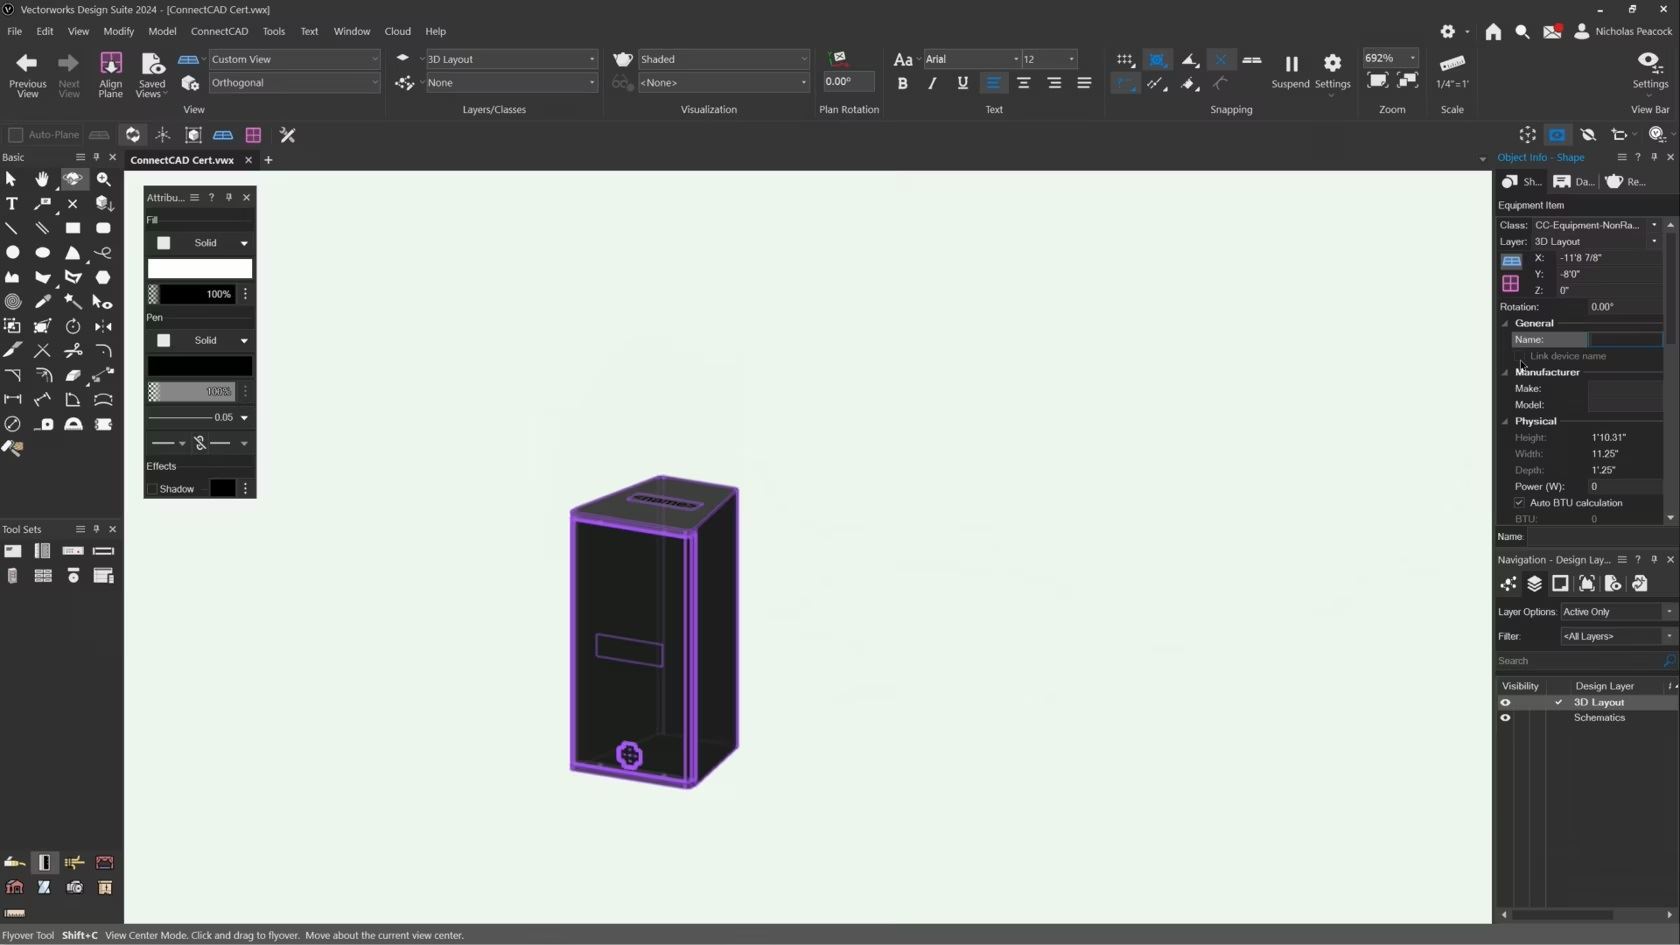
In this video, we will cover the basics of the Equipment Item Tool.
Category: (2024) Skill
Requires Approval: No
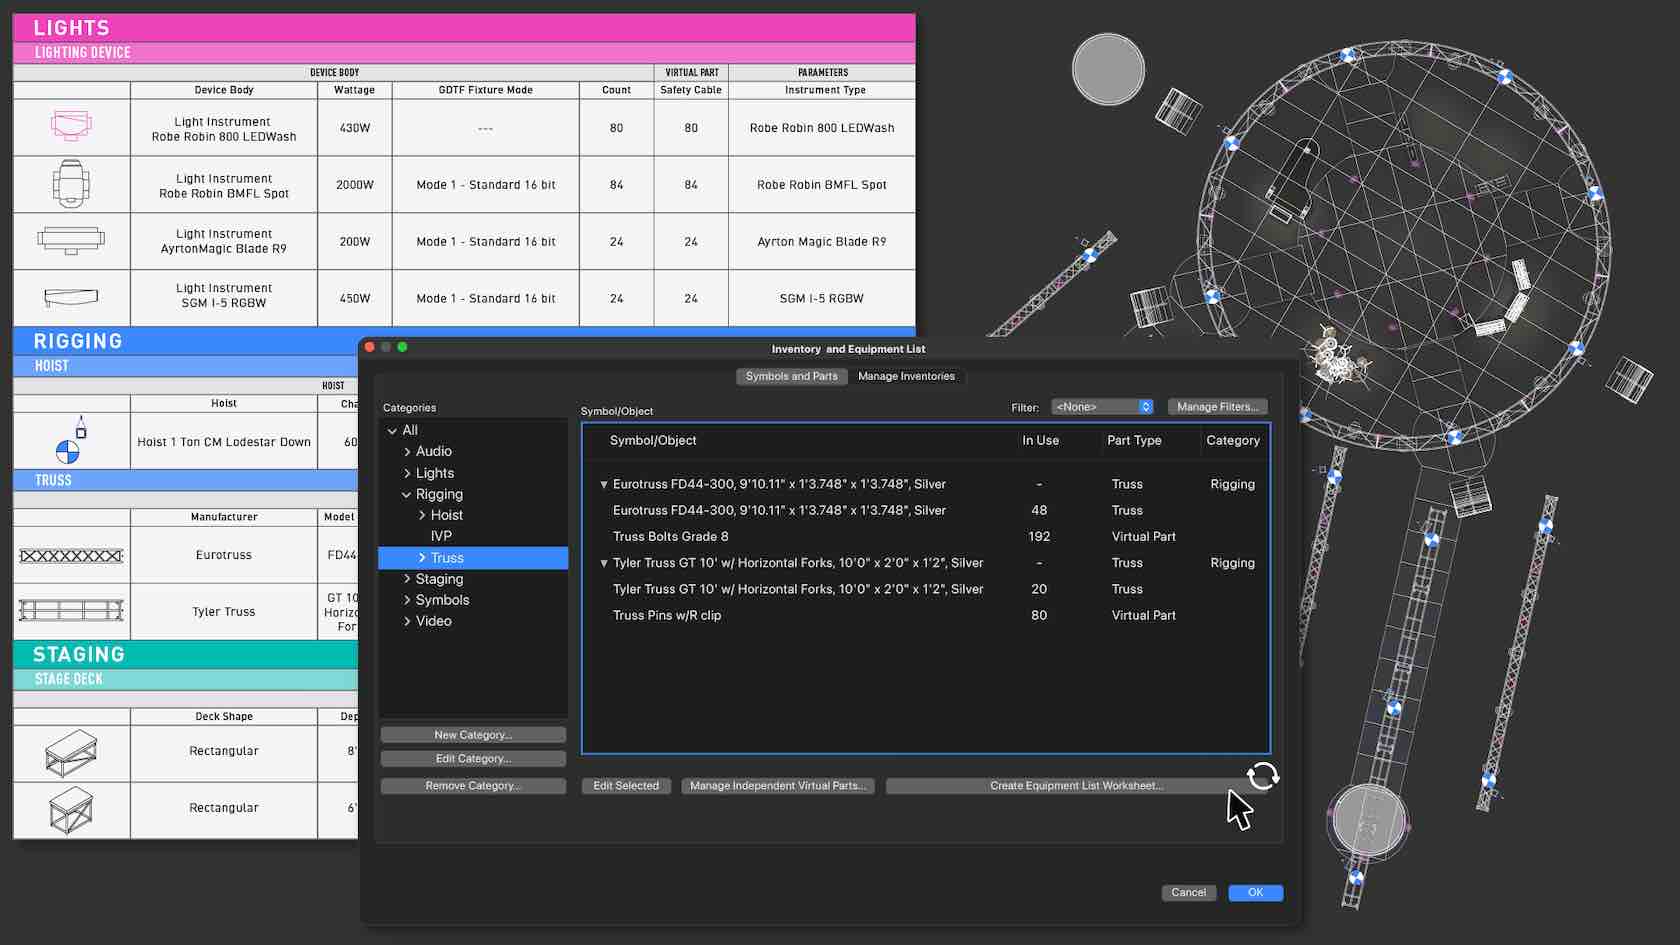
Track your equipment more efficiently in Vectorworks with new Equipment Lists, a unified equipment and inventory tracking process. You'll be able to consolidate all Spotlight objects in a file into concise or highly detailed reports. You'll also be able to add virtual parts and non-drawn items to your report. You'll get precise and accurate reports of necessary equipment that can be easily distributed to clients and vendors alike.
Category: Entertainment
Requires Approval: No
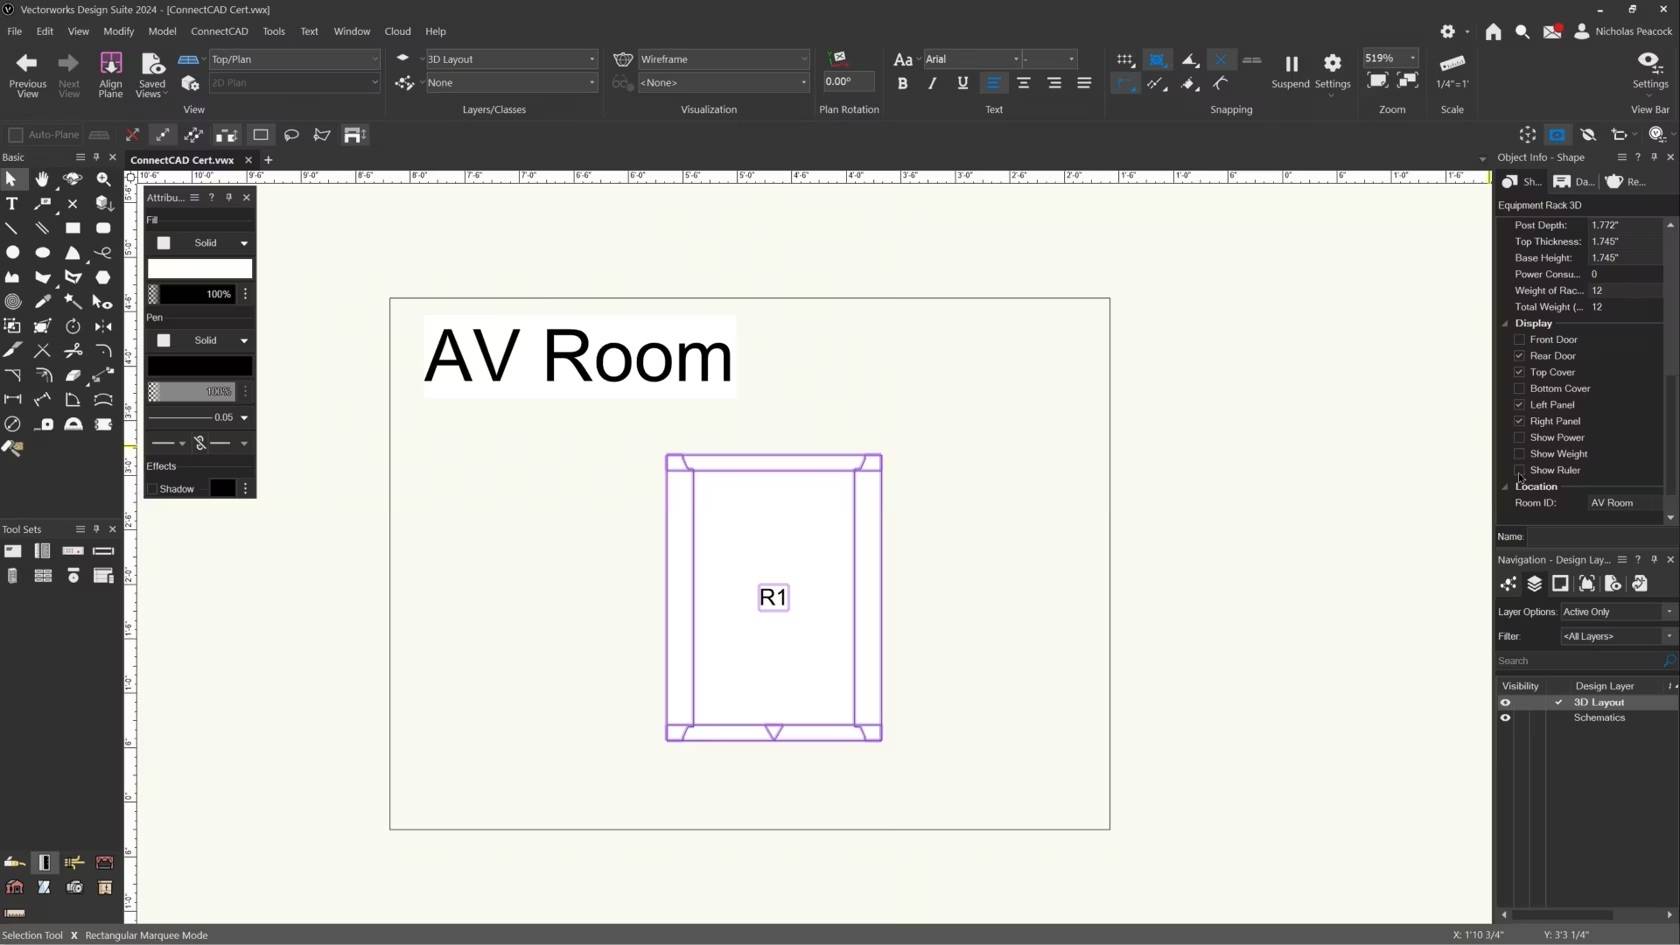
In this video, we will cover the basics of the Equipment Rack 3D Tool.
Category: (2024) Skill
Requires Approval: No
Experience better connectivity to external project data stored in Excel files. With the new Microsoft Excel referencing capabilities, you'll be able to create a new reference in Vectorworks, meaning you can opt for automatic updates to referenced files. Additionally, you can make changes in Vectorworks and push the data back to Excel.
Category: All Industries
Requires Approval: No

Jetzt verfügen Sie über eine dynamische Schnittstelle zu externen Projektdaten in Excel. Vectorworks 2024 aktualisiert automatisch Tabellen in Ihren Plänen und überträgt auch Änderungen aus den Tabellen in Excel.
Category: All Industries
Requires Approval: No
Put your knowledge to the test
- Manager: Jake Chambers
- Manager: Bryan Goff
- Manager: Helen Law
- Manager: Helen Law
- Manager: Mark Mullany
- Manager: Nicholas Peacock
- Manager: Keith Ragsdale
- Manager: Michael Sharon
Category: CHAPTER 2
Requires Approval: No
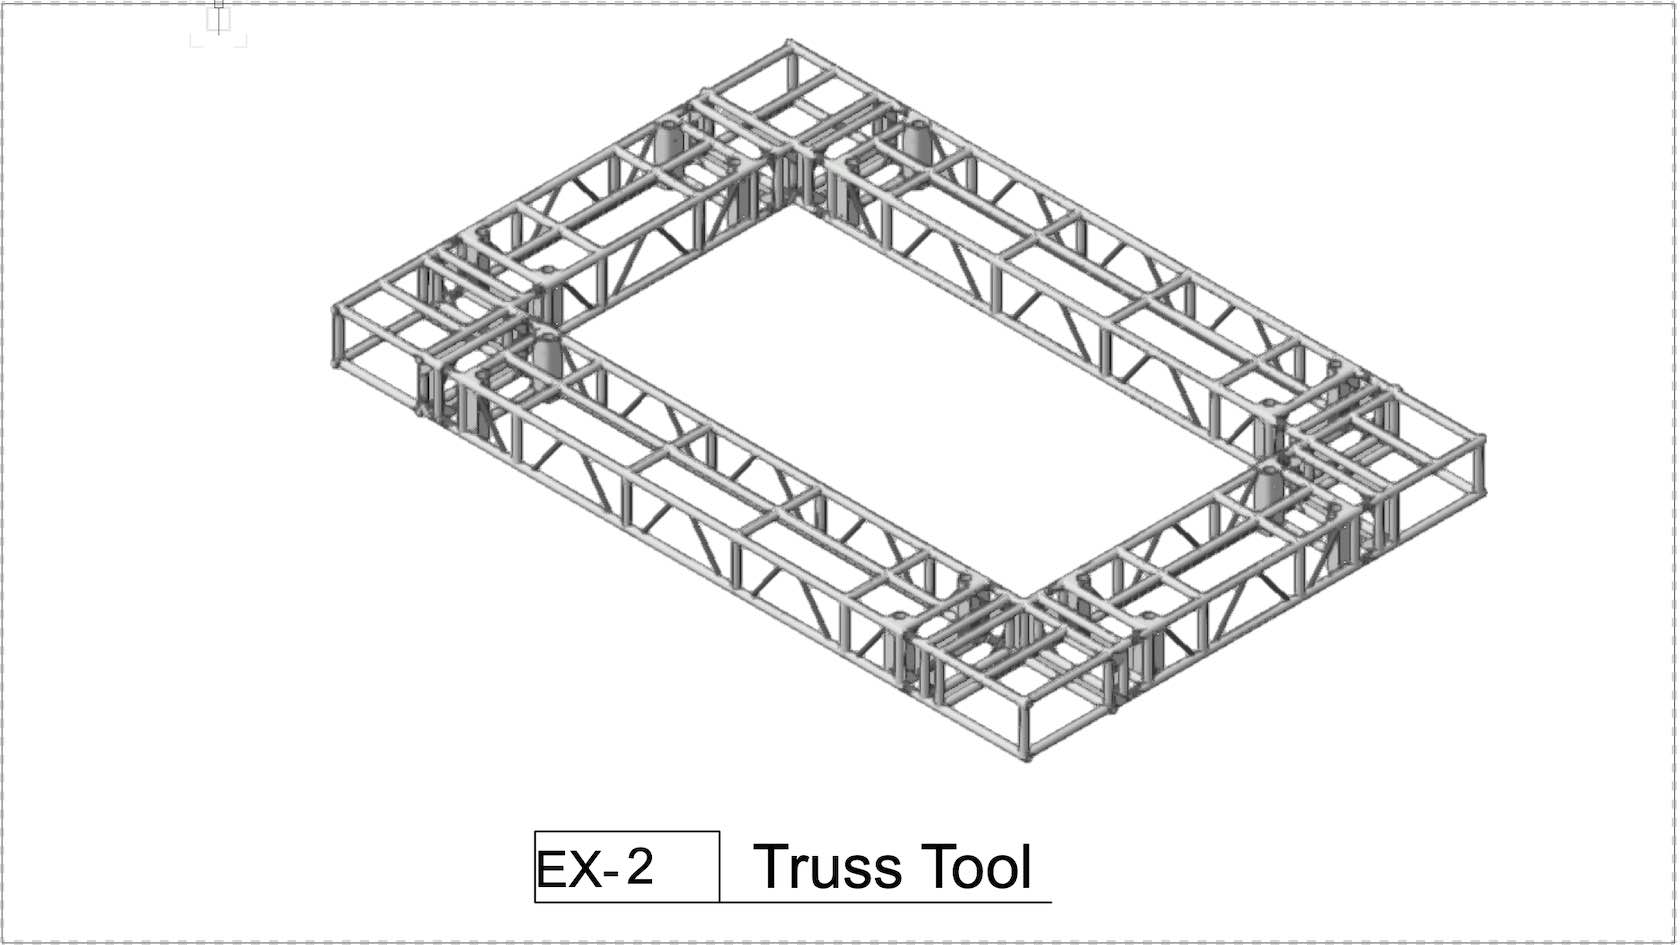
In this exercise we'll build a structure using the Truss Tool.
- Manager: Jake Chambers
- Manager: Bryan Goff
- Manager: Helen Law
- Manager: Helen Law
- Manager: Mark Mullany
- Manager: Nicholas Peacock
- Manager: Keith Ragsdale
- Manager: Michael Sharon
Category: CHAPTER 2
Requires Approval: No
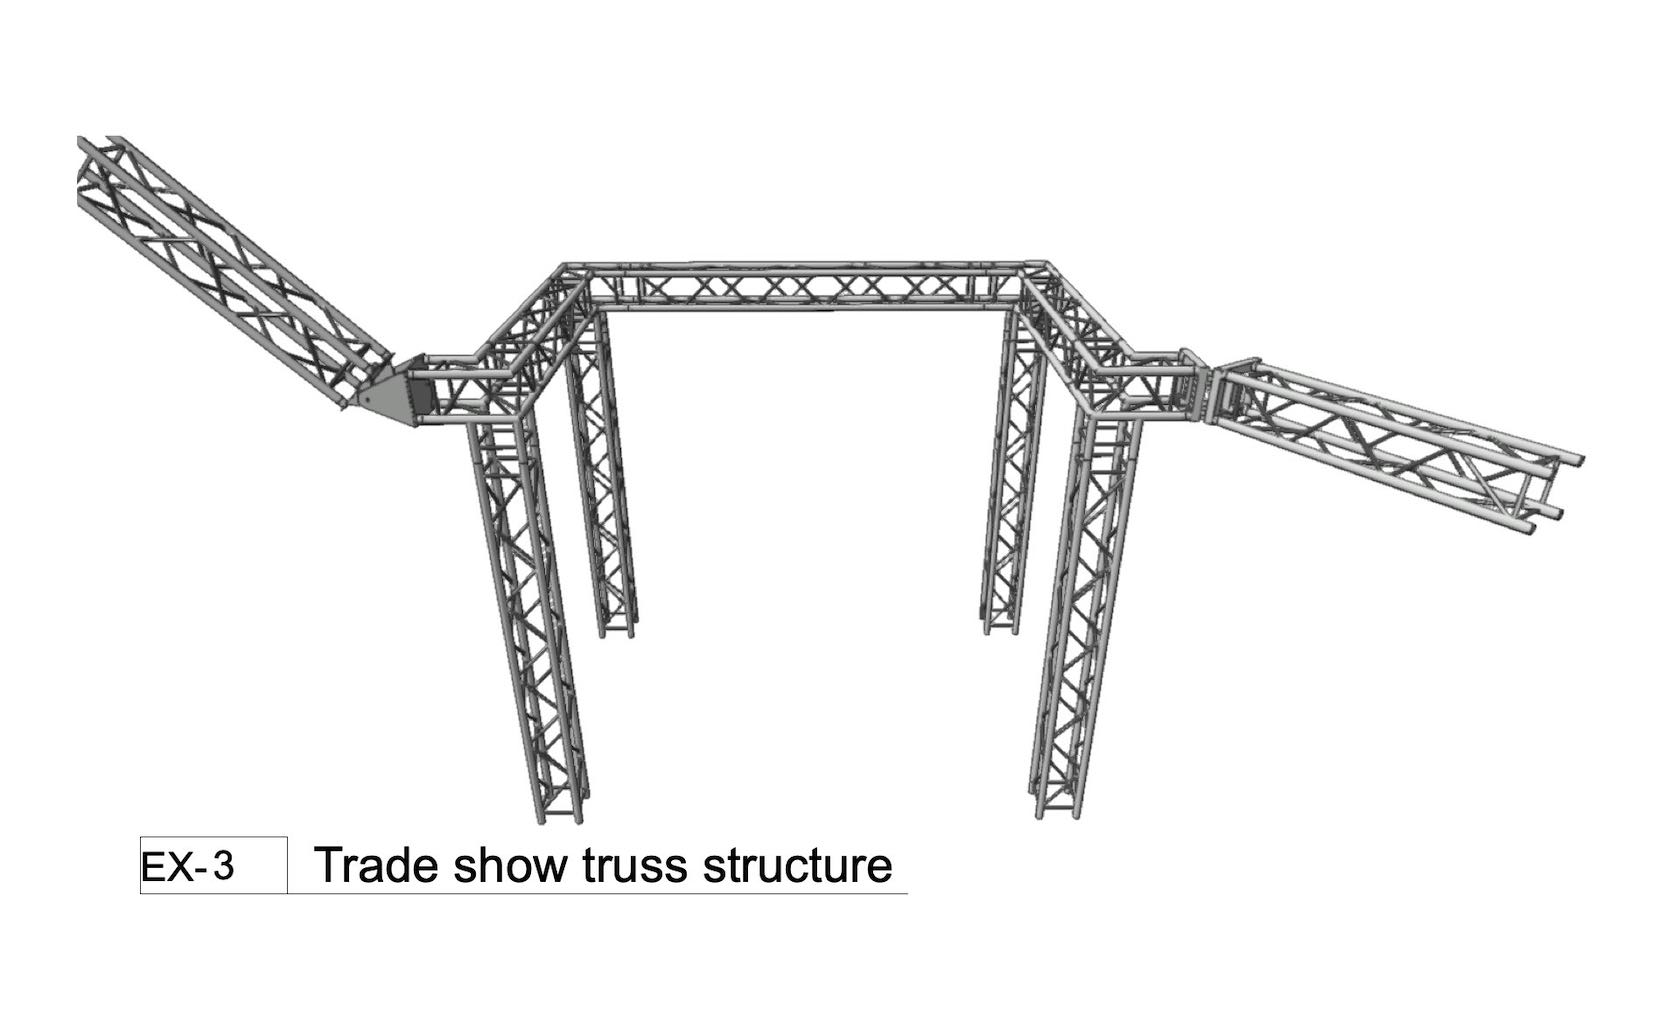
For a more challenging test, build a truss arch for a trade show booth.
- Manager: Jake Chambers
- Manager: Bryan Goff
- Manager: Helen Law
- Manager: Helen Law
- Manager: Mark Mullany
- Manager: Nicholas Peacock
- Manager: Keith Ragsdale
- Manager: Michael Sharon
Category: CHAPTER 2
Requires Approval: No
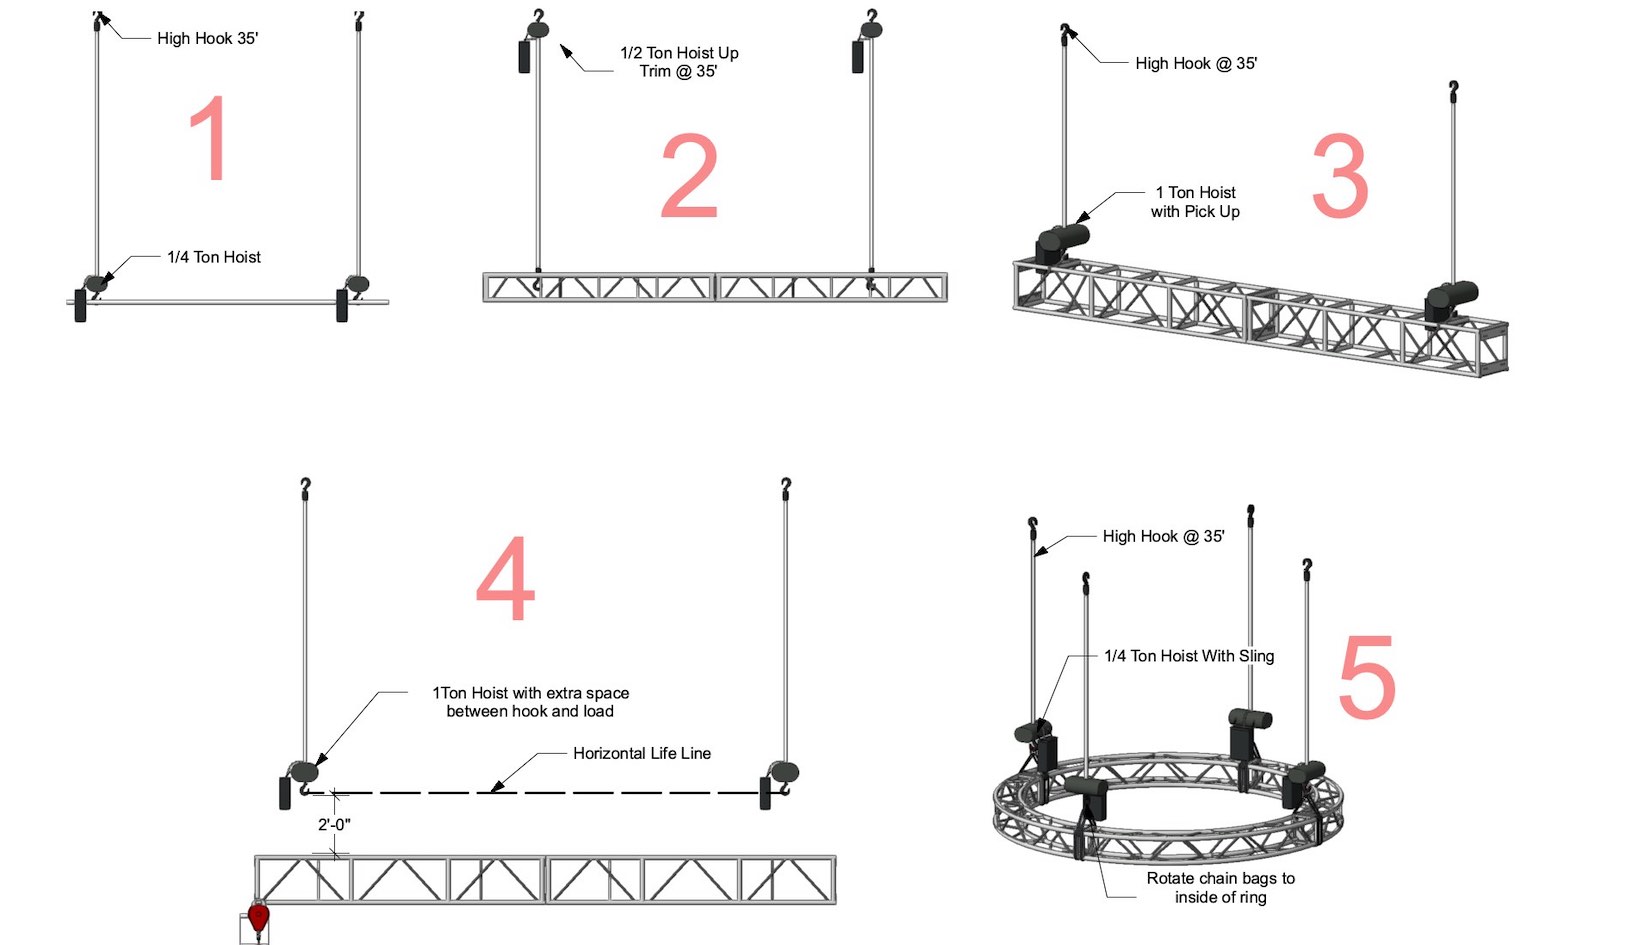
In this exercise you will practice inserting hoists for multiple situations.
Category: Non Current Material
Requires Approval: No
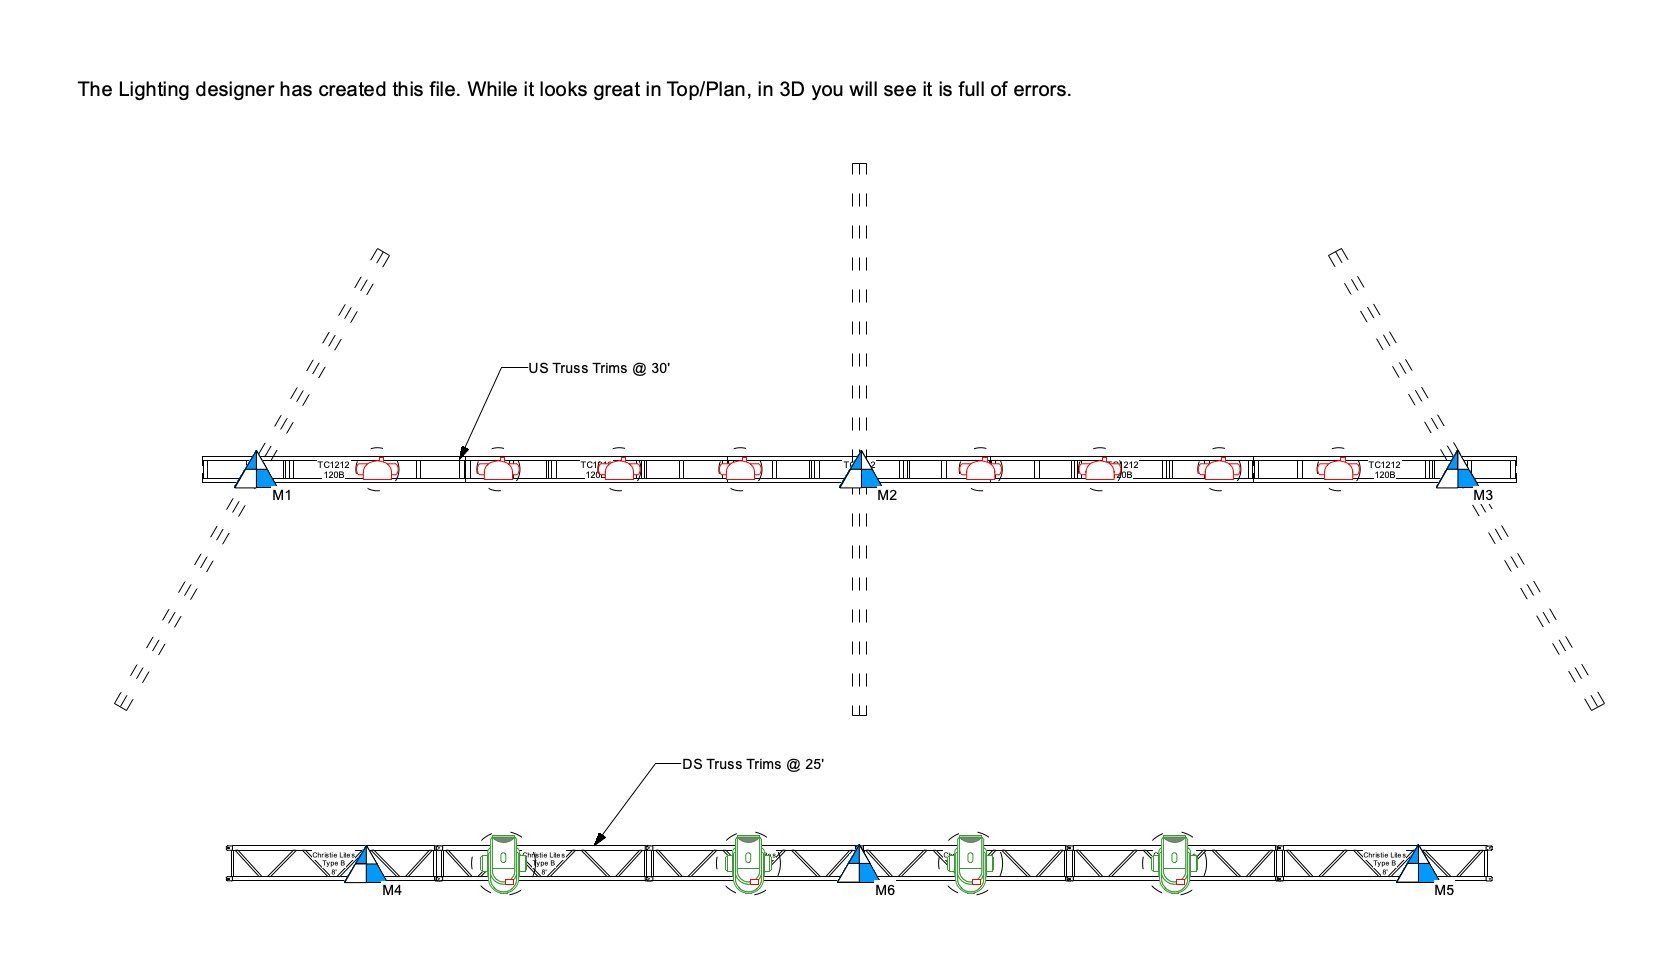
Our designer has sent us a file. While it looks correct in top/plan view, the file is full of errors. In this exercise, we will correct all the errors, and make it ready for Braceworks calculations.
Category: Chapter 4 Hoists
Requires Approval: No

In Vectorworks Landmark you can place Existing Trees based on information from a survey file. In this video we will demonstrate how to import existing trees from a survey file.
Category: Landmark 2024 Certificaiton
Requires Approval: No

This video demonstrates how to set the preferences of your existing tree prior to placement in you project.
Category: Landmark 2024 Certificaiton
Requires Approval: No
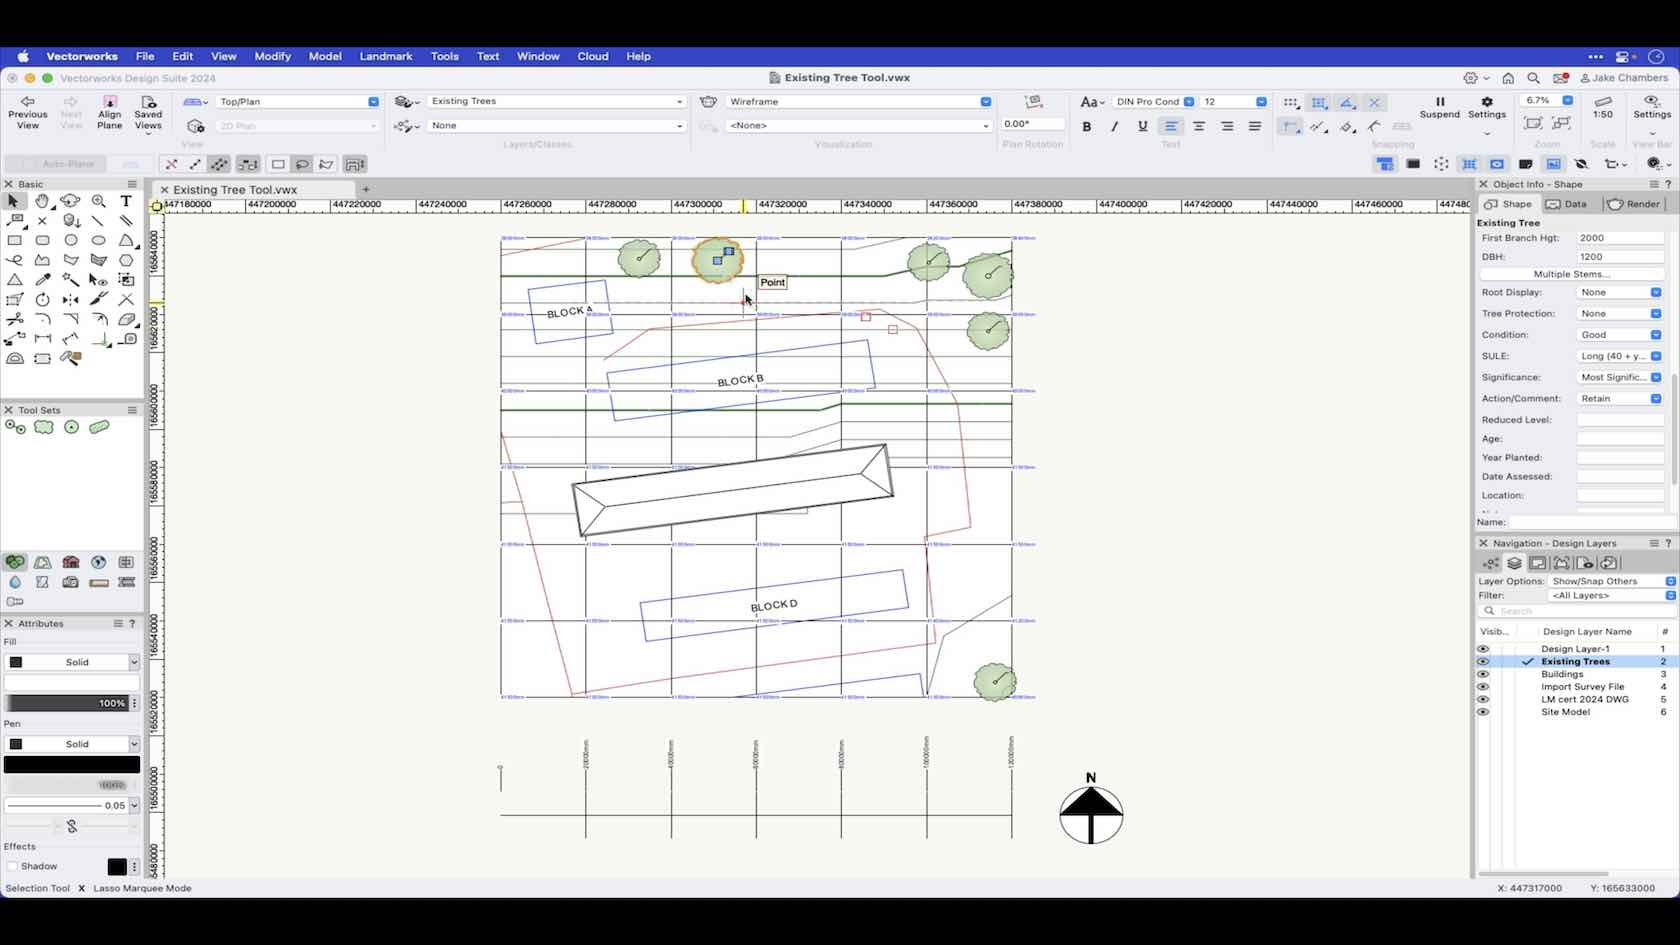
The existing tree tool enables you to place an existing tree object into your project based on data you enter manually. Using this tool gives you the ability to display important visual data graphically in 2D such as tree protection zones and significance indicators along with a 3D mesh representation displaying volume of canopy's and trunks crucial for BIM workflows if required.
Category: Landmark 2024 Certificaiton
Requires Approval: No
In this video, we will cover the basics of the External Tool.
Category: (2024) Skill
Requires Approval: No

See how the Eyedropper tool transfers selected attributes from one object to another similar object in a single step.
Category: Skill
Requires Approval: No

Fangpunktfänge ermöglichen Ihnen ein schnelles und präzises Auswählen von geometrischen Punkten an bestehenden Objekten. Sie erhalten einen Überblick über die wichtigsten Fangpunkte und ihre Verwendung.
Category: Erste Schritte 2024
Requires Approval: No
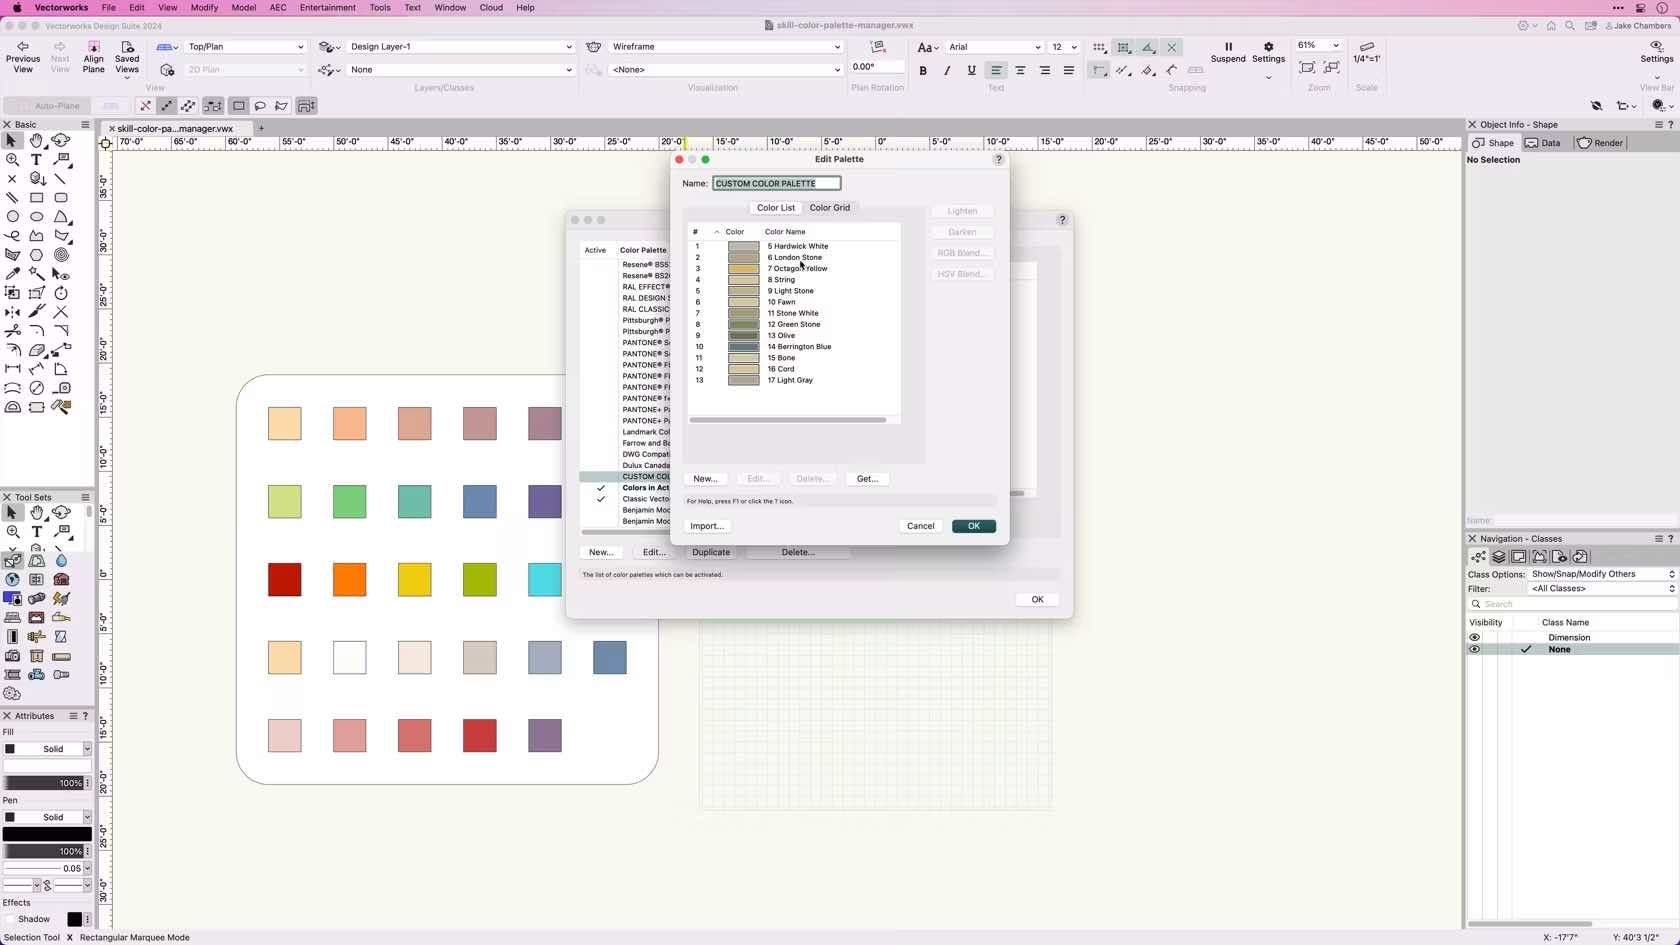
Lernen Sie Farben zuordnen, übernehmen und verwalten.
Category: Erste Schritte 2024
Requires Approval: No
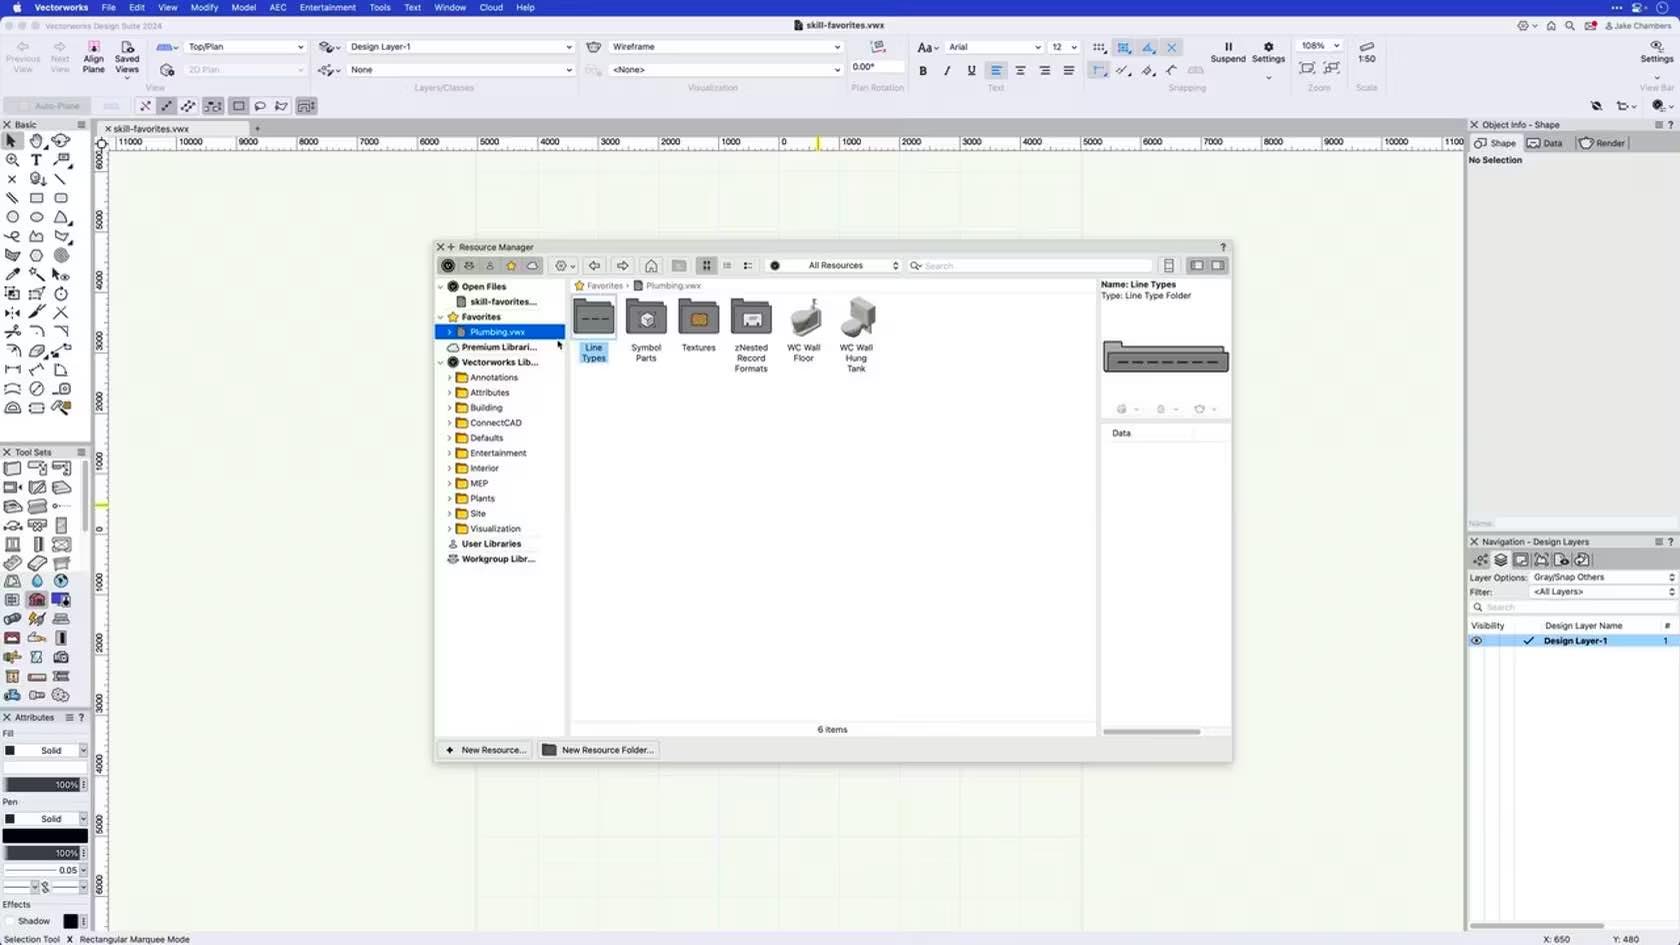
This course demonstrates how to create Resource Libraries and setup Favorites files within the Resource Manager.
Category: Skill
Requires Approval: No
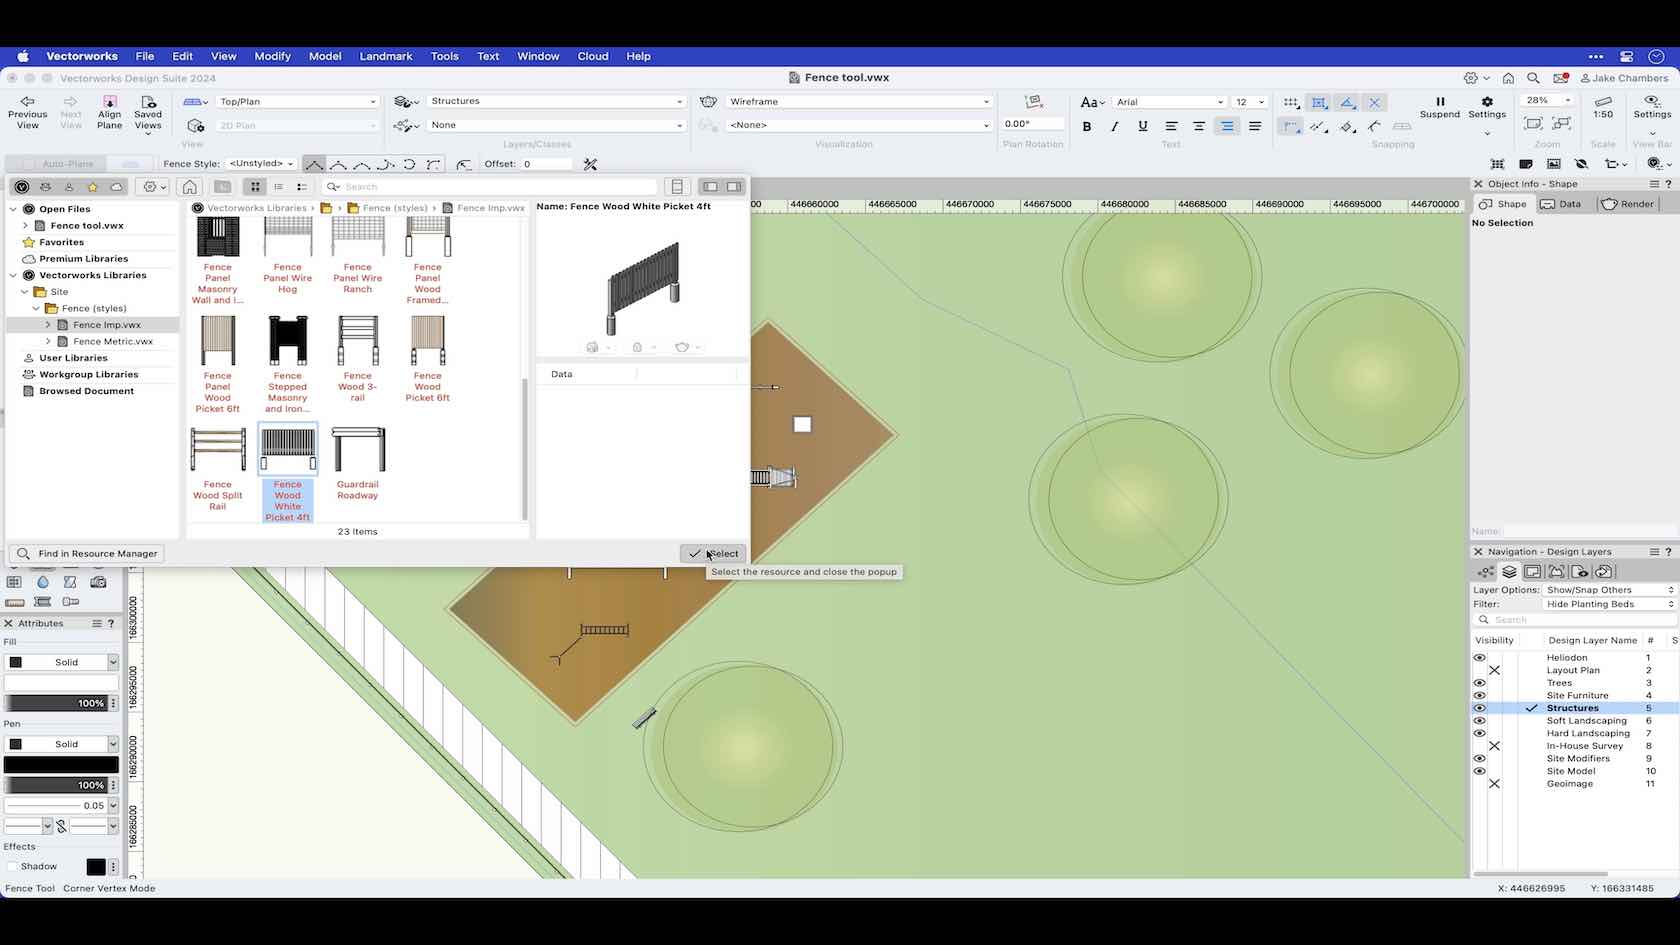
The fence tool enables you to incorporate detailed fence objects into your design. When using the fence tool, you will have the ability to draw fences using fence styles from the Vectorworks libraries or you can create your own fence styles and save them to your library of choice for future use. In this video we look at the drawing modes of the tool along with using the reshape tool to make any amendments to the fence after it is drawn.
Category: Landmark 2024 Certificaiton
Requires Approval: No
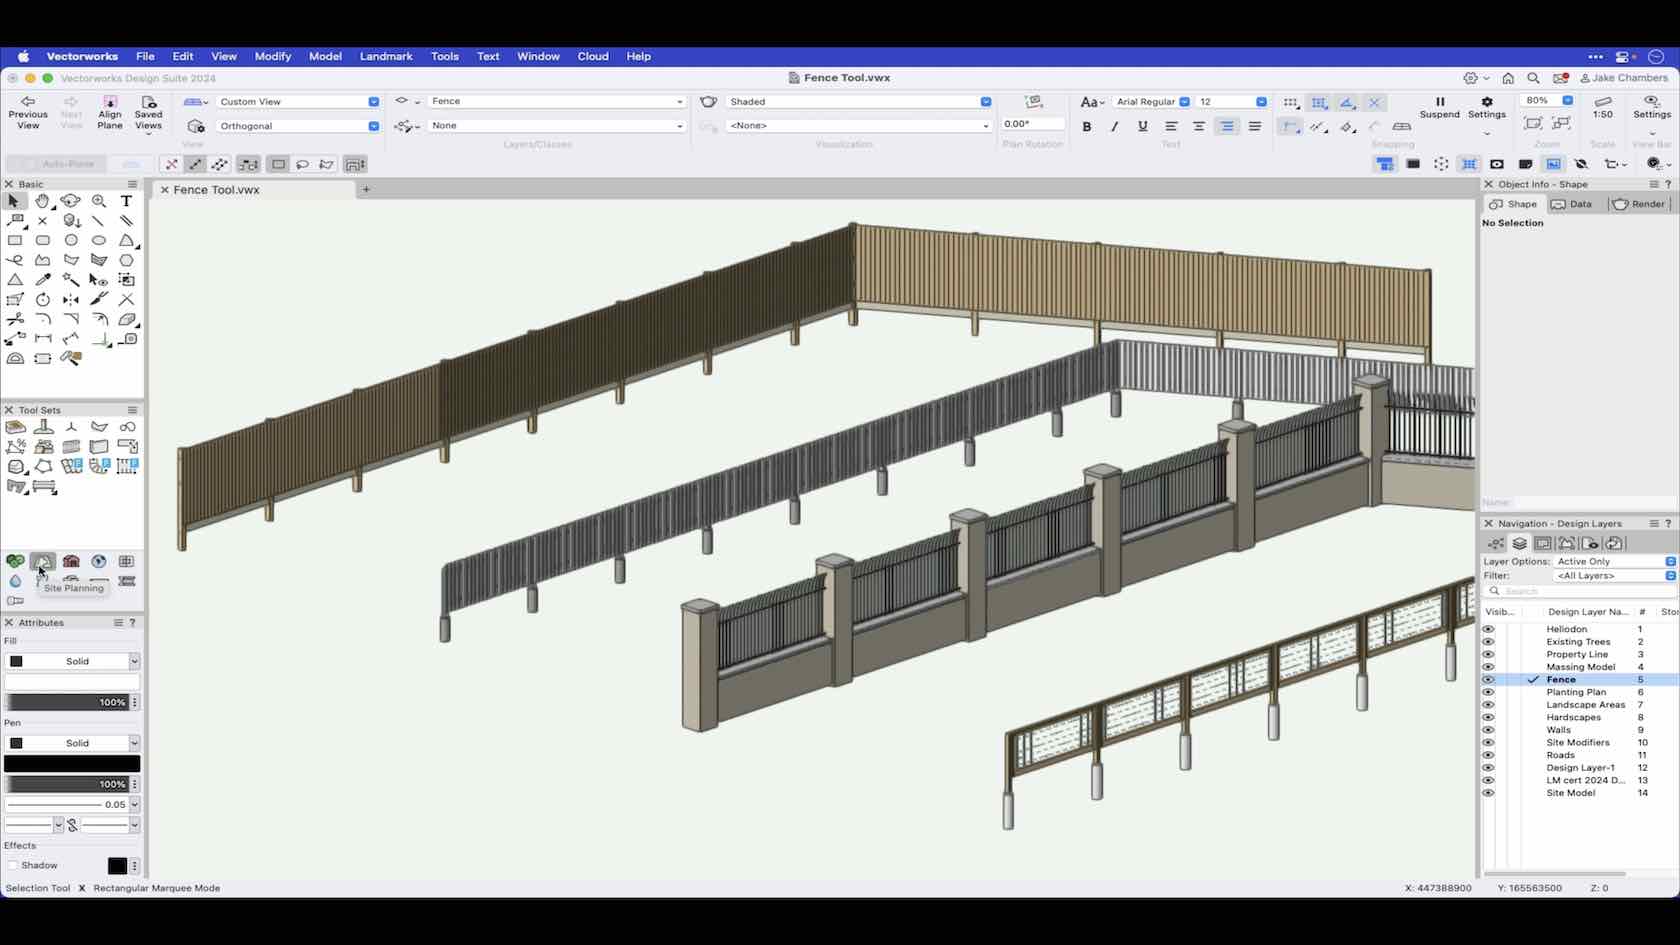
The fence tool enables you to incorporate detailed fence objects into your design. When using the fence tool, you will have the ability to draw fences using fence styles from the Vectorworks libraries or you can create your own fence styles and save them to your library of choice for future use. In this video we look at the drawing modes of the tool along with using the reshape tool to make any amendments to the fence after it is drawn.
Category: Overview
Requires Approval: No
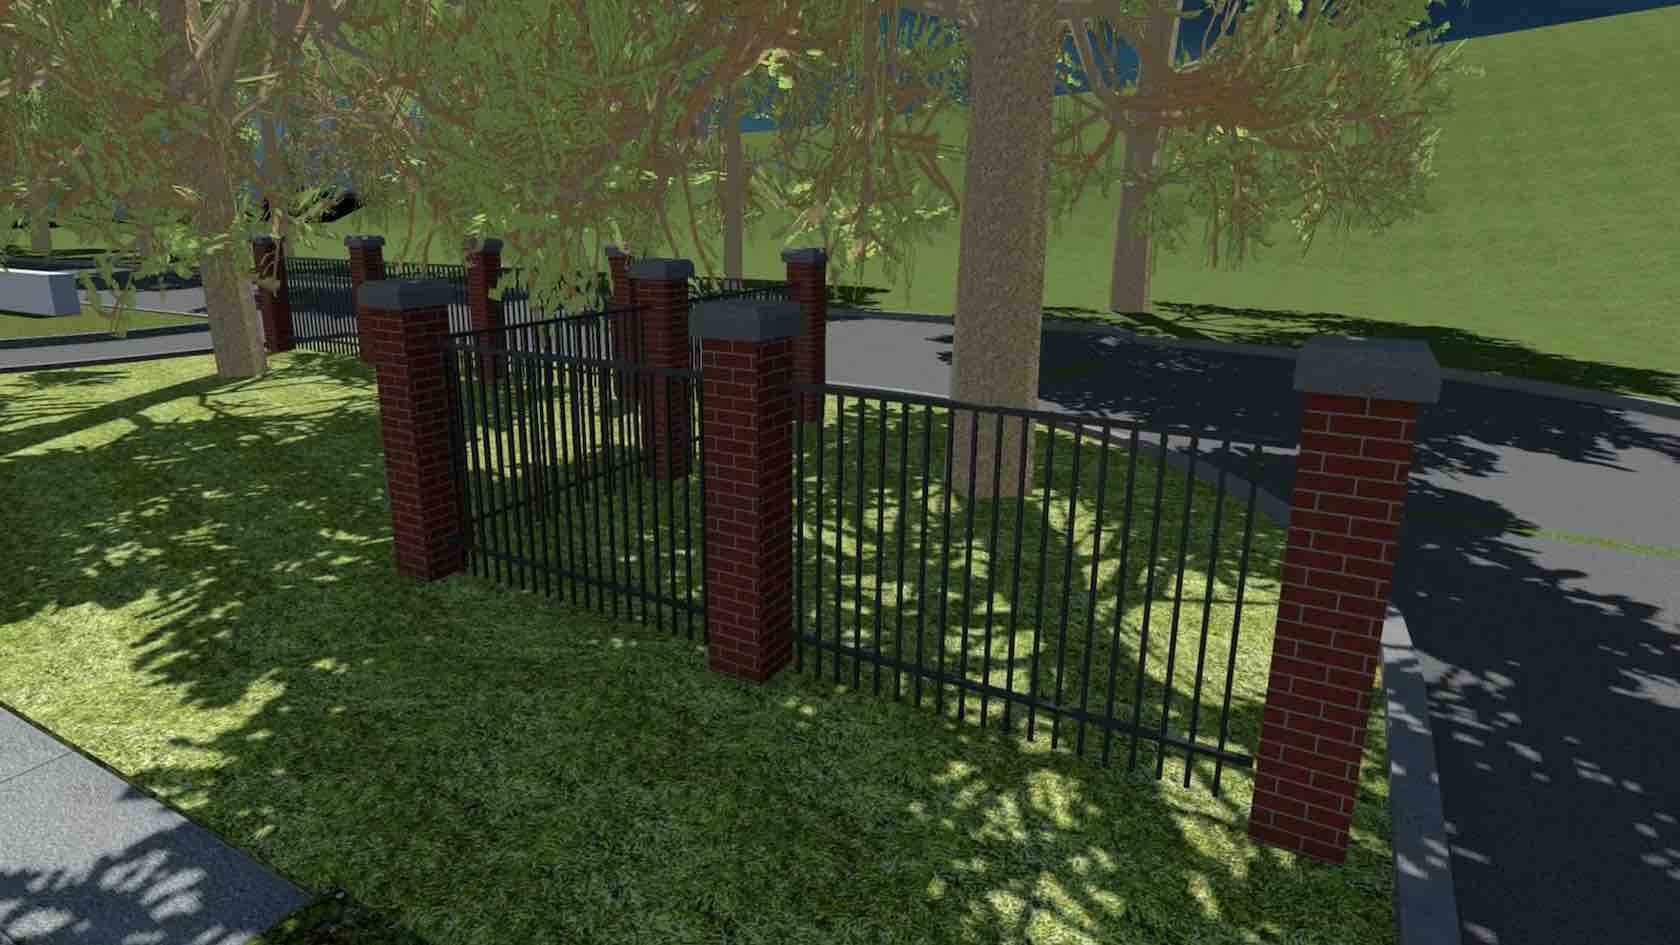
Say hello to the new automated Fence tool. Optimized for simplified and detailed representations, the Fence tool supports integrated posts, gates, and terrain-conforming options like raked or panel/stepped. Save significant time while designing in 2D and 3D with accurate material reporting, reducing errors in material specifications.
Category: Landscapes
Requires Approval: No
In this challenge you will be looking at creating a set of Design Layers and Classes to practise your understanding of how these are used within a workflow.
Category: Skill
Requires Approval: No
This video will demonstrate the three modifying modes of the Fillet Tool.
Category: Skill
Requires Approval: No

Lernen Sie das Werkzeug Fläche zusammenfügen kennen.
Category: Erste Schritte 2024
Requires Approval: No

Lernen Sie den Befehl Flächenunterteilung kennen. Weitere Inhalte zum Thema "Erste Schritte 3D" finden Sie hier.
Category: Erste Schritte 2024
Requires Approval: No
How to access the floating data bar to enter exact dimensions when drawing shapes.
Category: Skill
Requires Approval: No
Lernen Sie das Werkzeug Füllung und Textur bearbeiten kennen.
Category: Erste Schritte 2024
Requires Approval: No
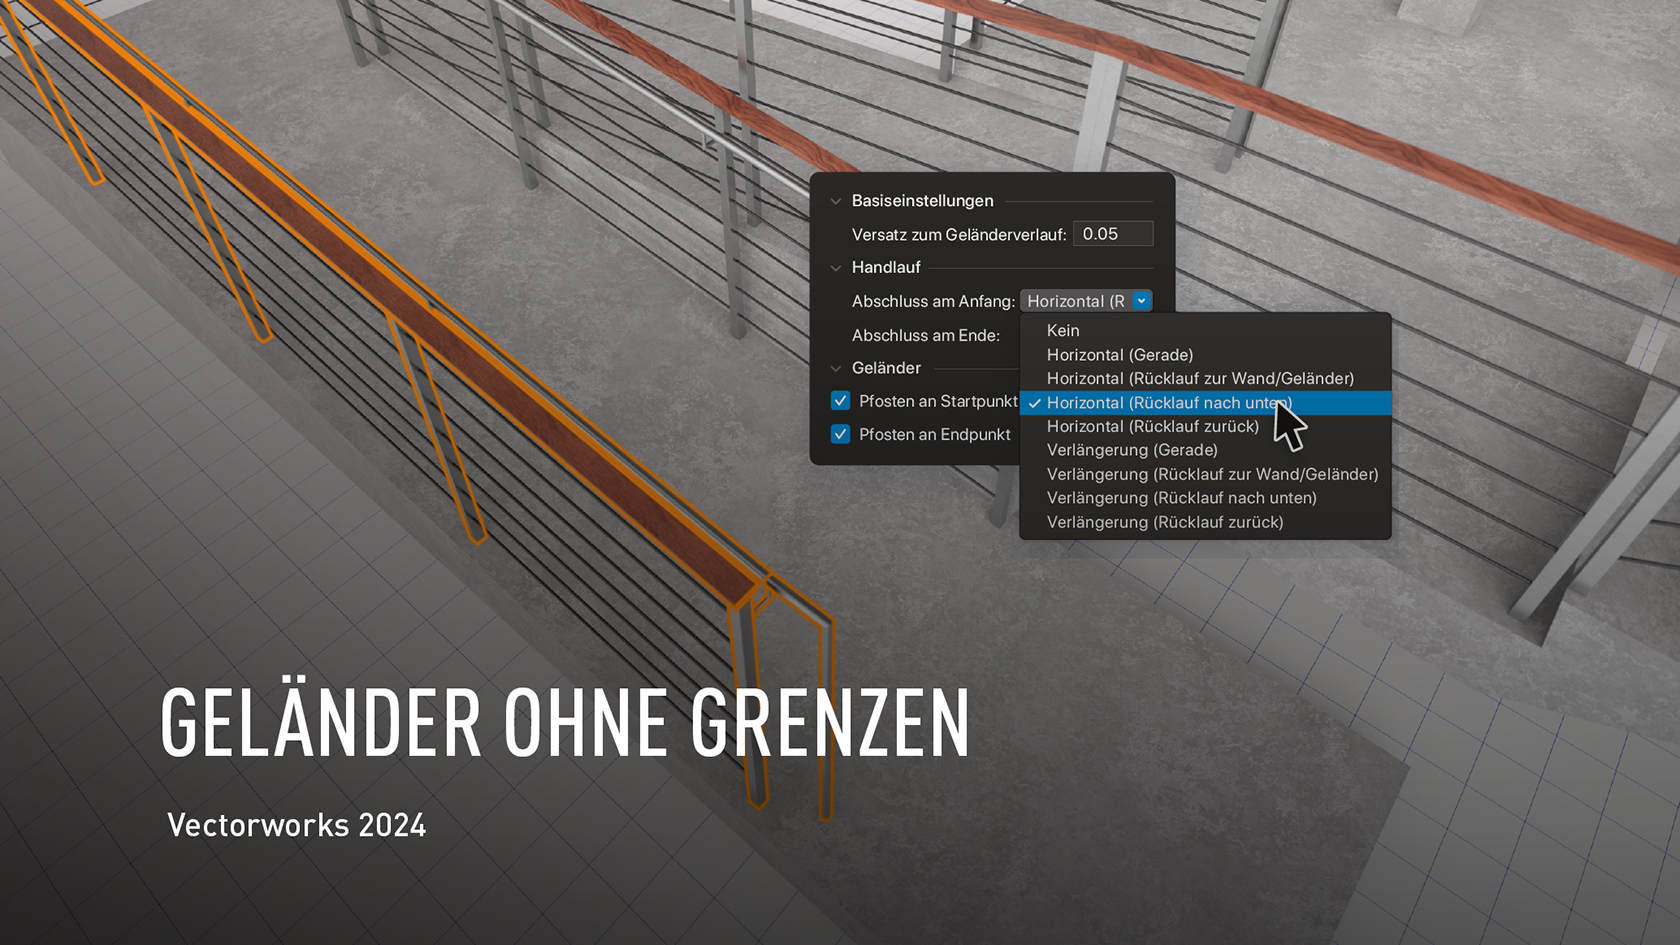
Vectorworks 2024 erlaubt Ihnen, Geländer und Handläufe noch individueller zu konfigurieren. Der flüssige Arbeitsablauf schließt stilisierte Objekte und zusätzliche Erstellungsoptionen ein, die mit anderen Objekten im Modell wie Böden, Decken, Rampen oder Treppen interagieren und sich automatisch an diese anpassen.
Category: All Industries
Requires Approval: No
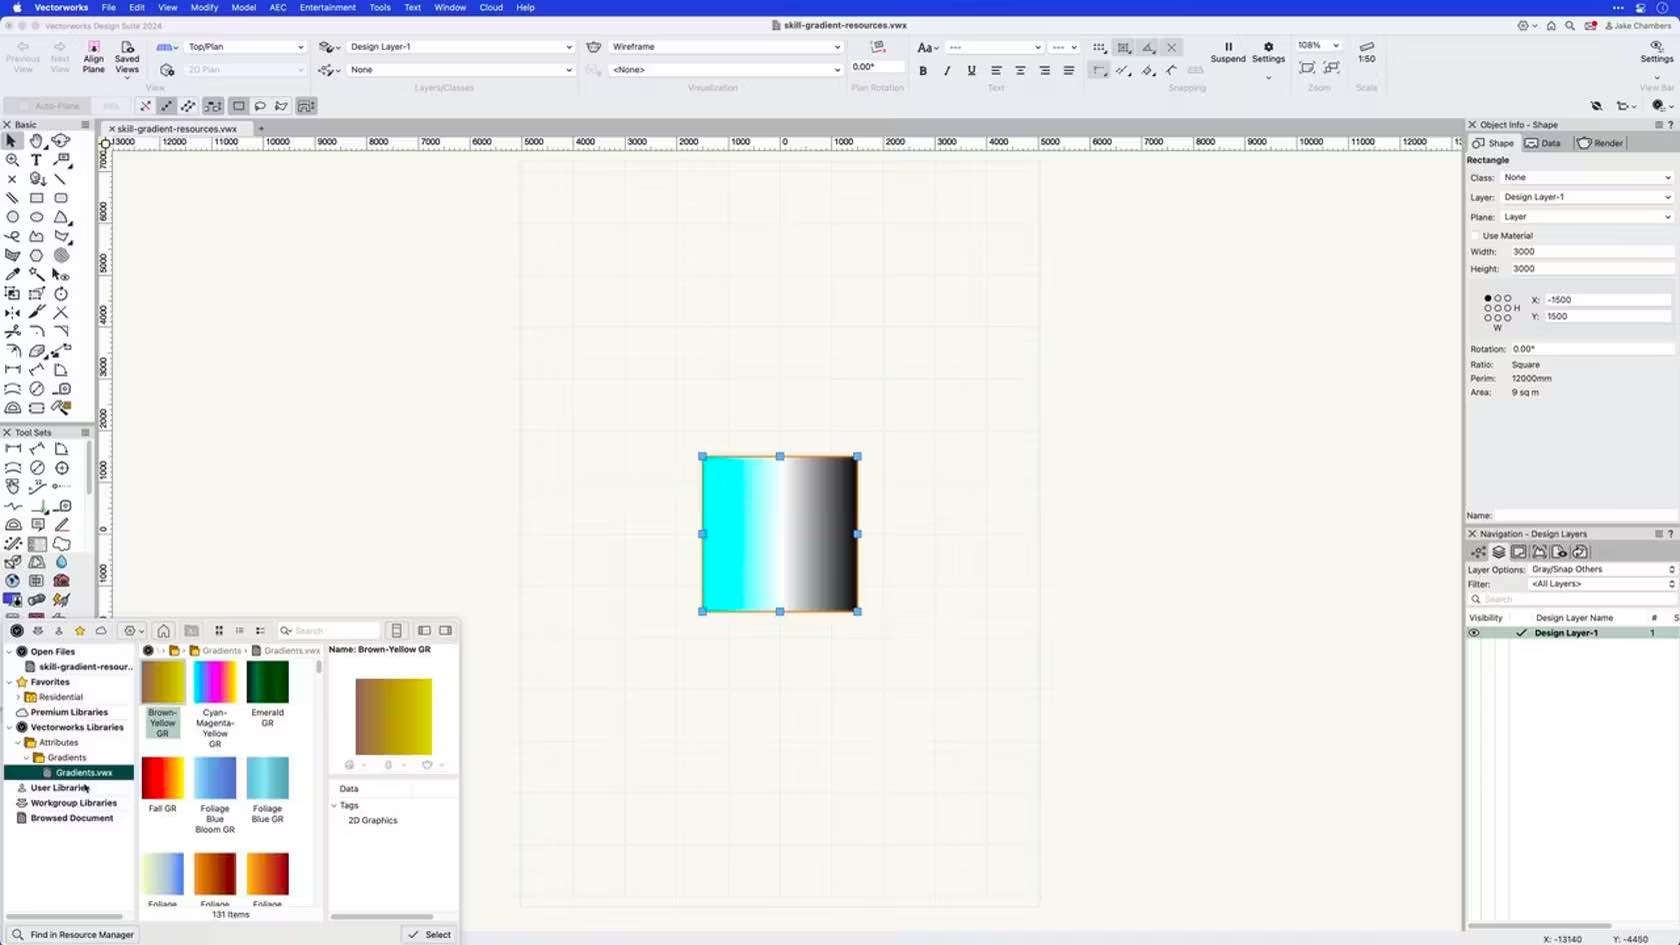
This course demonstrates how to create, apply, and edit gradient resources.
Category: Skill
Requires Approval: No
Enhance your workflow with a better way to create custom graphic legends. It’s now easier to align, scale, and alter the dimension of images as well as customize dynamic text. You’ll also be able to preview changes in sorting and class visibility.
Category: All Industries
Requires Approval: No
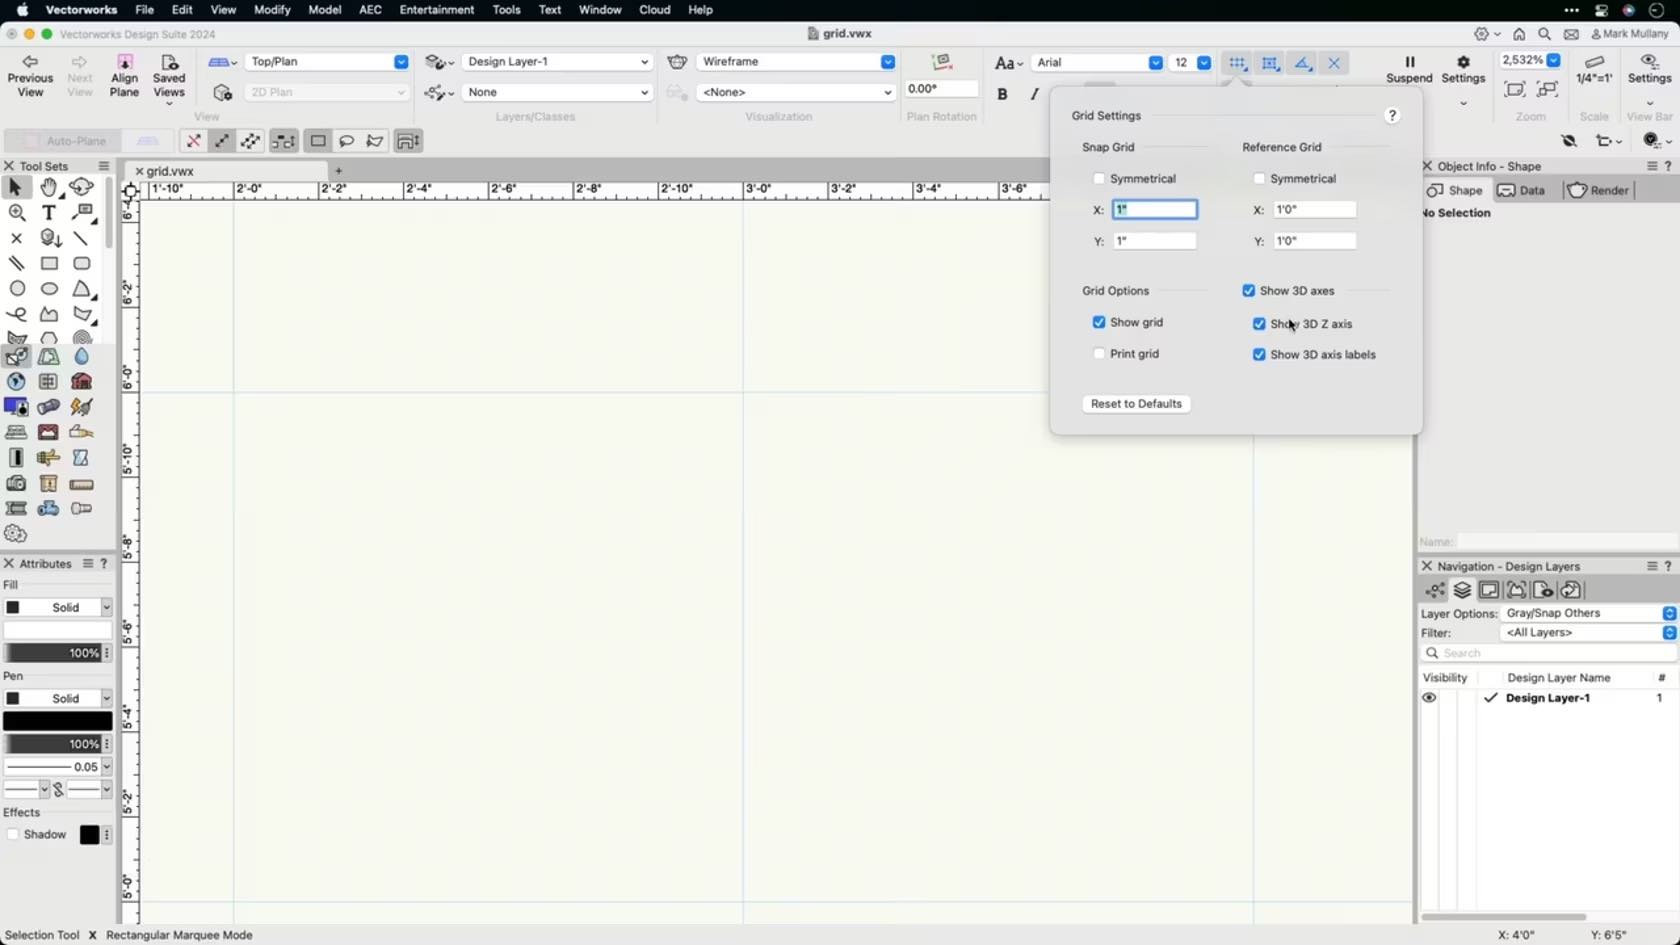
In this course, we will be discussing the grid settings and grid snapping in Vectorworks.
Category: Skill
Requires Approval: No
Entdecke in unserem Webinar die grundlegenden Funktionen von ConnectCAD – dem leistungsstarken Modul für Vectorworks, das speziell für die effiziente Planung von Signalflüssen entwickelt wurde. Erfahre, wie ConnectCAD die Signalflussplanung revolutioniert und nahtlos in Vectorworks integriert ist, und entdecke die benutzerfreundlichen Funktionen, die Deine Arbeitsabläufe optimieren.
(Für Version 2024)
Category: Featured
Requires Approval: No
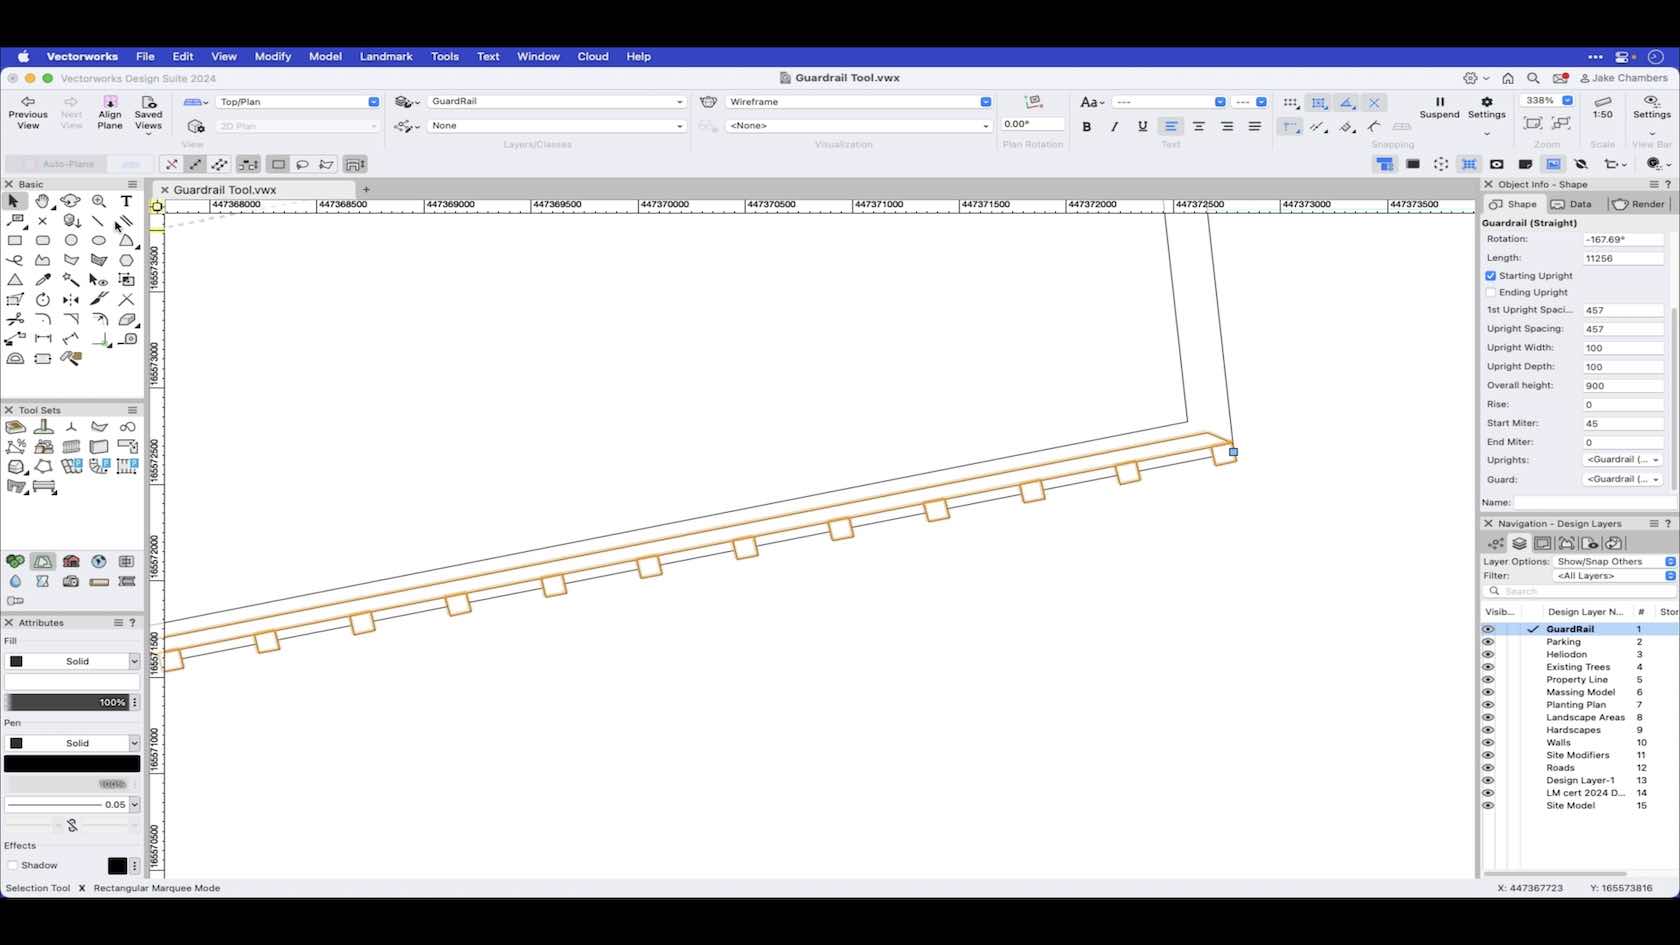
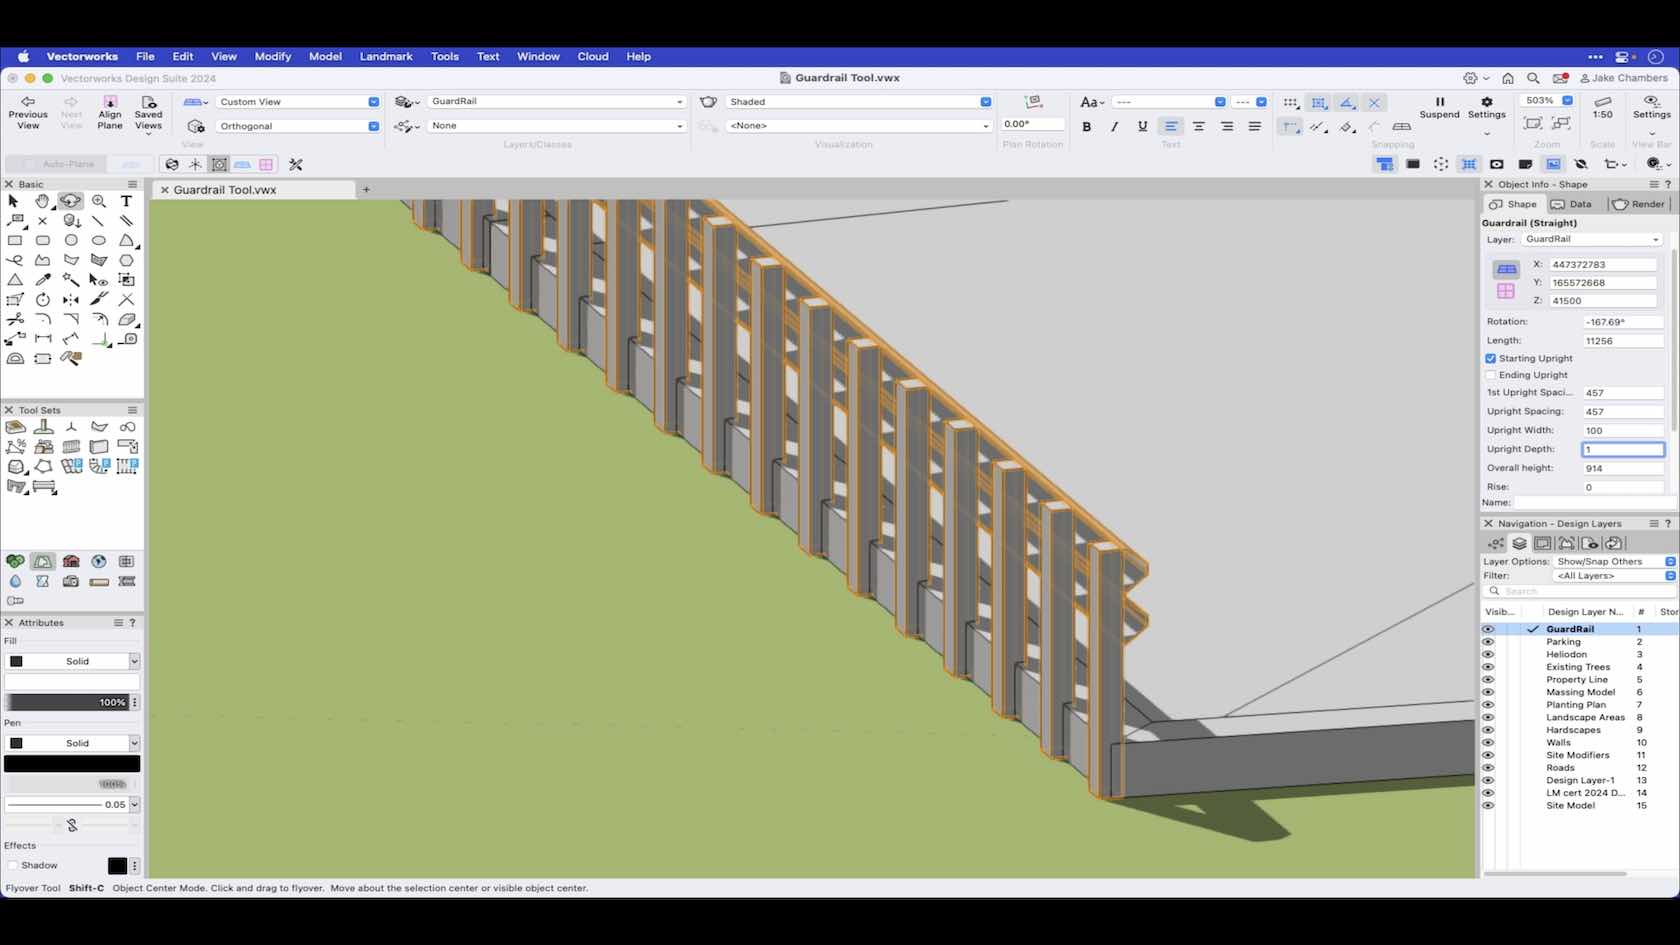
The guardrail tool enables you to draw a guardrail which has both 2D and 3D representation. This video demonstrates how to draw a guardrail and set the preferences via the tools preferences button and also how to make changes via the object info palette after placement.
Category: Landmark 2024 Certificaiton
Requires Approval: No
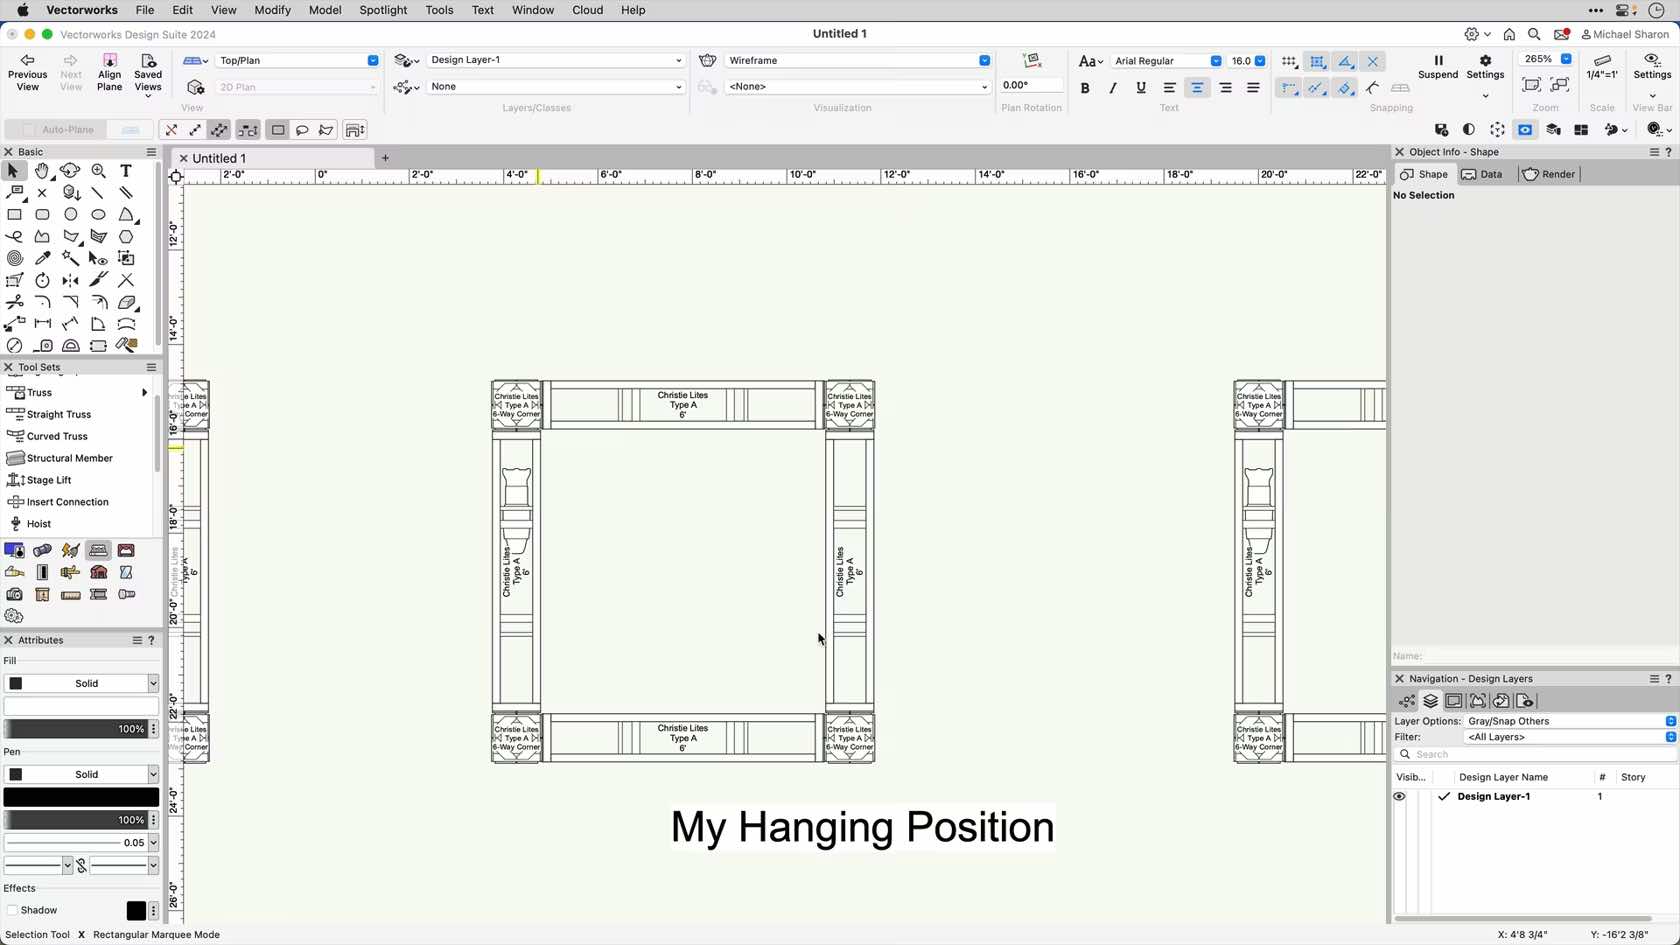
This video will demonstrate how to create a hanging position, and how to use it in your rigging system.
Category: Non Current Material
Requires Approval: No
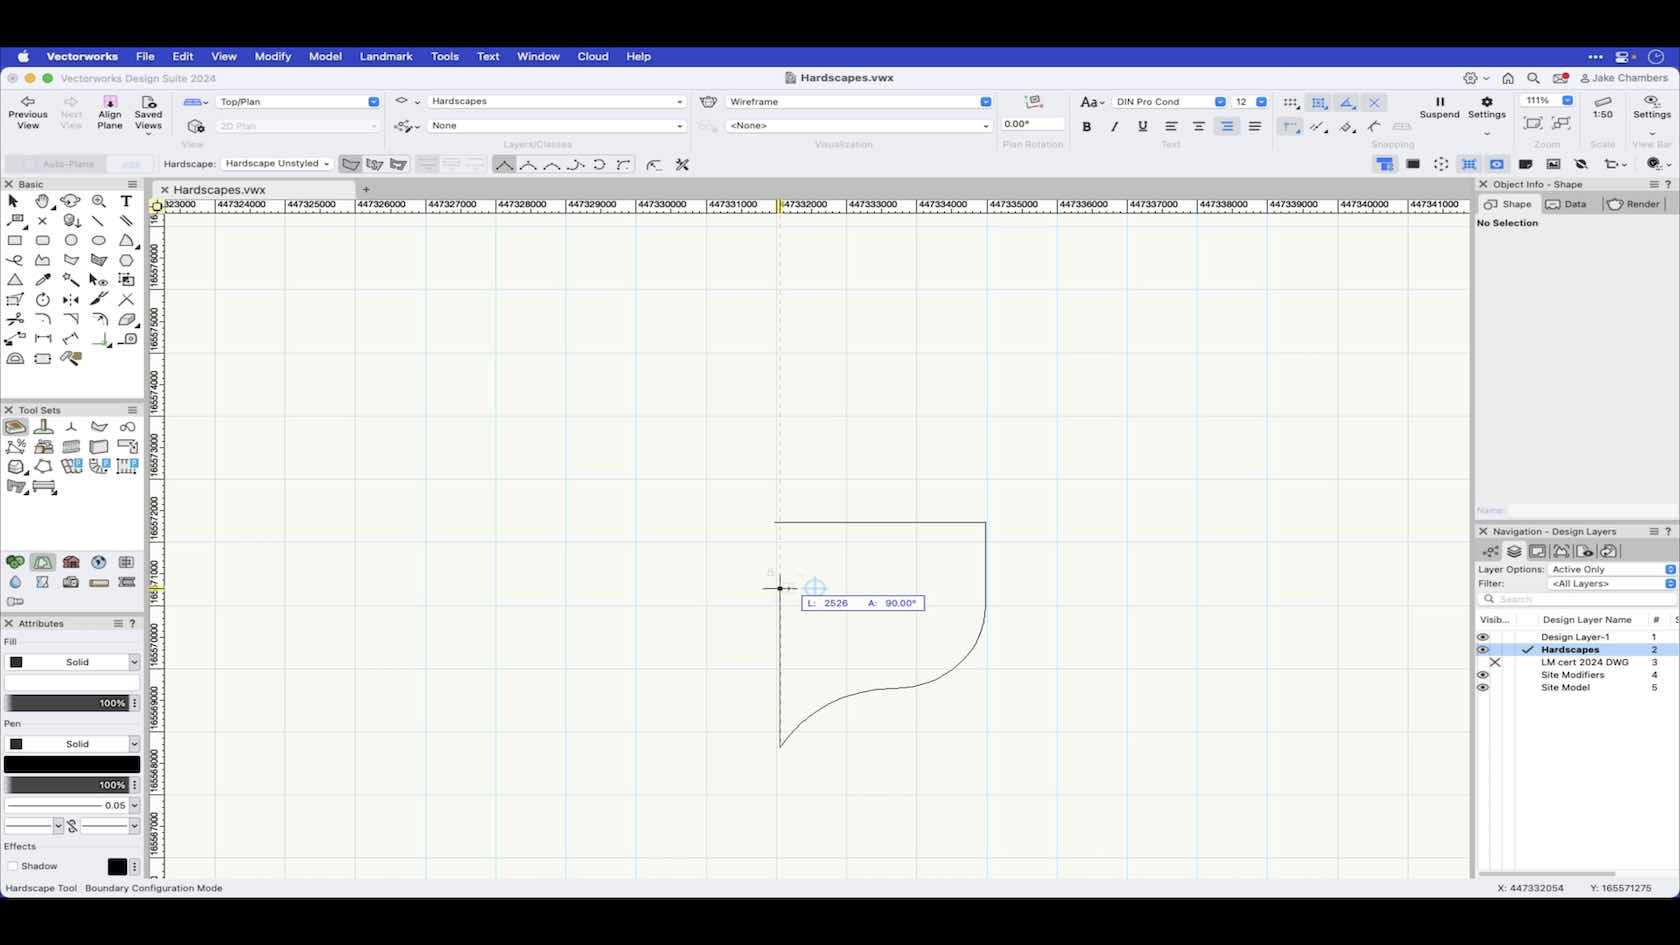
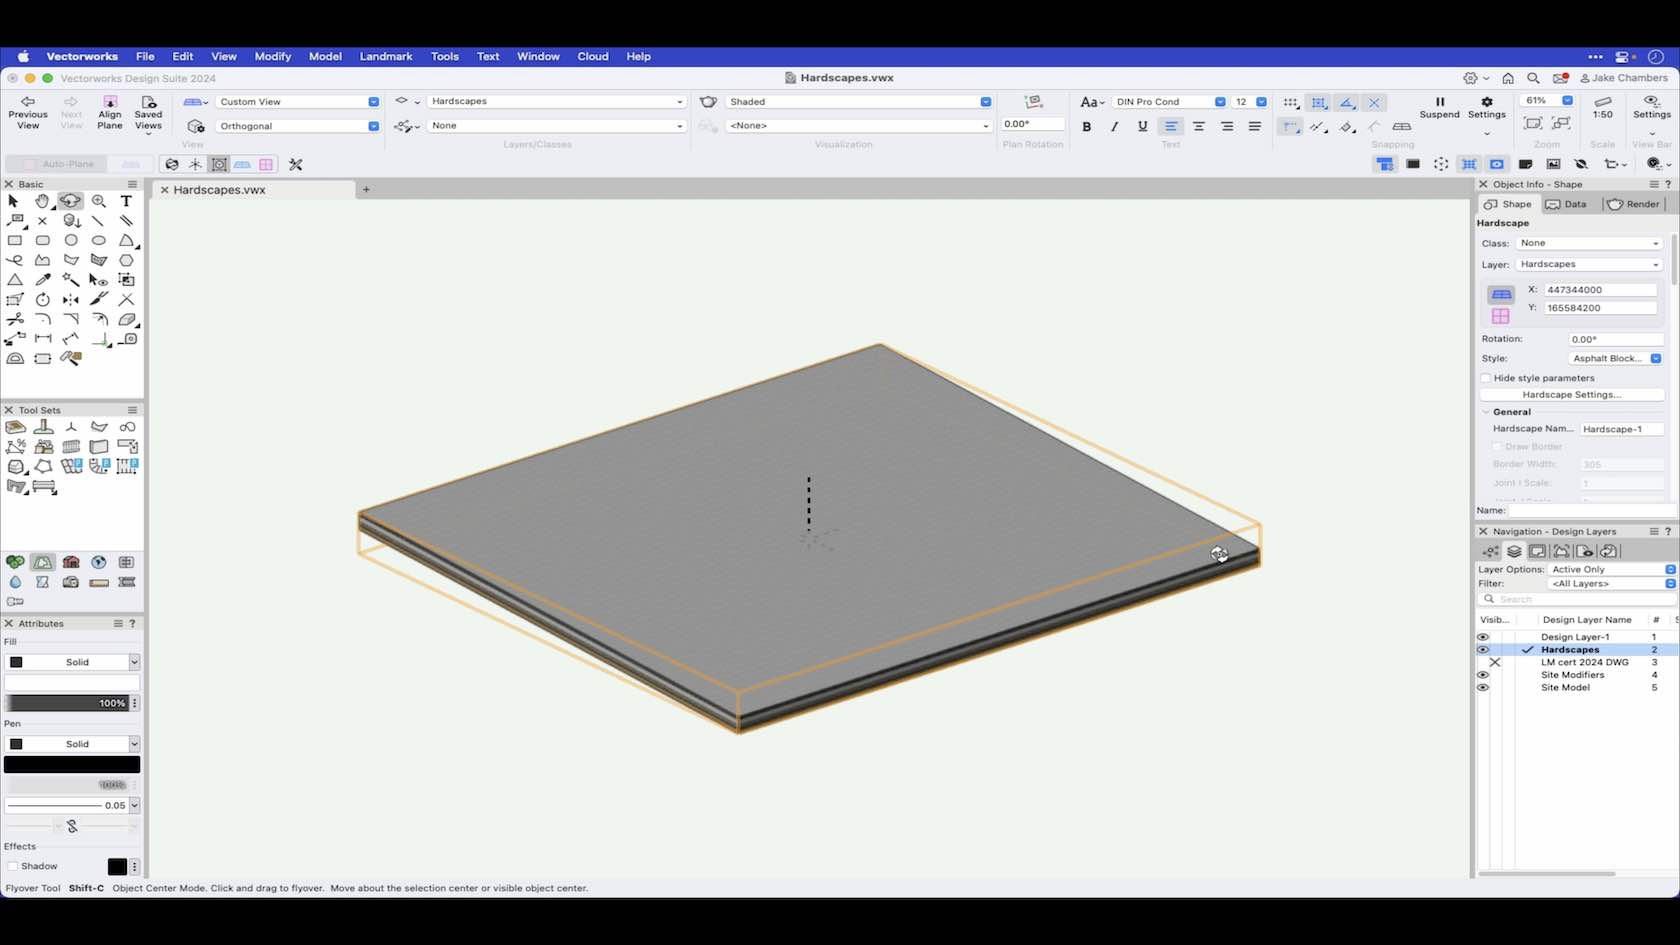
This Video explains and demonstrates the modes of the Hardscape tool.
Category: Landmark 2024 Certificaiton
Requires Approval: No
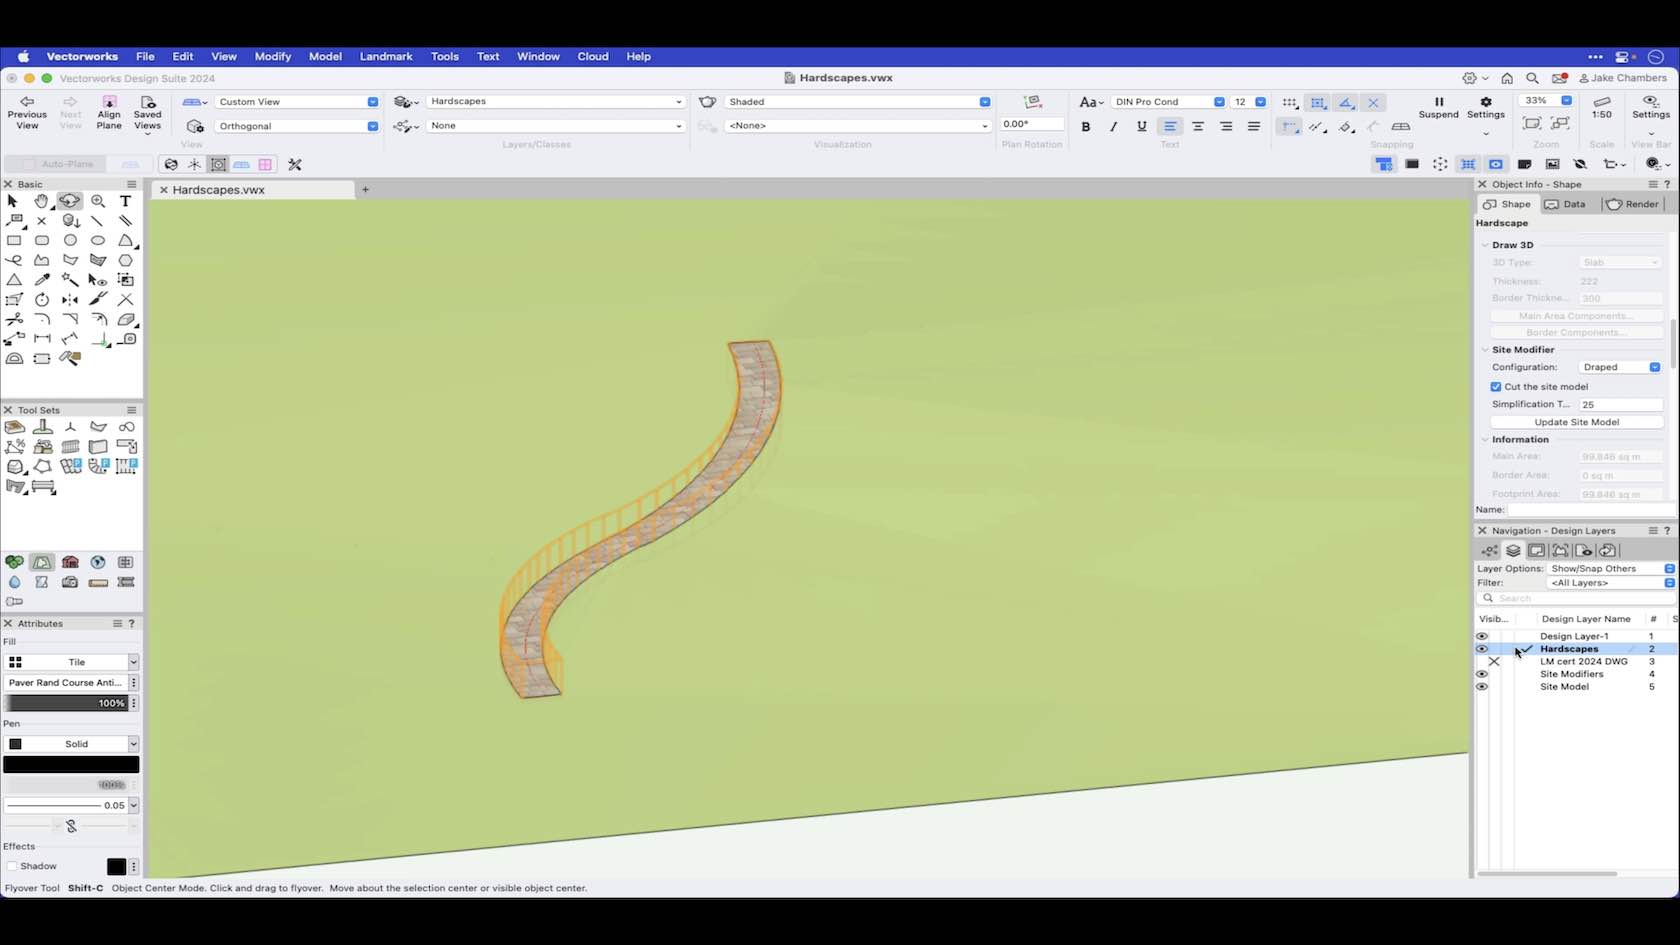
This Video will show the function of the site modifer configuration within the hardscape object.
Category: Landmark 2024 Certificaiton
Requires Approval: No
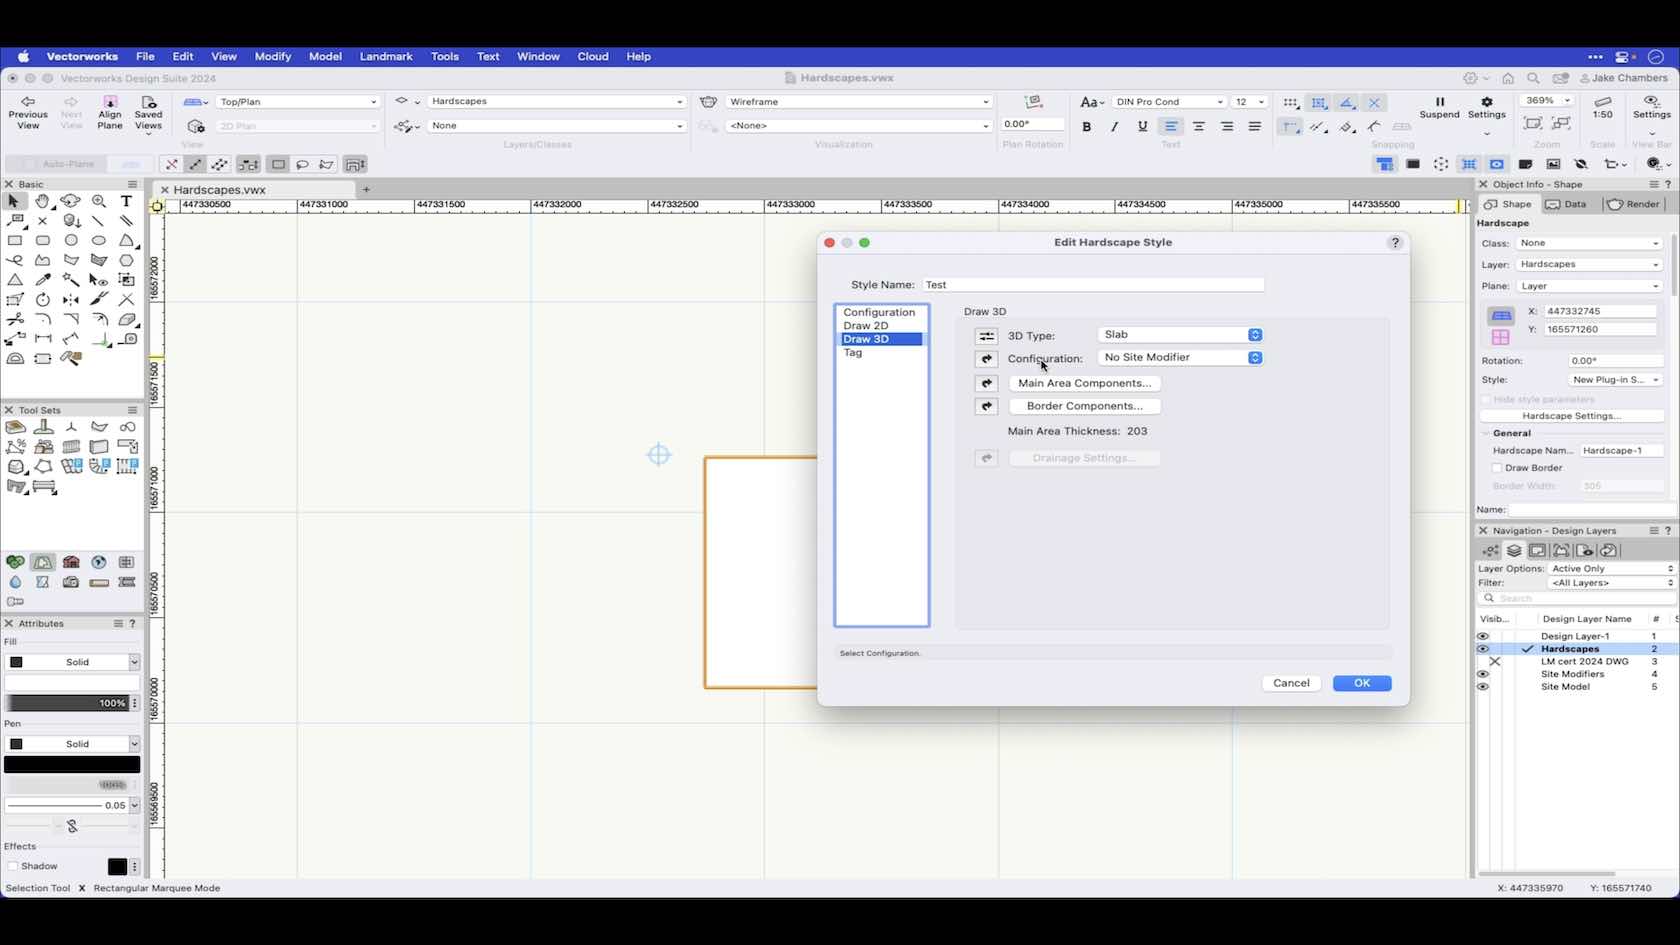
This Video will show what makes up a Hardscape Style.
Category: Landmark 2024 Certificaiton
Requires Approval: No
This course demonstrates how to create, apply, and edit Associative and Non-associative Hatches using the Resource Manager and the Hatch command.
Category: Skill
Requires Approval: No
In this video we look at the Heliodon tools preferences and how to place a Heliodon into a project.
Category: Landmark 2024 Certificaiton
Requires Approval: No
Discover how to use the Heliodon to create Solar Animations to use for Sun and Shade analysis to help aide your design process.
Category: Landmark 2024 Certificaiton
Requires Approval: No
This video will introduce us to the hoist origin tool.
Category: Chapter 4 Hoists
Requires Approval: No
In this video, we'll explore in depth the hoist functions and settings.
Category: Non Current Material
Requires Approval: No
In this video, we will cover the basics of the HopOver Tool.
Category: (2024) Skill
Requires Approval: No
Lernen Sie das Werkzeug zur horizontalen, vertikalen und diagonalen Bemaßung kennen.
Category: Erste Schritte 2024
Requires Approval: No
How Not to Break Project Sharing by Diana Kesselschmidt, Technical Director/Production Manager & Lighting Designer
Presentation from LDI 2024
Category: All Industries
Requires Approval: No
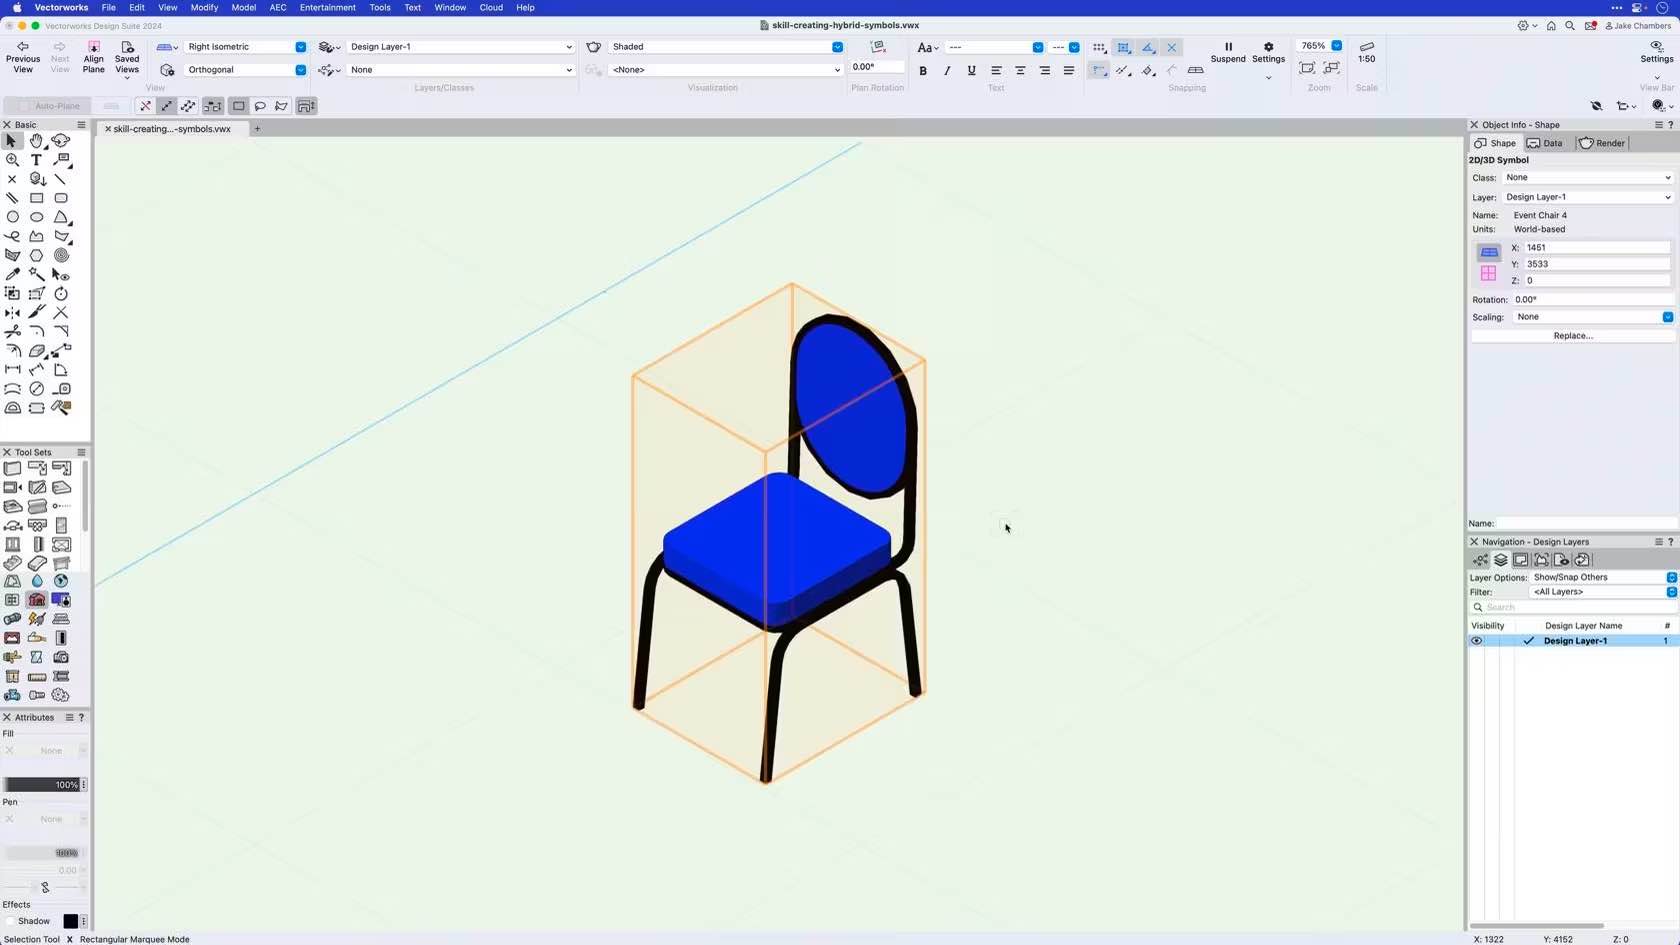
In this course you will practise how to create a Hybrid Symbol using 2D and 3D geometry.
Category: Skill
Requires Approval: No
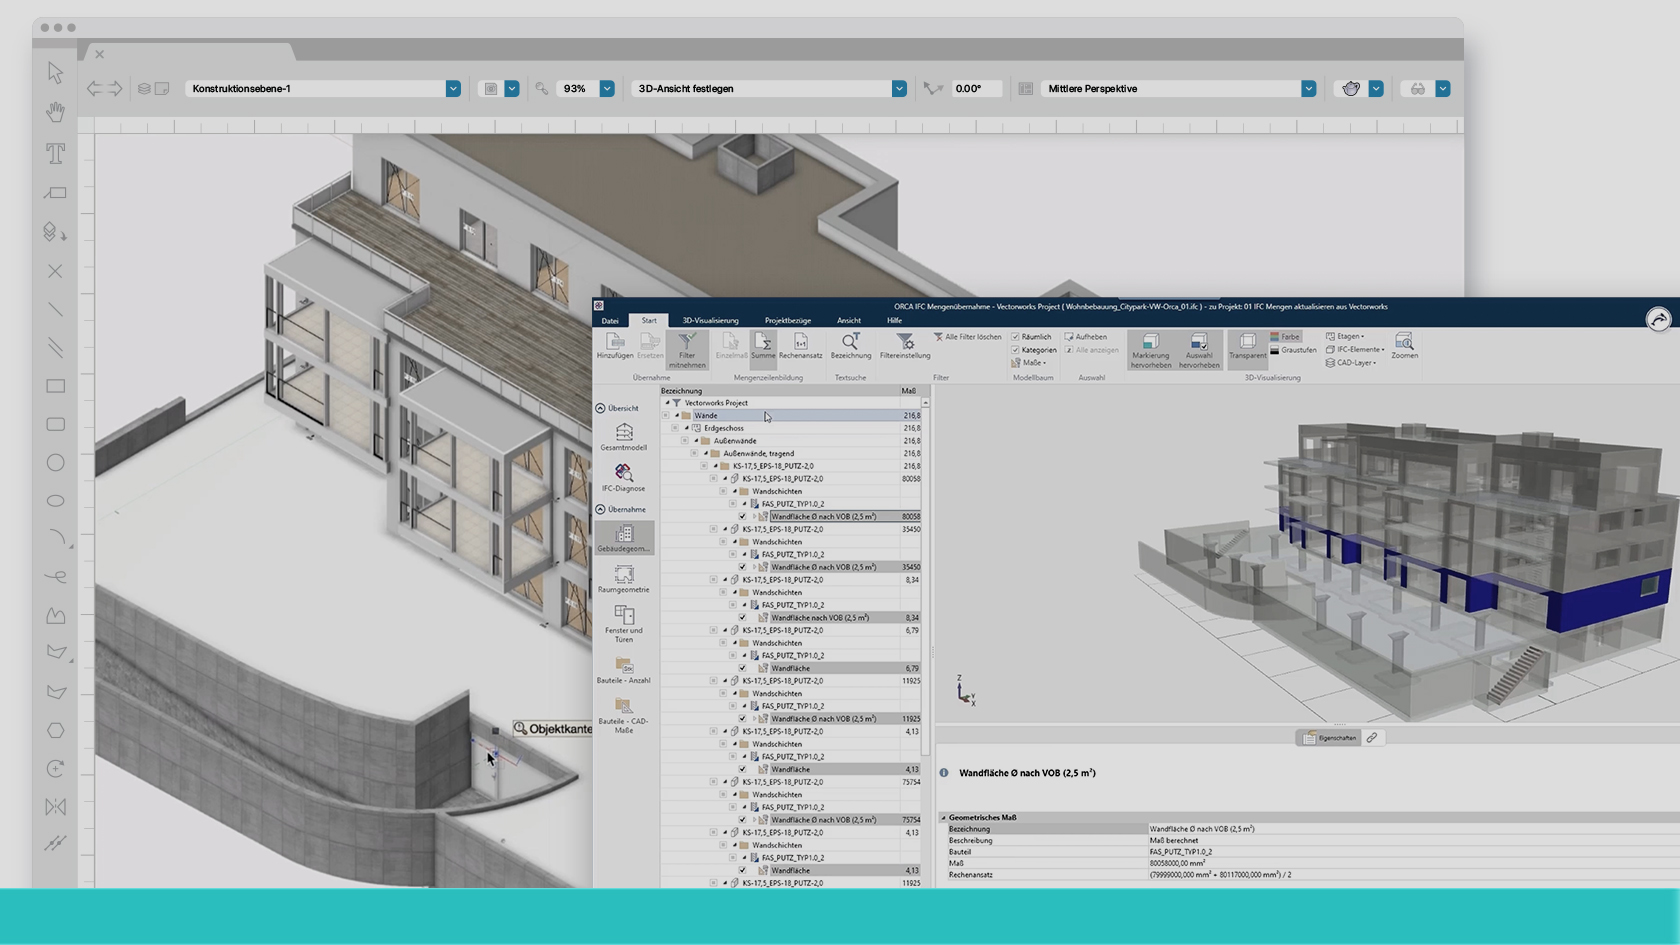
In diesem Webinar präsentieren Experten von Vectorworks und ORCA Software einen effizienten, digitalen Workflow zur Aktualisierung von Mengen und Massen nach Modellanpassungen.
(Für Version 2024)
Category: Featured
Requires Approval: No

Das DXF/DWG-Format ist ein weltweit etabliertes Dateiformat für den Datenaustausch in der CAD-Industrie.
DXF und DWG haben sich zum De-facto-Standard entwickelt, d.h. sie unterliegen keiner allgemeinen Normierung,
daher kann es beim Datentransfer von CAD- zu CAD-System immer wieder zu Problemen kommen.
Um ihre Daten möglichst verlustarm aus oder nach Vectorworks zu transferieren, vermitteln wir mit diesem Webinar
Einiges an Basiswissen, Tipps und Tricks und zeigen auch spannende Neuerungen die wir in Vectorworks für Sie
integriert haben.
(Für Version 2024)
Category: Featured
Requires Approval: No
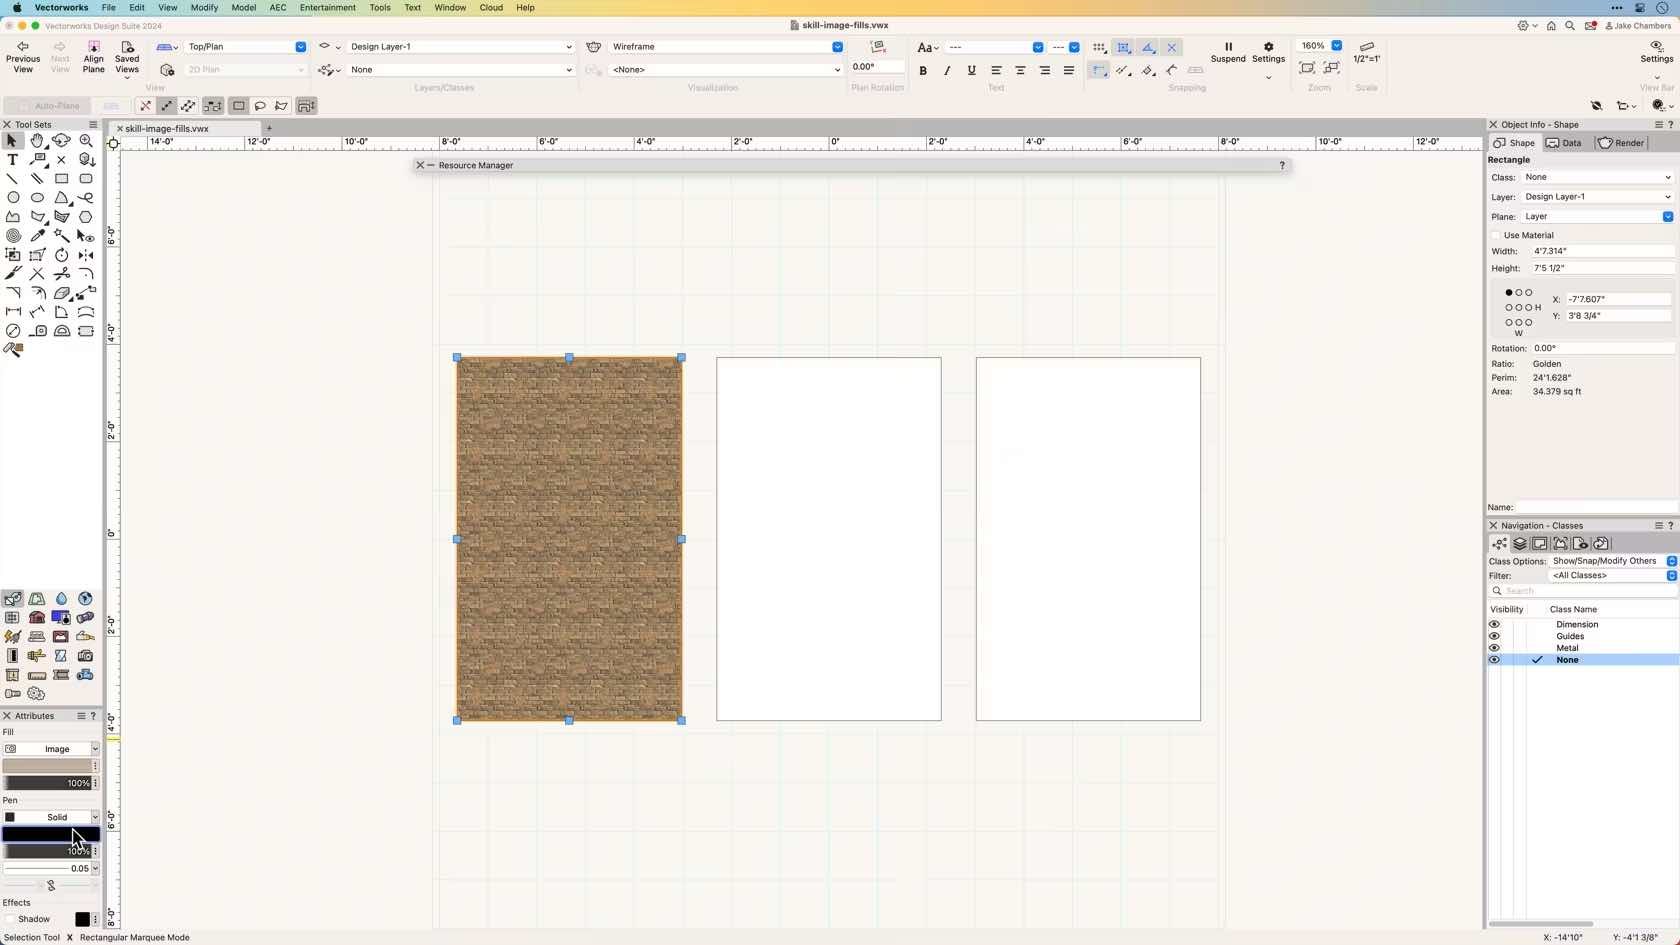
In this course you will learn how to apply image fills to 2D planar objects.
Category: Skill
Requires Approval: No
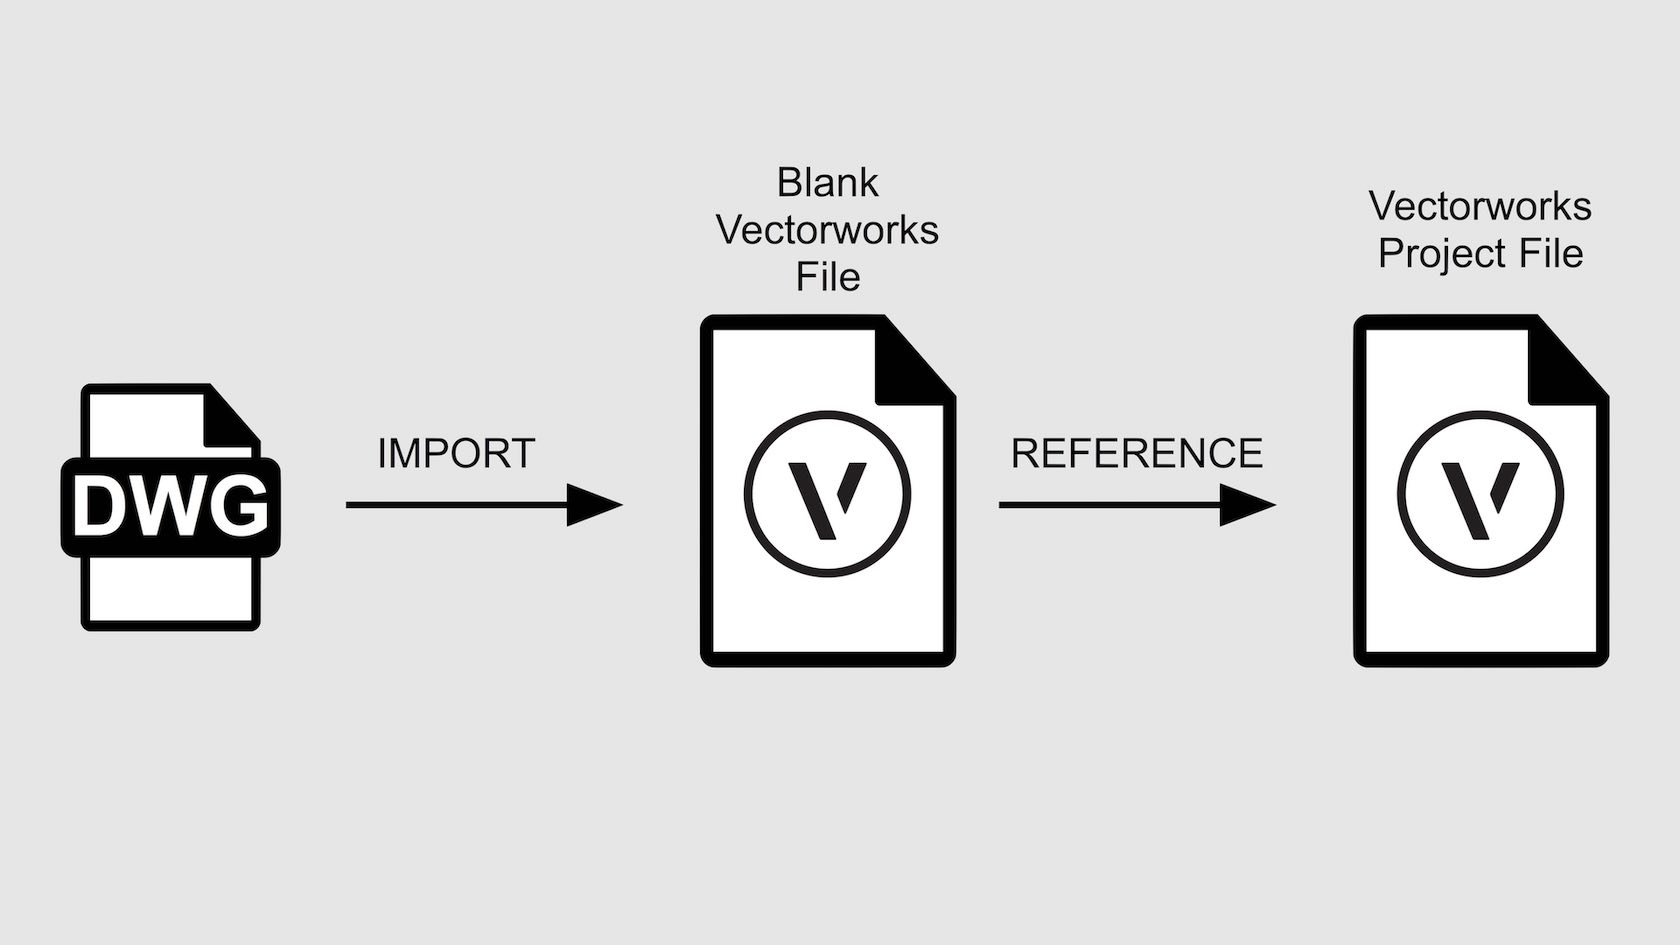
People frequently get sent DXF/DWG files when working as part of a team. DWG is the native format of AutoCAD® produced by Autodesk Inc. DXF is the drawing Exchange Format also used by AutoCAD®. Many other CAD applications can export to DWG format too. Luckily the import process is the same for both! You can also choose to Reference your DWG/DXF file. This creates a link from your project file to the DWG file without you having to import all of the DWG/DXF geometry into your file. This makes it much easier to manage received drawings in a team project, once a DWG/DXF have been superseded by a new one, as long as the DWG/DXF retains the original name all files will always be up to date! It might be a good idea to import DWG/DXF files into a blank file first, as a sort of quarantine. You can edit the information you have received in there, then reference that Vectorworks file into your main project files.
Category: Skill
Requires Approval: No
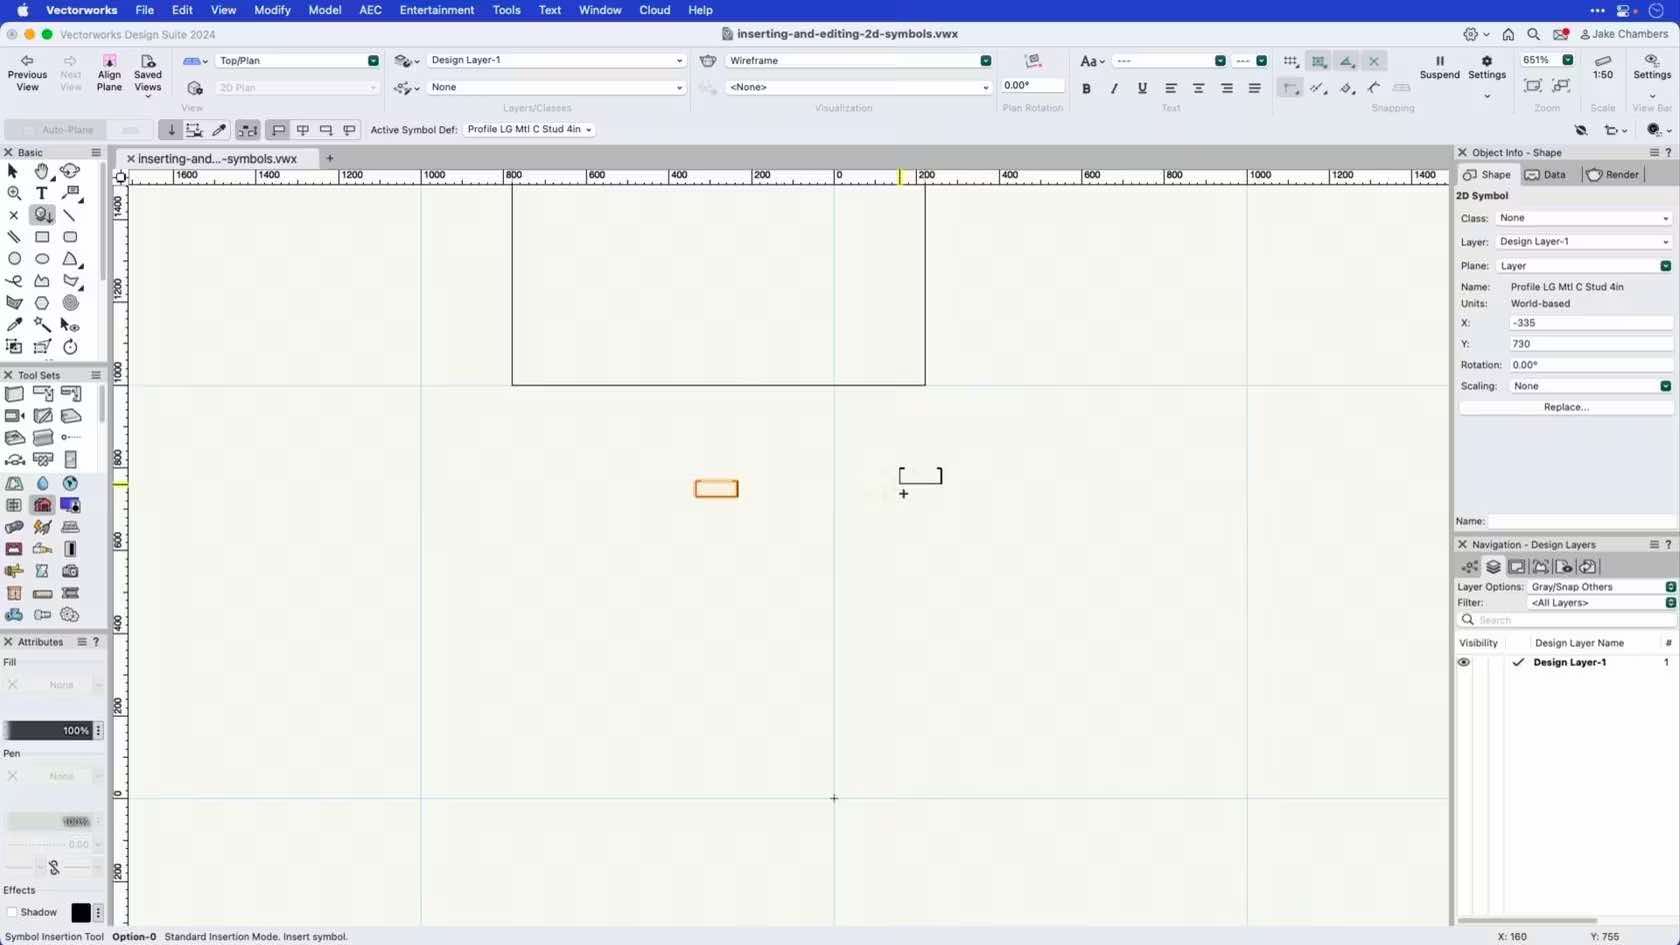
This course demonstrates how to insert 2D symbols onto a design layer.
Category: Skill
Requires Approval: No
In this video we'll be introduced to the proper way to insert a hoist.
Category: Non Current Material
Requires Approval: No
In this video, we will explore the interactive appearance preferences found in Vectorworks software.
Category: Skill
Requires Approval: No
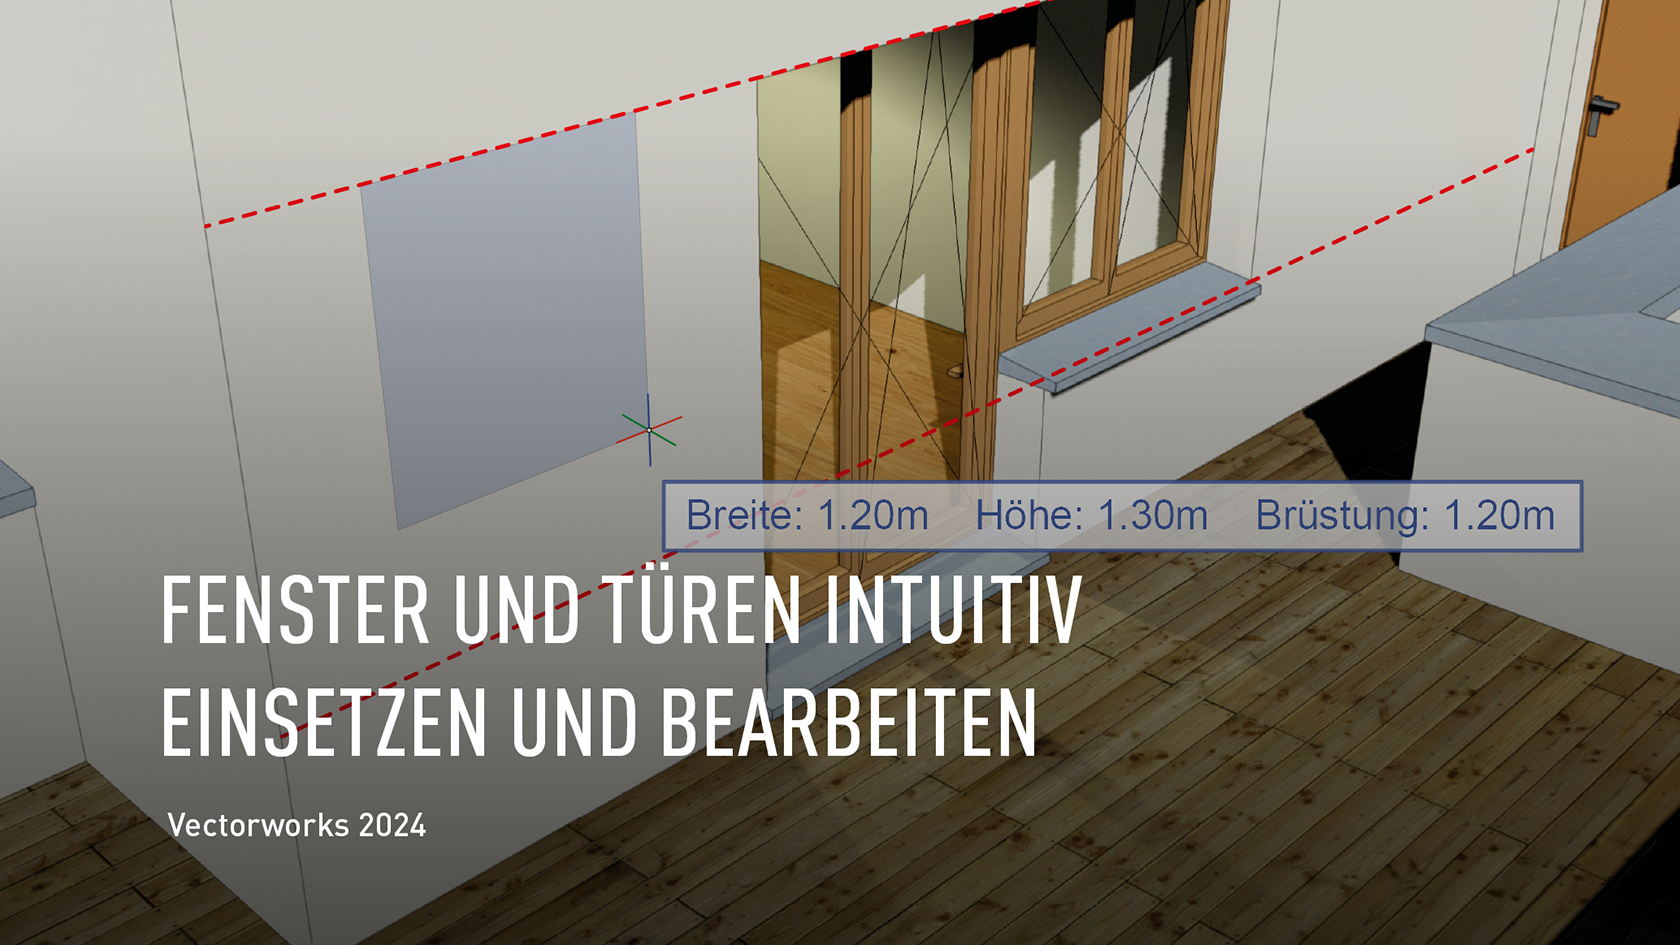
Vectorworks 2024 bietet gleich eine ganze Reihe von Verbesserungen, die Arbeitsprozesse mit Fenstern und Türen erheblich vereinfachen. Beispielsweise können Sie neu Fenster direkt modellieren, einfach durch Ziehen eines Rechtecks auf die Fassade oder einer Linie im Grundriss. Eingeblendete Hilfslinien erleichtern das genaue Positionieren. Ebenso einfach ist das Umformen direkt in 3D mit Modifikationspunkten. Das ist die schnelle, intuitive Alternative zu den Parametern, auf die viele gewartet haben.
Category: Buildings
Requires Approval: No
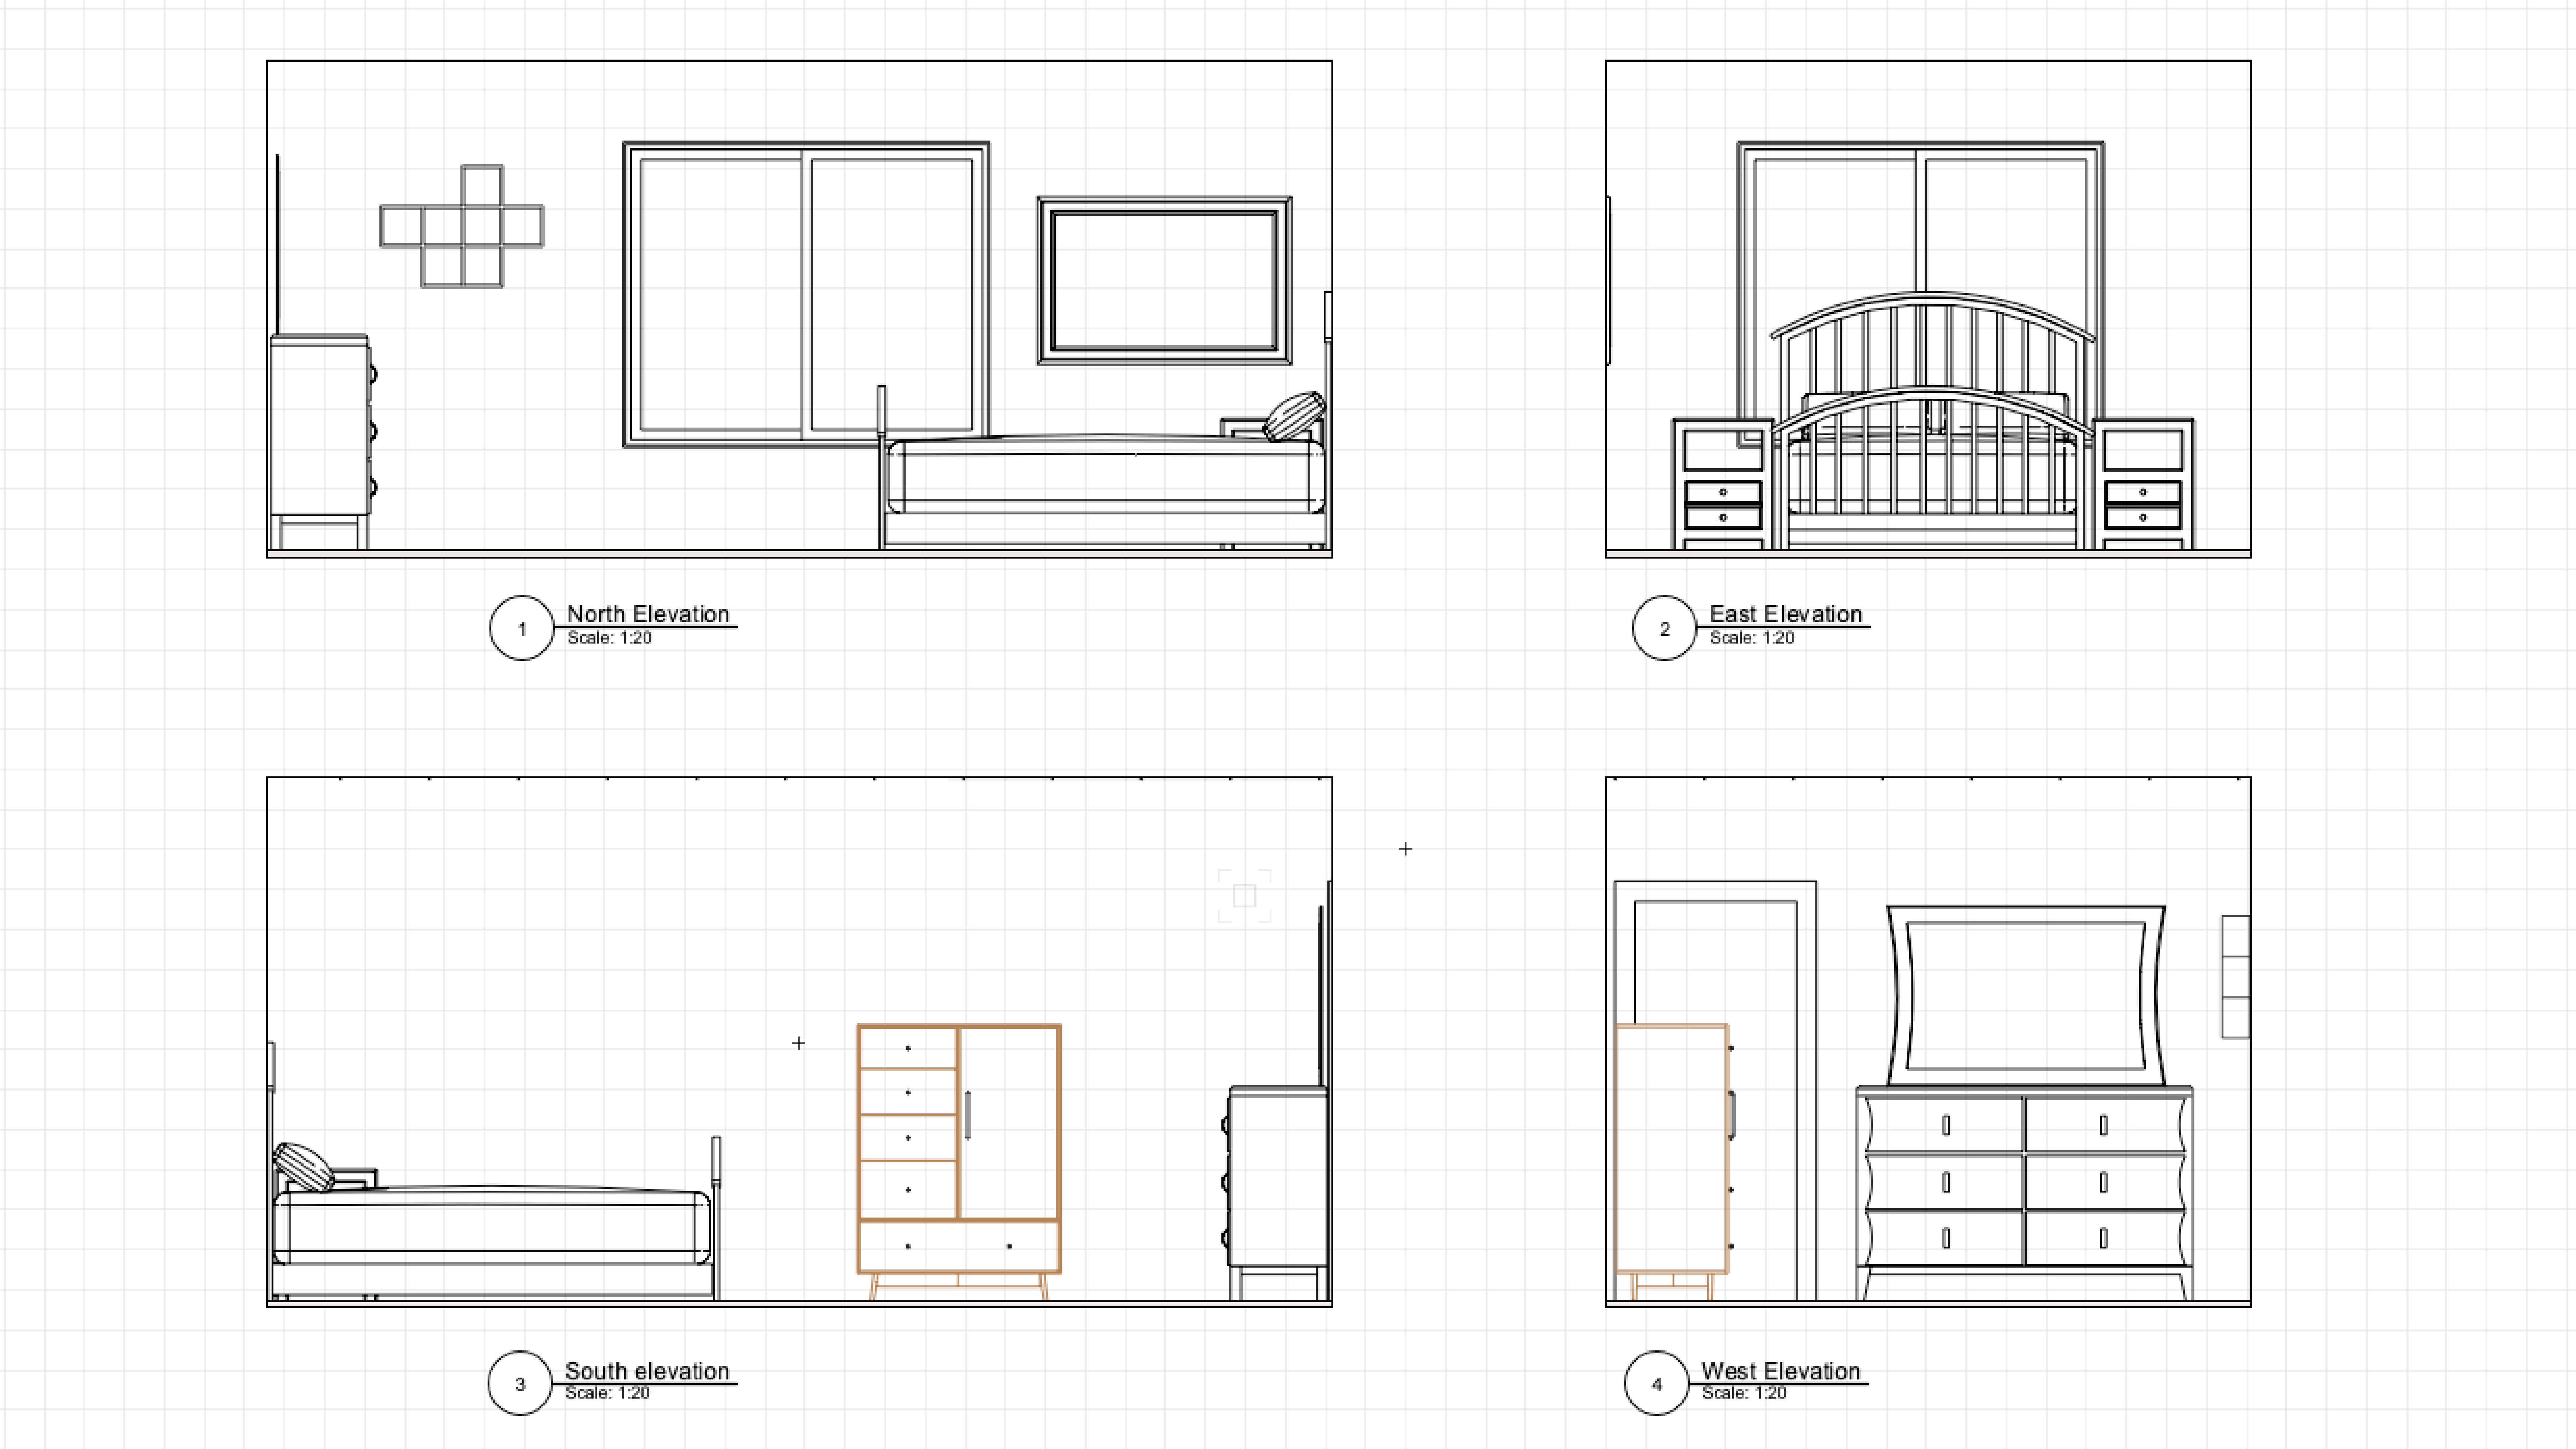
Create Interior Elevation viewports is a special command in Vectorworks that places an interior elevation marker and automatically generates up to 4 section viewports displays the North, East, South and West elevations of a room.
Category: Architect Certification 2024
Requires Approval: No
Introduction to the Vectorworks Spotlight Professional Certification course.
Category: Spotlight Certification 2024
Requires Approval: No

Understand what a Design Layer is and how it can be used in a document.
Category: Skill
Requires Approval: No
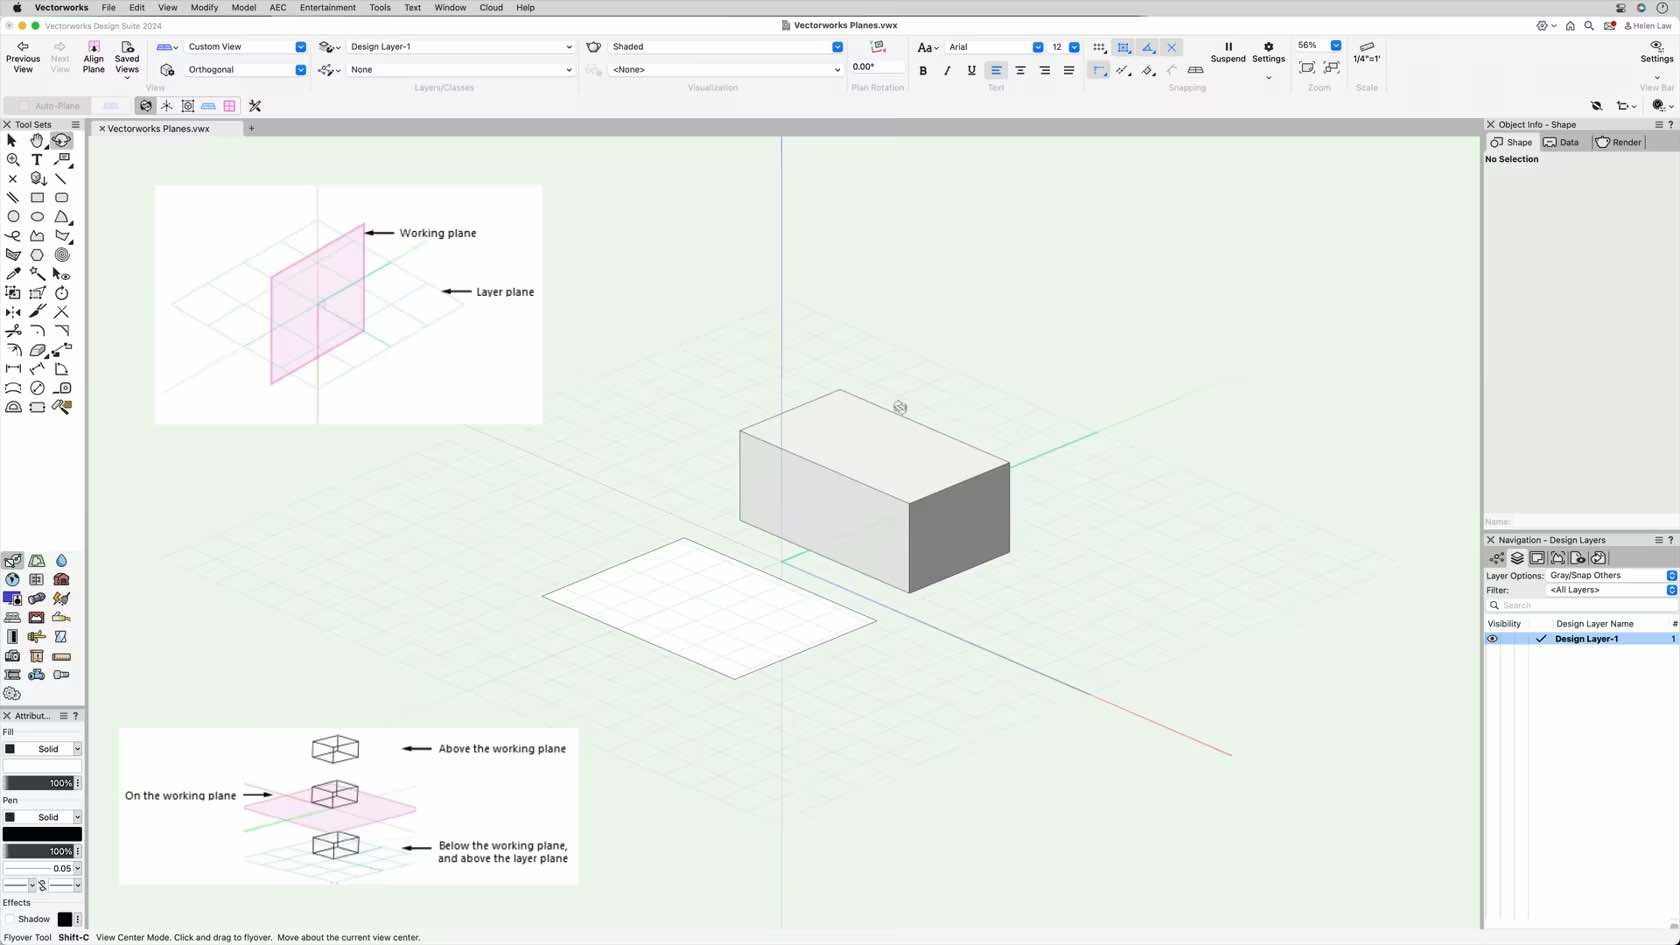
In this video, we will examine the difference between Layer Plane and Working Plane.
Category: Skill
Requires Approval: No
This course provides an introduction to using sheet layers and gives an overview of the sheet layer section of the Core Concepts Certification.
Category: Skill
Requires Approval: No
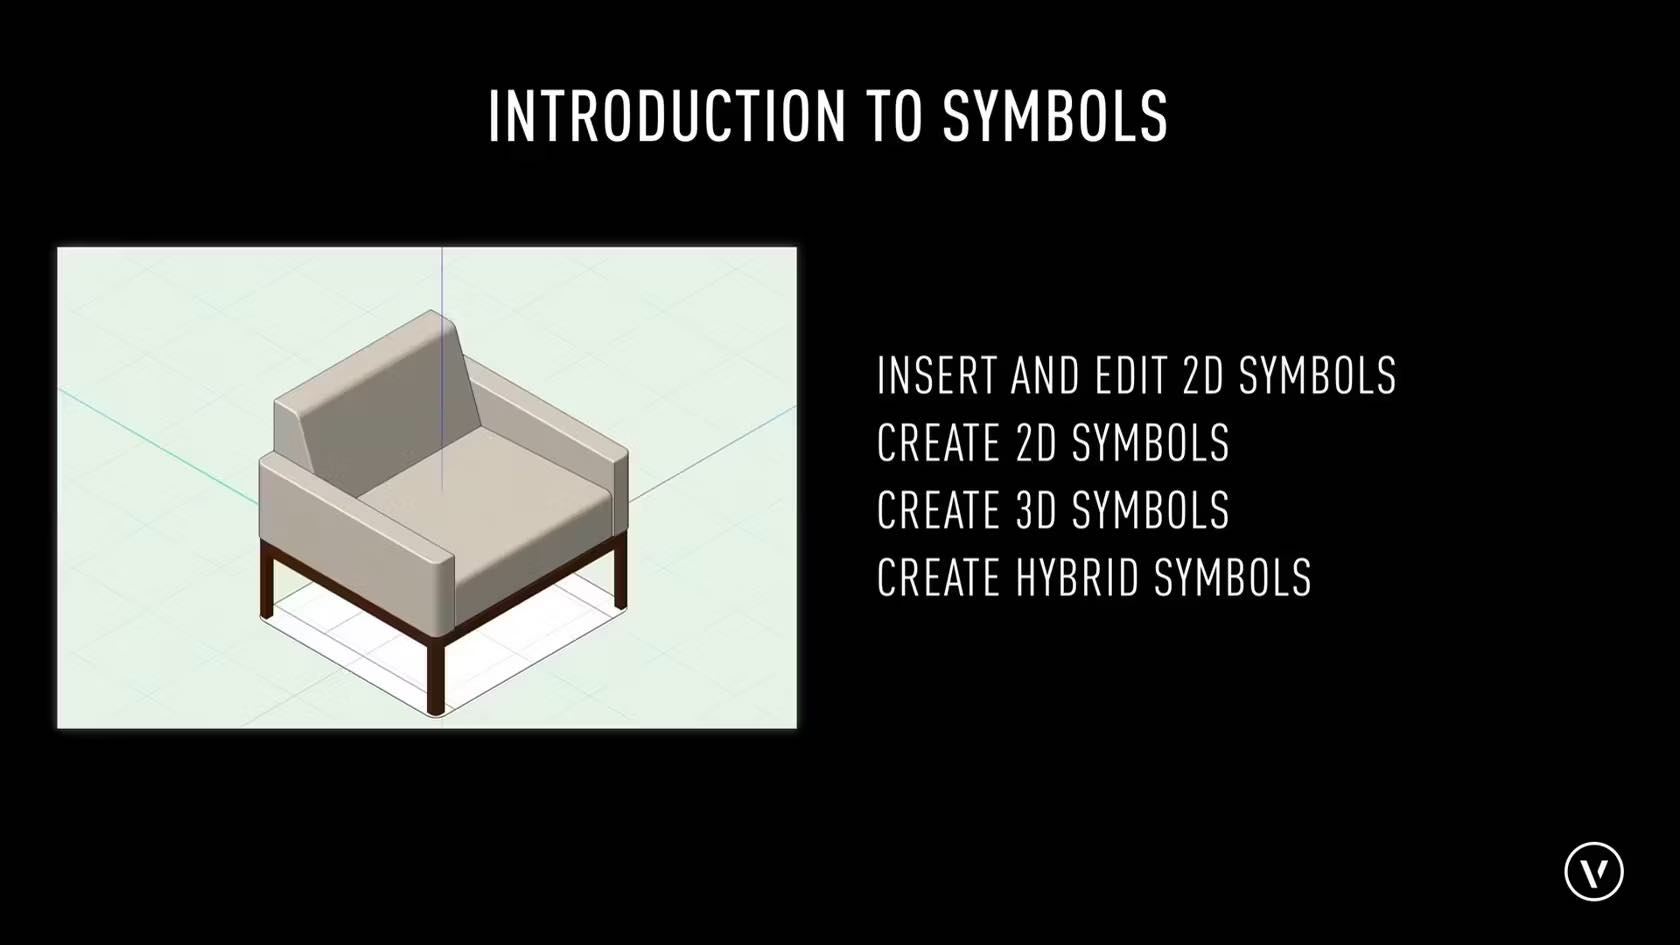
This course provides an introduction to symbols and symbol types and an overview of the Core Certification sections on Symbols.
Category: Skill
Requires Approval: No

An introduction to the Vectorworks Architect Certification learning path
Category: Architect Certification 2024
Requires Approval: No
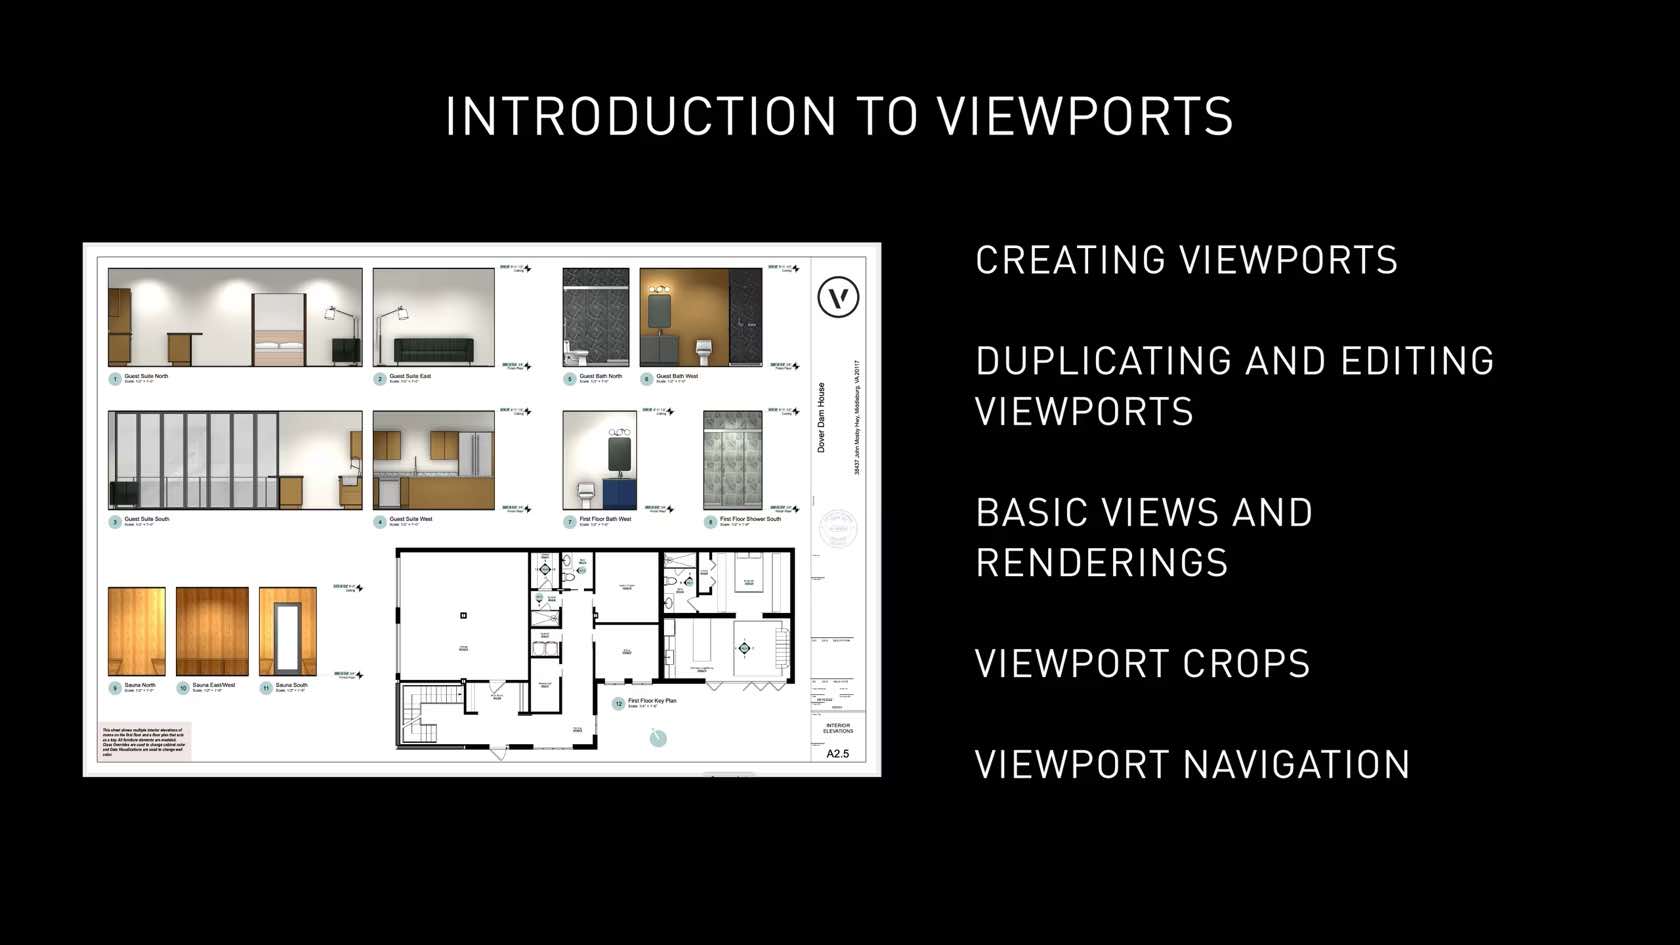
This course introduces the concept of viewports and provides an overview of the courses that demonstrate basic viewport settings, workflows, and functionality.
Category: Skill
Requires Approval: No
In this video, we will cover the basics of the Jackfield Tools.
Category: (2024) Skill
Requires Approval: No
Eines der wichtigsten Gestaltungsmittel für Aussenräume ist das Werkzeug Belag/Weg. Es befindet sich in den Modulen Vectorworks Architektur sowie Vectorworks Landschaft und wurde in den letzten Jahren stark ausgebaut. Belag/Weg bietet heute eine ganze Reihe raffinierter Möglichkeiten, die sich nicht auf den ersten Blick erschließen. Dieses Webinar zeigt Ihnen, wie man schnell und sicher ans Ziel kommt, ohne dass man mit dem Ausprobieren der Optionen viel Zeit verliert. Ihre erfahrenen Begleiter auf diesem Spaziergang durch digitale Landschaften sind Fabio Häuselmann (Zeichner EFZ Landschaftsarchitektur) und CAD Consultant Noémie Kölliker. Frische Luft schnuppern sollten hier alle, die ab und zu oder auch häufiger Außenräume planen und gestalten wollen.
(Für Version 2024)
Category: Featured
Requires Approval: No


Lernen Sie das Werkzeug Kurvenverbindung kennen. Weitere Inhalte zum Thema "Erste Schritte 3D" finden Sie hier.
Category: Erste Schritte 2024
Requires Approval: No
A recap on the tools and commands covered in this section to create and develop an example project through the Landmark Certification.
Category: Landmark 2024 Certificaiton
Requires Approval: No
A recap on the tools and commands covered in this section to create and develop an example project through the Landmark Certification.
Category: Landmark 2024 Certificaiton
Requires Approval: No
A recap on the tools and commands covered in this section to create and develop an example project through the Landmark Certification.
Category: Landmark 2024 Certificaiton
Requires Approval: No

A recap on the tools and commands covered in this section to create and develop an example project through the Landmark Certification.
Category: Landmark 2024 Certificaiton
Requires Approval: No
Welcome to section one of the Vectorworks Landmark Professional Certification. It is recommended to watch each skill video in order and then follow along with the Section Tutorial at the end of the section. The section tutorials will recap on the skills learnt and you will build an example project as you work through each of the 4 section tutorials.
At the end of the section tutorial please save your file as this will be used to continue to develop the example file in the following section tutorials. Additional file resources required will also be available via the link below.
Category: Landmark 2024 Certificaiton
Requires Approval: No

Welcome to section two of the Vectorworks Landmark Professional Certification. It is recommended to watch each skill video in order and then follow along with the Section Tutorial at the end of the section.
The section tutorials will follow on from the previous section tutorial and recap on the skills learnt during this section and continue to build an example project as you work through each of the 4 section tutorials.
At the end of the section tutorial please save your file as this will be used to continue to develop the example file in the following section tutorials.Category: Landmark 2024 Certificaiton
Requires Approval: No
Welcome to section three of the Vectorworks Landmark Professional Certification. It is recommended to watch each skill video in order and then follow along with the Section Tutorial at the end of the section.
The section tutorials will follow on from the previous section tutorial and recap on the skills learnt during this section and continue to build an example project as you work through each of the 4 section tutorials.
At the end of the section tutorial please save your file as this will be used to continue to develop the example file in the following section tutorials.Category: Landmark 2024 Certificaiton
Requires Approval: No

Welcome to section four of the Vectorworks Landmark Professional Certification. It is recommended to watch each skill video in order and then follow along with the Section Tutorial at the end of the section.
The section tutorials will follow on from the previous section tutorial and recap on the skills learnt during this section and continue to build an example project as you work through each of the 4 section tutorials.
At the end of the section tutorial please save your file.Category: Landmark 2024 Certificaiton
Requires Approval: No
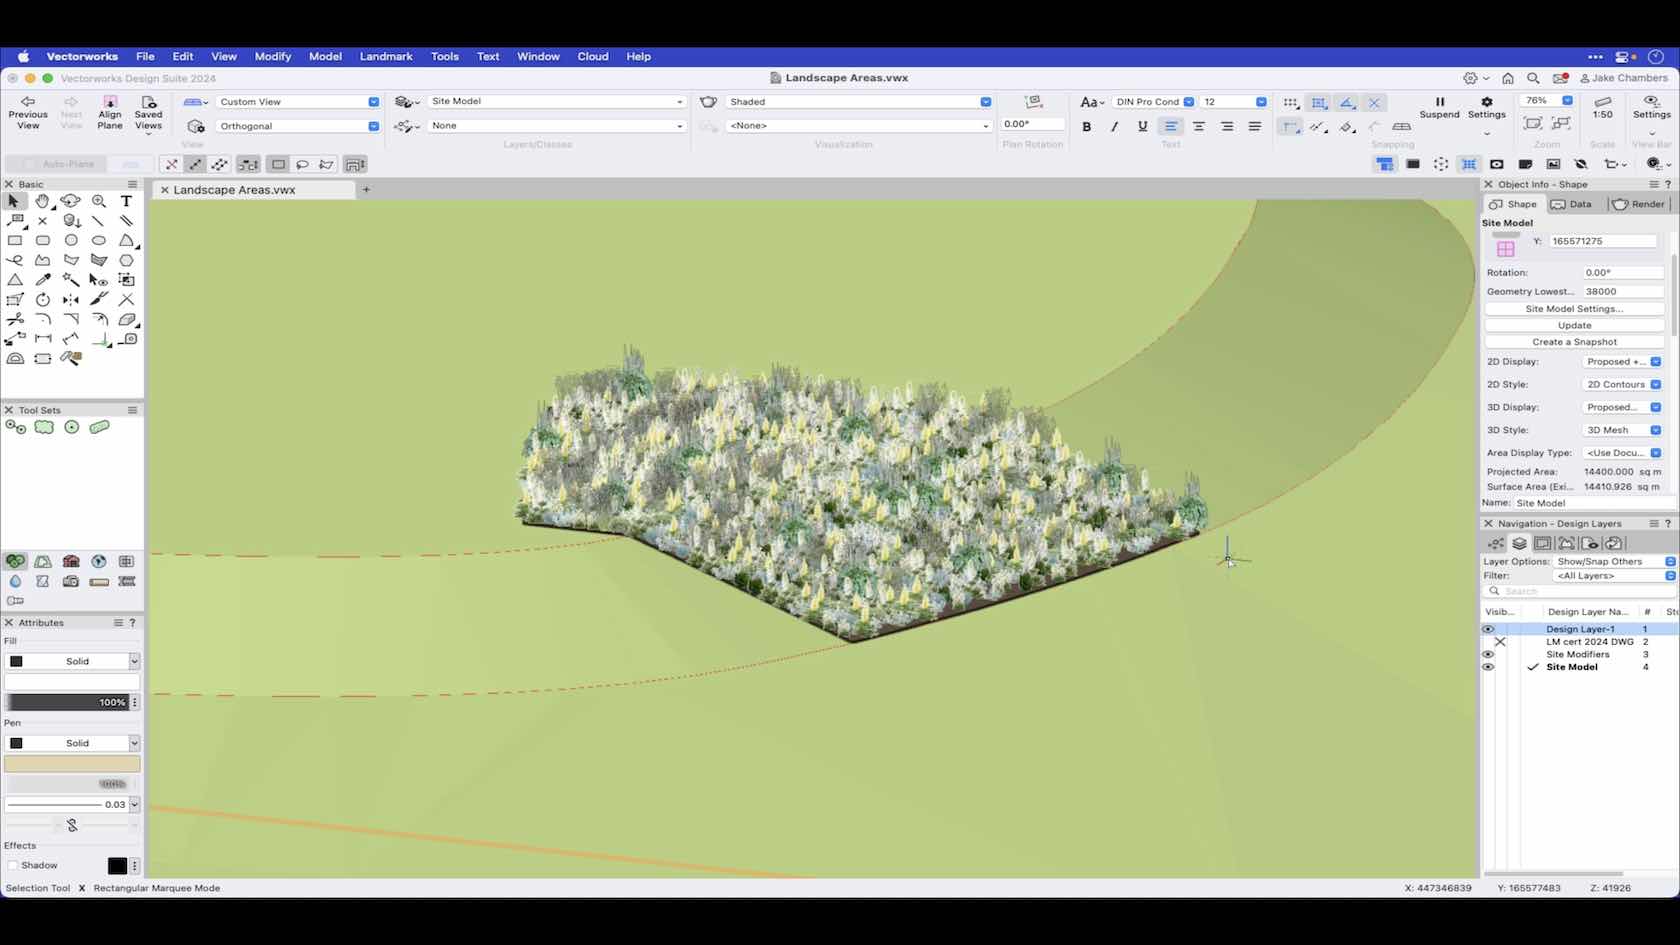
This video demonstrates how to draw a landscape area using the landscape area tool and the settings required to ensure that the landscape area interacts with the site model.
Category: Landmark 2024 Certificaiton
Requires Approval: No
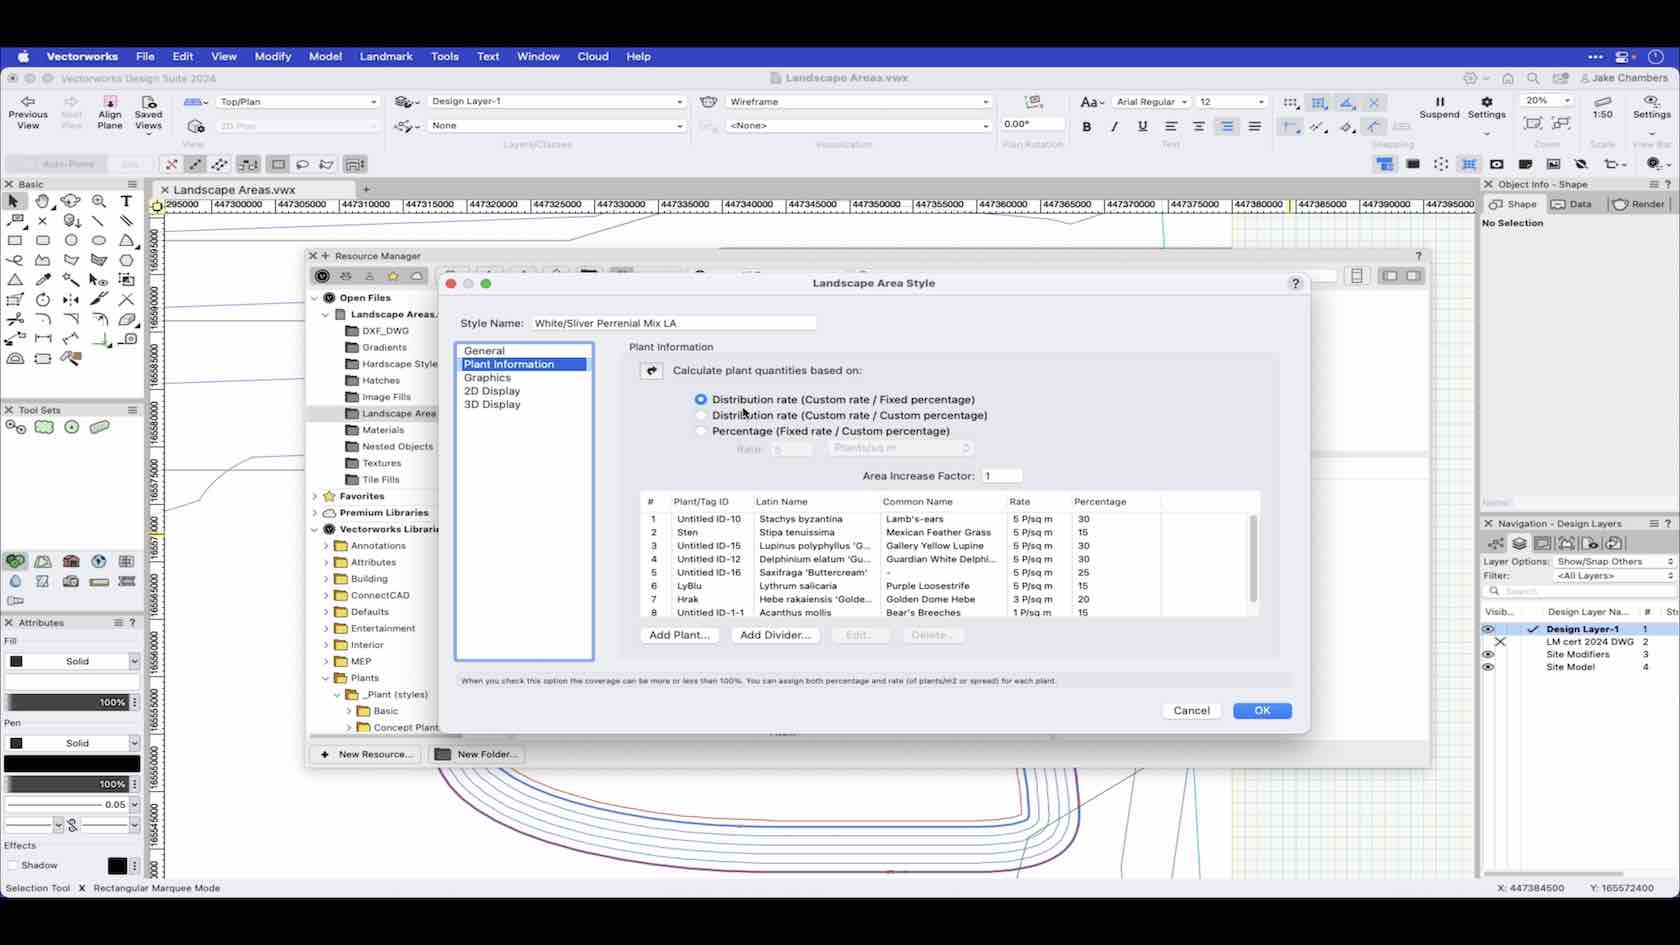
Landscape area styles are made up of plant symbol combinations and components. In this video you will learn the preferences and parameters of landscape area styles.
Category: Landmark 2024 Certificaiton
Requires Approval: No
In this course, we will explore the page setup in the design layer.
Category: Skill
Requires Approval: No
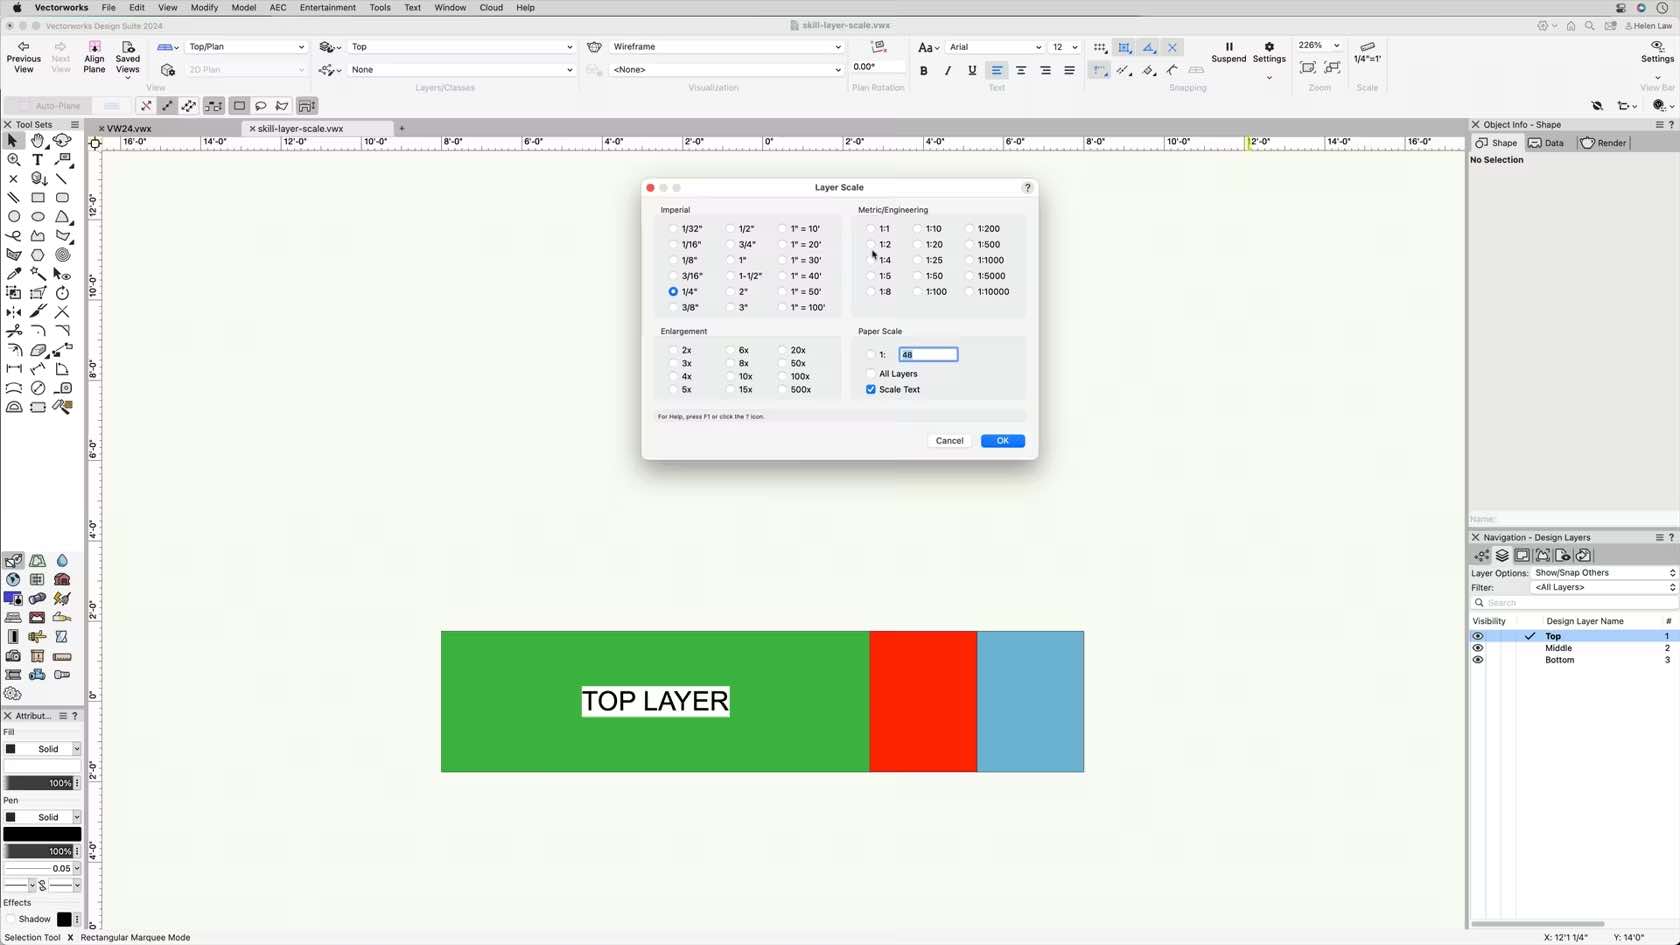
This course demonstrates how to change layer scale and how it should be used between the model and drawings.
Category: Skill
Requires Approval: No
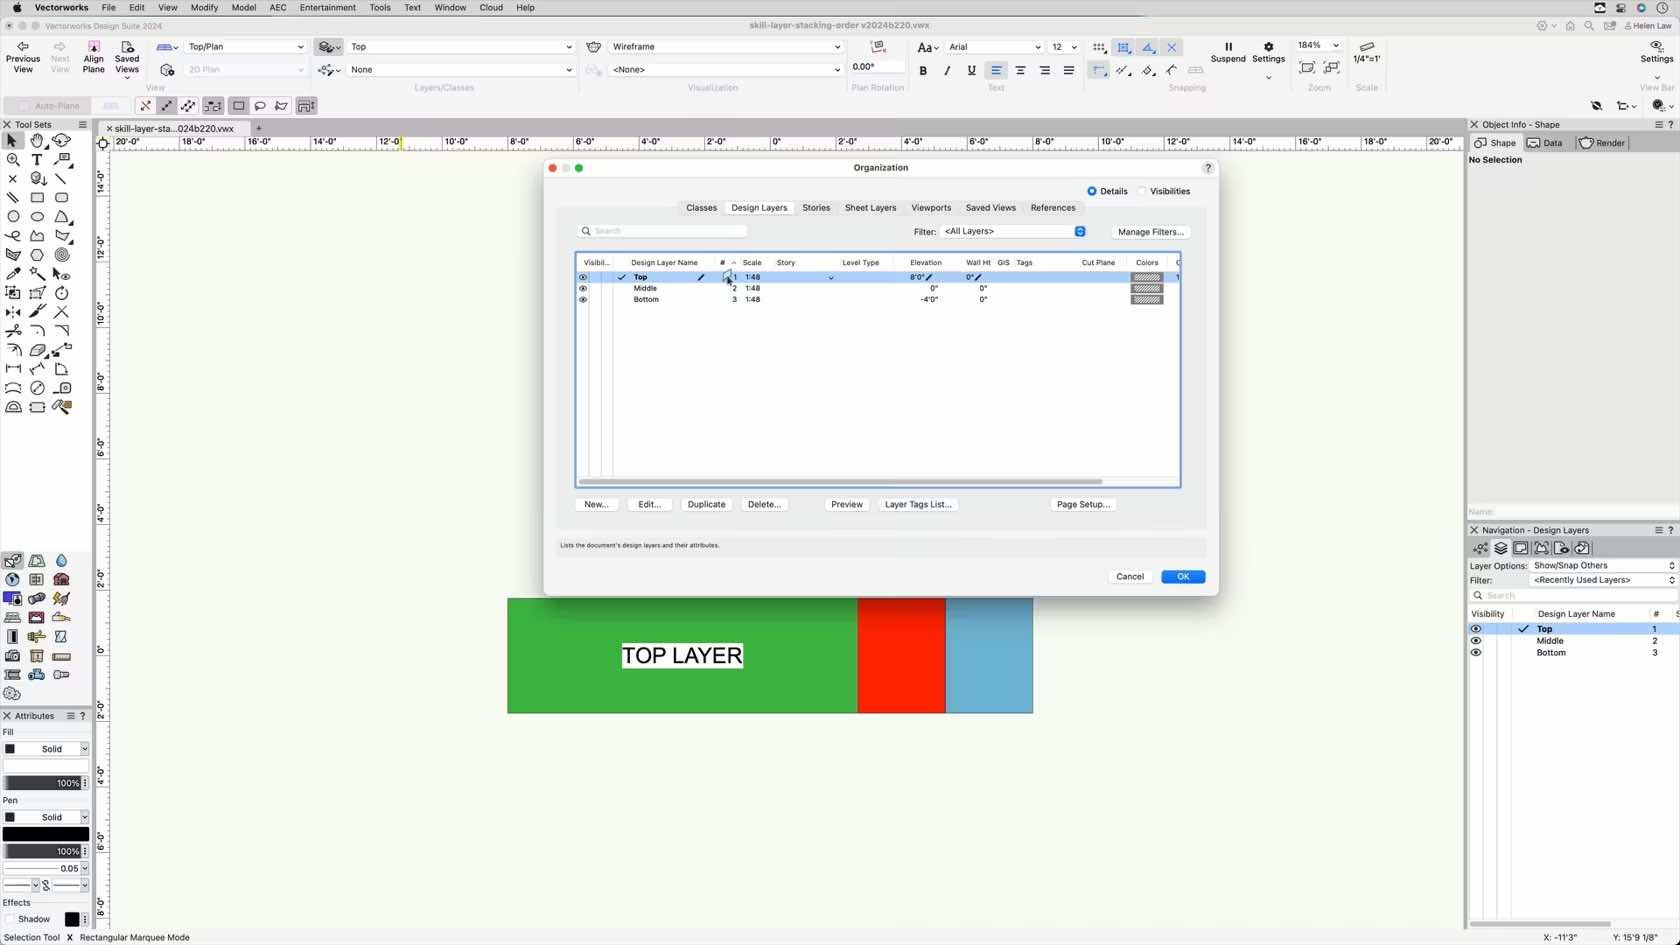
This course demonstrates how to change layer stacking order to create different drawing types and workflows.
Category: Skill
Requires Approval: No
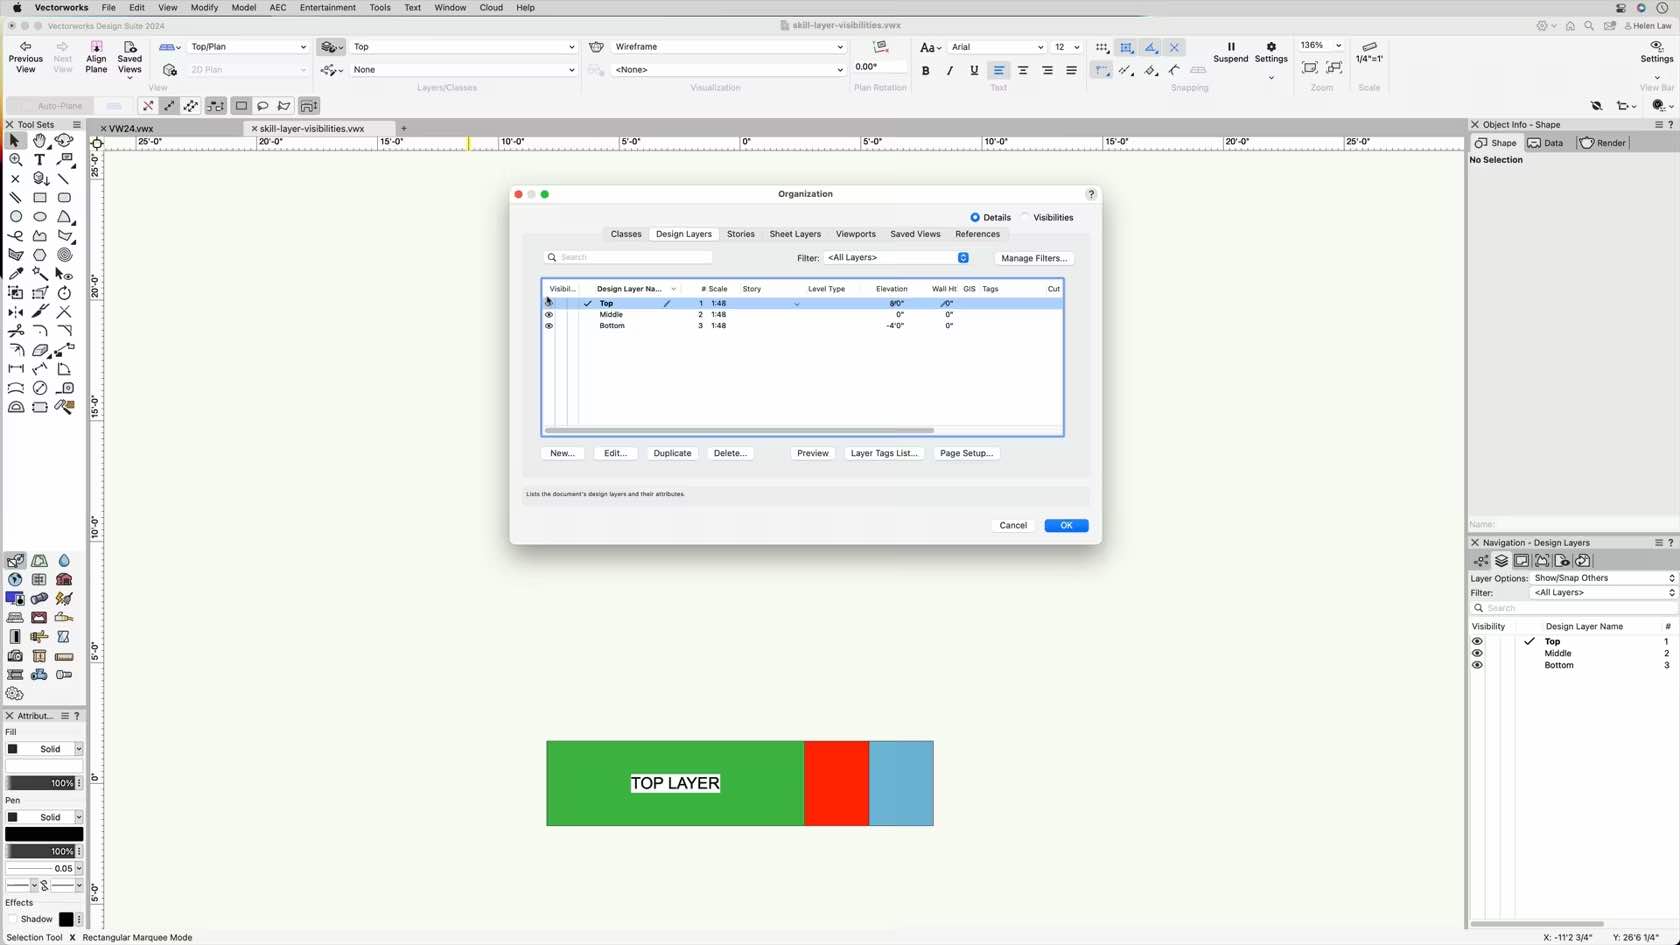
This course demonstrates how to adjust and manage layer visibilities and how to change layer options to improve workflows.
Category: Skill
Requires Approval: No
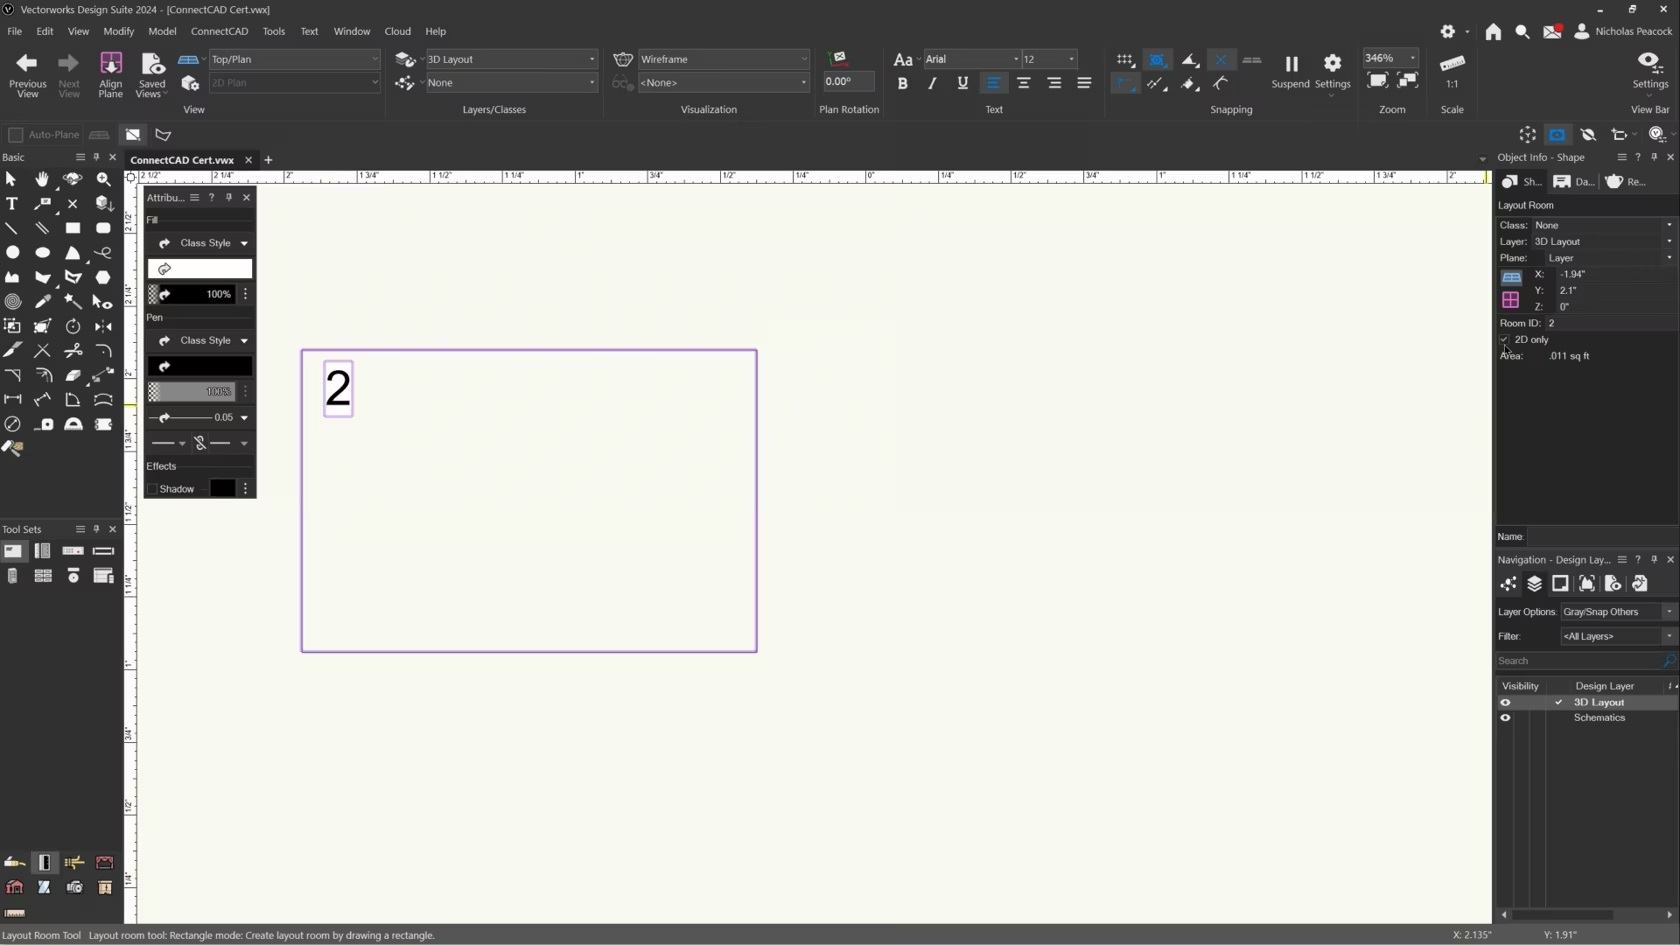
In this video, we will cover the basics of the Layout Room Tool.
Category: (2024) Skill
Requires Approval: No
In this video, we will cover the basics of the Legend Tool.
Category: (2024) Skill
Requires Approval: No

The purpose of this sample file is to showcase models that can be made in Vectorworks Fundamentals. These models are created as 2D/3D (hybrid) symbols that are fully modeled using in-house Vectorworks tools, rendered in Renderworks, and exhibited on sheet layers to show a "fabrication drawing set." There are several saved views and sheet layers to show the models, and the symbols can be shared or imported into other Vectorworks files. Start with the first saved view to begin.
Category: Sample Project
Requires Approval: No
Now that the truss is floating, we will learn how
to add lighting devices, lighting accessories, number and patch lights,
and display data with label legends. Participants will then continue to
explore the process of building a light plot.
Category: Spotlight Certification 2024
Requires Approval: No
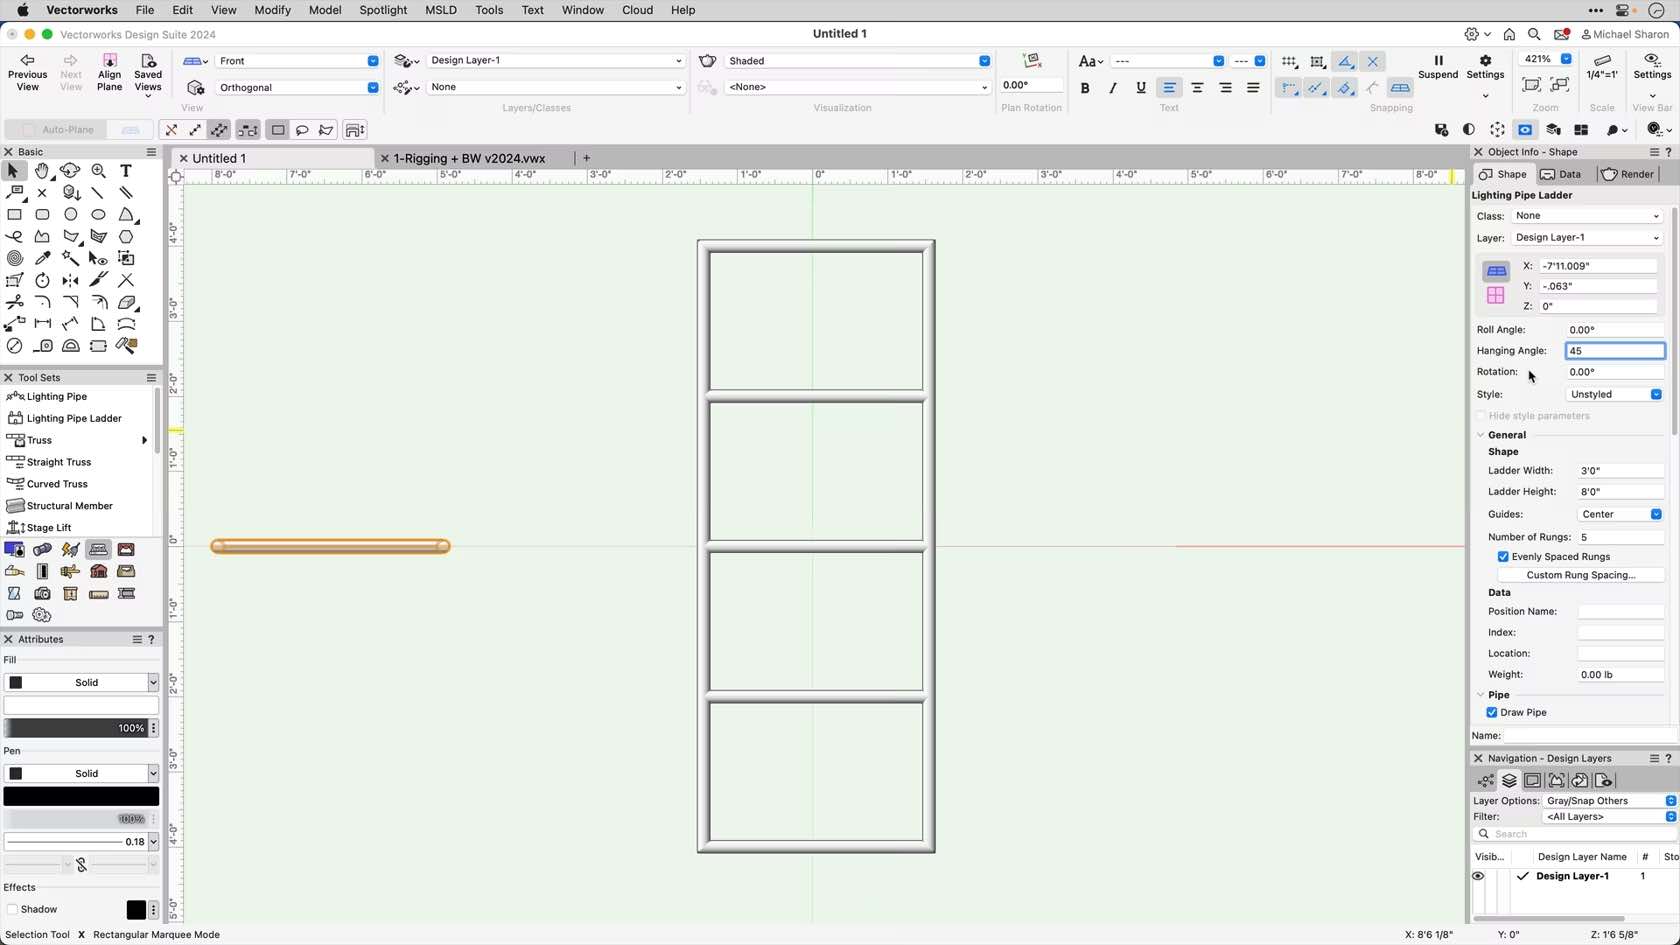
This course will explore the settings for the Lighting Pipe Ladder tool.
- Manager: Jake Chambers
- Manager: Bryan Goff
- Manager: Helen Law
- Manager: Helen Law
- Manager: Mark Mullany
- Manager: Nicholas Peacock
- Manager: Keith Ragsdale
- Manager: Michael Sharon
Category: CHAPTER 2
Requires Approval: No
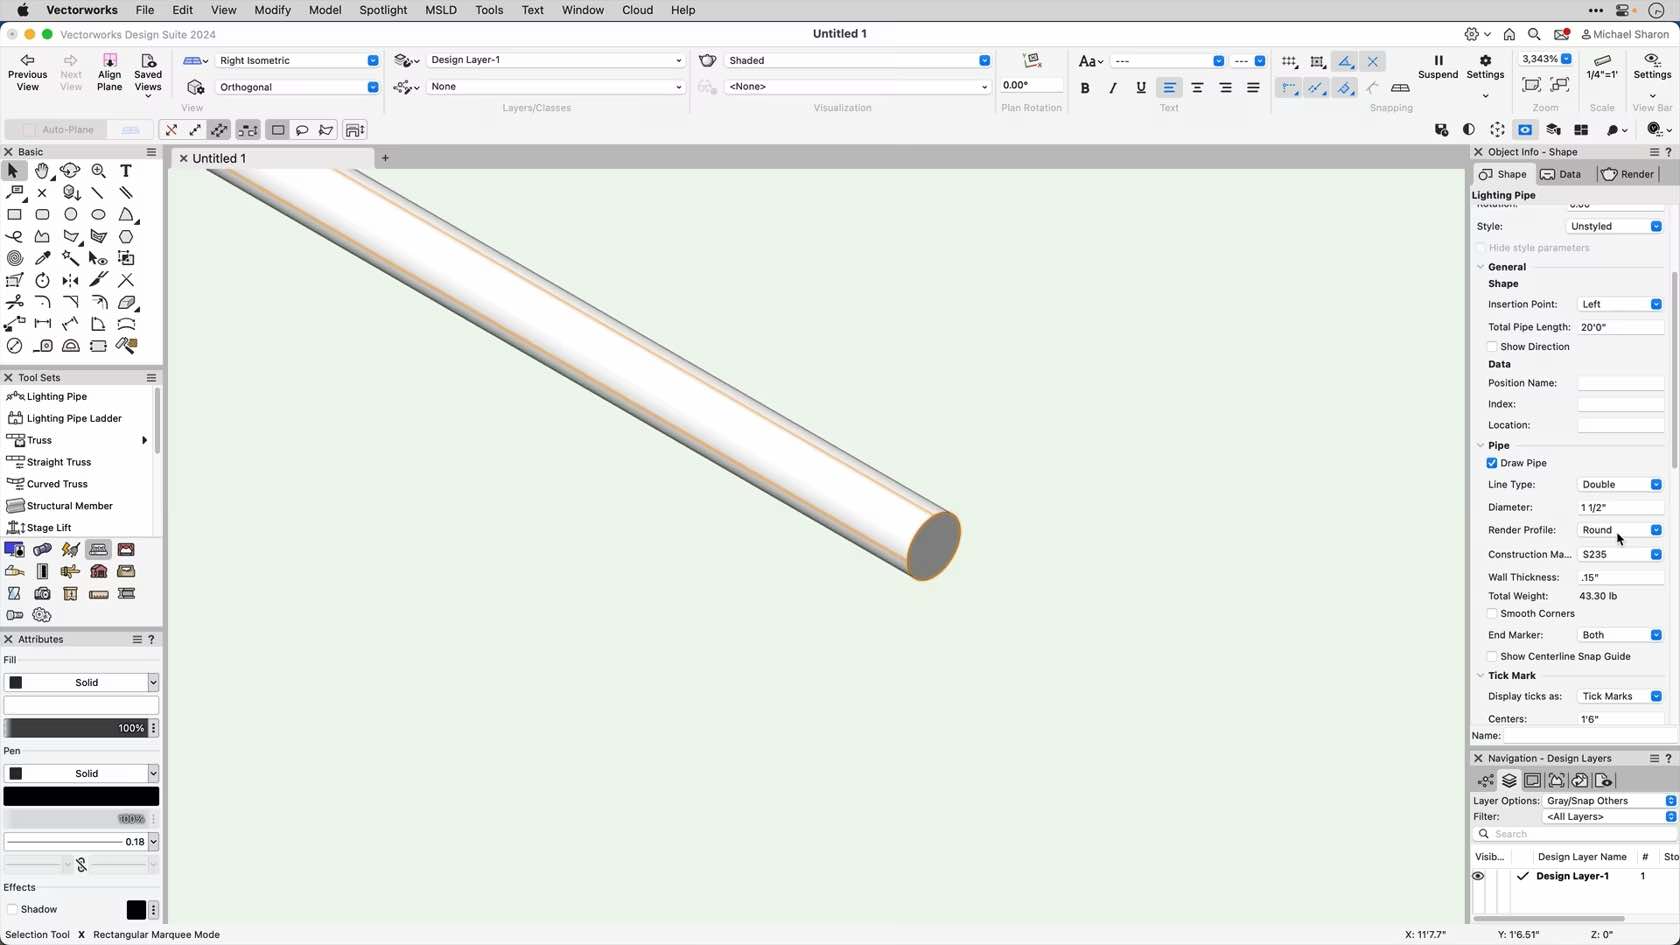
This video will go in-depth to the settings and functions of the Lighting Pipe tool
- Manager: Jake Chambers
- Manager: Bryan Goff
- Manager: Helen Law
- Manager: Helen Law
- Manager: Mark Mullany
- Manager: Nicholas Peacock
- Manager: Keith Ragsdale
- Manager: Michael Sharon
Category: CHAPTER 2
Requires Approval: No
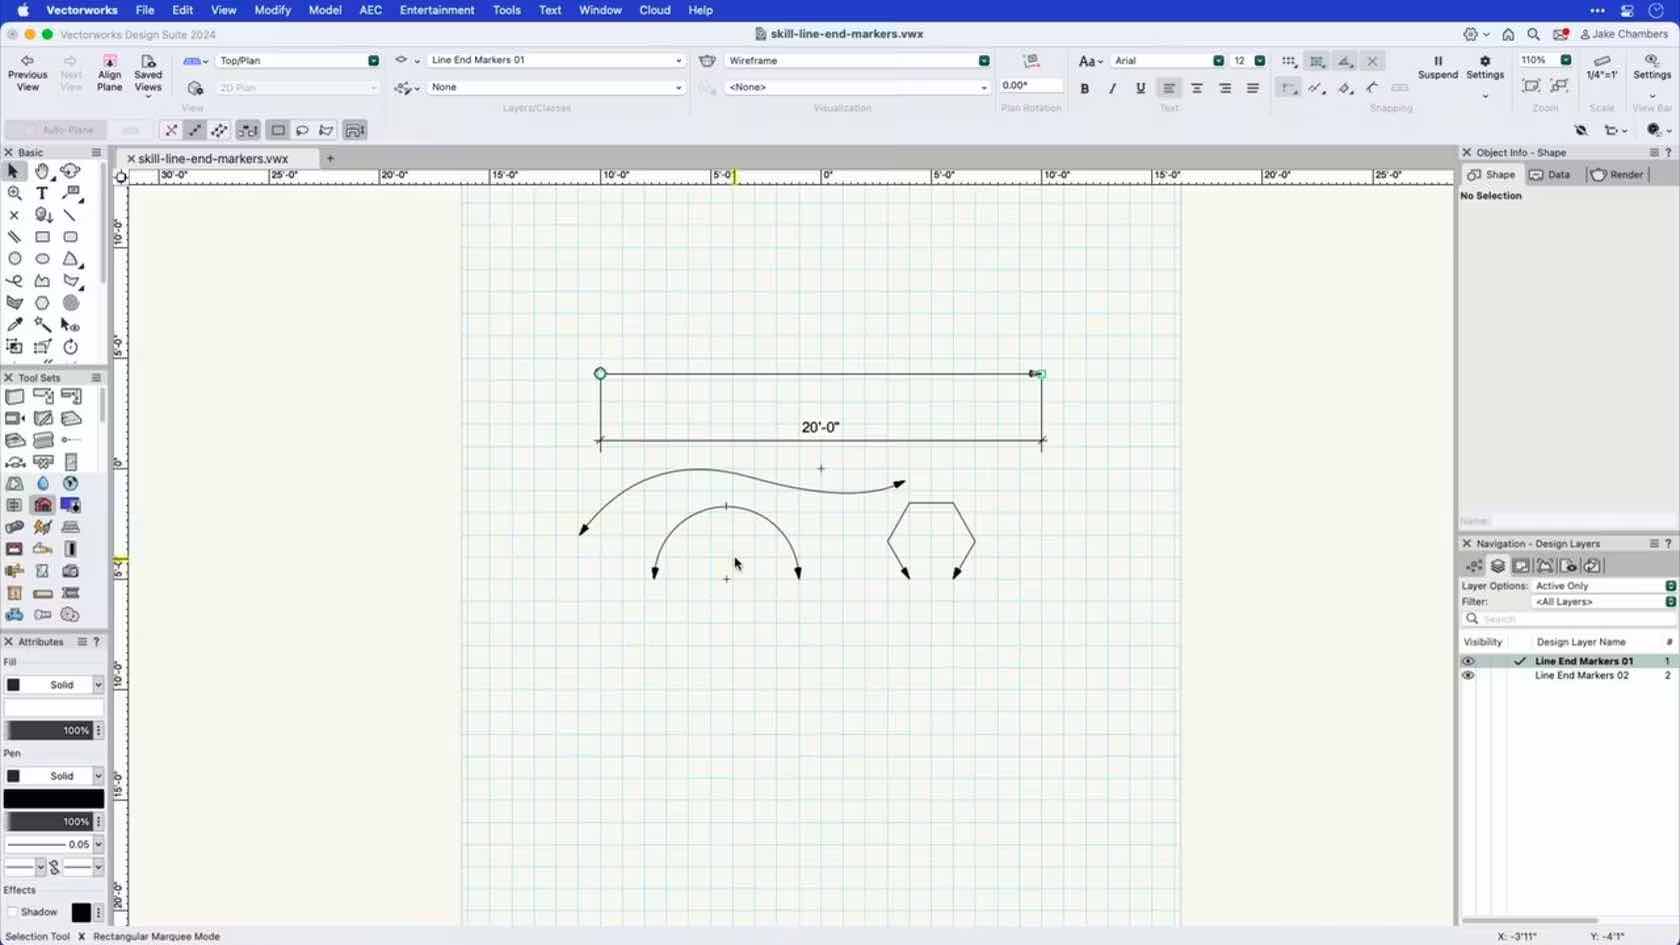
This course demonstrates how to apply default line end markers, create custom end markers, and edit end markers.
Category: Skill
Requires Approval: No
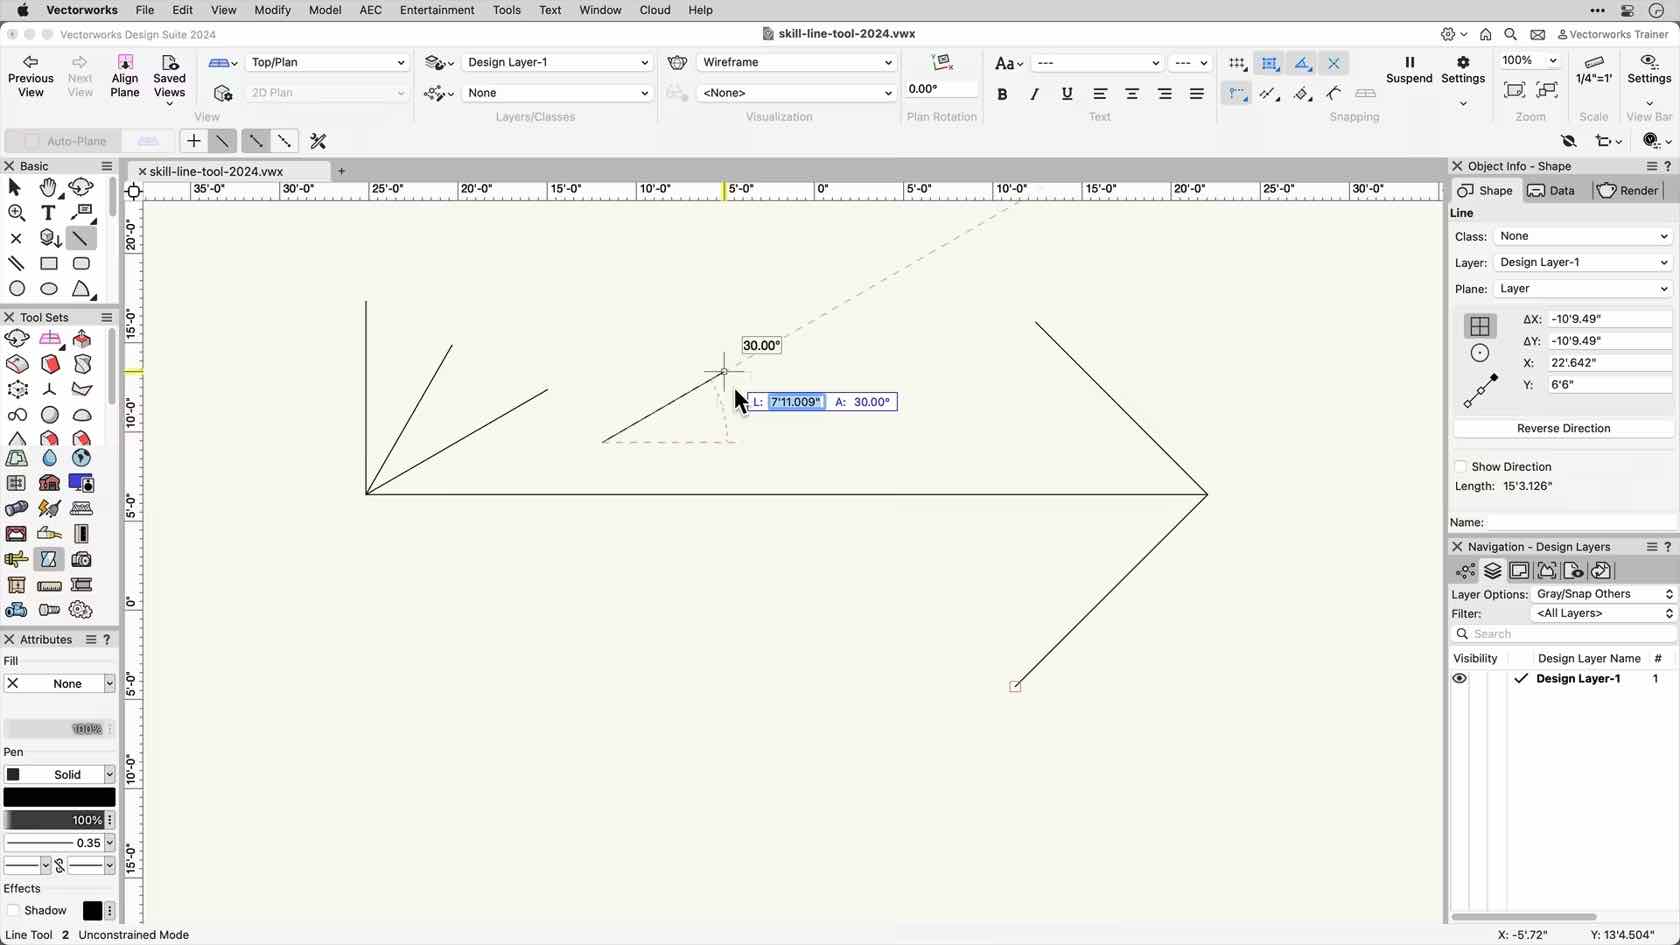
Understanding the clicking behavior of the Line Tool and the various drawing modes.
Category: Skill
Requires Approval: No
Lernen Sie in Vectorworks verschiedene Linienarten anlegen und verwalten.
Category: Erste Schritte 2024
Requires Approval: No
Learn the basics of the Make Rack Equipment Worksheet Tool
Category: (2024) Skill
Requires Approval: No
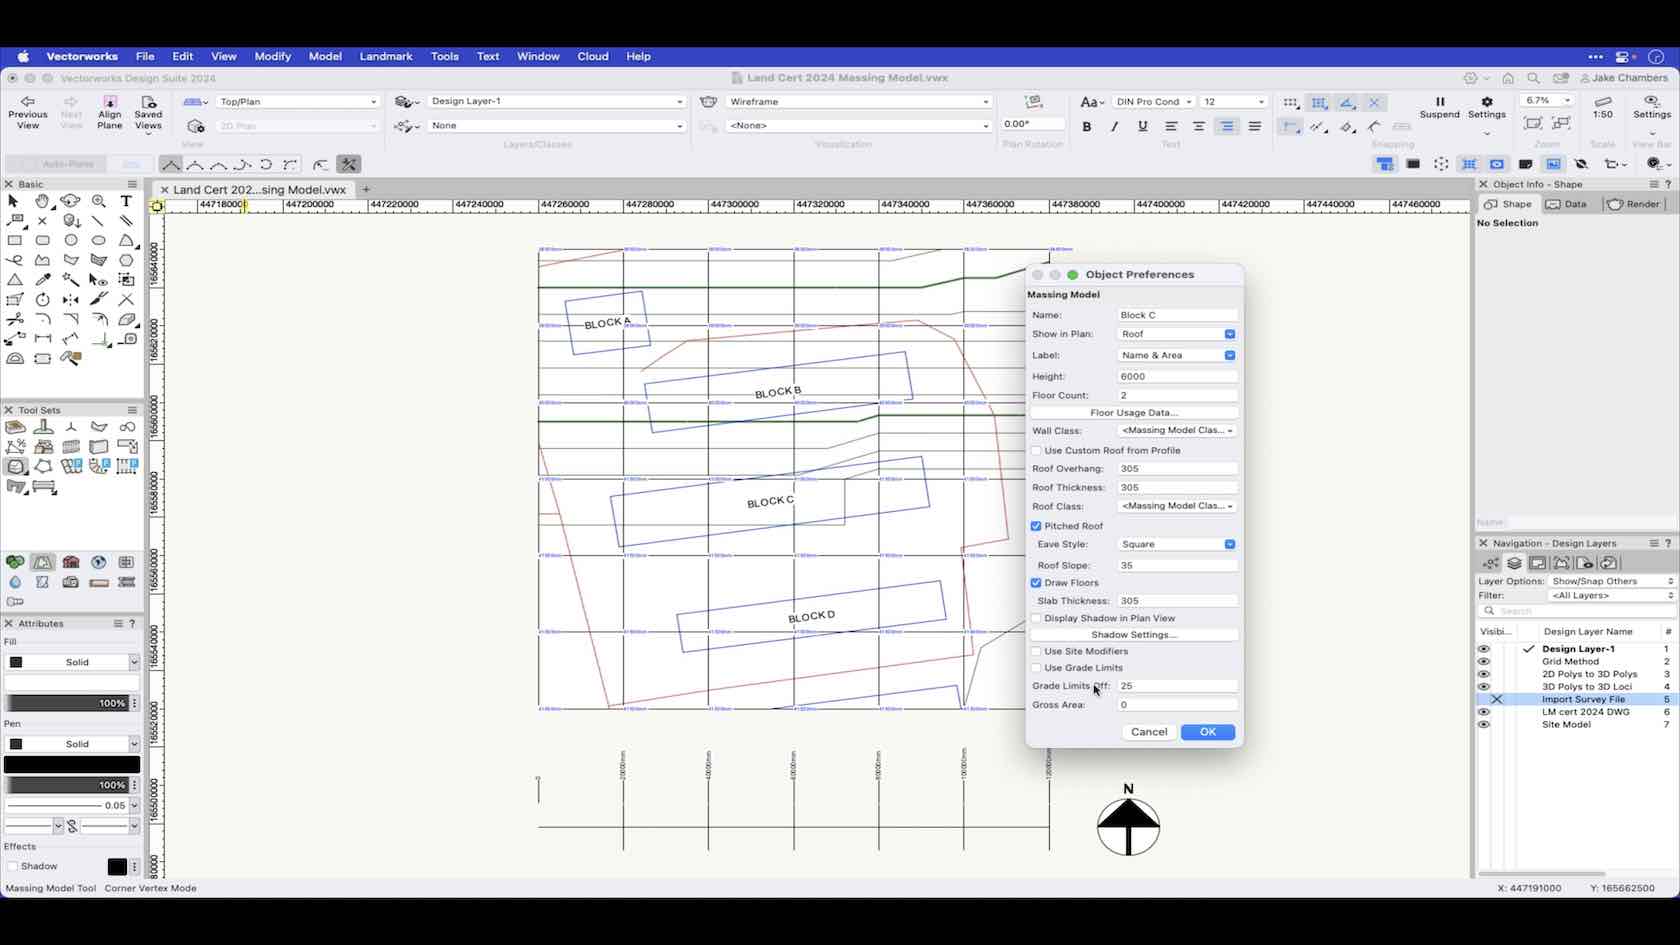
In this video we look at the different ways you can create a Massing Model.
Category: Landmark 2024 Certificaiton
Requires Approval: No
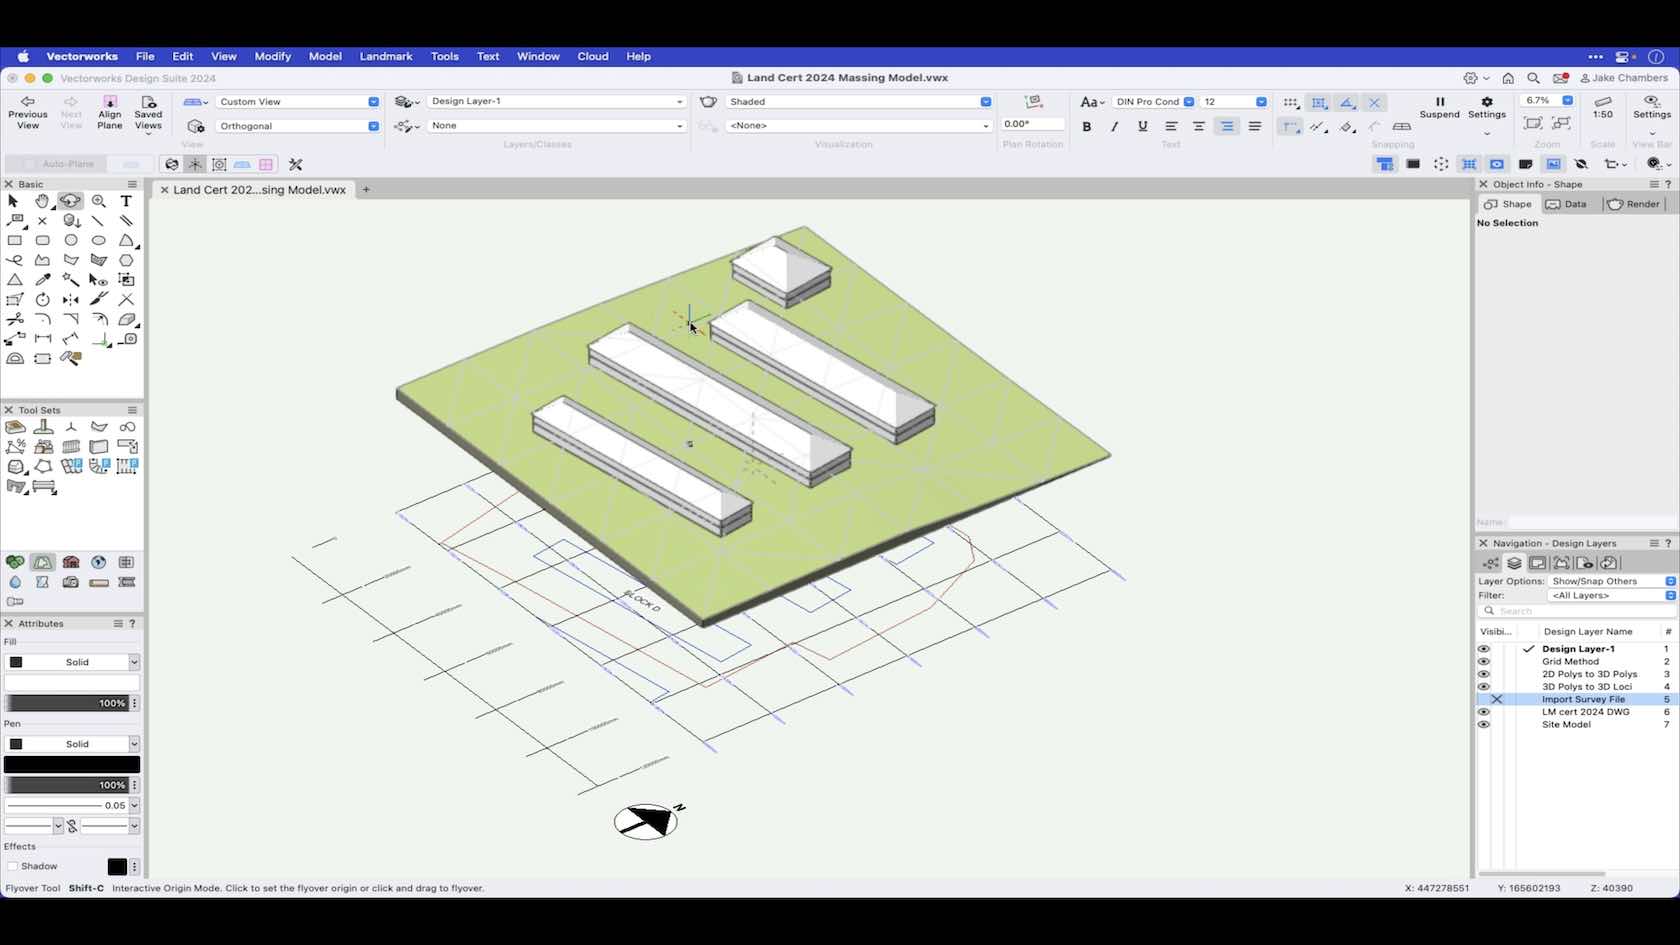
An overview of the preferences of the Massing Model tool and its uses.
Category: Landmark 2024 Certificaiton
Requires Approval: No
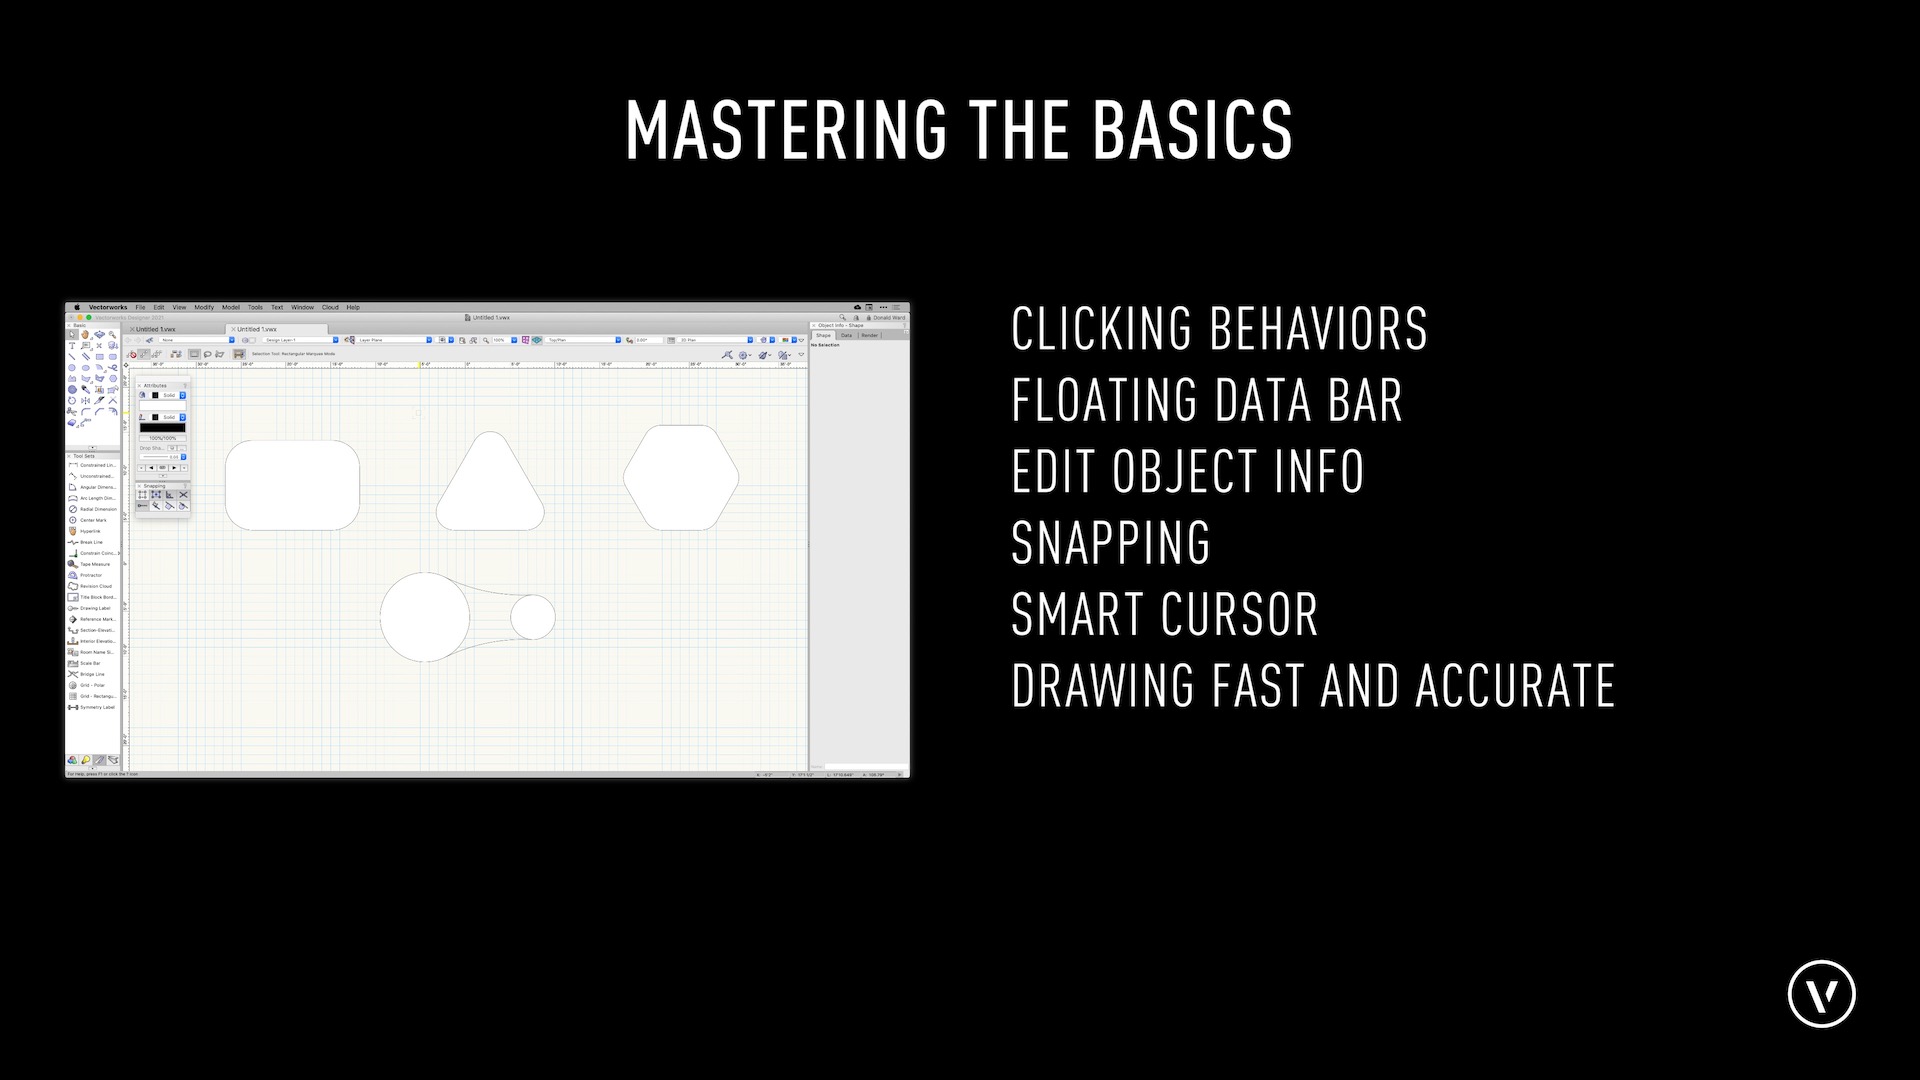
In this section, we will be mastering the core functionality including snapping, clicking, and drawing.
Category: Skill
Requires Approval: No

Lernen Sie die verschiedenen Möglichkeiten der Interaktionen im Umgang mit der Maus kennen.
Category: Erste Schritte 2024
Requires Approval: No
Lernen Sie die Vorteile beim Arbeiten mit der Mehrfenster-Technik kennen.
Category: Erste Schritte 2024
Requires Approval: No
In this course, we will discuss the menu bar in Vectorworks. We will discuss differences between the workspaces and operating systems. We will also explore the standard menu command locations.
Category: Skill
Requires Approval: No
This course will take a look at the Mirror tool and its various modes.
Category: Skill
Requires Approval: No
Erfahren Sie mehr über Strategien und Kompetenzen zur Implementierung der BIM-Methode im Architekturbüro.
Lernen Sie die BIM-Werkzeuge von Vectorworks an einem Beispielprojekt kennen.
Wir besprechen den Ablauf eines BIM-Consultings mit Angabe von Kontaktdaten.
(Für Version 2024)
Category: Featured
Requires Approval: No
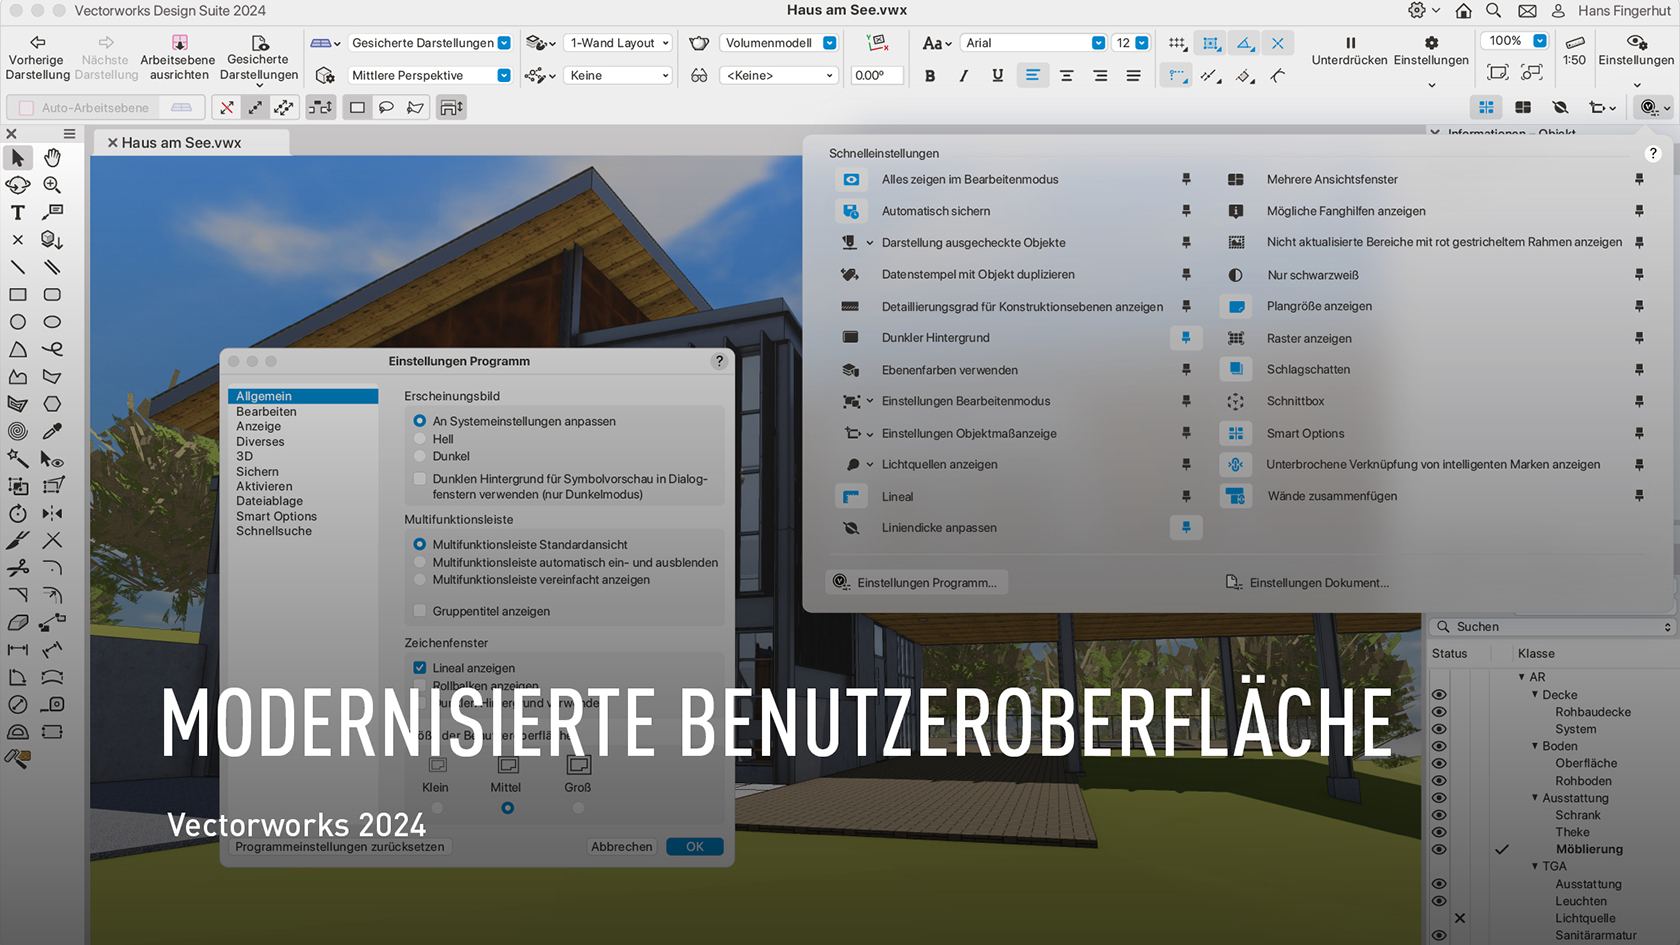
Die modernisierte Benutzeroberfläche ist leichter anzupassen und beschleunigt Ihre Arbeit in Vectorworks. Die neu gestaltete Ansichtsleiste stellt eine größere Auswahl an Werkzeugen in den Vordergrund. Und Sie können selbst entscheiden, wie Sie Ihre Arbeit organisieren. Alles, was Sie benötigen, ist dort, wo es sein soll. Außerdem ist der Dark Mode jetzt unter Windows und Mac verfügbar.
Category: All Industries
Requires Approval: No
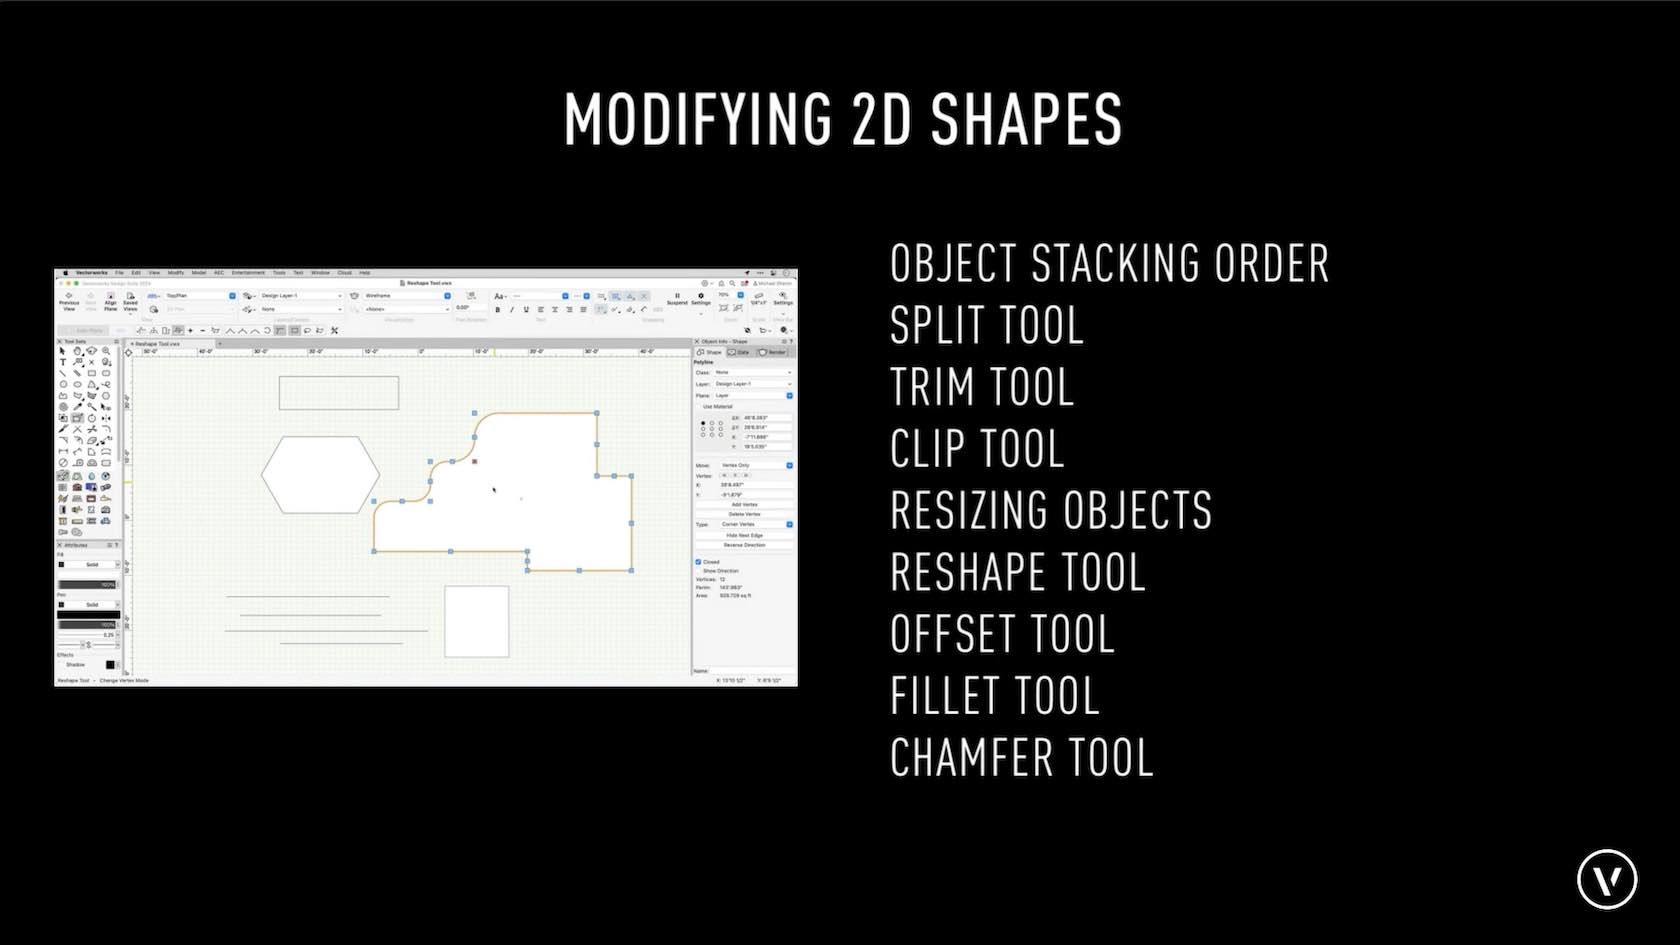
This overview will cover the techniques you will be learning to modify 2D shapes.
Category: Skill
Requires Approval: No
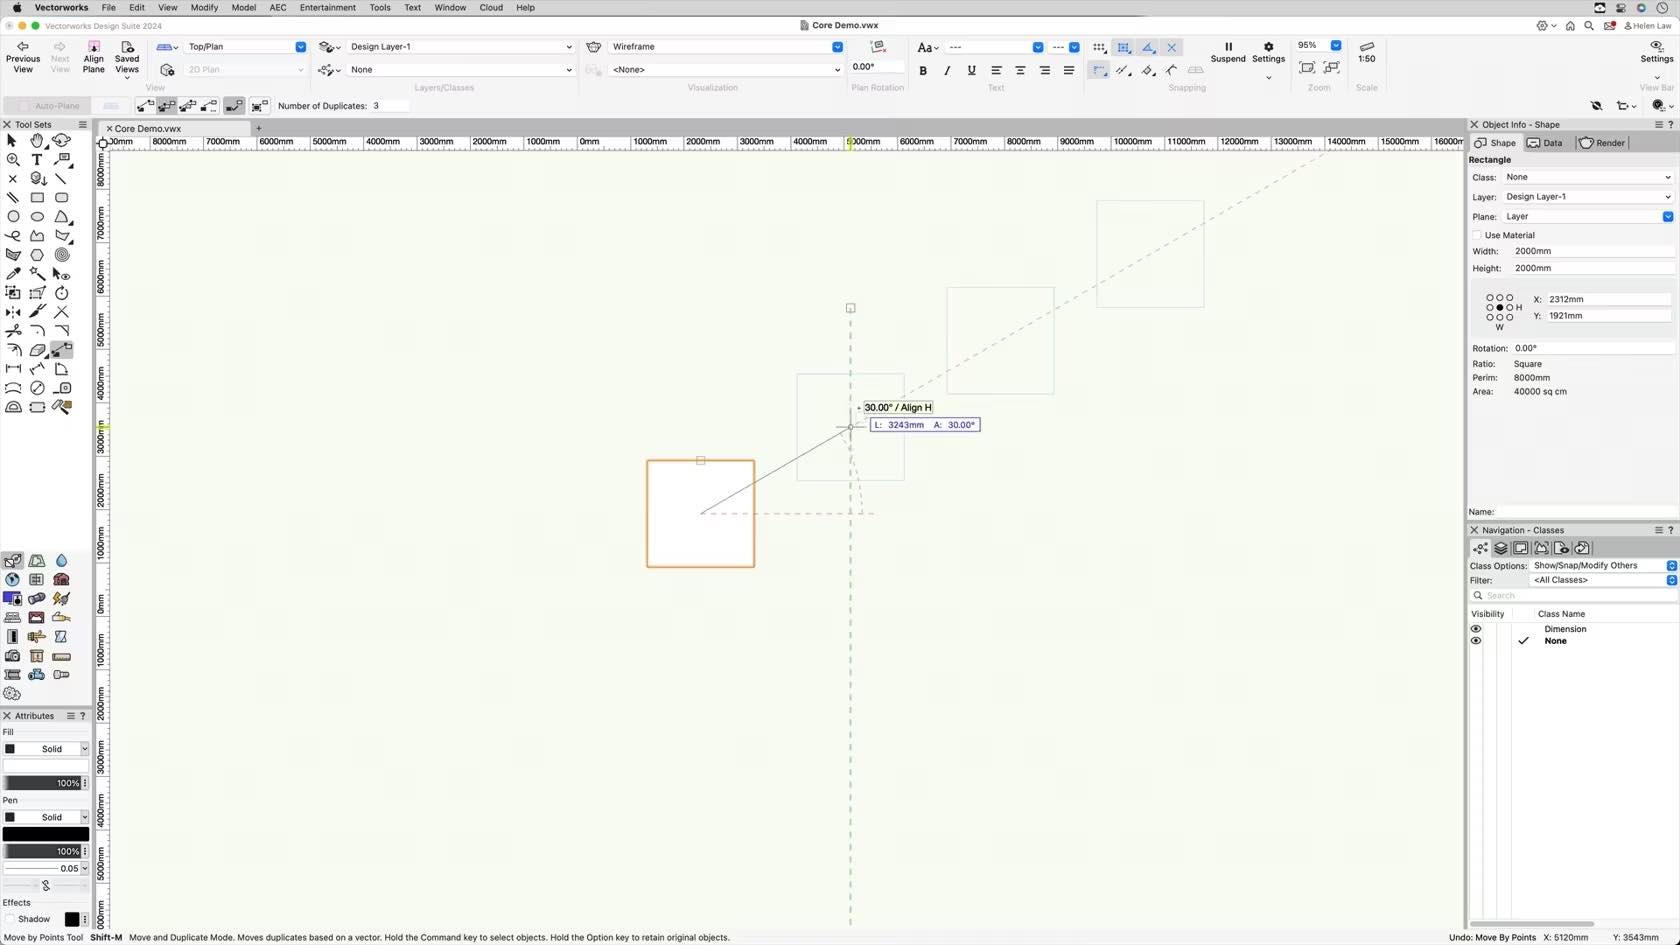
This course will take a look at the Move by Points tool to move, duplicate and set the position of objects.
Category: Skill
Requires Approval: No
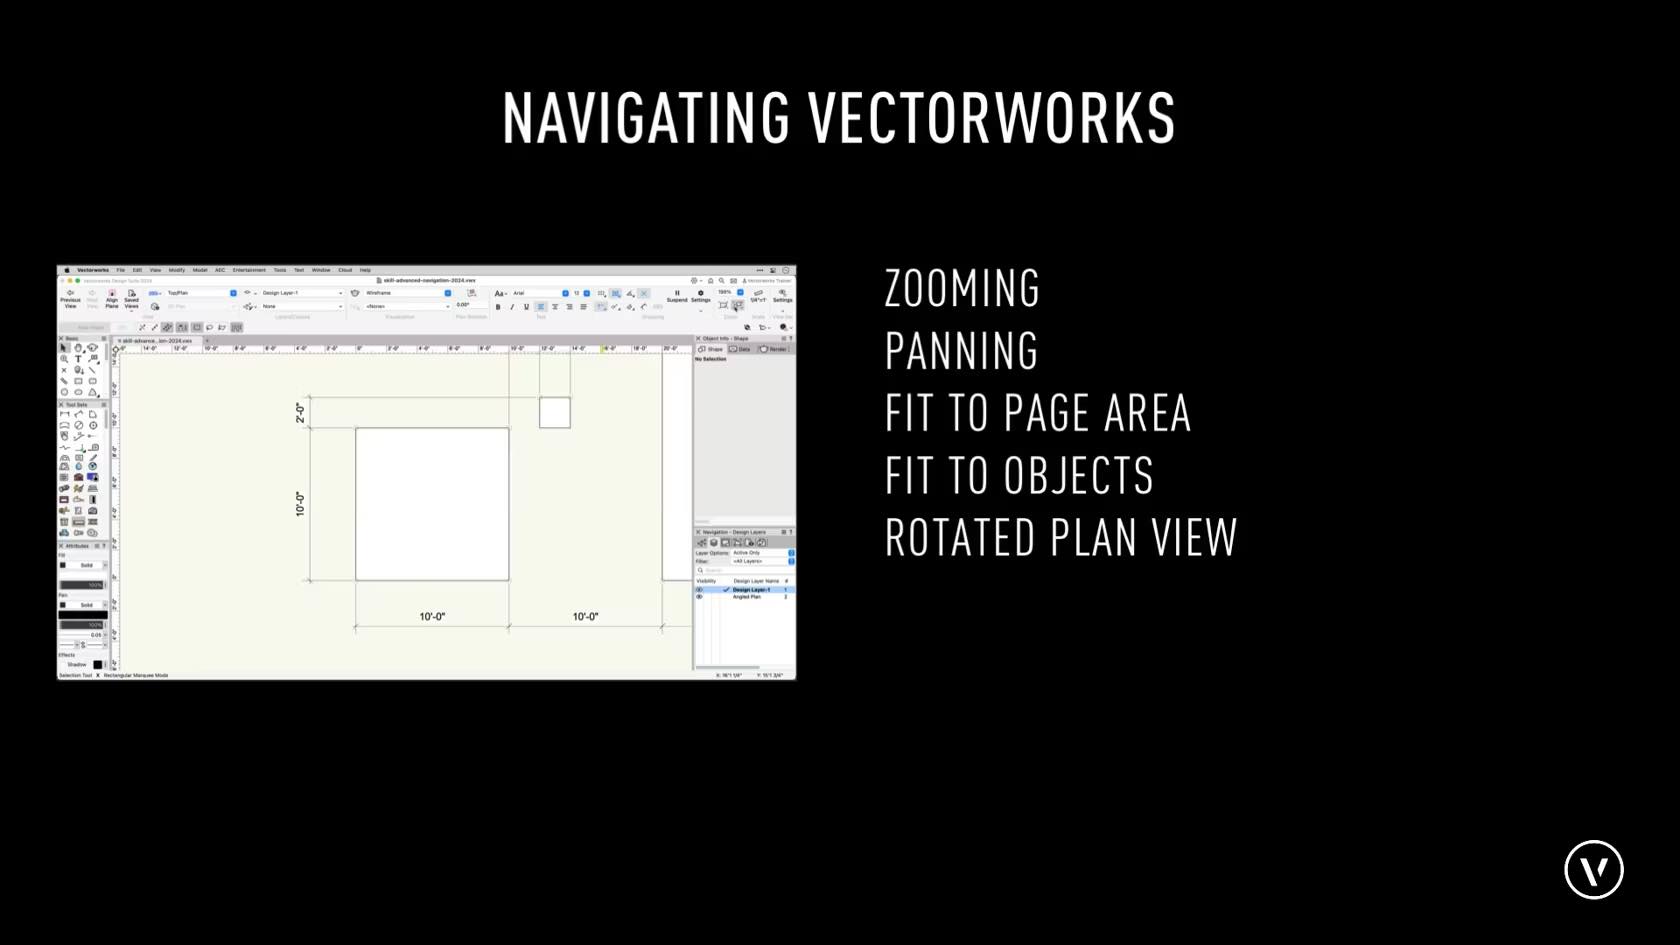
In this overview, we will discuss the overall concepts of zooming and panning. We will also discuss more advanced commands such as fit to objects.
Category: Skill
Requires Approval: No
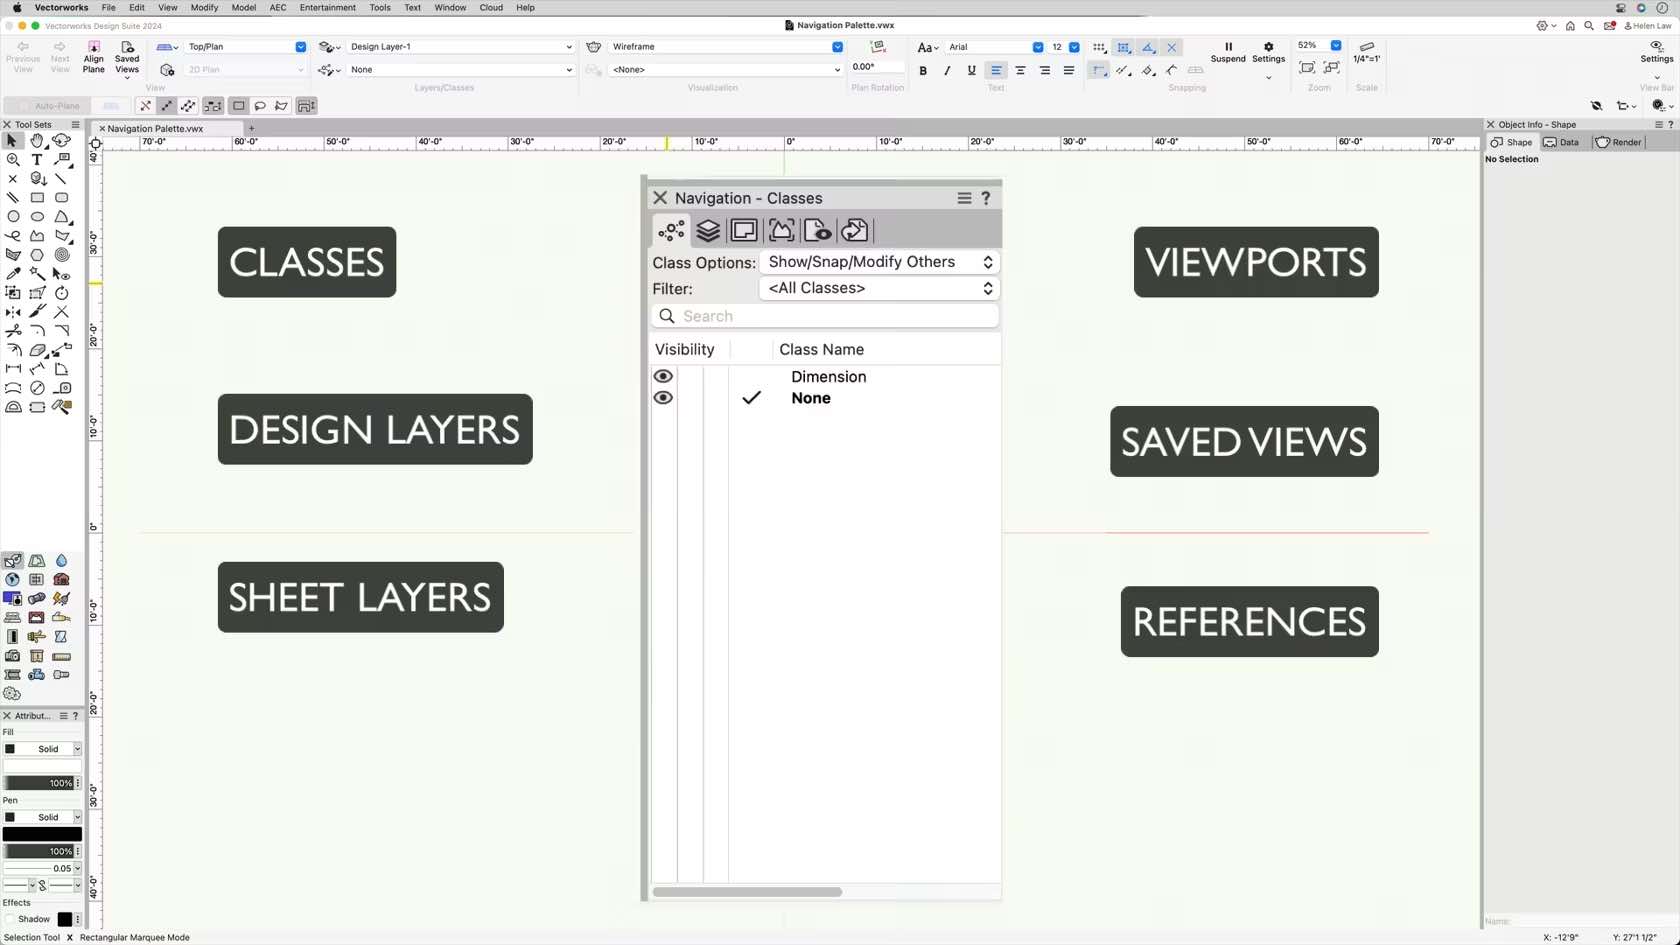
In this course, we will be discussing navigating through the Navigation Palette.
Category: Skill
Requires Approval: No
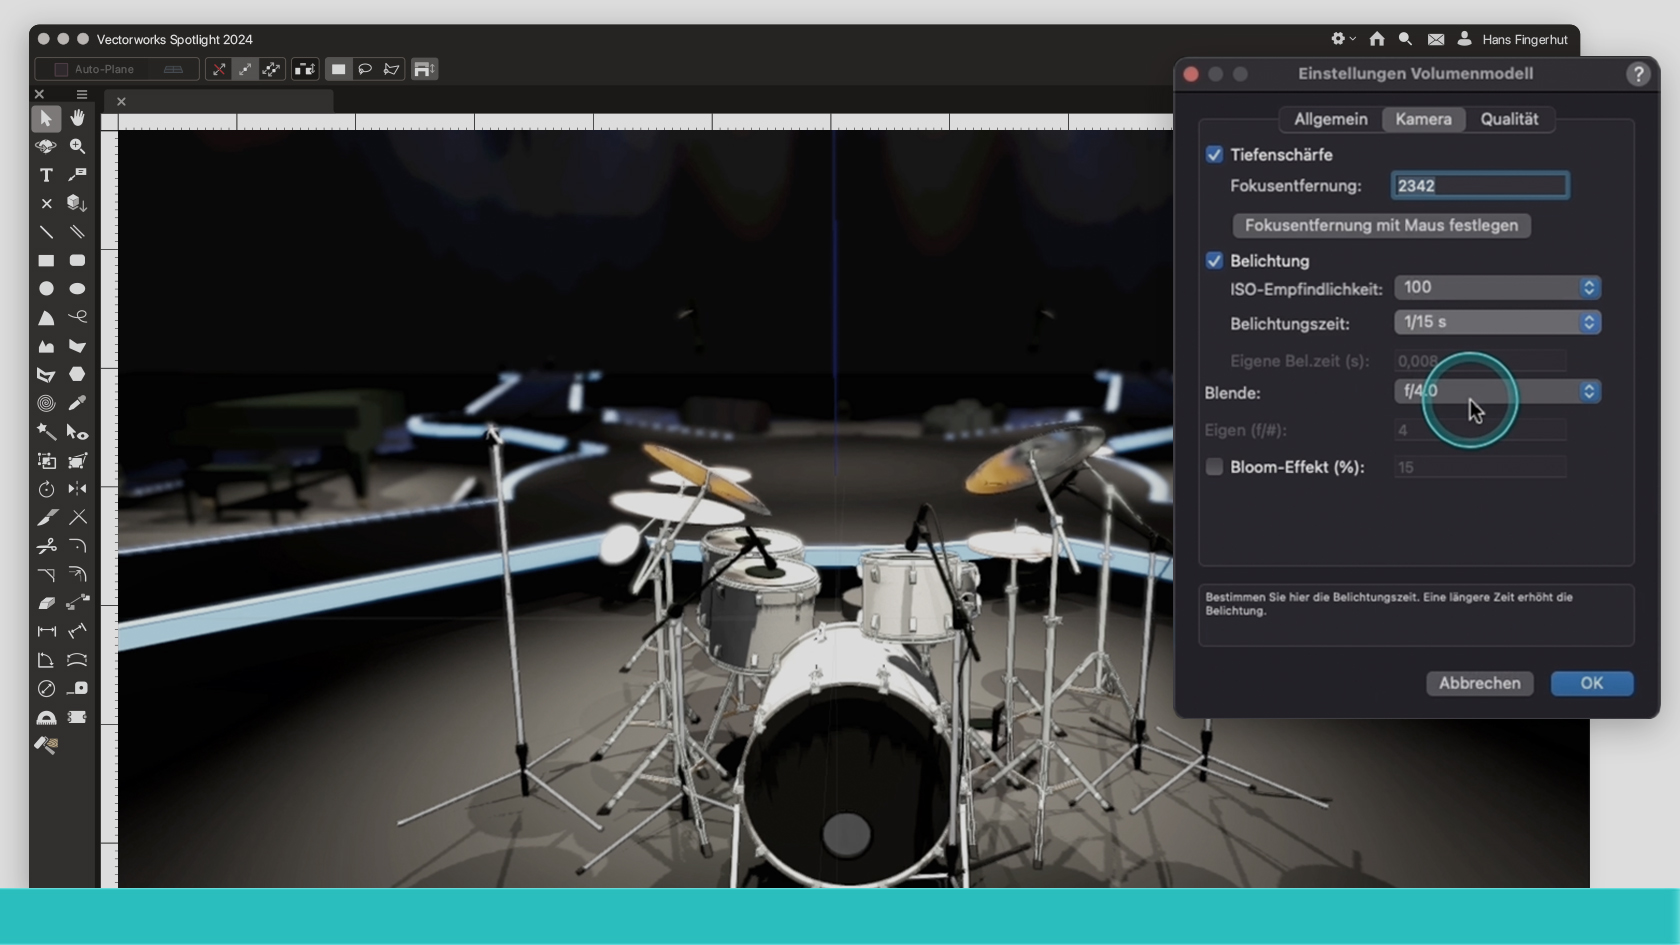
In diesem Webinar erhältst Du einen Überblick über die Neuerungen in Vectorworks Spotlight 2024. Entdecke neue Tools und neue Eigenschaften bestehender Tools.
(Für Version 2024)
Category: Entertainment
Requires Approval: No
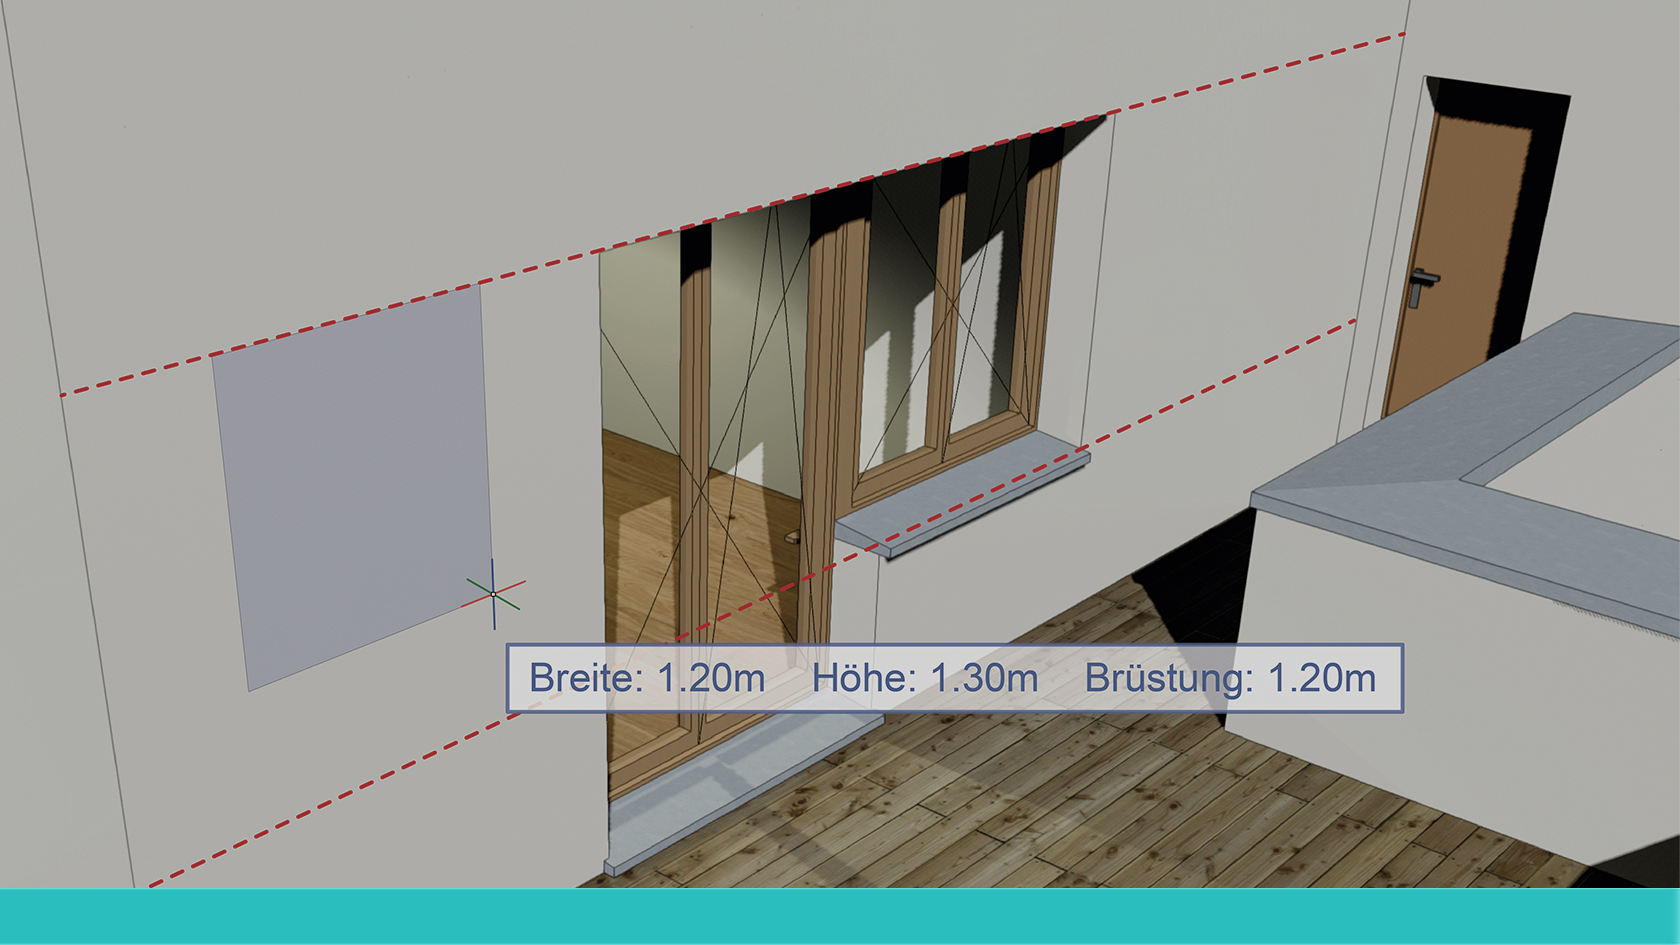
Vectorworks 2024 bedeutet schnellere Workflows für alle Phasen. Bei Fenstern, Türen und Wänden wird das mit einer ganzen Reihe von Verbesserungen erreicht. Die Vectorworks-Spezialisten Xaver Meier und Reto Thomet zeigen Ihnen, wie Sie Zeit sparen beim präzisen Einsetzen und Positionieren von Fenstern und Türen in Wände. Auch das Wandwerkzeug hat ein paar neue Tricks für Sie auf Lager. In kurzer Zeit lernen Sie in diesem Webinar, wie Sie in Ihrer Arbeit am meisten von den Neuerungen profitieren können.
(Für Version 2024)
Category: Buildings
Requires Approval: No
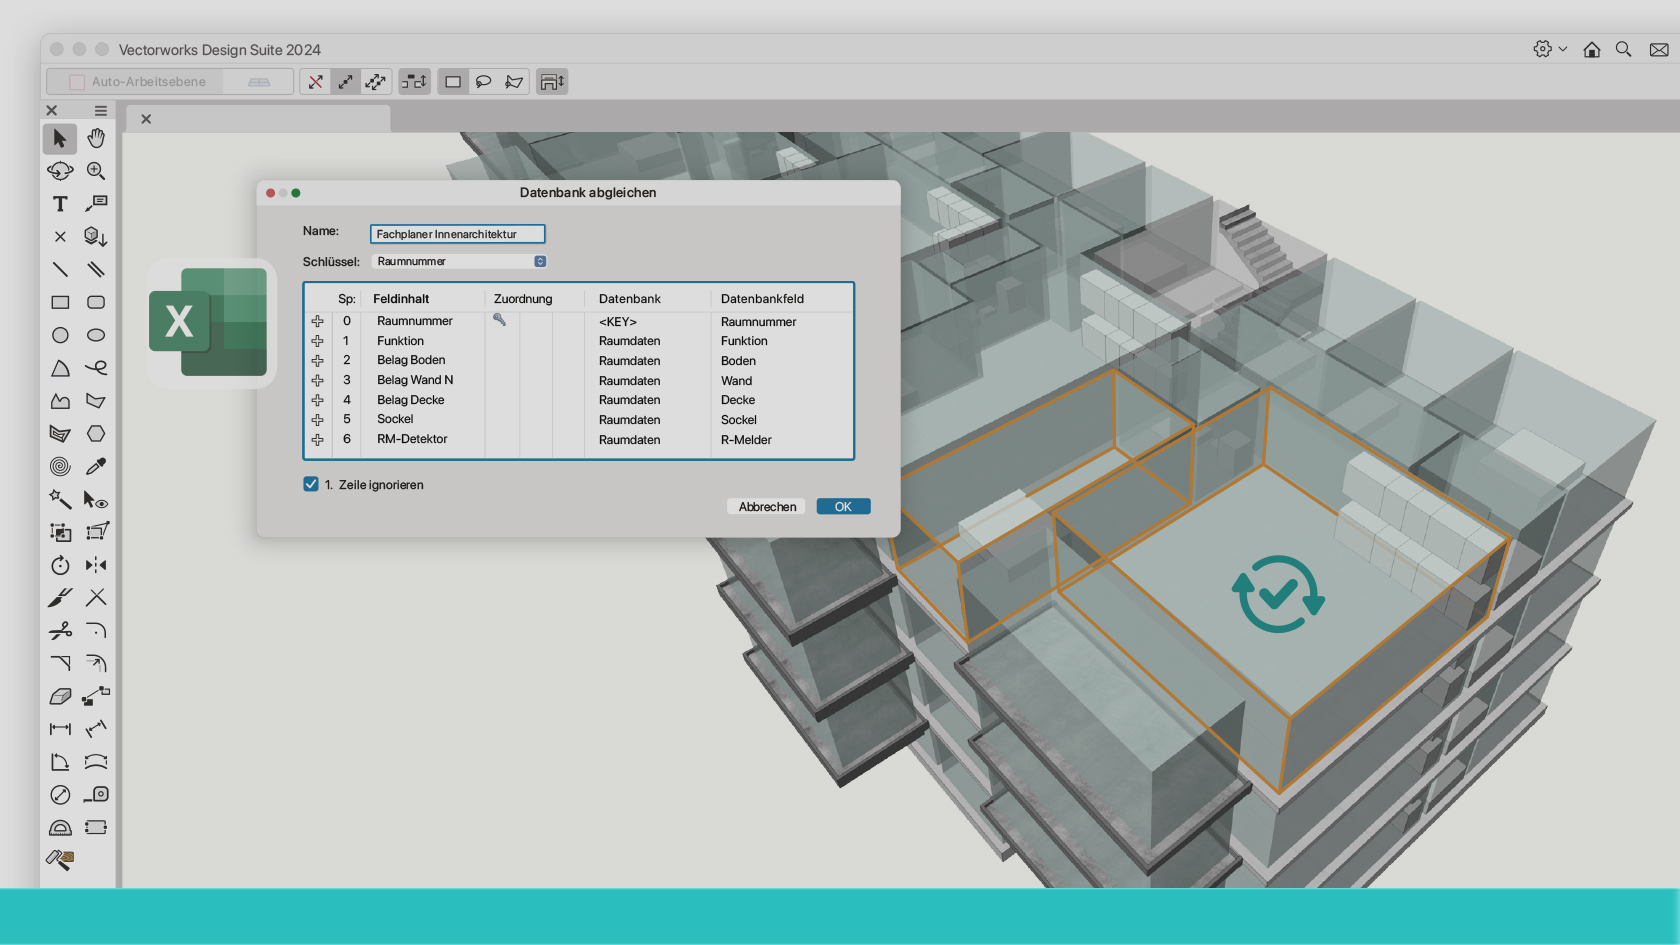
In einer Welt, in der Daten zunehmend an Bedeutung gewinnen, haben wir den Menübefehl "Datenbank abgleichen" mit einer Vielzahl aufregender Neuerungen ausgestattet. Diese Erweiterungen bieten unseren Anwendern nun noch mehr Flexibilität, indem sie nicht nur TXT- und CSV-Dateiformate unterstützen, sondern auch XLS- und XLSX-Formate. Darüber hinaus haben wir die Effizienz verbessert, indem wir die Synchronisierung mit mehreren Datenbanken ermöglichen. Entdecken Sie, wie diese Verbesserungen Ihre Arbeitsabläufe optimieren können!
(Für Version 2024)
Category: Featured
Requires Approval: No
Lernen Sie das Werkzeug Nurbs-Kurve kennen. Weitere Inhalte zum Thema "Erste Schritte 3D" finden Sie hier.
Category: Erste Schritte 2024
Requires Approval: No
Directly apply a variety of graphics directly through the attributes palette.
Category: Skill
Requires Approval: No

In this course, we will explore the different settings and tabs in the Object Info Palette.
Category: Skill
Requires Approval: No
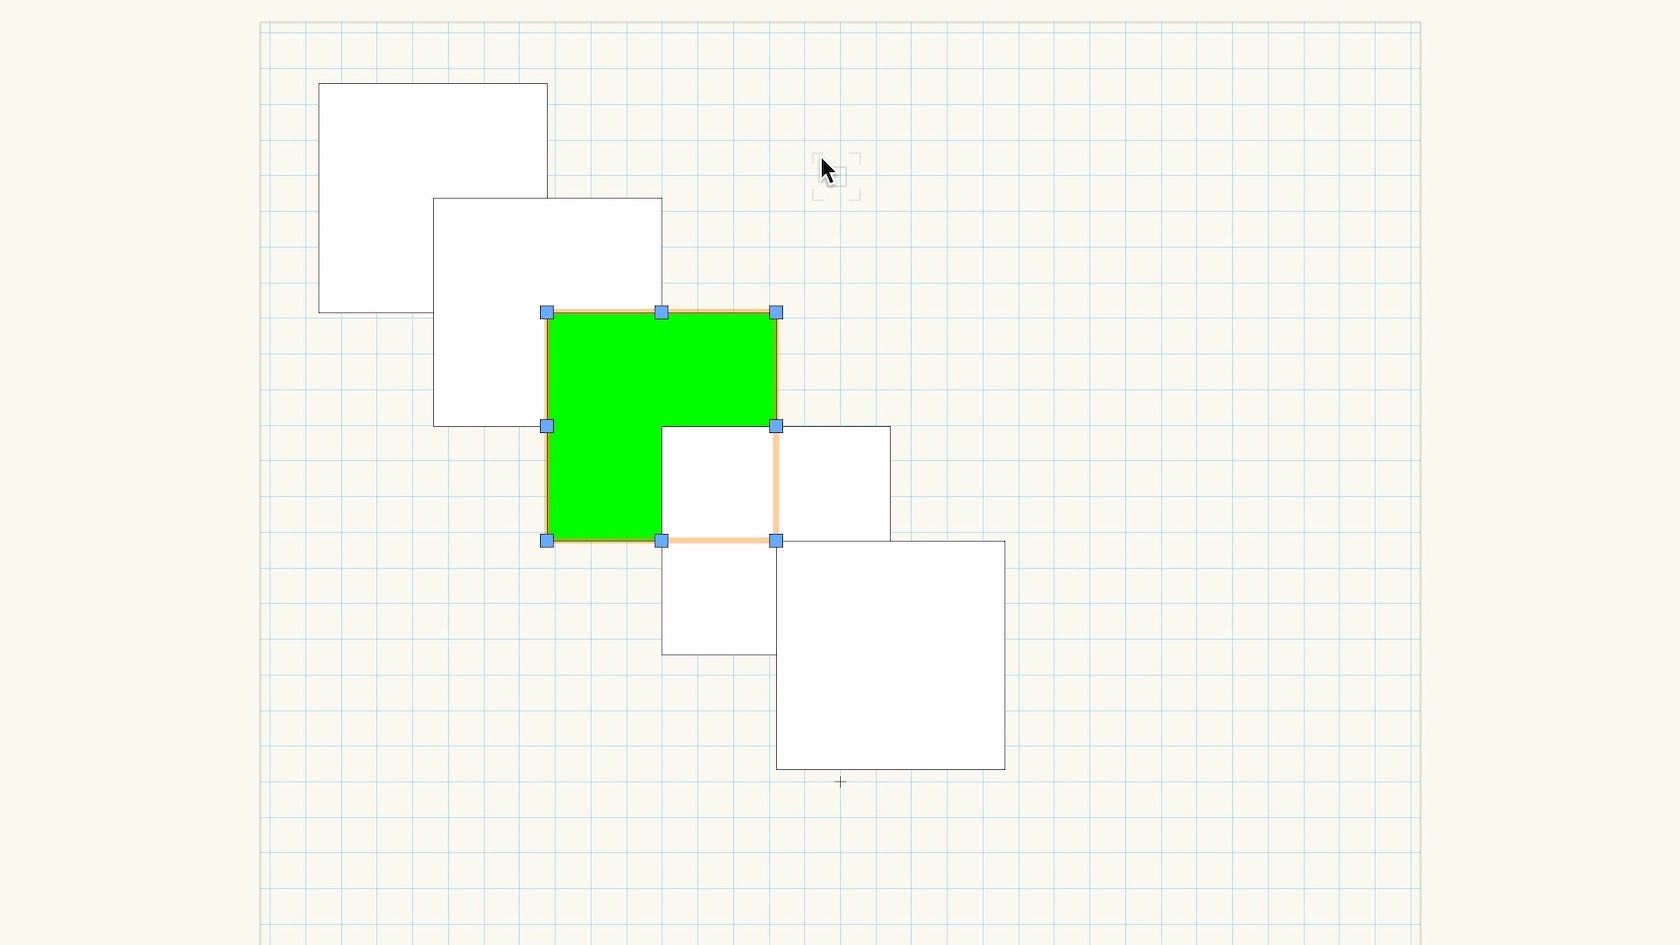
Examine the default behavior of object stacking when objects are created.
Category: Skill
Requires Approval: No
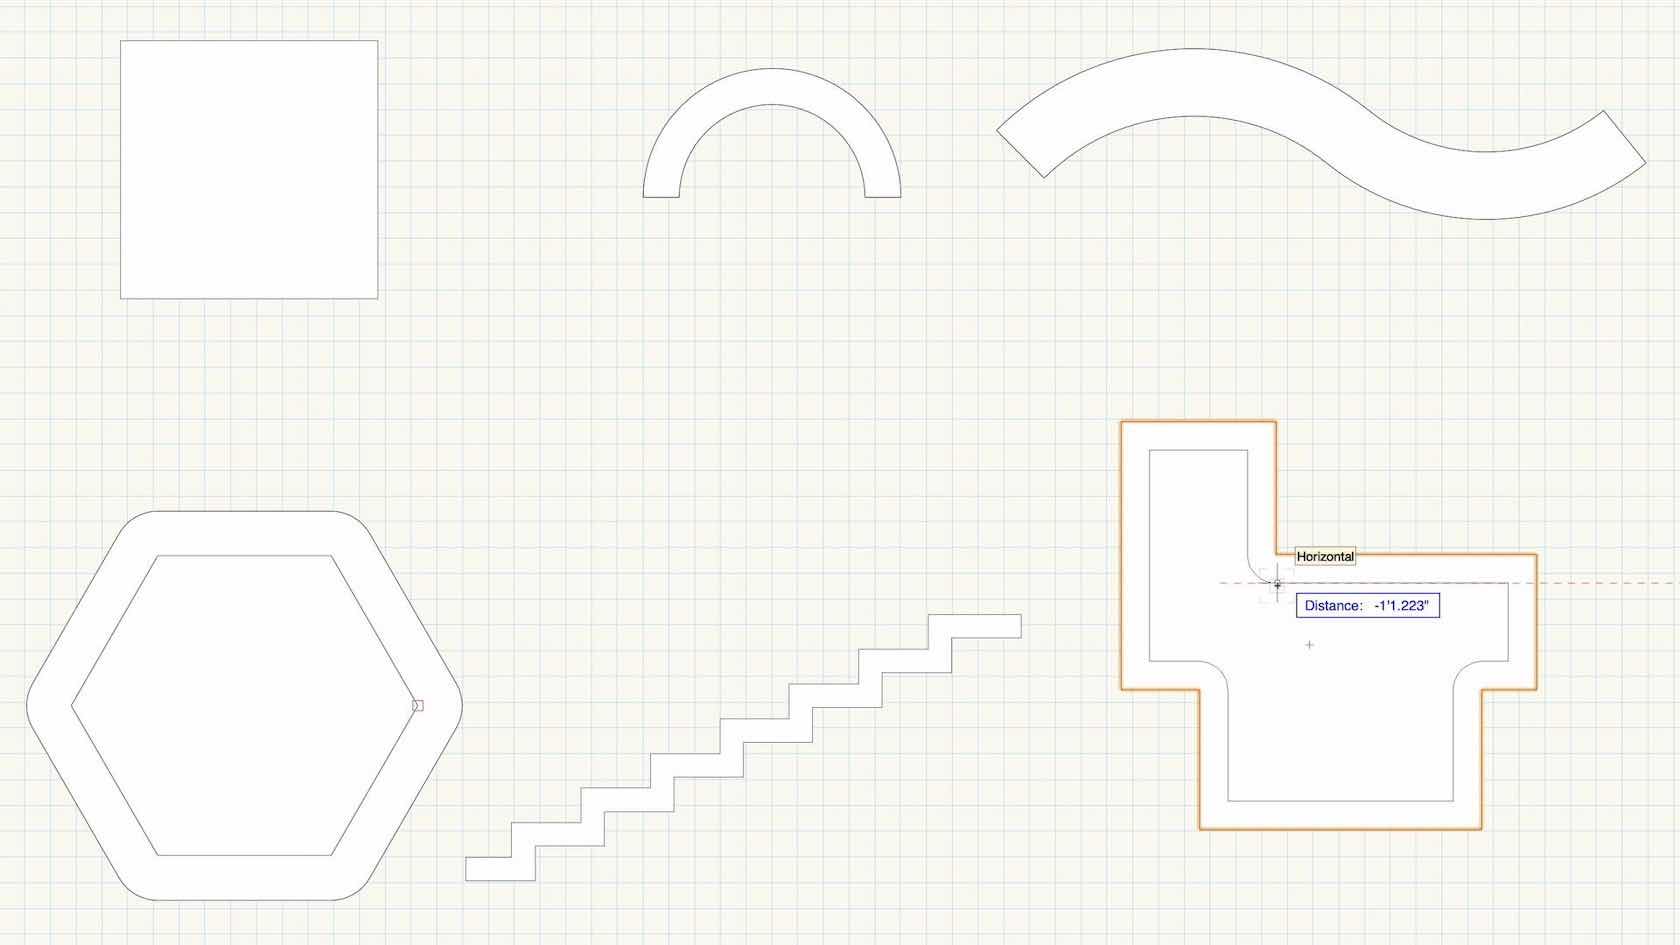
Mastering the Offset tool and understanding the various modes and tool preferences.
Category: Skill
Requires Approval: No
In this section we will explore how to organize a new project/file in Vectorworks Architect using templates. Templates allow us to create/input project contents (architectural elements such as walls, floors, roofs, etc.) quickly using Vectorworks' built-in organizational structure for Layers, Stories, and Levels. We’ll also take a quick look at an important distinction between Classes and Materials before concluding with a discussion about options and best practices for importing contents (.dwg for example) from outside sources.
Category: Architect Certification 2024
Requires Approval: No

This first section of the Spotlight certification course introduces the
Spotlight workspace, and the tools and commands included. We will
discuss file preferences, Spotlight preferences and resources, and
working with templates. This is primarily a watch-and-take-notes
section.
Category: Spotlight Certification 2024
Requires Approval: No
Stories are simply a way of organising Design Layers. They are necessary for BIM and they also enable you to create separate boundings, for things like the components in your walls, using Level Types. When designing a building generally you will have several layers that are common to each story, for example, each story will likely have a floor layer, wall layer, ceiling layer etc. Stories let you create these automatically and set their 3D height relative to the height of the story, rather than the ground. This also means if, for example, you need to create a double height entrance level, you simply change the story height and the rest will adjust themselves!
Category: Architect Certification 2024
Requires Approval: No


Sie erhalten einen Überblick über Aufbau und Verwendung von Paletten. Passen Sie Ihre Arbeitsoberfläche an und werden Sie durch benutzerdefinierte Arbeitsumgebungen in Ihrem täglichen Arbeitsablauf effizienter.
Category: Erste Schritte 2024
Requires Approval: No
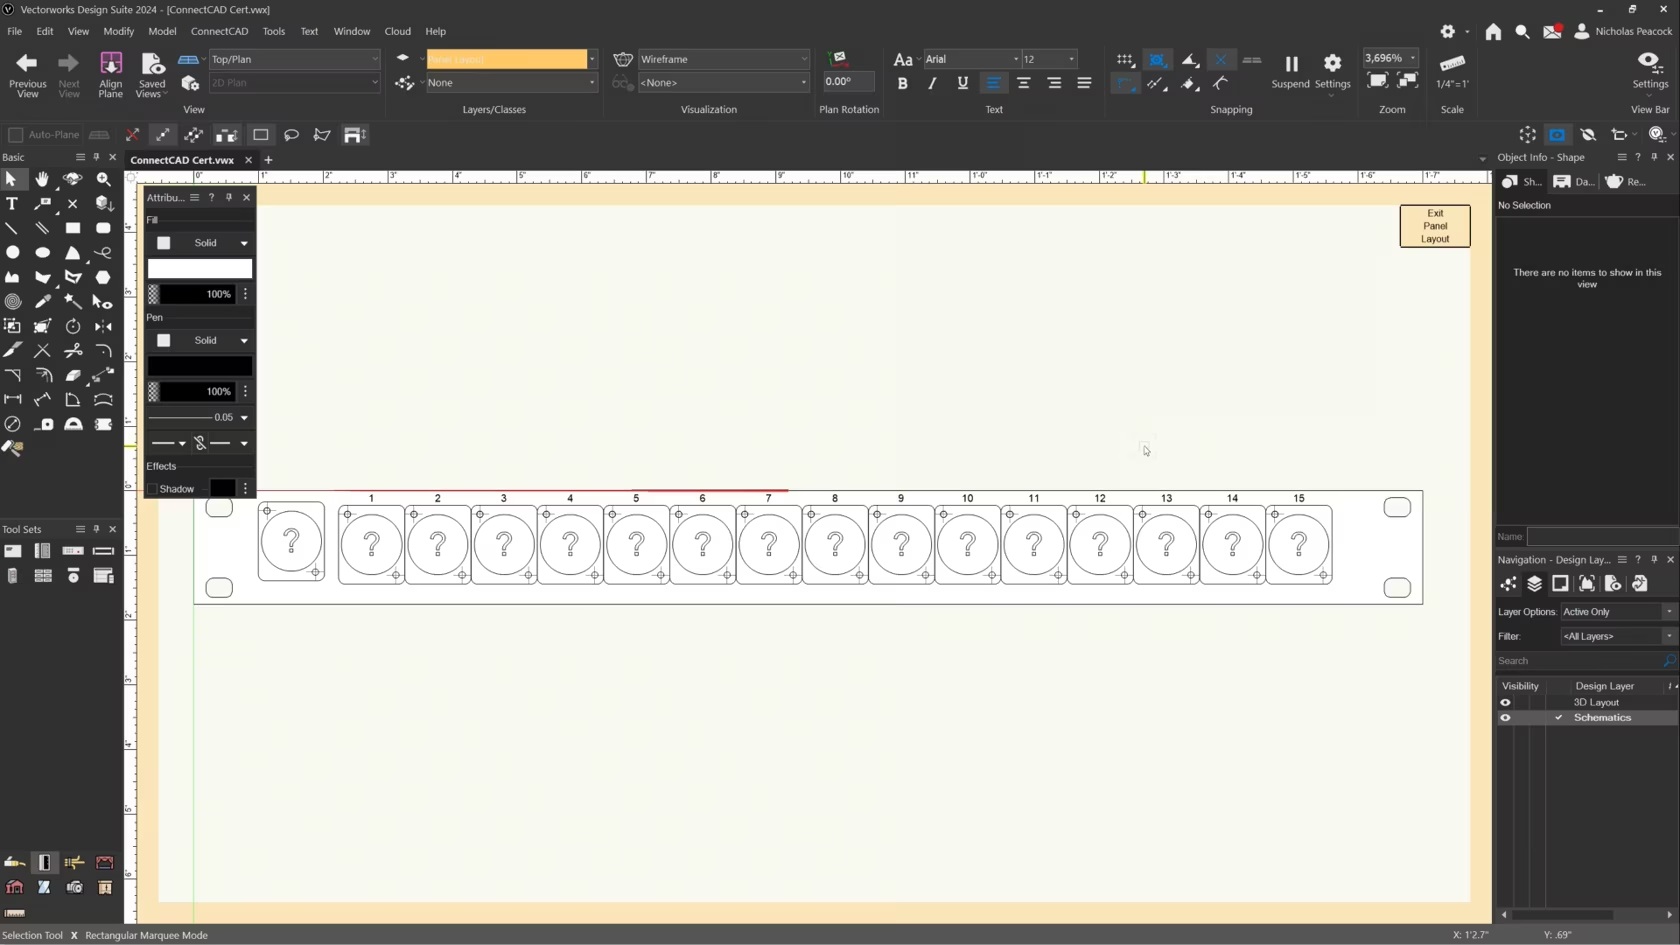
In this video, we will cover the basics of the Panel Connector Tool.
Category: (2024) Skill
Requires Approval: No
In this video, we will be exploring the different panning options in Vectorworks.
Category: Skill
Requires Approval: No

Railing improvements bring you the flexibility and accuracy you need to create more custom configurations. This more efficient workflow includes styled objects and more creation options that interact with other model objects like slabs, stairs, and site models. The Railing tool will also support guardrails and handrails as well as configurations designed to help you meet building code and accessibility standards.
Category: Buildings
Requires Approval: No
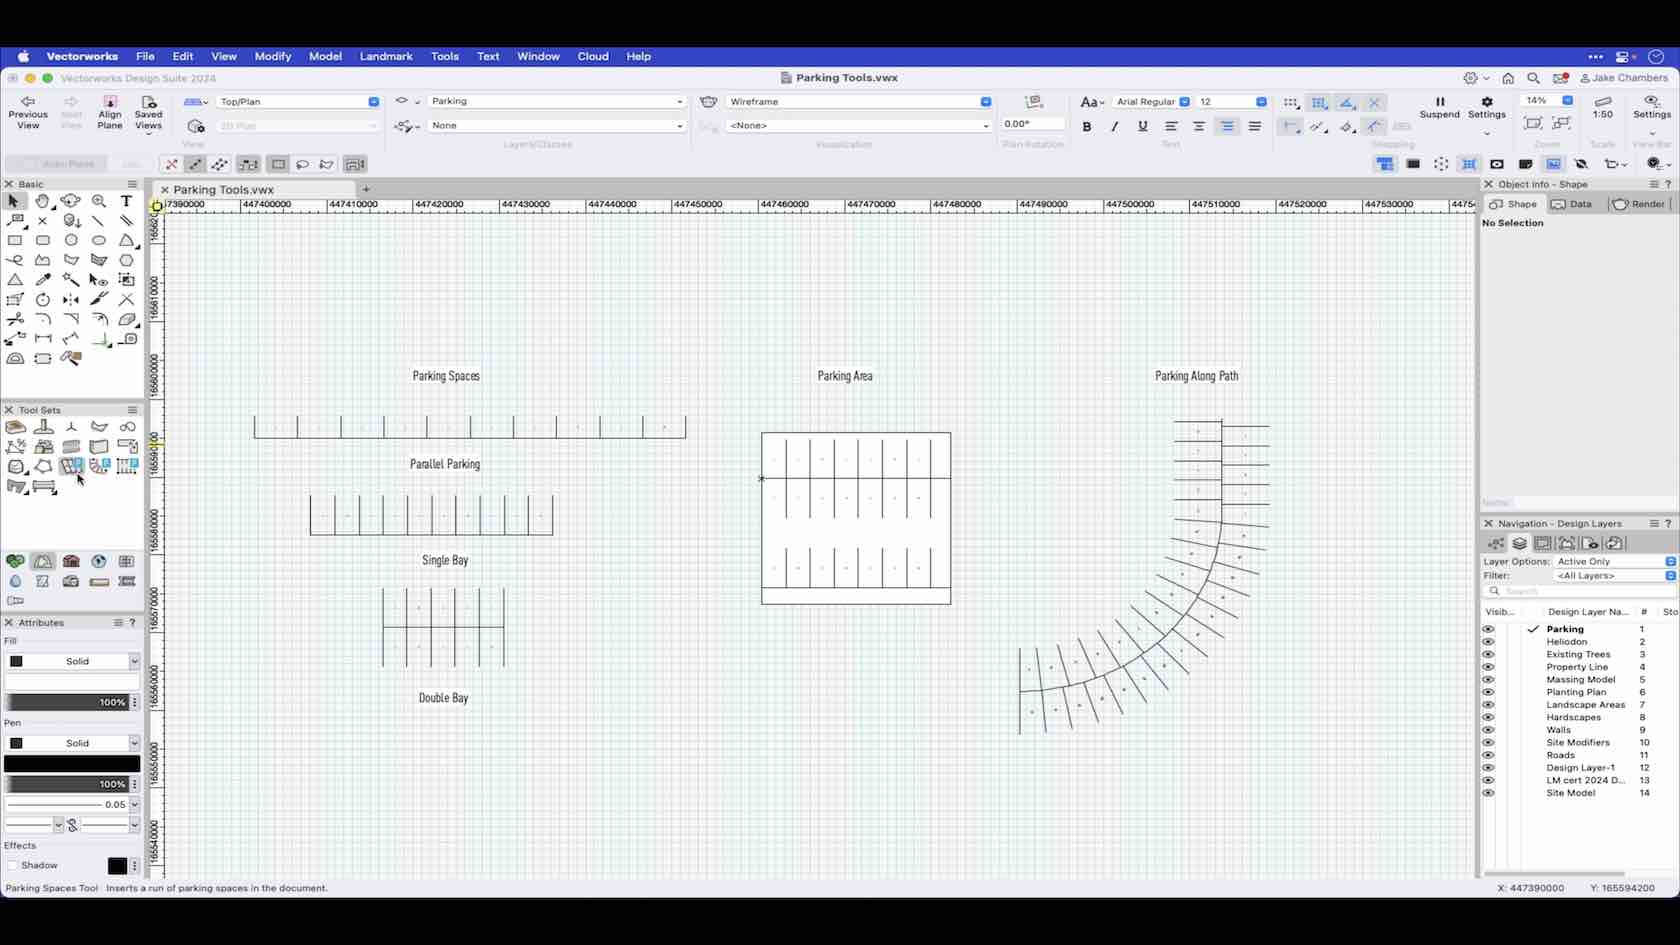
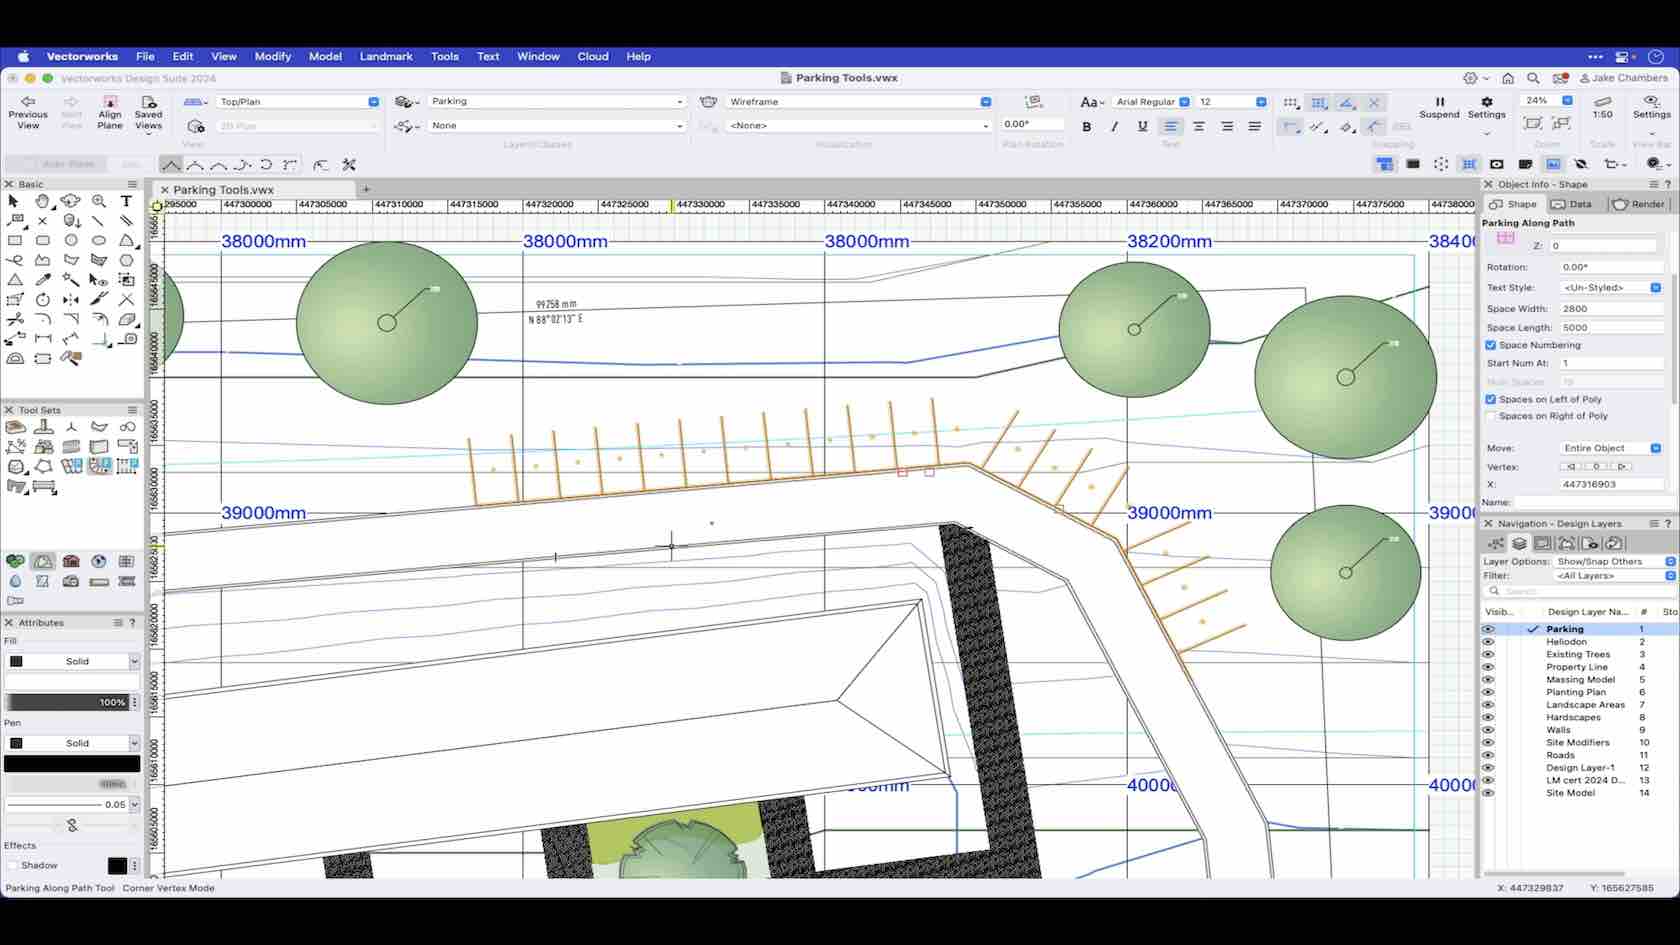
The parking tools enable you to set out your parking bays by setting the preferences. This video demonstrates Parking Along Path.
Category: Landmark 2024 Certificaiton
Requires Approval: No
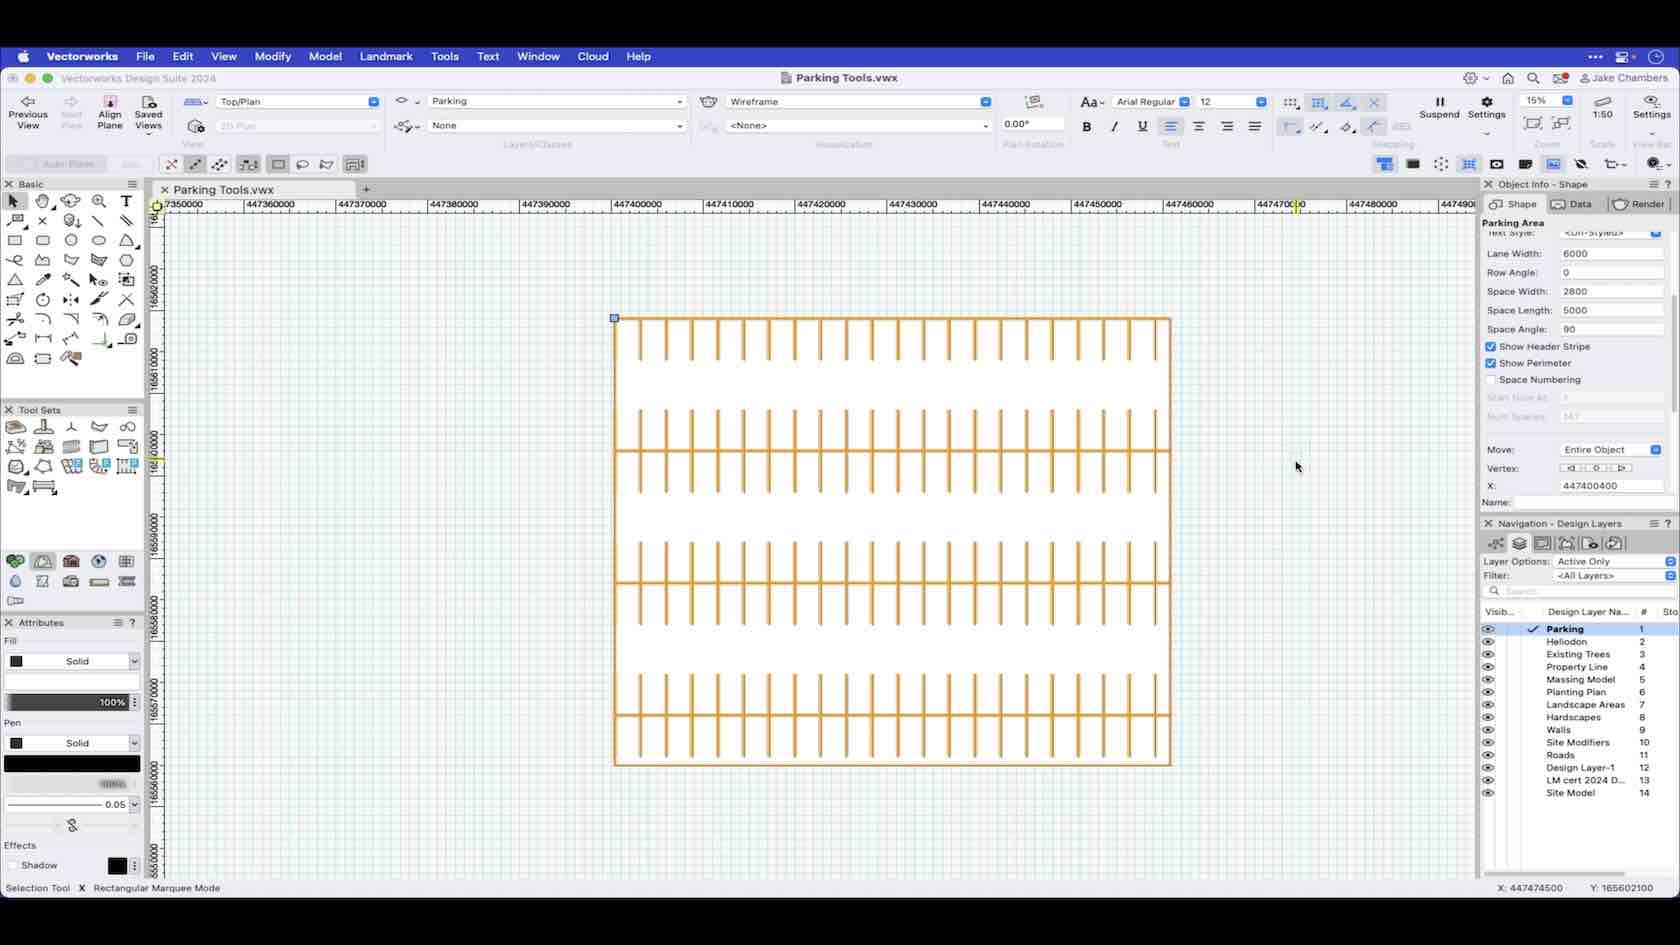
The parking tools enable you to set out your parking bays by setting the preferences. This video demonstrates Parking Area.
Category: Landmark 2024 Certificaiton
Requires Approval: No
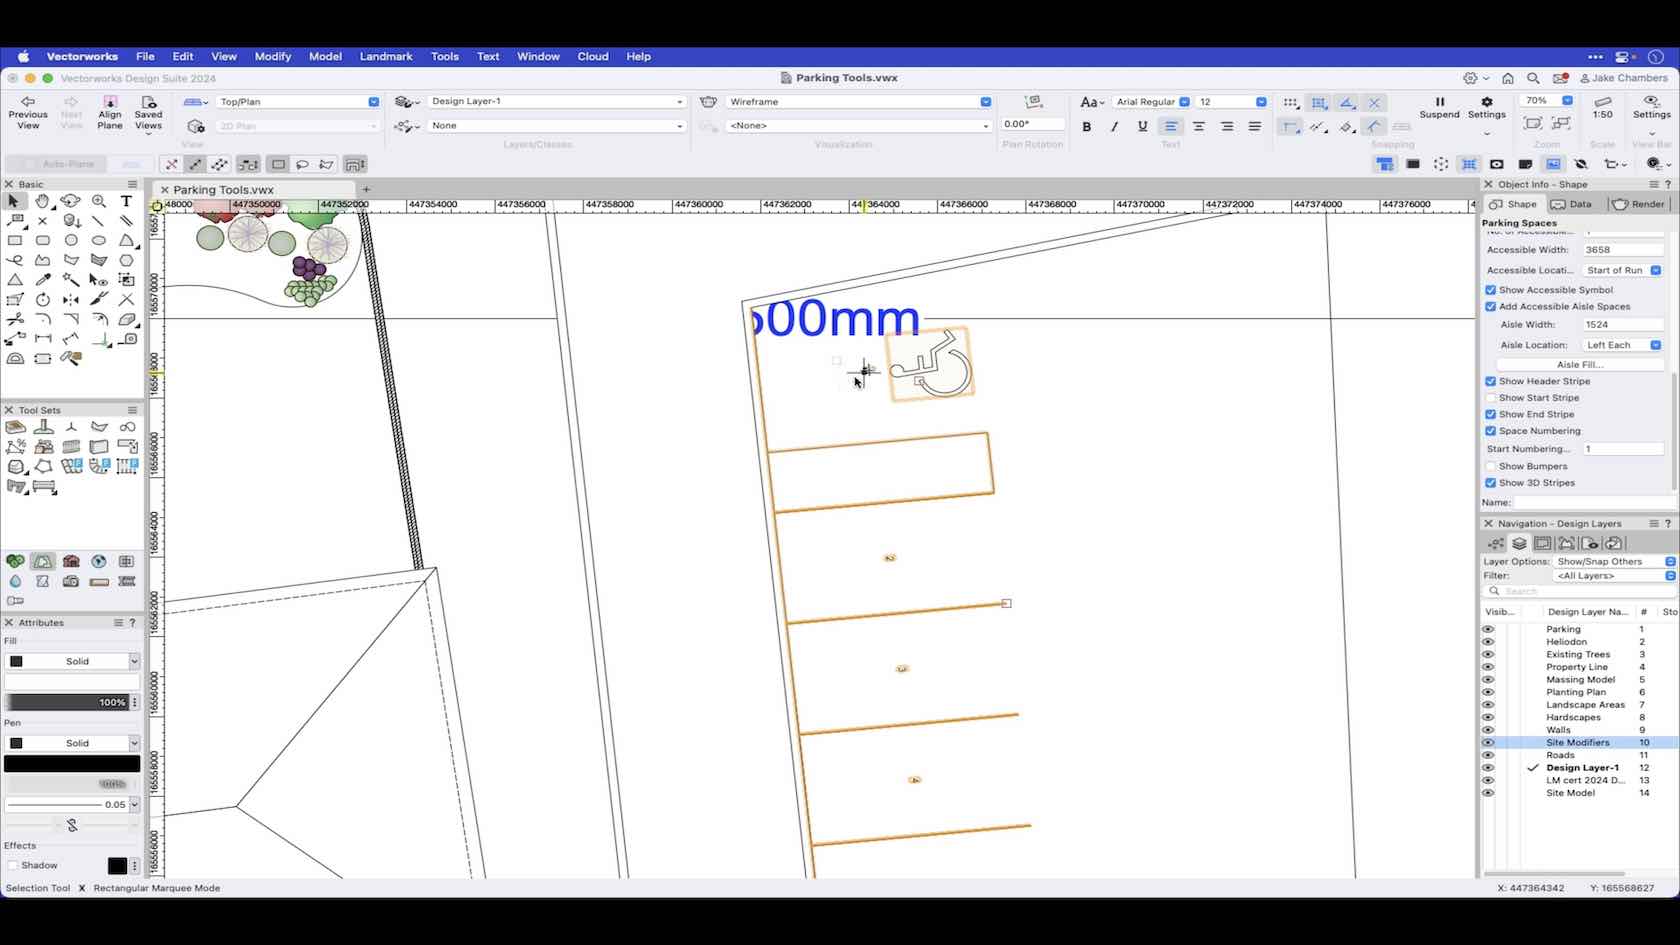
The parking tools enable you to set out your parking bays by setting the preferences. This video demonstrates Parking Spaces.
Category: Landmark 2024 Certificaiton
Requires Approval: No

Mit dem Werkzeug Plankopf verfügen Sie über ein nützliches Instrumentarium zum Gestalten und Strukturieren Ihrer Layouts und Pläne. Mithilfe von Plankopf-Stilen können Sie leicht Bürostandards anlegen und zur Verfügung stellen, Einstellungen treffen, welche Teile Ihres Plankopfes anpassbar bleiben sollen und dateiübergreifende Änderungs- und Indextabellen führen. Einmal eingerichtet, ermöglichen Ihre intelligenten Planköpfe ein flexibles Arbeiten und Anpassen Ihrer Layouts zur Planausgabe.
(Für Version 2024)
Category: All Industries
Requires Approval: No
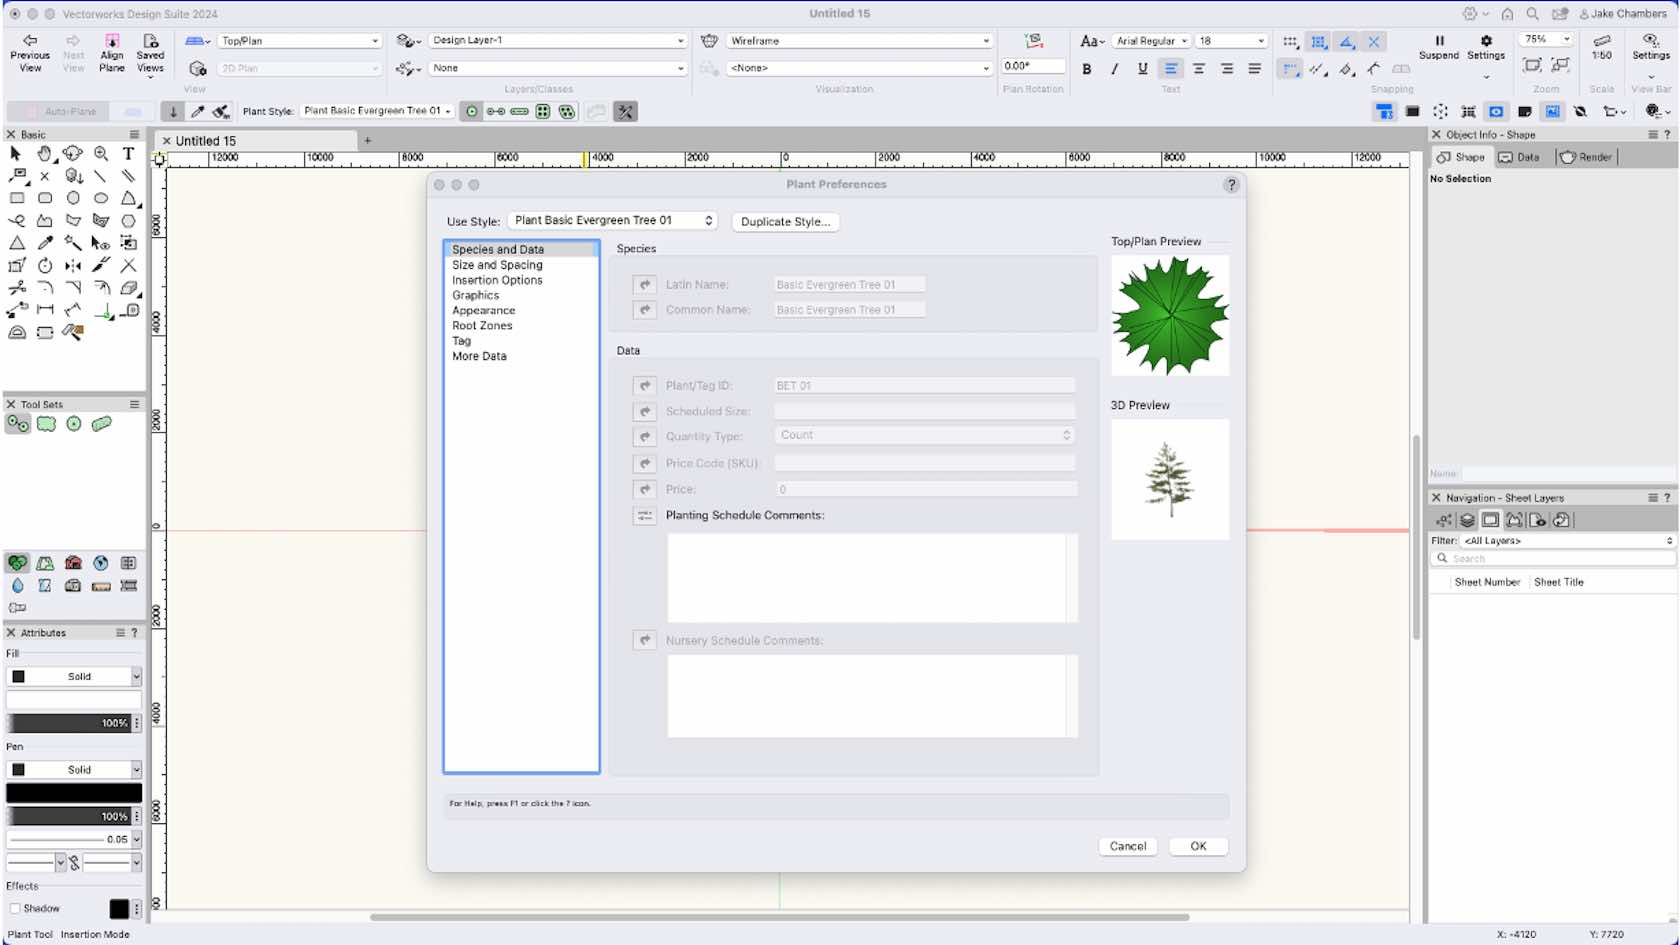
By using plug-in object styles, you can create plants with a combination of parameters that are determined by style or by instance. Style parameters have a fixed value established by the style; instance parameters can be set independently for each instance of the object in the drawing.
In this course we will look at Plant Styles and there settings along with using the Plant Tool Preferences which allows the setting of individual values of parameters that are set per instance prior to placement.
Category: (2024) Skill
Requires Approval: No

In Vectorworks Landmark you can create your own library of plants by creating plant styles. Plant styles contain data and settings unique to each plant object. In this video you will learn how to create a plant style from a catalog.
Category: Landmark 2024 Certificaiton
Requires Approval: No
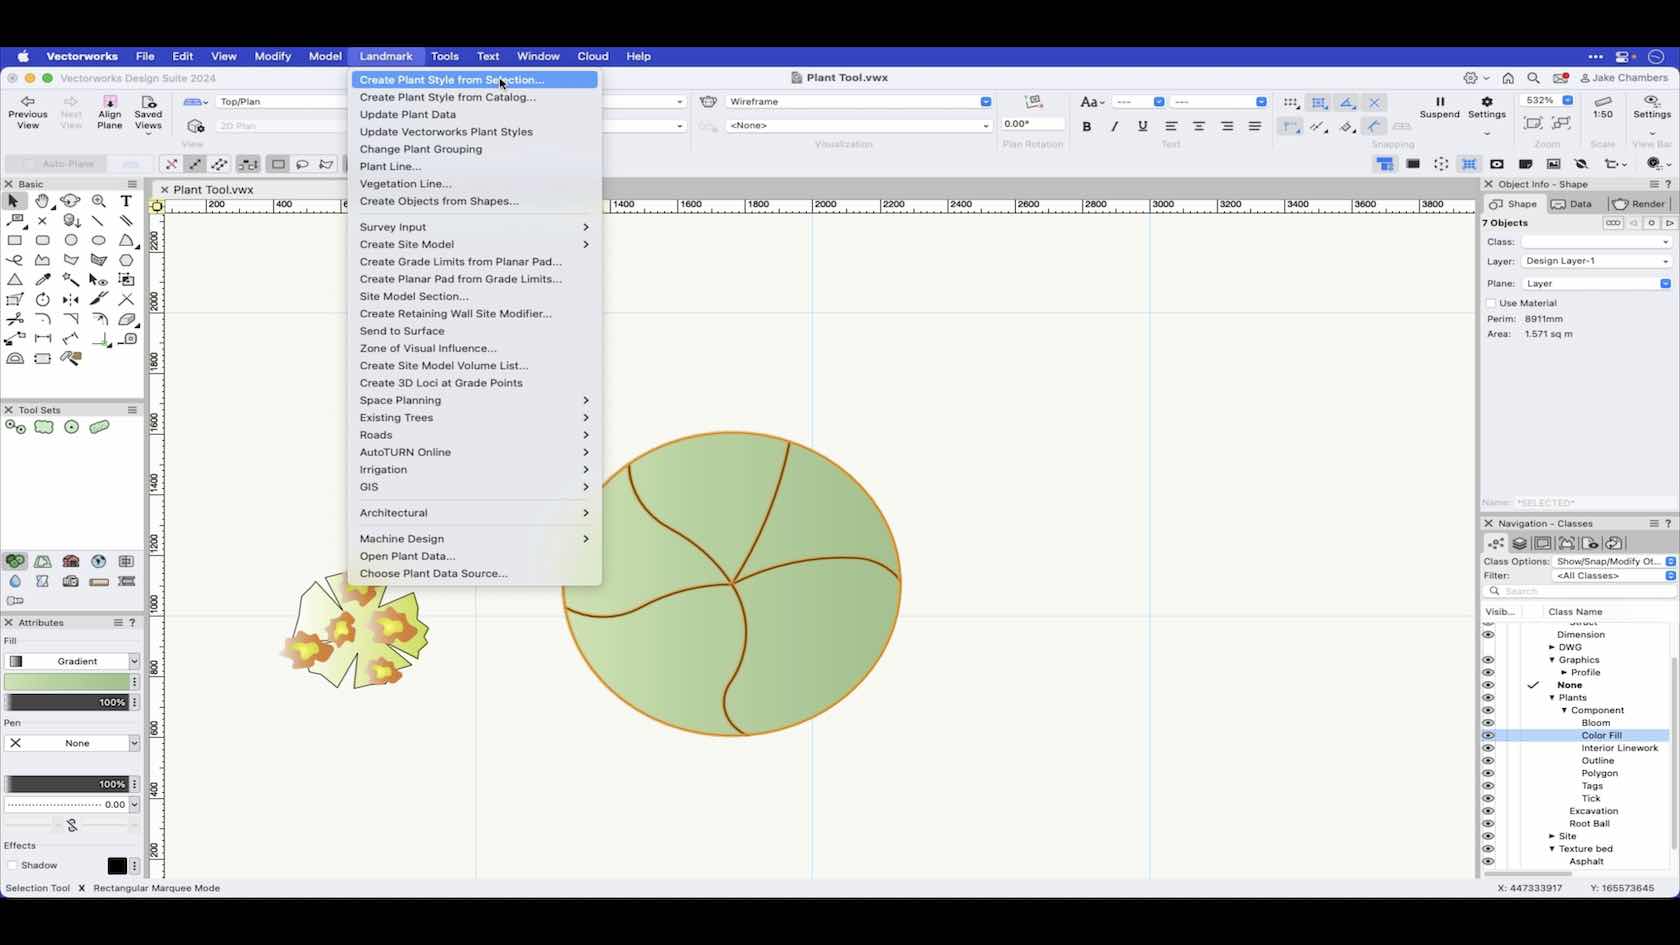
In Vectorworks Landmark you can create your own library of plants by creating plant styles. Plant styles contain data and settings unique to each plant object. In this video you will learn how to create a plant style from selection.
Category: Landmark 2024 Certificaiton
Requires Approval: No
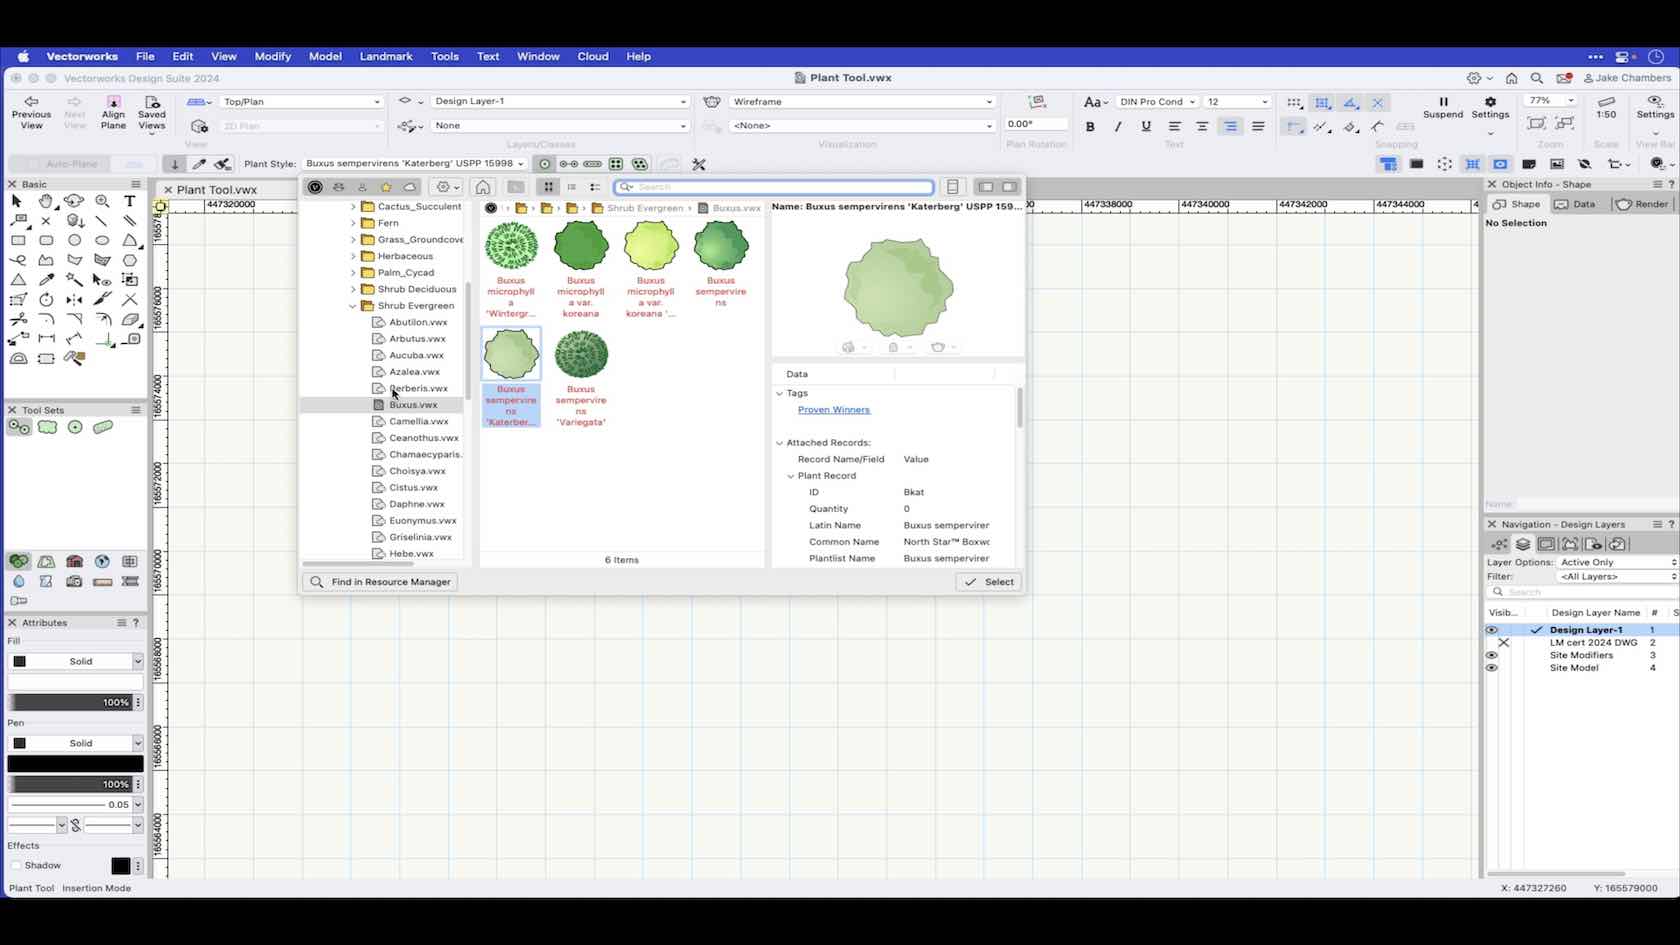

The plant tool enables you to place plants using various placement modes, this video will show how these various modes function along with adjusting parameters via the tools preferences and in the object info palette after placement.
Category: Landmark 2024 Certificaiton
Requires Approval: No
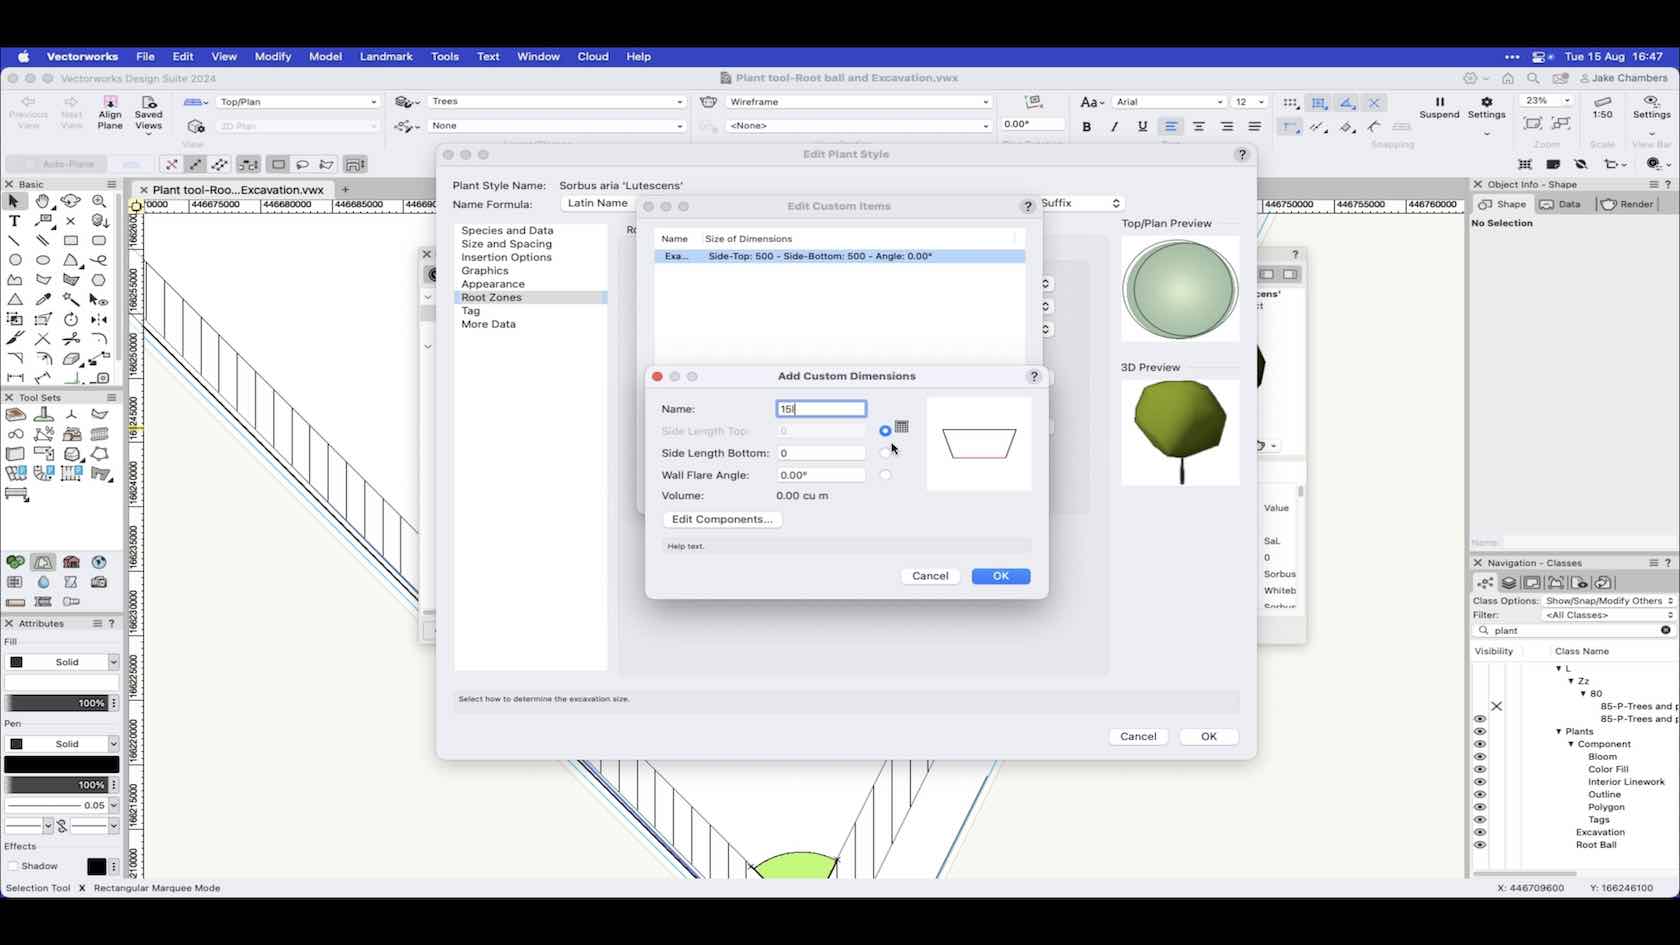
When the specification of your plants has been confirmed, you can edit the plant styles in your project and set up the root ball and excavation pit settings based on the sizes that will be installed onsite. These can be shown in both 2D and 3D, having root ball and excavation pit data helps aid designing and planning around your plants and to use in a BIM workflow for clash detection.
Category: (2024) Skill
Requires Approval: No
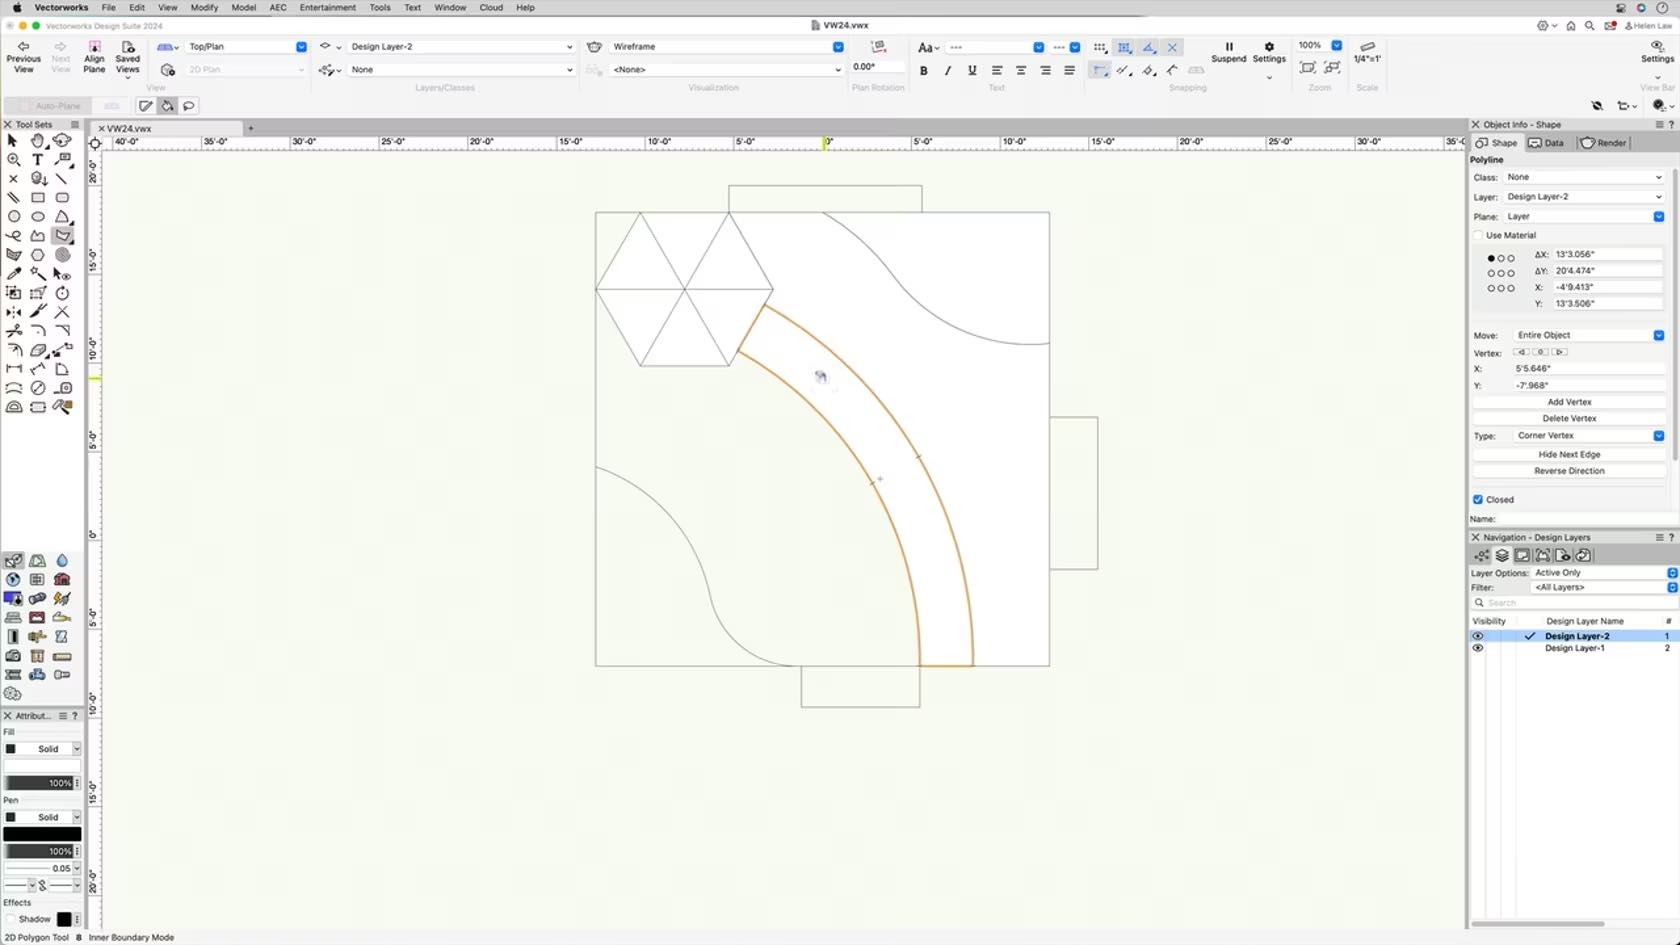
In this course, we will gain an understanding of the Polygon Tool.
Category: Skill
Requires Approval: No
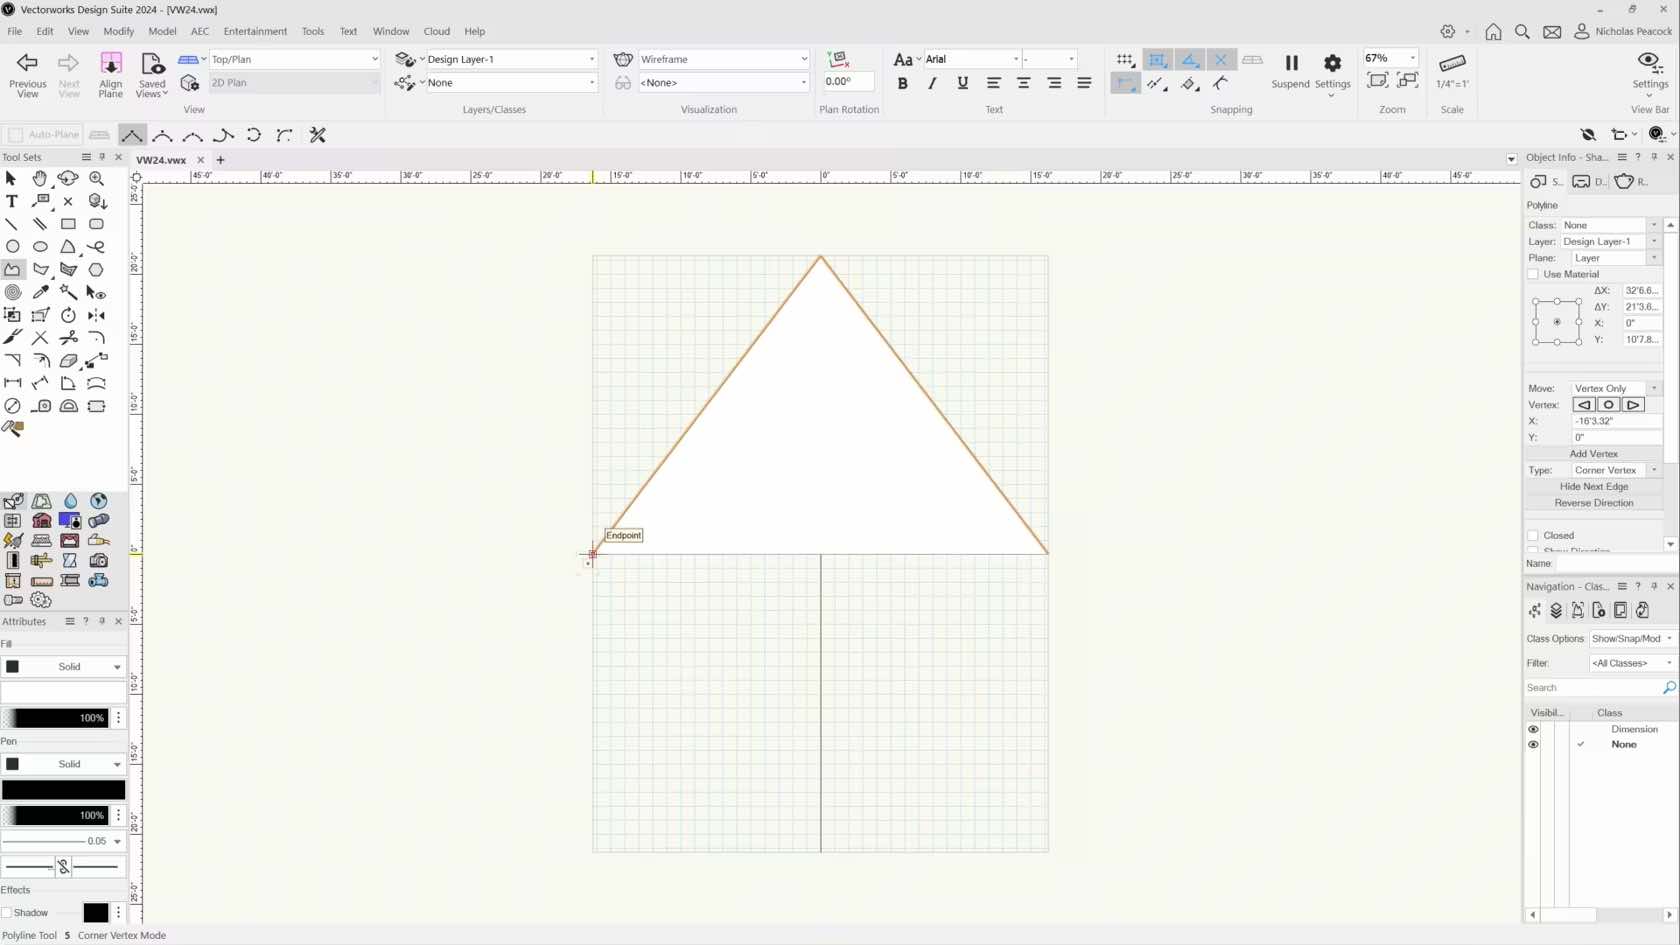
In this course, we will explore the Polyline Tool and all of its modes.
Category: Skill
Requires Approval: No
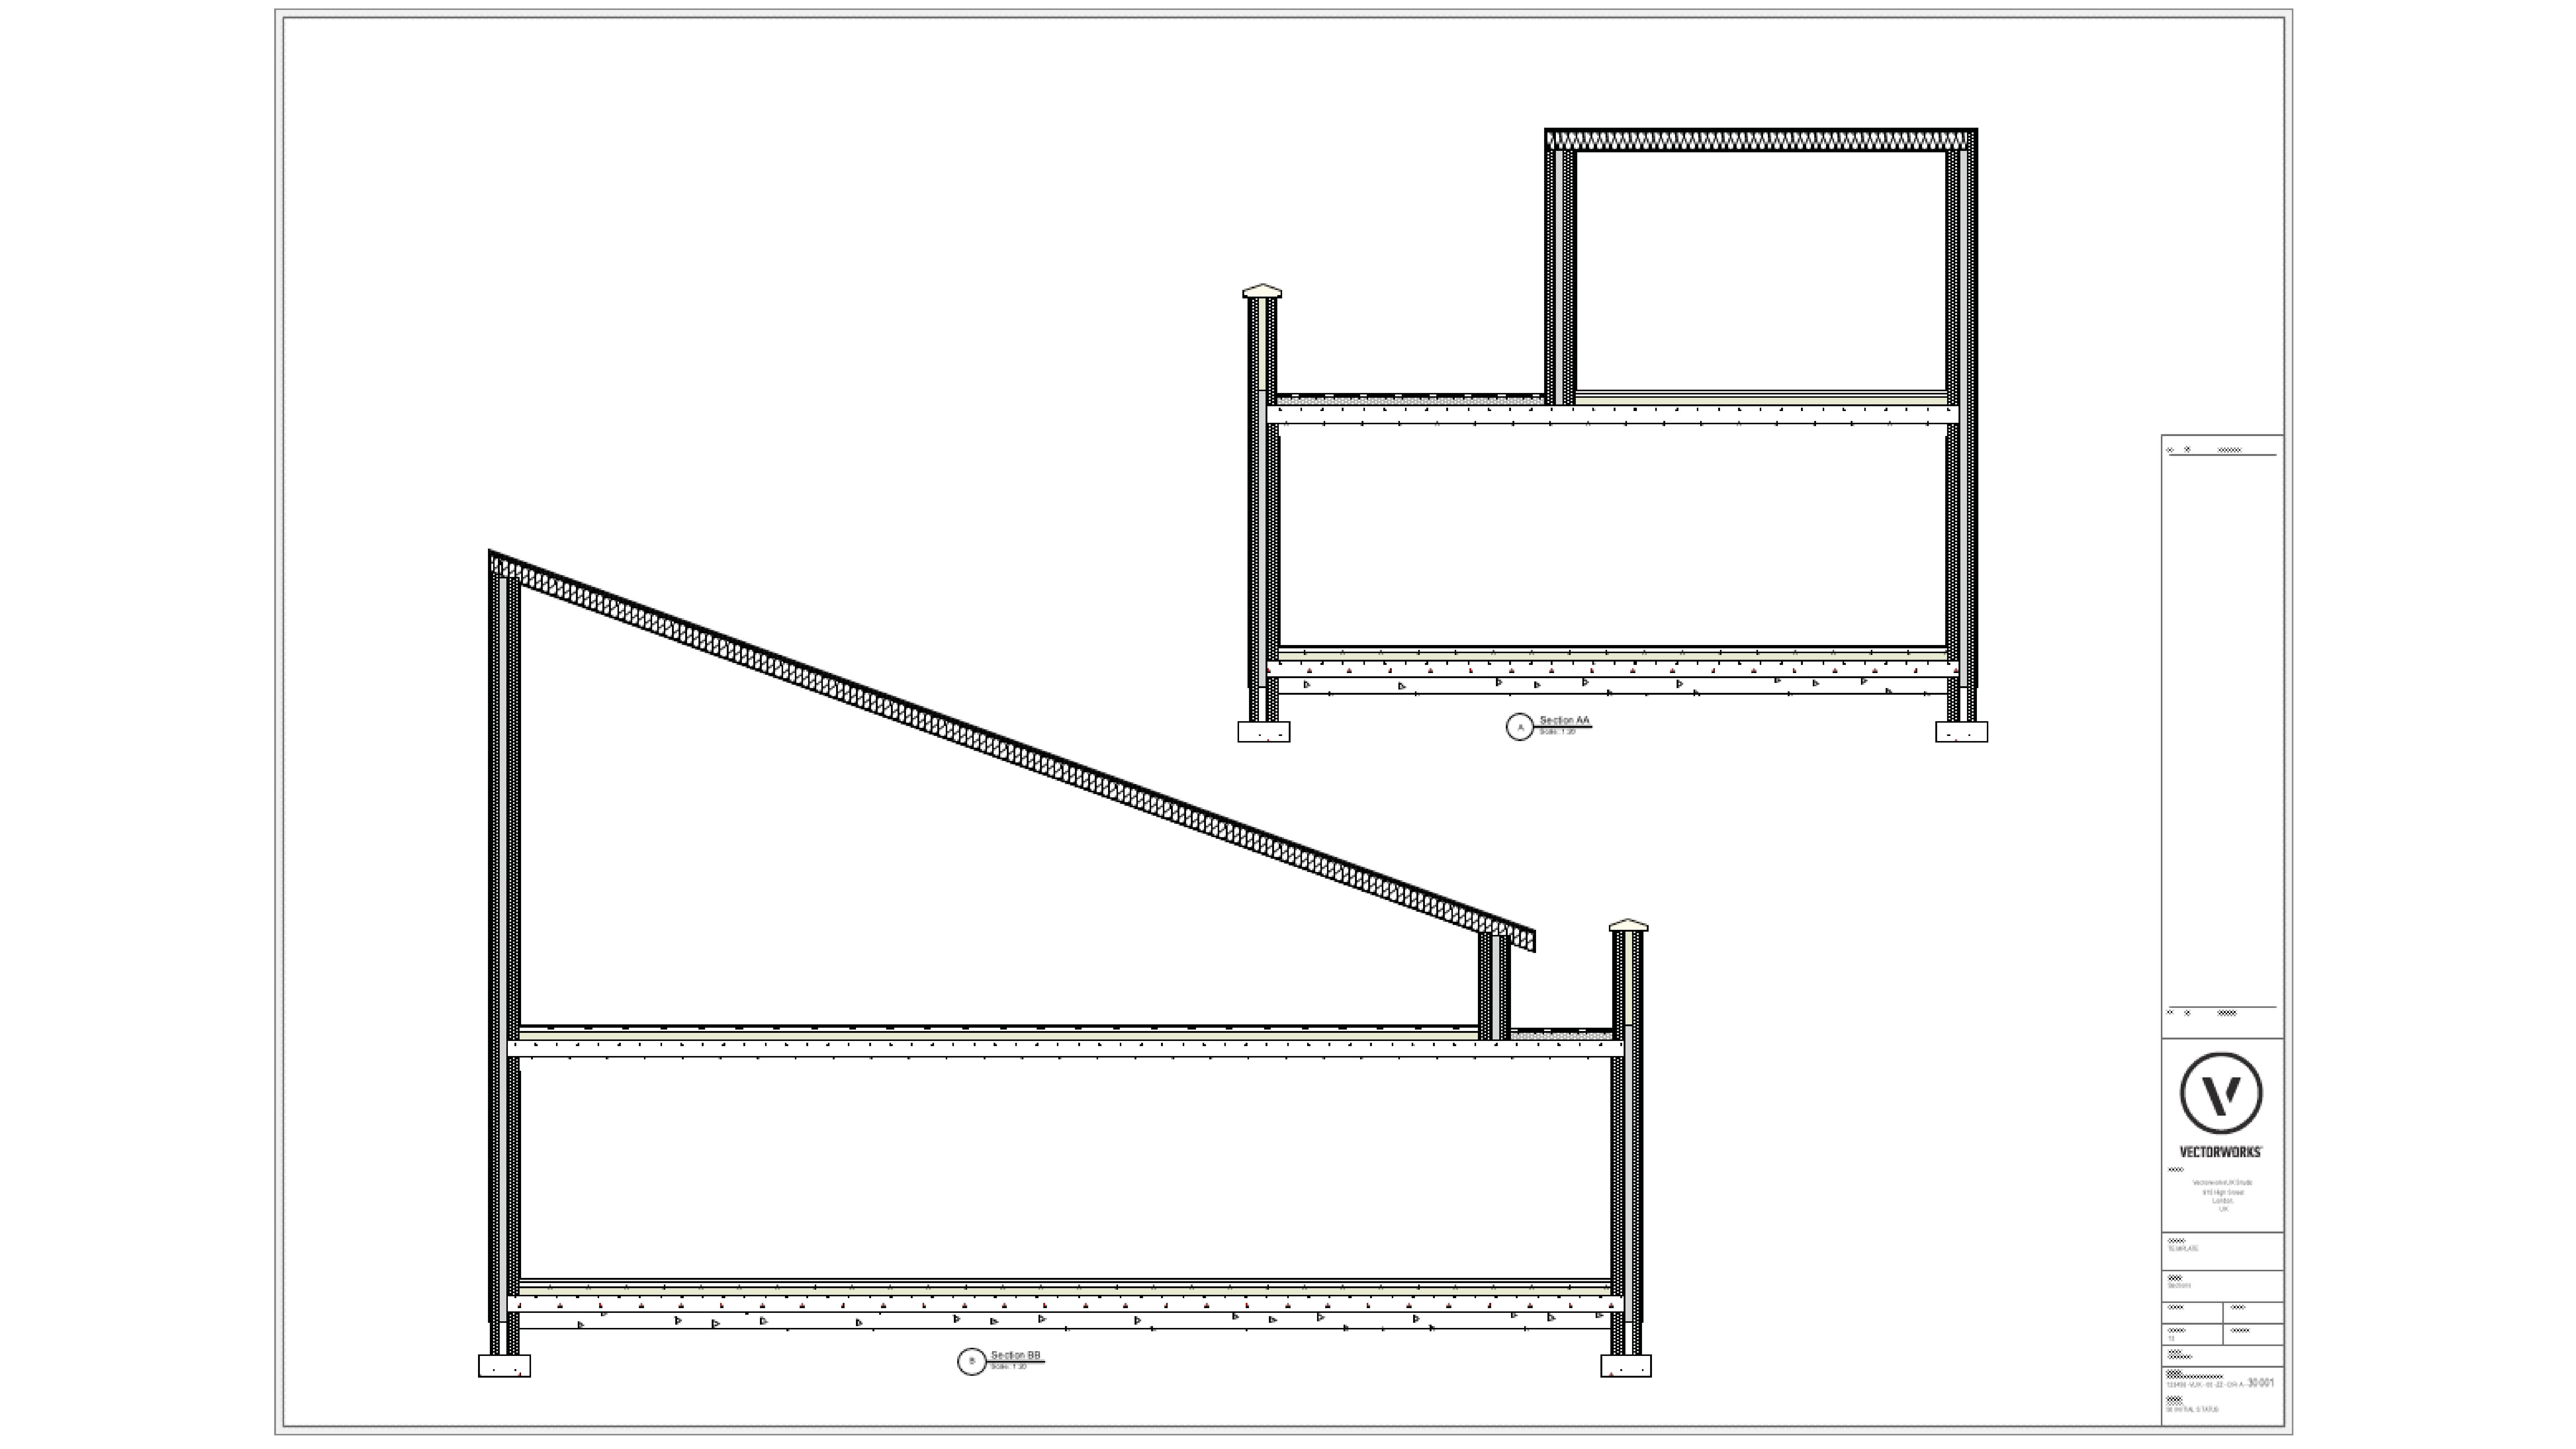
Present your architectural concept model on sheet layers. Building upon existing knowledge of viewport creation, the course introduces the concept of section viewports to enhance the participants' ability to communicate design ideas effectively.
Category: Architect Certification 2024
Requires Approval: No

In this section we will be using Sheet Layers and Viewports to produce Plans, Sections and Elevations of our design from the model.
Category: Architect Certification 2024
Requires Approval: No

In this challenge you will put into practise the skills you have learnt from the presentation section of Core.
Category: Skill
Requires Approval: No
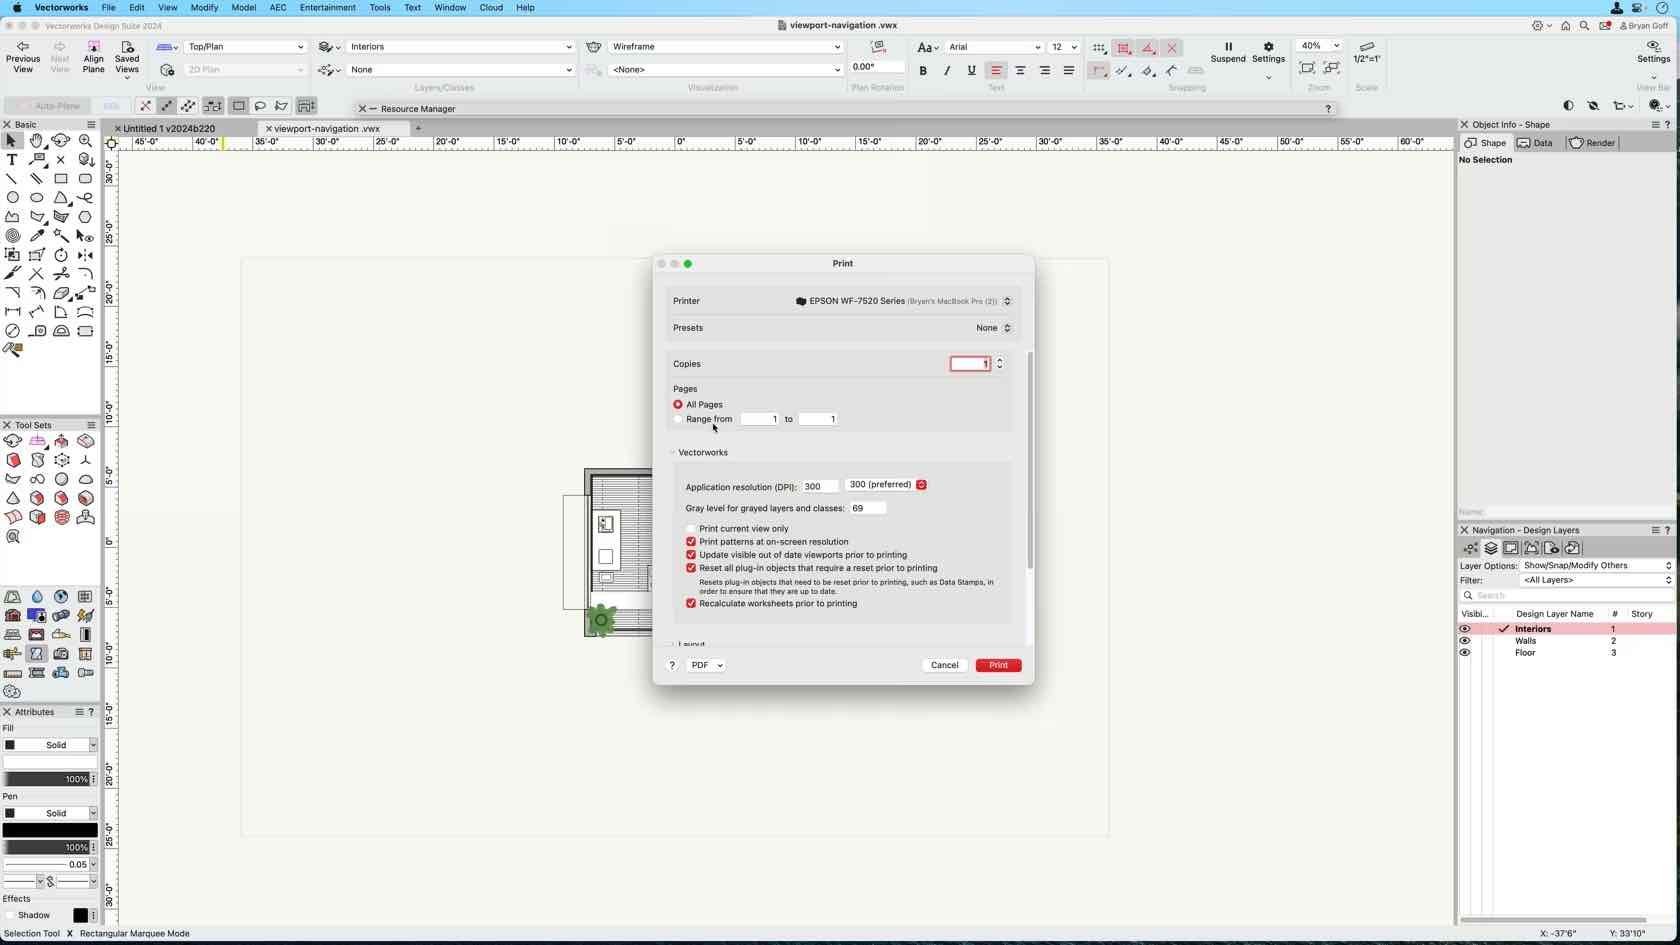
This course will look at how to print a sheet layer and export it to PDF.
Category: Skill
Requires Approval: No
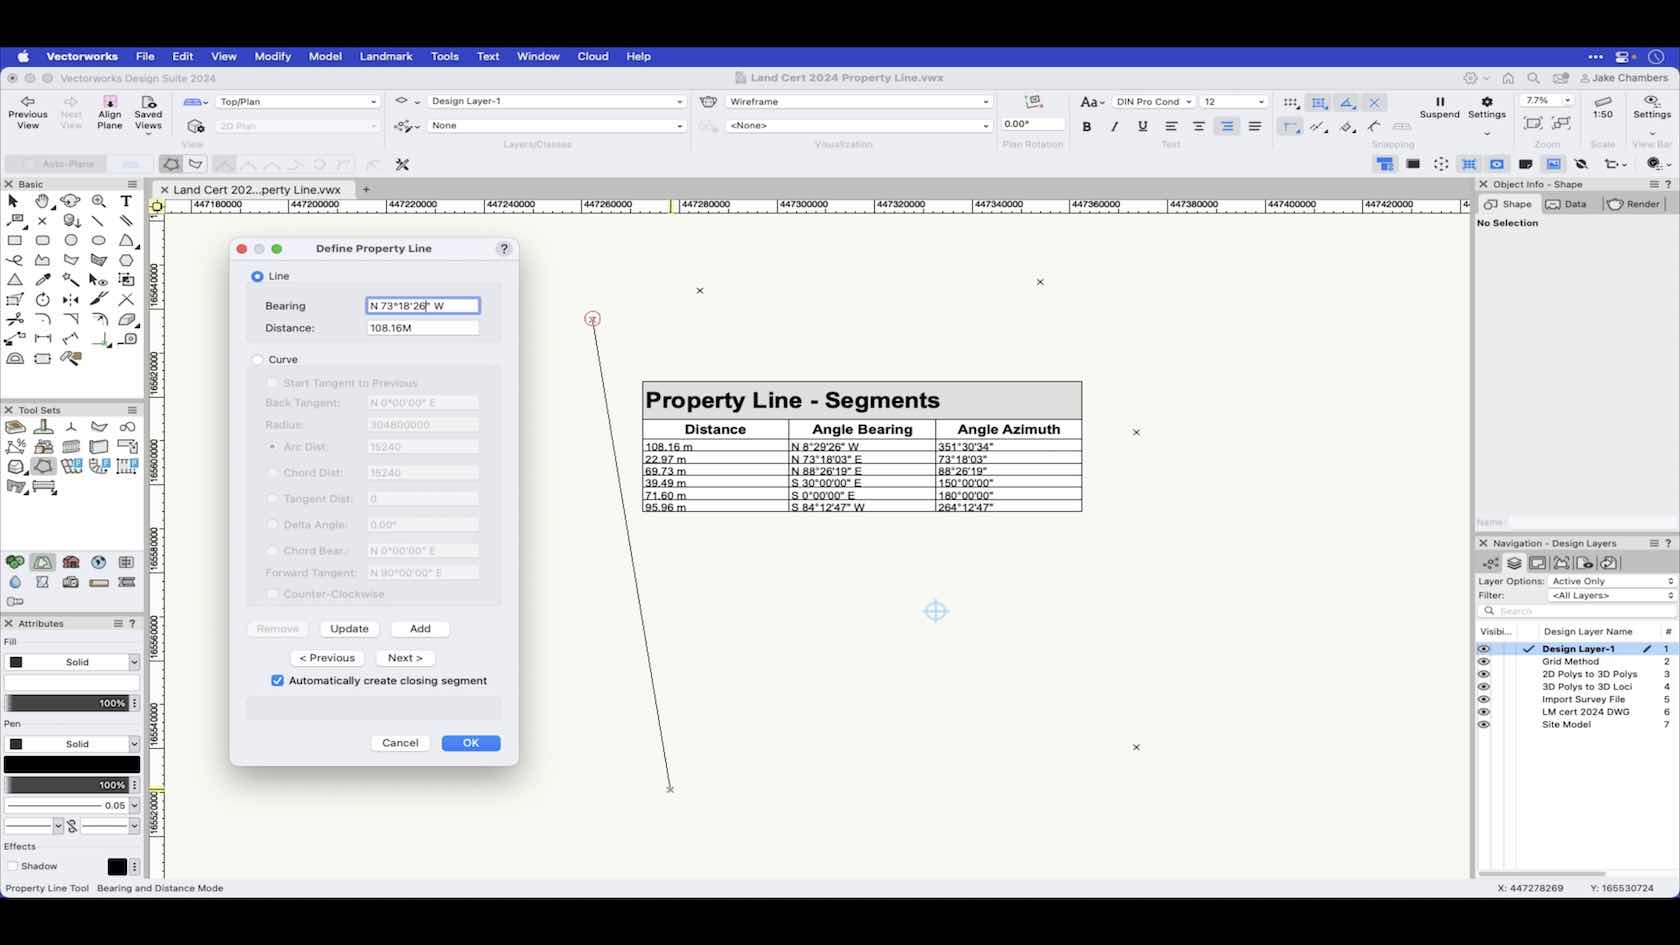
In this video you will learn how to draw a property line using the bearing and distance mode of the Property Line tool.
Category: Landmark 2024 Certificaiton
Requires Approval: No
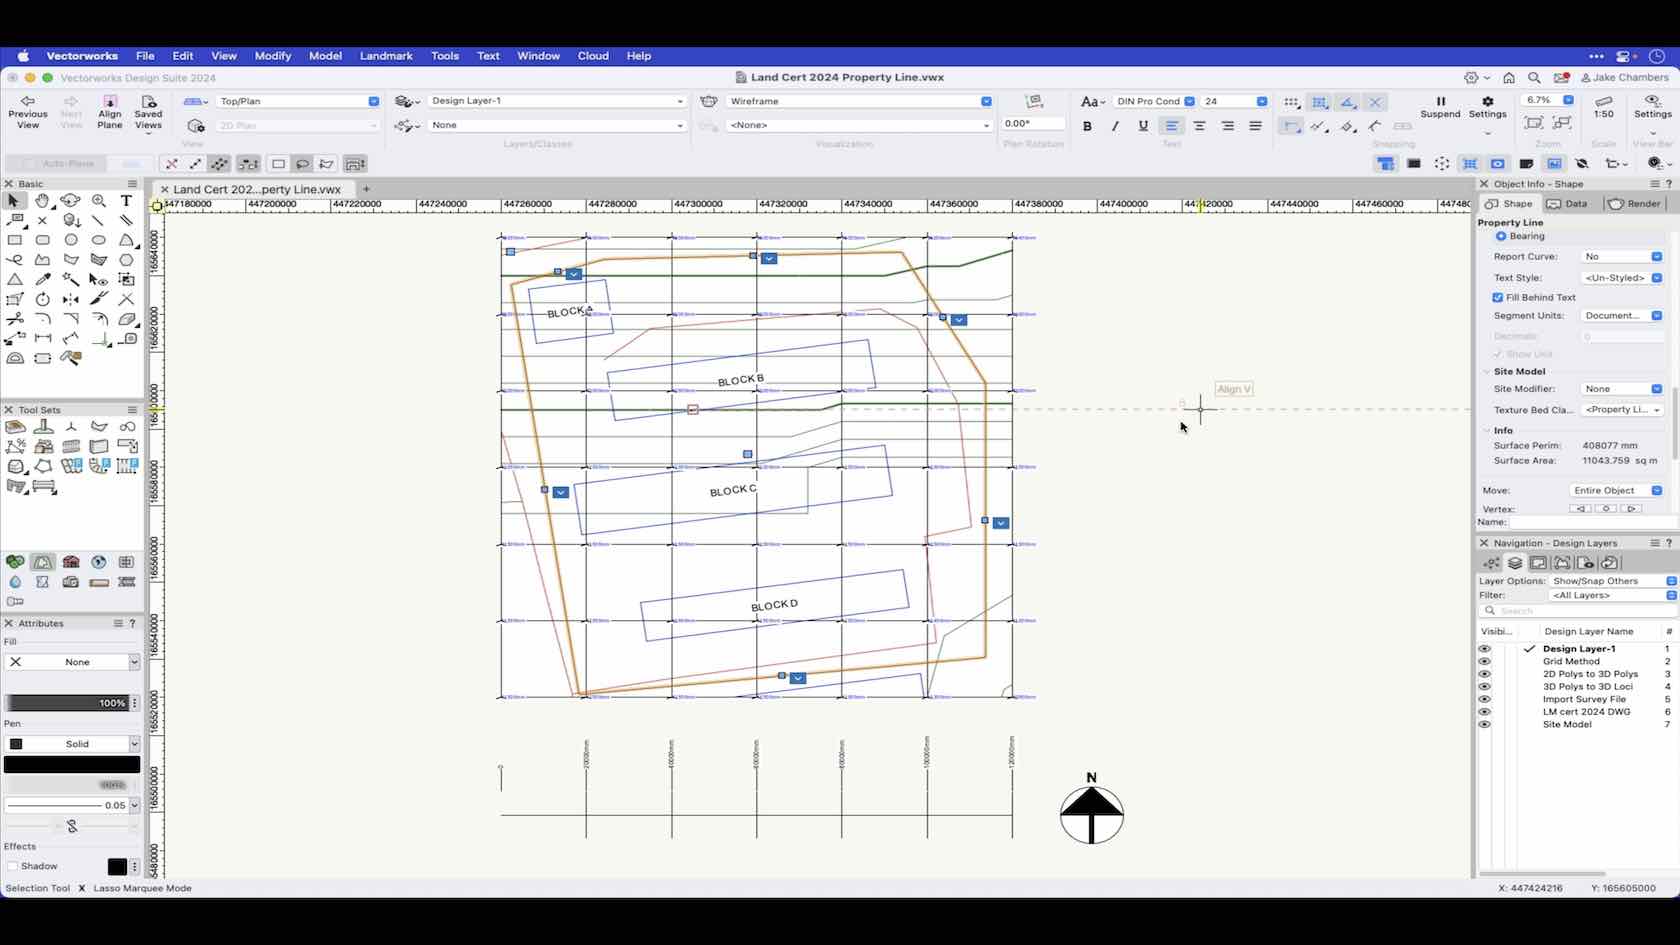
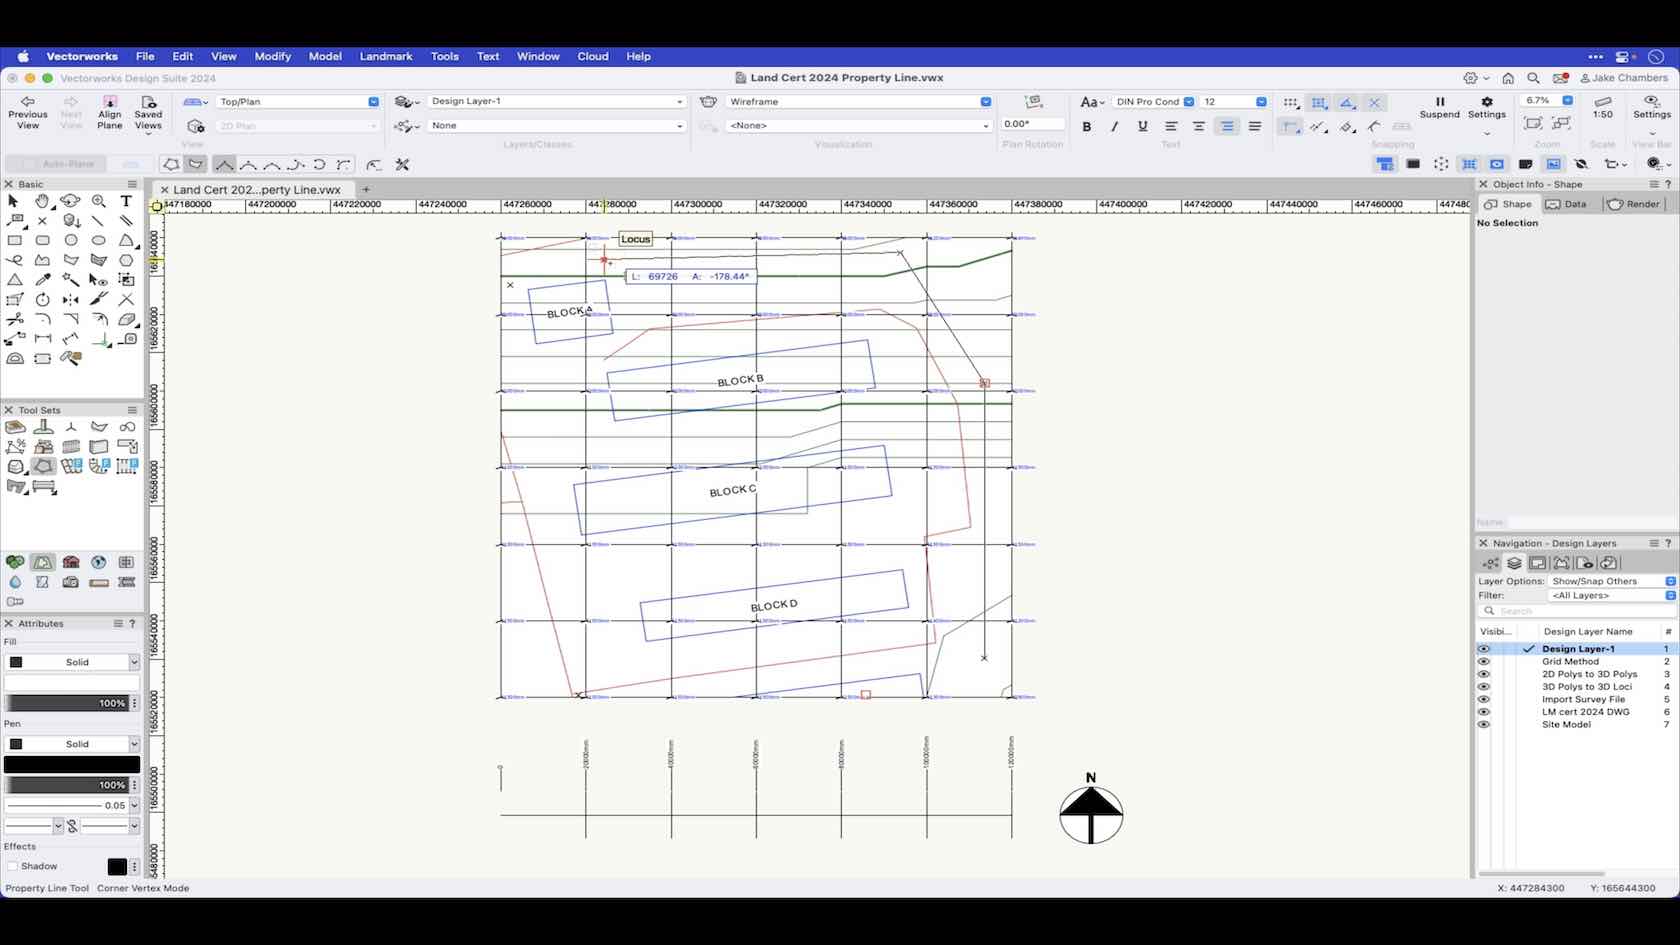
This video will demonstrate how to draw a property line with the Property Line tool using the polyline mode.
Category: Landmark 2024 Certificaiton
Requires Approval: No
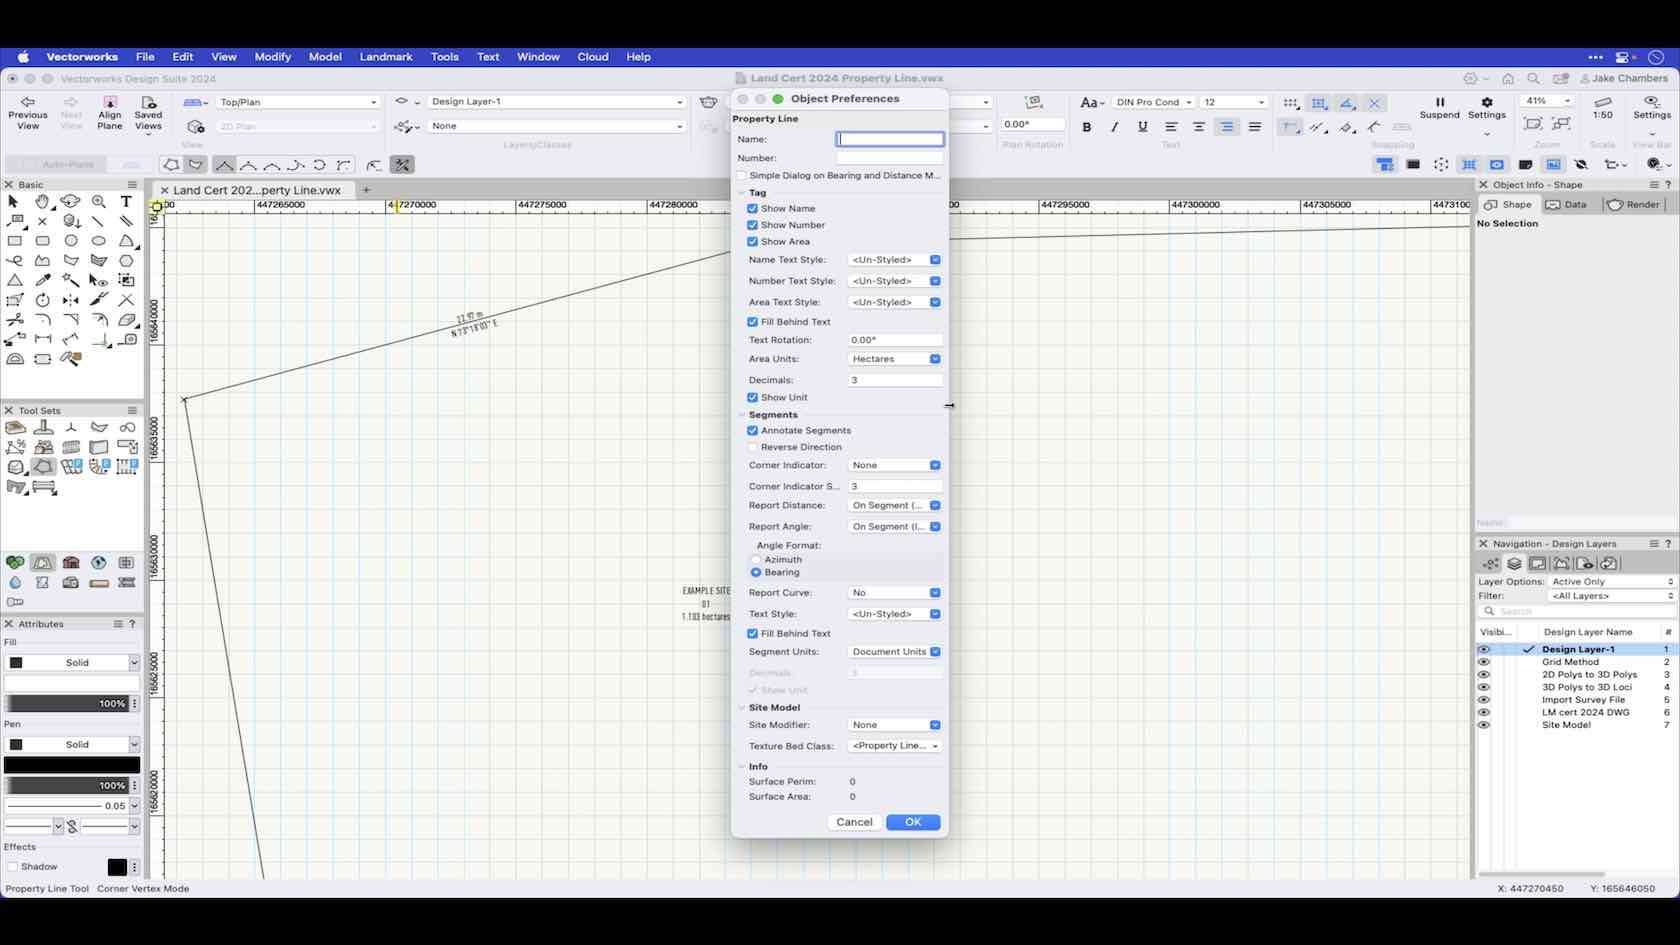
This video explains the preferences you can set prior to drawing a property line with the Property line tool.
Category: Landmark 2024 Certificaiton
Requires Approval: No

Share your designs with the world using the publish command, while we're at it we'll explore a few of the features of Vectorworks Cloud Services
Category: Architect Certification 2024
Requires Approval: No
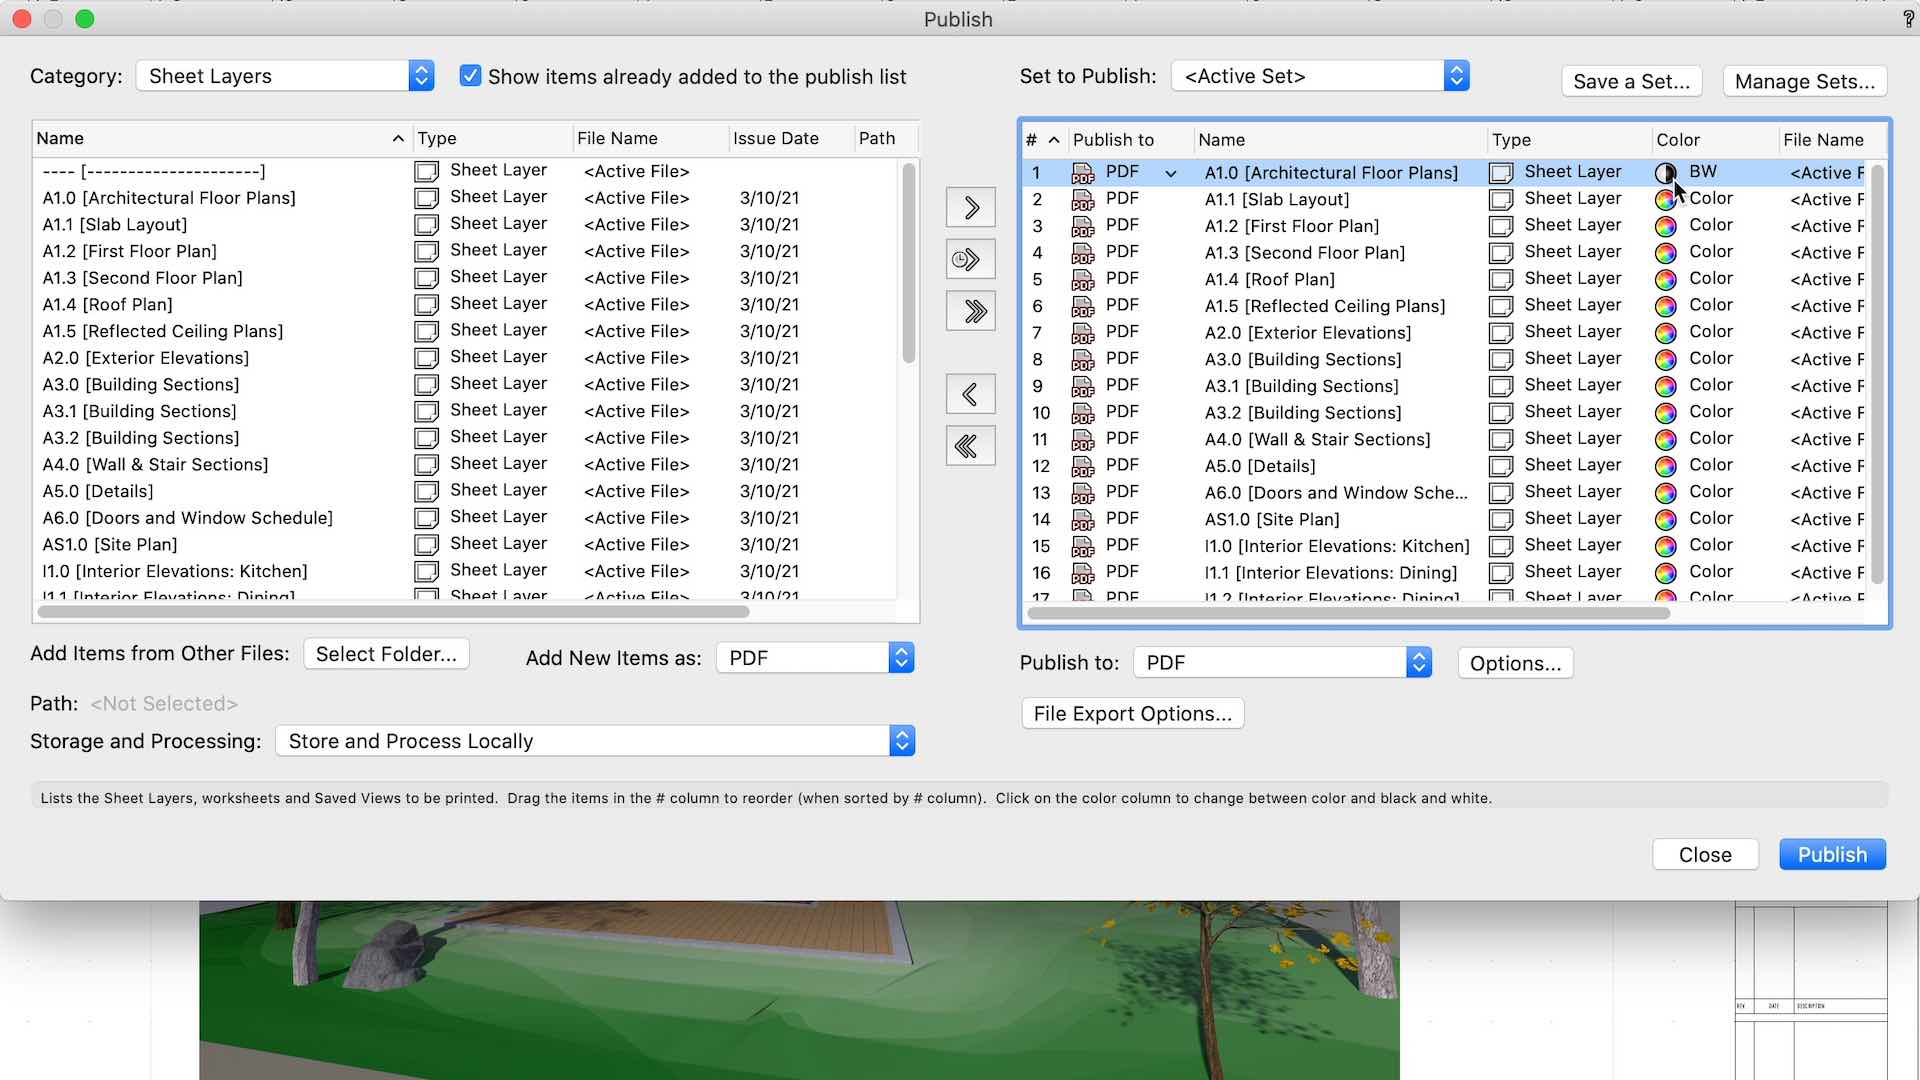
In this session, we will explore adding a final layer of detail to our model with Interior Elevation and Detail Viewports before reviewing Vectorworks' Data Visualization features. Then, finally, we will examine the Publishing options and share our designs with the world!
Category: Architect Certification 2024
Requires Approval: No
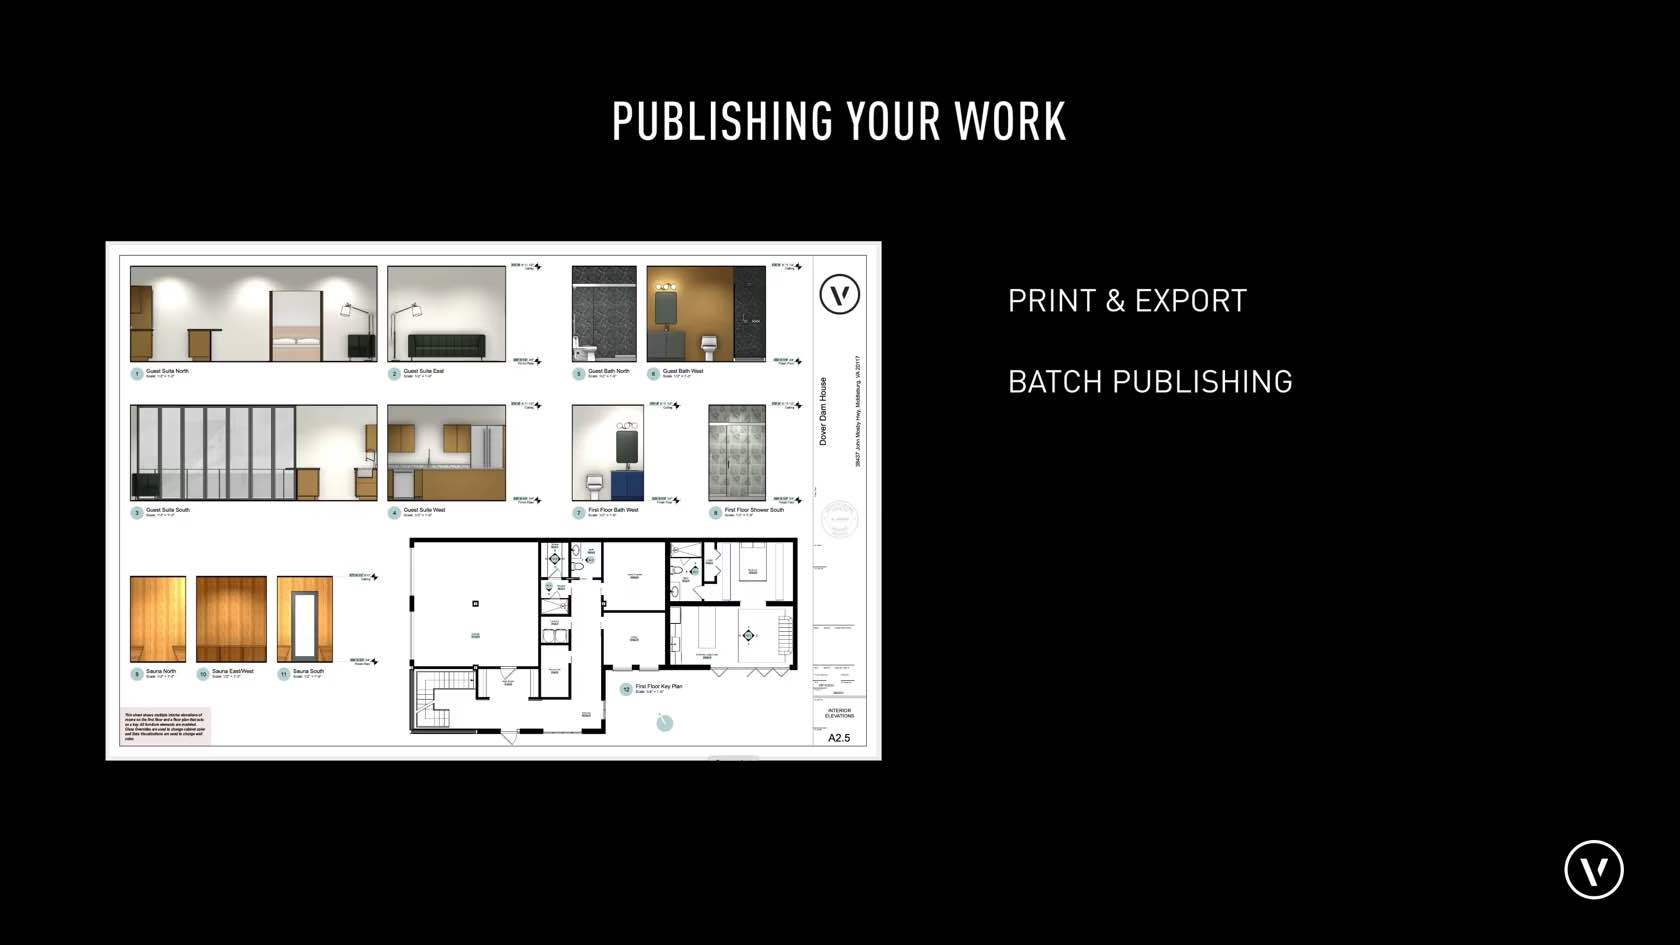
This course introduces the publishing section for the Core VCA Certification.
Category: Skill
Requires Approval: No

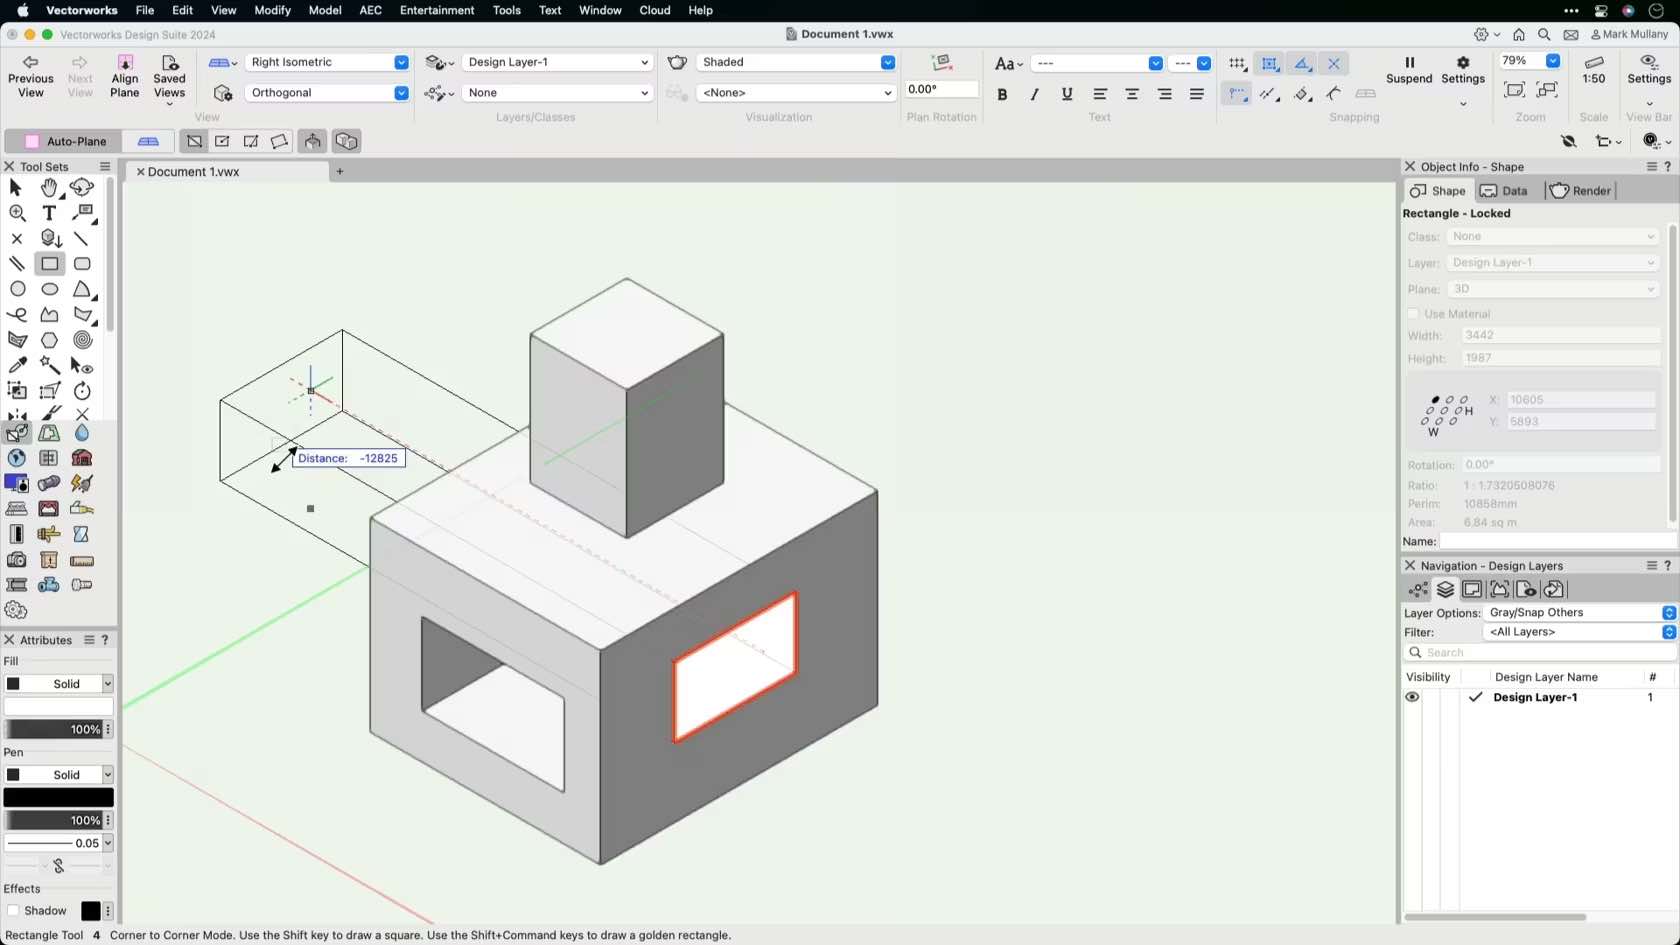
Quick command preferences are a great way to set up shortcuts to certain document preferences. In this course, we will discuss how to access and work with these preferences.
Category: Skill
Requires Approval: No
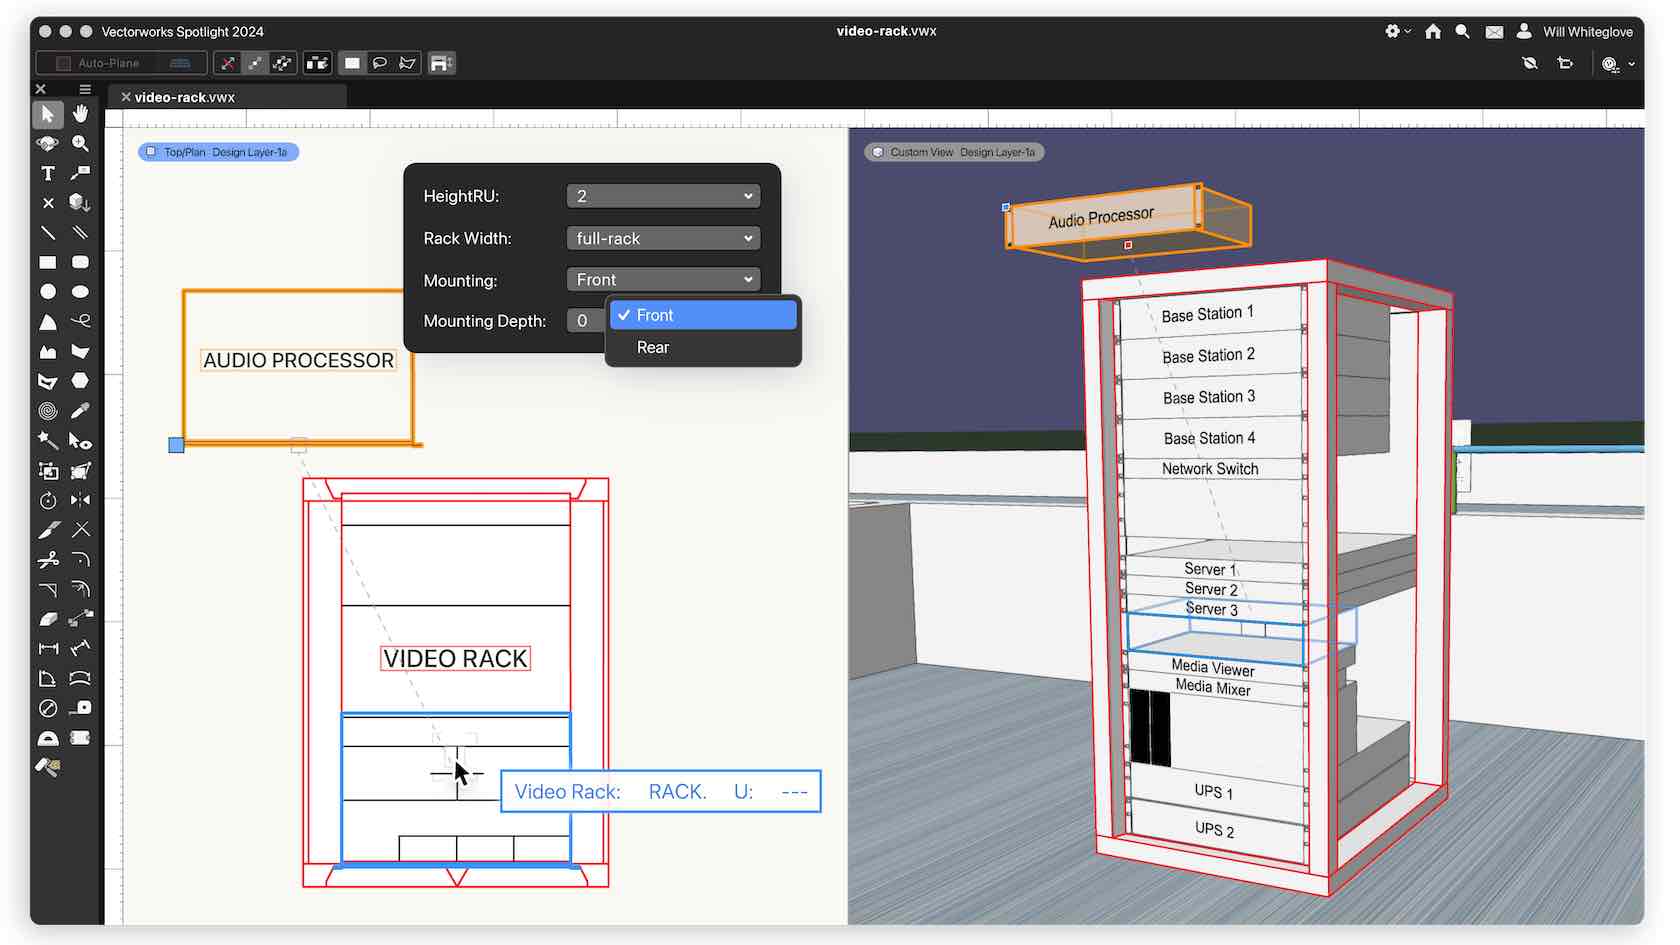
Layout rooms and rack planning updates in Vectorworks 2024 open new planning and design possibilities for your A/V workflows.
This webinar, hosted by Jesse Cogdell, European entertainment product specialist, will explore how your new workflow will function, and how you can leverage the latest features in ConnectCAD in Vectorworks 2024.
Category: Entertainment
Requires Approval: No
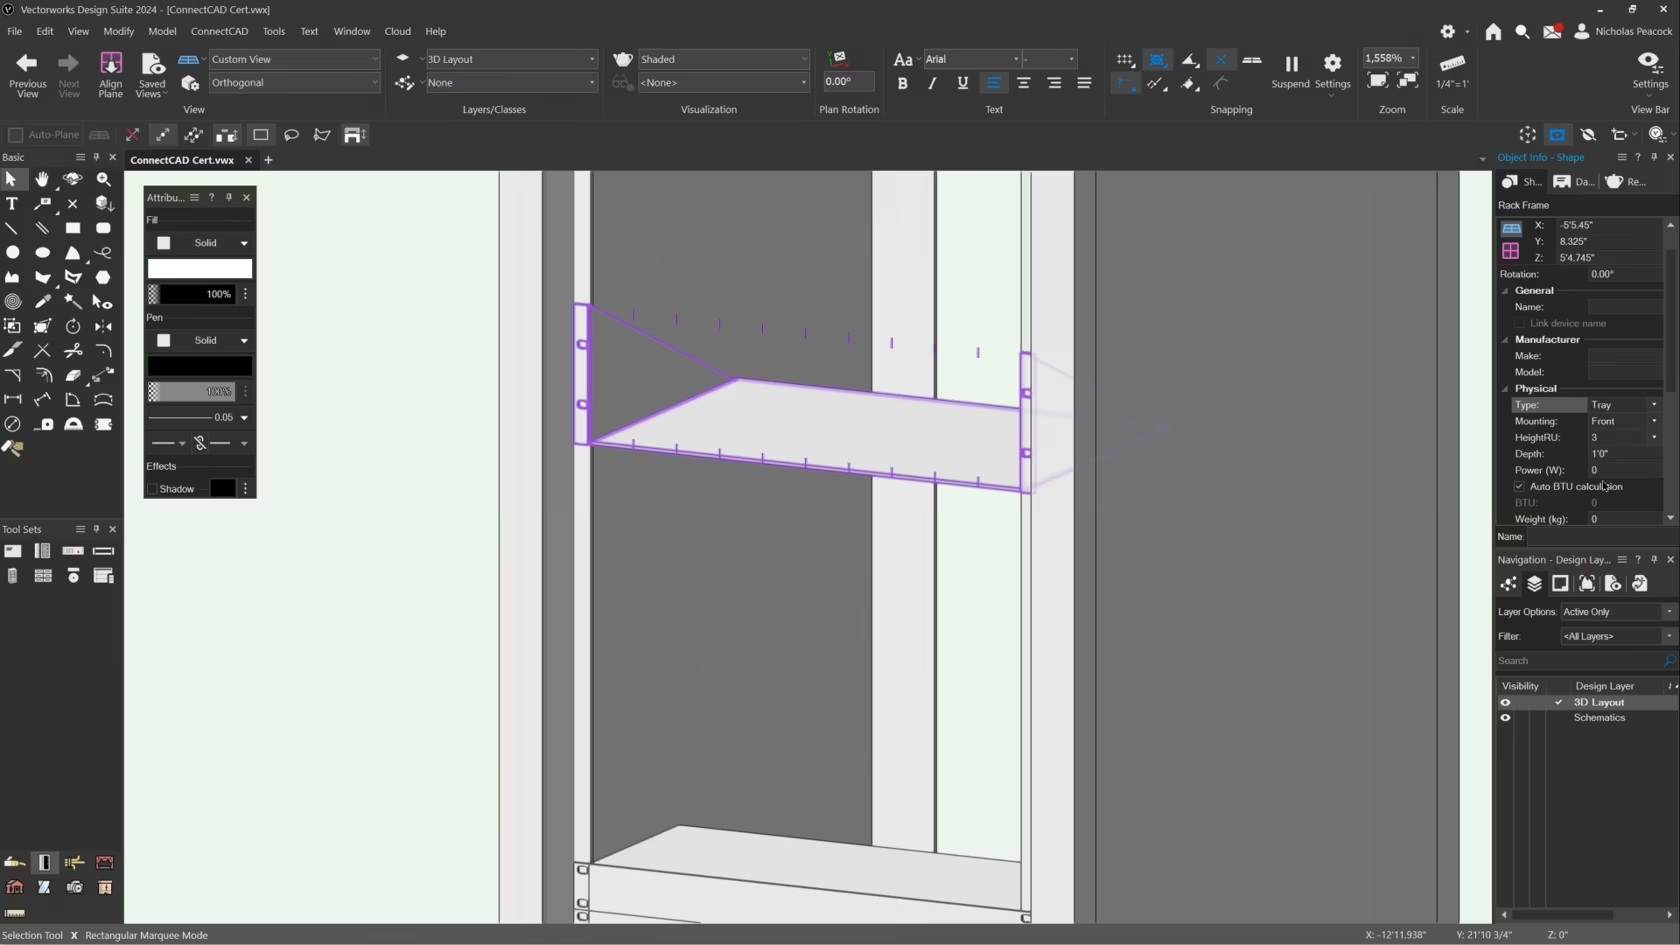
In this video, we will cover the basics of the Rack Frame Tool.
Category: (2024) Skill
Requires Approval: No
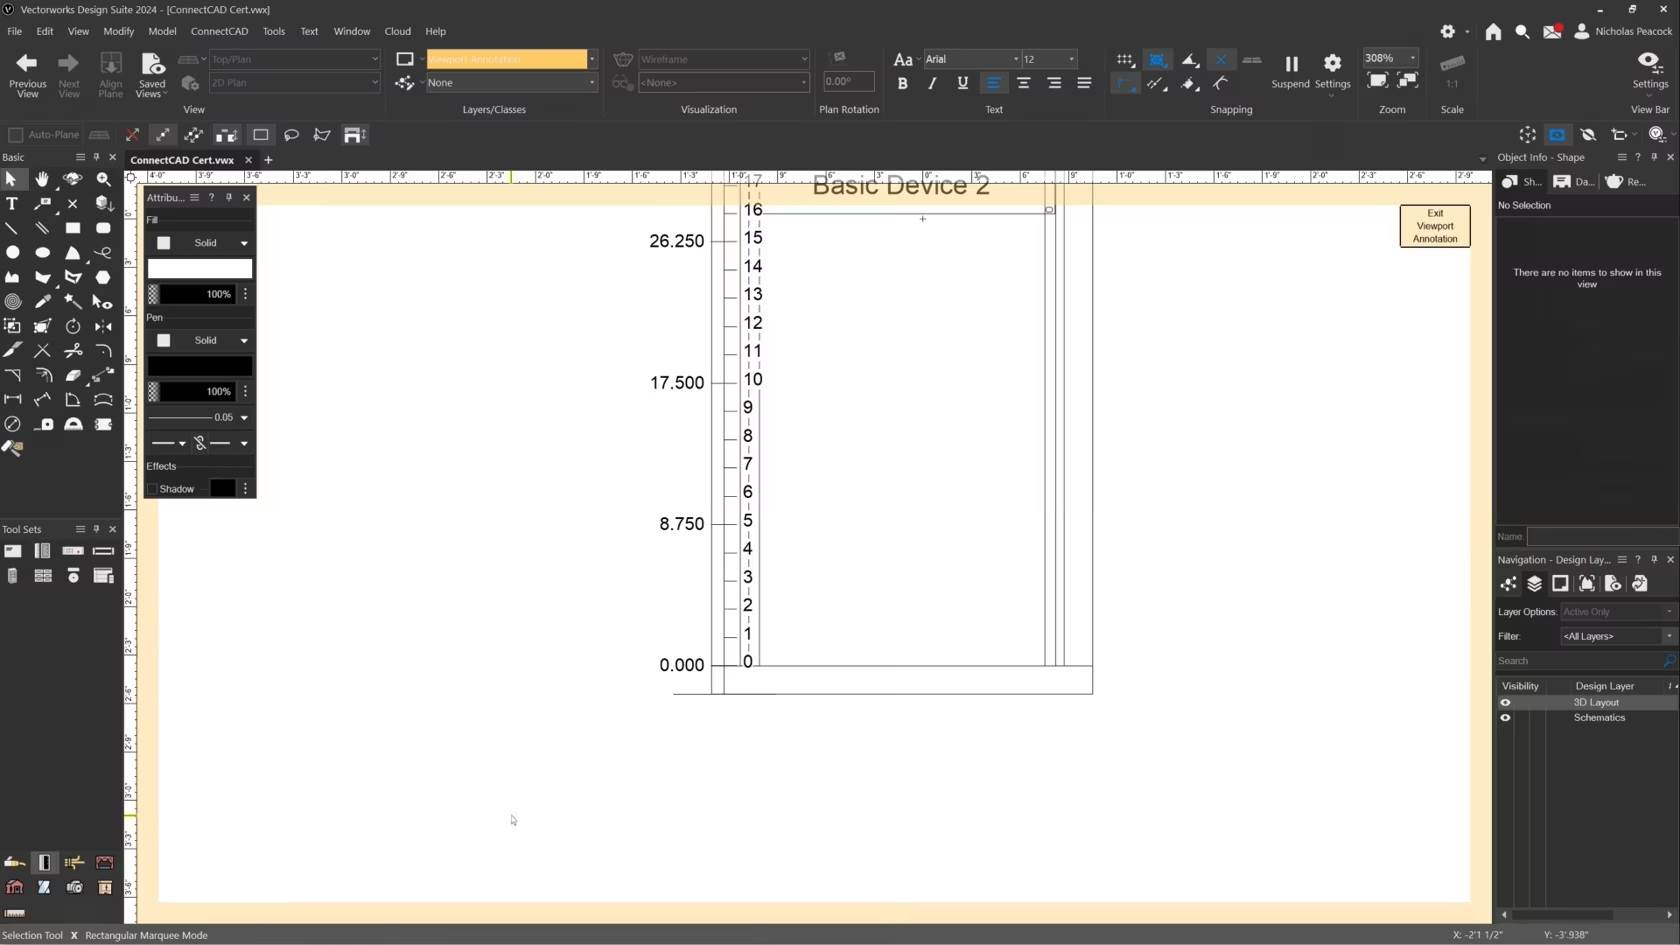
In this video, we will cover the basics of the Rack Ruler Tool.
Category: (2024) Skill
Requires Approval: No
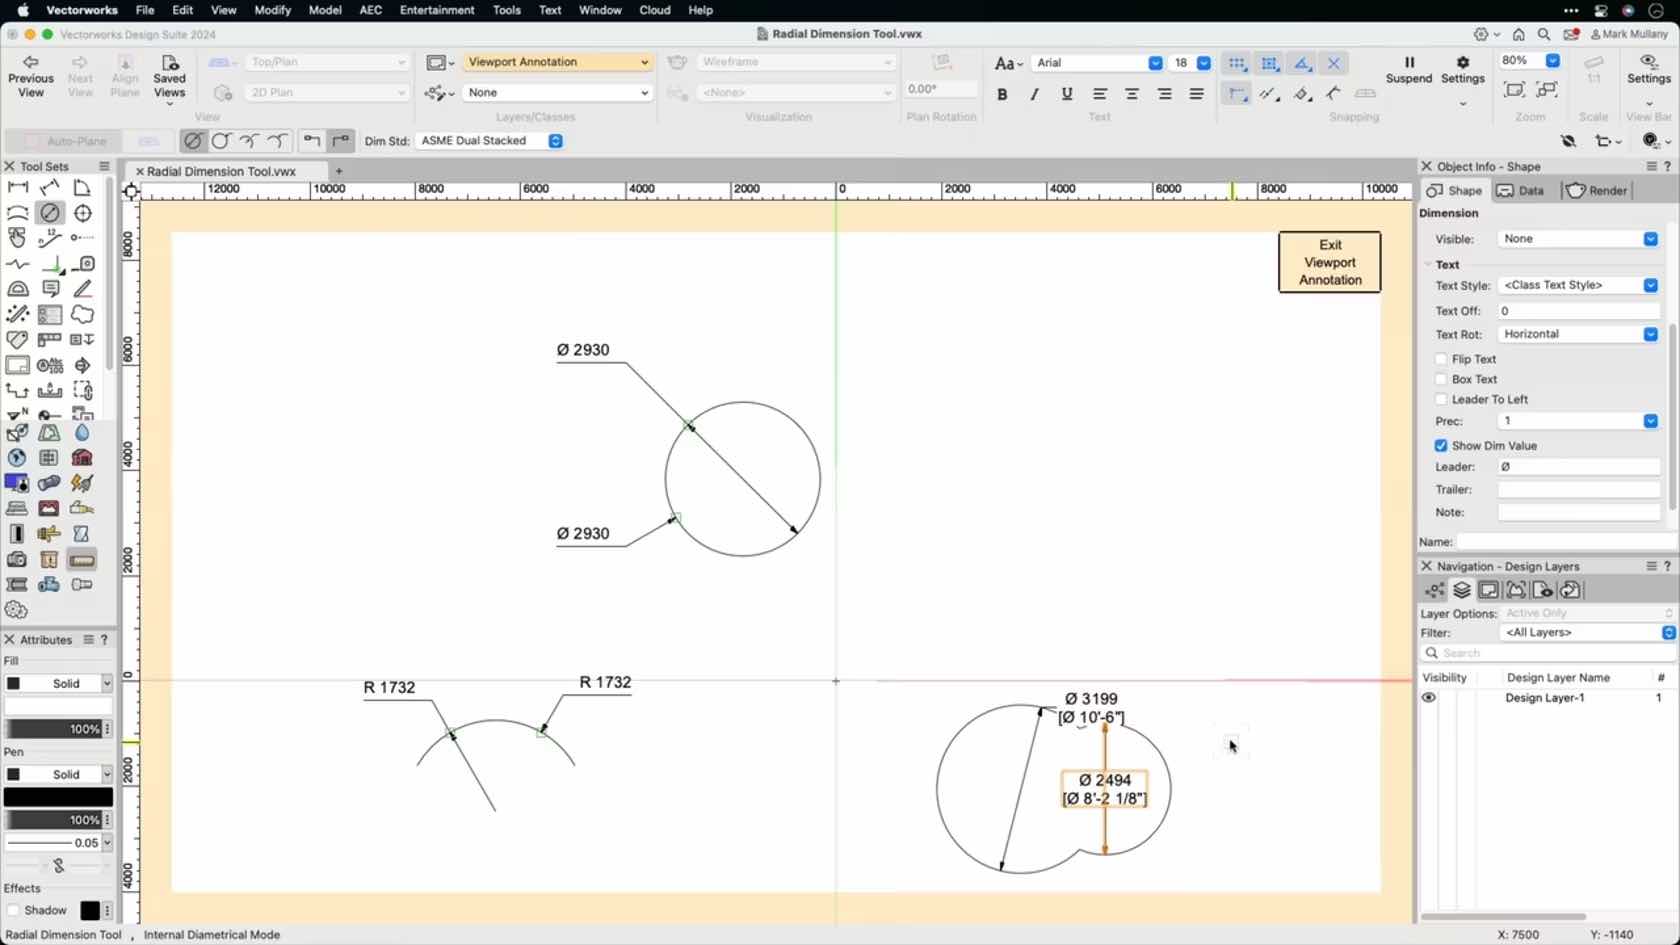
Die 3D-Planung einer Zufahrtsrampe beispielsweise in eine Tiefgarage ist eine anspruchsvolle Angelegenheit. Nicht nur ist die gekrümmte Form dieses Bauteils mit sauberen Anschlüssen an Strasse und Einfahrt bei engen Platzverhältnissen nicht einfach zu modellieren. Gleichzeitig müssen zahlreiche komplexe Regeln und Empfehlungen eingehalten werden zu Neigung, Gefälle, Befahrbarkeit usw. Marcellus Schwarz (Ing. TU Arch SIA) und CAD-Expertin Noémie Kölliker zeigen Ihnen in diesem Webinar Schritt für Schritt, wie Sie solche Aufgaben mit Vectorworks Architektur oder Vectorworks Landschaft elegant und regelkonform lösen.
(Für Version 2024)
Beispieldateien "Rampe" hier herunter laden
Category: Featured
Requires Approval: No

Lernen Sie das Werkzeug regelmäßiges Vieleck kennen.
Category: Erste Schritte 2024
Requires Approval: No
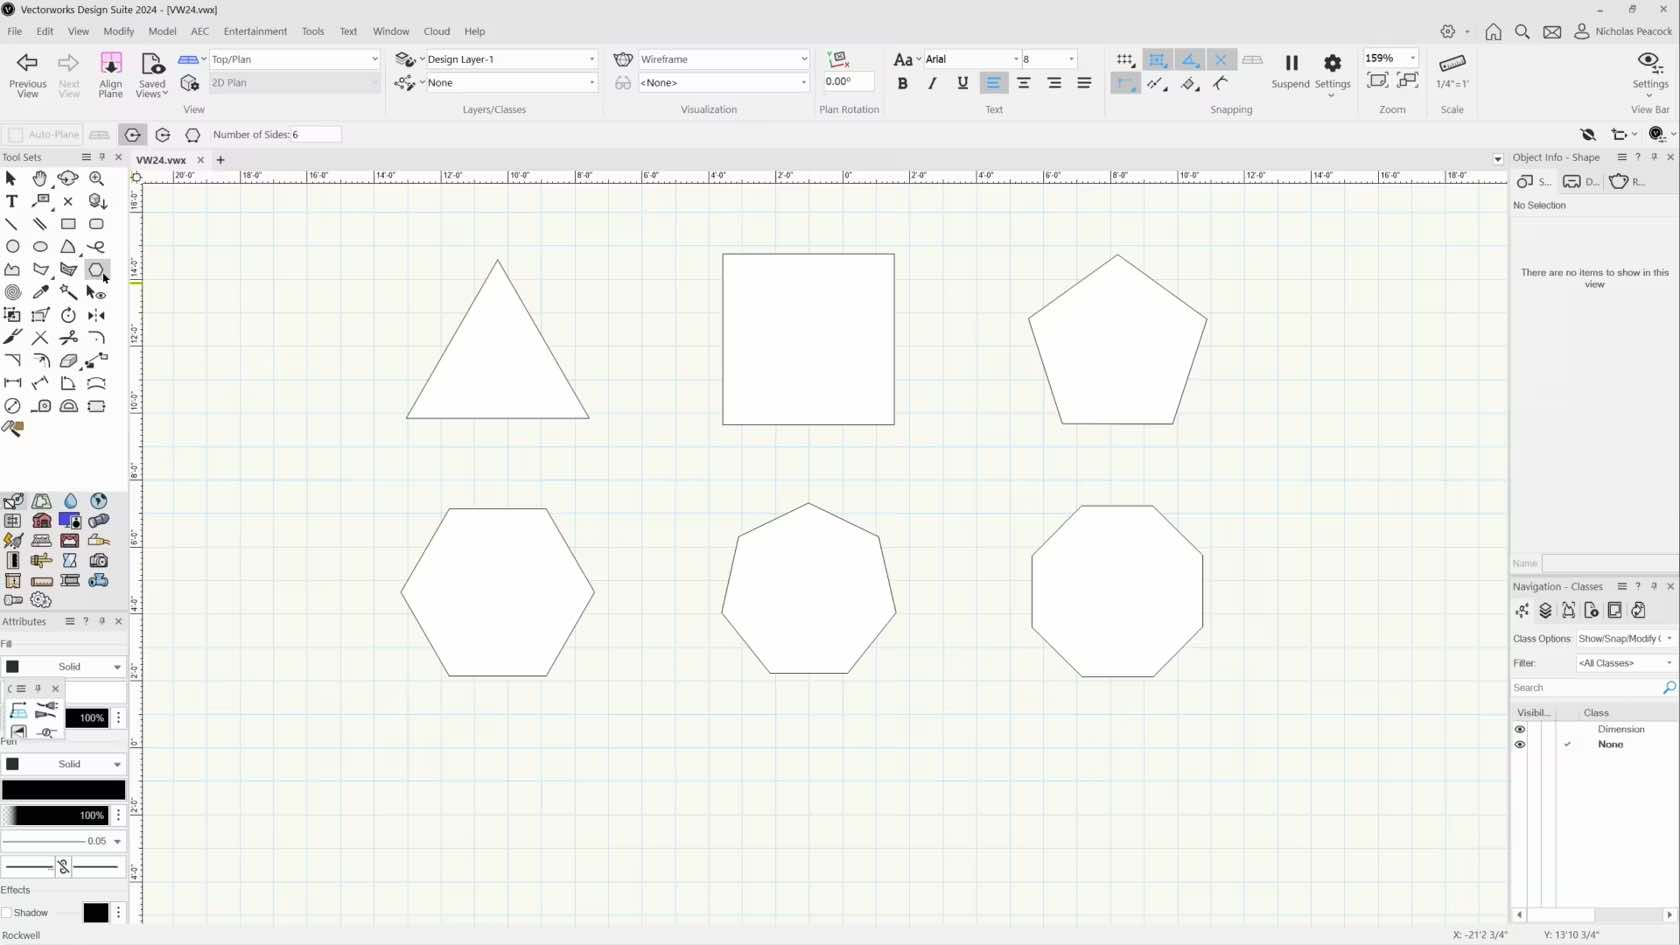
In this course, we will gain an understanding the purpose of the Regular Polygon Tool and the various drawing tools.
Category: Skill
Requires Approval: No
Finally, we’ll present our drawings. We'll make line drawings for room
layouts, light plots, and rigging schedules. Then we'll use camera
viewports to make fully rendered images using render styles, textures,
and lighting options. We'll wrap it up by publishing our final drawing
sets.
Category: Spotlight Certification 2024
Requires Approval: No
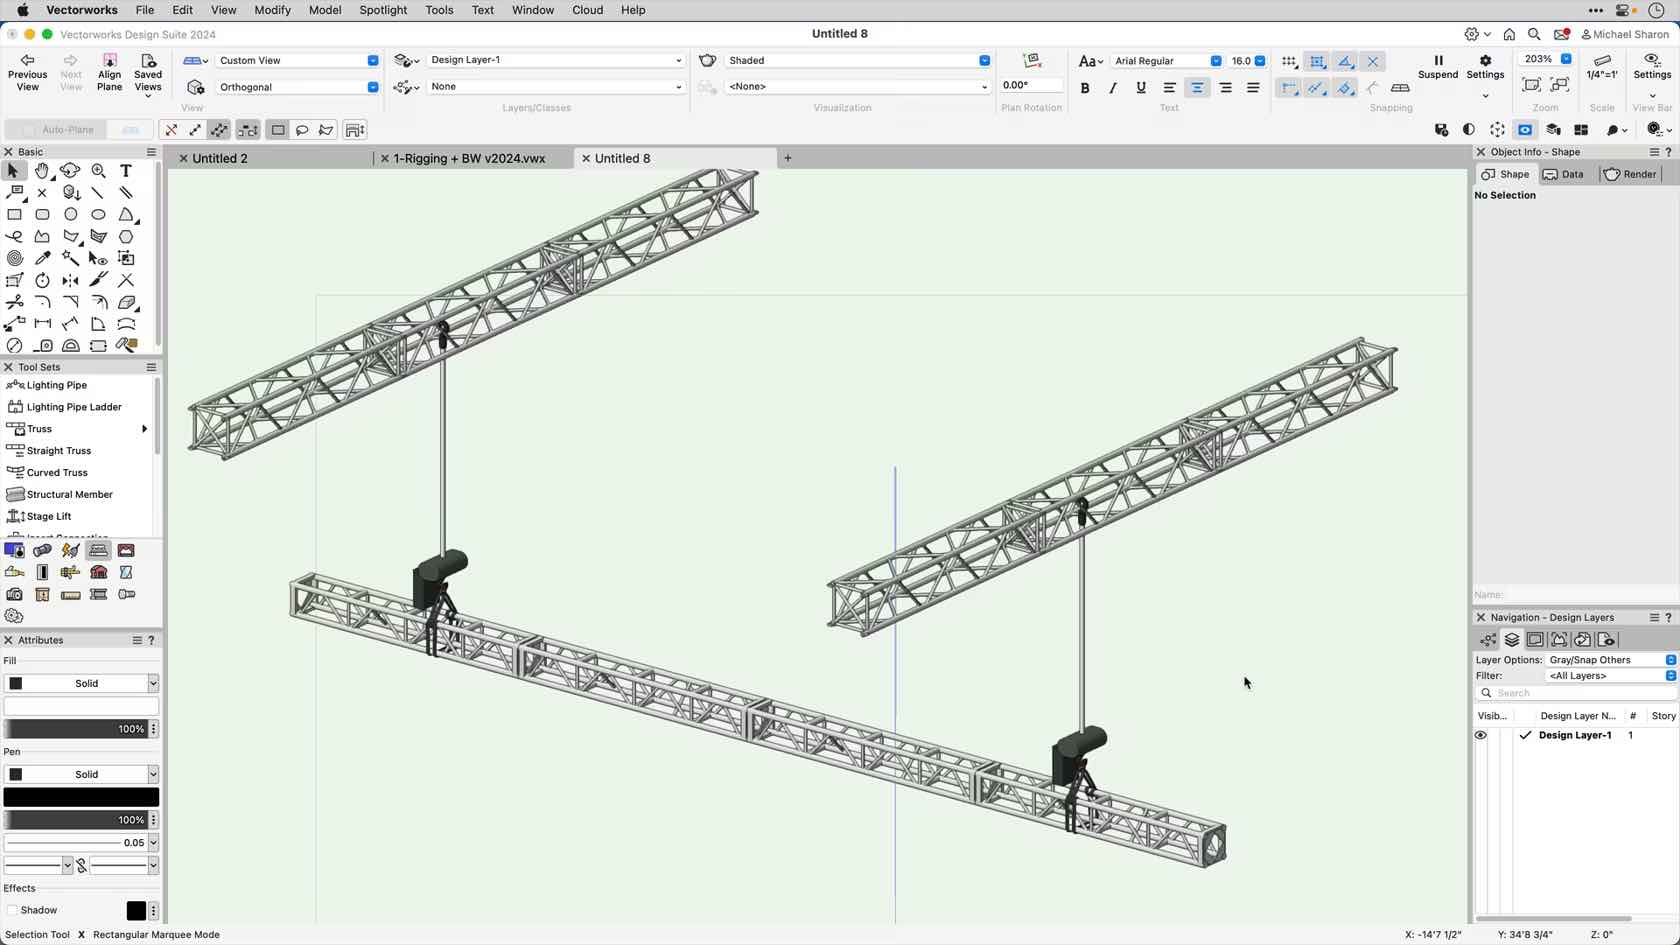
This video will demonstrate how to replace one length of truss with a compatible truss of a different length.
Category: CHAPTER 2
Requires Approval: No
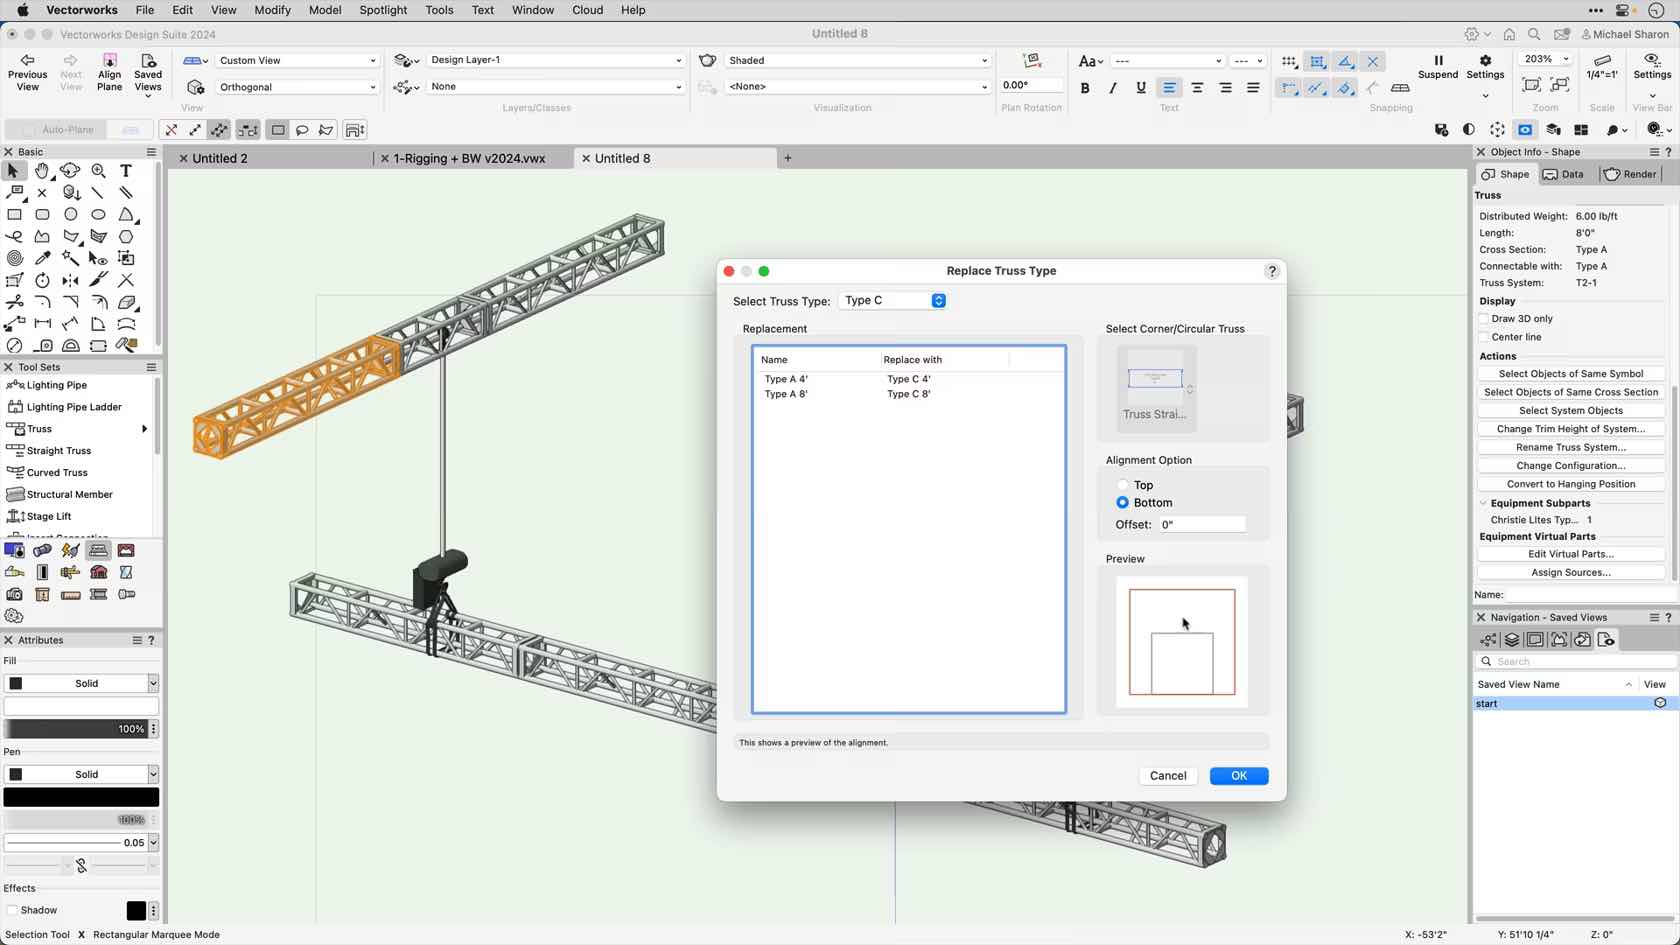
This video will demonstrate how to replace one type of truss with another type in a rigging system.
Category: CHAPTER 2
Requires Approval: No
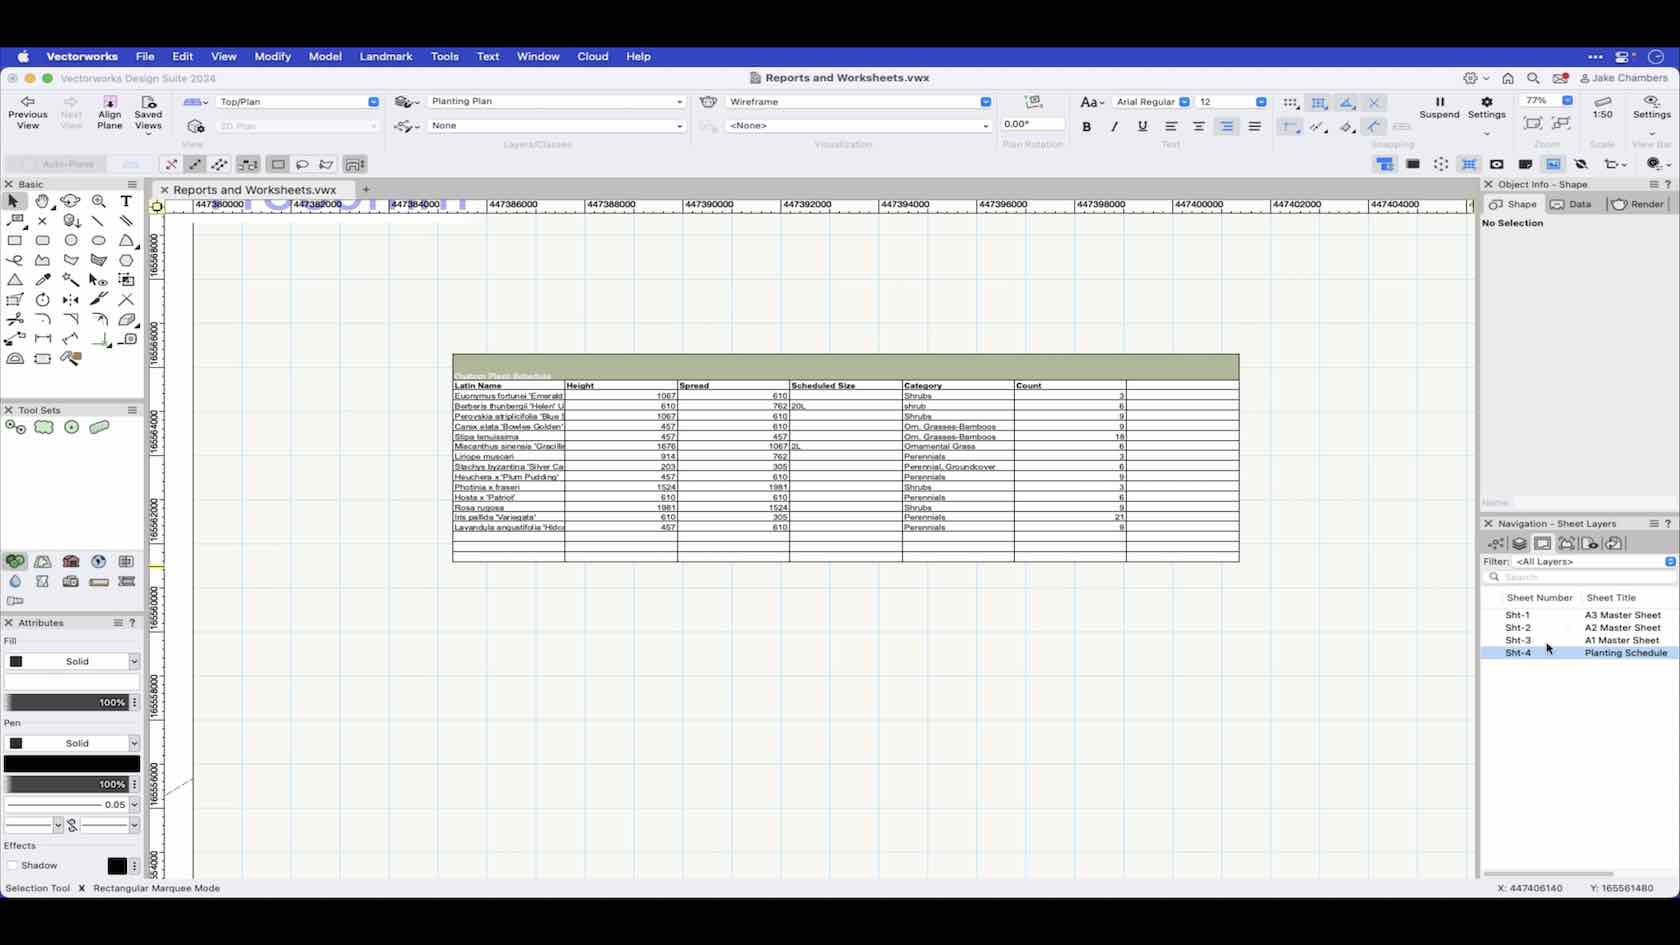
In this video we will look at how we can create a simple planting schedule by creating a custom worksheet/report.
Category: Landmark 2024 Certificaiton
Requires Approval: No
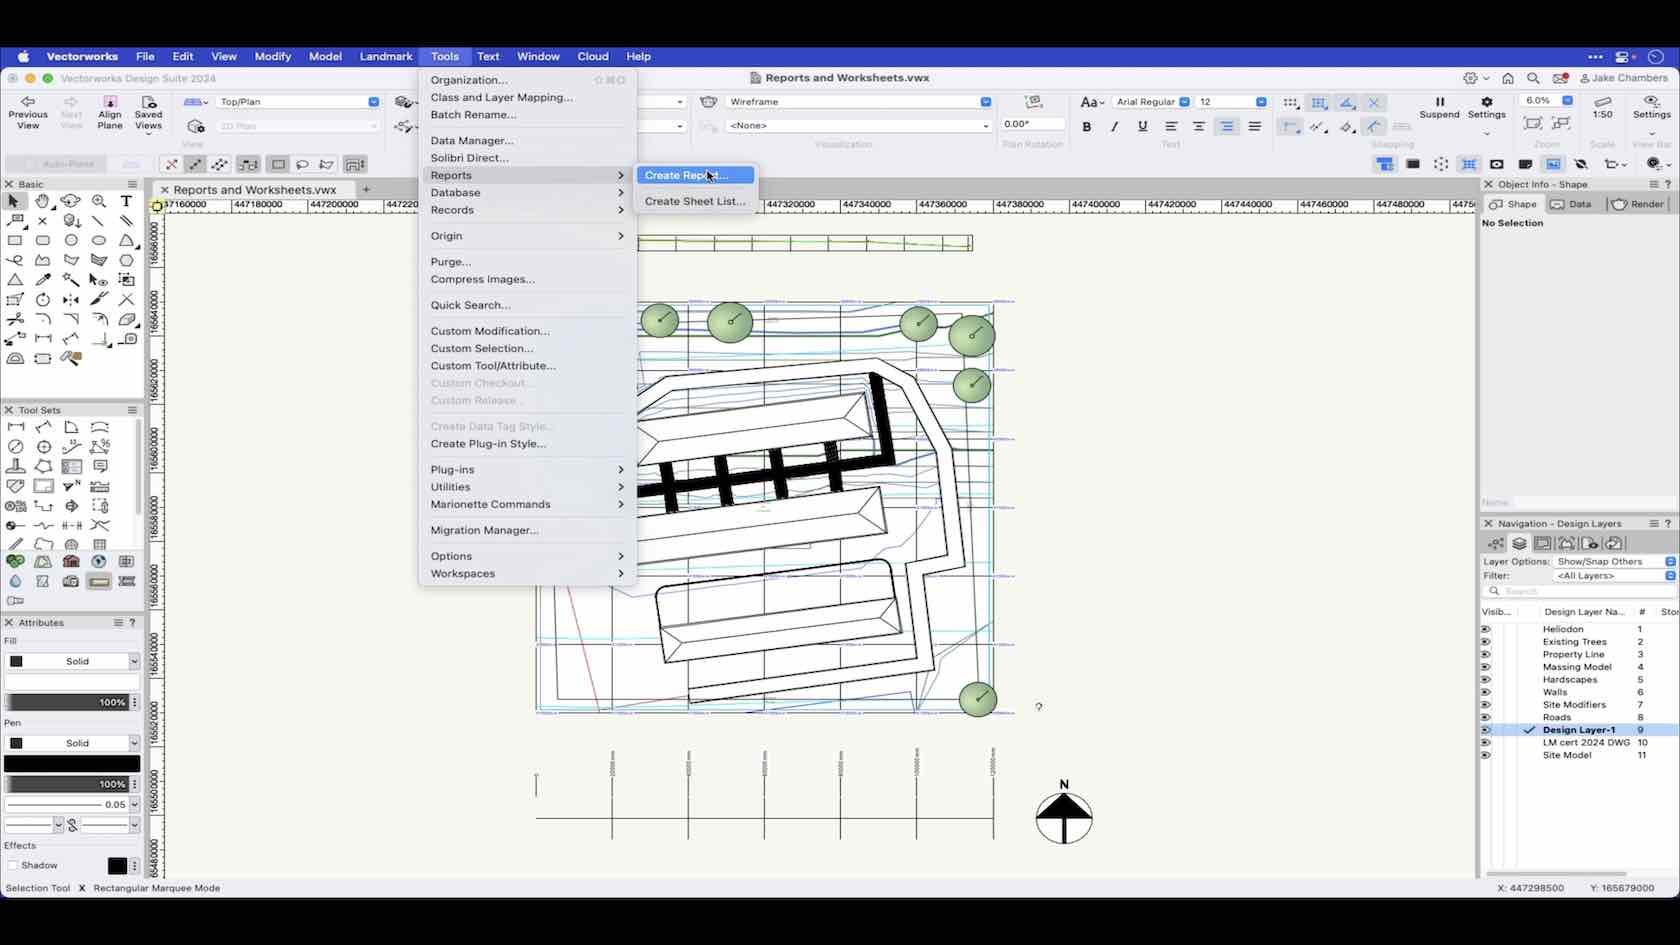
Explore how the reshape tool can be used to modify 2D shapes and objects created from 2D shapes.
Category: Skill
Requires Approval: No
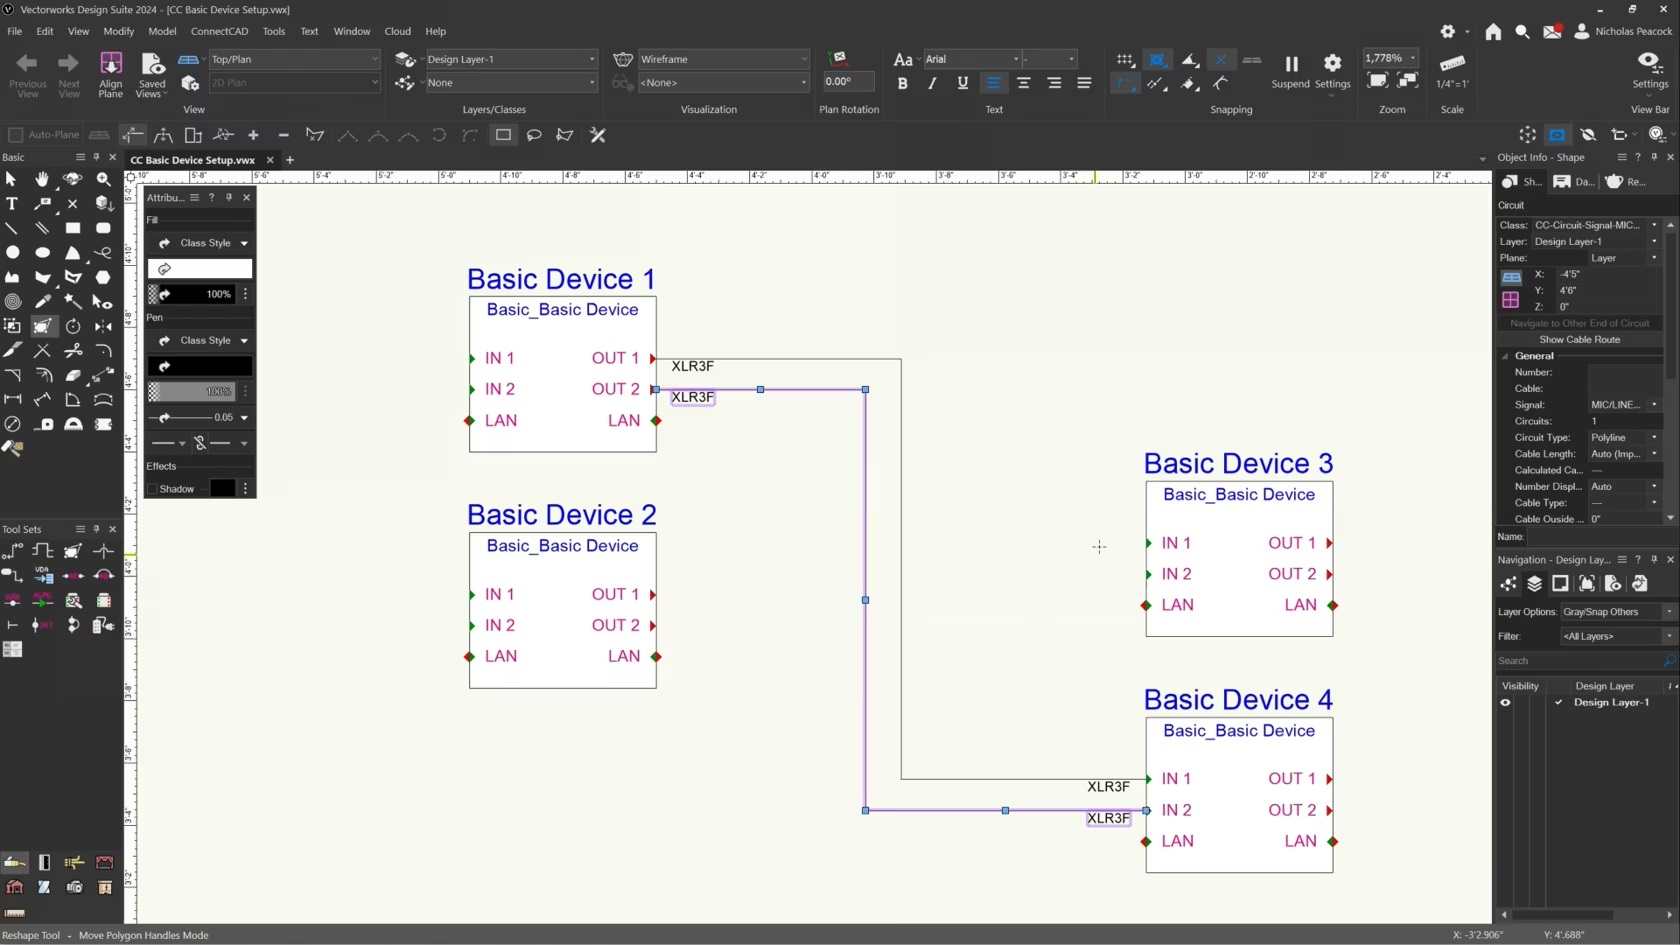
In this video, we will cover the basics of the Reshape Tool for ConnectCAD.
Category: (2024) Skill
Requires Approval: No
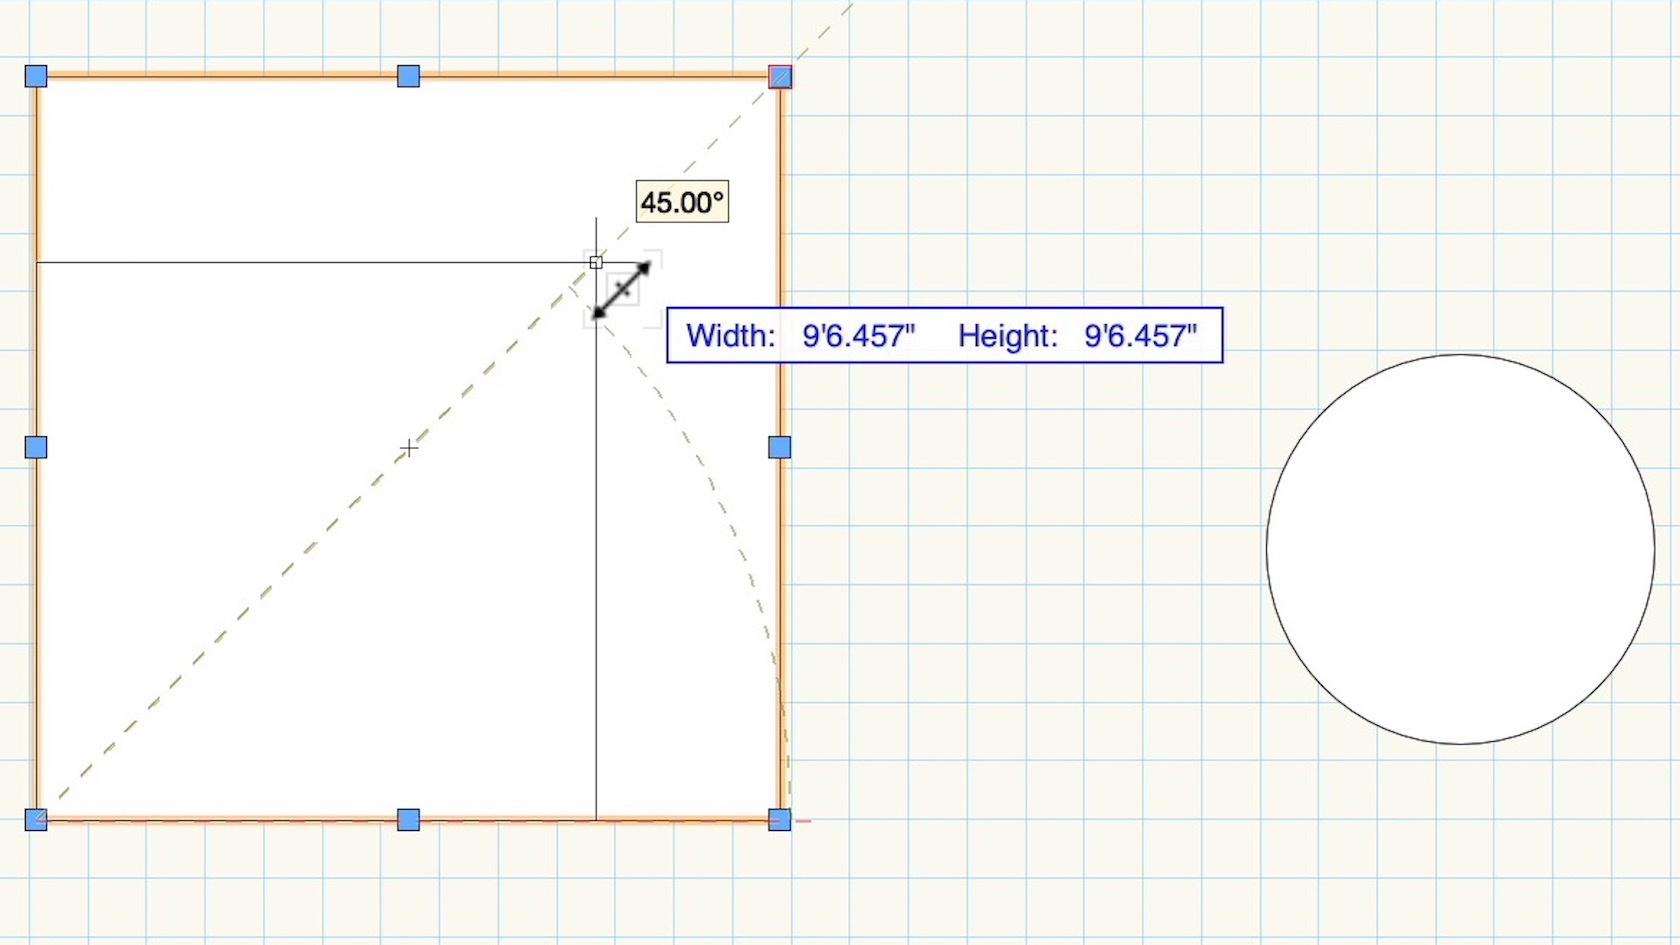

This course provides an overview to the organizing and saving resources using the Resource Manager.
Category: Skill
Requires Approval: No
In this video, we will discuss the layout and general operation of the Resource Manager. We will look at the different options and common questions we receive about it.
Category: Skill
Requires Approval: No
This course demonstrates how to organize resources using the Resource Manager and save Resources to an existing Favorites File.
Category: Skill
Requires Approval: No

Use the Resource Manager to manage resources in the current file, and to access resources in other files.
Category: Landmark 2024 Certificaiton
Requires Approval: No
Participants will add lighting pipes, lighting pipe ladders, and explore
the various truss tools. We will also add hanging positions and attach
different rigging elements to our design. We will add and attach hoists
and Hoist Origins and begin working with the attached data.
Category: Spotlight Certification 2024
Requires Approval: No
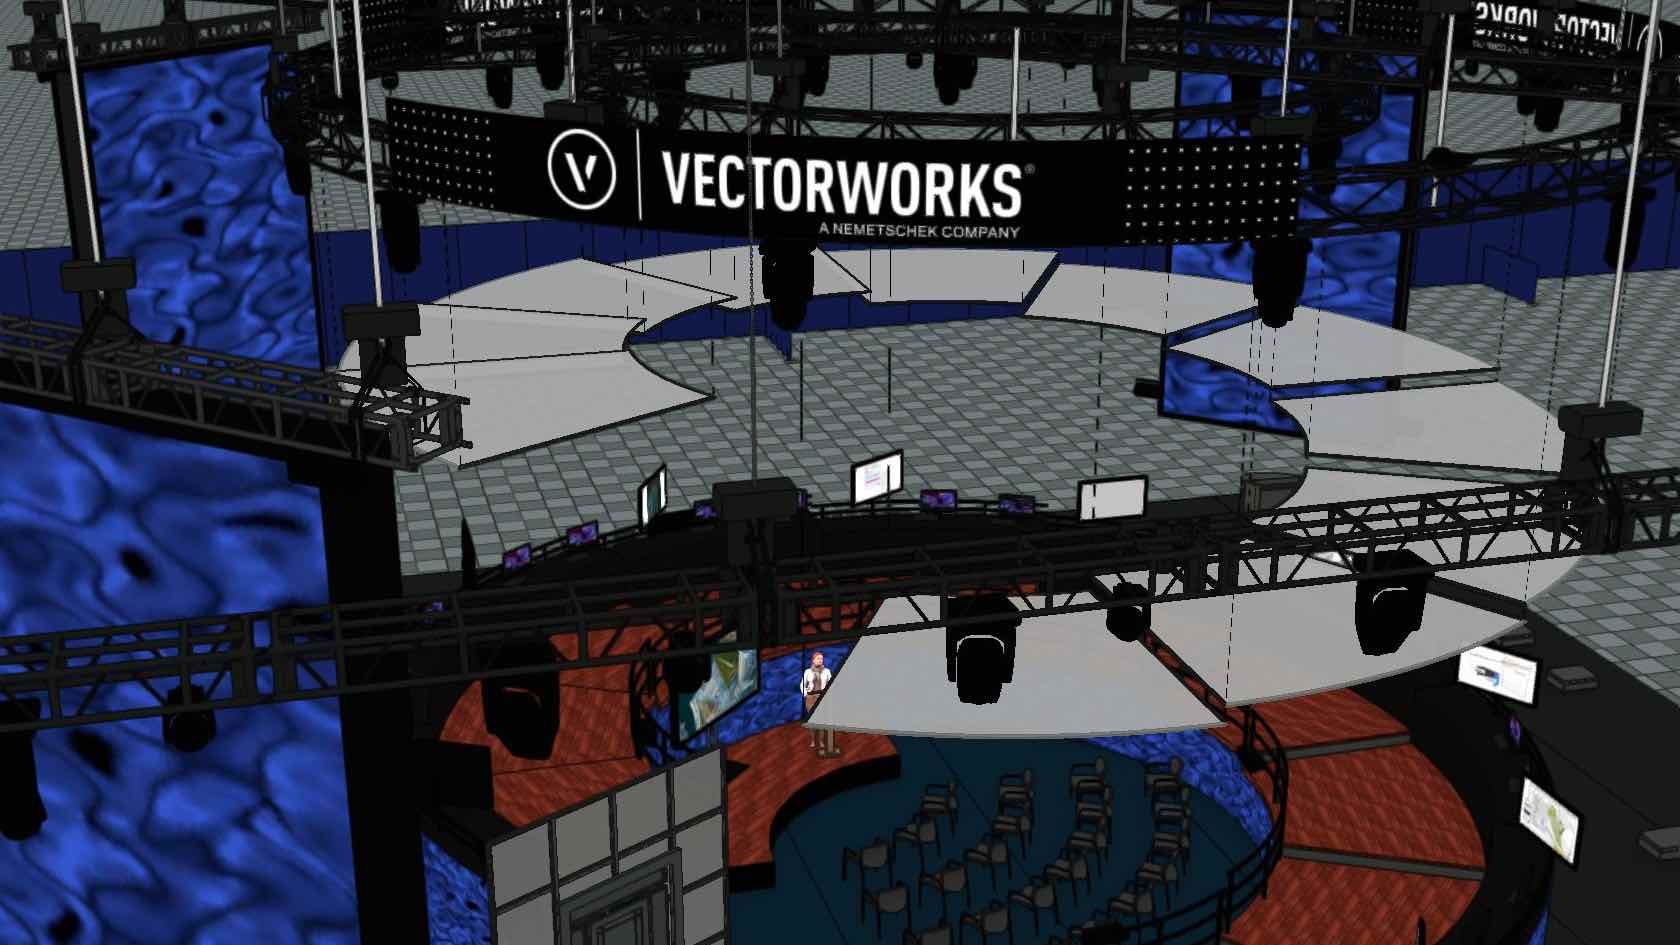
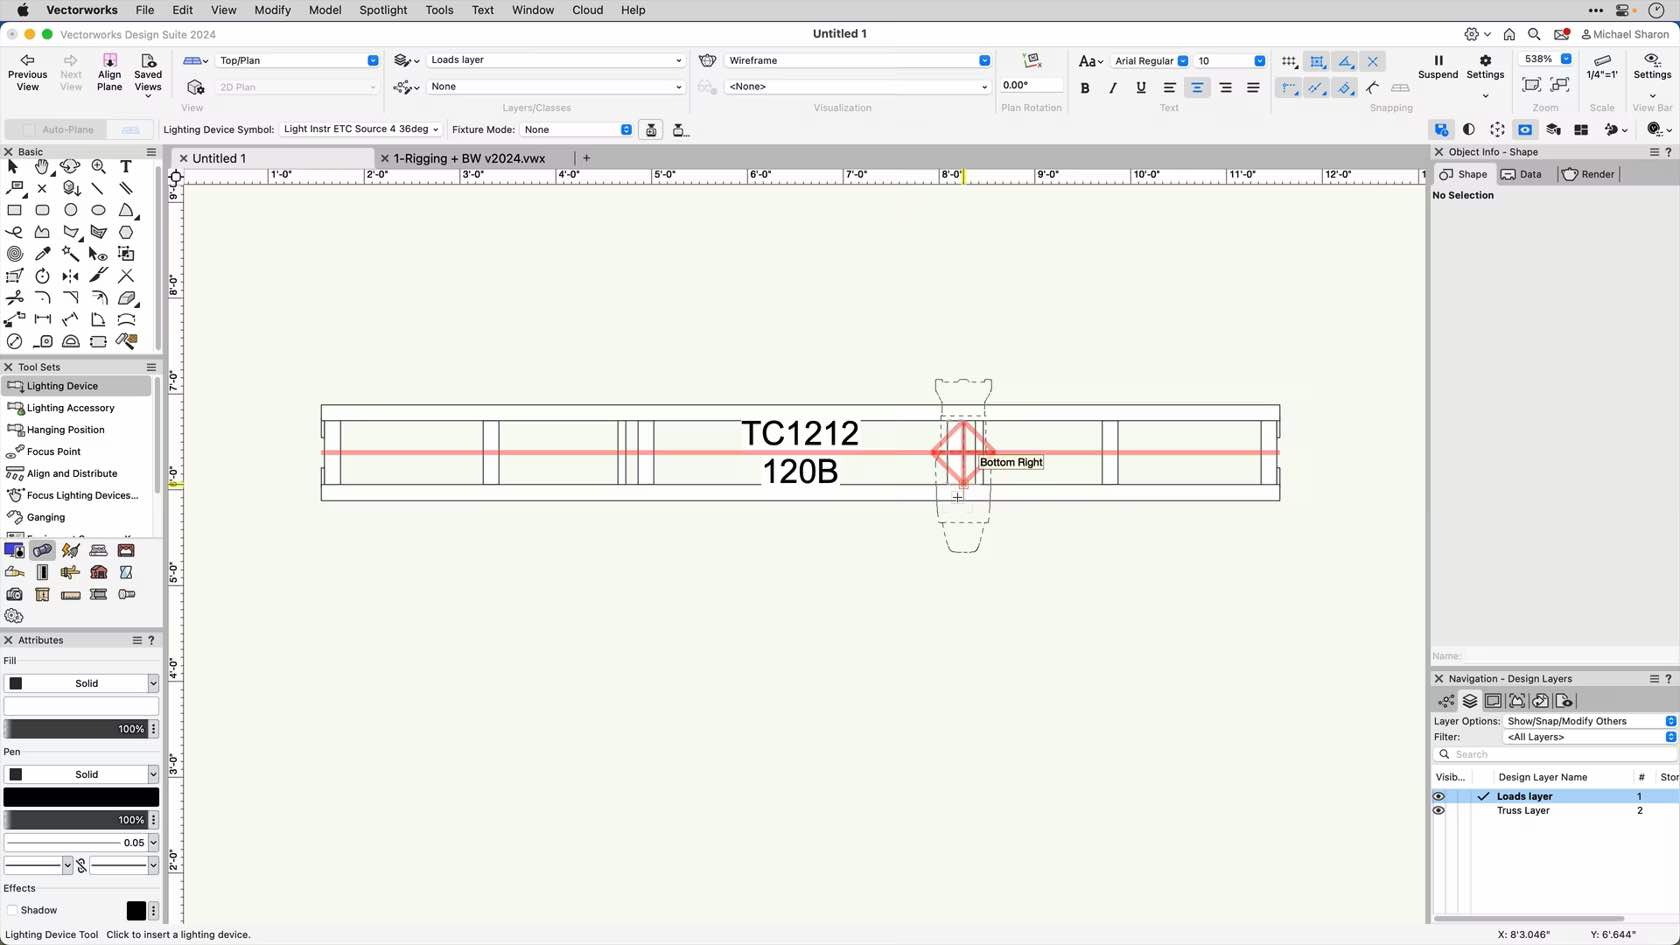
This course will demonstrate how to connect loads to rigging objects, use the Manage Loads tool as well as the Rigging Loads tool.
Category: Chapter 3 Loads
Requires Approval: No
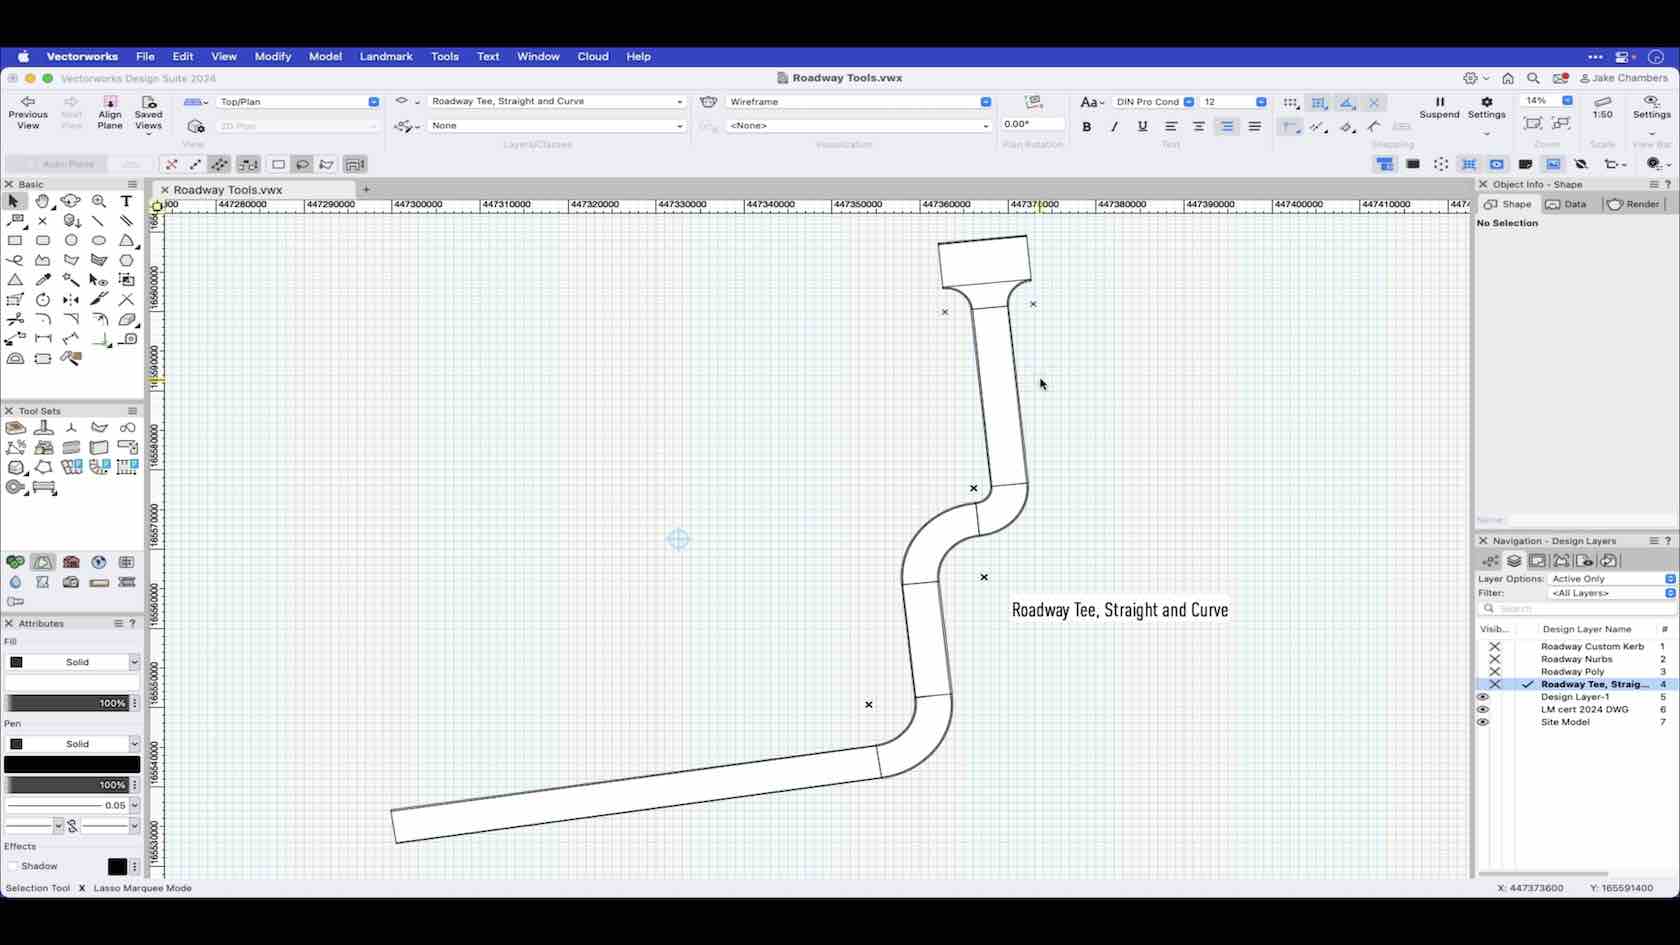

Simple roadway tools allow you to assemble and join straight and curved roadway sections. This video demonstrates how to use the Roadway Custom kerb.
Category: Landmark 2024 Certificaiton
Requires Approval: No
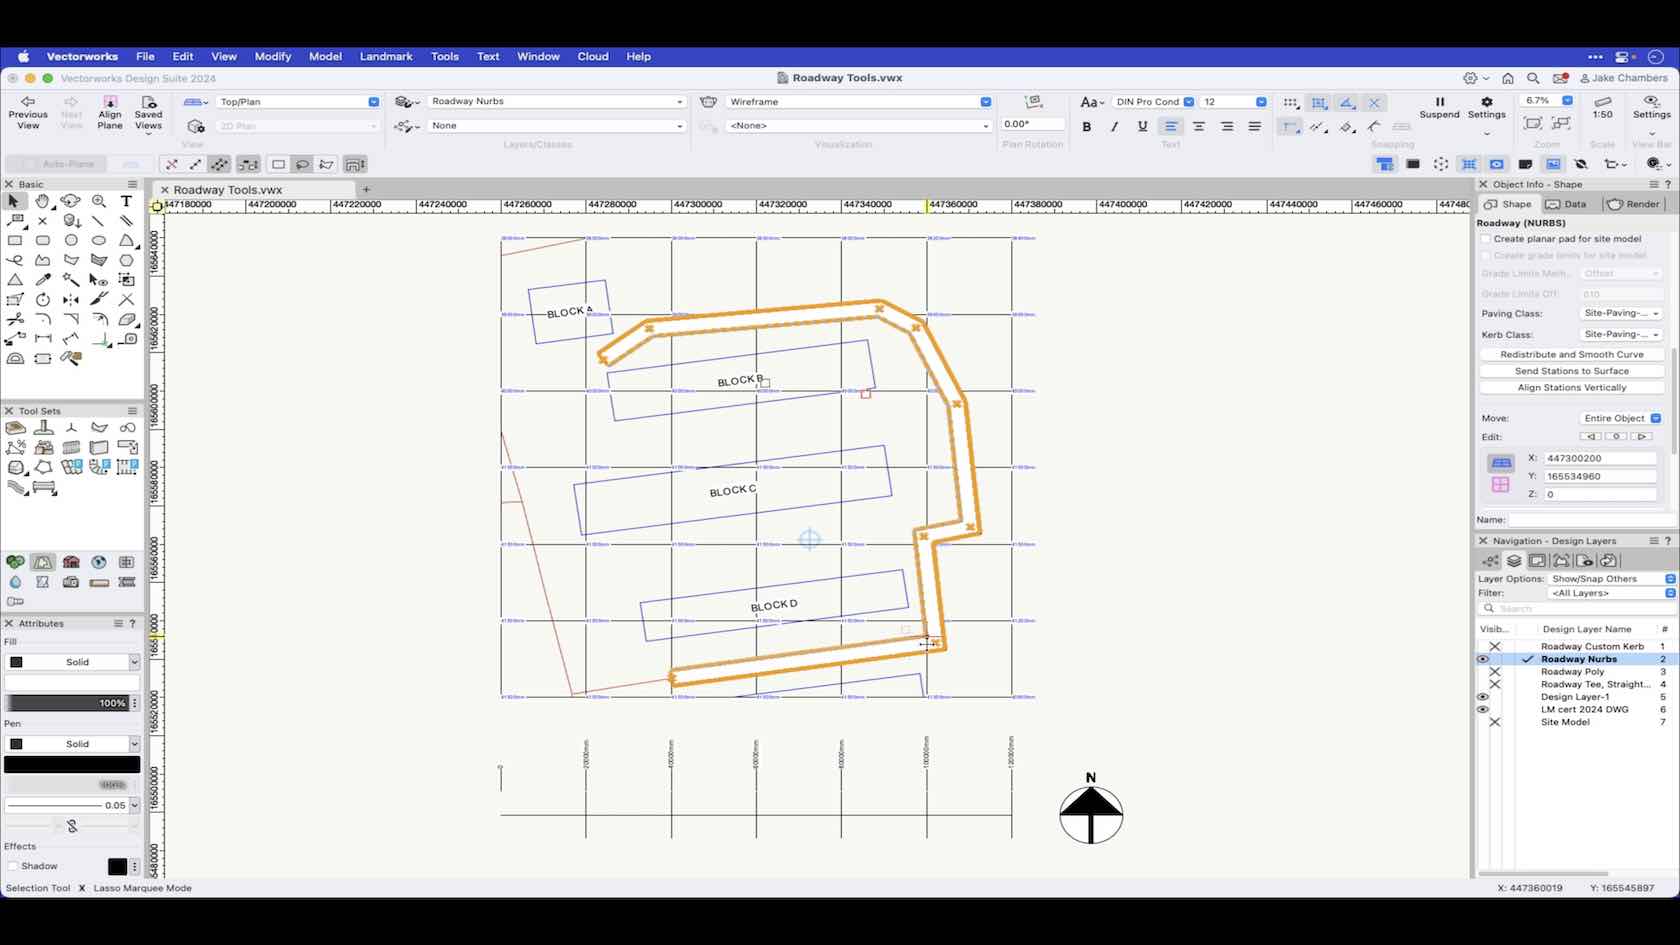
Simple roadway tools allow you to assemble and join straight and curved roadway sections. This video demonstrates how to use the Roadway Nurbs
Category: Landmark 2024 Certificaiton
Requires Approval: No
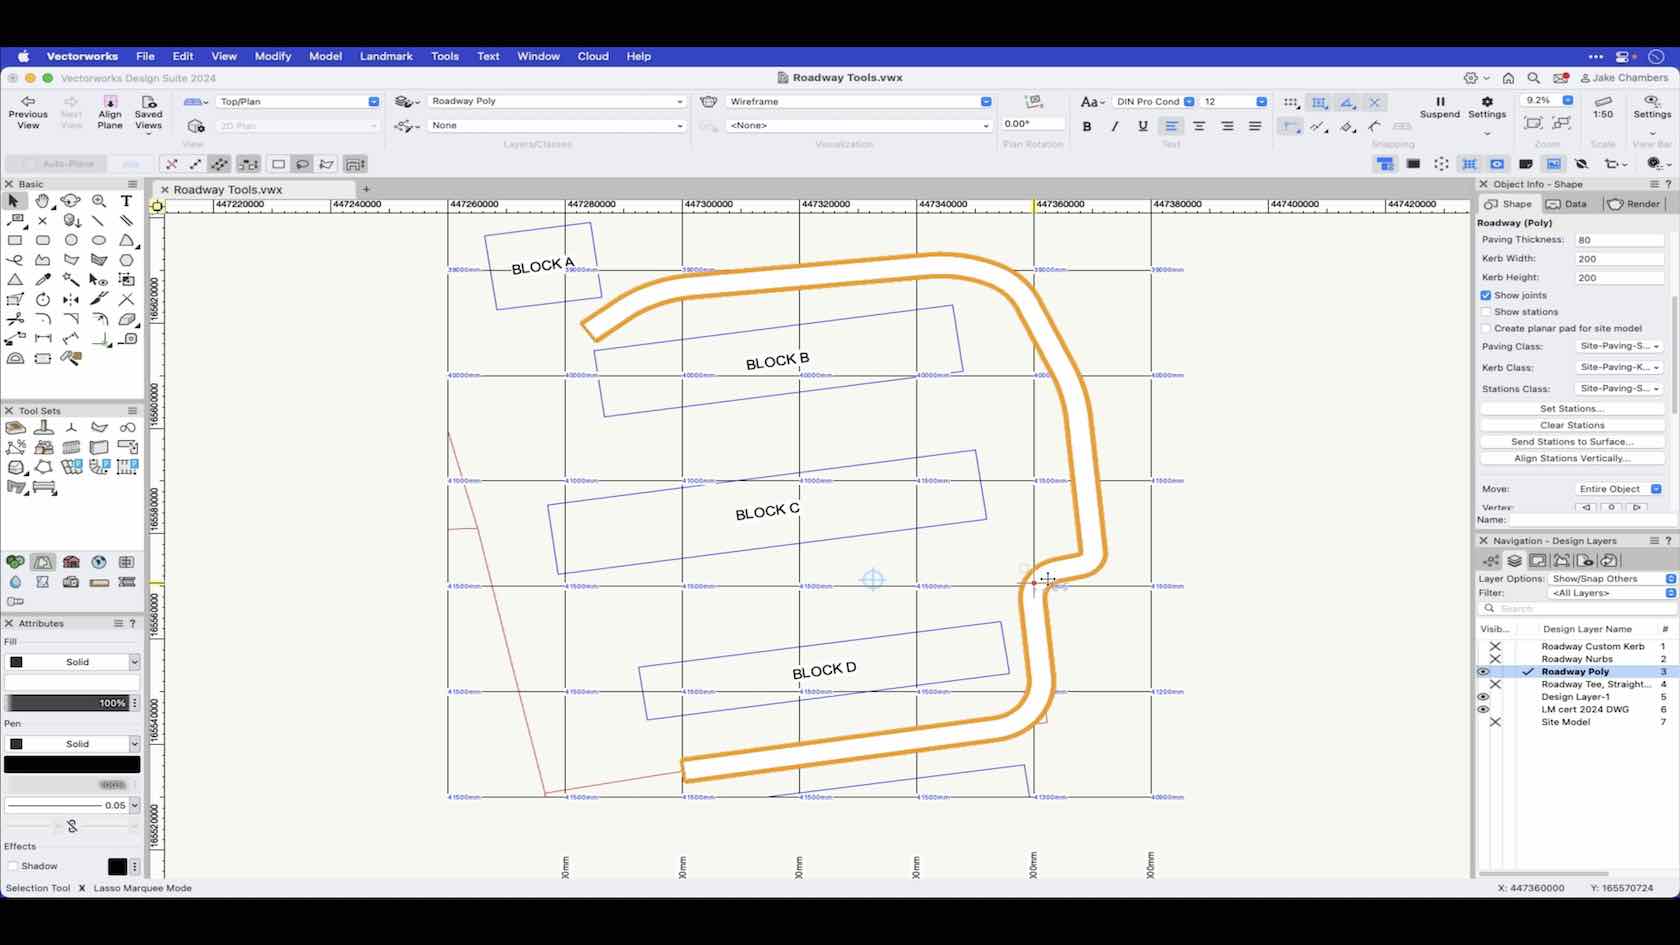
Simple roadway tools allow you to assemble and join straight and curved roadway sections. This video demonstrates how to use the Roadway poly.
Category: Landmark 2024 Certificaiton
Requires Approval: No
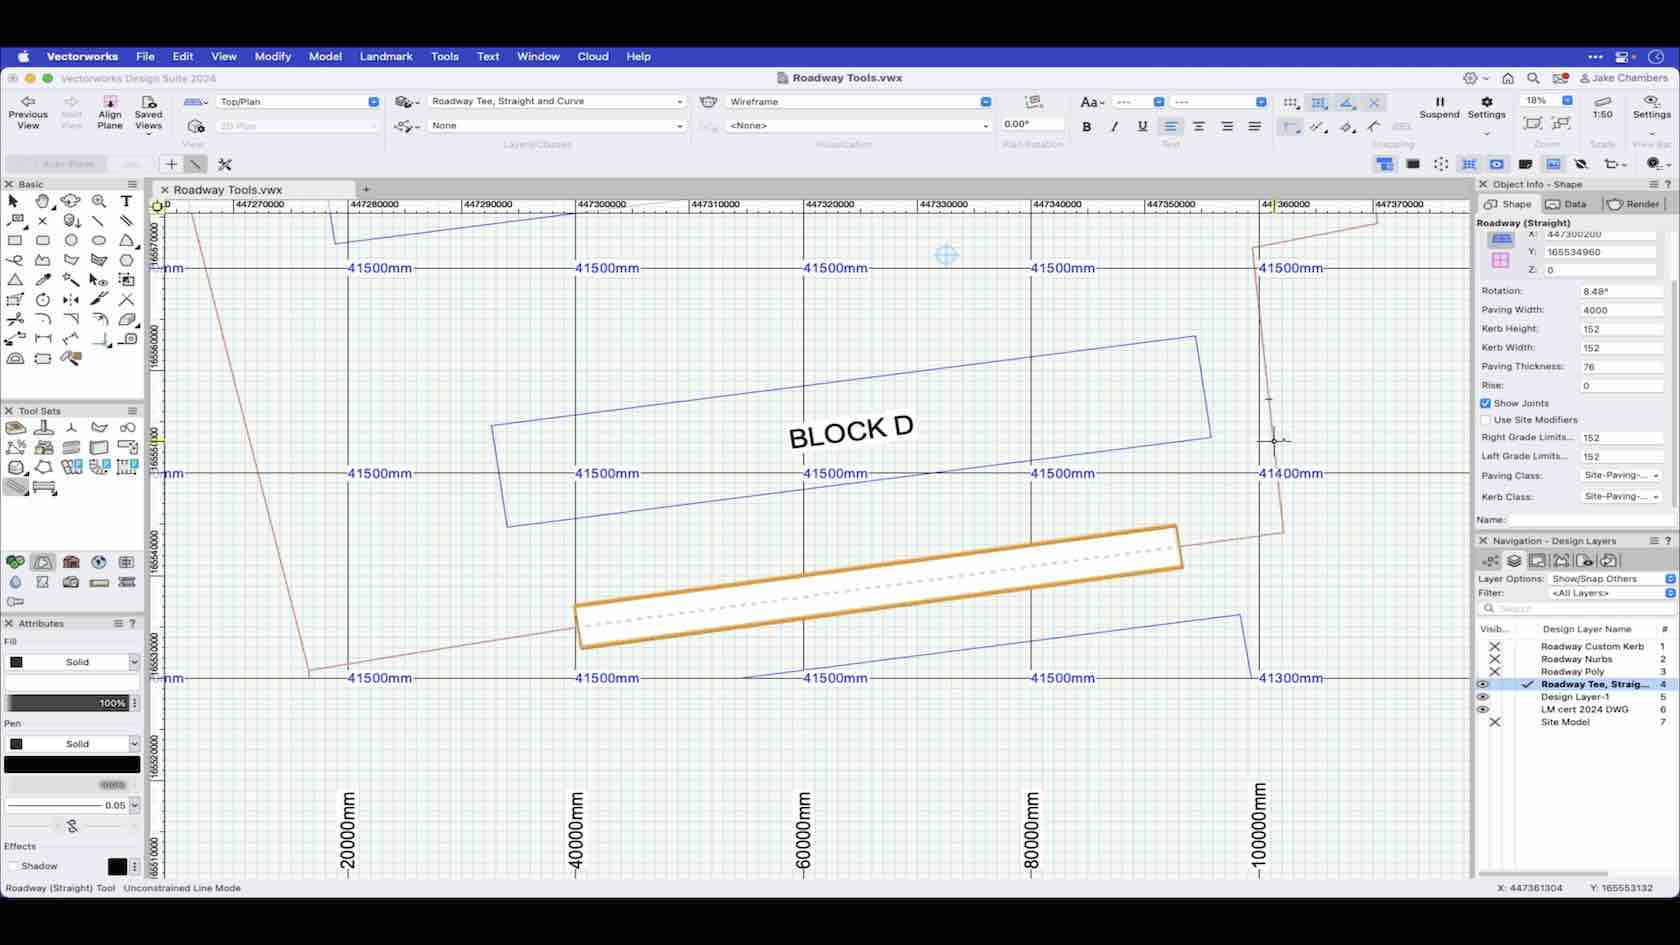
Simple roadway tools allow you to assemble and join straight and curved roadway sections. This video demonstrates how to use the Roadway tee, Straight and Curve.
Category: Landmark 2024 Certificaiton
Requires Approval: No

Roofs can be styled and used with the Create roof and Create Roof Face commands. Styled objects save you time as you can preset most of the options and in the case of roof means you can have your common roof build ups, with all the associated graphics and data pre-styled.
Category: Skill
Requires Approval: No
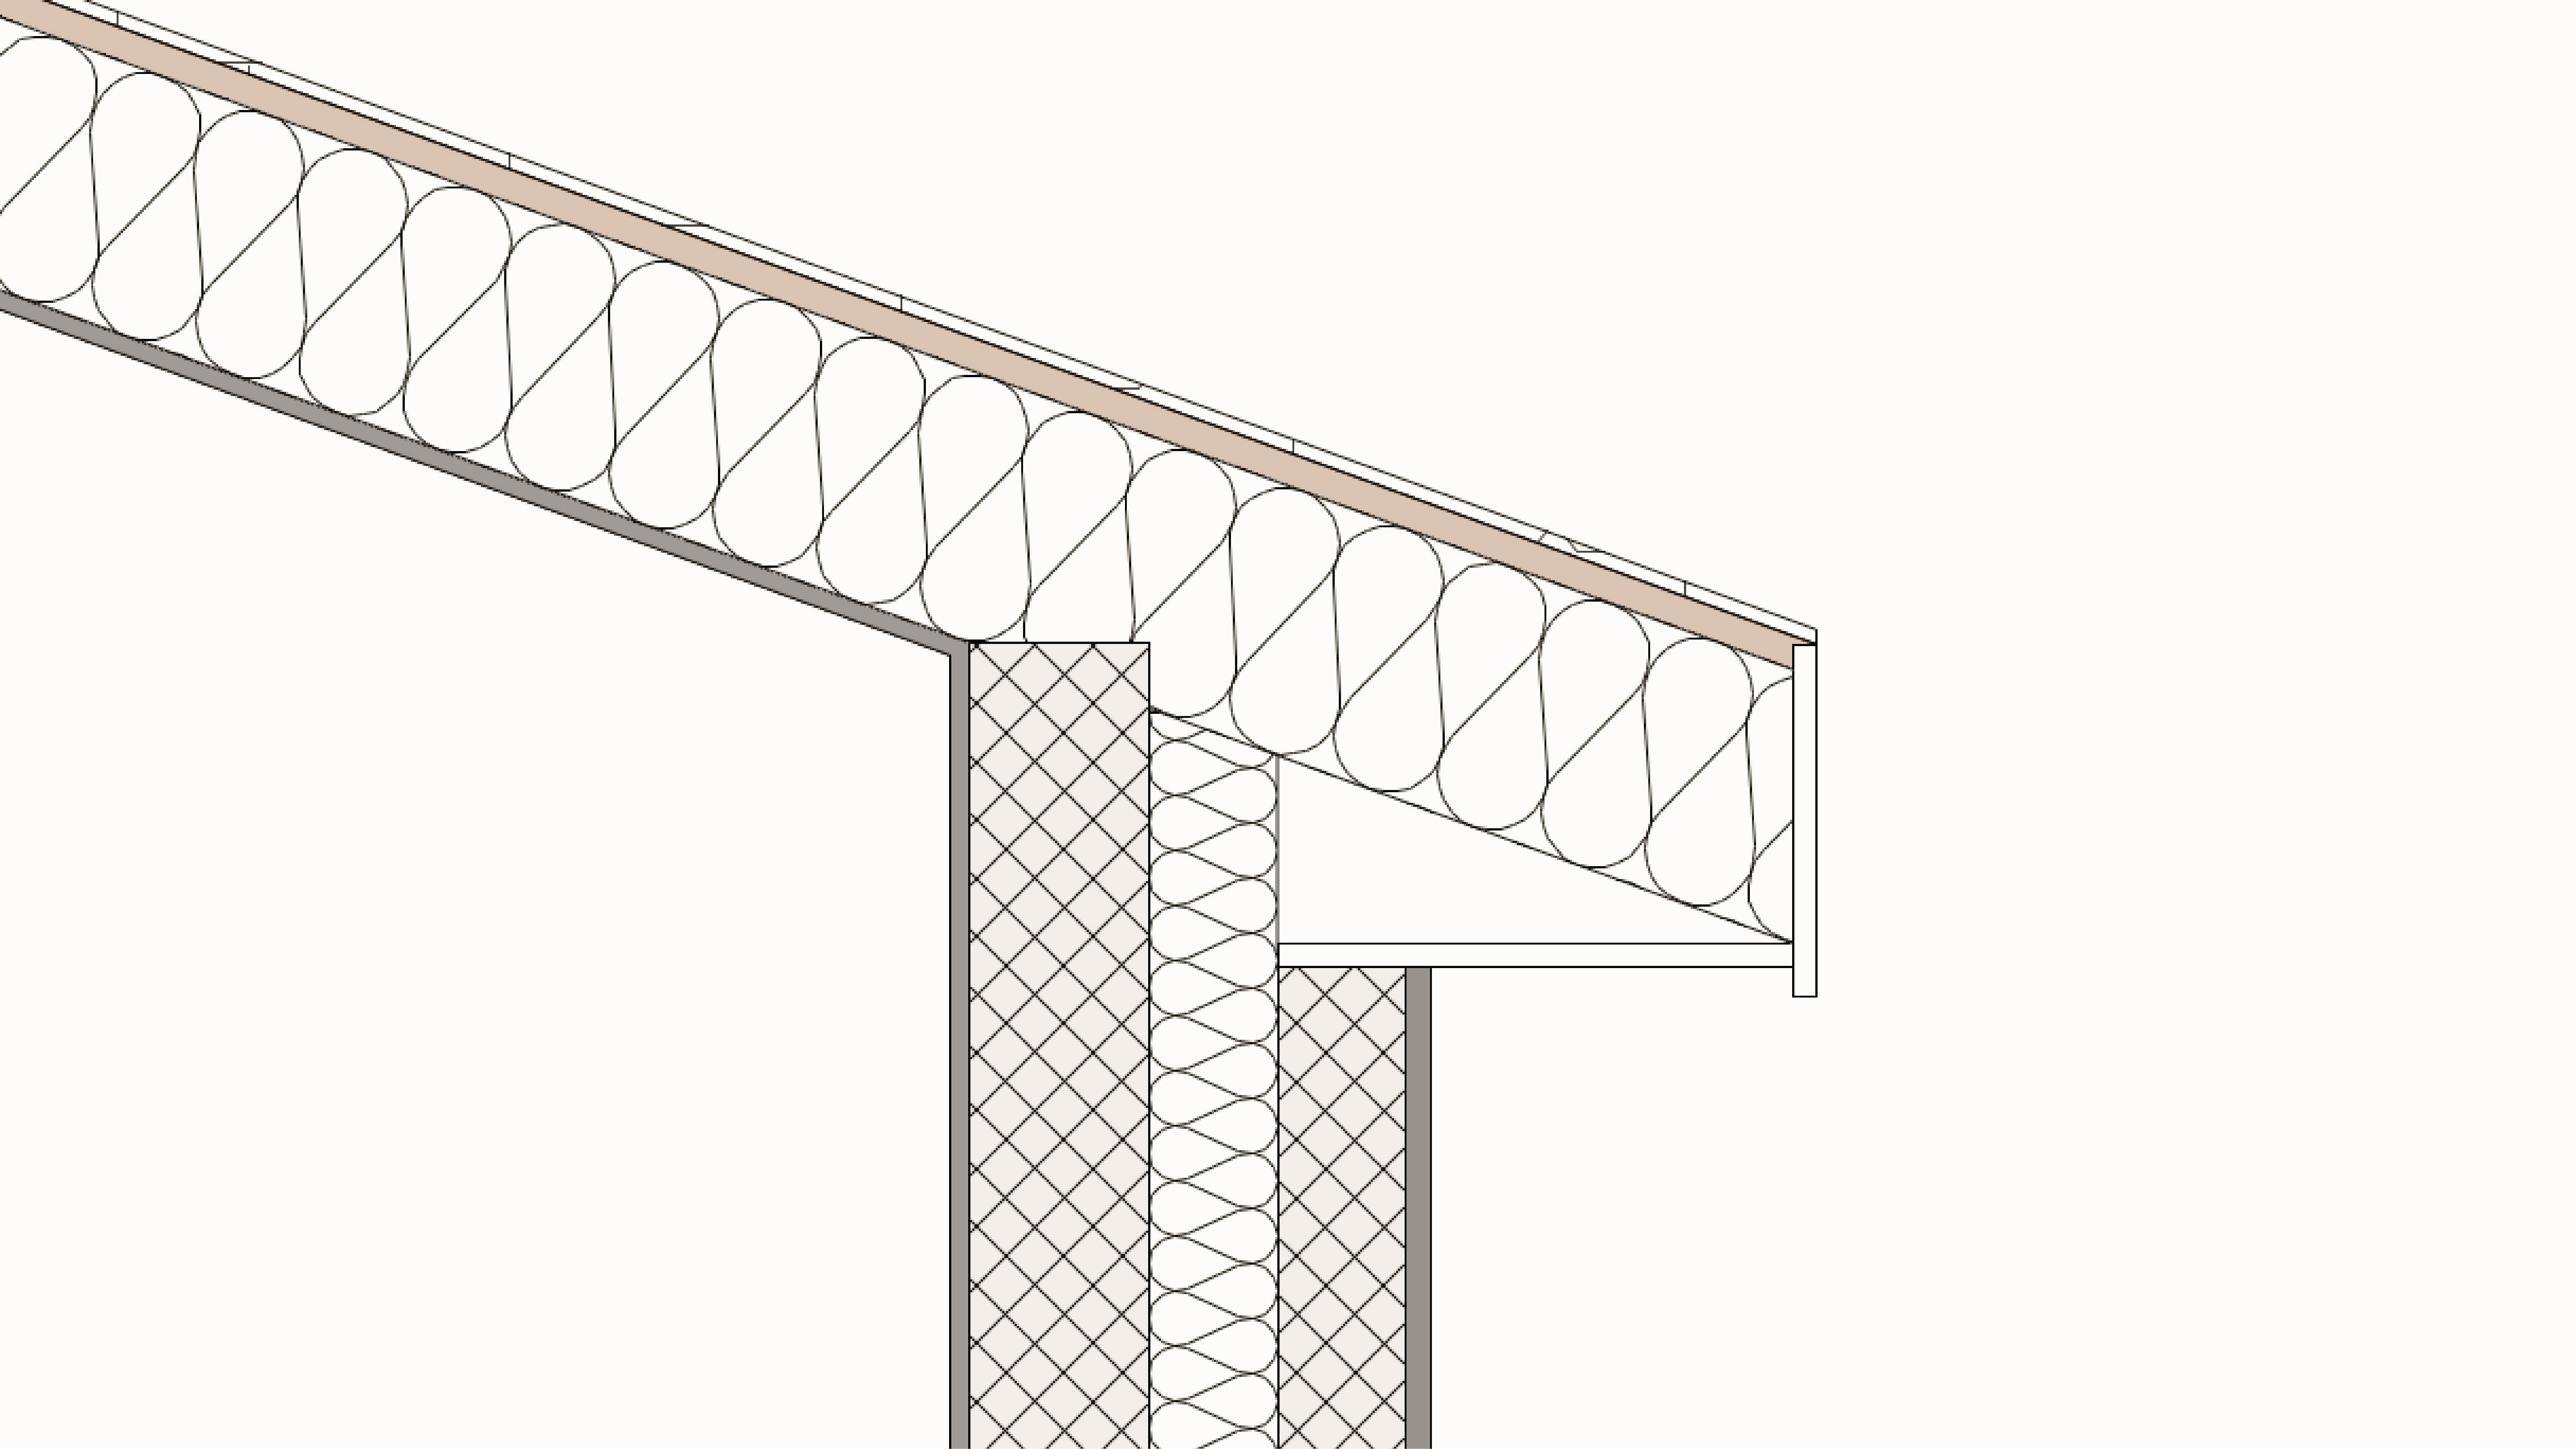
Roofs can do more than keep the rain out! Add components to improve your model and your sections.
Vectorworks can automatically generate a wide range of roofs from your existing walls or from a 2D shape. You can also create your own roof faces to create more complex roofs. Roofs are also able to interact with certain symbols to create dormers and skylights!
Vectorworks can automatically generate a wide range of roofs from your existing walls or from a 2D shape. You can also create your own roof faces to create more complex roofs. Roofs are also able to interact with certain symbols to create dormers and skylights!
Category: Architect Certification 2024
Requires Approval: No

This course will take a look at how to use the Rotate Tool and its different modes.
Category: Skill
Requires Approval: No
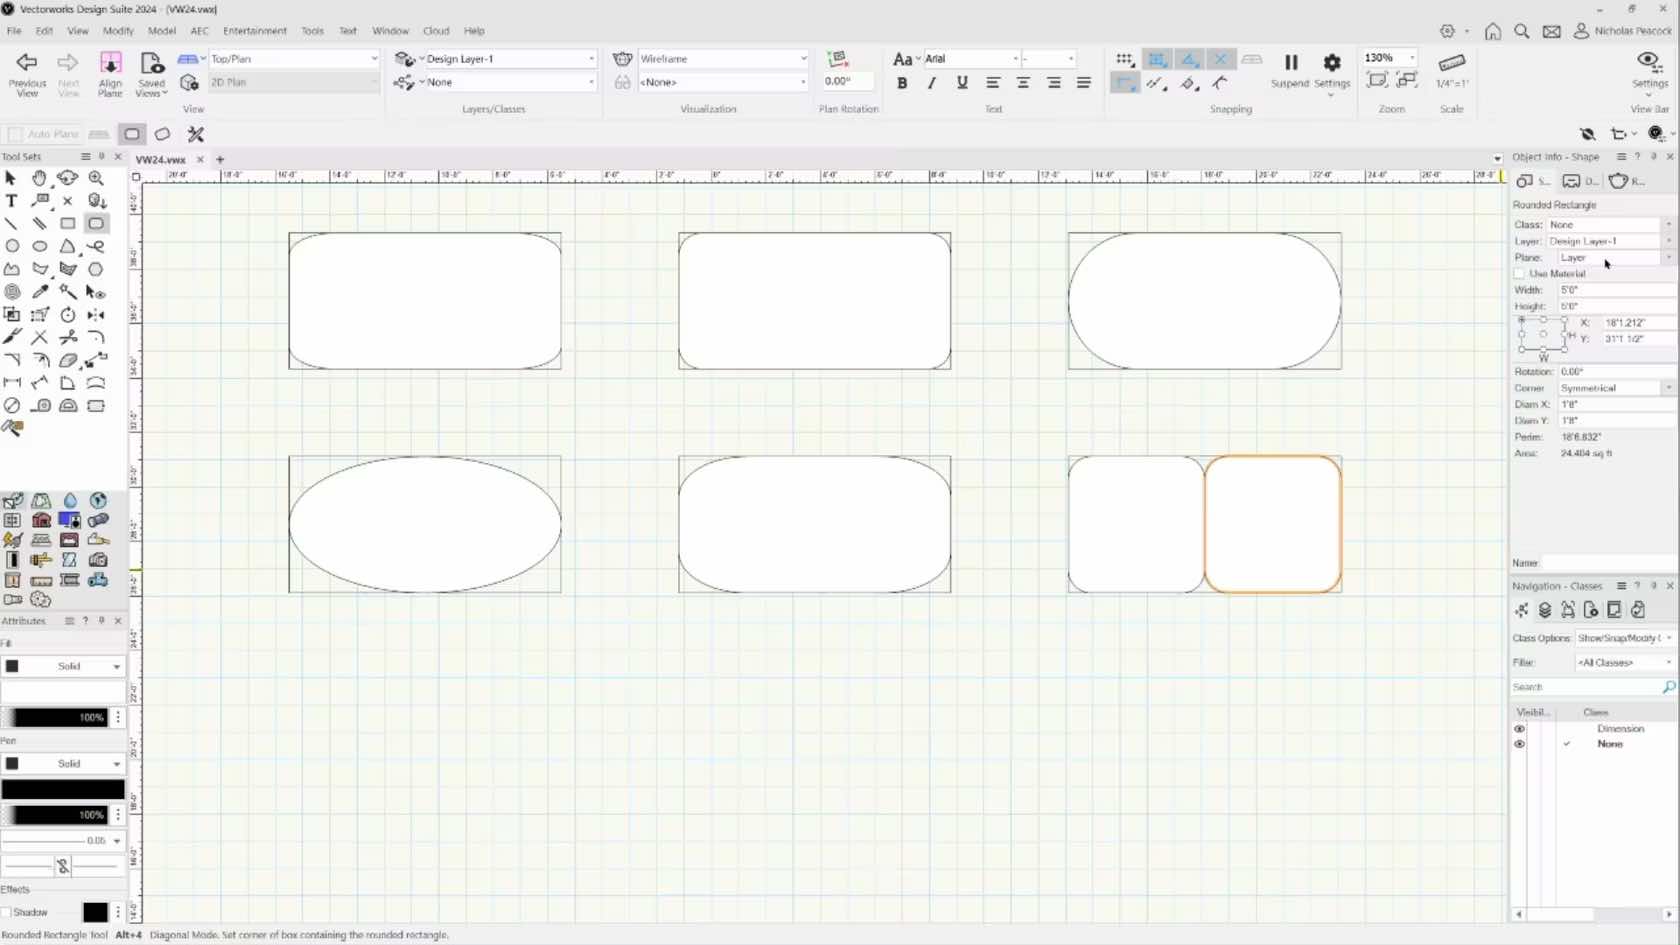
This course demonstrates how to create custom saved views to increase productivity.
Category: Skill
Requires Approval: No


In this course, we will explore where we can adjust the workspace and confirm we are in the intended workspace.
Category: Skill
Requires Approval: No
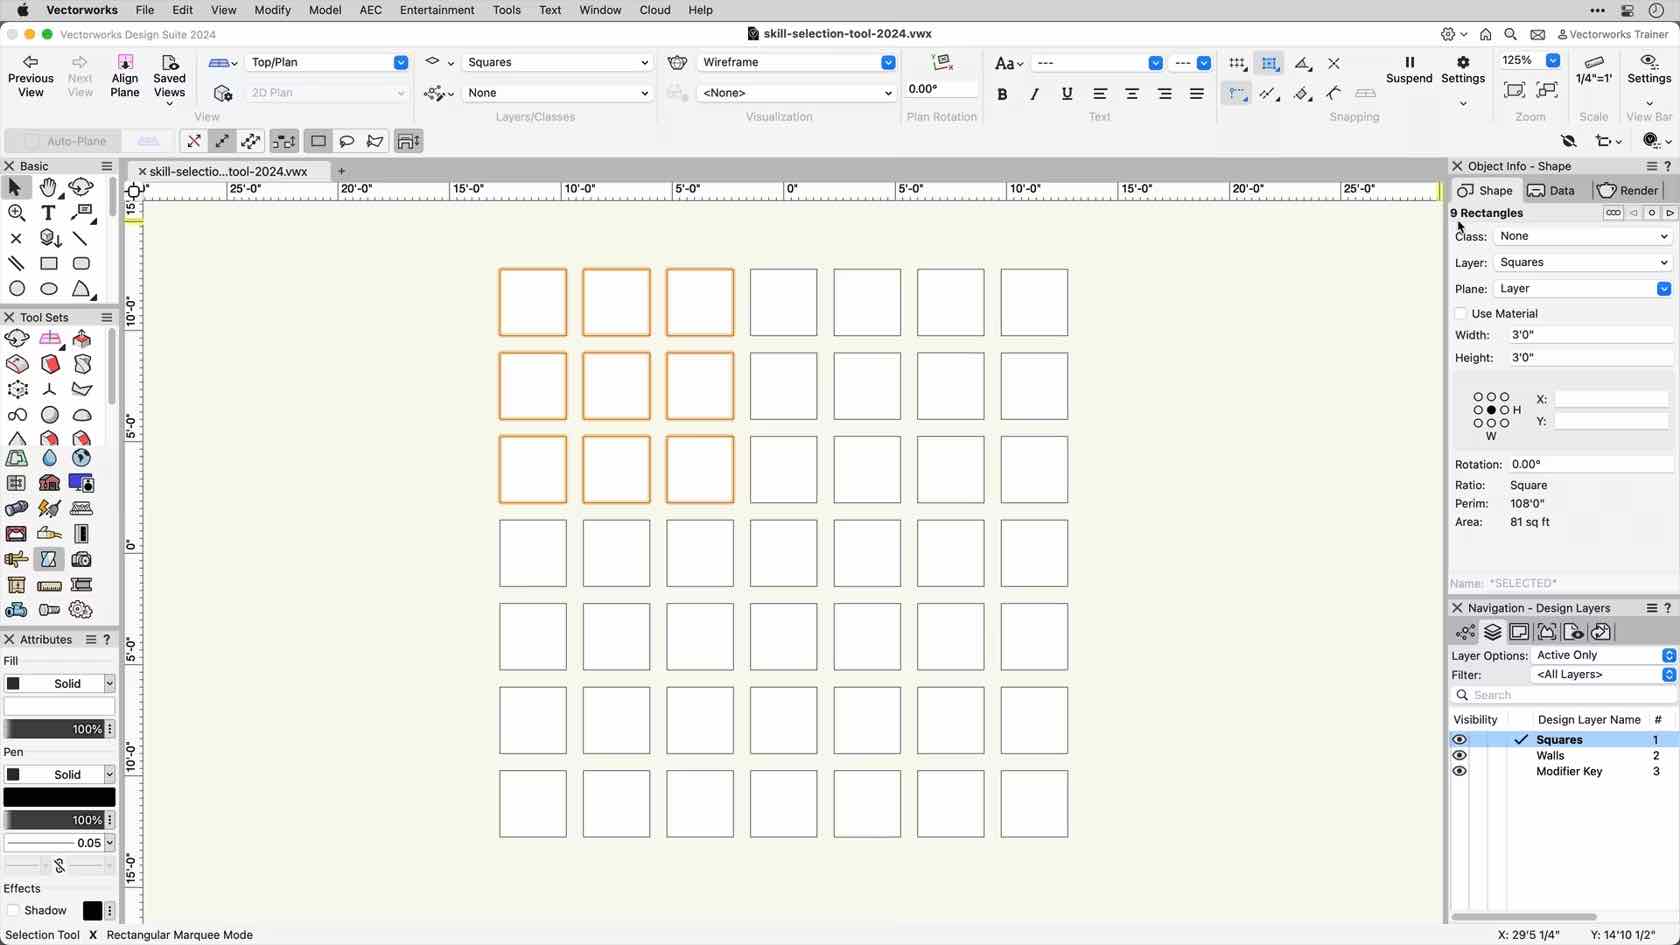
This course covers the various functions and modes of the Selection Tool.
Category: Skill
Requires Approval: No

An overview of the send to surface command.
Category: Landmark 2024 Certificaiton
Requires Approval: No
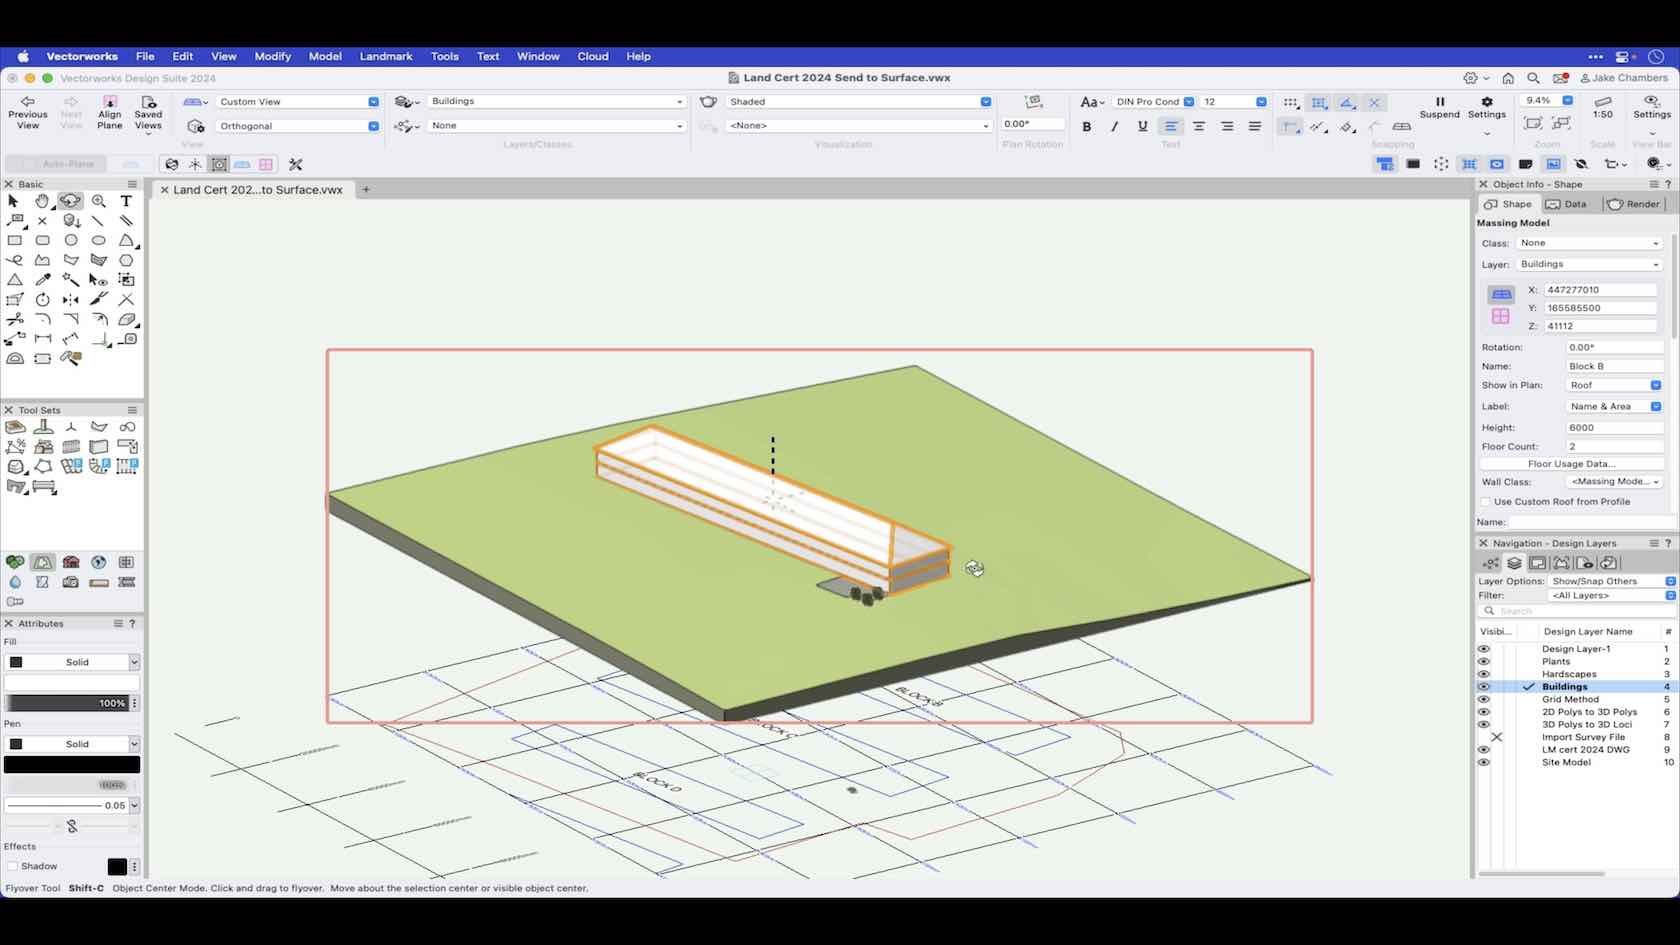
In this video we go through the send to surface command to send objects to the site model surface.
Category: Landmark 2024 Certificaiton
Requires Approval: No
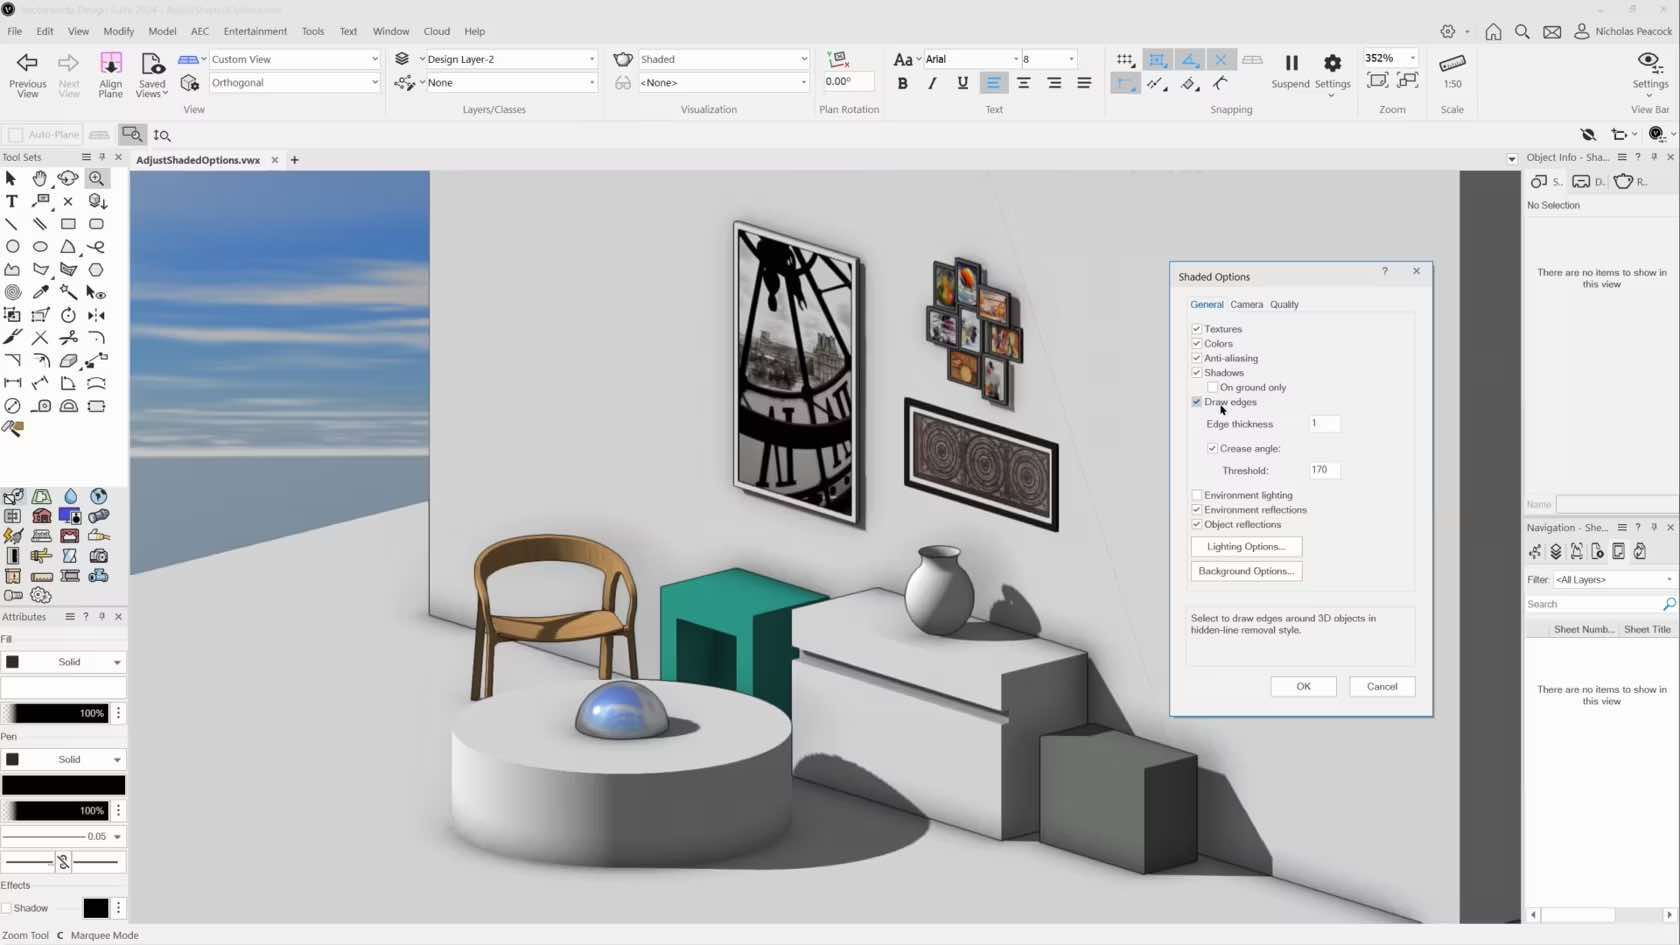
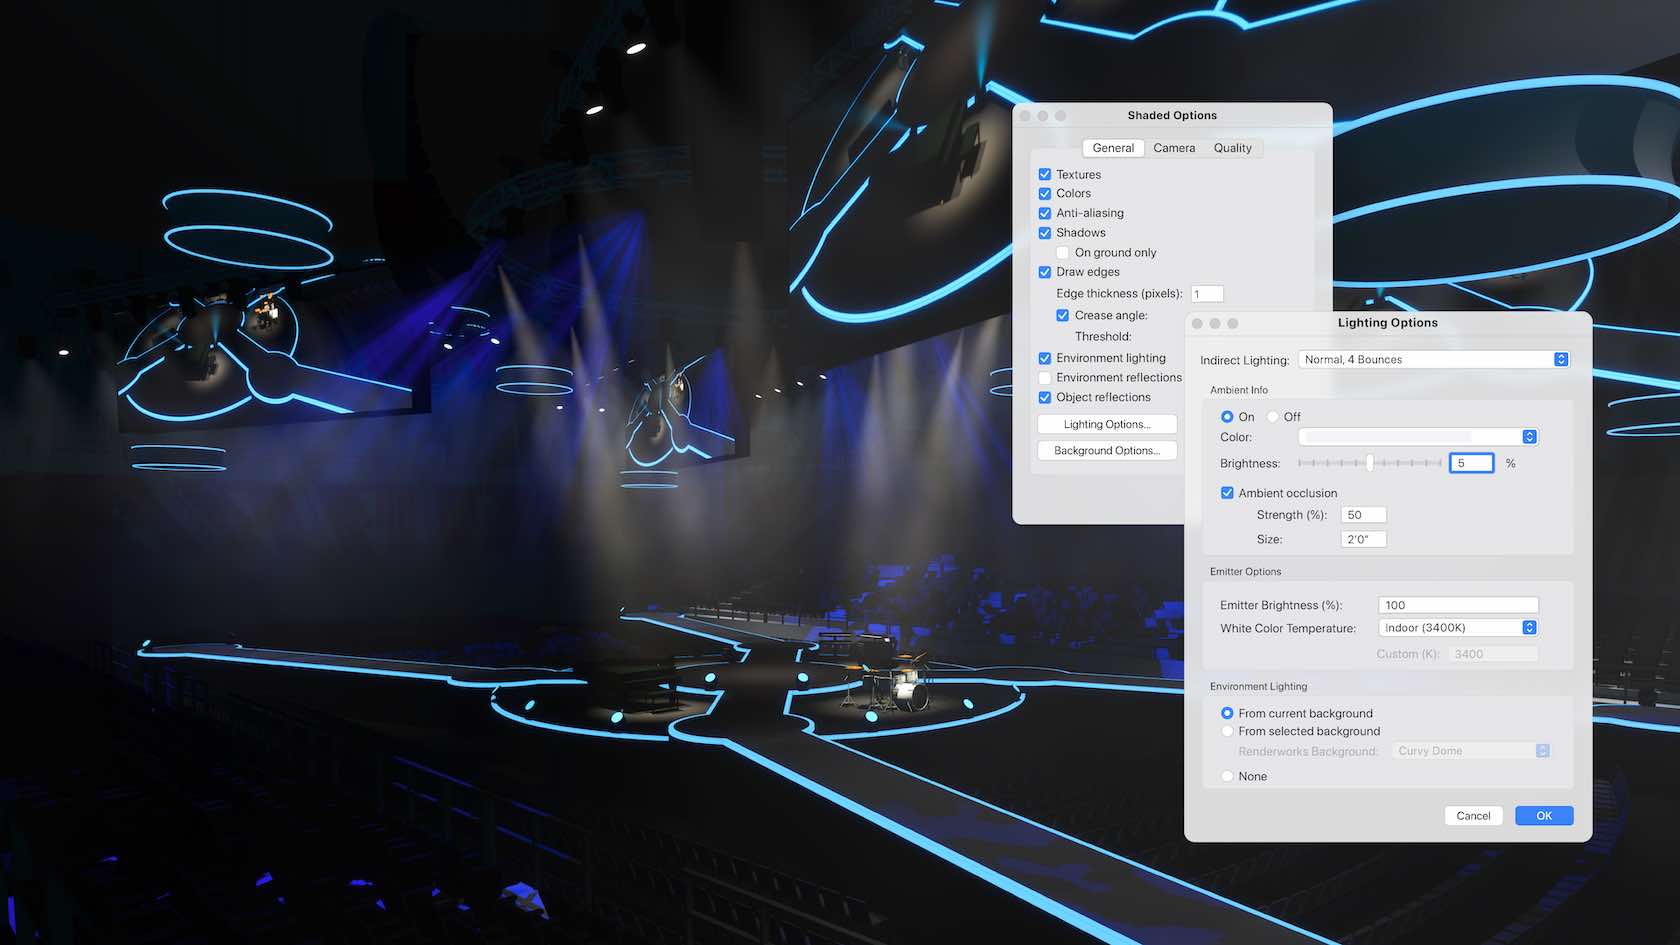
Create higher levels of realism earlier in your design process with improvements to Shaded rendering. Take advantage of unlimited shadow casting in real-time processing to assess your designs more confidently on the fly and quickly determine lighting, camera, and material setup so you can create better visuals more quickly. The shaded options dialog now includes direct
access to lighting controls, like ambient and environmental lighting, and
Renderworks background controls. Access all new camera settings that allow you to
define depth of field, exposure, and the ability to add bloom for camera-like
effects on your shaded render views.
Category: All Industries
Requires Approval: No
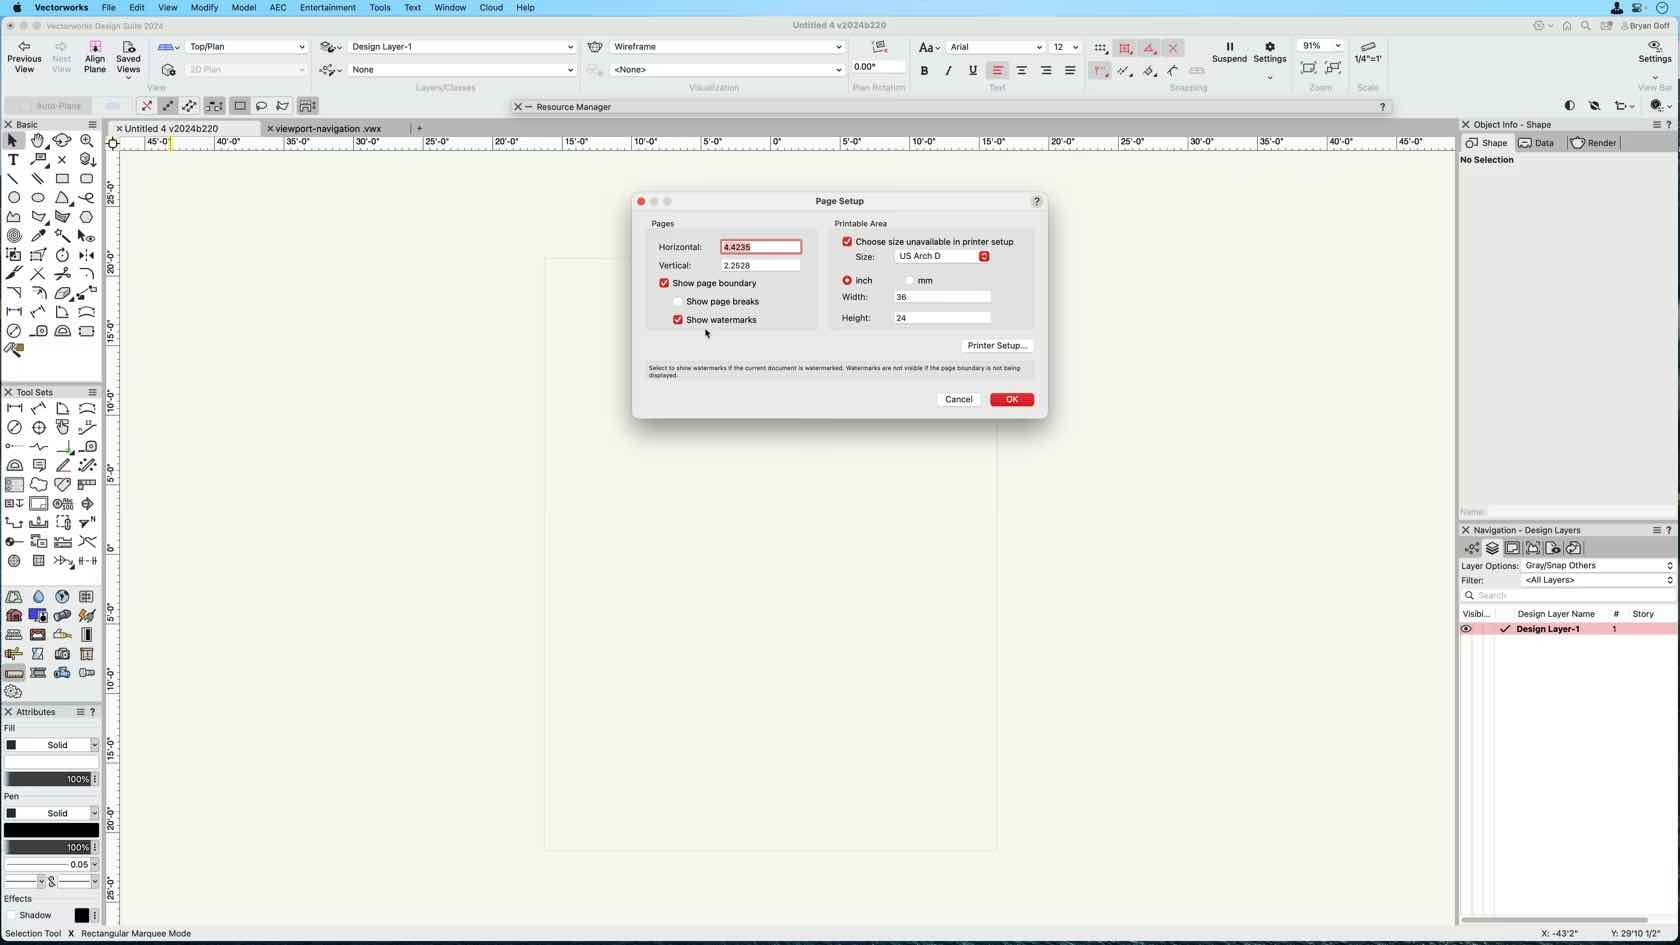
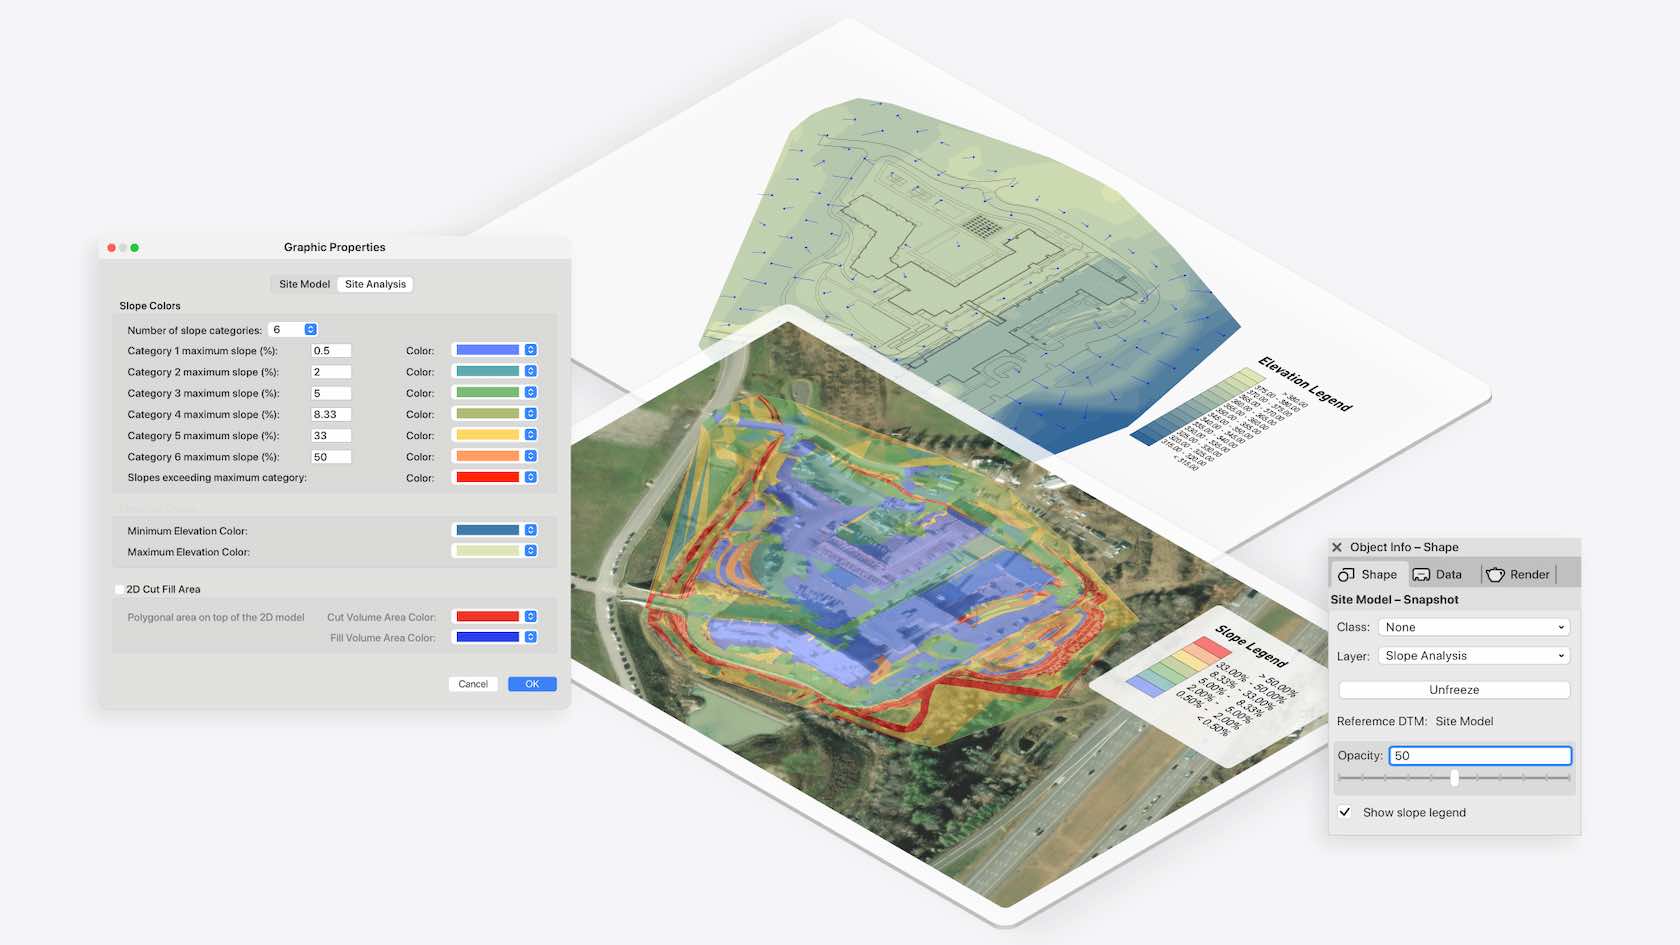
Experience better control over the graphical output of your site model snapshot with new legends to help clients understand annotations. A highly customizable color scale provides all the relevant information about slope ranges and elevation values. Additional settings allow you to display customizable site model data, perfect for reference or comparative analyses. Easily visualize data and effectively make and communicate design decisions.
Category: Landscapes
Requires Approval: No
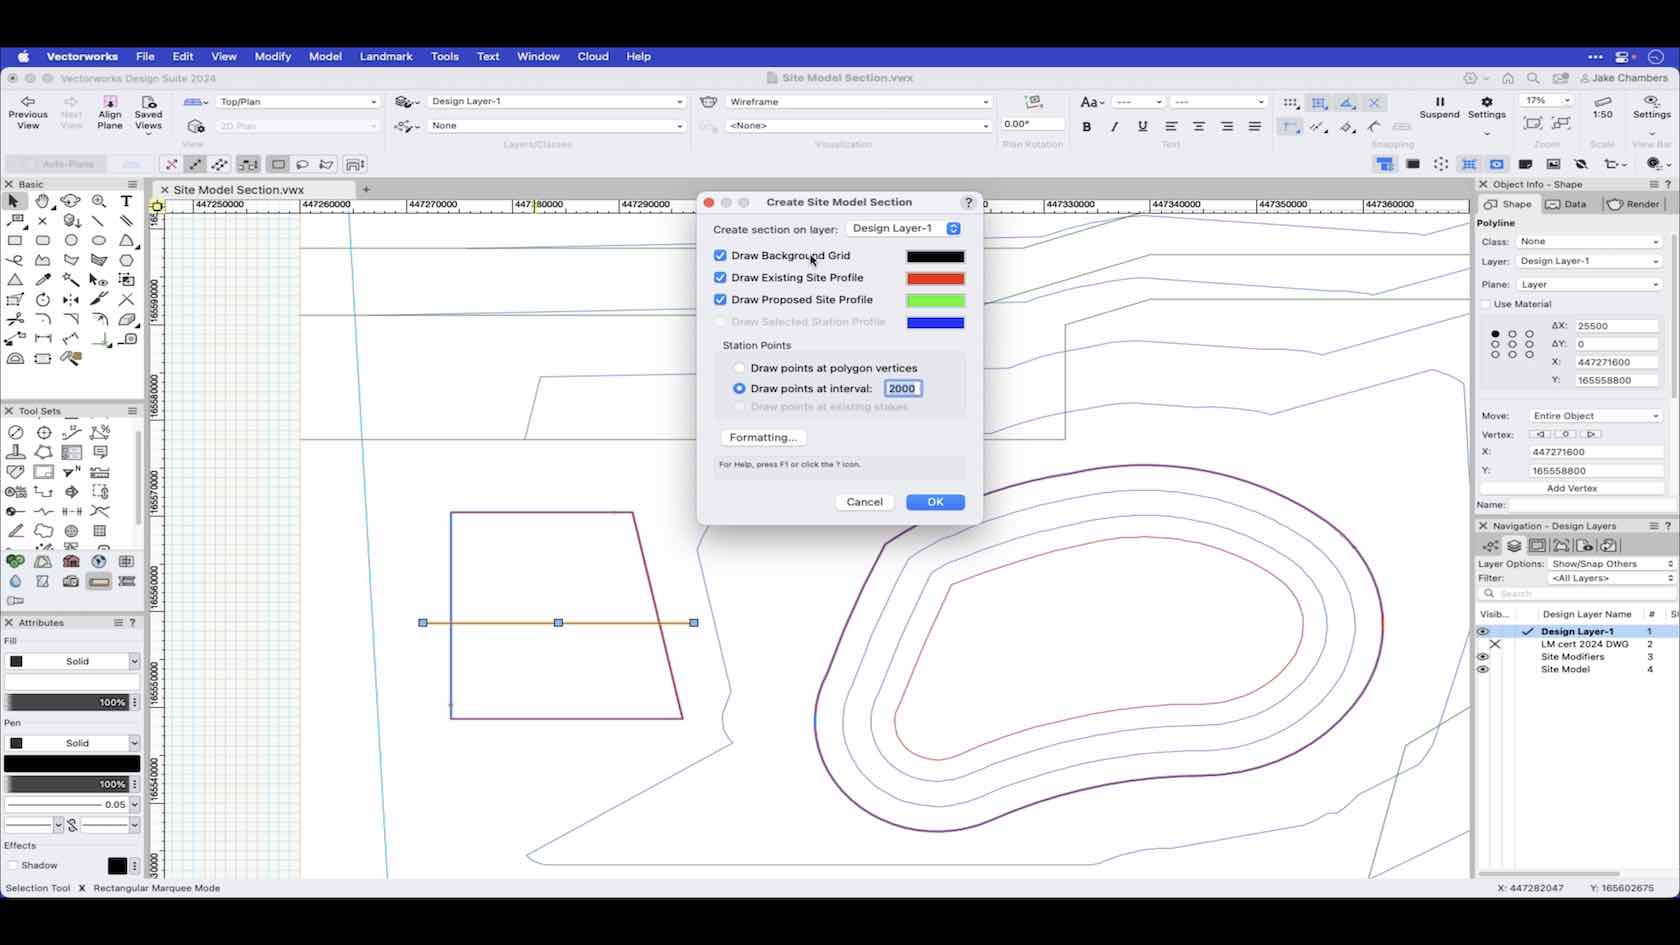
In this video we show how to use the site model section command on a defined section of the site model.
Category: Landmark 2024 Certificaiton
Requires Approval: No
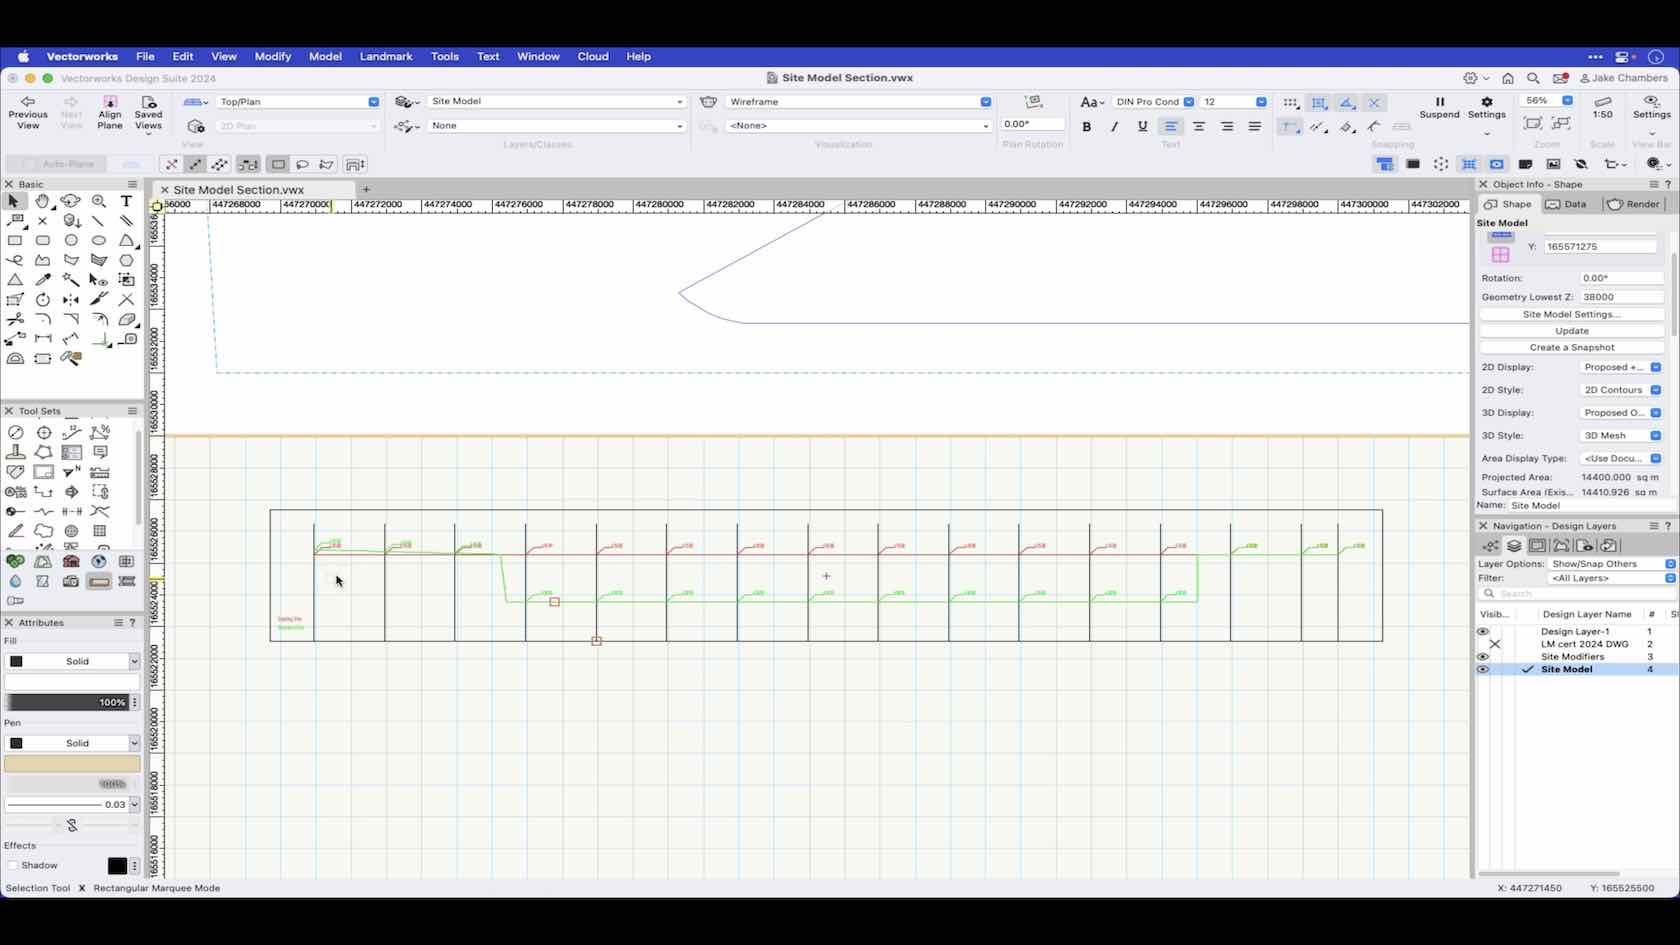
An overview of the Site Model section command.
Category: Landmark 2024 Certificaiton
Requires Approval: No
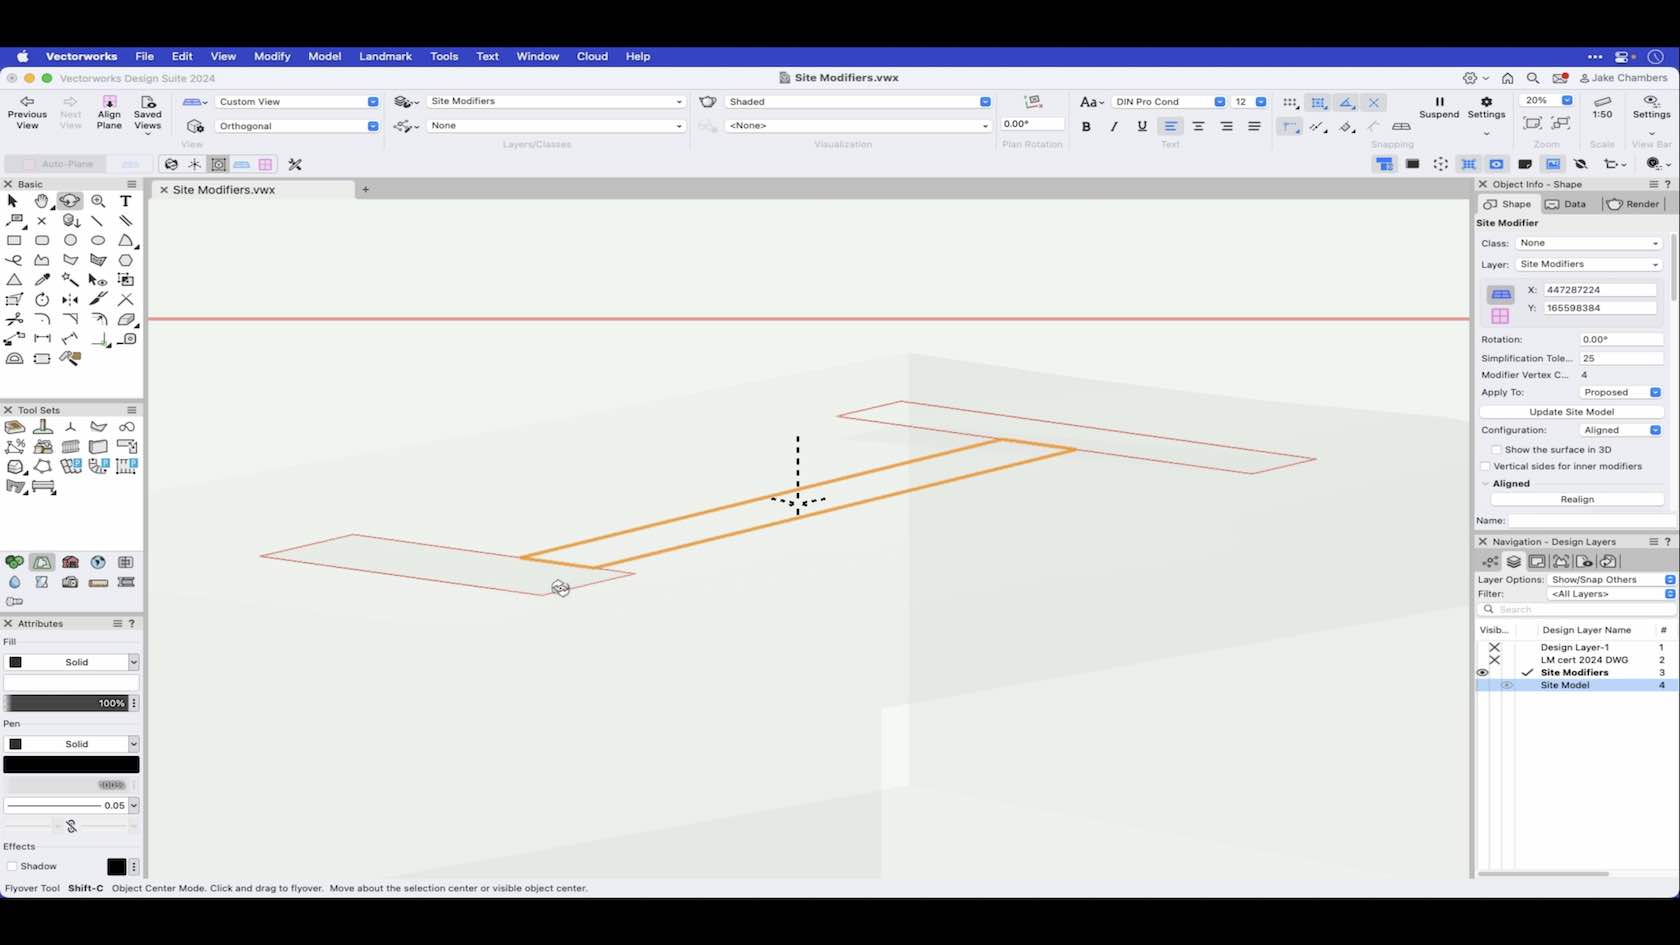
The aligned modifier creates an aligned pad that vertically matches the horizontal edges of surrounding modifiers. Aligned pads are complex, non-planar modifiers that can also be modified with vertical profiles, stake objects, and grade objects. This video demonstrates how to draw an aligned modifier.
Category: Landmark 2024 Certificaiton
Requires Approval: No
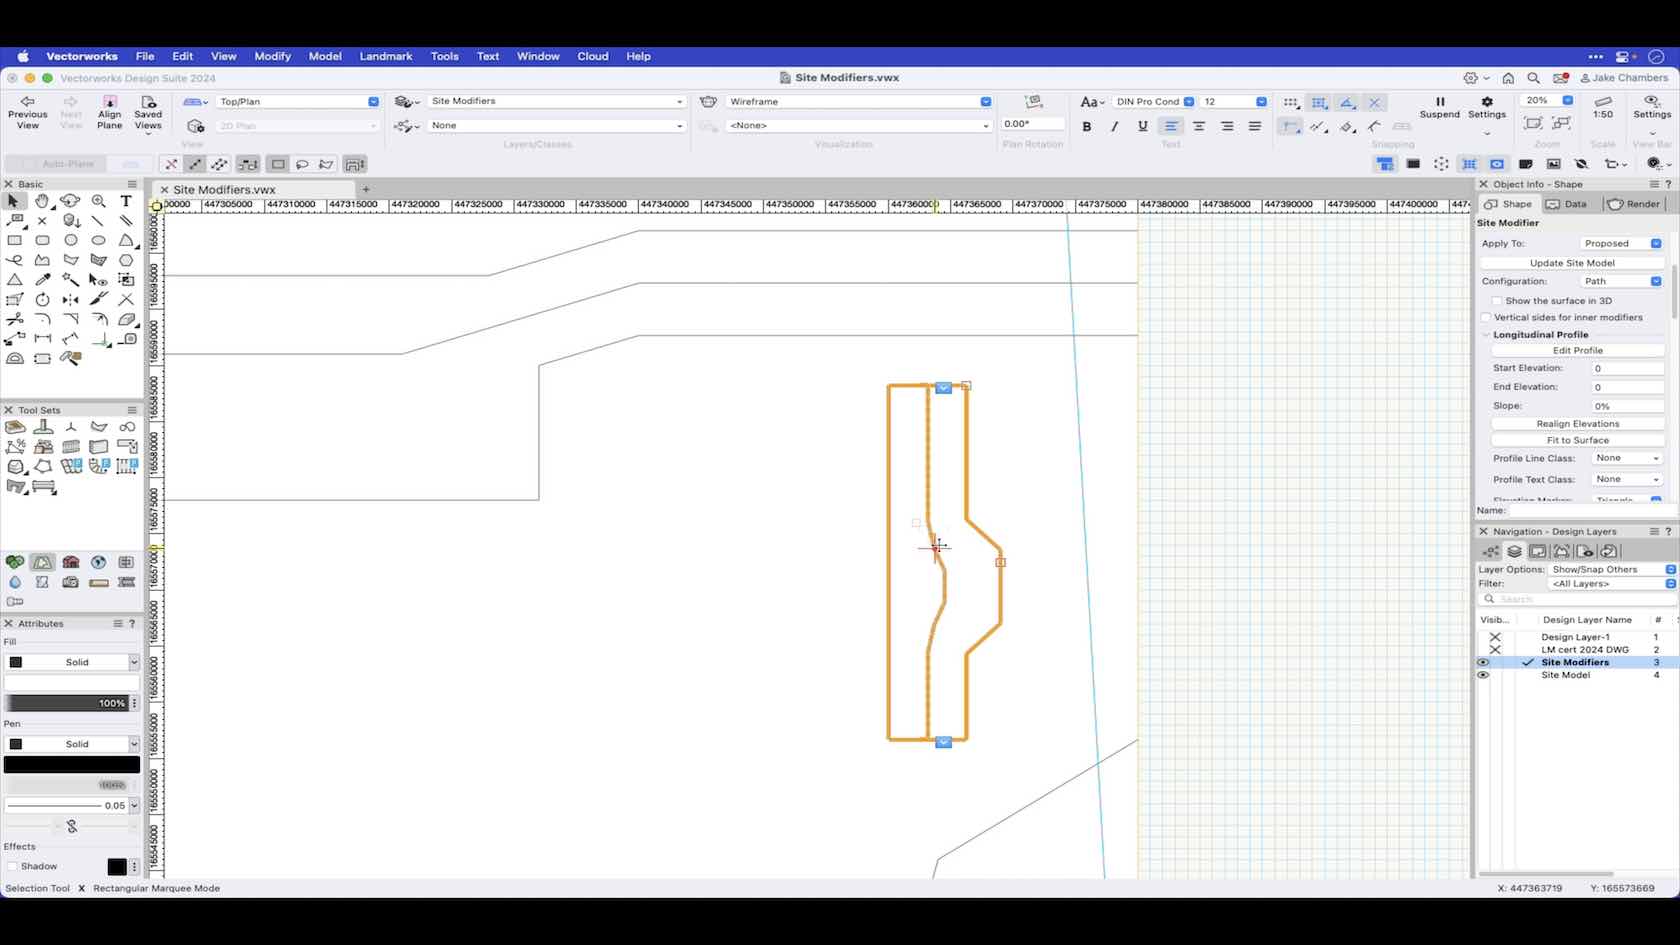
The boundary path modifier creates a surface defined by one longitudinal profile and a set of transverse profiles, defined as a boundary polyline with a center line based on the boundary. This video demonstrates how to draw and use the boundary path modifier.
Category: Landmark 2024 Certificaiton
Requires Approval: No
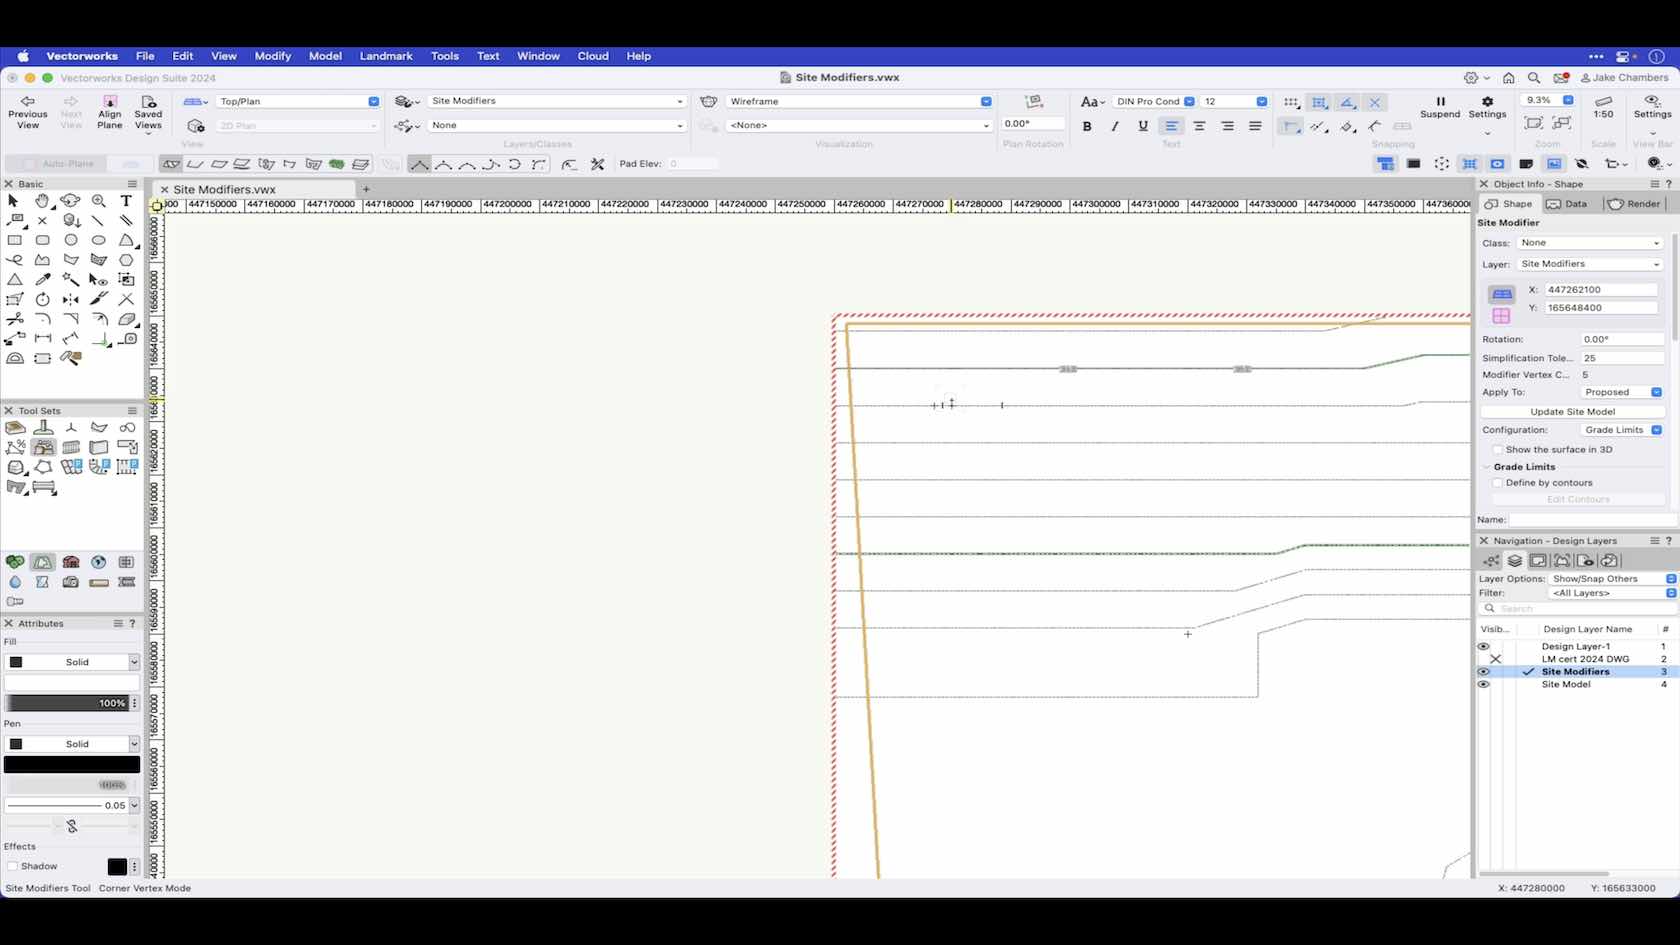
The grade limit defines an area of topographical transition between existing site data and the site modifiers enclosed within the limits. This video will demonstrate how to draw and apply a grade limit to the site model.
Category: Landmark 2024 Certificaiton
Requires Approval: No
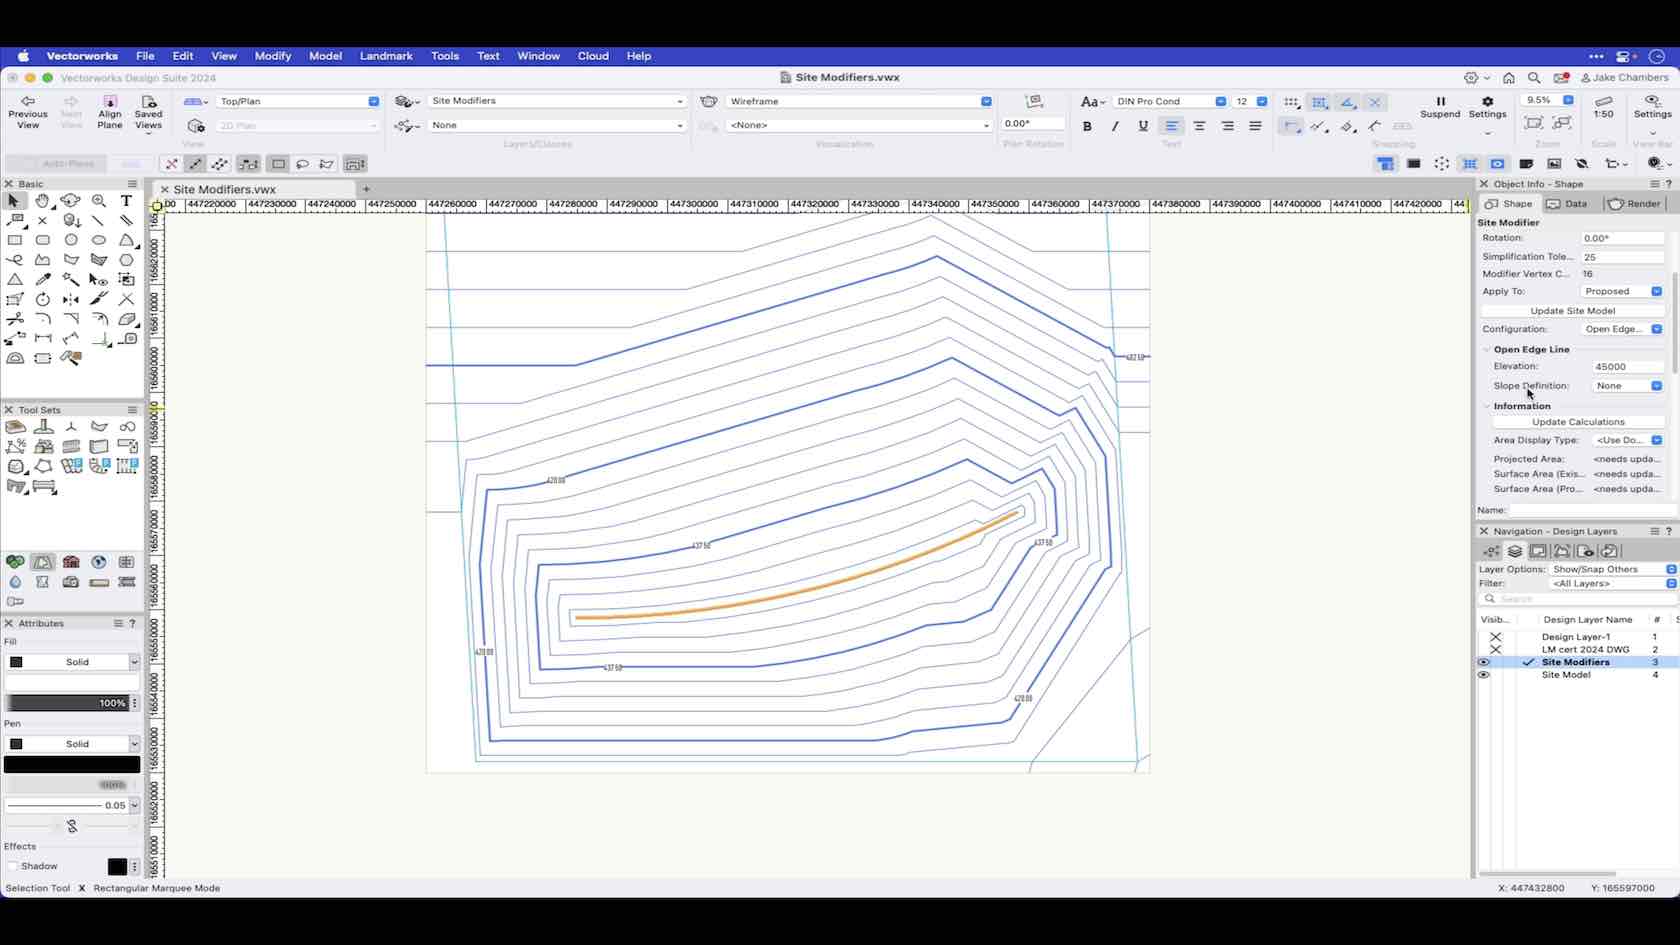
An open edge line modifier is an open 3D polygon which modifies the site model, and represents an open line at a constant elevation.
Category: Landmark 2024 Certificaiton
Requires Approval: No
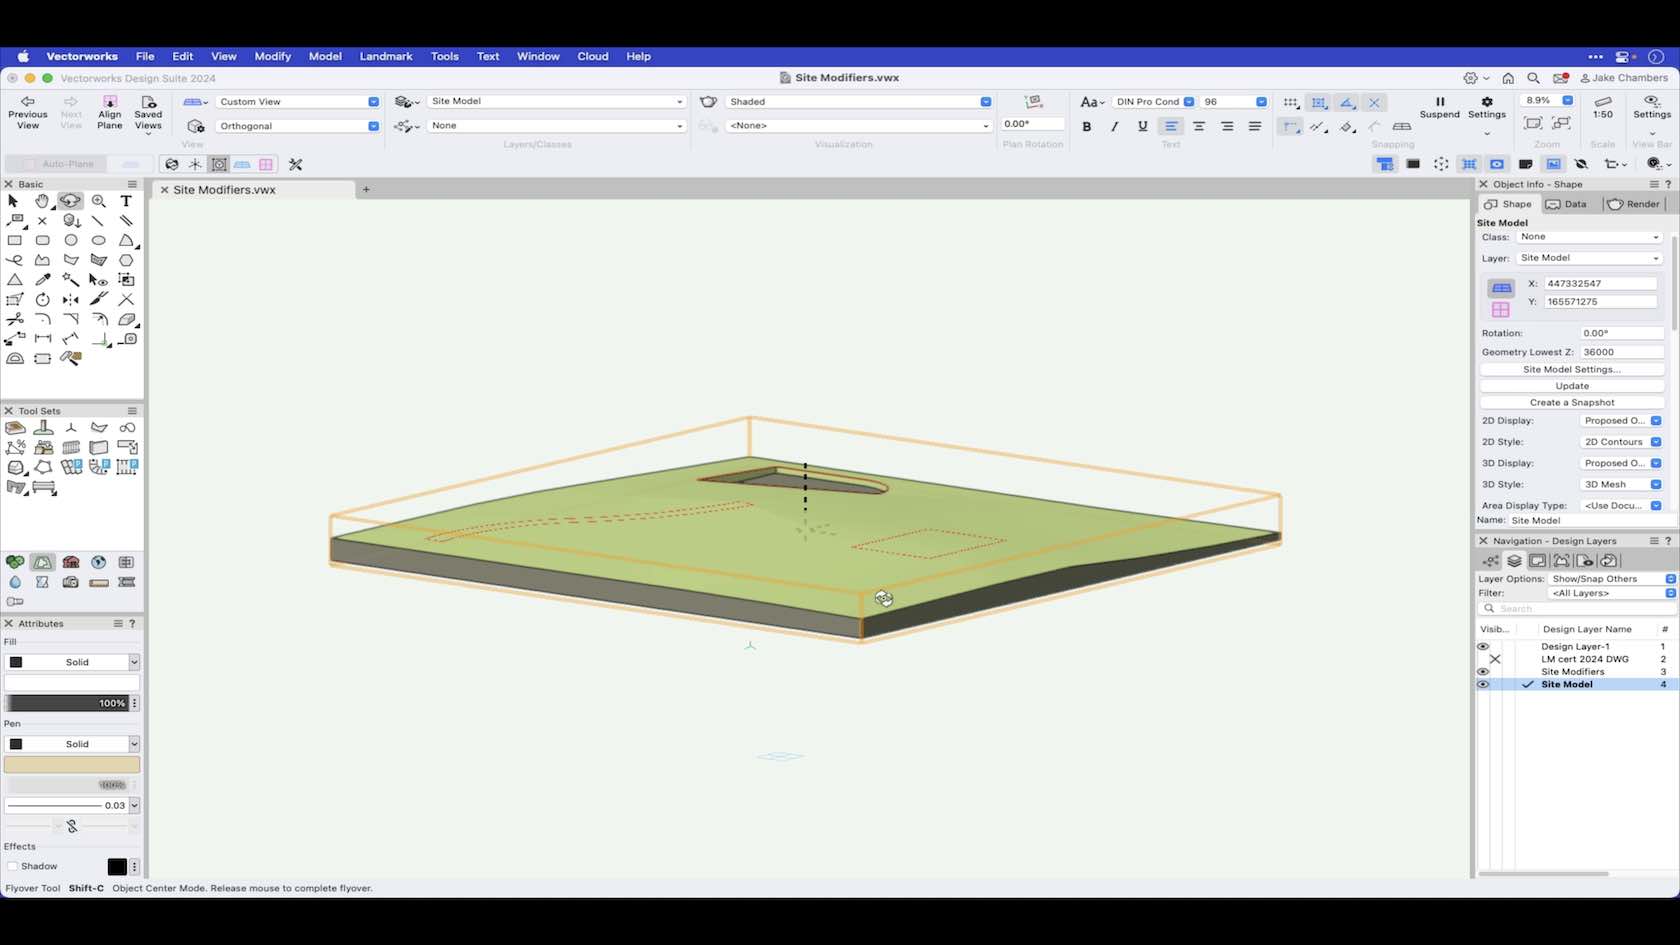
Site Modifiers are used to modify and make changes to the site model surface.
Category: Landmark 2024 Certificaiton
Requires Approval: No
The pad with retaining edge creates a pad with an edge around it, allowing the terrain to be shaped around the pad. This video demonstrates how to draw a pad with retaining edge and use its features.
Category: Landmark 2024 Certificaiton
Requires Approval: No
The pathway path modifier creates a surface defined by one longitudinal profile and a set of transverse profiles, defined by a pathway/center line polyline and a specified width value. This video demonstrates how to draw a pathway path modifier and how to use features such as transverse profiles.
Category: Landmark 2024 Certificaiton
Requires Approval: No
A planar pad draws a closed area which modifies the site model. This video demonstrates how to draw a planar pad and use its functions and features such as slope definitions.
Category: Landmark 2024 Certificaiton
Requires Approval: No
Learn how to use the Landmark Command Create Retaining Wall Site Modifier.
Category: Landmark 2024 Certificaiton
Requires Approval: No
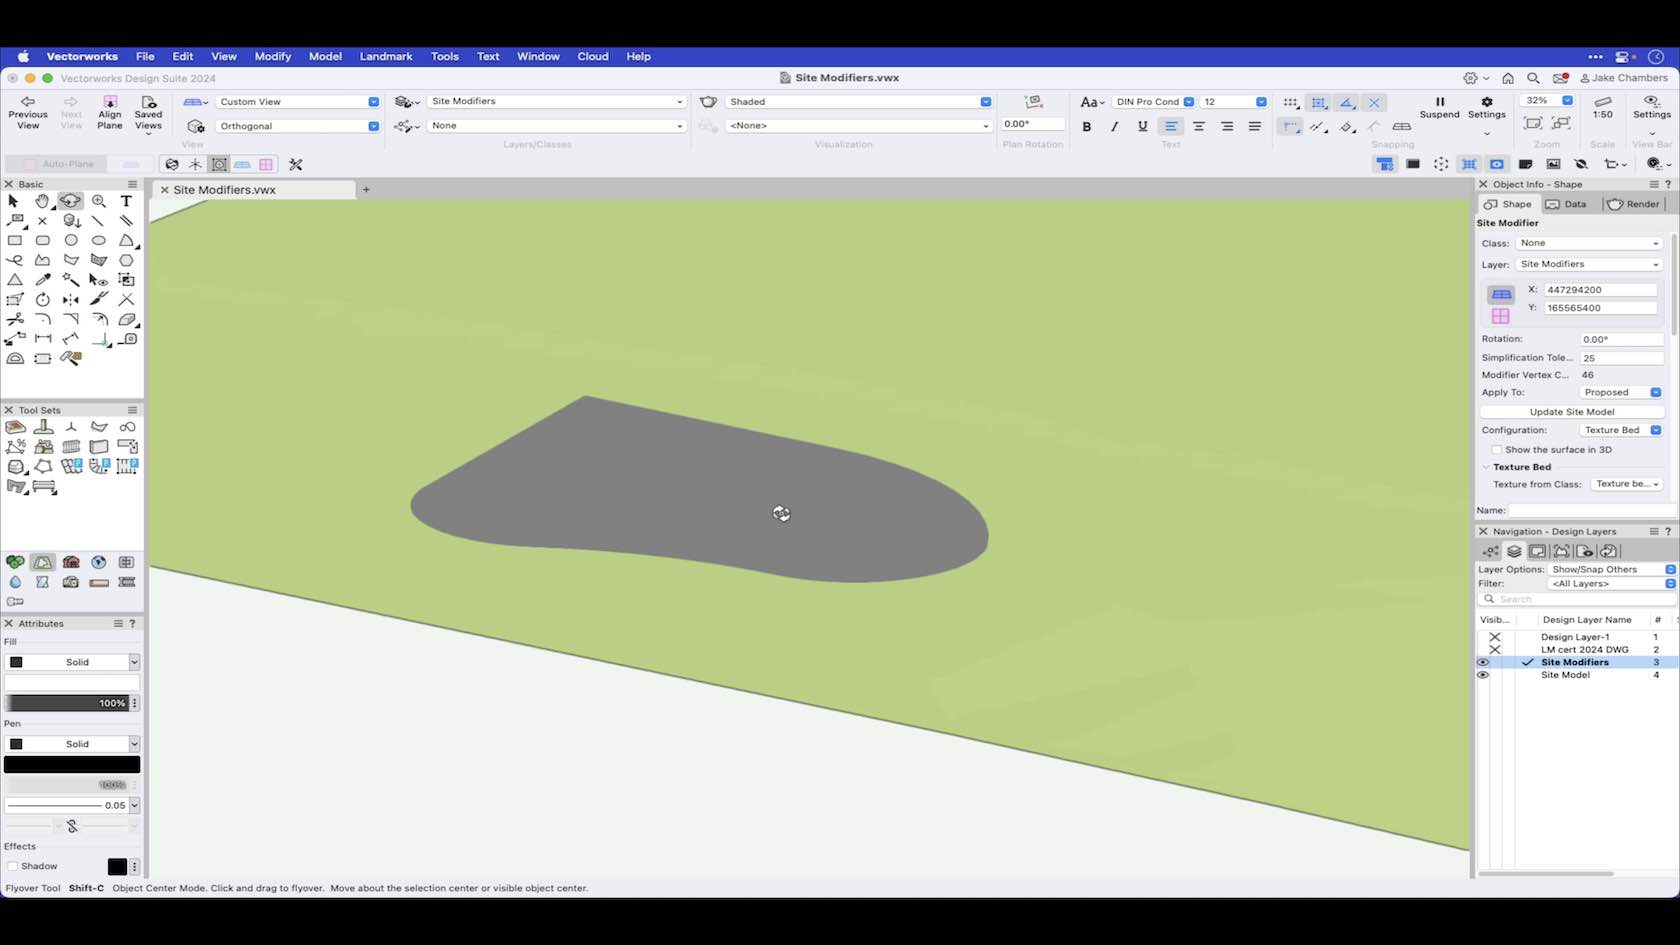
The texture bed modifier creates an area of the site model that can be textured. This video will show how to draw a texture bed modifier and how to apply a texture to the site model surface.
Category: Landmark 2024 Certificaiton
Requires Approval: No
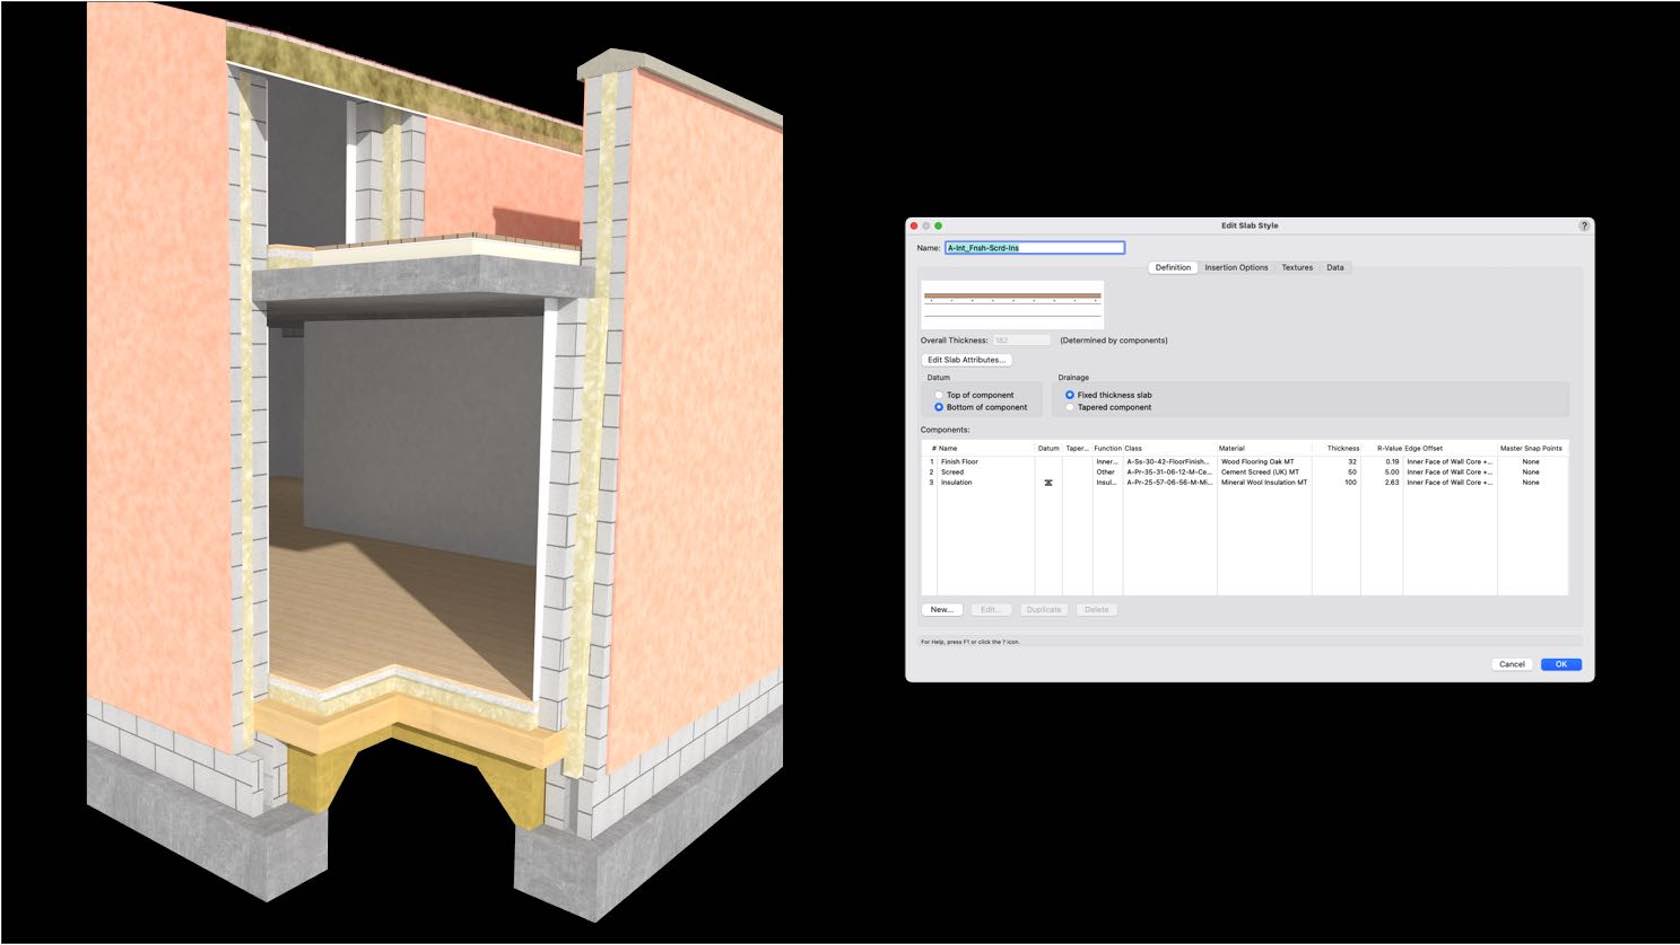
Slabs can be styled. Styled objects save you time as you can preset most of the options and in the case of walls means you can have your common wall build ups, with all the associated graphics and data pre-styled.
Category: Skill
Requires Approval: No
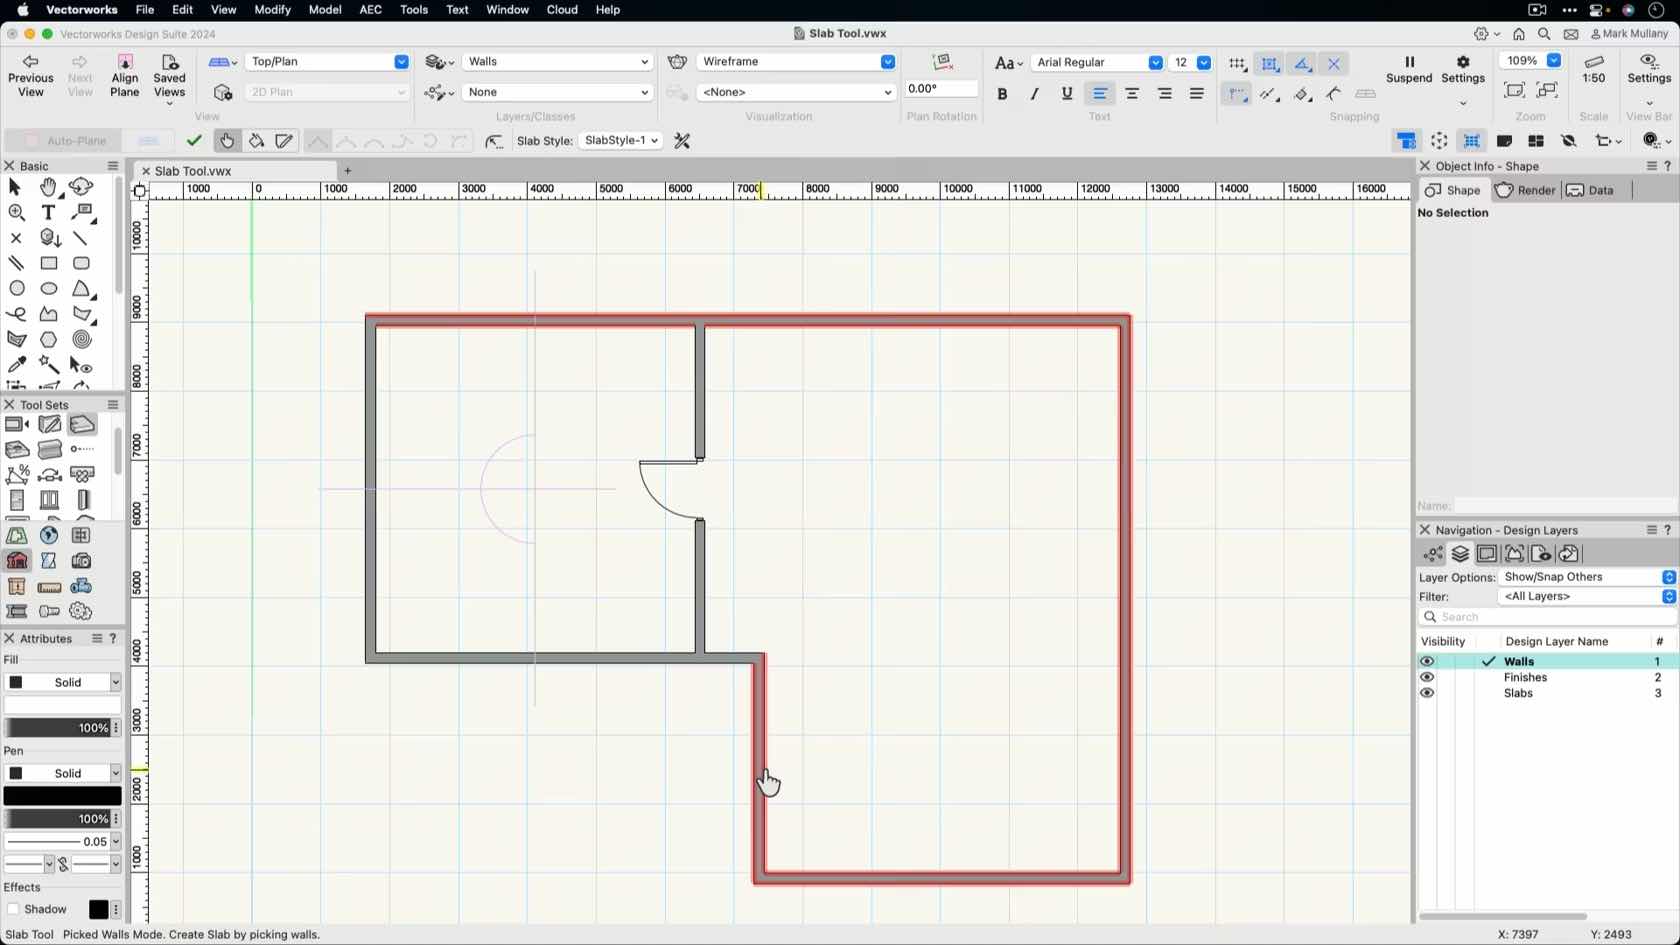
In this video, we will explore the Snap to Intersection function.
Category: Skill
Requires Approval: No
In this video, we will introduce the concept of snapping in Vectorworks.
Category: Skill
Requires Approval: No
Die Neuerungen in interiorcad 2023 powered by Vectorworks beschleunigen Arbeitsabläufe und erhöhen die Zuverlässigkeit der Software. Wie man als Schreiner die neuen Funktionen am besten einsetzt, vermittelt Ihnen in diesem Webinar der interiorcad-Experte und Werkmeister David Zehntner.
Er zeigt Ihnen unter anderem, wie Sie bei der Arbeit mit beliebigen Beschlägen Zeit sparen oder mit vereinfachten Beschlagsgeometrien die Performance des Programms verbessern. Es bleibt auch genügend Zeit für clevere Tipps und Tricks, Antworten auf individuelle Fragen und einen Ausblick auf Vectorworks 2024. Melden Sie sich jetzt an und holen sich viel Know-how in kurzer Zeit.
(Für Version 2024)
Category: Interiors
Requires Approval: No
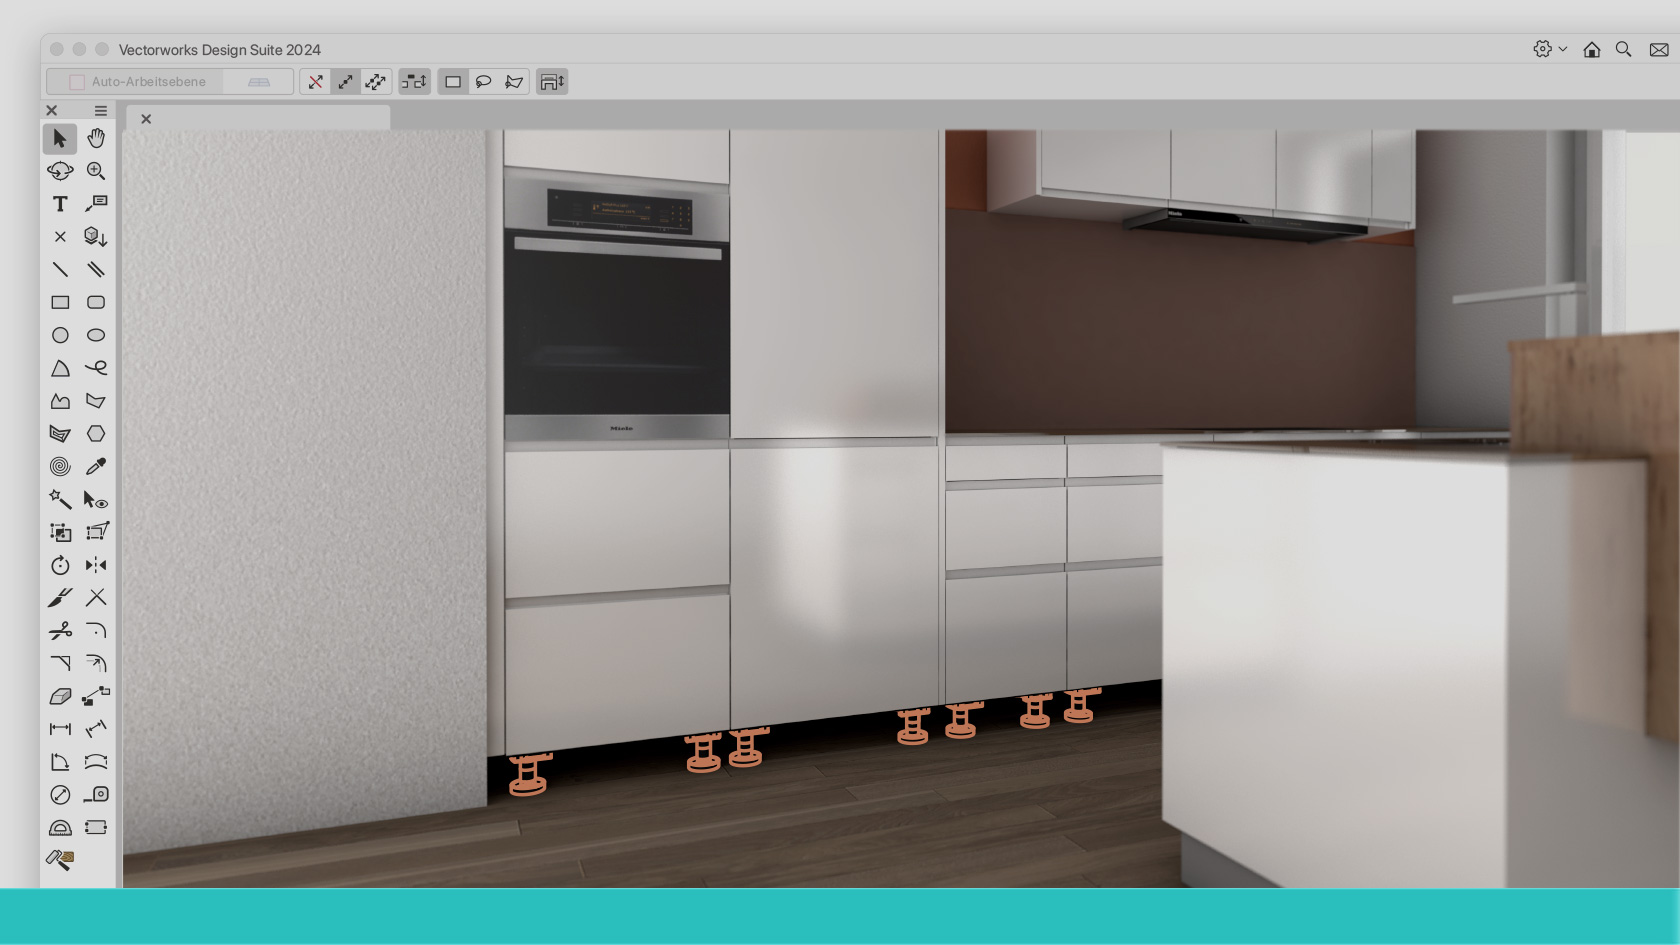
Der aktuelle Korpusmöbelplaner in interiorcad weist gegenüber seinem Vorgänger "Classic" zahlreiche Vorteile auf. Falls Sie mit dem Umstieg noch gewartet haben, ist jetzt der richtige Zeitpunkt, denn unsere interiorcad-Spezialisten und Schreiner Leonard Kern und David Zehntner zeigen in einer Dreiviertelstunde, wie Sie sich sofort zurechtfinden.
(Für Version 2024)
Category: Featured
Requires Approval: No
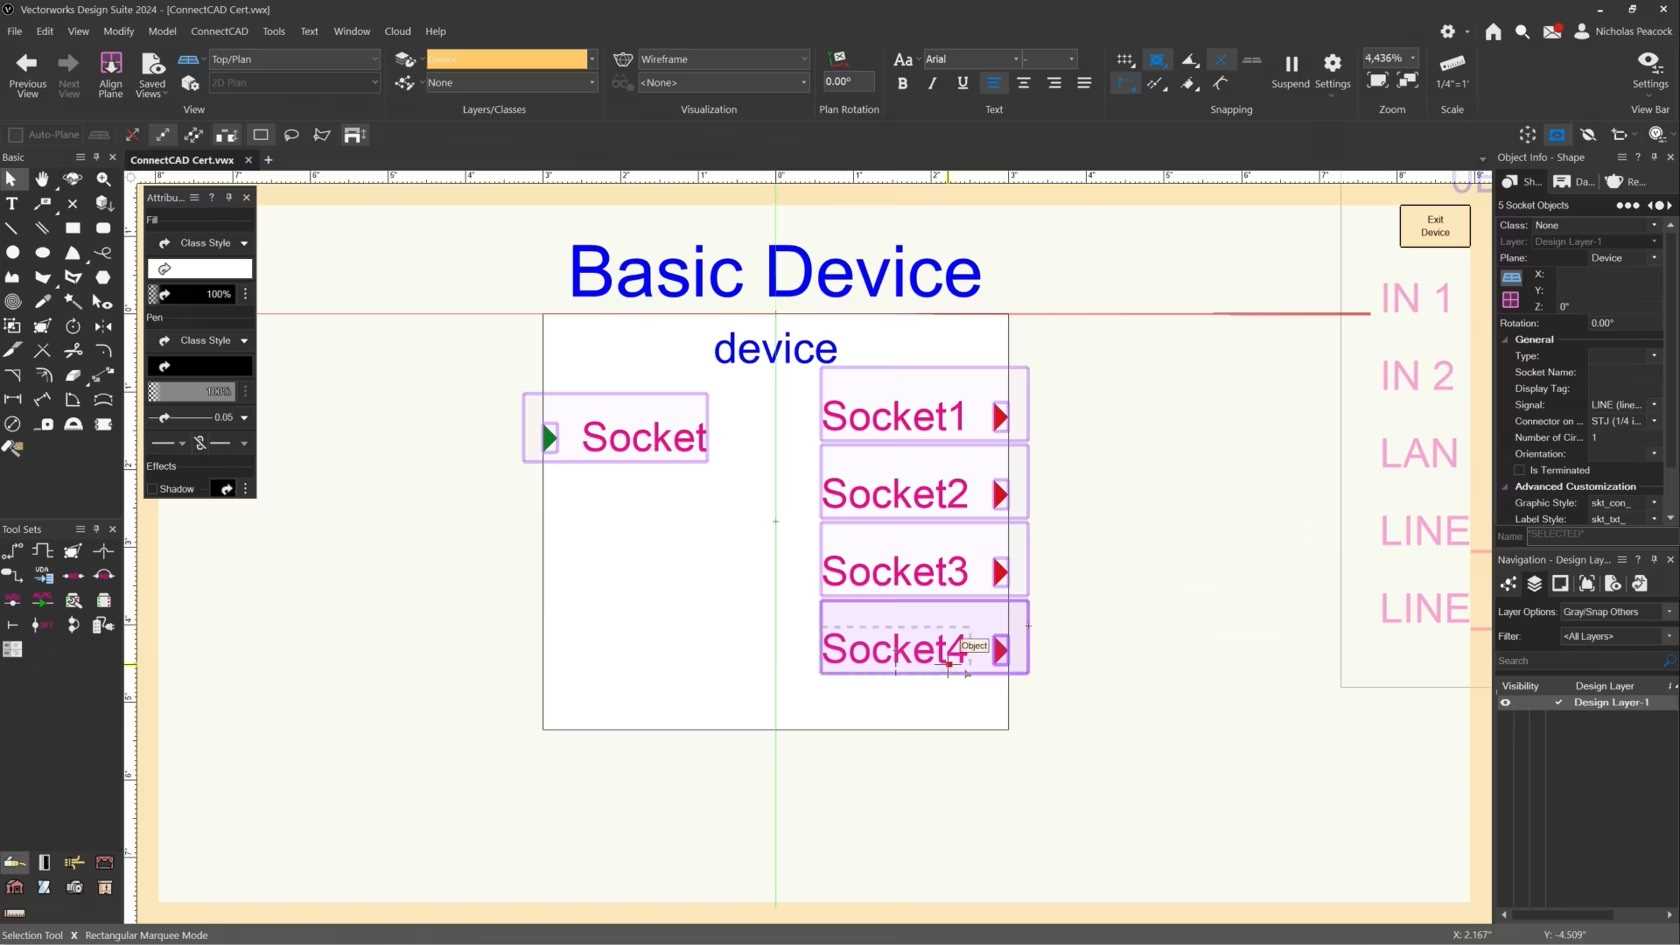
In this video, we will cover the basics of the Socket Tool.
Category: (2024) Skill
Requires Approval: No


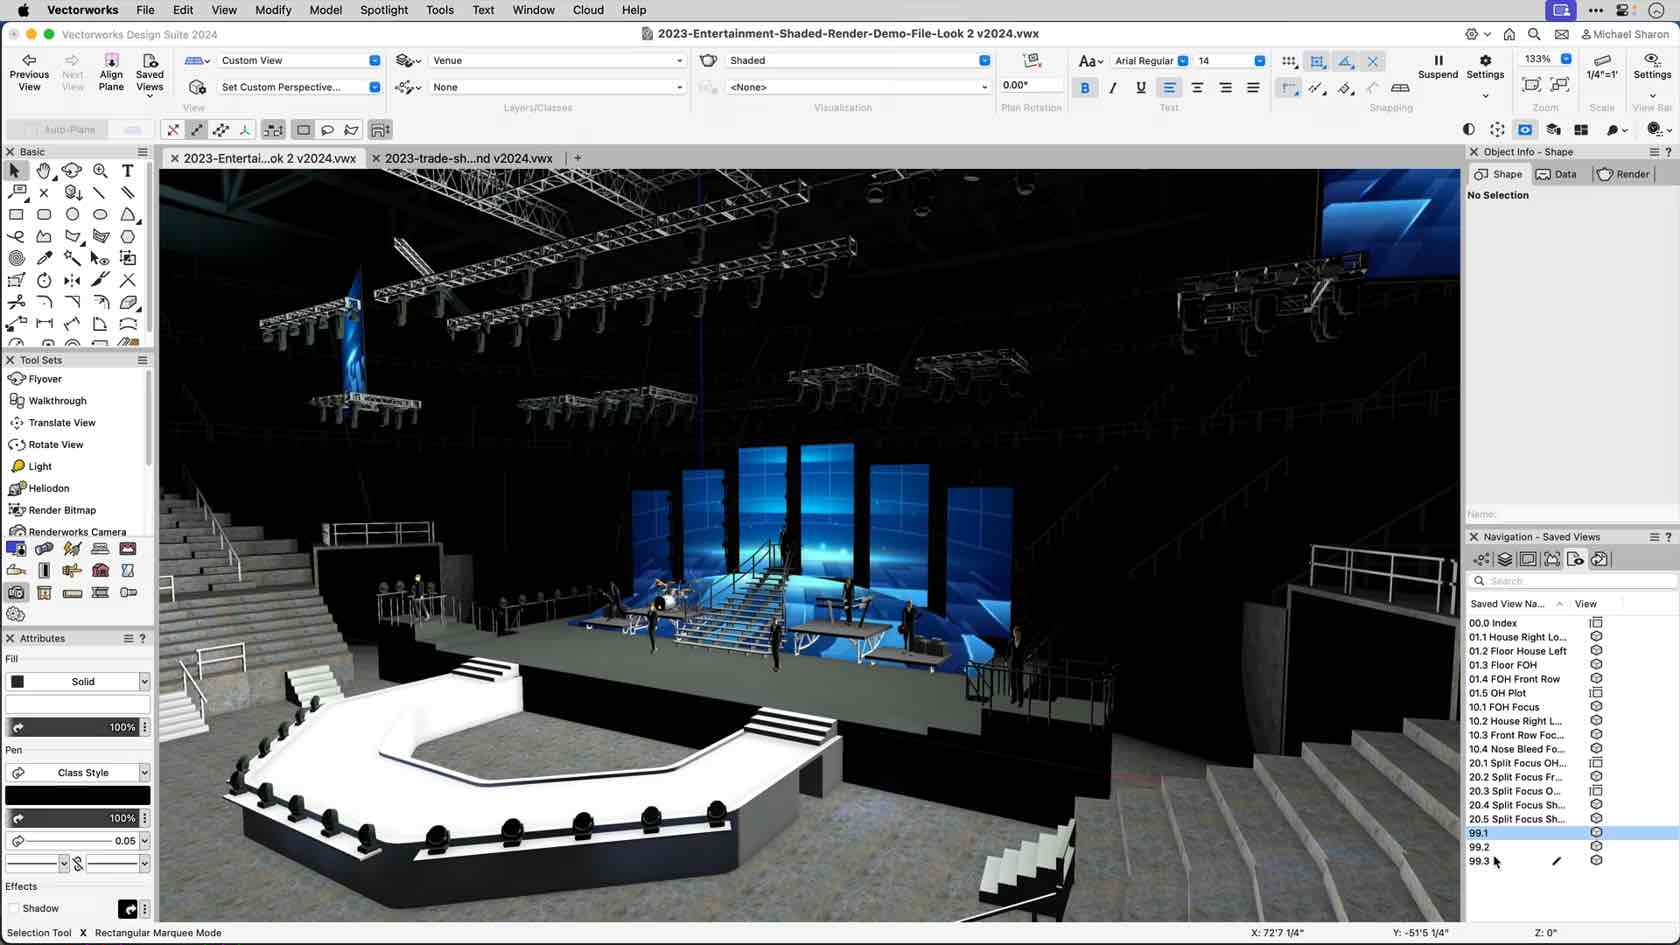
This video will introduce you the the Vectorworks Spotlight Rigging and Braceworks course
Category: CHAPTER 1
Requires Approval: No
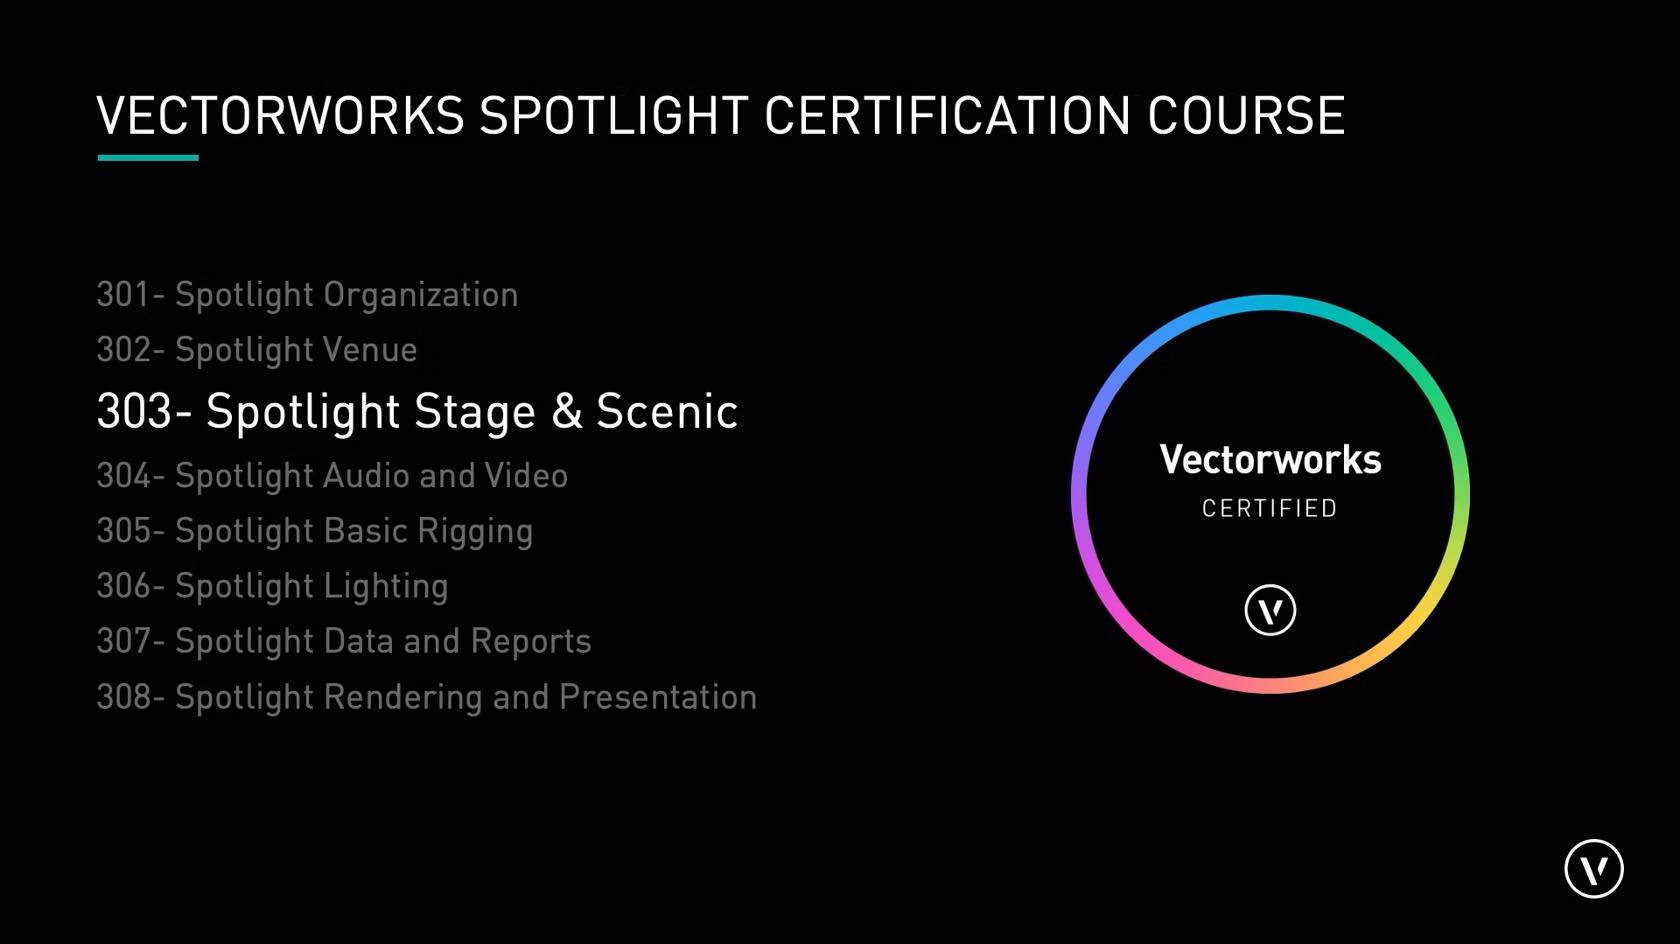
Participants will add stage and scenic elements to their design,
including seating, staging and steps, curtains and pipe-and-drape.
Category: Spotlight Certification 2024
Requires Approval: No
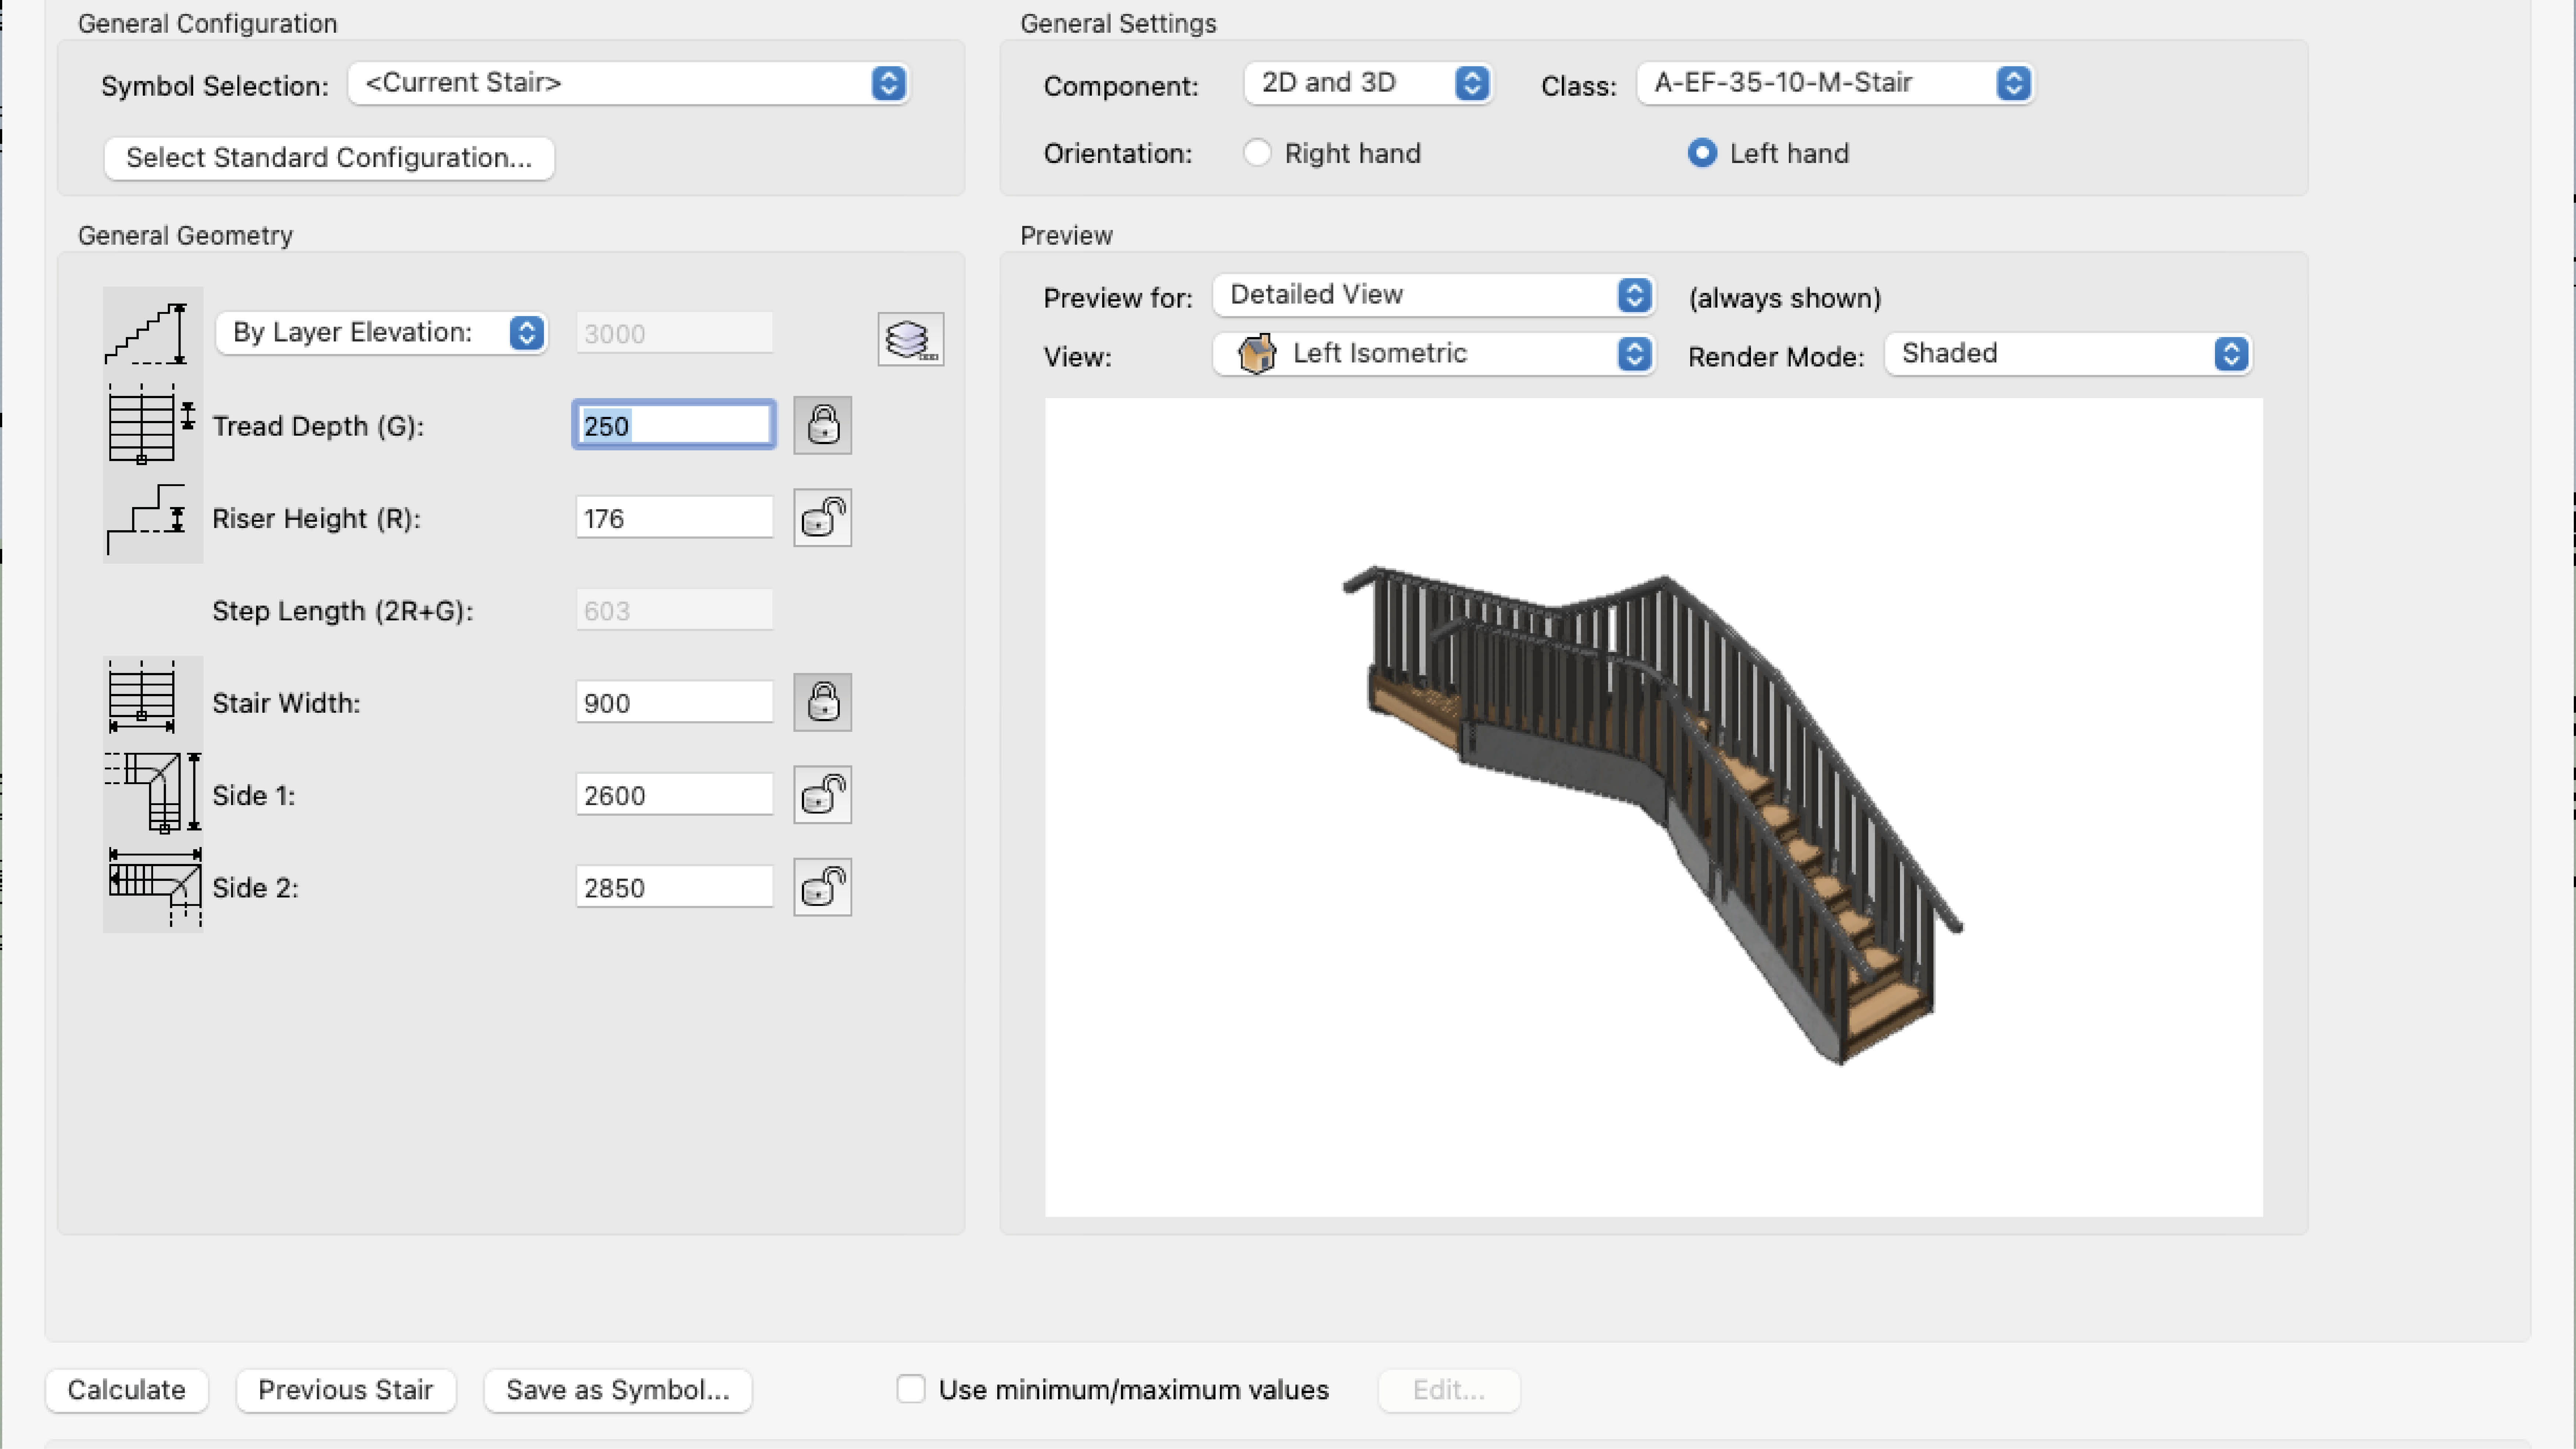
Stairs help you get from one story to another and are generally quite complex - luckily Vectorworks provides a tool to help you!
Stairs are complicated things involving lots of different pieces such as treads and risers, stringers and handrails. On top of all that there are also some fairly strict regulations on stairs in order to make them safe. Modelling a stair yourself would be time consuming and difficult and also a real pain if you had to make any changes! Vectorworks provides you with a tool to help generate your stairs and while the tool is complex (as it needs to be!) it will make creating stair objects easier for you particularly once you have saved some styles.
Stairs are complicated things involving lots of different pieces such as treads and risers, stringers and handrails. On top of all that there are also some fairly strict regulations on stairs in order to make them safe. Modelling a stair yourself would be time consuming and difficult and also a real pain if you had to make any changes! Vectorworks provides you with a tool to help generate your stairs and while the tool is complex (as it needs to be!) it will make creating stair objects easier for you particularly once you have saved some styles.
Category: Architect Certification 2024
Requires Approval: No
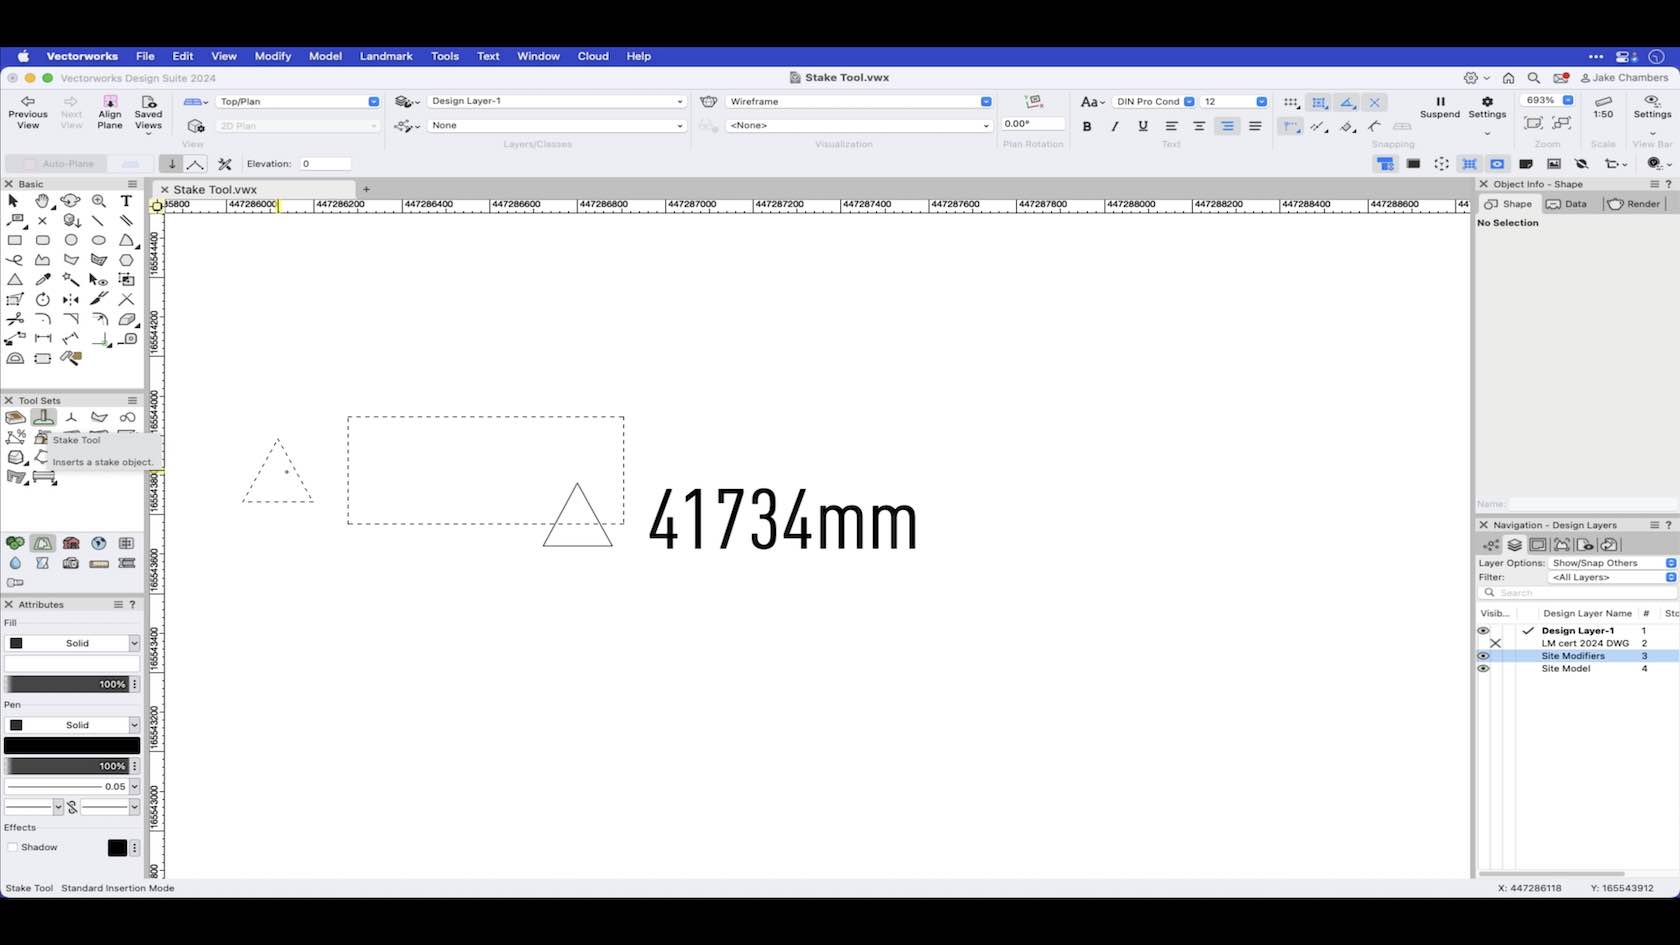
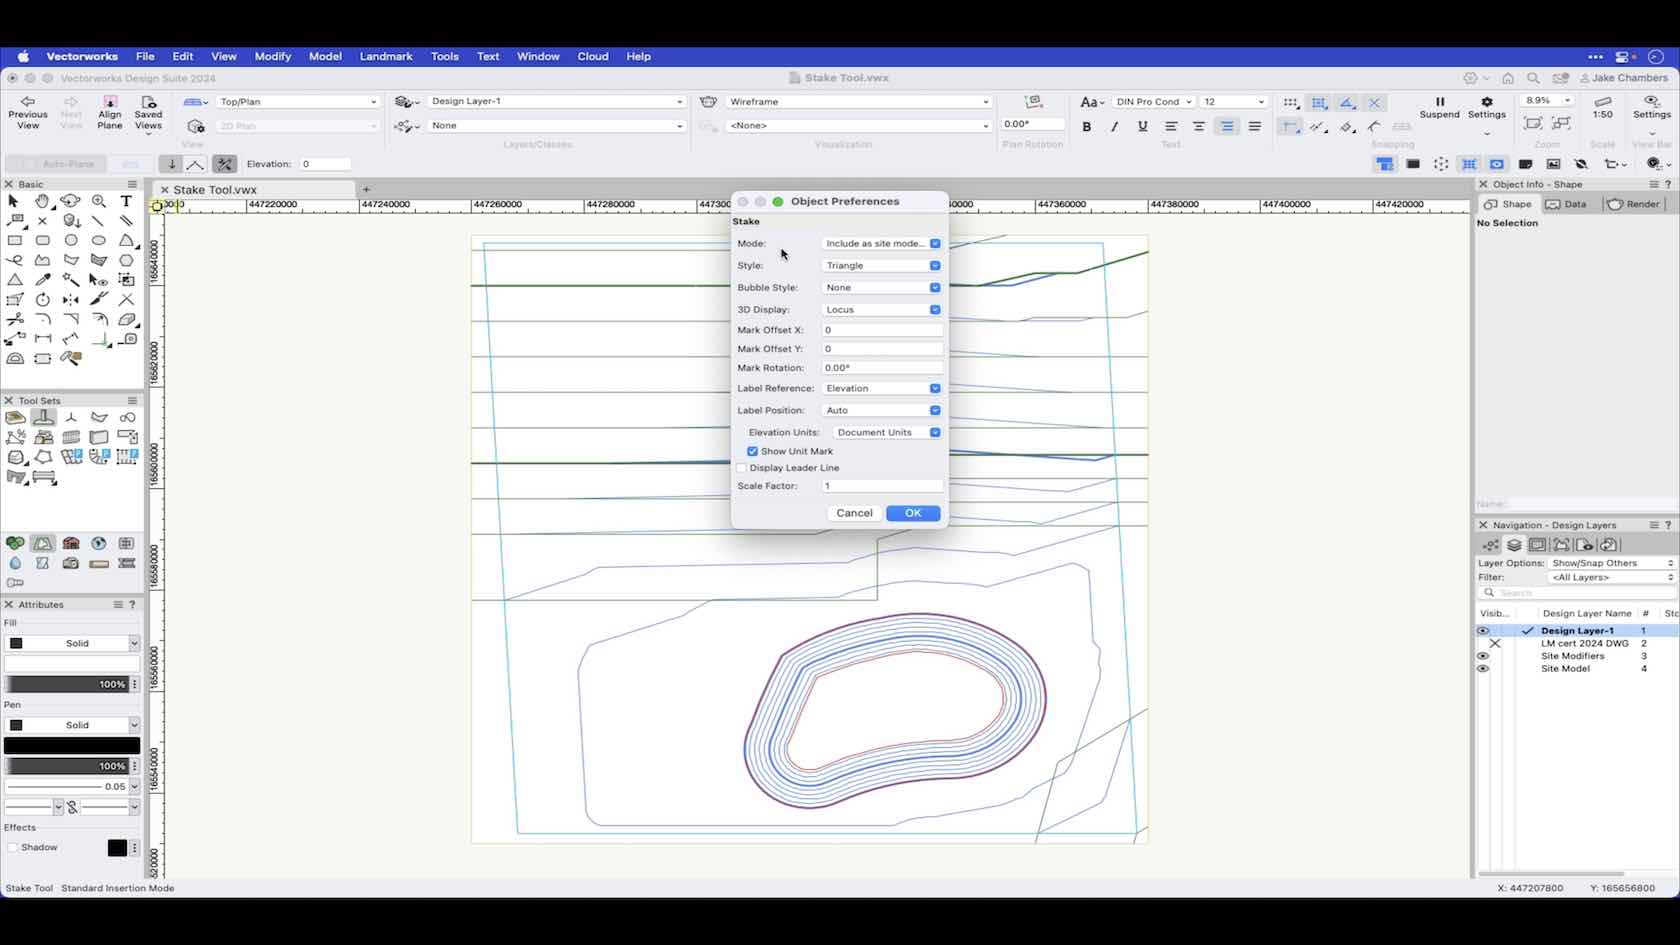
This video will demonstrate the modes of the Stake tool.
Category: Landmark 2024 Certificaiton
Requires Approval: No
This course will take a look at the standard 3D views available.
Category: Skill
Requires Approval: No
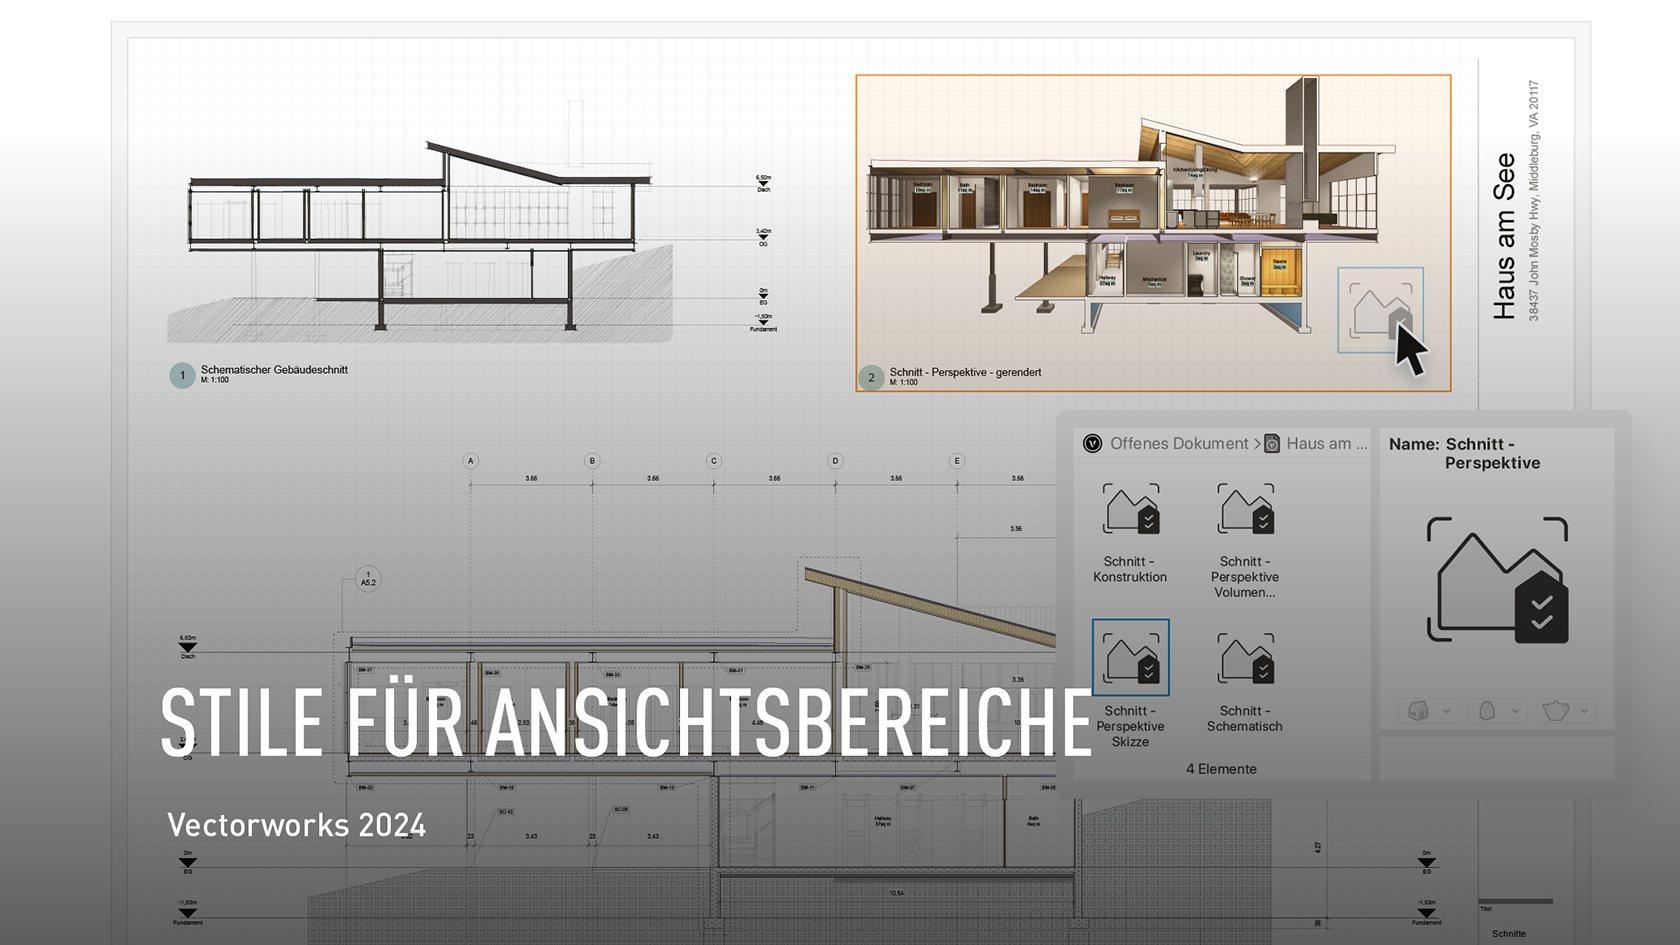
Mit den neuen Stilen für Ansichtsbereiche in Vectorworks 2024 speichern Sie Ihre wichtigsten Einstellungen für Ansichtsbereiche und weisen sie jederzeit mit einem Klick zu. Schnitte, Perspektiven usw. sind nicht nur im Nu erstellt, sondern entsprechen auch präzise den Standards Ihres Büros.
Category: All Industries
Requires Approval: No
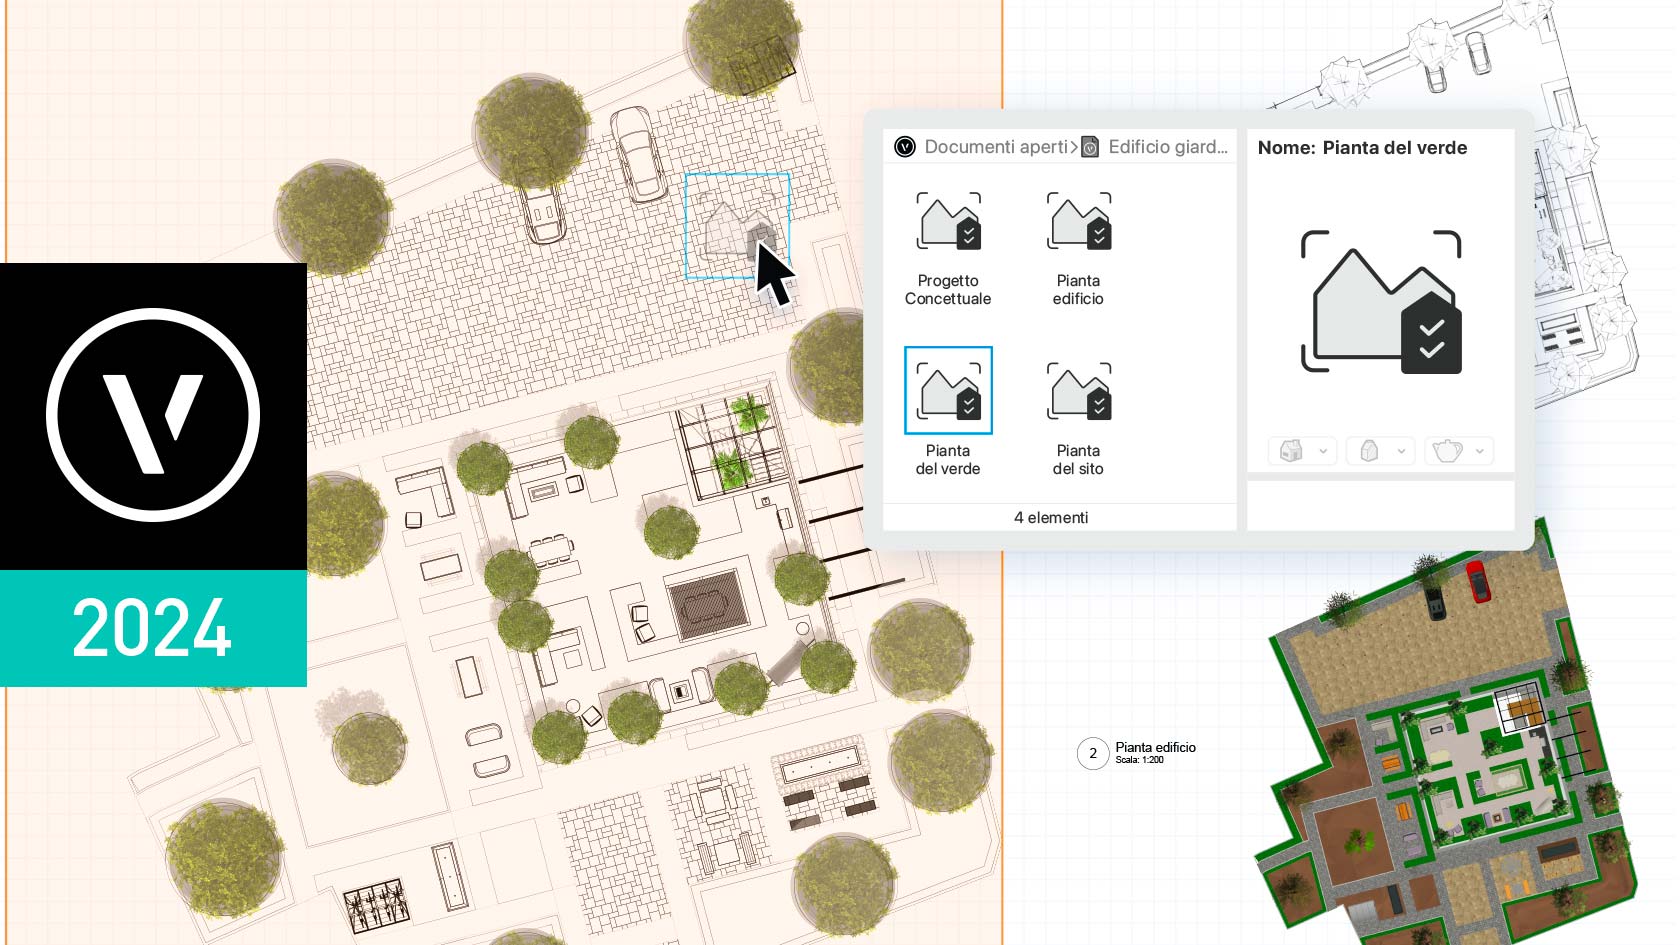
Con i nuovi Stili Viewport di Vectorworks 2024, sarai in grado di salvare le impostazioni personalizzate delle Viewport come Stili, rendendoli facilmente trasferibili tra le stesse Viewport e anche su file di progetto diversi. Sarai in grado di eliminare il lavoro ripetitivo nel replicare le impostazioni delle Viewport ed evitare errori.
Category: All Industries
Requires Approval: No
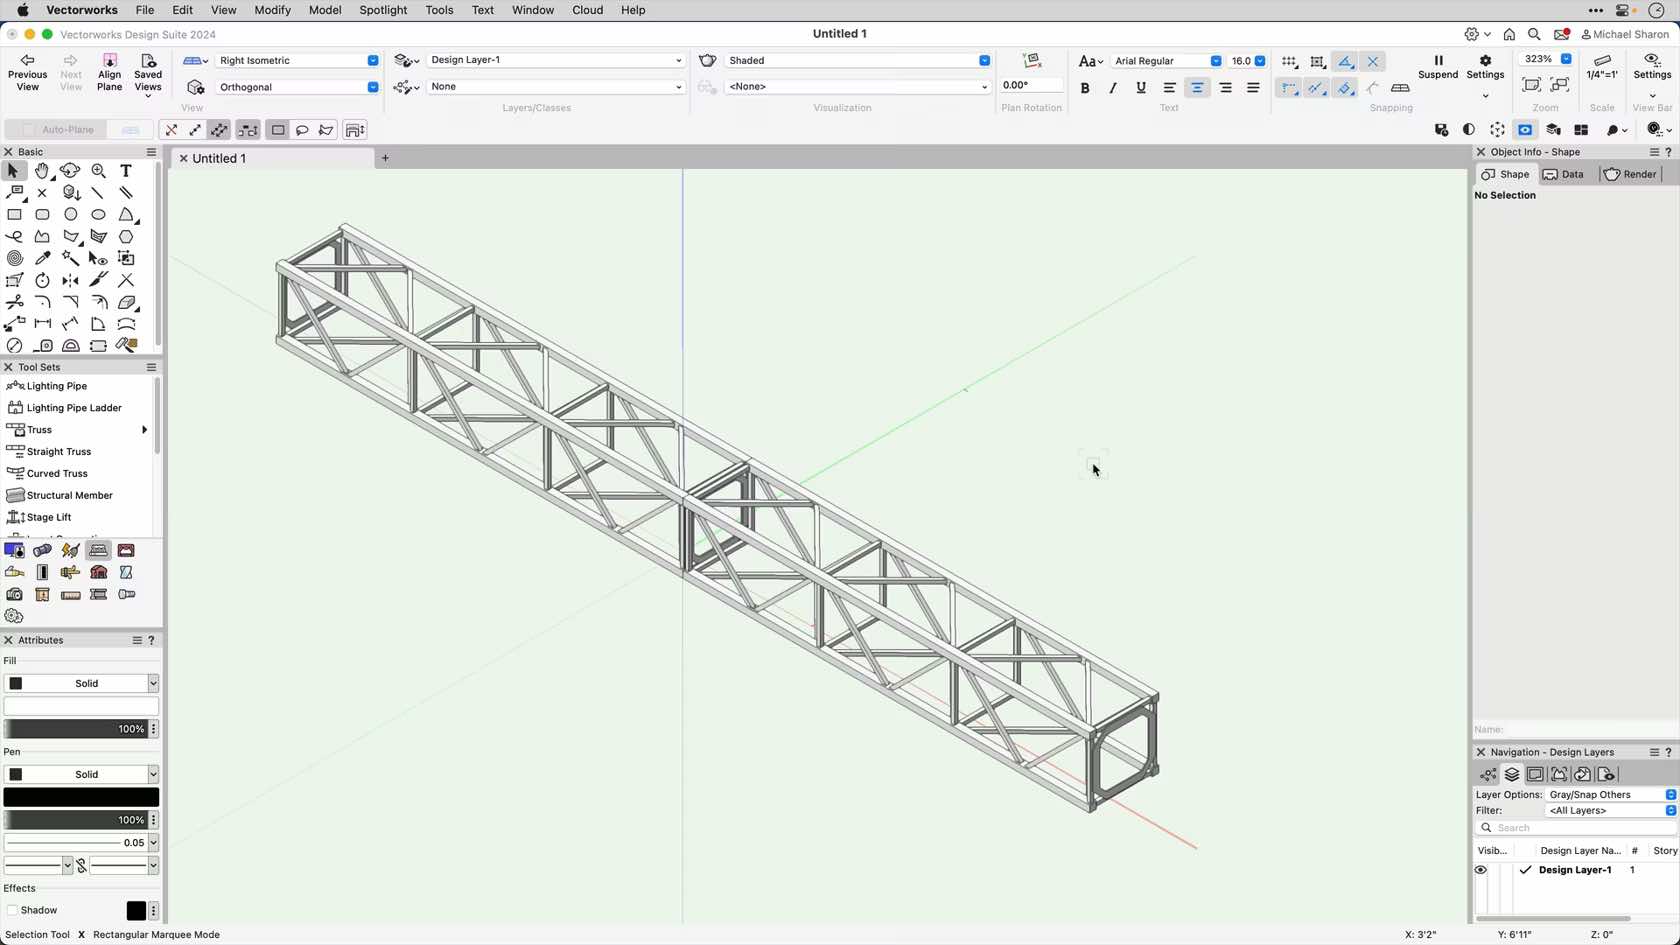
This course will explore in-depth the settings and options for the Straight Truss tool.
- Manager: Jake Chambers
- Manager: Bryan Goff
- Manager: Helen Law
- Manager: Helen Law
- Manager: Mark Mullany
- Manager: Nicholas Peacock
- Manager: Keith Ragsdale
- Manager: Michael Sharon
Category: CHAPTER 2
Requires Approval: No
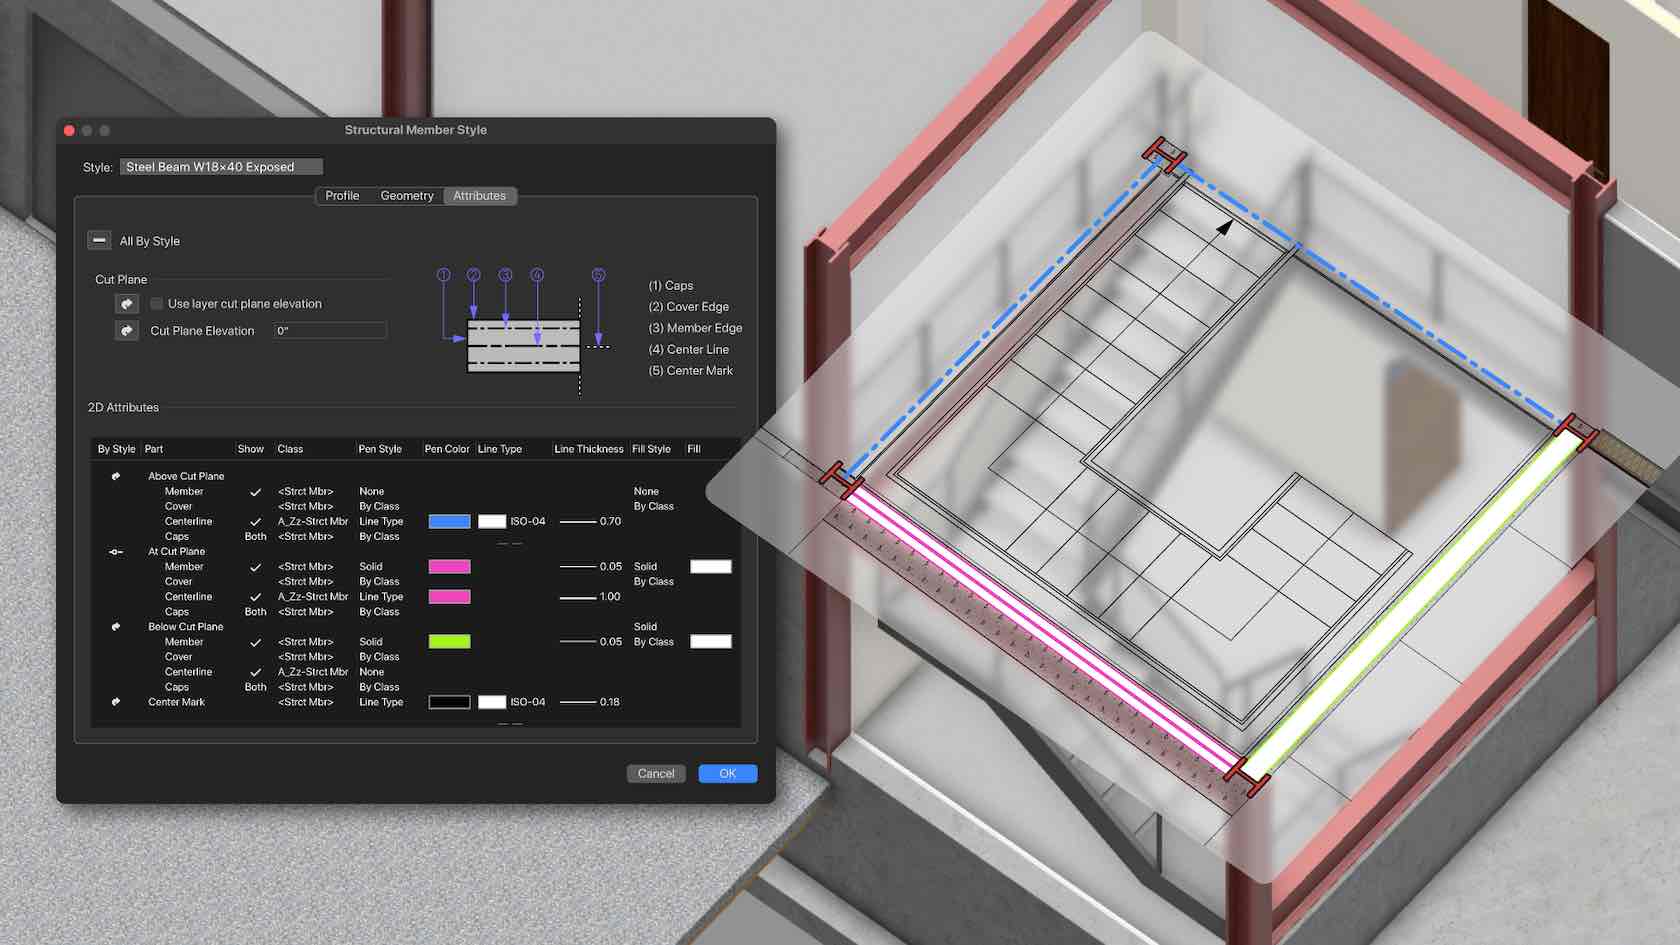
Streamline your design and documentation processes with improvements to structural members. Find greater control over 2D and 3D attributes, material, shape, and size of styled and instance-based parameters. And with control of auto-joining and support of the Create Objects from Shapes command, you'll save time when designing using these objects.
Category: Buildings
Requires Approval: No
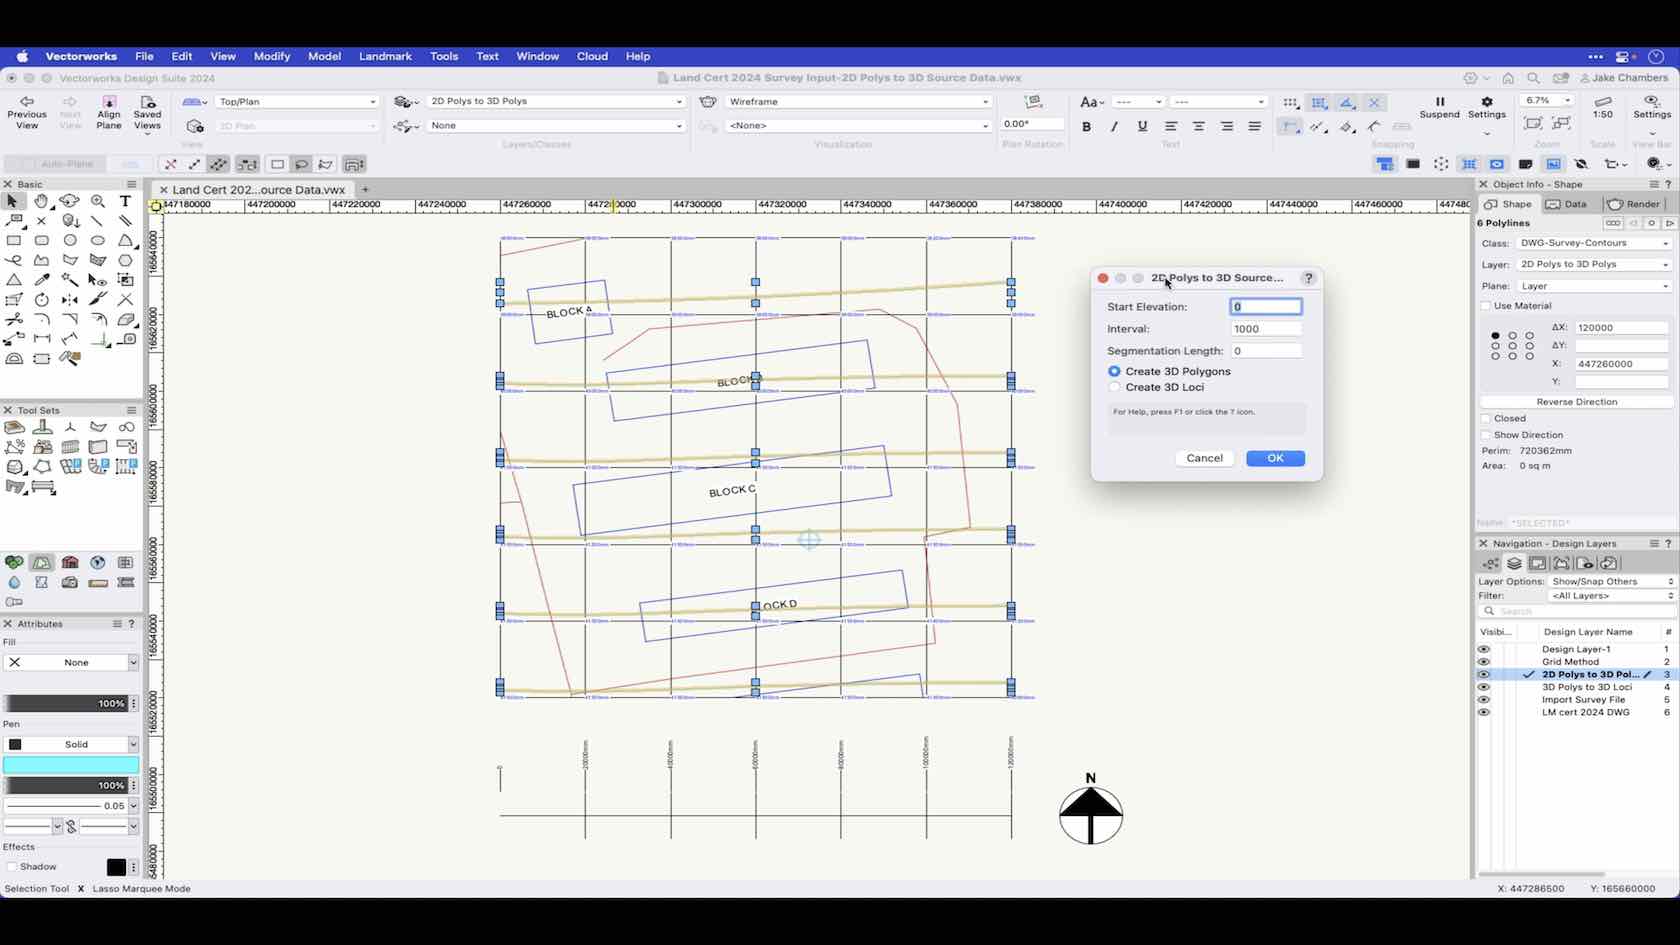
This video demonstrates how to convert 2D polylines into 3D source data using the Landmark Commands menu.
Category: Landmark 2024 Certificaiton
Requires Approval: No
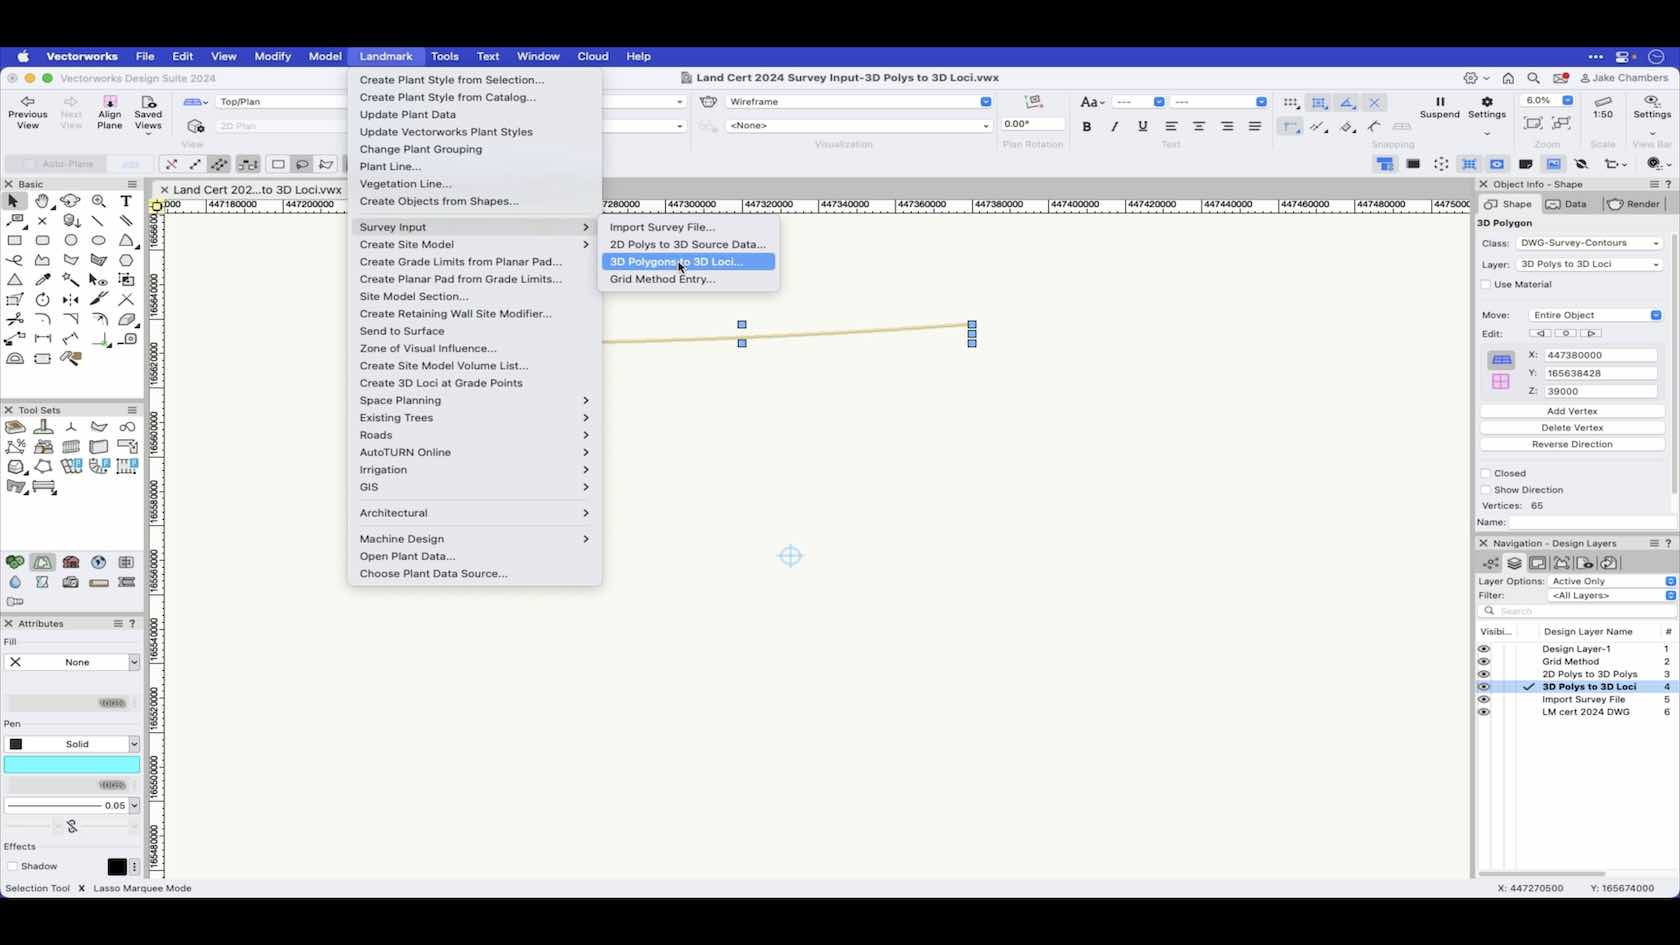
In this video we look at how 3D Polys can have 3D Loci placed along there vertices by running the 3D Polys to 3D Loci command.
Category: Landmark 2024 Certificaiton
Requires Approval: No
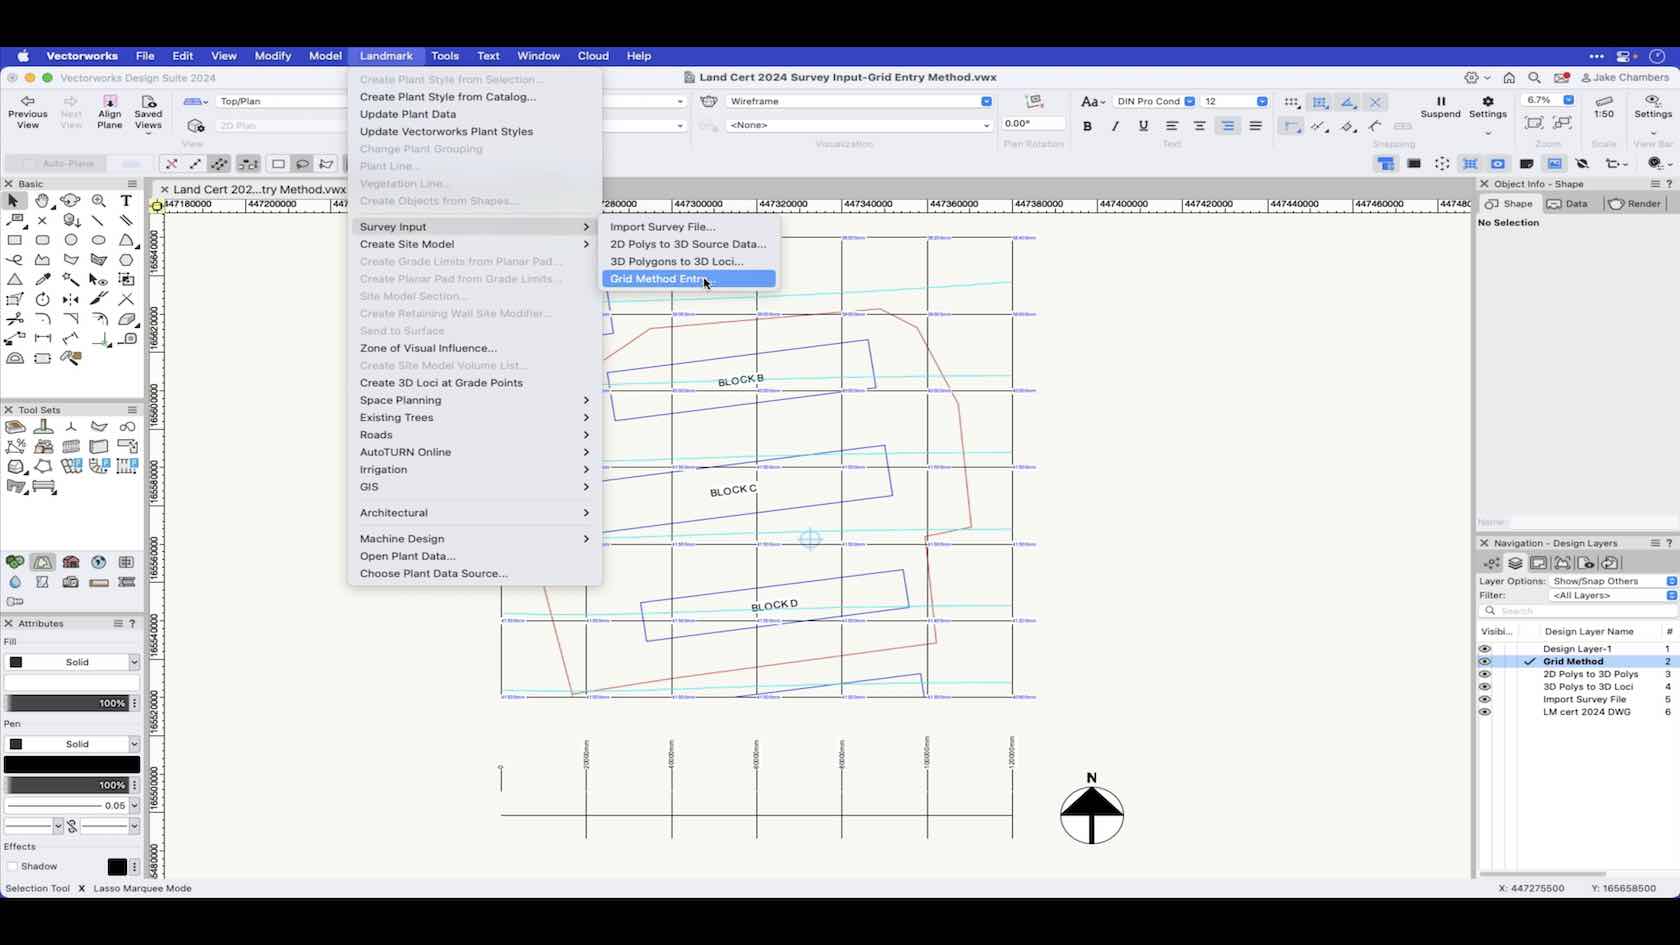
This video will demonstrate how to use the grid entry method for inputting survey data.
Category: Landmark 2024 Certificaiton
Requires Approval: No
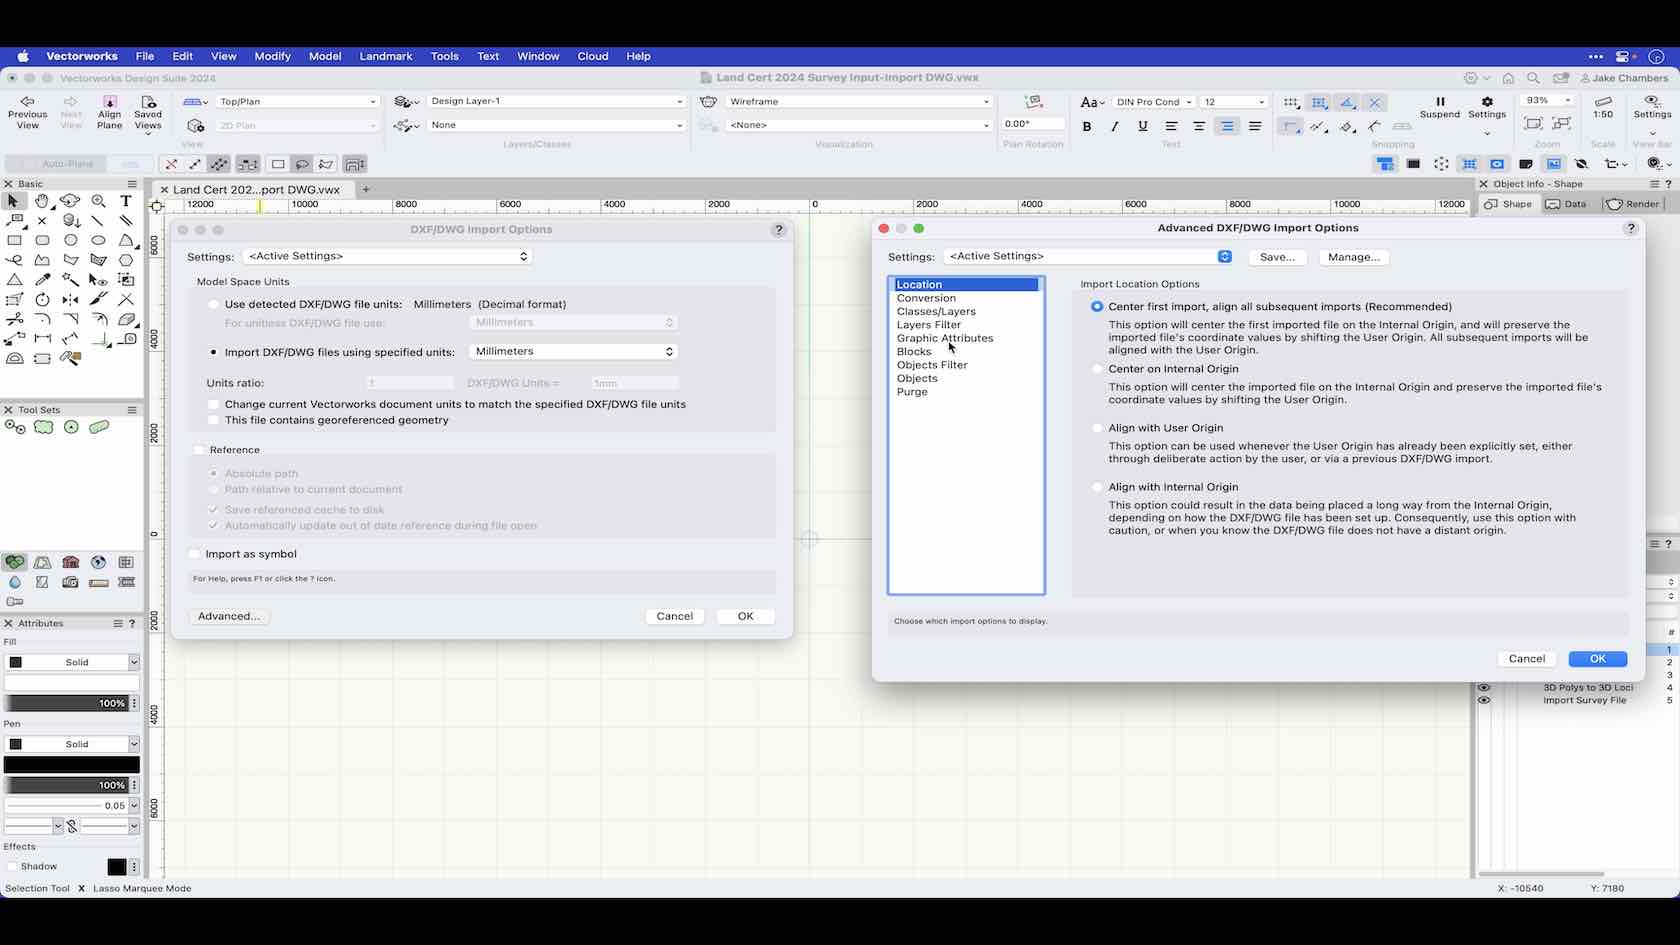
In this video we walk through the steps required to import a DWG survey file and look at the forms of 3D data within.
Category: Landmark 2024 Certificaiton
Requires Approval: No
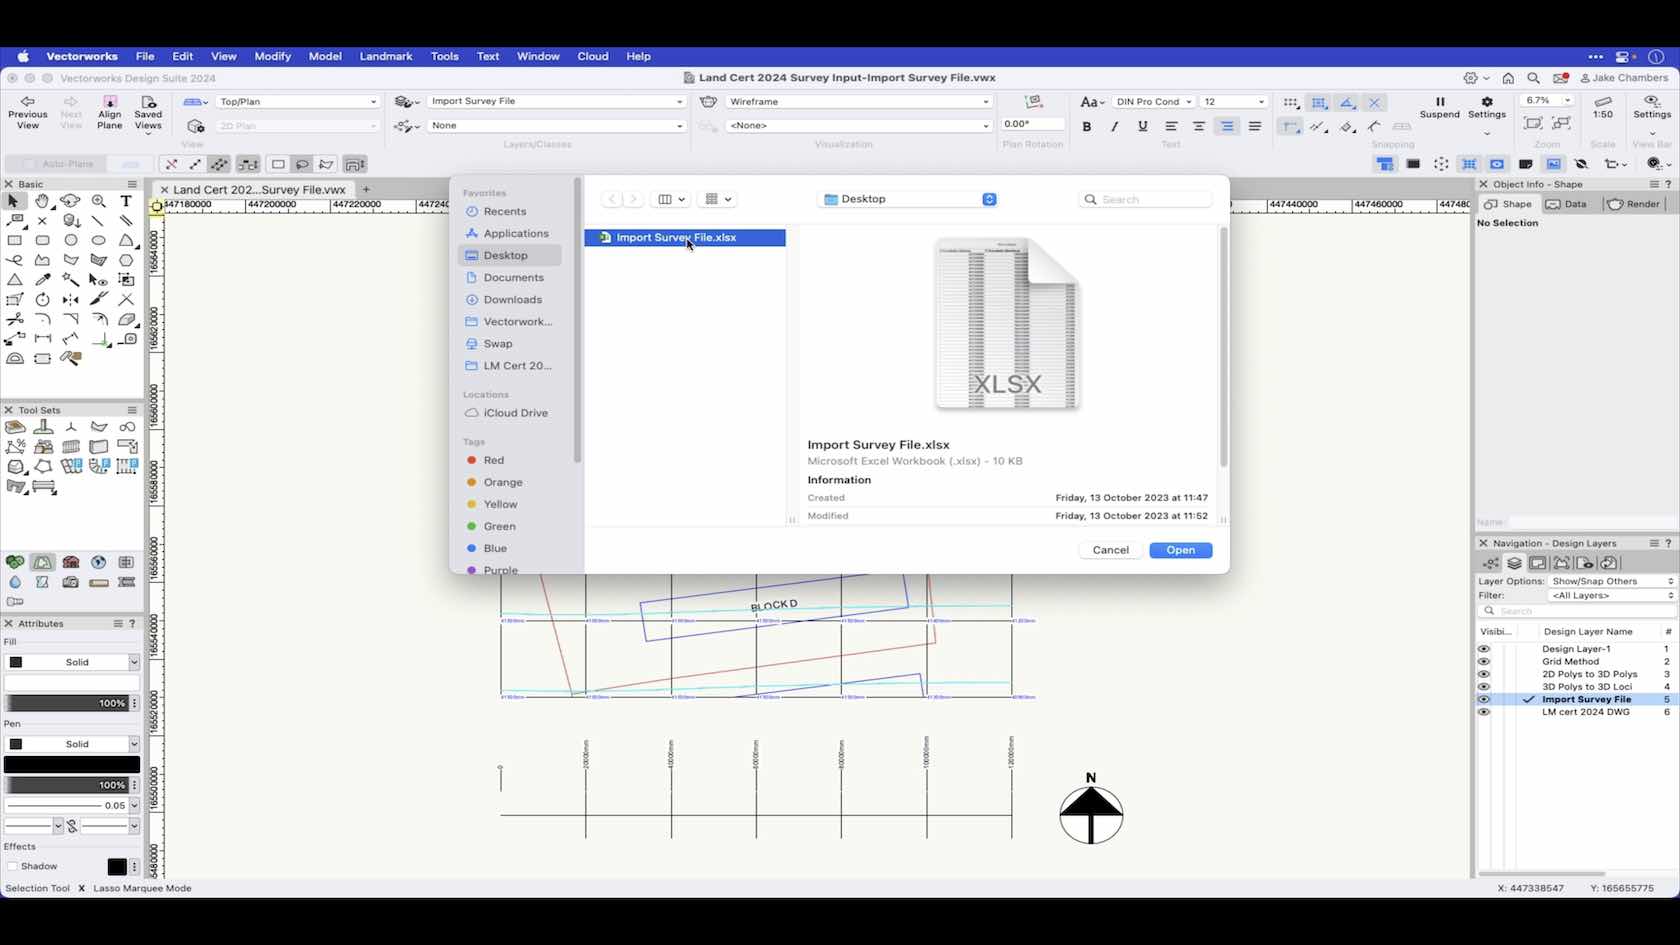
In this video we take a look at how to import survey data from a spreadsheet file.
Category: Landmark 2024 Certificaiton
Requires Approval: No
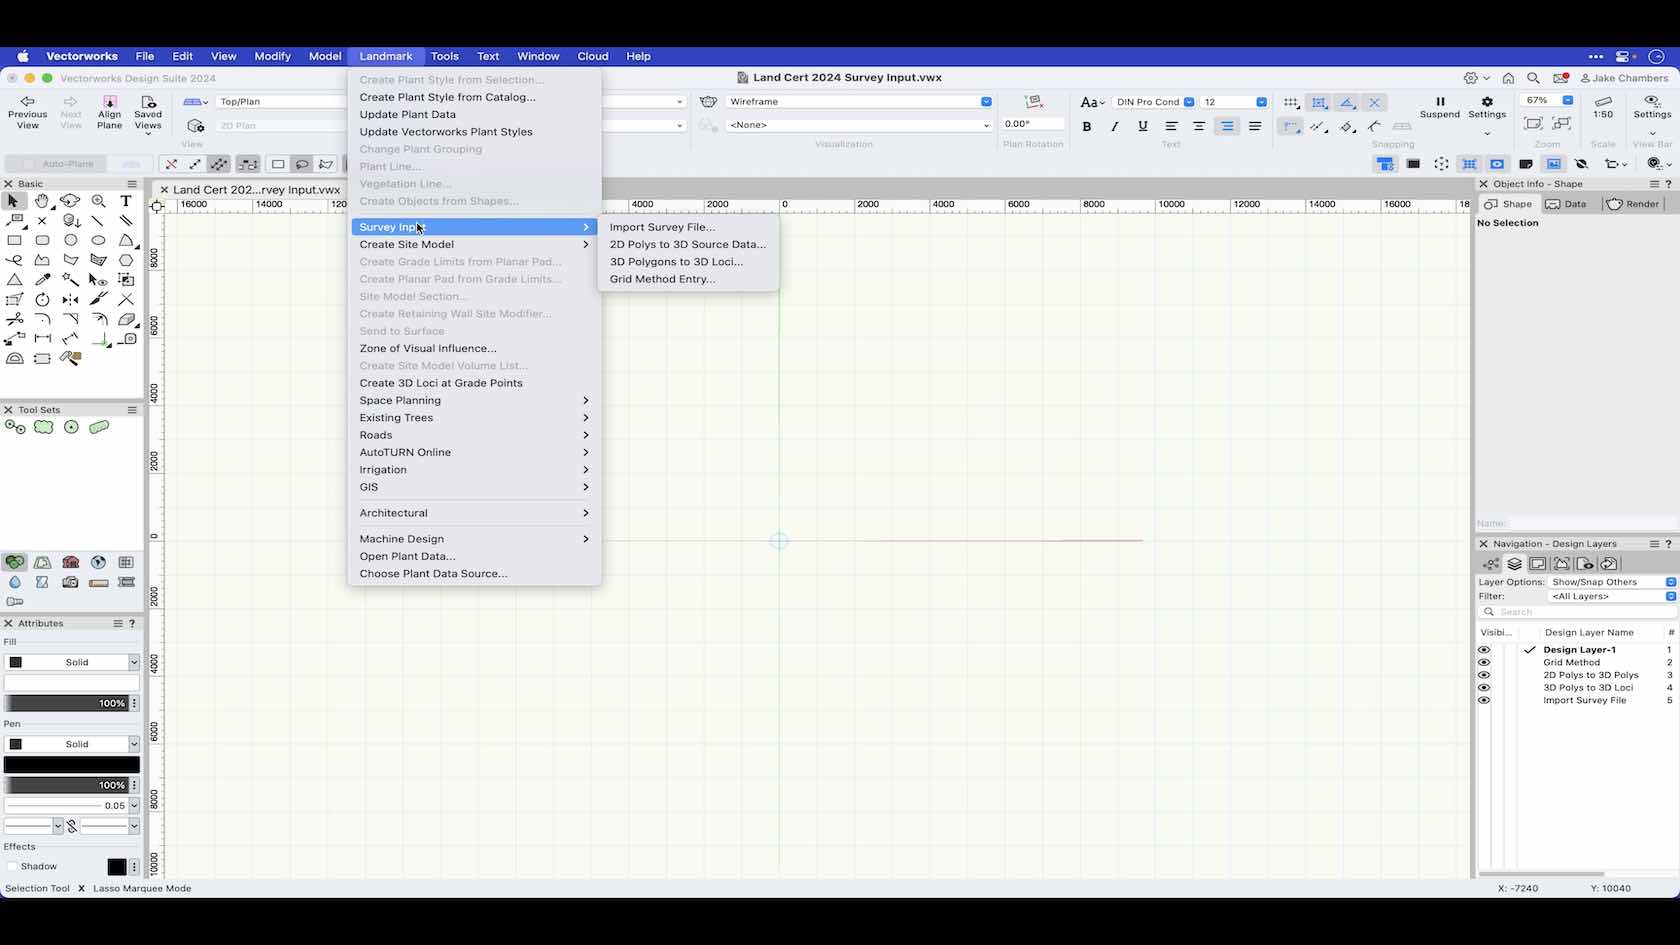
An overview to look at how we can import survey data or input our own survey data using the survey input commands in Vectorworks.
Category: Landmark 2024 Certificaiton
Requires Approval: No
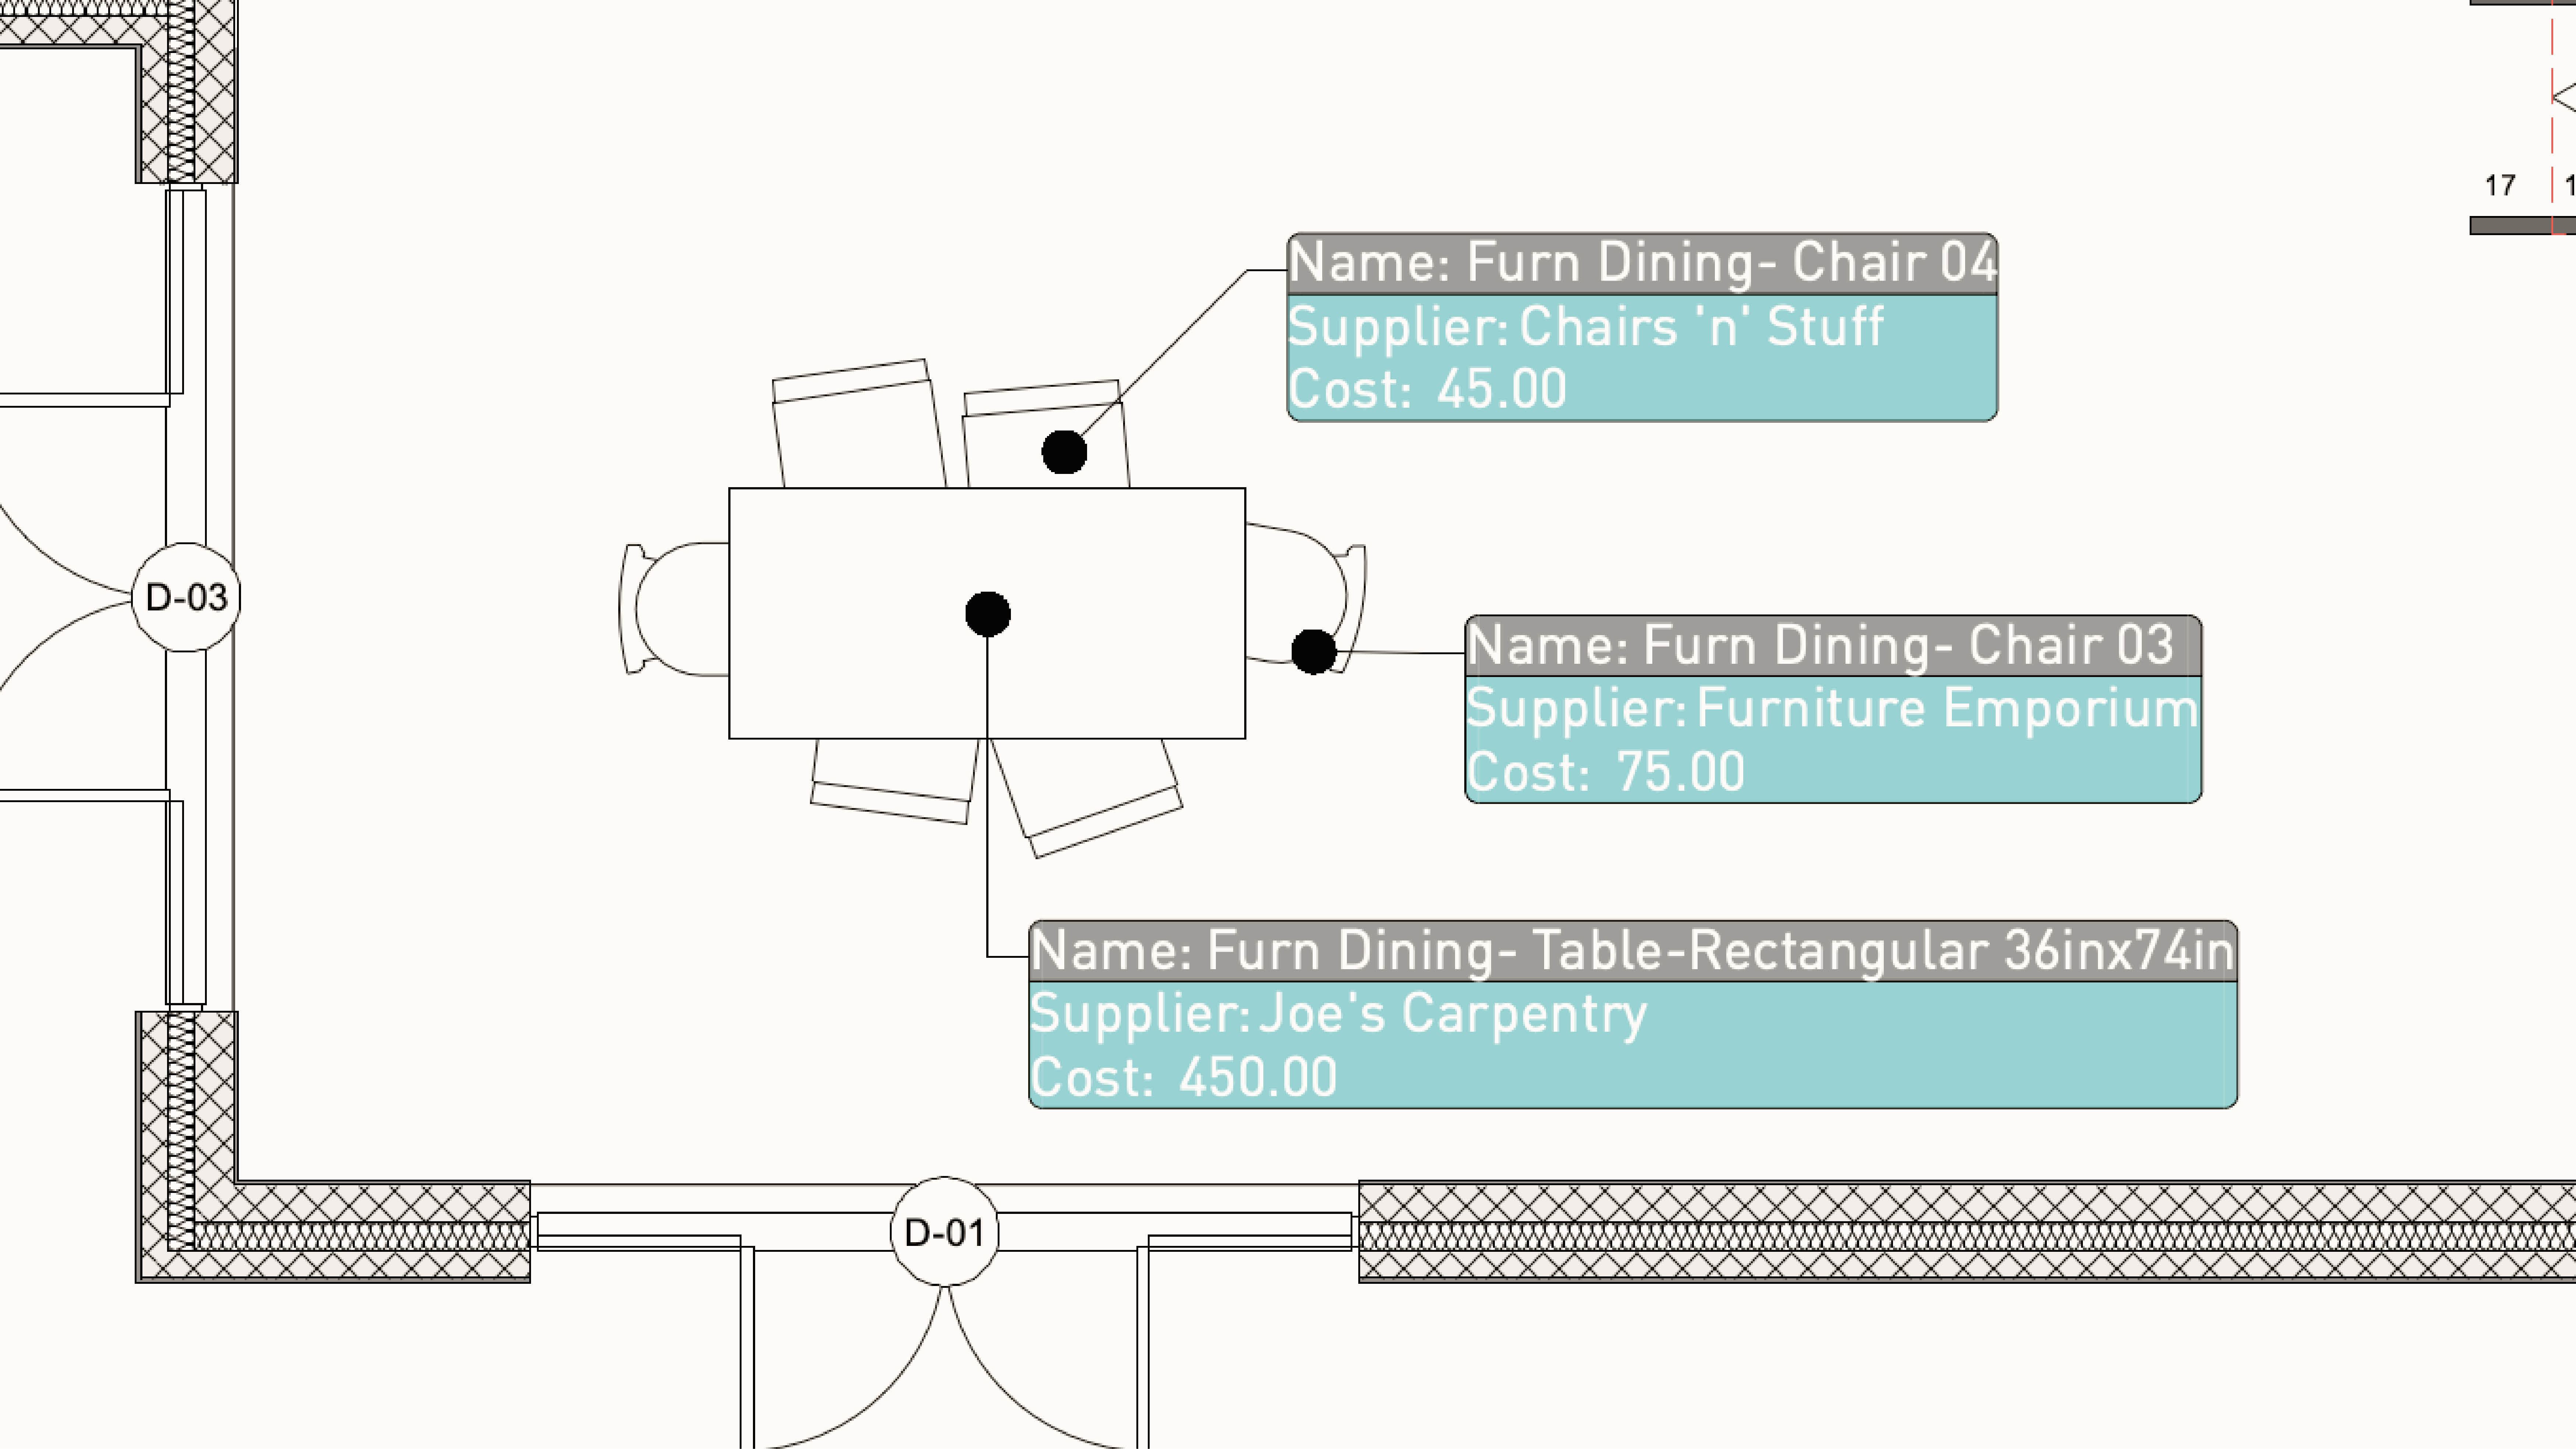
Quite often you will find yourself drawing the same thing over and over again — try using a symbol instead. Any geometry can be saved into a symbol. Once the geometry is packaged into a symbol, any changes to the symbol definition will automatically update any instances of the symbol on the drawing.
You can create a Hybrid symbol—which contains both a 2D and a 3D representation. These representations can also contain different graphics for different detail levels.
Symbols also keep the size of your file small and enable efficient changes across a drawing. If you need to make multiple copies of anything, first, convert it to a symbol.
This section will recap creating a symbol as well as introduce the concepts of 2D components, Detail levels and Component Location
Category: Architect Certification 2024
Requires Approval: No
Sie erhalten einen Überblick, wie Sie mit Tabellen Zeichnungen intelligent auswerten.
Category: Erste Schritte 2024
Requires Approval: No
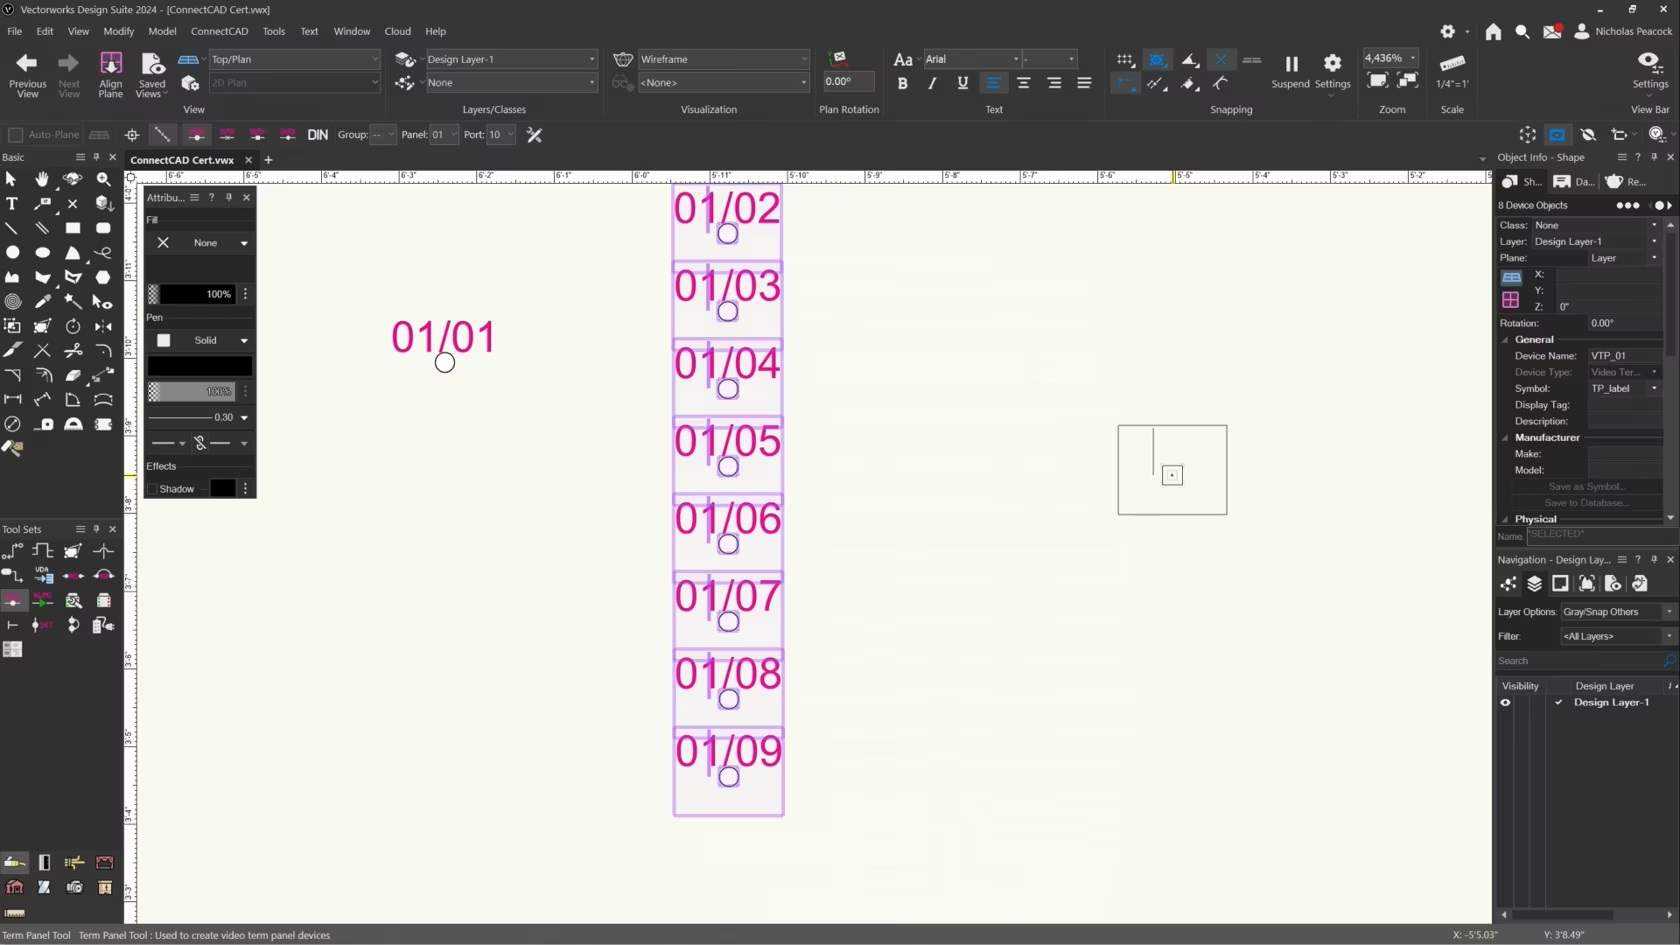
In this video, we will cover the basics of the Term Panel Tool.
Category: (2024) Skill
Requires Approval: No
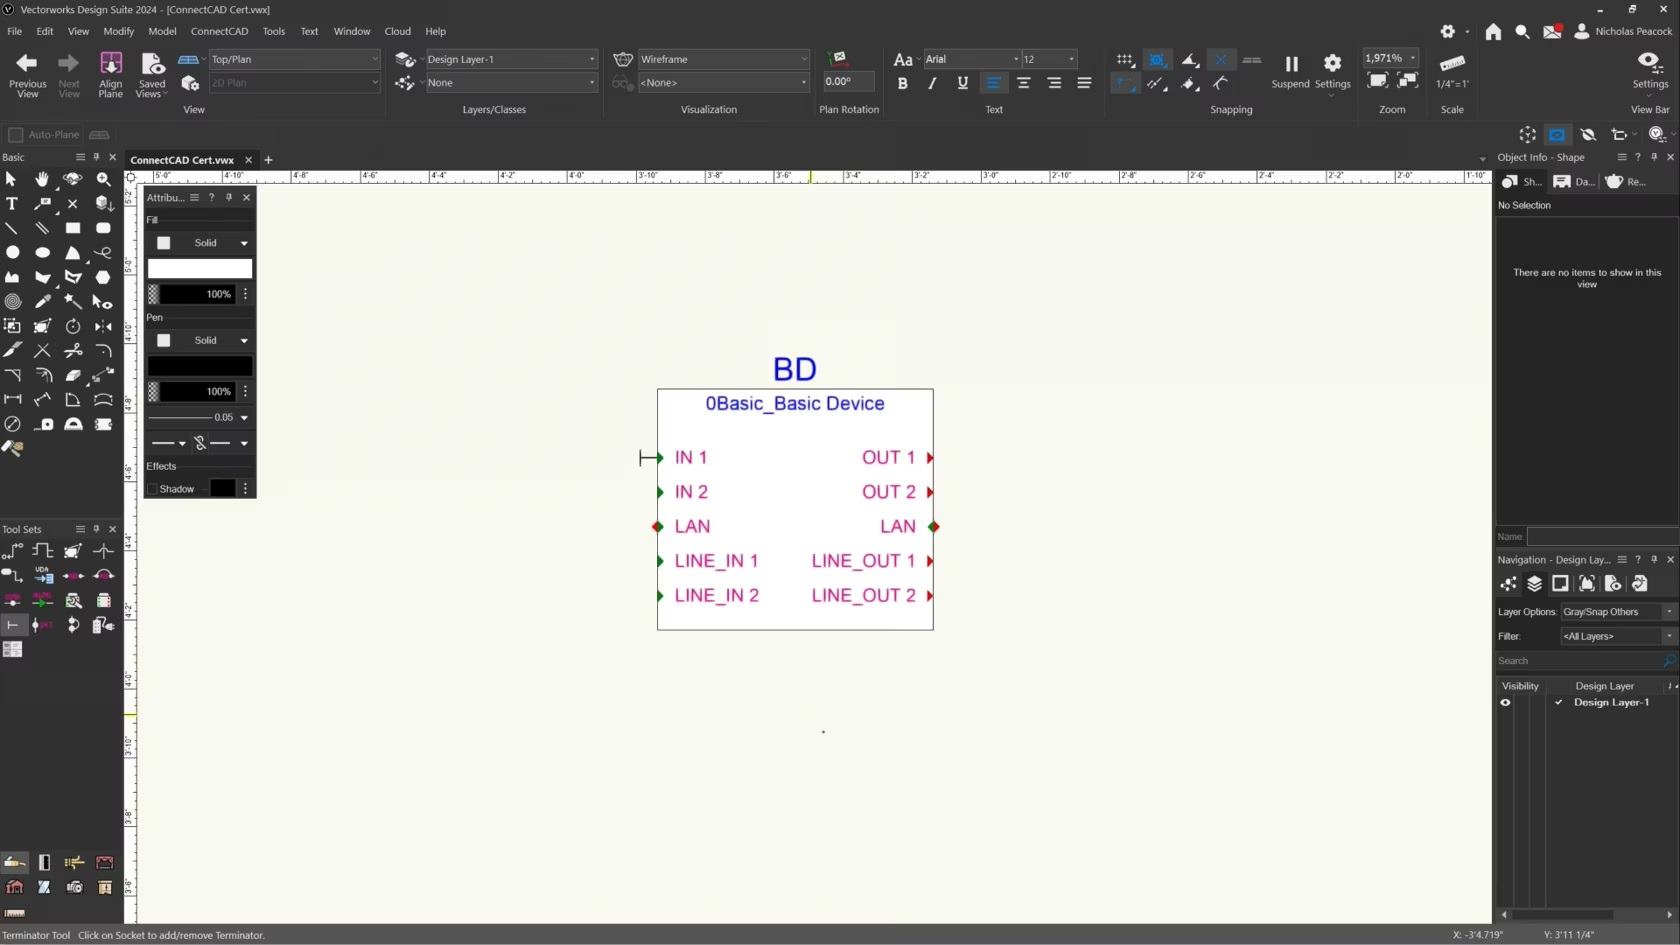
In this video, we will cover the basics of the Terminator Tool.
Category: (2024) Skill
Requires Approval: No
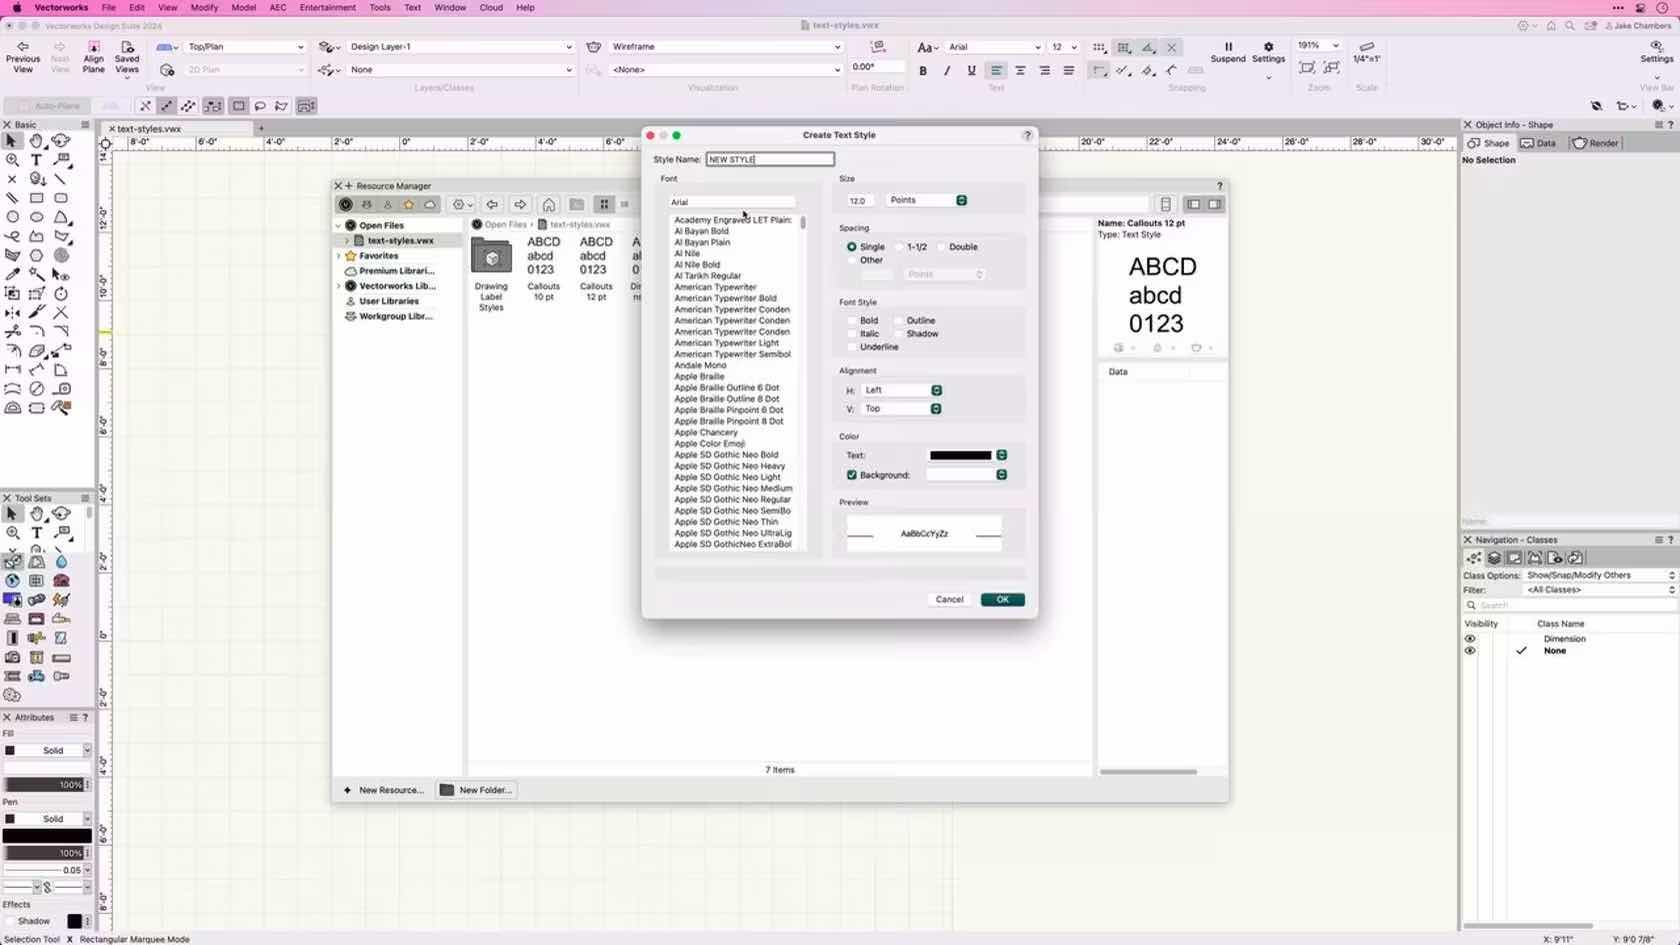
This course introduces Text Styles and demonstrates how to apply, create, edit, and import text styles.
Category: (2024) Skill
Requires Approval: No
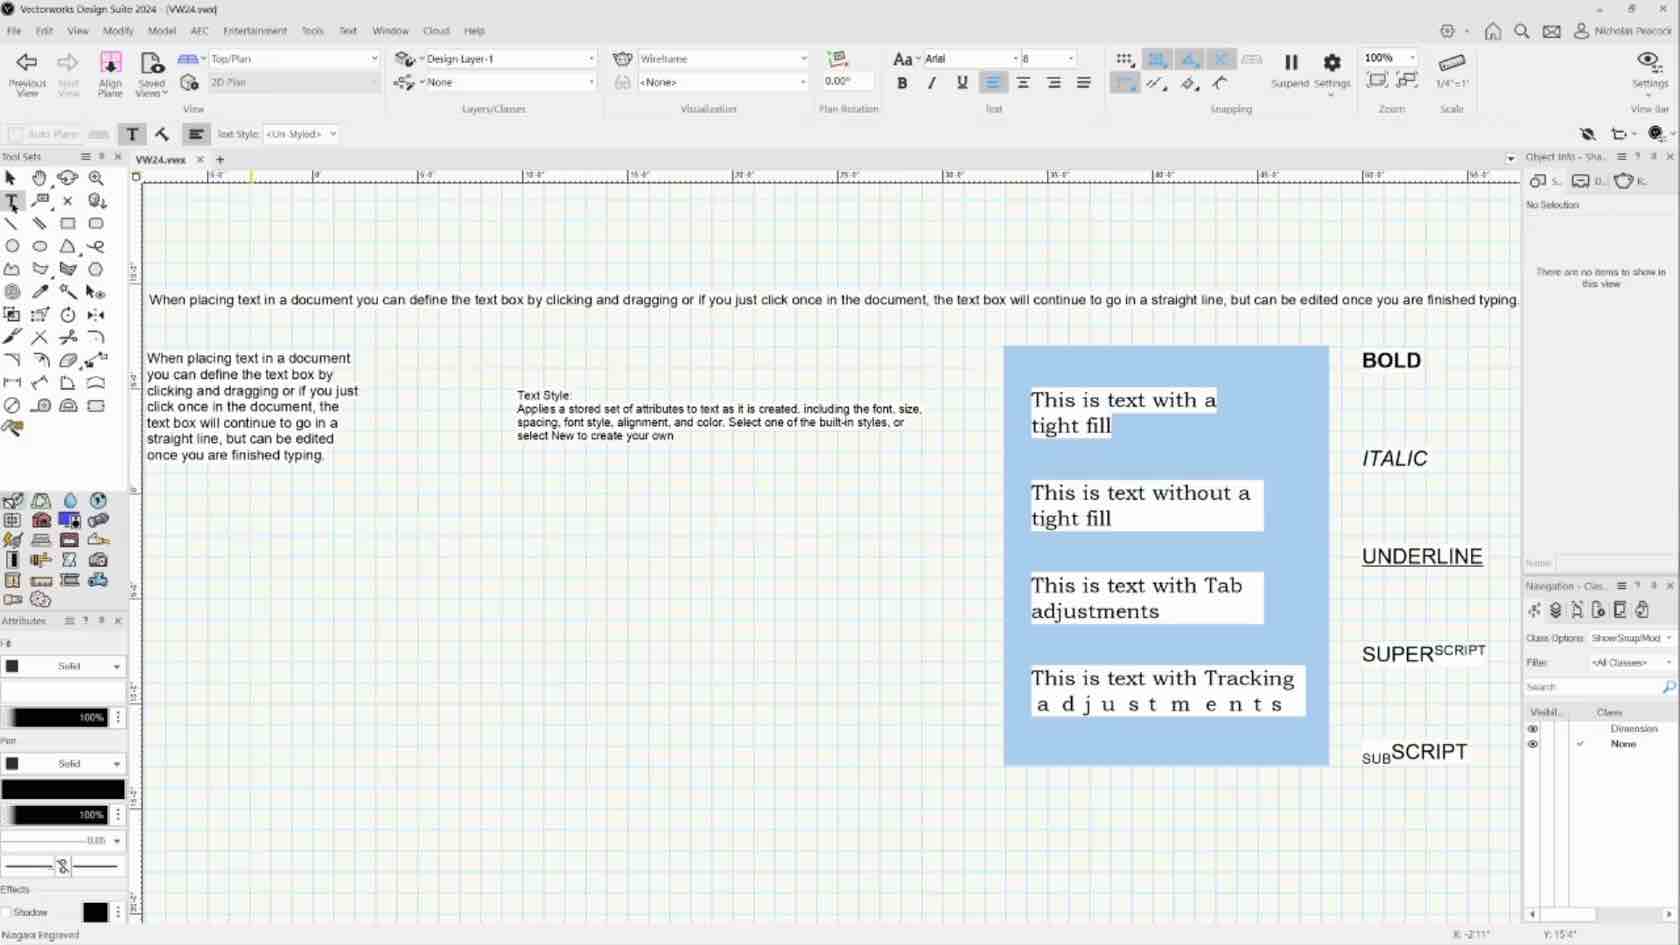
In this course, we will learn to place and format text in the document.
Category: Skill
Requires Approval: No

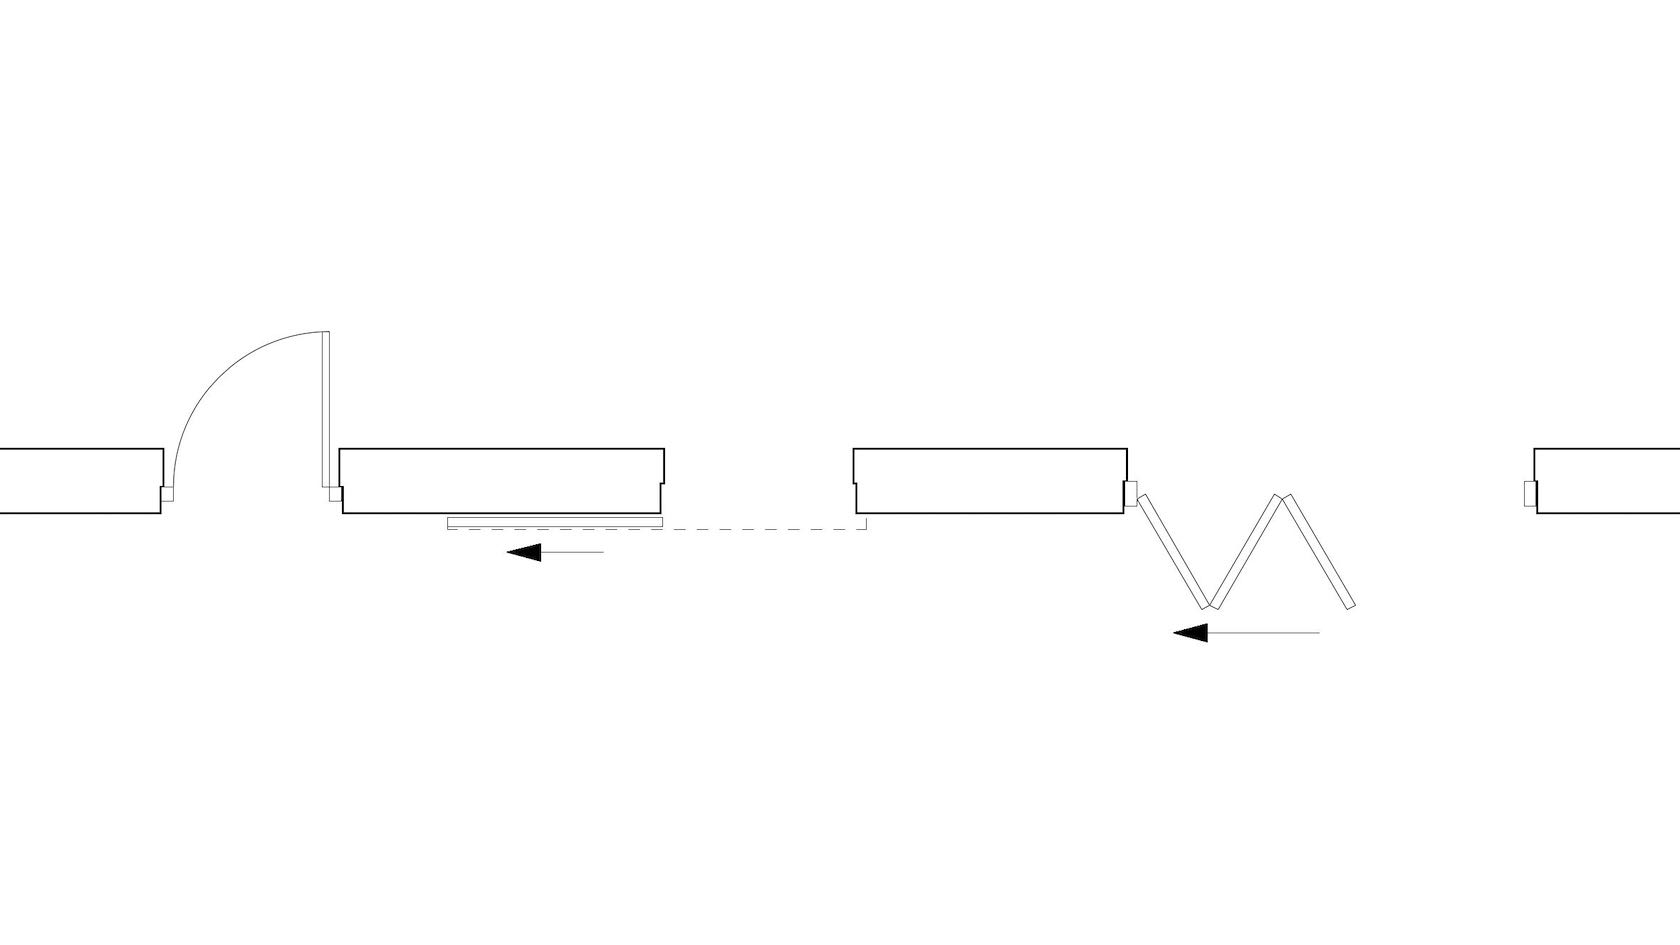
The Door tool has many settings and features to allow you to create, modify and schedule your doors. Explore the commonly used settings and gain an understanding of how to use the door settings dialogue in your projects.
- Manager: Jake Chambers
- Manager: Bryan Goff
- Manager: Helen Law
- Manager: Helen Law
- Manager: Mark Mullany
- Manager: Nicholas Peacock
- Manager: Keith Ragsdale
- Manager: Michael Sharon
Category: Skill
Requires Approval: No
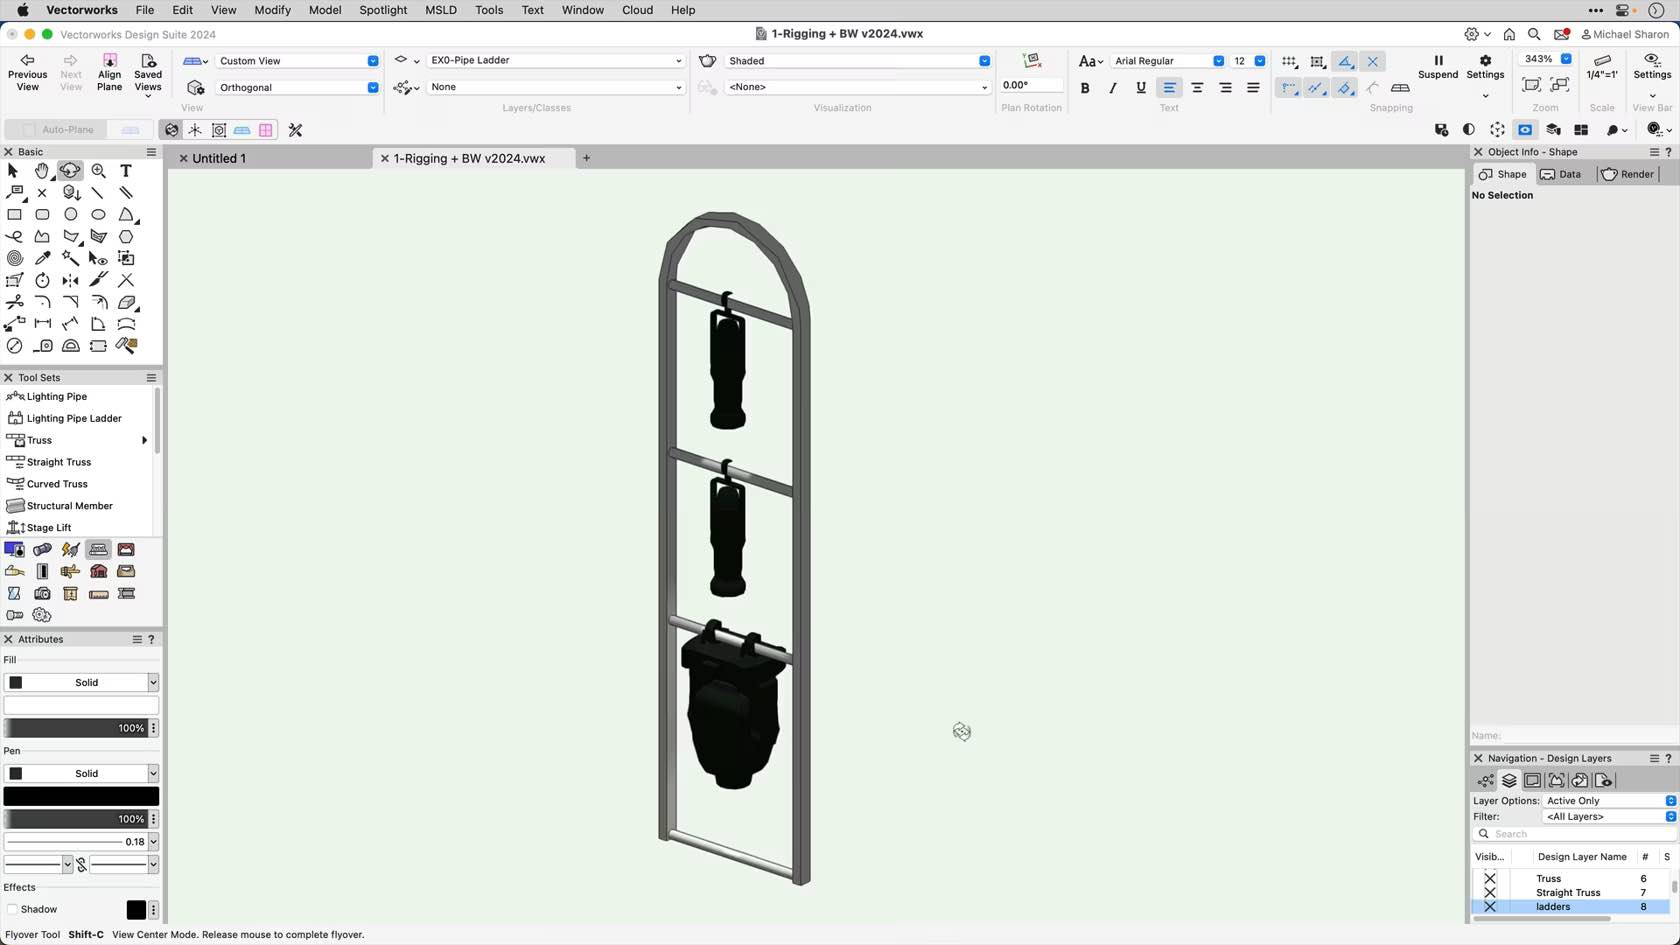
This video will introduce us to the Lighting Pipe Ladder tool.
- Manager: Jake Chambers
- Manager: Bryan Goff
- Manager: Helen Law
- Manager: Helen Law
- Manager: Mark Mullany
- Manager: Nicholas Peacock
- Manager: Keith Ragsdale
- Manager: Michael Sharon
Category: Non Current Material
Requires Approval: No
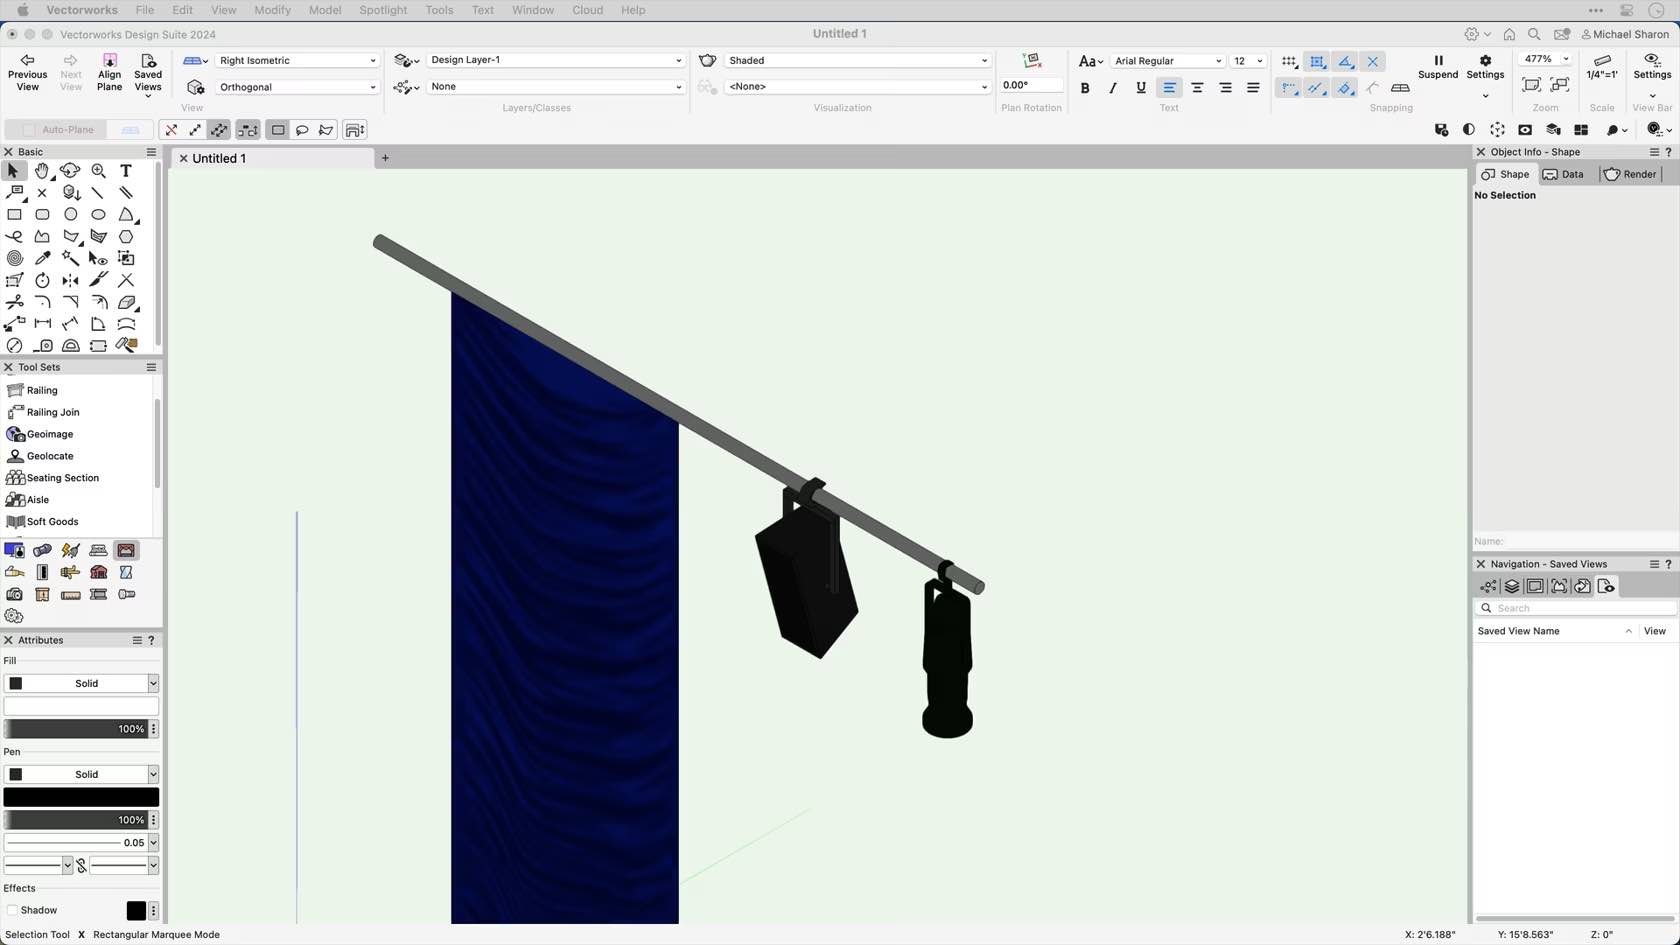
This video is an introduction to the Vectorworks Spotlight Lighting Pipe tool.
- Manager: Jake Chambers
- Manager: Bryan Goff
- Manager: Helen Law
- Manager: Helen Law
- Manager: Mark Mullany
- Manager: Nicholas Peacock
- Manager: Keith Ragsdale
- Manager: Michael Sharon
Category: Non Current Material
Requires Approval: No
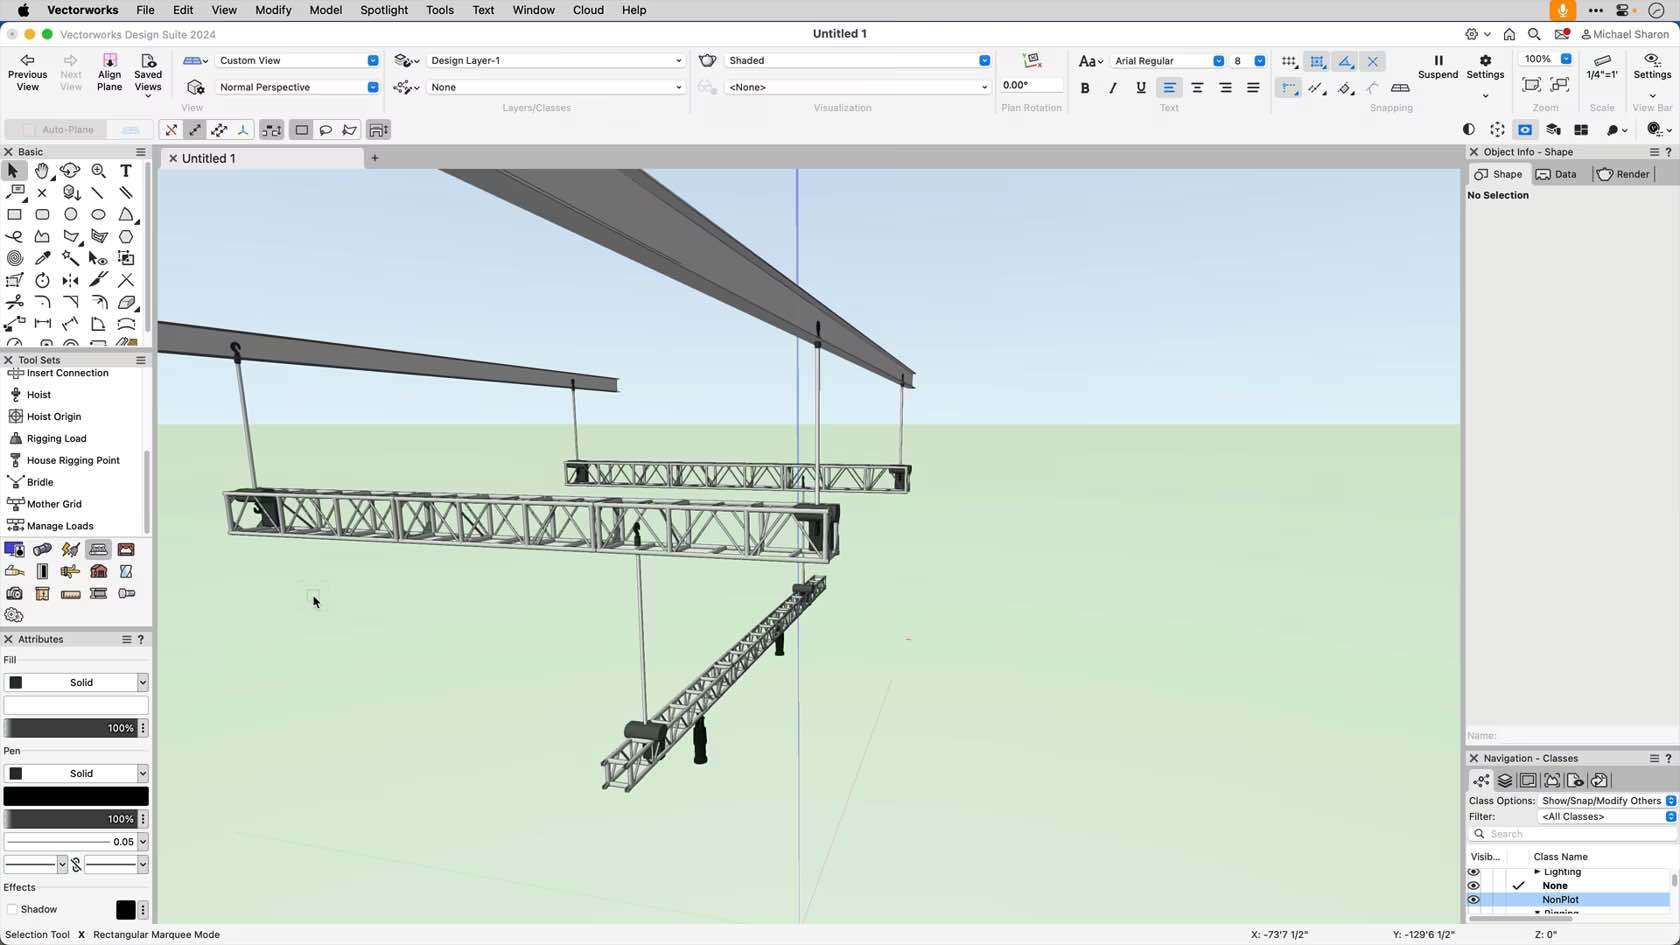
In this video, we'll learn how to insert a mother grid.
Category: Chapter 4 Hoists
Requires Approval: No
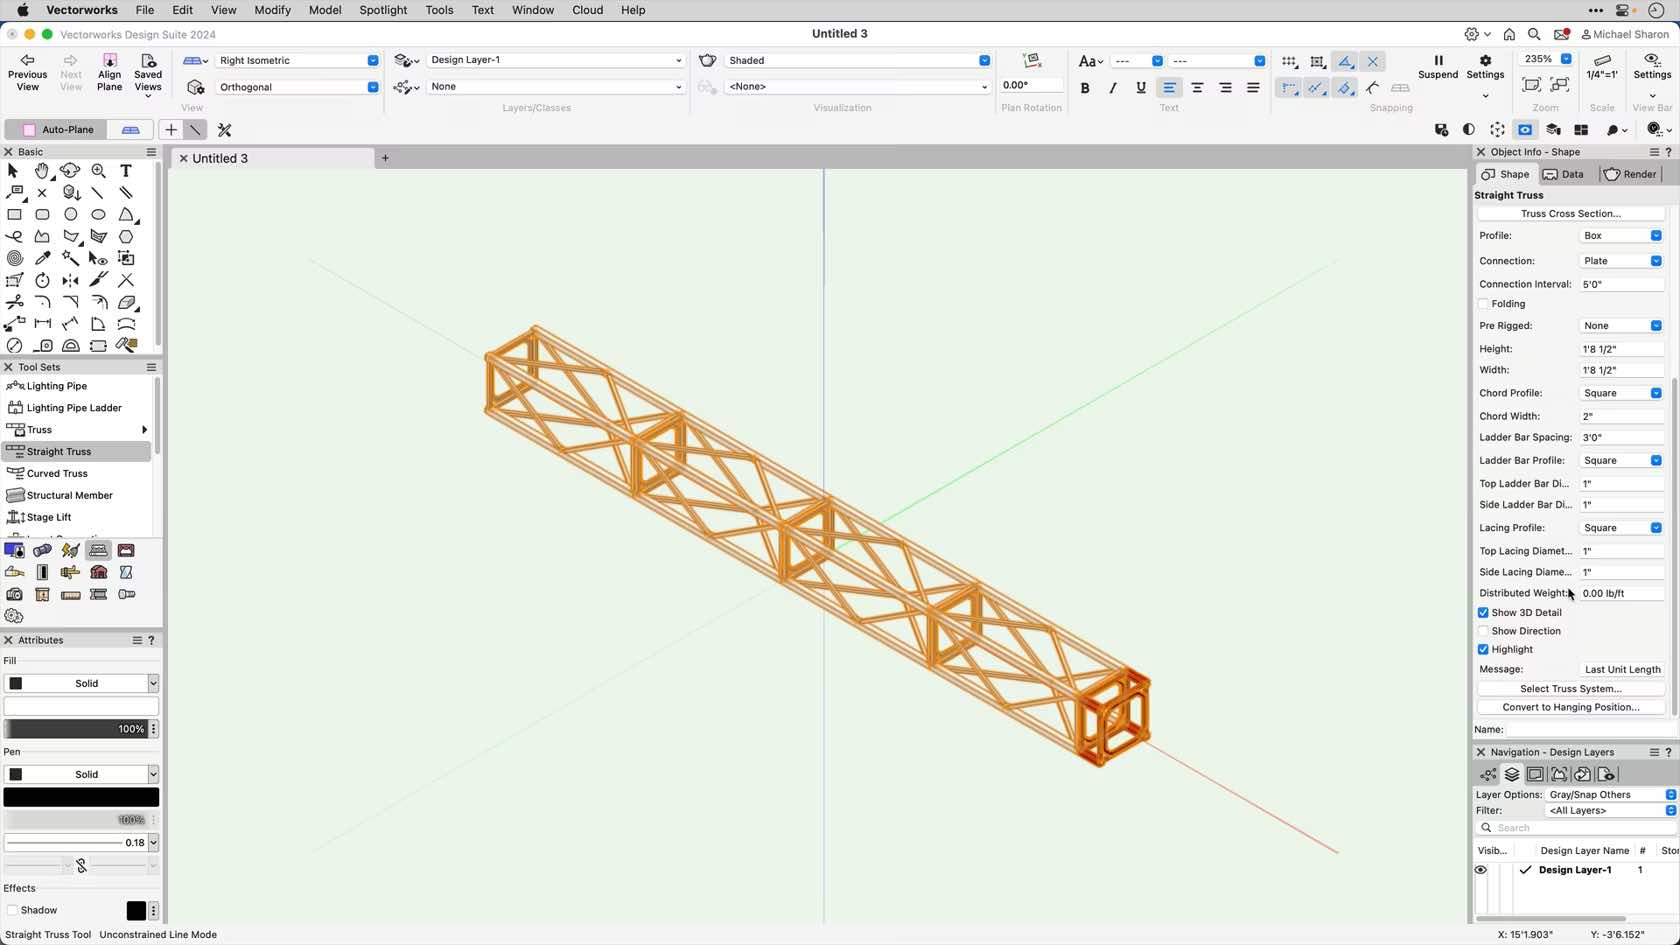
This course will introduce us to the Straight Truss tool.
- Manager: Jake Chambers
- Manager: Bryan Goff
- Manager: Helen Law
- Manager: Helen Law
- Manager: Mark Mullany
- Manager: Nicholas Peacock
- Manager: Keith Ragsdale
- Manager: Michael Sharon
Category: CHAPTER 2
Requires Approval: No
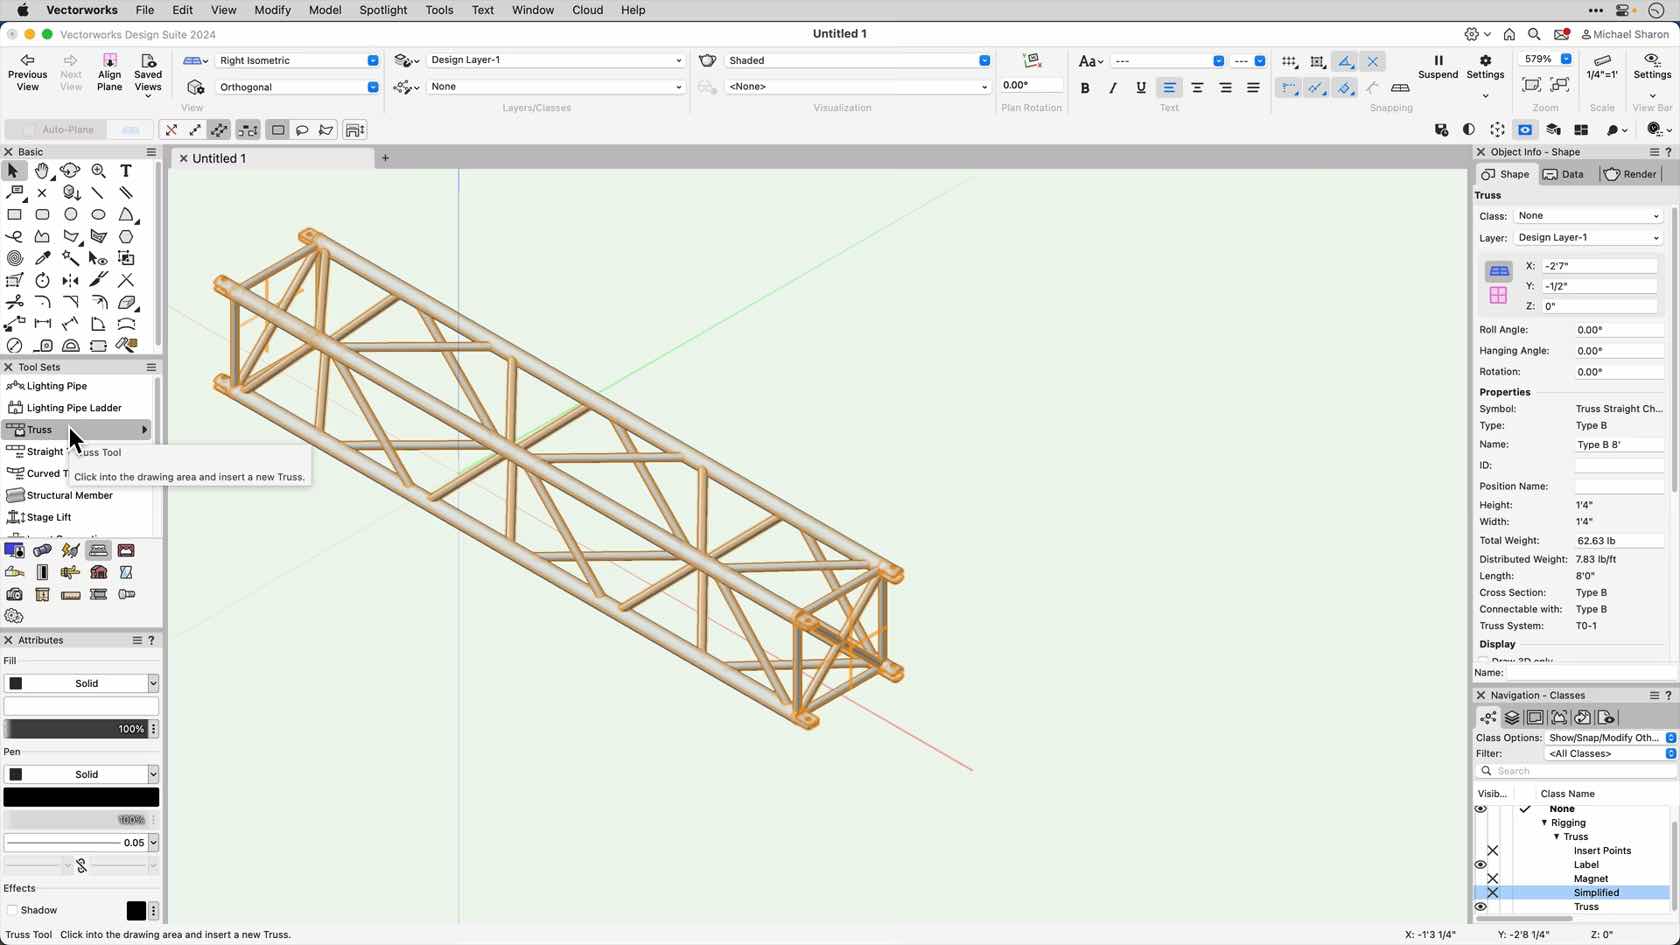
In this section we'll introduce the truss tool..
- Manager: Jake Chambers
- Manager: Bryan Goff
- Manager: Helen Law
- Manager: Helen Law
- Manager: Mark Mullany
- Manager: Nicholas Peacock
- Manager: Keith Ragsdale
- Manager: Michael Sharon
Category: Non Current Material
Requires Approval: No
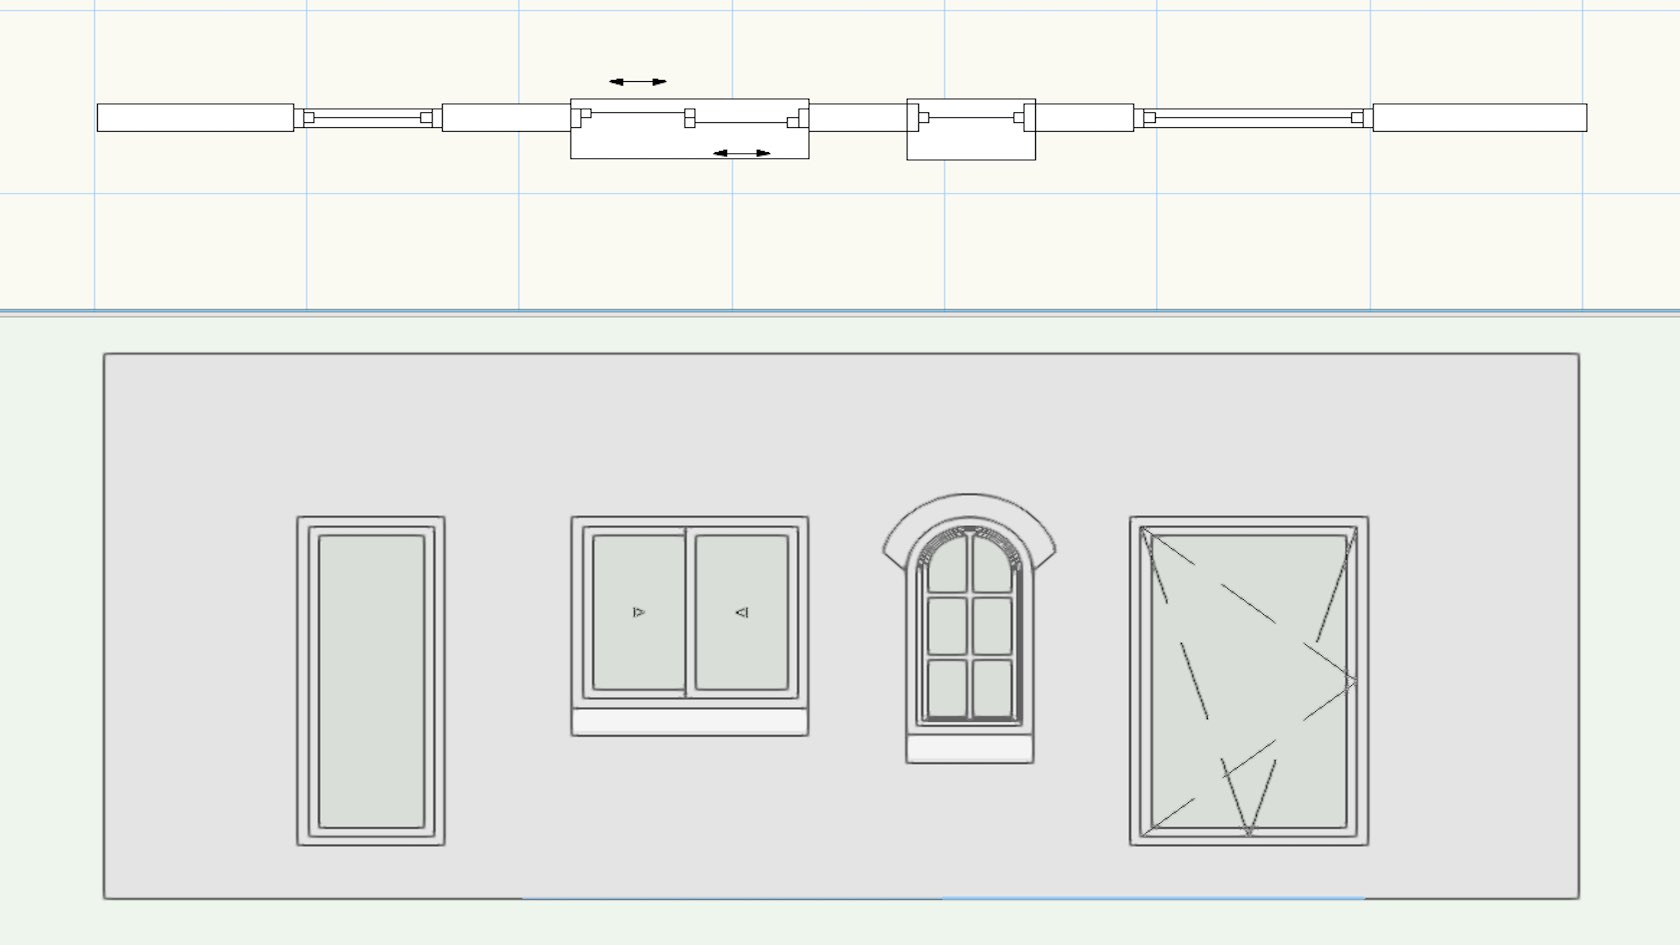
The Window tool has many settings and features to allow you to create, modify and schedule your windows. Explore the commonly used settings and gain an understanding of how to use the window settings dialogue in your projects.
Category: Skill
Requires Approval: No
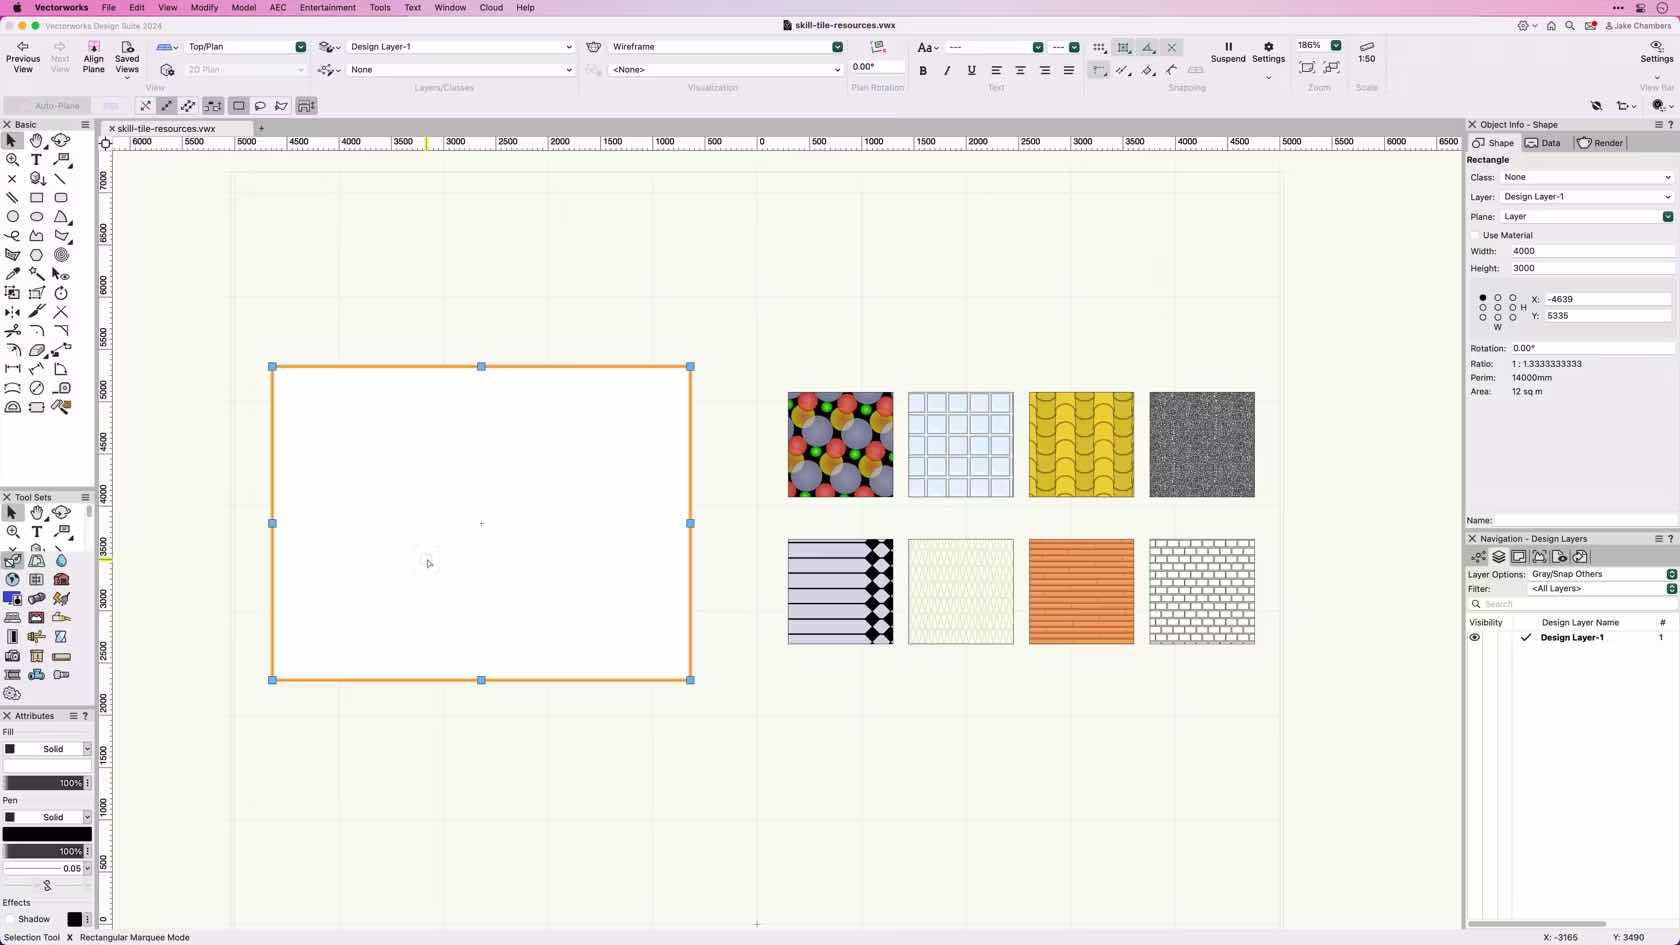
This course provides an overview and demonstrates how to apply and create Tile Resources.
Category: Skill
Requires Approval: No

Taking the #TimeToTalk today
Time to Talk Day is the UK's biggest mental health conversation. It’s a day for friends, families, communities, and workplaces to come together to talk, listen and change lives. It’s run by Mind and Rethink Mental Illness and is being delivered in partnership with Co-op for the third year running. On February 1st 2024 the Vectorworks UK office held a meeting with a quiz to get the conversations started.
Here is your chance to take the quiz yourself and find more resources for supporting mental health issues.
- Manager: Samuel Griffith
- Manager: Jasmine Mullany
- Manager: Tamsin Slatter
Category: Vectorworks Customer Skills Academy
Requires Approval: No
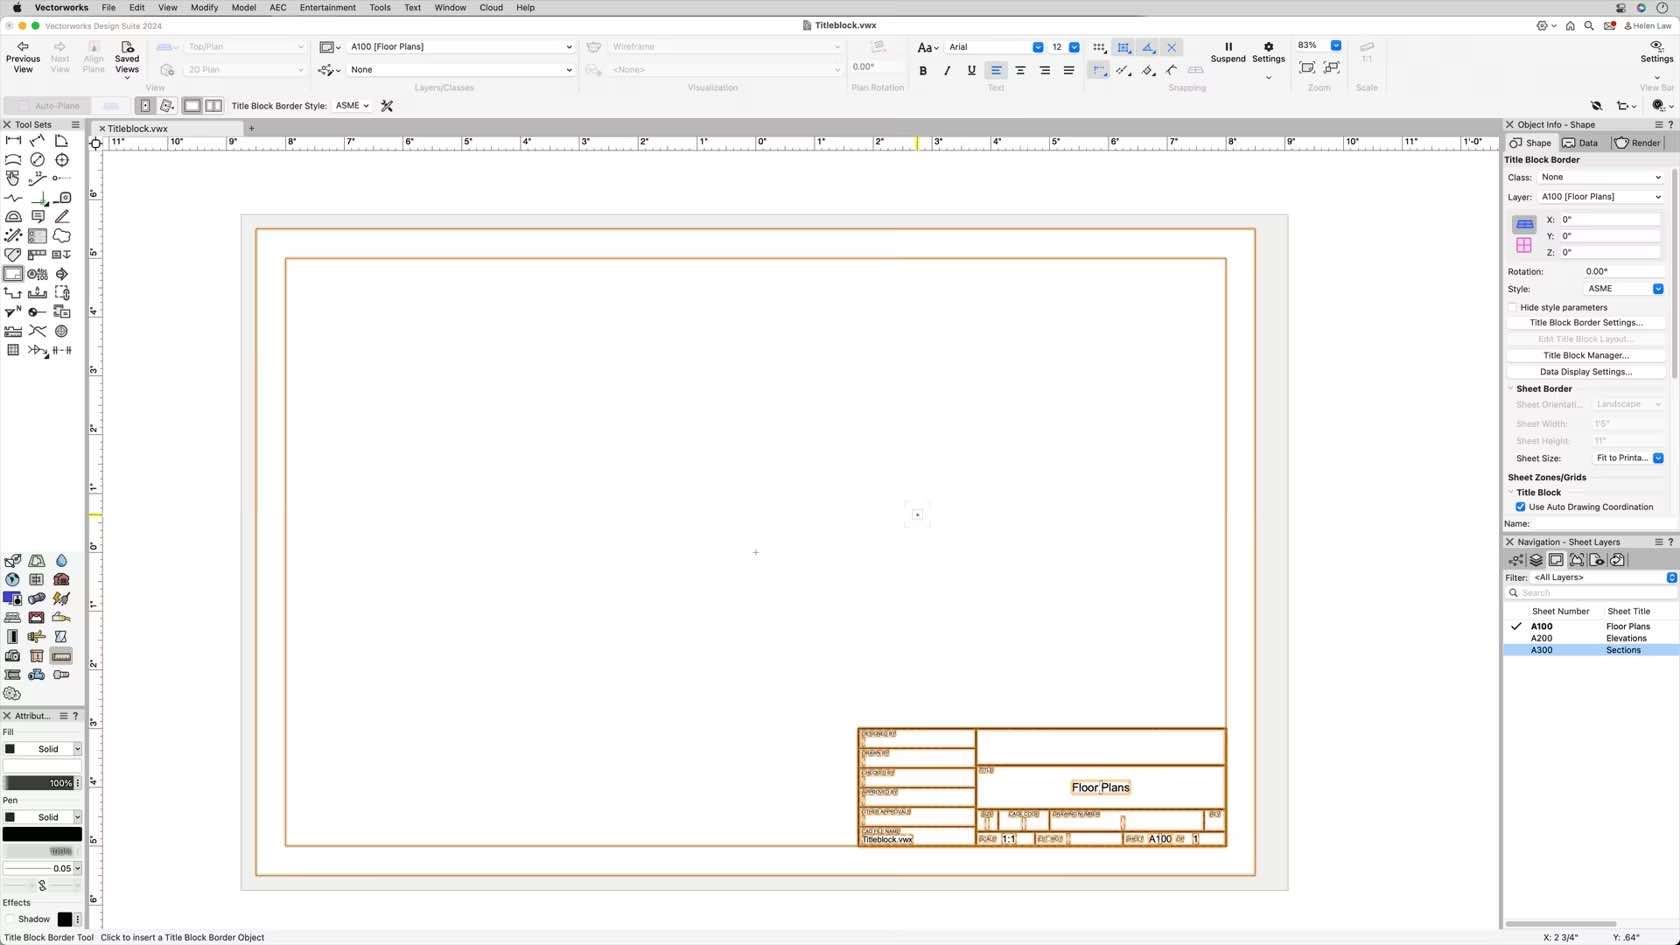
This course demonstrates how to place title blocks using the different modes of the title block border tool.
Category: Skill
Requires Approval: No
In this course, we will be exploring the Basic and Tool Sets palettes. We will discuss different ways of viewing the tool palettes. We will also discuss tool modes and shortcuts related to them
Category: Skill
Requires Approval: No
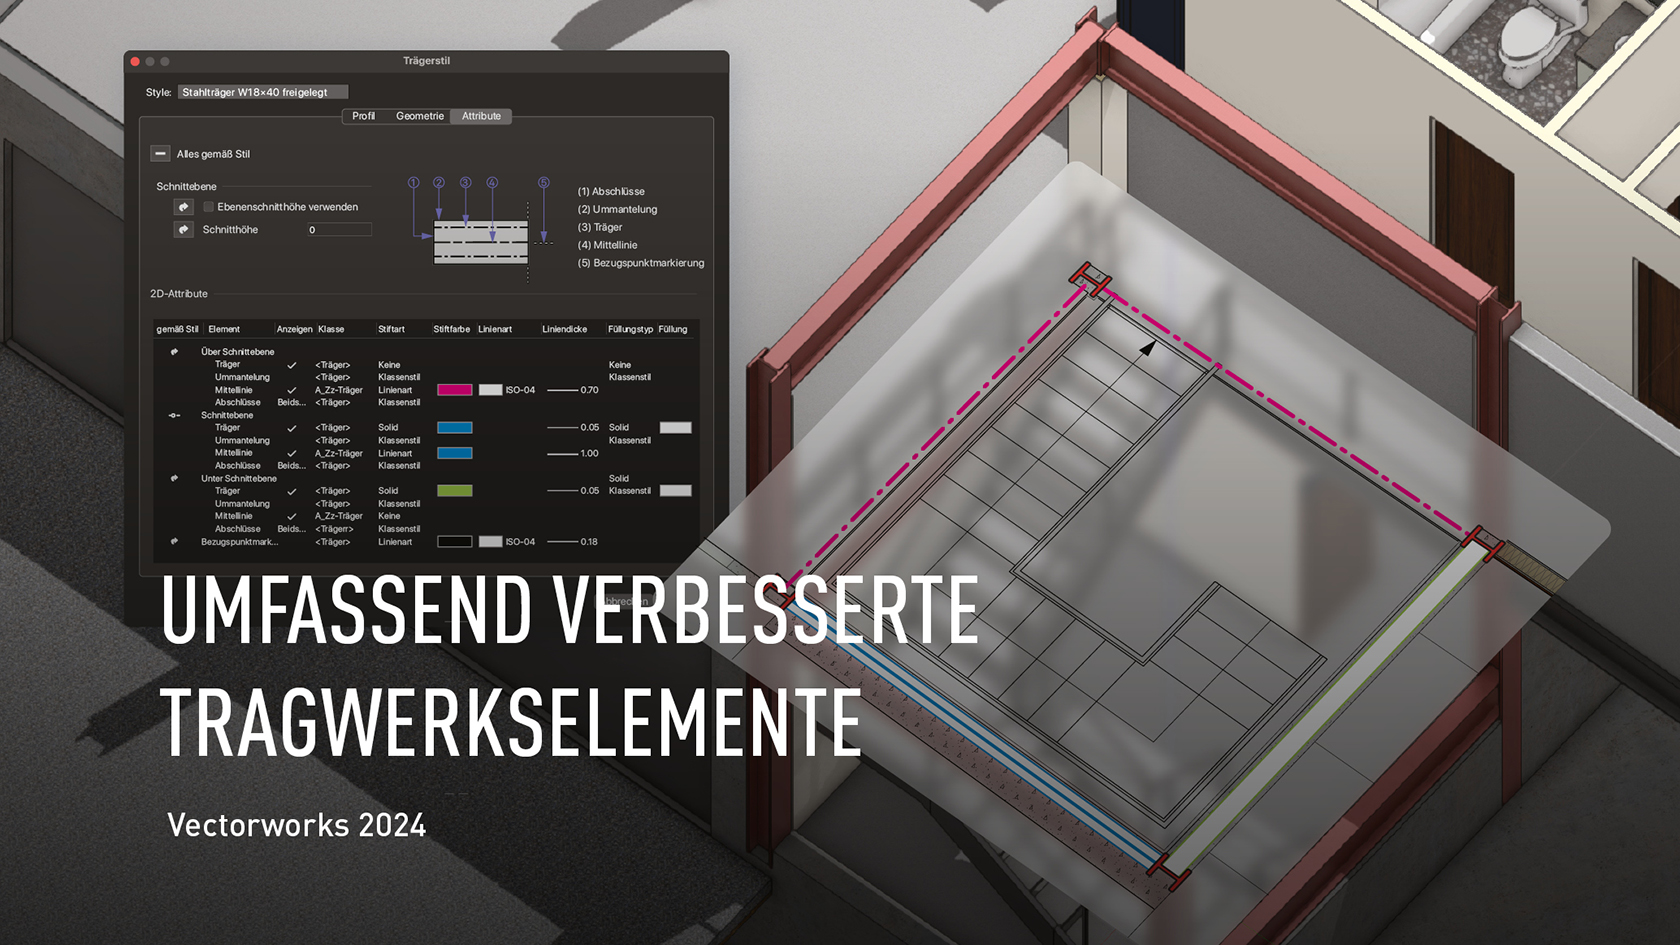
Mit Vectorworks 2024 sparen Sie viel Zeit beim Erstellen und Umformen von Tragwerkselementen. 2D- und 3D-Attribute, Form, Größe und Material lassen sich jetzt detailliert einstellen, die 2D-Darstellung entspricht ohne Aufwand genau Ihren Vorstellungen, beispielsweise nur mit Abschlüssen und Mittellinie. Weitere Verbesserungen betreffen das automatische Zusammenfügen und die Unterstützung des Befehls „In Intelligentes Objekt umwandeln”.
Category: Buildings
Requires Approval: No
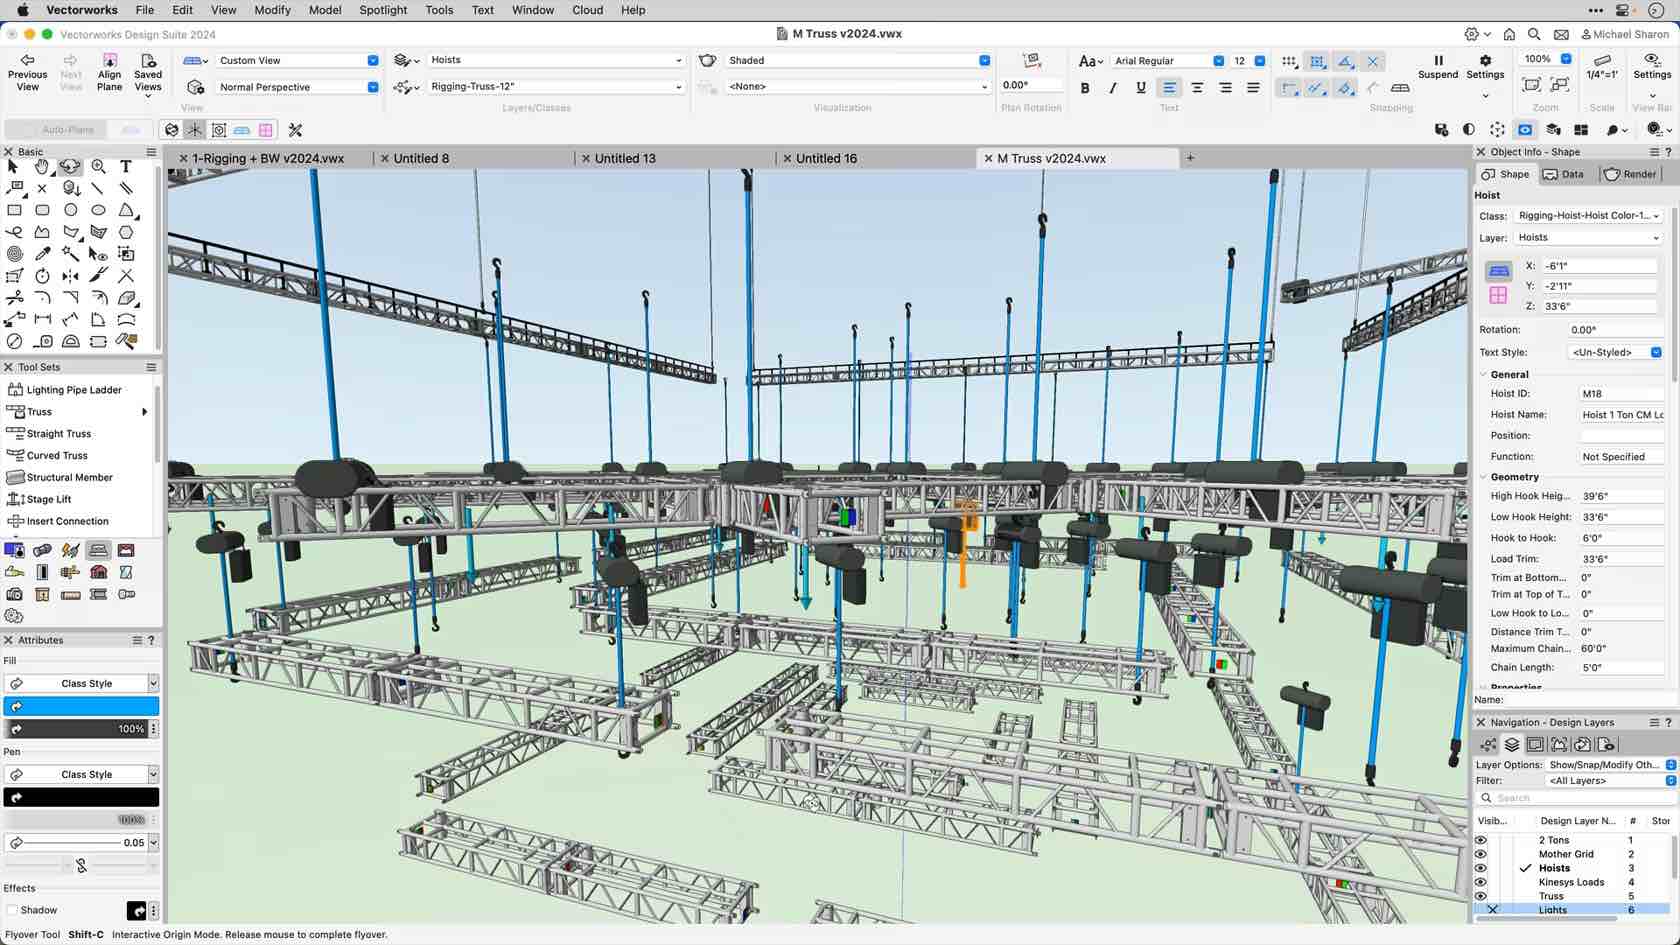
This video will explore how we can use the Insert Connection tool to connect our rigging objects.
Category: Chapter 4 Hoists
Requires Approval: No
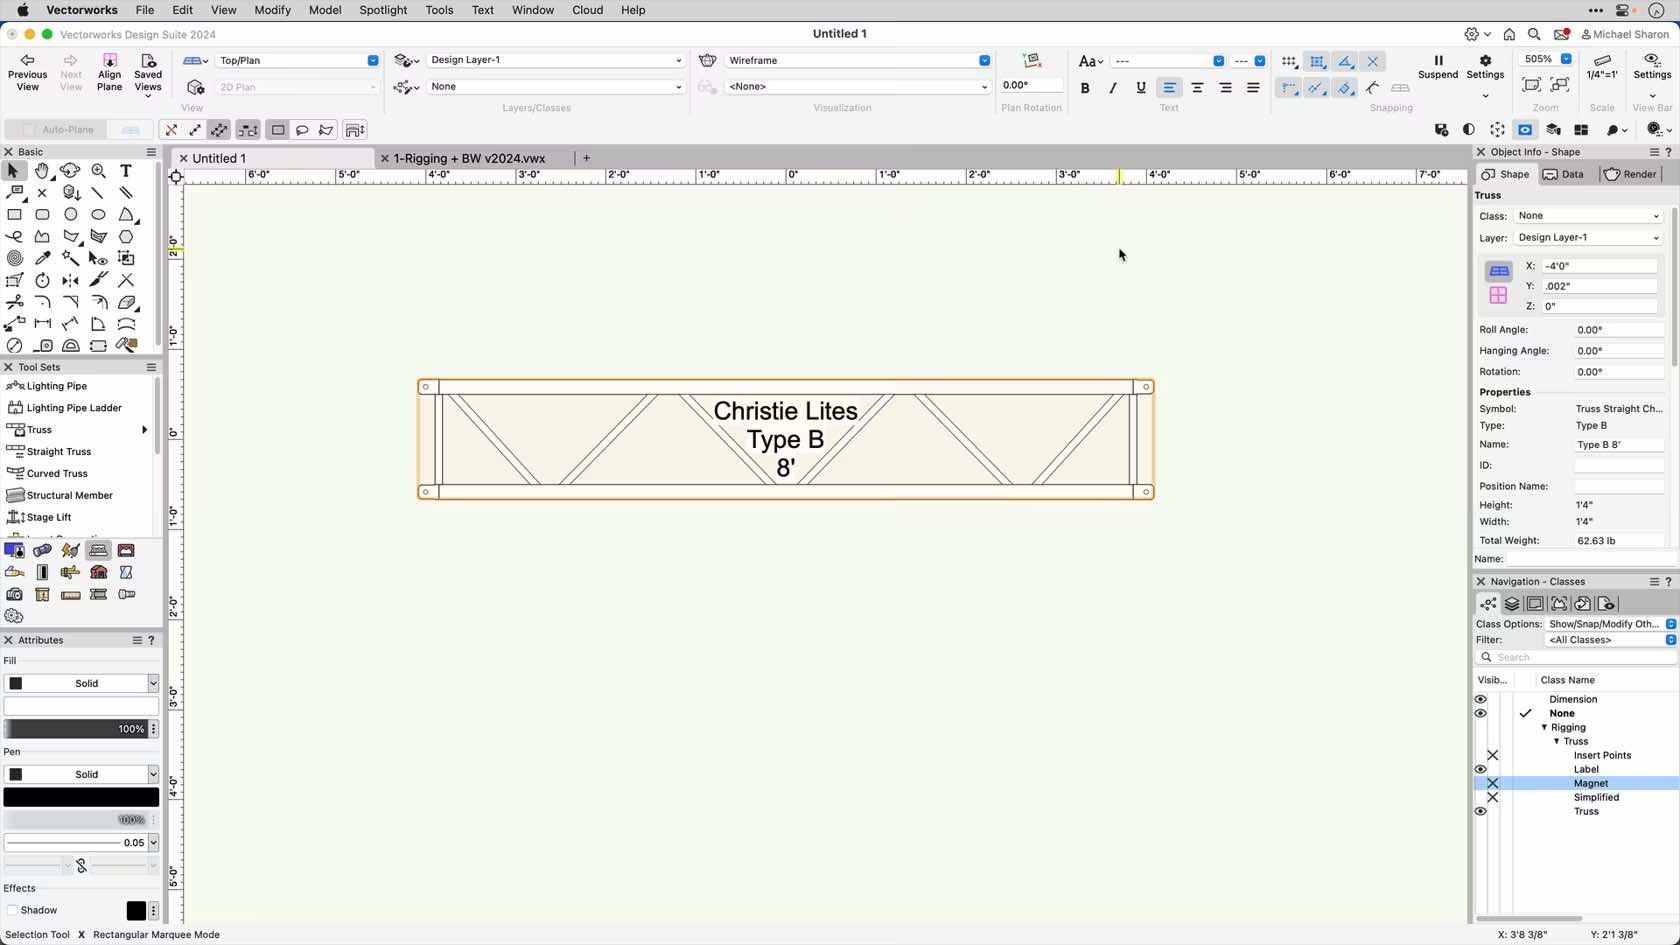
This course explores in-depth the functions and settings of the Truss Tool.
Category: Non Current Material
Requires Approval: No
Sie erhalten einen Überblick über die die verschiedenen Objekttypen in Vectorworks.
Category: Erste Schritte 2024
Requires Approval: No

The updated and modernized user interface makes working in Vectorworks more efficient and easier to customize. The reorganized View and Mode bars bring a wide range of tools to the forefront, so you can decide how to organize and have everything you need right where you need it. And dark mode is now available on both Windows and Mac.
Category: All Industries
Requires Approval: No
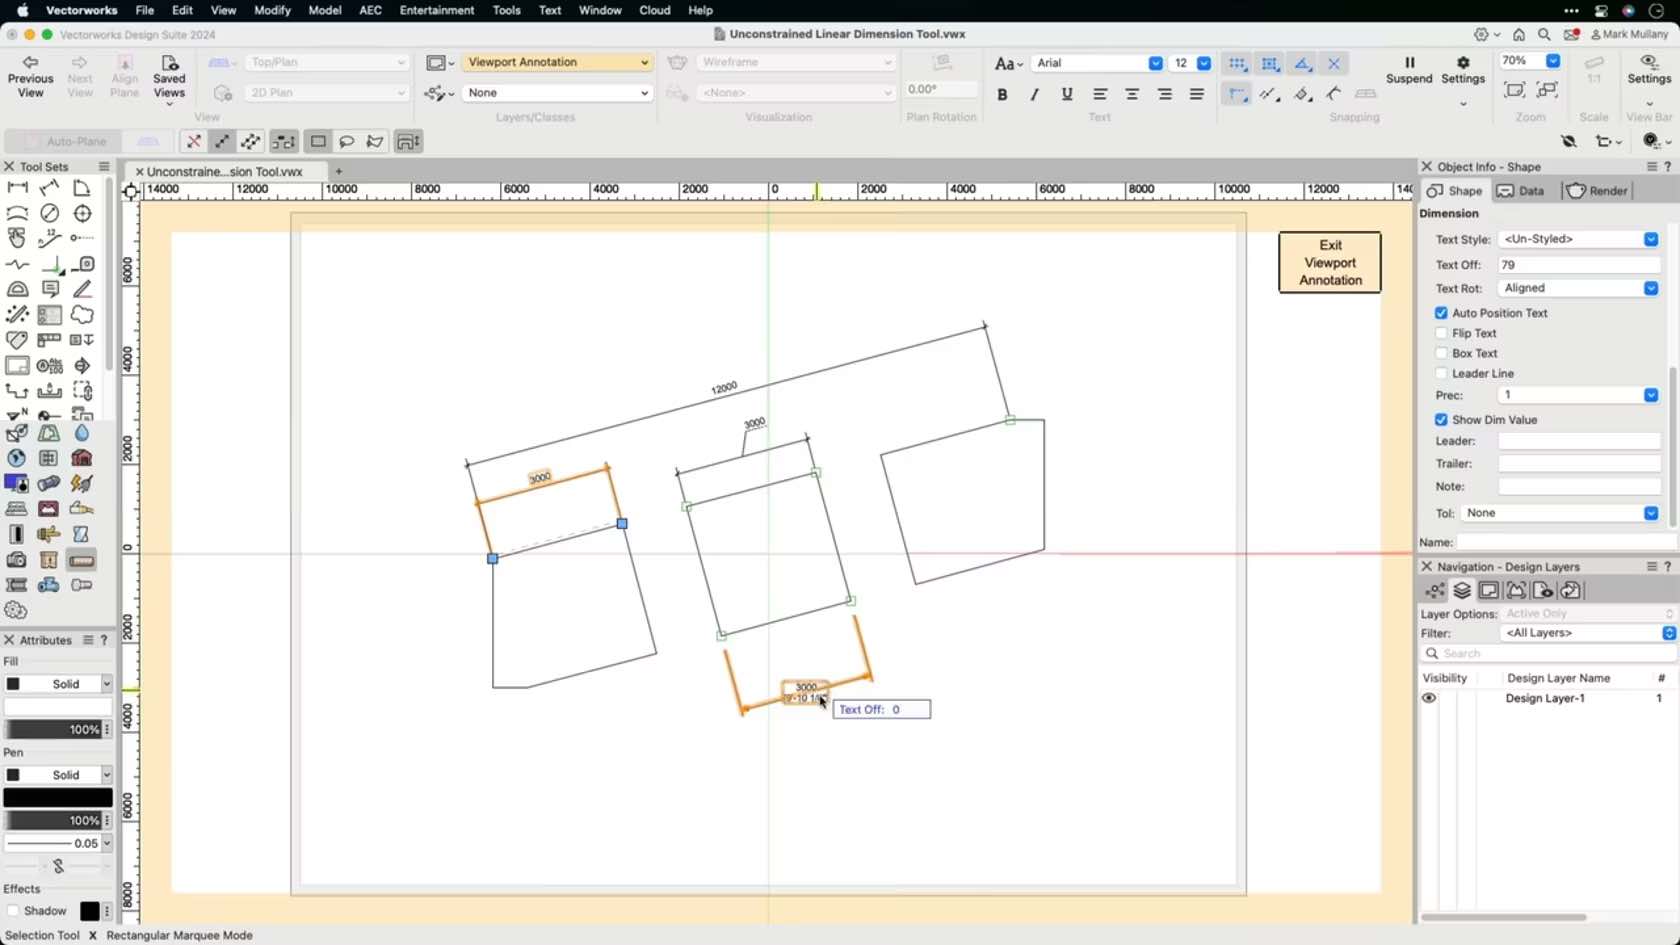
This course will look at the Unconstrained Linear Dimension tool to dimension drawings.
Category: Skill
Requires Approval: No

Natürlich: Mit interiorcad lassen sich Möbel perfekt präsentieren und effizient produzieren. Aber das Programm kann noch mehr. interiorcad Master powered by Vectorworks gibt Ihnen auch die Freiheit, einmal auf einen ganz ungewöhnlichen Kundenwunsch einzugehen oder einfach der eigenen Kreativität zu folgen. Denn wenn man ein paar Dinge beachtet und richtig vorgeht, ist der Aufwand für das Planen und auch das Umsetzen spezieller Projekte viel geringer, als man meint. Versäumen Sie auf keinen Fall dieses besondere Webinar mit Vectorworks-Guru Dominique Corpataux und Werkmeister David Zehntner. Es könnte den Designer in Ihnen zu neuen Ufern führen.
(Für Version 2024)
Category: Featured
Requires Approval: No

In today's digital landscape, harnessing creativity and productivity is key to thriving in the fields of architecture, design, and 3D visualization. Dive into the world of 3D workflows with Jonathan Reeves, an architect, author, and Vectorworks expert, where Vectorworks 2024, Twinmotion, and Enscape merge to transform your design process..
Whether you specialise in architecture, interior design, landscape design, or urban planning, this webinar will provide you with the tools and techniques to unlock your creative potential and power up your productivity.
Category: Buildings
Requires Approval: No
This four video course is going to show you the resources available to you when selling Vectorworks 2024, along with key features that have been introduced that can be leveraged in your day to day selling conversations.
The first video will help you understand the resources available, including short form videos for all industries. The following three videos will focus on the exciting features introduced in Vectorworks 2024 and how to talk about these with your customers.
By the end of this course, you should be suitably prepared to harness the complete spectrum of product resources and discuss these features with the confidence required to sell!
- Manager: Samuel Griffith
- Manager: Jasmine Mullany
- Manager: Tamsin Slatter
Category: Vectorworks Customer Skills Academy
Requires Approval: No
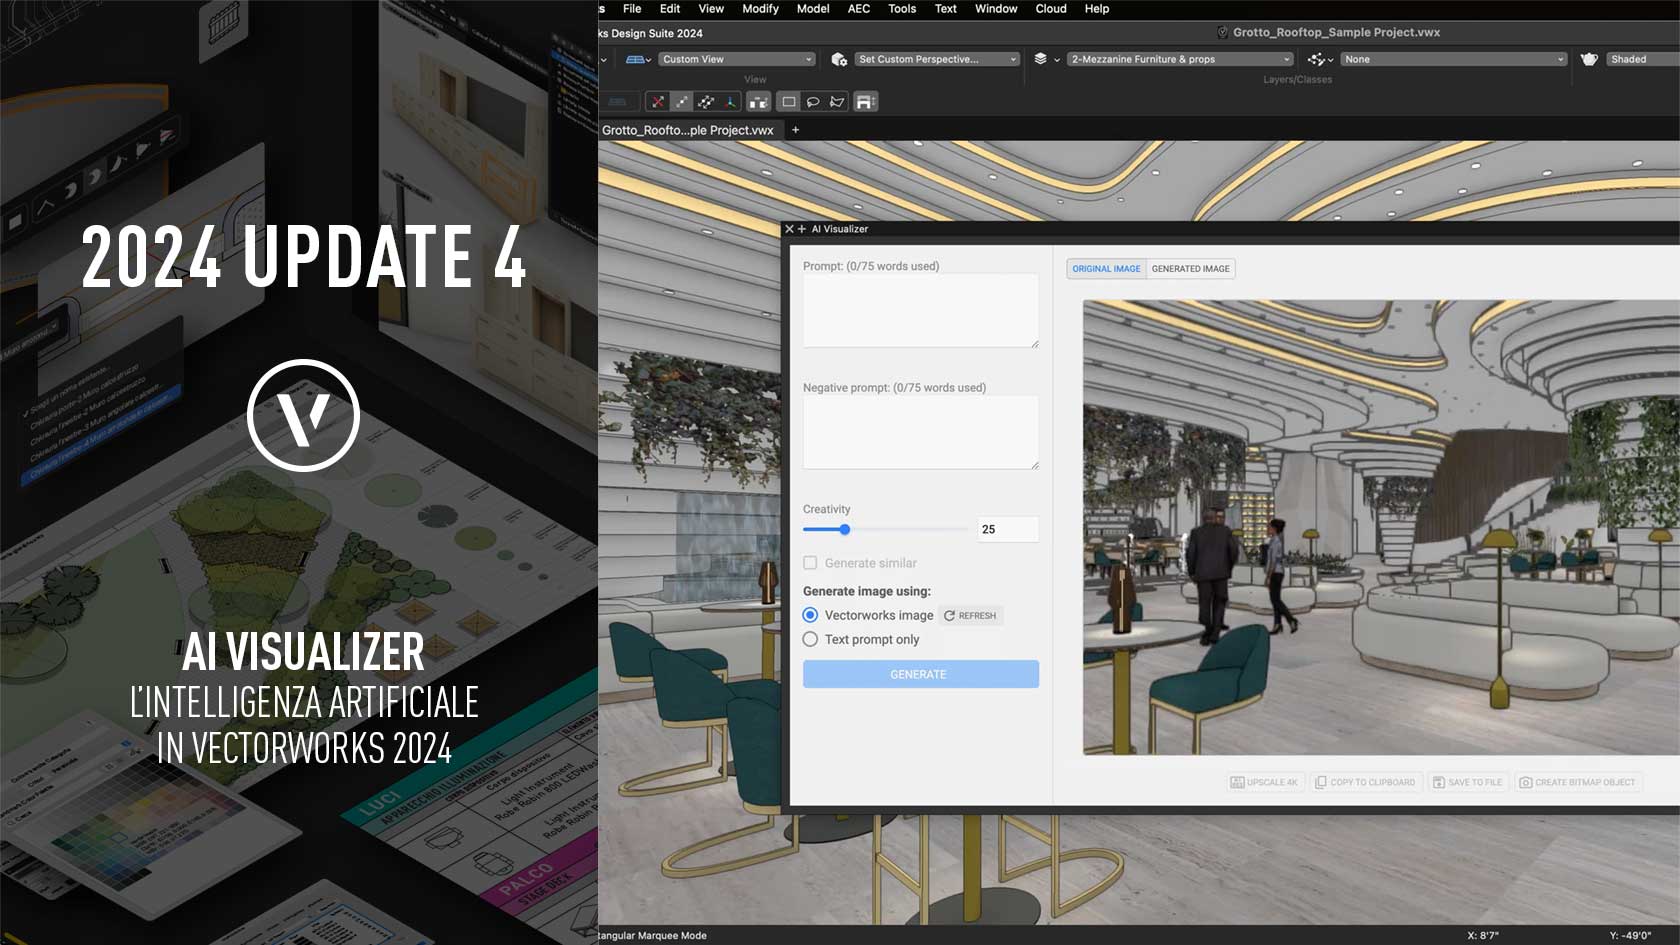
Combina la potenza di Vectorworks con la velocità di generazione immagini tramite intelligenza artificiale supportata da Stable Diffusion. Direttamente disponibile all'interno dell'interfaccia di Vectorworks, questa funzionalità sperimentale utilizza i Vectorworks Cloud Service per un flusso di lavoro senza installazione e privo di interruzioni, consentendo di ideare rapidamente concetti illustrativi o creare immagini raffinate utilizzando i modelli Vectorworks in qualsiasi fase della progettazione.
Category: All Industries
Requires Approval: No
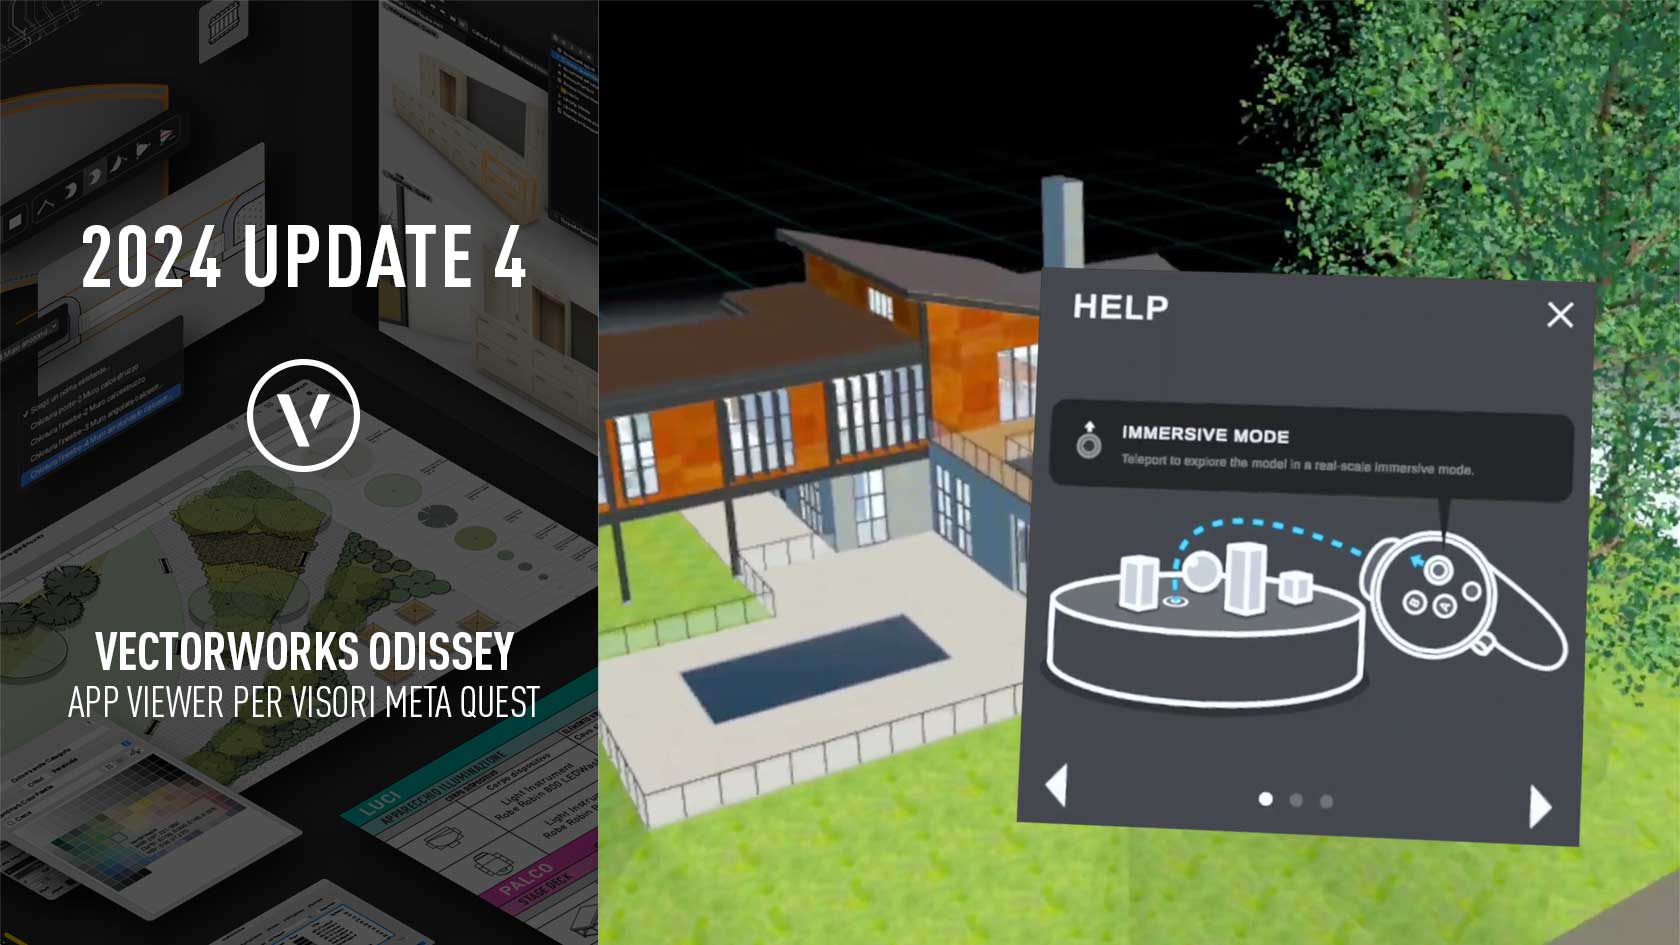
Immergiamoci nel mondo del design con Vectorworks Odyssey, un'app viewer della realtà virtuale progettata per visori Meta Quest 2 o superiori. Odissey ci consente, assieme ai nostri partner di progetto, di vivere esperienze di design in fase embrionale e schematica in realtà virtuale, fornendo preziosi feedback e garantendo una prospettiva completa del tuo lavoro grazie alle opzioni di visualizzazione in modalità dollhouse e vola attraverso.
Category: All Industries
Requires Approval: No
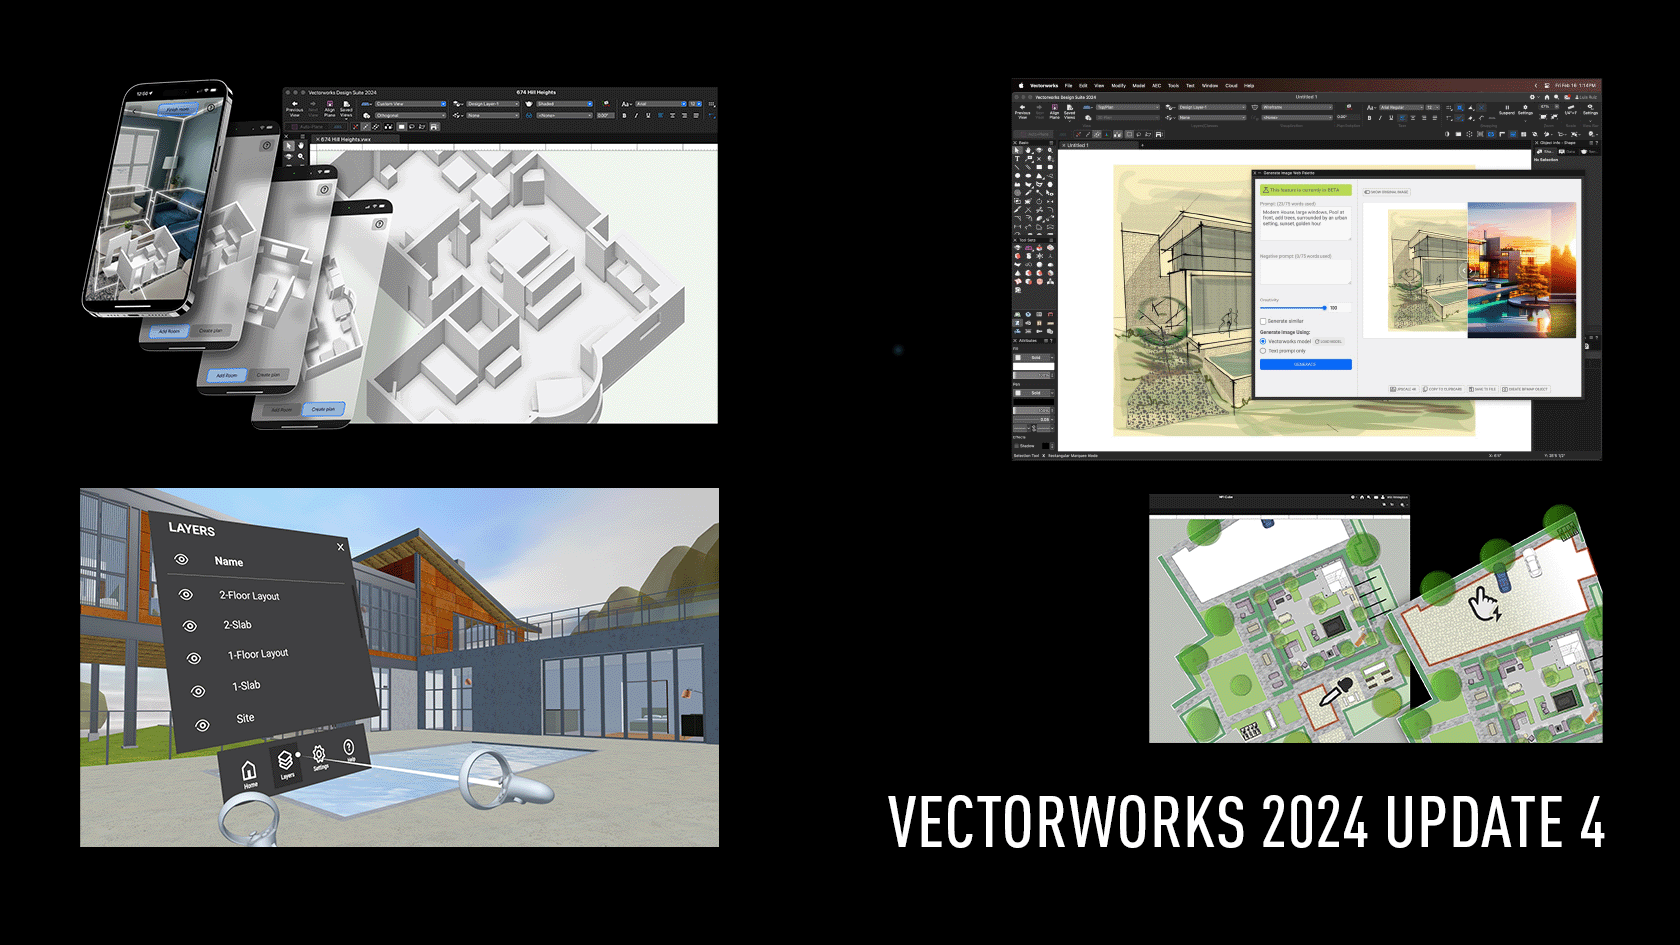
Gain a high level overview of the new features of 2024 Update 4 and what they will mean to our customers.
- Manager: Samuel Griffith
- Manager: Jasmine Mullany
- Manager: Tamsin Slatter
Category: Vectorworks Customer Skills Academy
Requires Approval: No
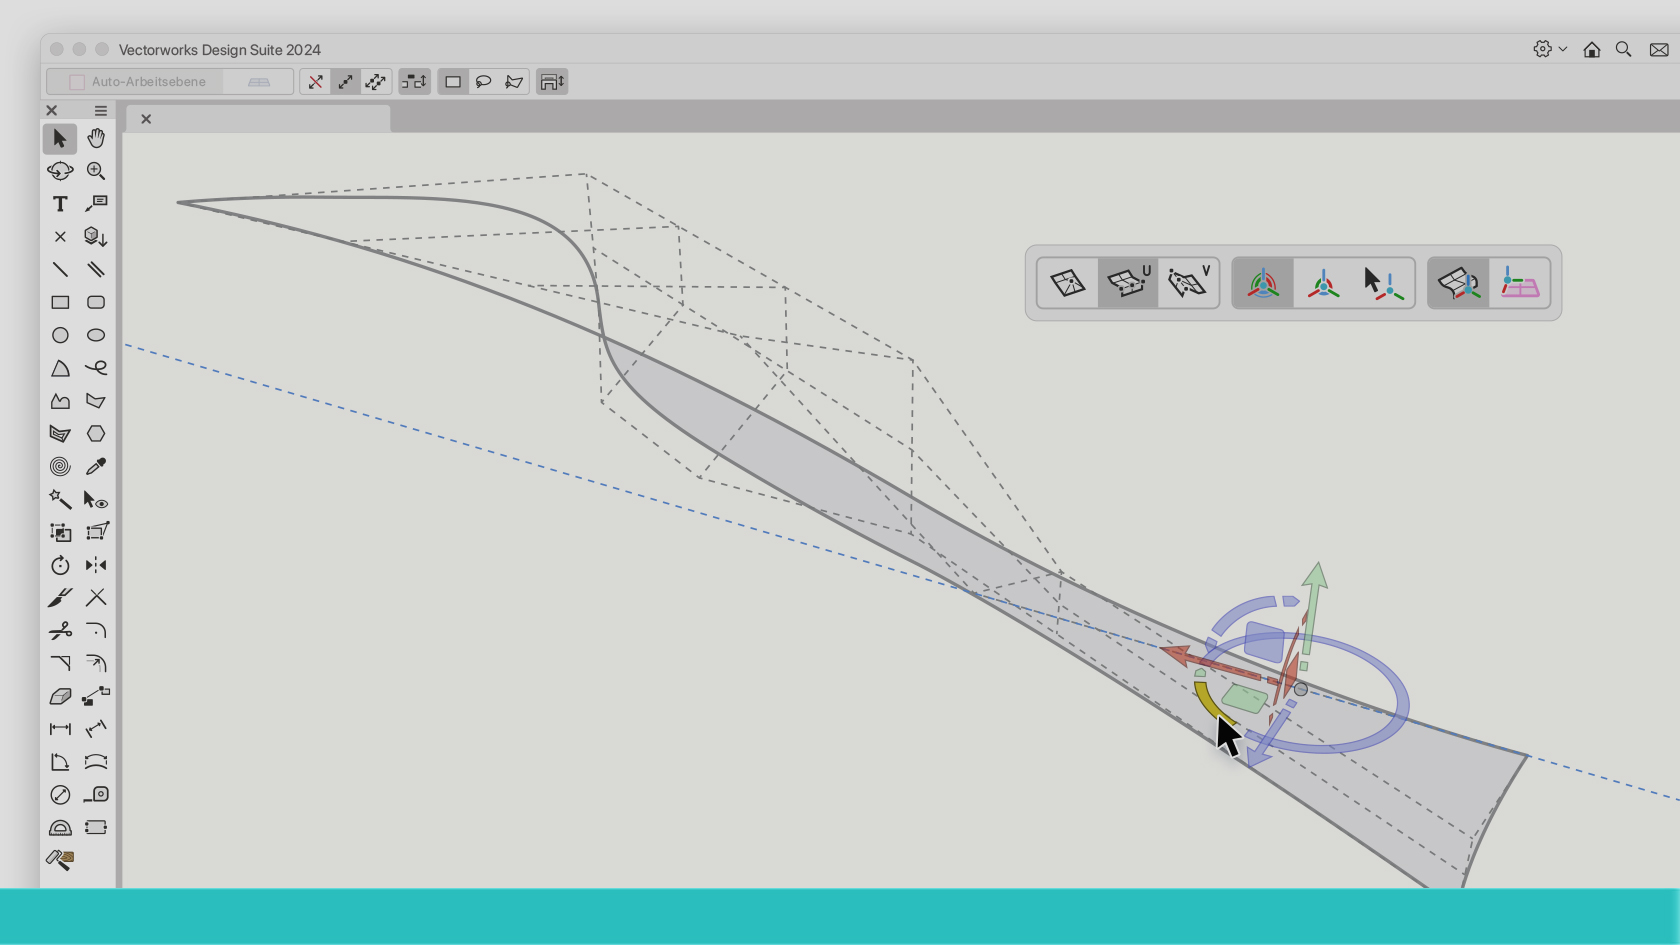
Die optische Modellierhilfe 3D-Modifikator wurde mit Version 2024 von Vectorworks eingeführt. Der 3D-Modifikator wird immer bei der Maus eingeblendet und reagiert dynamisch auf verschiedene 3D-Situationen. Weiss man, wie man den raffinierten Modelierkompass richtig liest und nutzt, kann man eine Menge Zeit und Klicks sparen. Dieses Webinar der beiden Vectorworks-Cracks Noémie Kölliker und Frédéric Abt ist ein Muss für alle, die ab und zu oder auch häufiger in 3D arbeiten.
(Für Version 2024)
Category: All Industries
Requires Approval: No
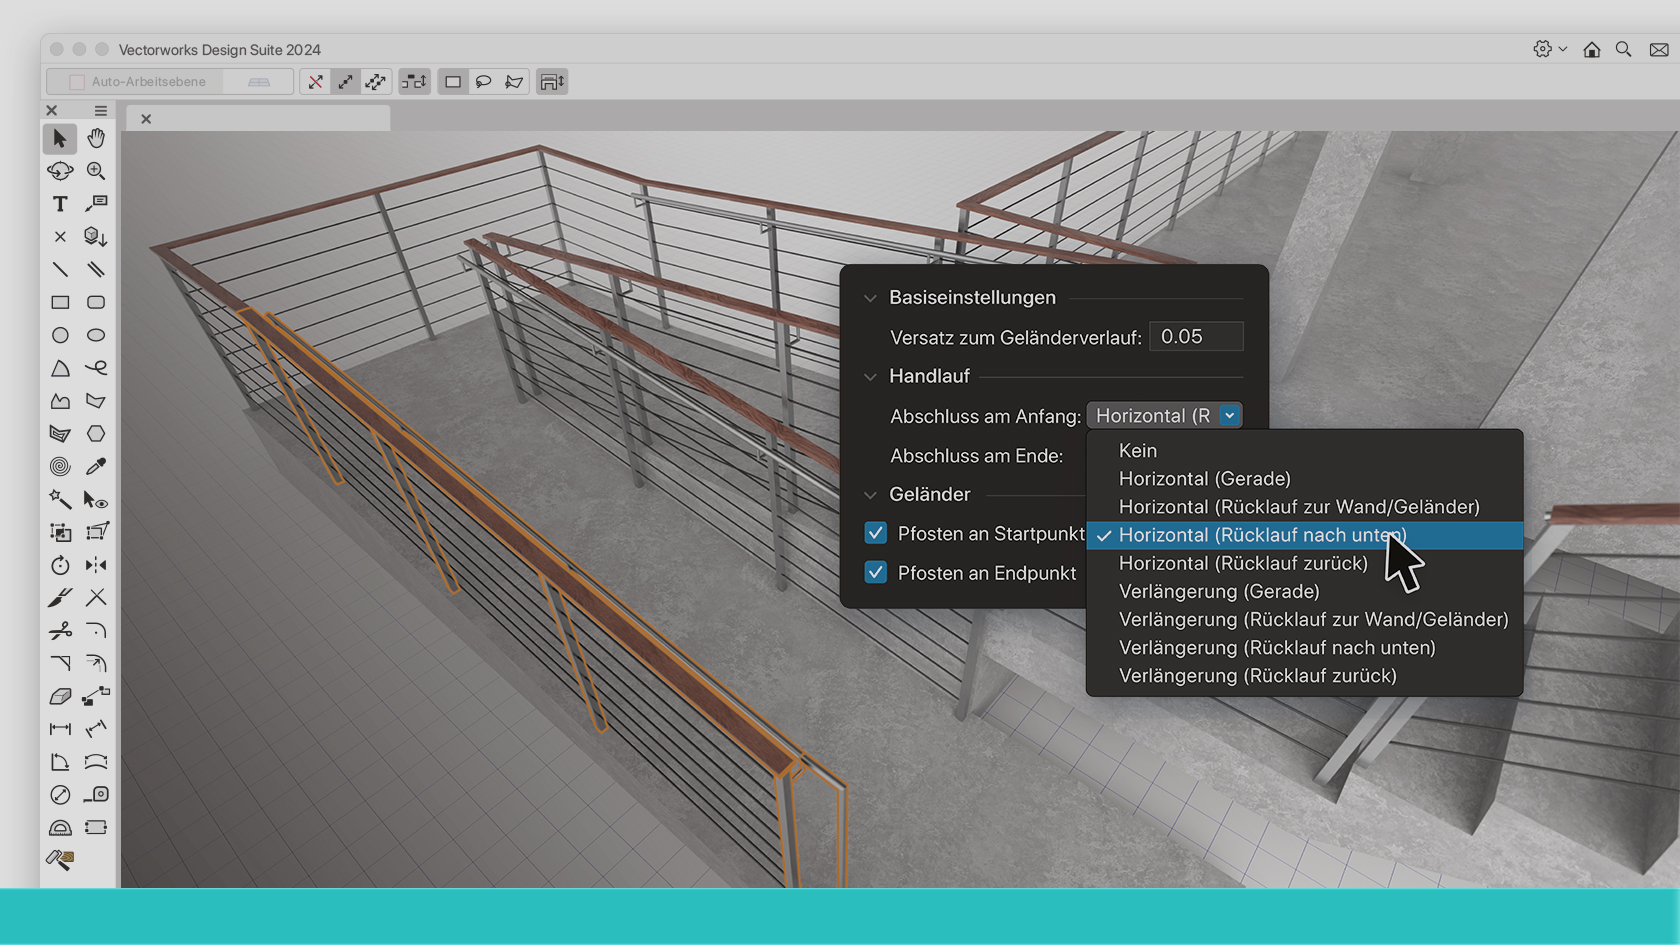
Die Möglichkeiten, die das neue Werkzeug für Geländer und Handläufe bietet, lassen kaum noch Wünsche offen. Wer erfahren will, wie man das gewünschte Objekt exakt nach den eigenen Vorstellungen gestaltet, ohne viel Zeit zu verlieren, sollte dieses Webinar nicht versäumen. Vectorworks-Spezialistin und Innenarchitektin Ketarini Ratnacumar führt Sie Stufe für Stufe sicher zu den effizientesten Arbeitsabläufen.
(Für Version 2024)
Category: Buildings
Requires Approval: No
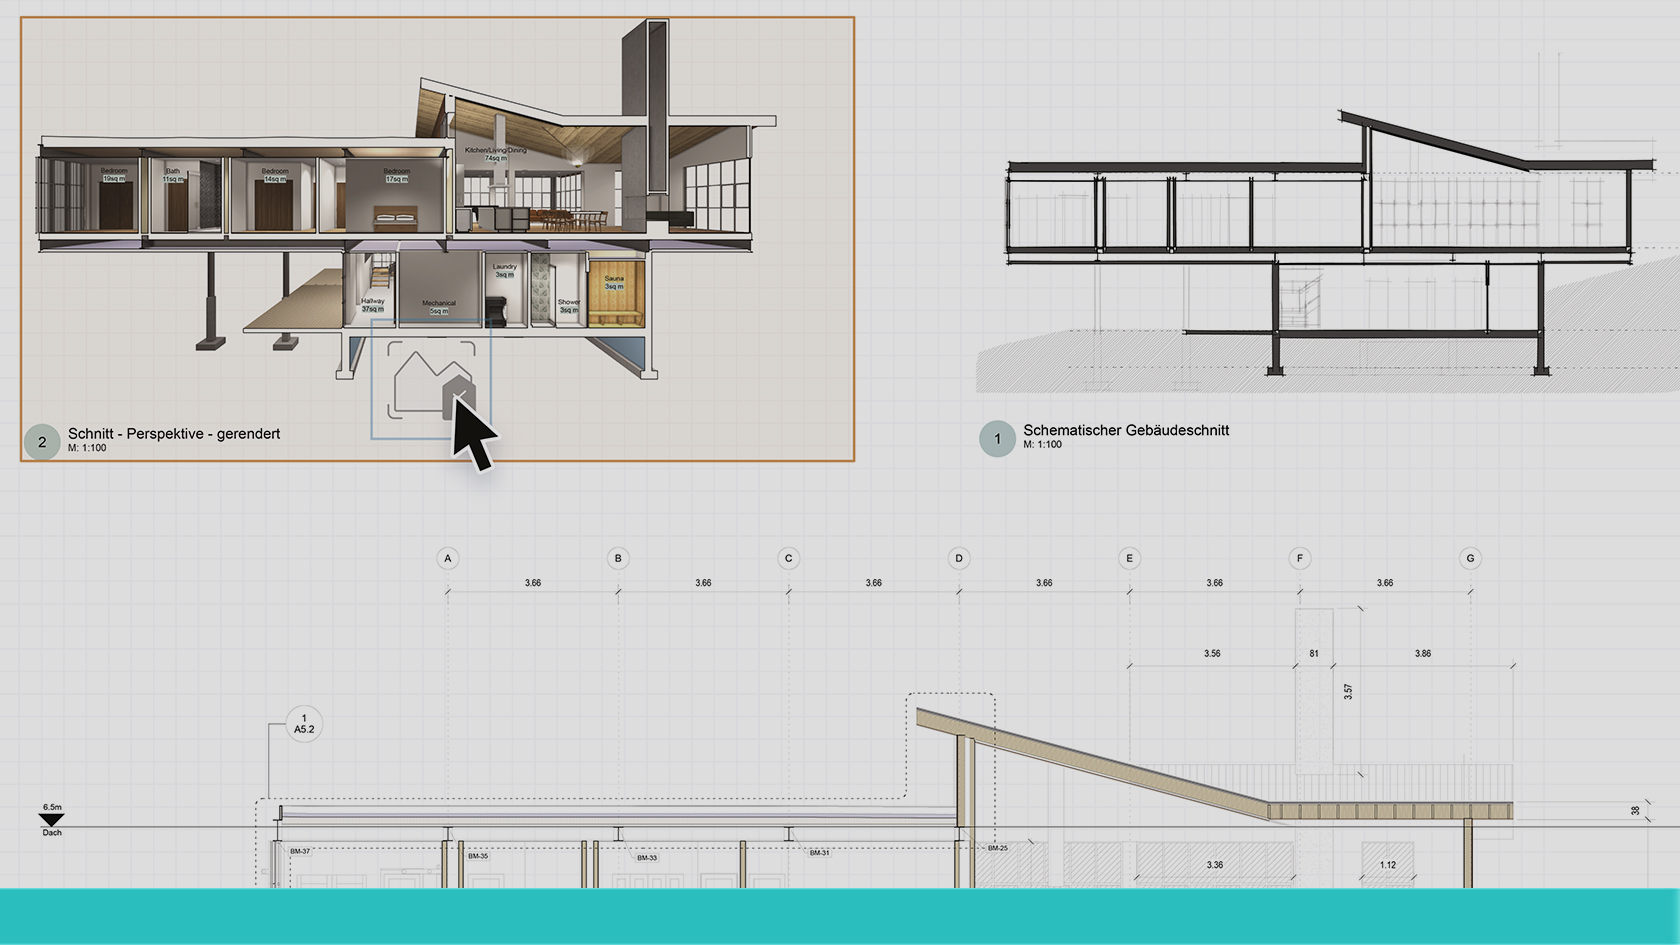
Stile in Vectorworks sind eine praktische Sache. Sie stellen eine grosse Hilfe dar beim Definieren und vor allem beim Bearbeiten der Eigenschaften von verschiedenen parametrischen Bauteilen, Intelligenten Objekten oder Rendereinstellungen. Mit Vectorworks 2024 werden nun auch Stile für Ansichtsbereiche eingeführt. Wie man am besten damit umgeht, damit man keine Zeit mit Ausprobieren verliert, zeigen Ihnen die beiden Vectorworks-Kenner Frédéric Abt und Xaver Meier in diesem 20minütigen Webinar.
(Für Version 2024)
Category: All Industries
Requires Approval: No
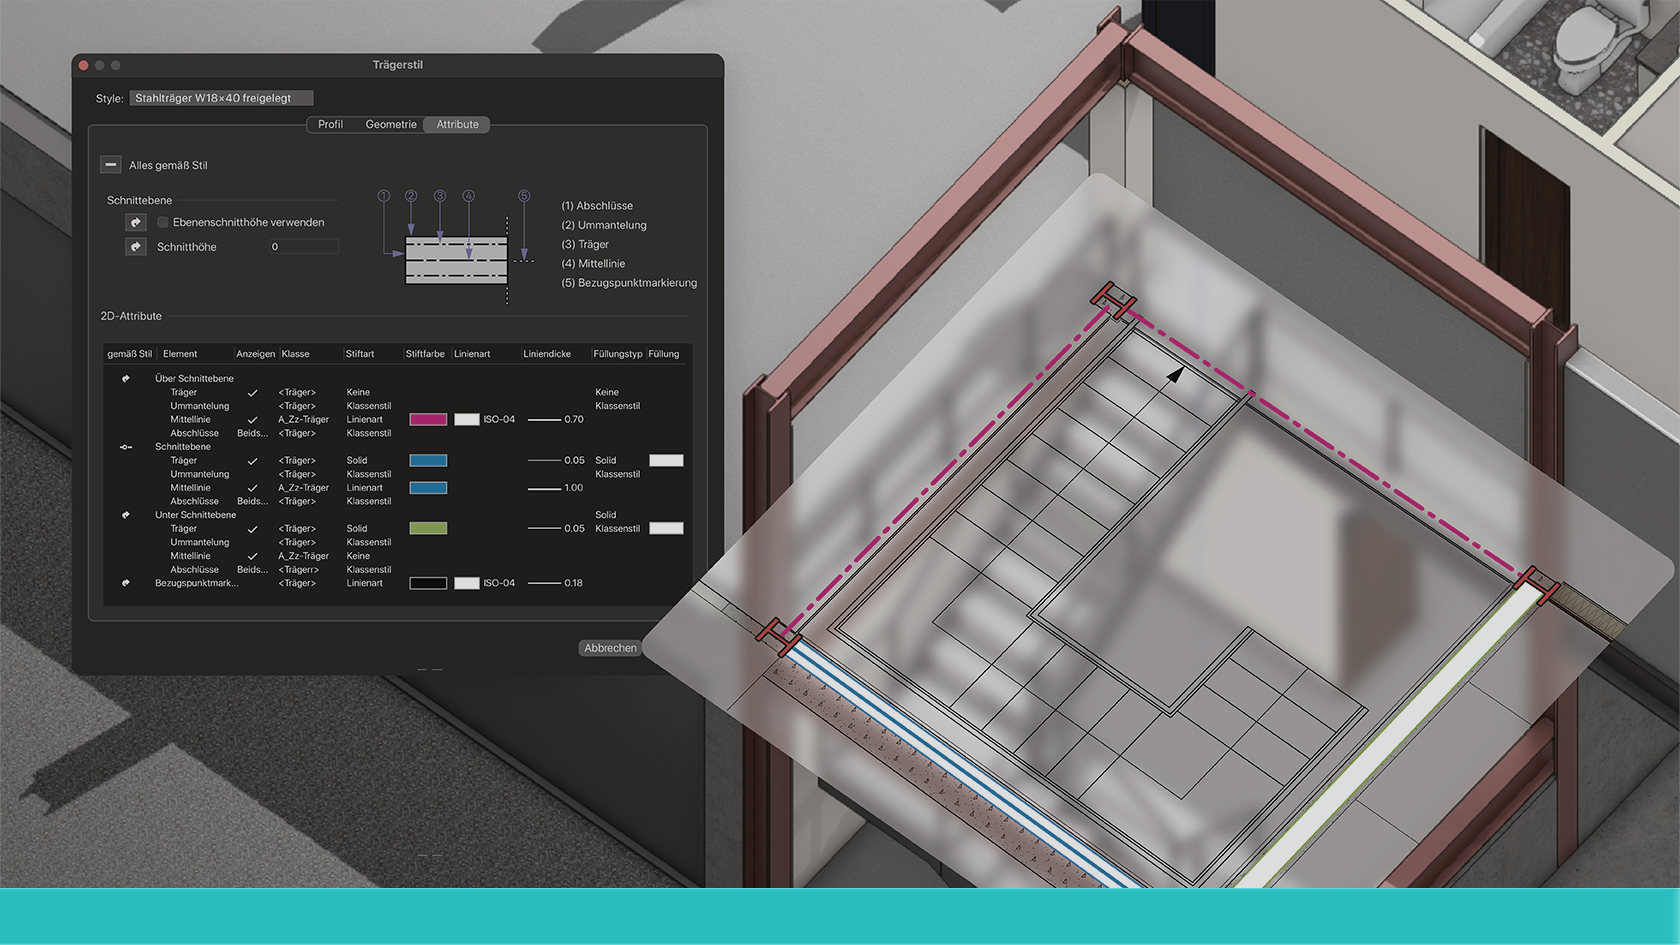
In Vectorworks 2024 wurde das Werkzeug für Tragswerkselemente gründlich überarbeitet und mit ganz neuen Möglichkeiten ausgestattet. Zum Beispiel lässt sich die 2D- und 3D-Darstellung viel detaillierter festlegen. Wenn man die neuen, effizienteren Arbeitsprozesse kennt, kann man eine Menge Zeit und Nerven beim Erstellen und Umformen von Tragwerkselementen sparen. Zusammen mit dem erfahrenen Vectorworks-Experten Marc Wittwer können Sie sich das ganze Know-how dazu in rund 20 kurzweiligen Minuten aneignen.
(Für Version 2024)
Category: Buildings
Requires Approval: No
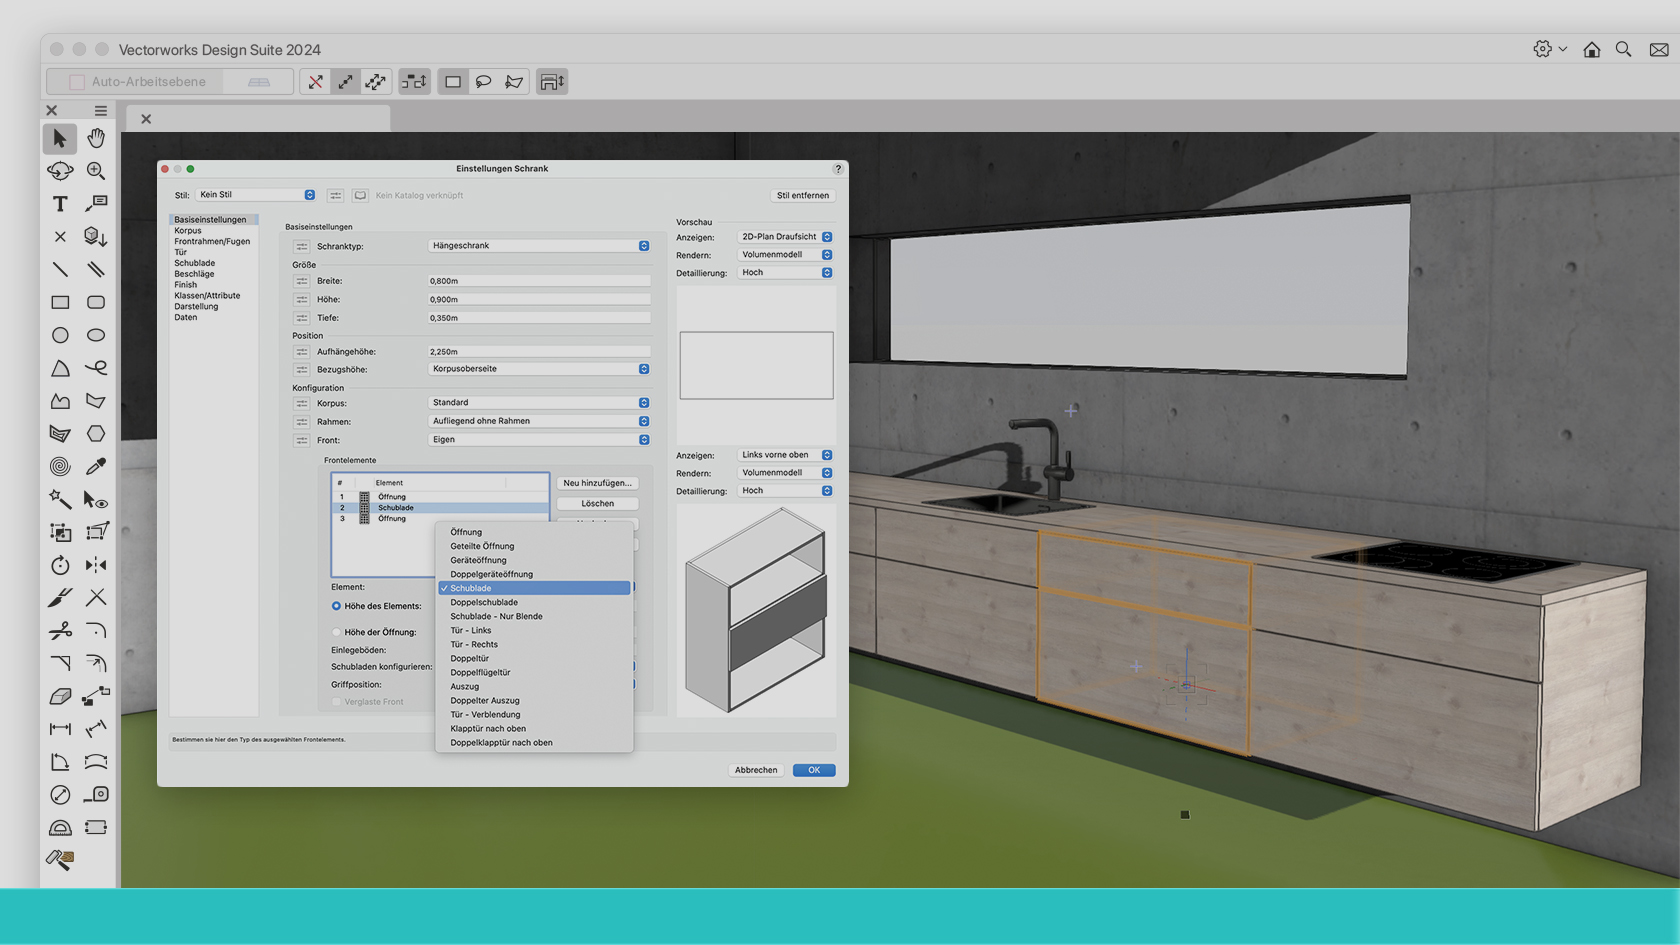
Mit dem neuen Schrankwerkzeug in Vectorworks 2024 können Sie maßgeschneiderte Küchen und individuelle Einbauschränke für verschiedenste Anforderungen schnell und effizient planen.
Wir zeigen Ihnen, wie Sie Schrank- und Korpustypen konfigurieren sowie Größe und Design anpassen können. Sie lernen, wie Sie Schränke texturieren und mit unterschiedlichen Darstellungsoptionen versehen. Erfahren Sie, wie Schrankstile gesichert und die dazugehörigen Daten ausgewertet werden können.
(Für Version 2024)
Category: Buildings
Requires Approval: No
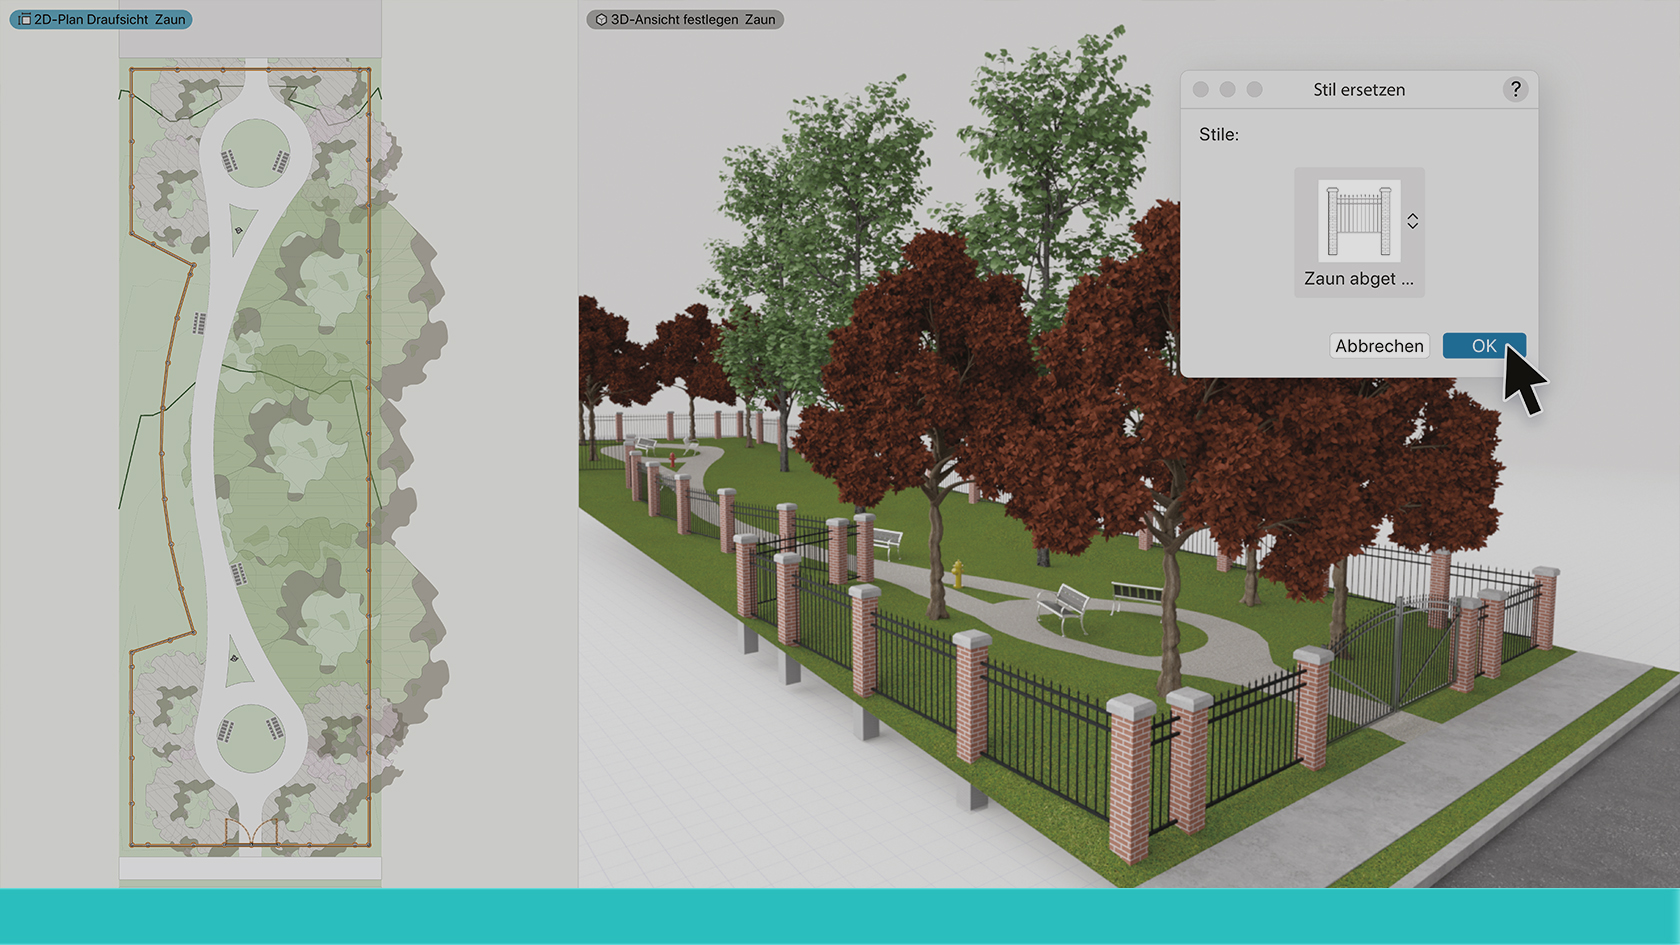
Vectorworks 2024 stellt allen, die Außenräume planen, ein ausgefeiltes Zaunwerkzeug zur Verfügung, das keine Wünsche offen lässt. Wer in einer knappen halben Stunde alle Tricks und Kniffe lernen möchte, um ohne Versuch und Irrtum sofort zum gewünschten Ziel zu gelangen, lässt sich dieses Webinar nicht entgehen. Noémie Kölliker und Fabio Häuselmann zeigen Ihnen alle geeigneten Workflows, um die grenzenlosen Möglichkeiten mit Pfosten, Stufen, Platten, Toren, Wänden, Rampen und Treppen effizient auszuschöpfen.
(Für Version 2024)
Category: Landscapes
Requires Approval: No

Put your Vectorworks Architect knowledge to the test and achieve your Vectorworks Architect Professional Certification. This exam evaluates participants knowledge of Vectorworks Architect tools, commands, and concepts. To prepare for this exam, it is recommended that participants first complete the Vectorworks Architect Professional Certification class. After successfully completing this exam with a score of 80%, participants will earn the Vectorworks Architect Professional Certification. The certification will be valid for 3 years.
Category: Architect Certification 2024
Requires Approval: Yes
Are you ready to embark on your journey with Vectorworks Architect? Look no further! In this engaging introductory session, we've meticulously distilled the essential tools, concepts, and workflows you need to kick-start your Vectorworks Architect experience.
Whether you're a novice taking your first steps or someone seeking a quick and practical overview, this one-hour video is your perfect gateway to the world of Vectorworks Architect. Join us as we unravel the key components of Vectorworks
Architect, offering you a comprehensive overview of this powerful design software. Our aim is to provide you with a concise, yet informative introduction to Vectorworks Architect that empowers you to start creating architectural designs with confidence.
While this session may be just an hour long, it will set you on the right path, equipping you with the fundamental knowledge needed to explore Vectorworks Architect further.
Category: Live Session
Requires Approval: No
Put your Vectorworks knowledge to the test and achieve your Vectorworks Core Associate Certification. The Core Certification exam tests knowledge of the basic concepts and skills needed to be proficient in Vectorworks design software's core functionality. The topics covered in this exam are available through on-demand video courses on the Vectorworks University. Learners should be comfortable with the Vectorworks interface, understand clicking behavior, and have a general knowledge of tools, menu commands, and understand document organization before attempting this exam. By successfully completing this exam with a score of 80 or higher, you will earn the Vectorworks Core Associate Certification.
Category: Exam
Requires Approval: No
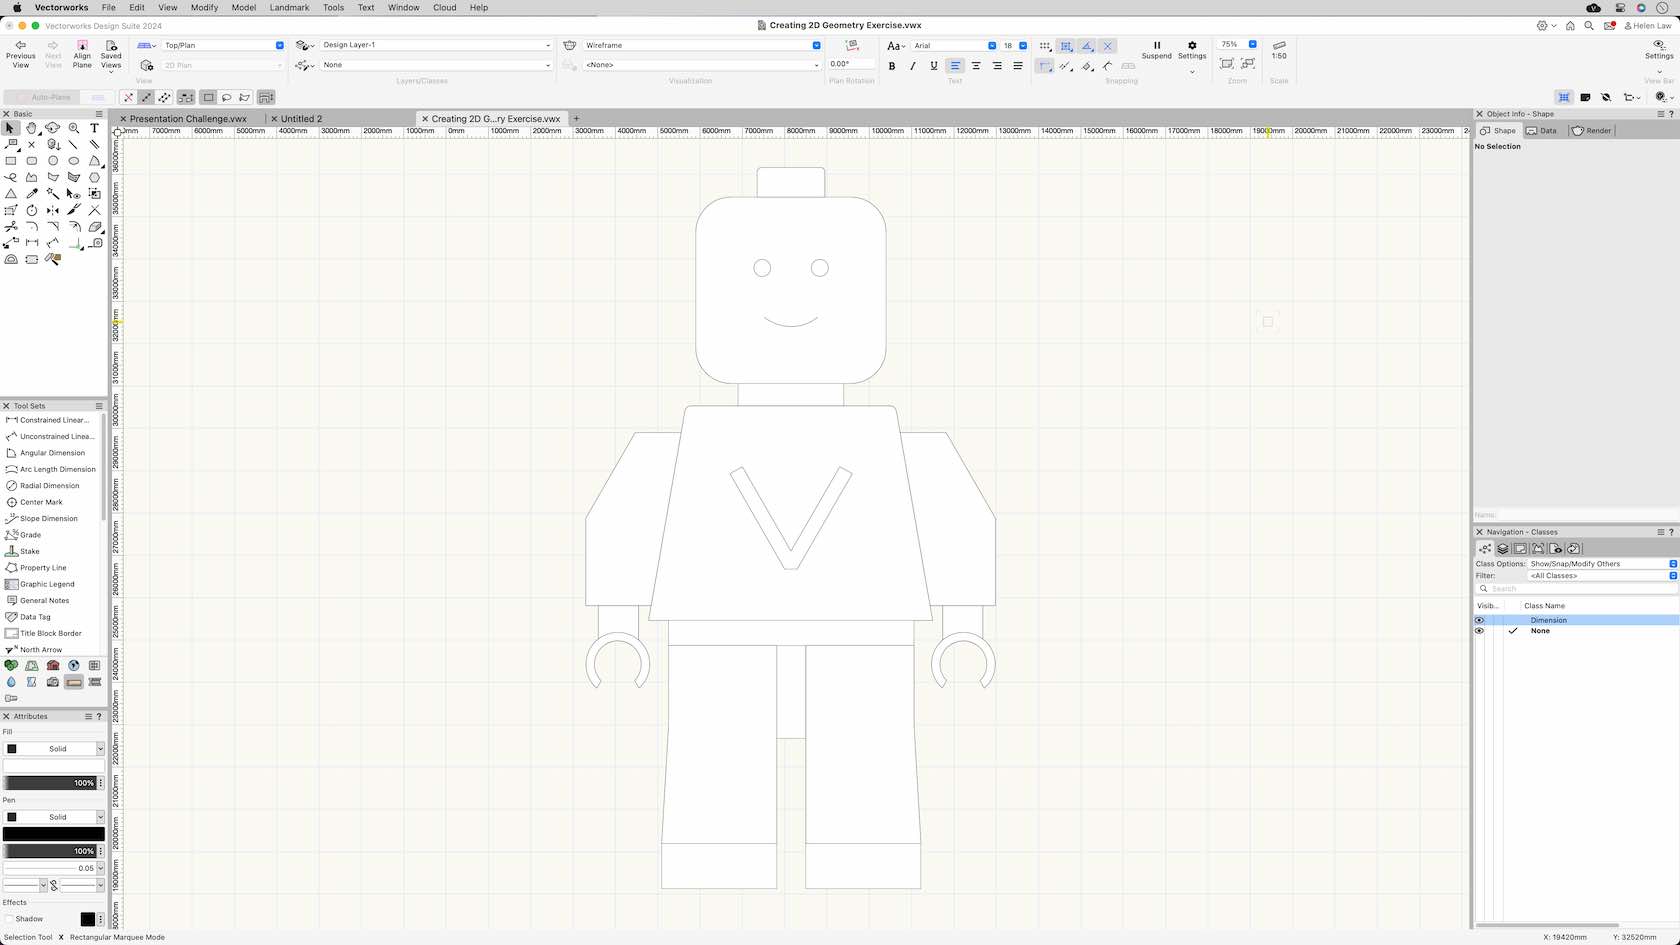
In this challenge you will use your recently learnt drawing skills, duplicating and editing skills to create a 2D figure.
Category: Skill
Requires Approval: No
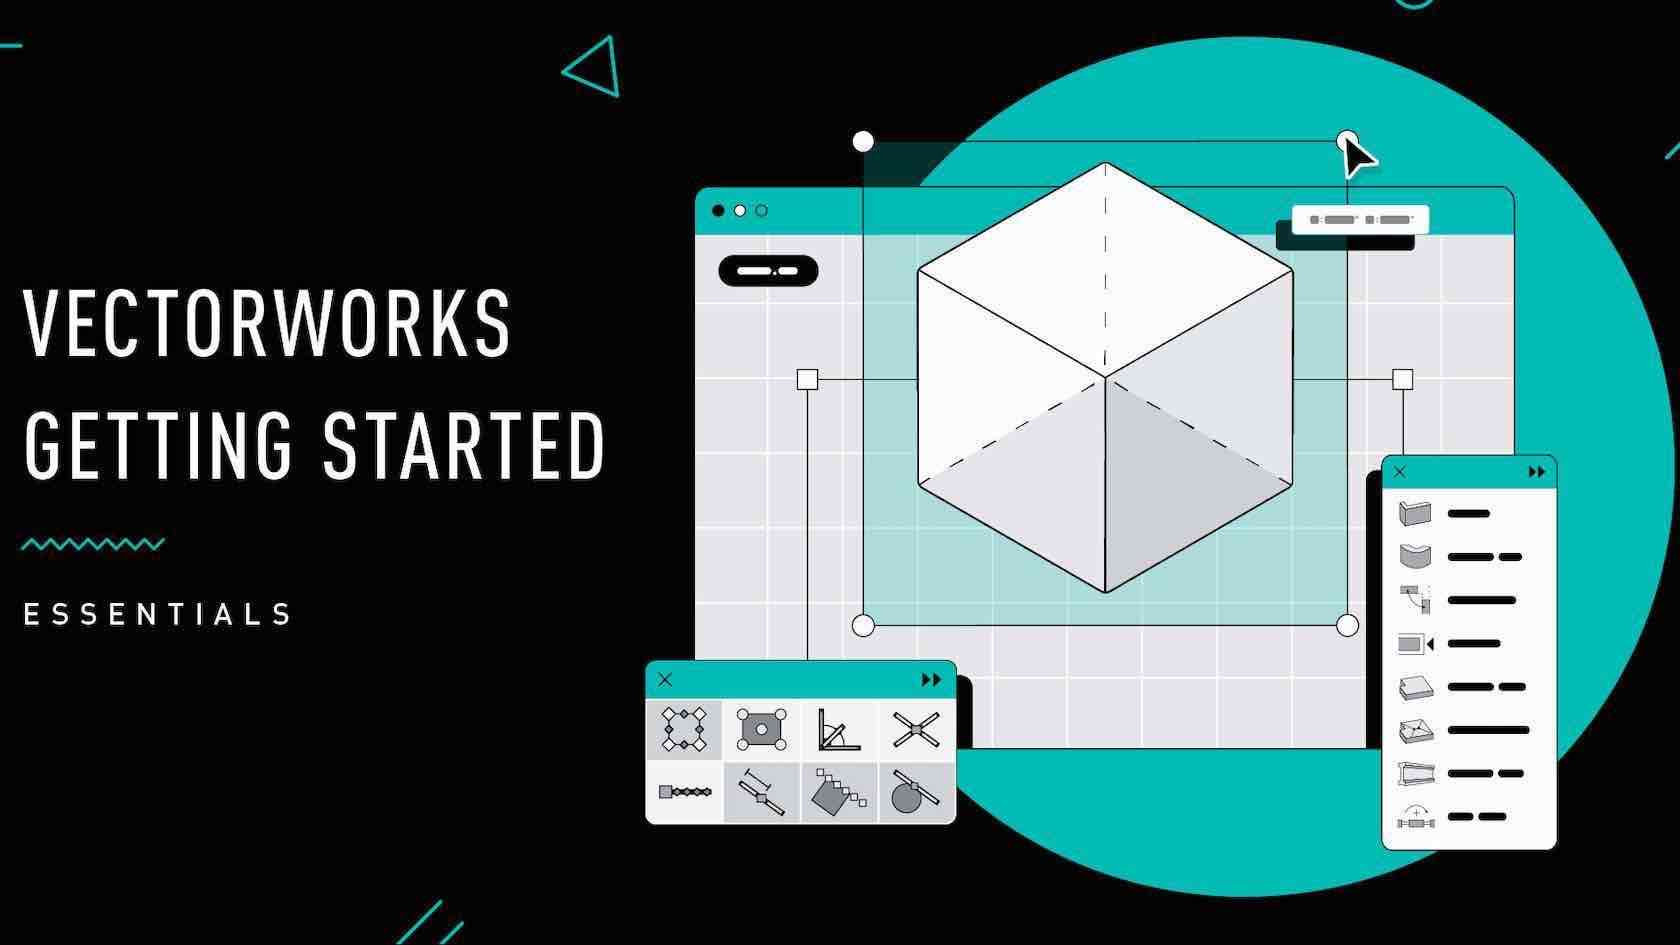
This introductory seminar provides a basic overview of the capabilities, concepts, resources, services, and benefits available for the Vectorworks user to get started. This session explains the user interface and demonstrates how to use tools and menu
commands to create and convert objects. Learn about classes, design layers, viewports, renderings, and sheet layers to present and annotate drawings and publish your work.
Category: Live Session
Requires Approval: No
Erfahren Sie, wie Sie schnell Informationen über die Programmfunktionen von Vectorworks erhalten und welche Hilfestellungen über das Programm hinaus Ihnen angeboten werden.
Category: Erste Schritte 2024
Requires Approval: No
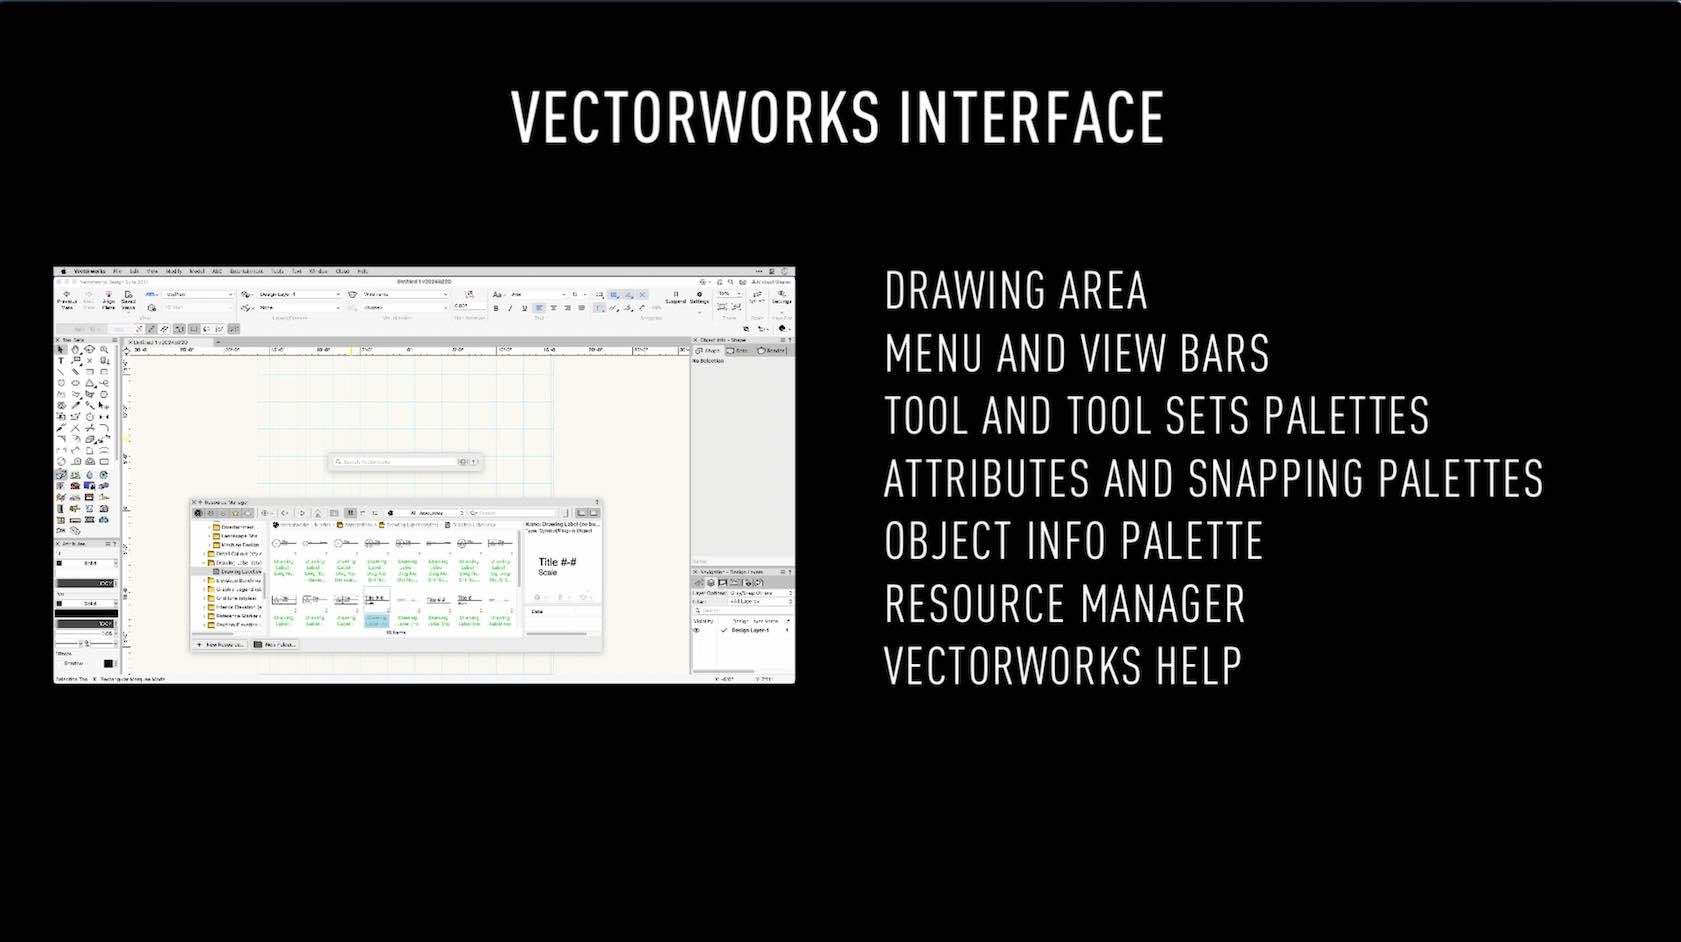
In this overview, we will explore the Vectorworks Interface. We will discuss the different palettes, bars, and quick options.
Category: Skill
Requires Approval: No

Put your Vectorworks Landmark knowledge to the test and achieve your Vectorworks Landmark Professional Certification. This exam evaluates particpants knowlegde of Vectorworks Landmark tools, commands, and concepts. To prepare for this exam, it is recommended that particpants first complete the Vectorworks Landmark Professional Certification class. After successfully completing this exam with a score of 40 or higher, participants will earn the Vectorworks Landmark Professional Certification. The certification will be valid for 3 years.
Category: Landmark 2024 Certificaiton
Requires Approval: Yes
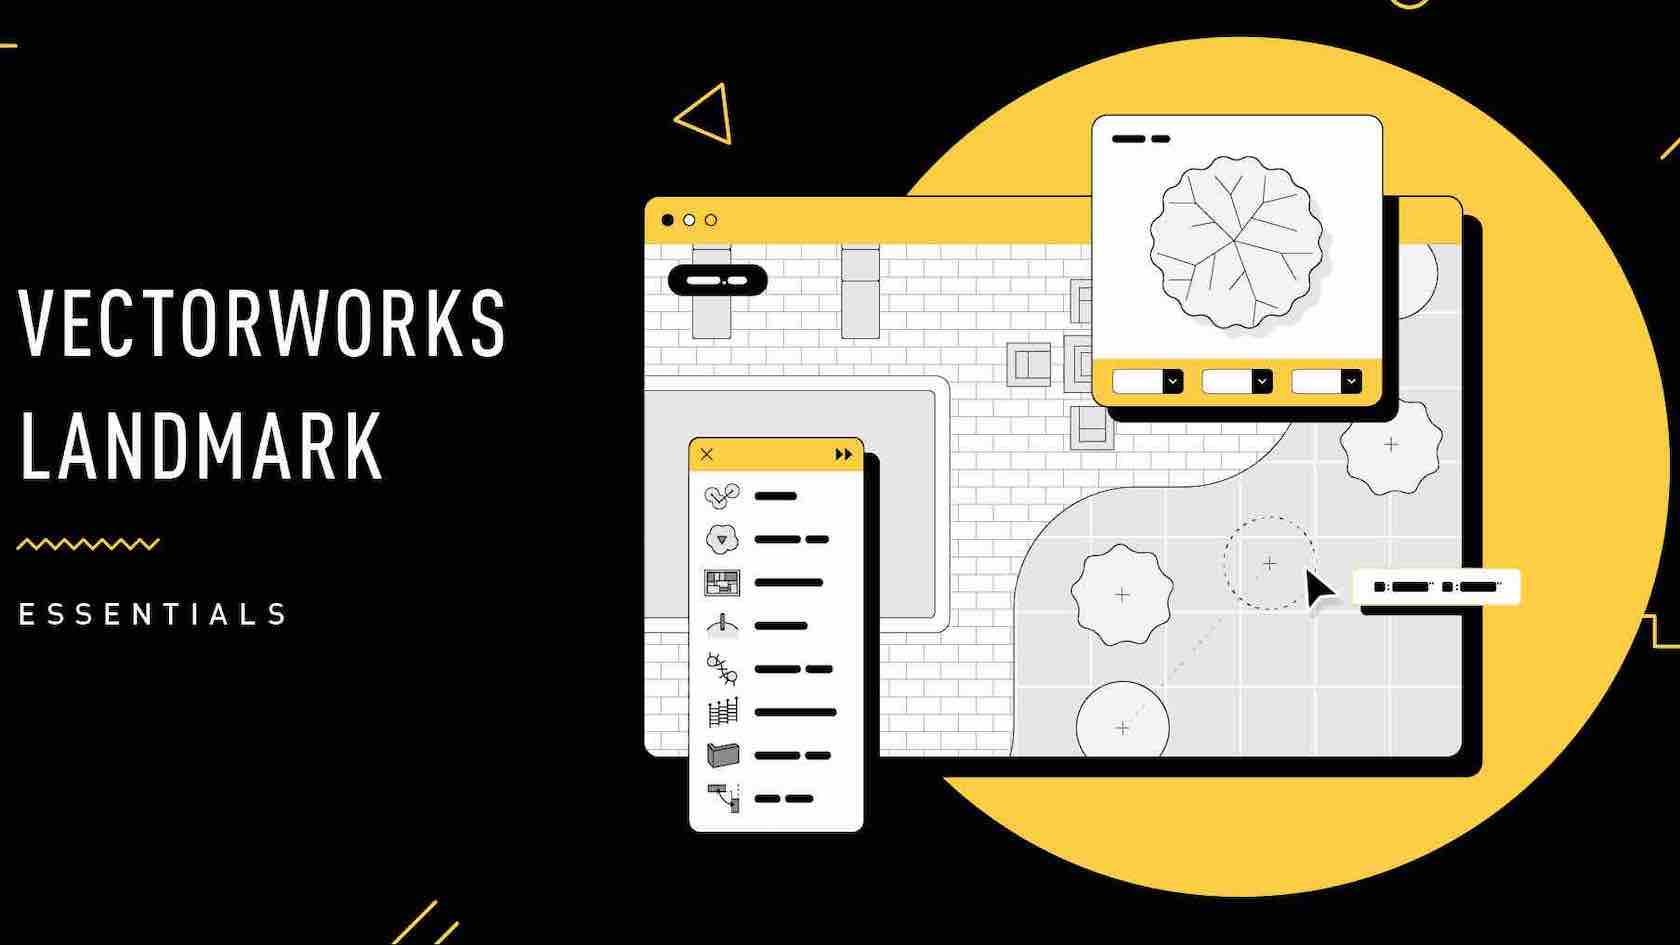
Are you ready to embark on your journey with Vectorworks Landmark? Look no further! In this engaging introductory session, we've meticulously distilled the essential tools, concepts, and workflows you need to kick-start your Vectorworks Landmark experience. Whether you're a novice taking your first steps or someone seeking a quick and practical overview, this one-hour seminar is your perfect gateway to the world of Vectorworks Landmark. Join us as we unravel the key components of Vectorworks Landmark, offering you a comprehensive overview of this powerful design software. Our aim is to provide you with a concise, yet informative introduction to Vectorworks Landmark that empowers you to start creating landscape designs with confidence. While this session may be just an hour long, it will set you on the right path, equipping you with the fundamental knowledge needed to explore Vectorworks Landmark further.
Category: Live Session
Requires Approval: No
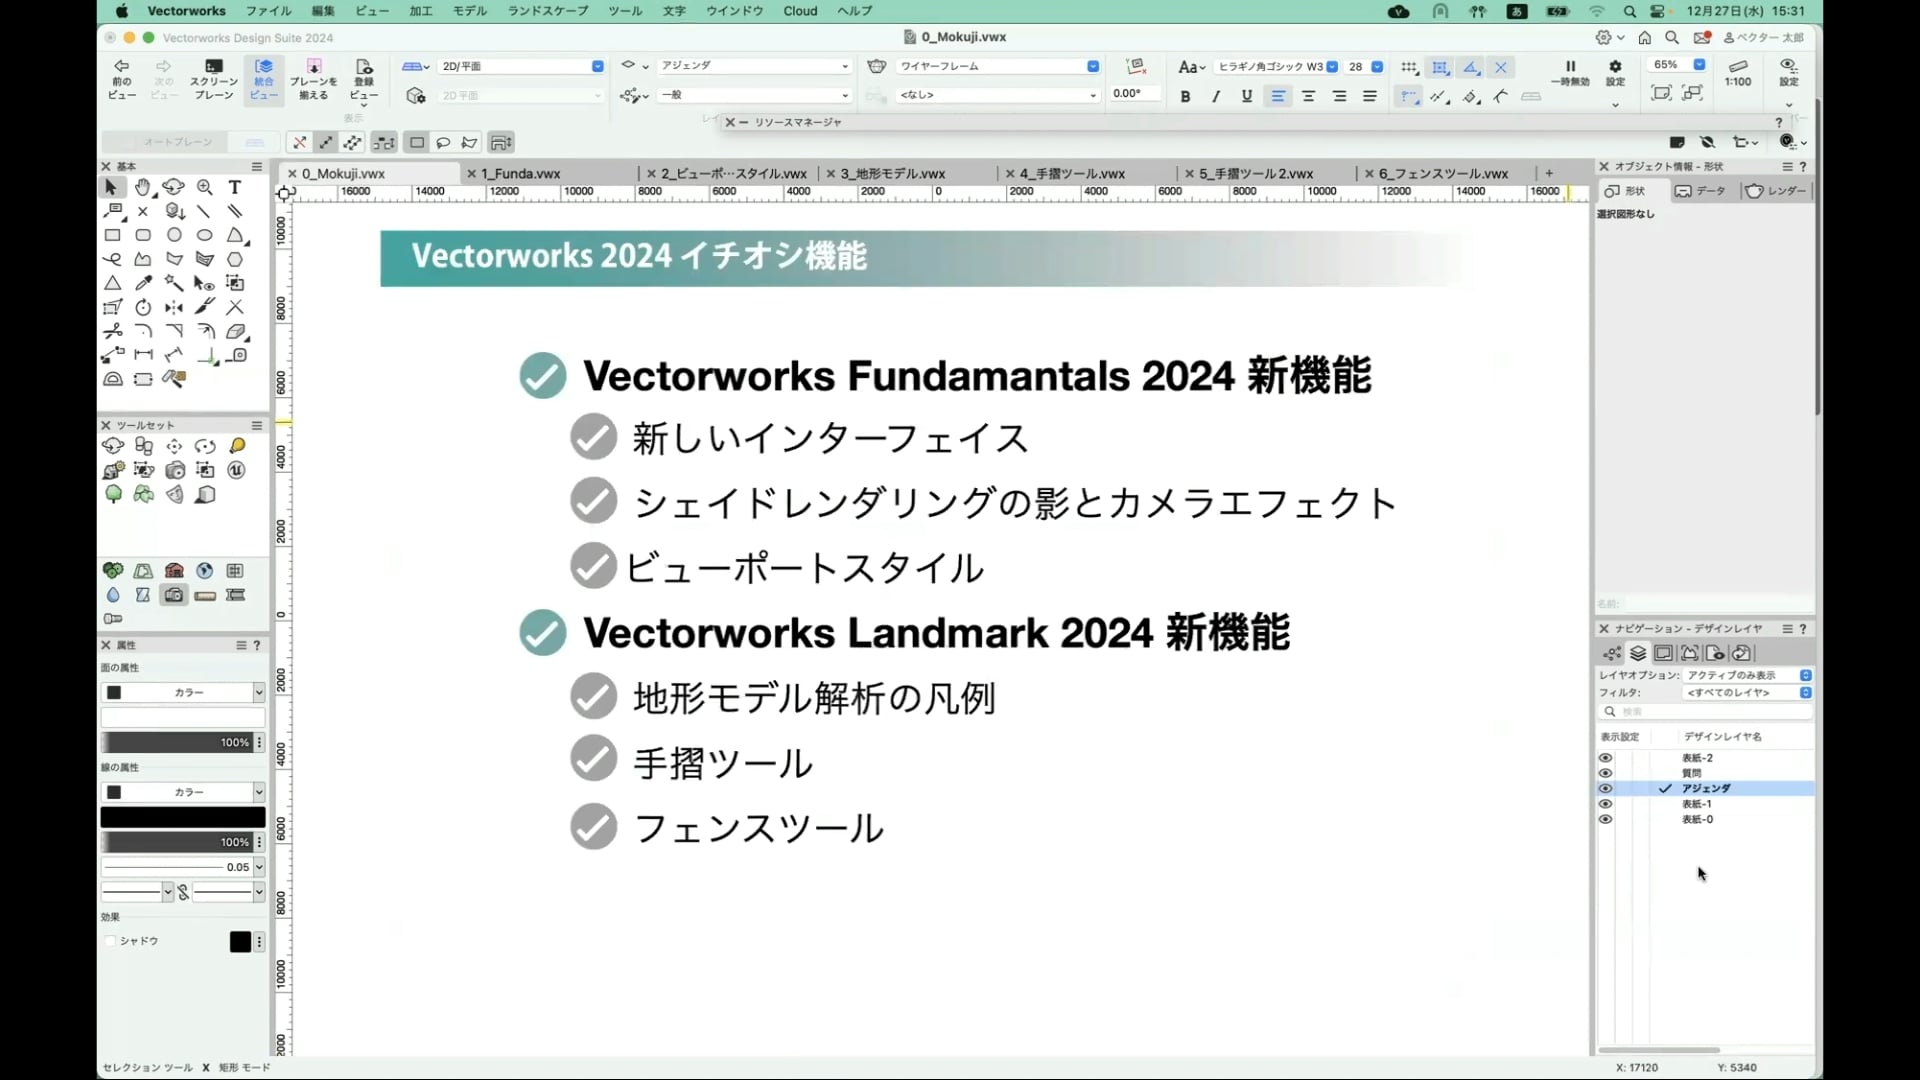
Vectorworks Landmarkユーザー様向けに開催した、Landmark の機能を中心にユーザーのみなさまからご質問いただく機能をWEB上で操作してご紹介するVectorworks Landmark Web勉強会第15回のアーカイブ動画です。
※動画はVectorworks 2024で収録しています。インターフェイスや機能の名称など一部現バージョンと異なる場合があります。ご了承ください。
Category: Live Session
Requires Approval: No

Put your Vectorworks Spotlight knowledge to the test and achieve your Vectorworks Spotlight Professional Certification. This exam evaluates particpants knowlegde of Vectorworks Spotlight tools, commands, and concepts. To prepare for this exam, it is recommended that particpants first complete the Vectorworks Spotlight Professional Certification class. After successfully completing this exam with a score of 80 or higher, participants will earn the Vectorworks Spotlight Professional Certification. The certification will be valid for 3 years.
Category: Spotlight Certification 2024
Requires Approval: Yes
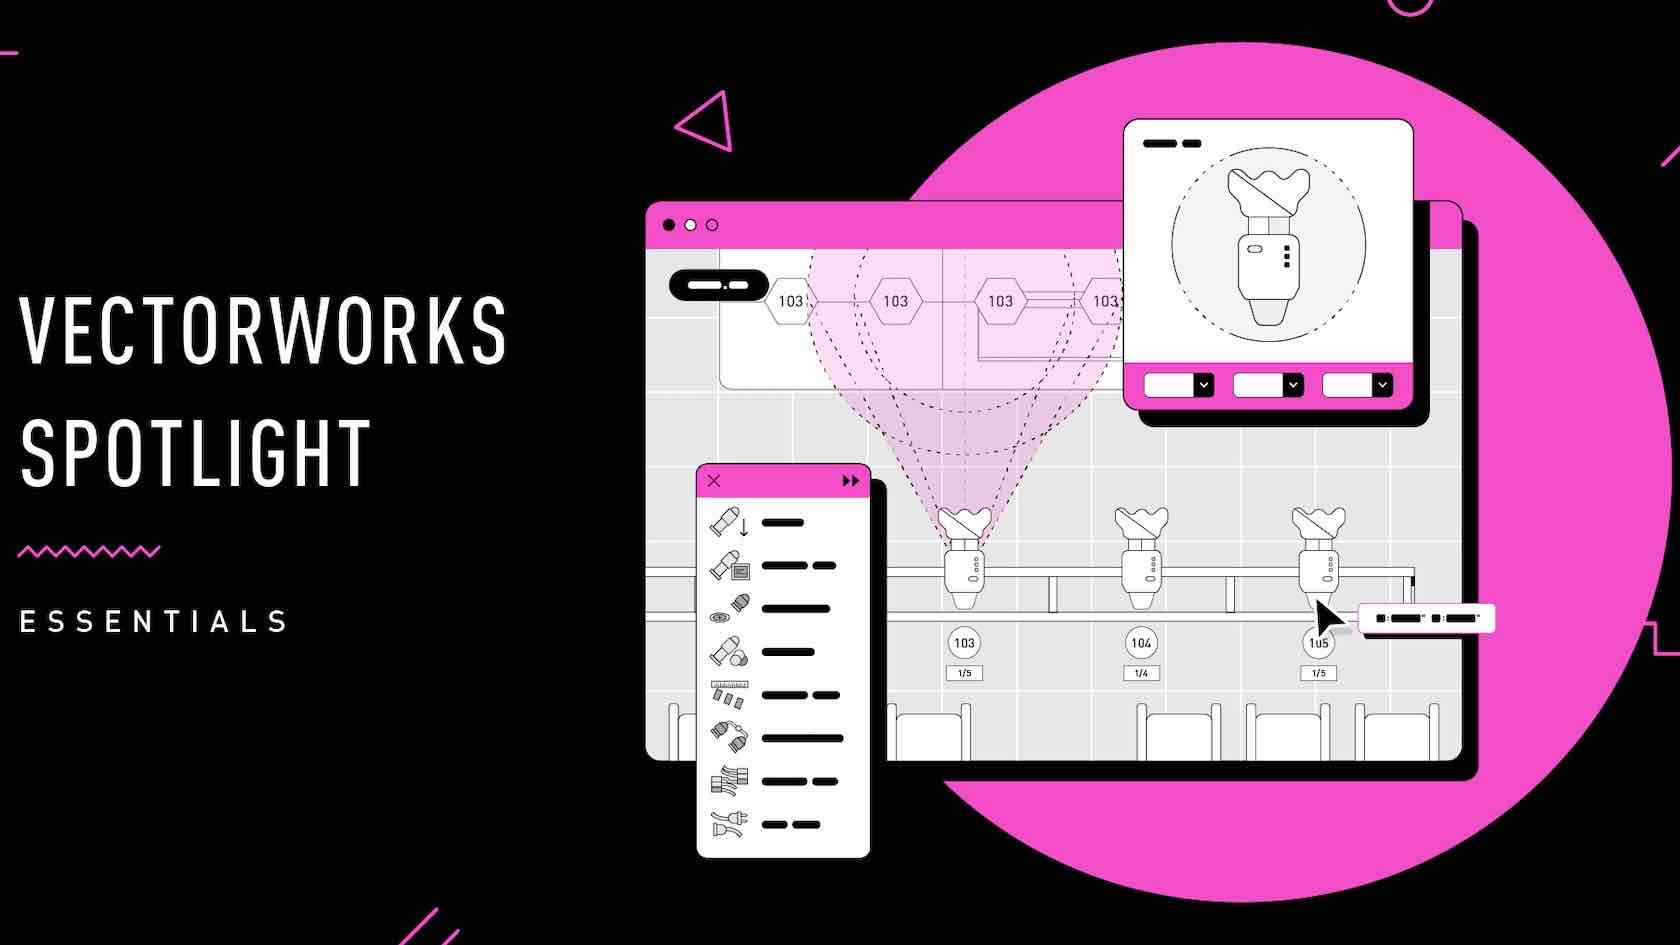
Are you ready to embark on your journey with Vectorworks Spotlight? Look no further! In this engaging introductory session, we've meticulously distilled the essential tools, concepts, and workflows you need to kick-start your Vectorworks Spotlight experience.
Whether you're a novice taking your first steps or someone seeking a quick and practical overview, this one-hour seminar is your perfect gateway to the world of Vectorworks Spotlight. Join us as we unravel the key components of Vectorworks Spotlight,
offering you a comprehensive overview of this powerful design software. Our aim is to provide you with a concise, yet informative introduction to Vectorworks Spotlight that empowers you to start creating entertainment designs with confidence. While
this session may be just an hour long, it will set you on the right path, equipping you with the fundamental knowledge needed to explore Vectorworks Spotlight further.
Category: Live Session
Requires Approval: No

ComputerWorks hat für Vectorworks Architektur für Gebäudeplanungen zwei aufeinander abgestimmte Vorgabedokumente für die verschiedenen Planungsphase entwickelt. Sie sorgen dafür, dass das Projekt von Anfang an mit einer korrekt eingerichteten Vectorworks-Datei starten kann: Mit einer Klassenstruktur nach eBKP-H, mit Geschossen und Referenzhöhen, mit einer zeitgemässen Nomenklatur für die Bauteile usw. Dieses Webinar wird von unseren praxiserprobten Experten Marc Wittwer (Arch. HTL) und Reto Thomet (Dipl. Arch. ETH) aus dem BIM-Consulting-Team von ComputerWorks durchgeführt. Sie erfahren in kurzer Zeit, wo diese wertvollen Dokumente zu finden sind, wie man im Team damit umgeht und wie man sie an spezifische Projekte und Bürostandards anpasst. Dieses Webinar ist ein Must für alle, die sich mit Architekturprojekten befassen.
(Für Version 2024)
Category: Featured
Requires Approval: No
Meistern Sie zielsicher Ihre Aufgaben am Arbeitsplatz mit Vectorworks. Egal, ob Sie ein Neuling oder ein erfahrener Vectorworks-Anwender sind, unser Zertifizierungsprogramm bietet Ihnen Möglichkeiten, weiter zu lernen und Ihre Fähigkeiten in Vectorworks unter Beweis zu stellen. Die Zertifizierung für Einsteiger umfasst mehrere Zertifikate zu verschiedenen Themenbereichen. Mit der Vectorworks-Zertifizierung EINSTEIGER - ERSTE SCHRITTE BESCHRIFTEN, BEMAßEN, DRUCKAUSGABE setzen Sie Ihre Lernreise fort.
Diese Zertifizierung enthält zahlreiche Videos, die Ihnen das notwendige Wissen zum sicheren Umgang mit den Werkzeugen in Vectorworks vermittelt. Nach dem Durcharbeiten sind Sie bereit für die Prüfung.
Die Zertifizierungsprüfung bestehend aus 50 Fragen ist mit einer Punktzahl von mindestens 40 Punkten bestanden. Durch das Bestehen der Vectorworks-Prüfung EINSTEIGER - ERSTE SCHRITTE BESCHRIFTEN, BEMAßEN, DRUCKAUSGABE und den Erhalt des Zertifikates zeigen Sie Arbeitgebern und Kunden, dass Sie über ein fundiertes Vectorworks Wissen zu den 3D-Werkzeugen zum 3D Modellieren und Bearbeiten verfügen.
Wir empfehlen dringend, den gesamten Vorbereitungskurs vor der Prüfung durchzuarbeiten. Vorbereitungskurs und Prüfung zur Vectorworks-Zertifizierung EINSTEIGER - ERSTE SCHRITTE BESCHRIFTEN, BEMAßEN, DRUCKAUSGABE sind für unbegrenzte Zeit kostenlos verfügbar. Wenn Sie das Gefühl haben, die behandelten Themen bereits zu beherrschen, können Sie auf dieser Seite unterhalb der Lerneinheiten direkt zur Prüfung springen. Ihr Zertifikat ist nach bestandener Prüfung 3 Jahre gültig. Sobald Sie die Prüfung bestanden haben, können Sie Ihr persönliches Vectorworks- Zertifikat und -Siegel herunterladen und anzeigen. Sie werden 6 Monate vor Ablauf Ihrer Zertifizierung benachrichtigt und erhalten Updates für Ihre Weiterbildung. Willkommen beim Vectorworks Zertifizierungsprogramm!
Category: Erste Schritte 2024
Requires Approval: No
Meistern Sie zielsicher Ihre Aufgaben am Arbeitsplatz mit Vectorworks. Egal, ob Sie ein Neuling oder ein erfahrener Vectorworks-Anwender sind, unser Zertifizierungsprogramm bietet Ihnen Möglichkeiten, weiter zu lernen und Ihre Fähigkeiten in Vectorworks unter Beweis zu stellen. Die Zertifizierung für Einsteiger umfasst mehrere Zertifikate zu verschiedenen Themenbereichen. Mit der Vectorworks-Zertifizierung EINSTEIGER - ERSTE SCHRITTE beginnt die Lernreise.
Diese Zertifizierung enthält zahlreiche Videos und Arbeitsdateien, die Ihnen das notwendige Wissen für das Verständnis von Vectorworks vermittelt. Nach dem Durcharbeiten sind Sie bereit für die Prüfung.
Die
Zertifizierungsprüfung bestehend aus 50 Fragen ist mit einer Punktzahl von mindestens 80 % bestanden. Durch das Bestehen der Vectorworks-Prüfung EINSTEIGER - ERSTE SCHRITTE und den Erhalt des Zertifikates zeigen Sie Arbeitgebern und Kunden, dass Sie mit dem Vectorworks-Prinzip vertraut sind.
Wir empfehlen dringend, den gesamten Vorbereitungskurs vor der Prüfung durchzuarbeiten. Vorbereitungskurs und Prüfung zur Vectorworks-Zertifizierung EINSTEIGER - ERSTE SCHRITTE
sind für unbegrenzte Zeit kostenlos verfügbar. Wenn Sie das Gefühl haben, die behandelten Themen bereits zu beherrschen, können Sie direkt zur Prüfung springen. Ihr Zertifikat ist nach bestandener Prüfung 3 Jahre gültig. Sobald Sie die Prüfung bestanden
haben, können Sie Ihr persönliches Vectorworks-Zertifikat und -Siegel herunterladen. Sie werden 6 Monate vor Ablauf Ihrer Zertifizierung benachrichtigt und erhalten weiterführende Informationen für Ihre Weiterbildung. Willkommen beim Vectorworks
Zertifizierungsprogramm!
Category: Erste Schritte 2024
Requires Approval: No
Meistern Sie zielsicher Ihre Aufgaben am Arbeitsplatz mit Vectorworks. Egal, ob Sie ein Neuling oder ein erfahrener Vectorworks-Anwender sind, unser Zertifizierungsprogramm bietet Ihnen Möglichkeiten, weiter zu lernen und Ihre Fähigkeiten in Vectorworks unter Beweis zu stellen. Die Zertifizierung für Einsteiger umfasst mehrere Zertifikate zu verschiedenen Themenbereichen. Mit der Vectorworks-Zertifizierung EINSTEIGER - ERSTE SCHRITTE 2D setzen Sie Ihre Lernreise fort. Diese Zertifizierung enthält zahlreiche Videos, die Ihnen das notwendige Wissen zum sicheren Umgang mit den 2D-Werkzeugen in Vectorworks vermittelt. Nach dem Durcharbeiten sind Sie bereit für die Prüfung.
Die Zertifizierungsprüfung bestehend aus 50 Fragen ist mit einer Punktzahl von mindestens 40 Punkten bestanden. Durch das Bestehen der Vectorworks-Prüfung EINSTEIGER -ERSTE SCHRITTE 2D und den Erhalt des Zertifikates zeigen Sie Arbeitgebern und Kunden, dass Sie über ein fundiertes Vectorworks Wissen zu den 2D-Werkzeugen zum 2D Zeichnen und Bearbeiten verfügen.
Wir empfehlen dringend, den gesamten Vorbereitungskurs vor der Prüfung durchzuarbeiten. Vorbereitungskurs und Prüfung zur Vectorworks-Zertifizierung EINSTEIGER - ERSTE SCHRITTE 2D sind für unbegrenzte Zeit kostenlos verfügbar. Wenn Sie das Gefühl haben, die behandelten Themen bereits zu beherrschen, können Sie direkt zur Prüfung springen. Ihr Zertifikat ist nach bestandener Prüfung 3 Jahre gültig. Sobald Sie die Prüfung bestanden haben, können Sie Ihr persönliches Vectorworks- Zertifikat und -Siegel herunterladen. Sie werden 6 Monate vor Ablauf Ihrer Zertifizierung benachrichtigt und erhalten weiterführende Informationen für Ihre Weiterbildung. Willkommen beim Vectorworks Zertifizierungsprogramm!
Category: Erste Schritte 2024
Requires Approval: No
Meistern Sie zielsicher Ihre Aufgaben am Arbeitsplatz mit Vectorworks. Egal, ob Sie ein Neuling oder ein erfahrener Vectorworks-Anwender sind, unser Zertifizierungsprogramm bietet Ihnen Möglichkeiten, weiter zu lernen und Ihre Fähigkeiten in Vectorworks unter Beweis zu stellen. Die Zertifizierung für Einsteiger umfasst mehrere Zertifikate zu verschiedenen Themenbereichen. Mit der Vectorworks-Zertifizierung EINSTEIGER - ERSTE SCHRITTE 3D setzen Sie Ihre Lernreise fort.
Diese Zertifizierung enthält zahlreiche Videos, die Ihnen das notwendige Wissen zum sicheren Umgang mit den 3D-Werkzeugen in Vectorworks vermittelt. Nach dem Durcharbeiten sind Sie bereit für die Prüfung.
Die Zertifizierungsprüfung bestehend aus 50 Fragen ist mit einer Punktzahl von mindestens 40 Punkten bestanden. Durch das Bestehen der Vectorworks-Prüfung EINSTEIGER - ERSTE SCHRITTE 3D und den Erhalt des Zertifikates zeigen Sie Arbeitgebern und Kunden, dass Sie über ein fundiertes Vectorworks Wissen zu den 3D-Werkzeugen zum 3D Modellieren und Bearbeiten verfügen.
Wir empfehlen dringend, den gesamten Vorbereitungskurs vor der Prüfung durchzuarbeiten. Vorbereitungskurs und Prüfung zur Vectorworks-Zertifizierung EINSTEIGER - ERSTE SCHRITTE 3D sind für unbegrenzte Zeit kostenlos verfügbar. Wenn Sie das Gefühl haben, die behandelten Themen bereits zu beherrschen, können Sie direkt zur Prüfung springen. Ihr Zertifikat ist nach bestandener Prüfung 3 Jahre gültig. Sobald Sie die Prüfung bestanden haben, können Sie Ihr persönliches Vectorworks- Zertifikat und -Siegel herunterladen und anzeigen. Sie werden 6 Monate vor Ablauf Ihrer Zertifizierung benachrichtigt und erhalten weiterführende Informationen für Ihre Weiterbildung. Willkommen beim Vectorworks Zertifizierungsprogramm!
Category: Erste Schritte 2024
Requires Approval: No
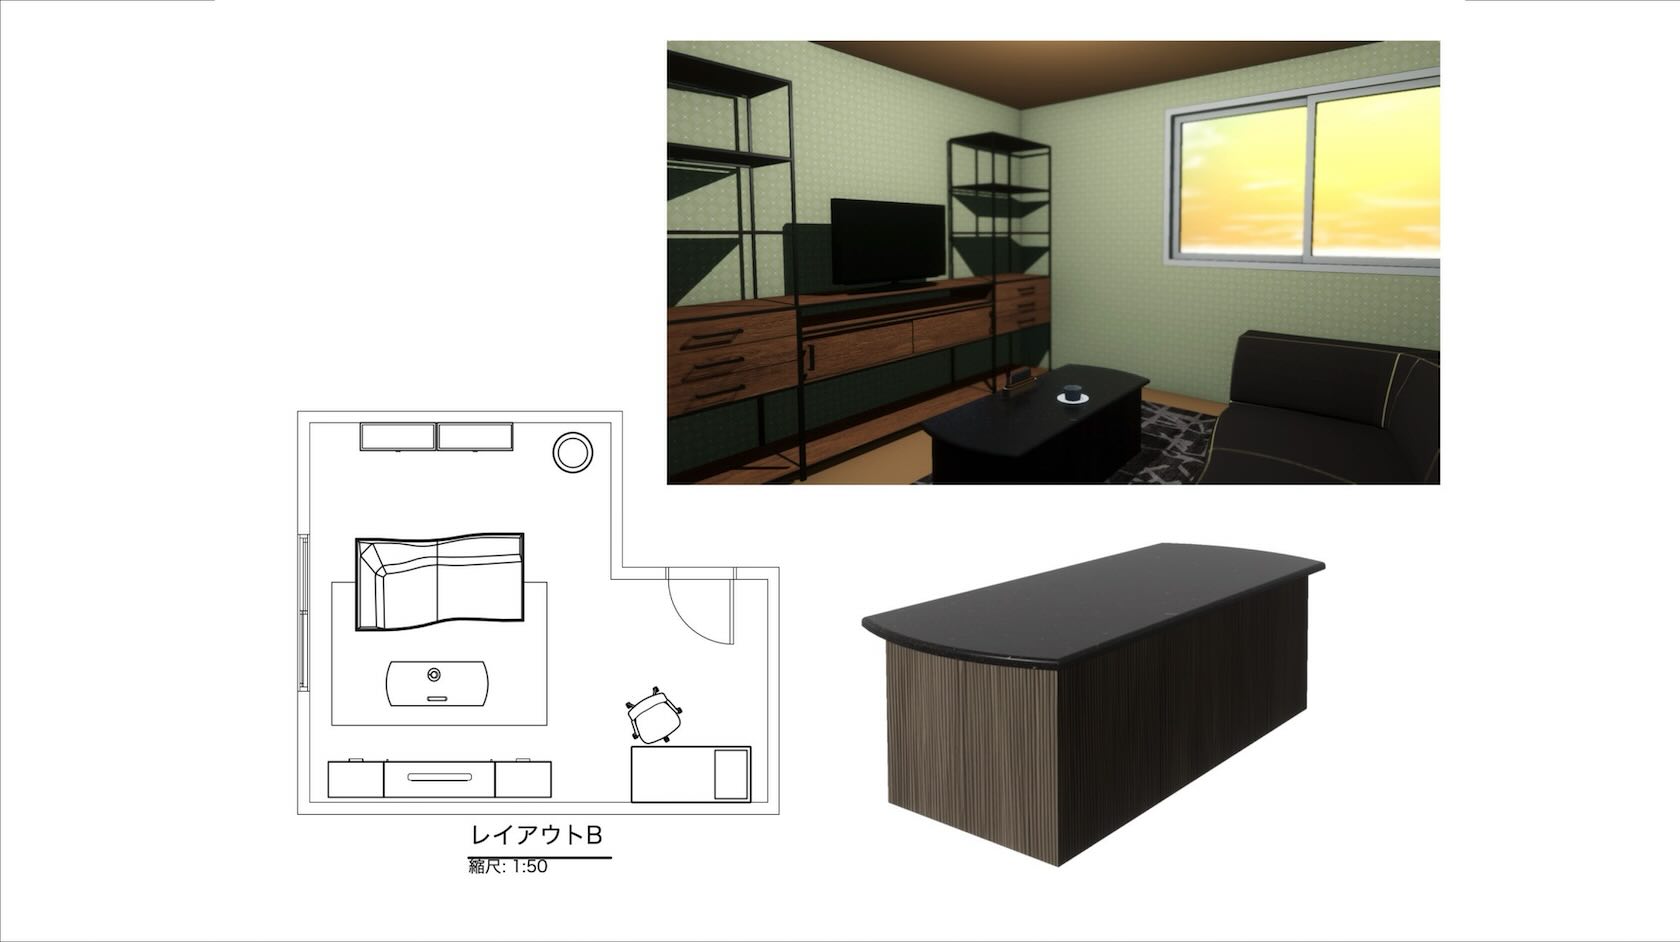
Vectorworksの基本的なツールやコマンド、パレットの使い方を習得いただきます。2D/3D作図機能を使って家具のモデリングを行い、部屋のレイアウト図を作成します。その後、シートレイヤでさまざまな表現の図面を作成します。Vectorworksを使いはじめるきっかけとなる内容です。
この動画は、Vectorworks 2025で操作を行います。
データはこちらよりダウンロードできます。
データは2024以下のバージョンでは開きませんのであらかじめご了承ください。
https://www.vectorworks.co.jp/seminar/dl/vwstart.zip
Category: Featured
Requires Approval: No
Participants will start with a blank file, import a PDF ground plan,
import a DWG floor plan, and build a venue using the Building Shell tool
set. We will end with a 3D model.
Category: Spotlight Certification 2024
Requires Approval: No

Lernen Sie den Umgang mit Verläufen in Vectorworks.
Category: Erste Schritte 2024
Requires Approval: No


In this course, we will discuss the view bar in Vectorworks. We will discuss the different buttons, drop downs, and settings.
Category: Skill
Requires Approval: No
This video provides an overview of some of the key tools and commands used when annotating drawings.
Category: Skill
Requires Approval: No
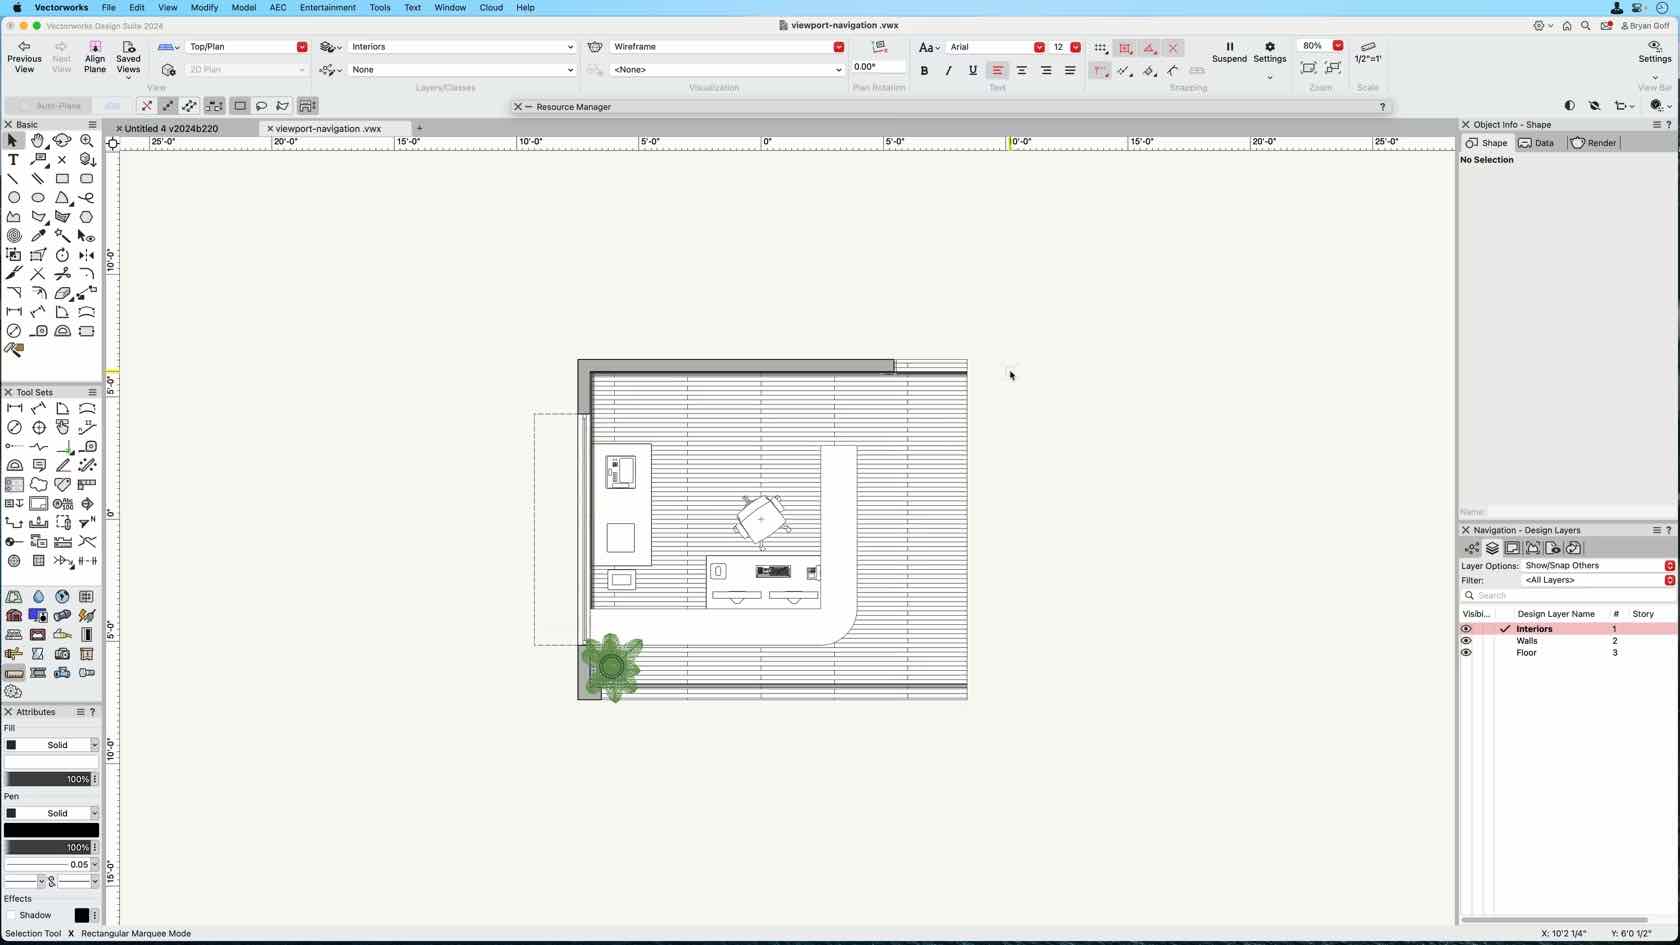
This course demonstrates how to use a viewport crop to create a focused drawing and rendering.
Category: Skill
Requires Approval: No
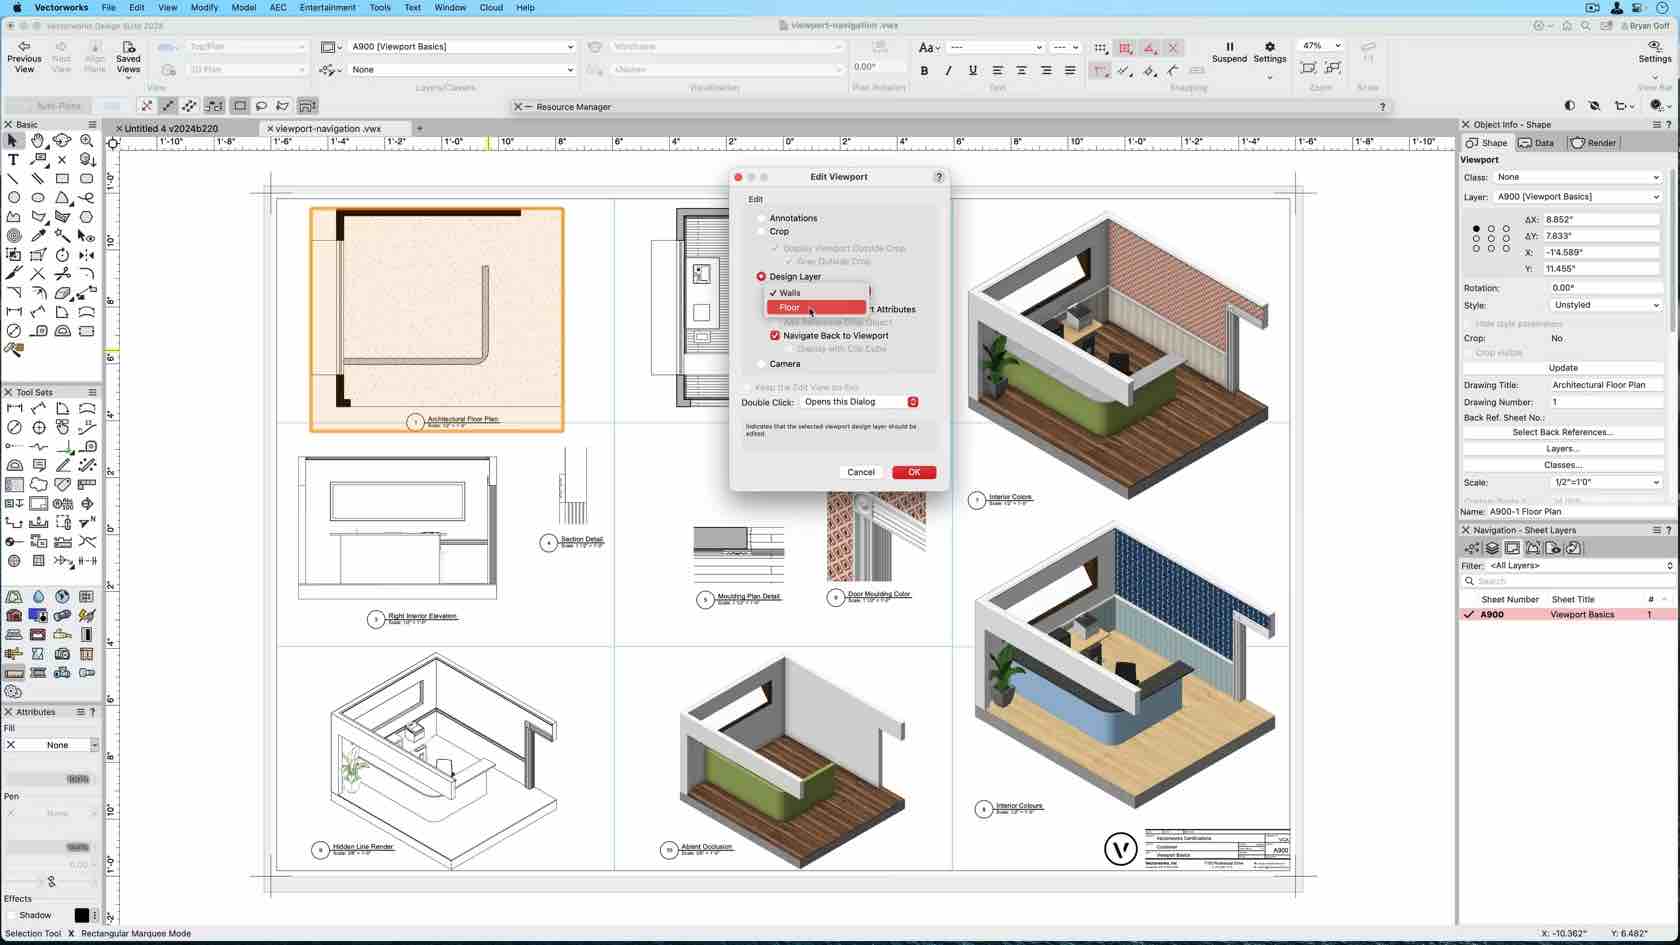
This course demonstrates how to increase productivity by navigating to the design layer using a viewport. This course also shows one how to improve design navigation workflows by using viewport navigation features and saved views.
Category: Skill
Requires Approval: No
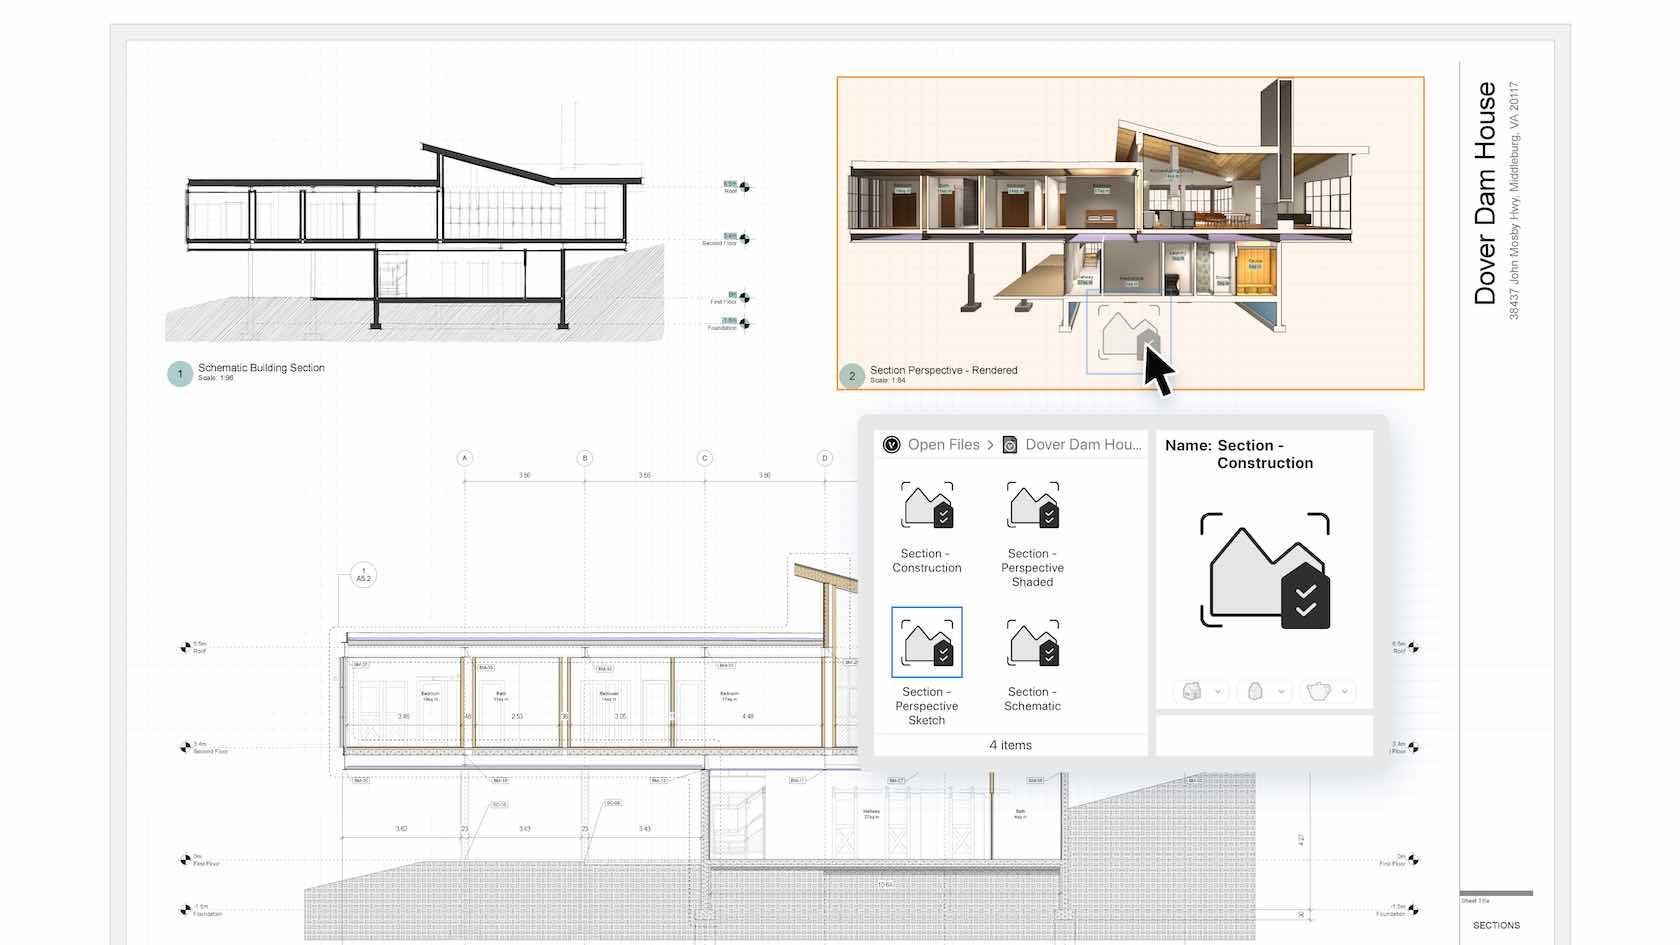
With new Viewport Styles in Vectorworks 2024, you'll be able to save custom viewport settings as styles, making them easily transferrable between viewports and project files. You'll be able to cut out the tedium of replicating your viewport settings and avoid errors. Create custom styles that let you change scale
or class and layer visibility so you can change from client-facing drawings to
more detailed construction plans quickly and easily. Quickly generate presentations from your section
viewports by changing class visibilities, cut plane attributes, and
visibilities at the cut plane and beyond. Easily interchange different rendering modes,
foreground and background rendering settings, and image effects. You can also
save your data visualization settings as Viewport Styles for faster
application.
Category: All Industries
Requires Approval: No
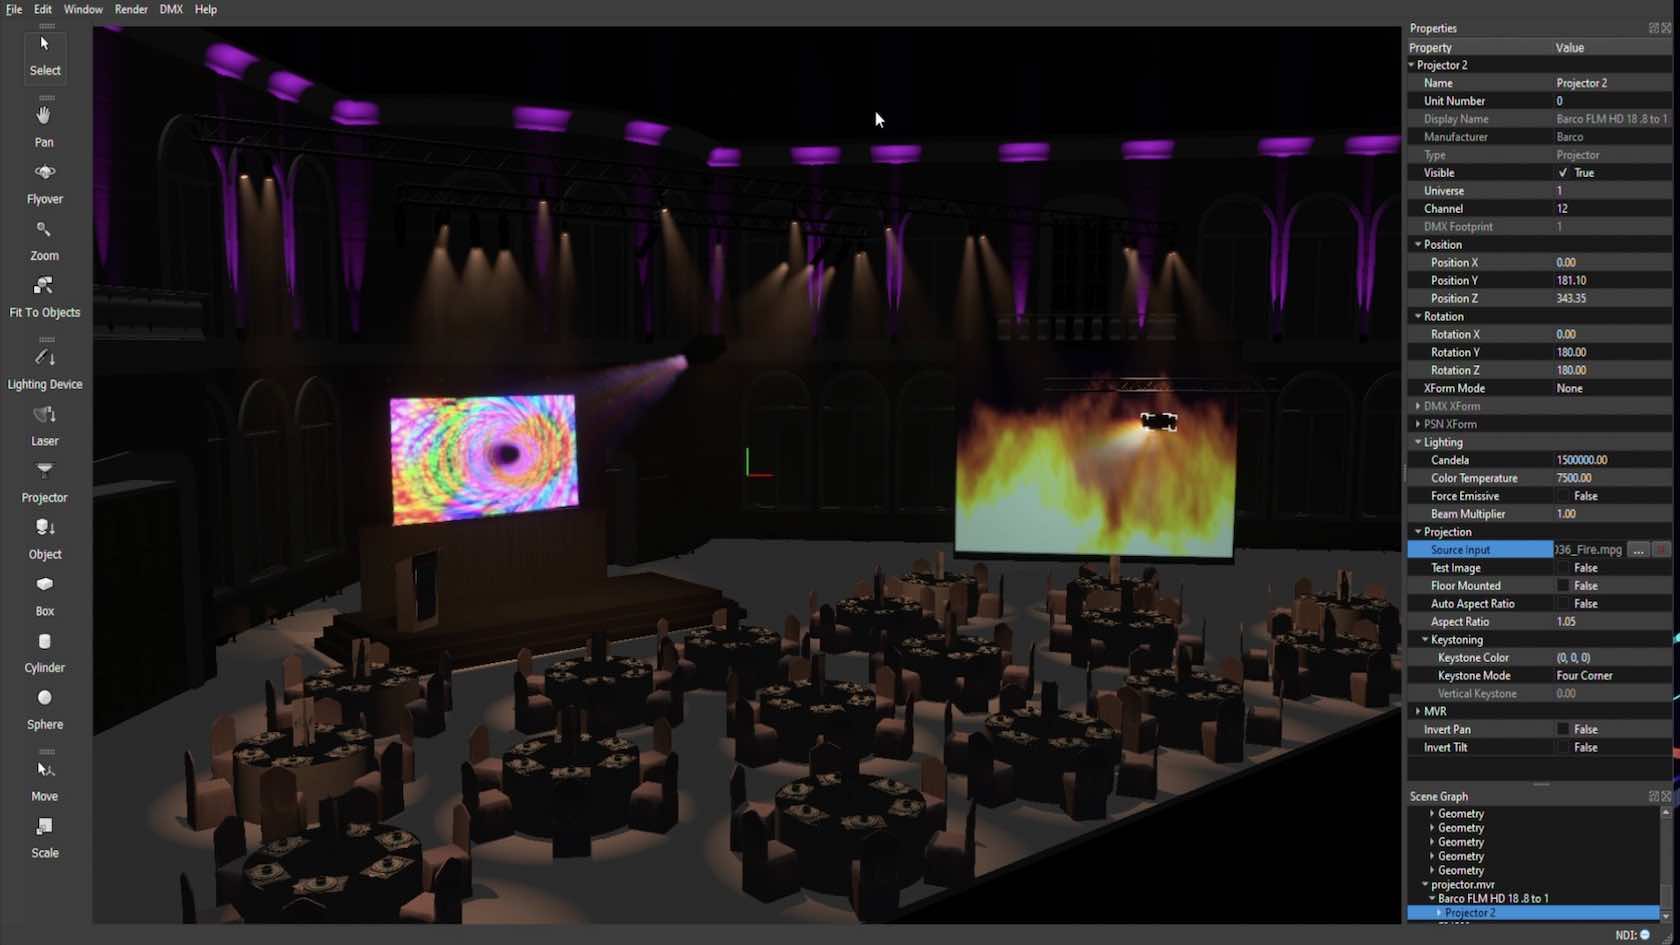
This video introduces the Projector object in Vision. The projector can be used to project an NDI or capture video stream, video file, or image file.
Category: Entertainment
Requires Approval: No
Lernen Sie die Befehle Volumen zusammenfügen sowie Schnittvolumen löschen und anlegen kennen. Weitere Inhalte zum Thema "Erste Schritte 3D" finden Sie hier.
Category: Erste Schritte 2024
Requires Approval: No

Vectorworks 2024 berechnet für die Darstellungsart „Volumenmodell” mehr als acht Lichtquellen: Das bedeutet, dass die Lichtverteilung und der Schattenwurf sichtbar realitätsnäher abgebildet werden. Das sorgt in Echtzeit für diese Extraportion Realismus, die man für die richtige Entscheidung oder das Rendering mit Wow-Effekt braucht. Zusätzlich haben Sie direkten Zugriff auf Einstellungen wie Belichtung, Umgebungslicht, Tiefenschärfe, Leuchteffekte und mehr.
Category: All Industries
Requires Approval: No
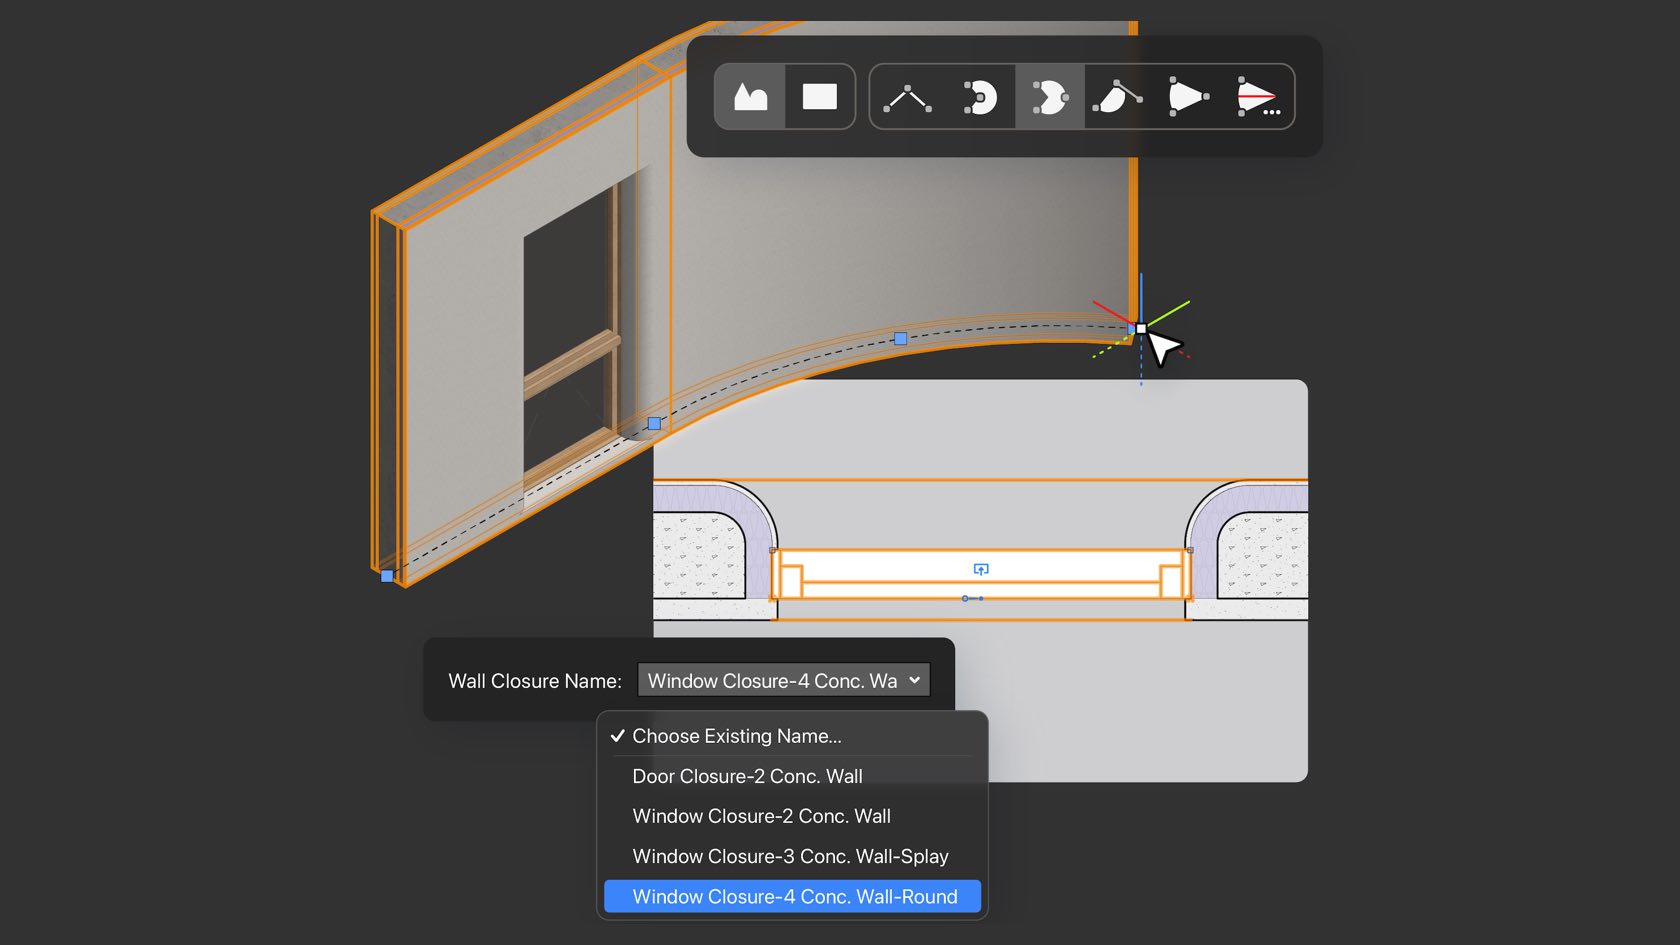
Stay in the creative flow with improvements to the Wall tool that bring you the ability to seamlessly switch linear and curved wall modes and to apply multiple configurations of wall component returns related to inserted objects. You'll save time with a simplified workflow aimed at giving you the flexibility you need with fewer clicks in between.
Category: Buildings
Requires Approval: No
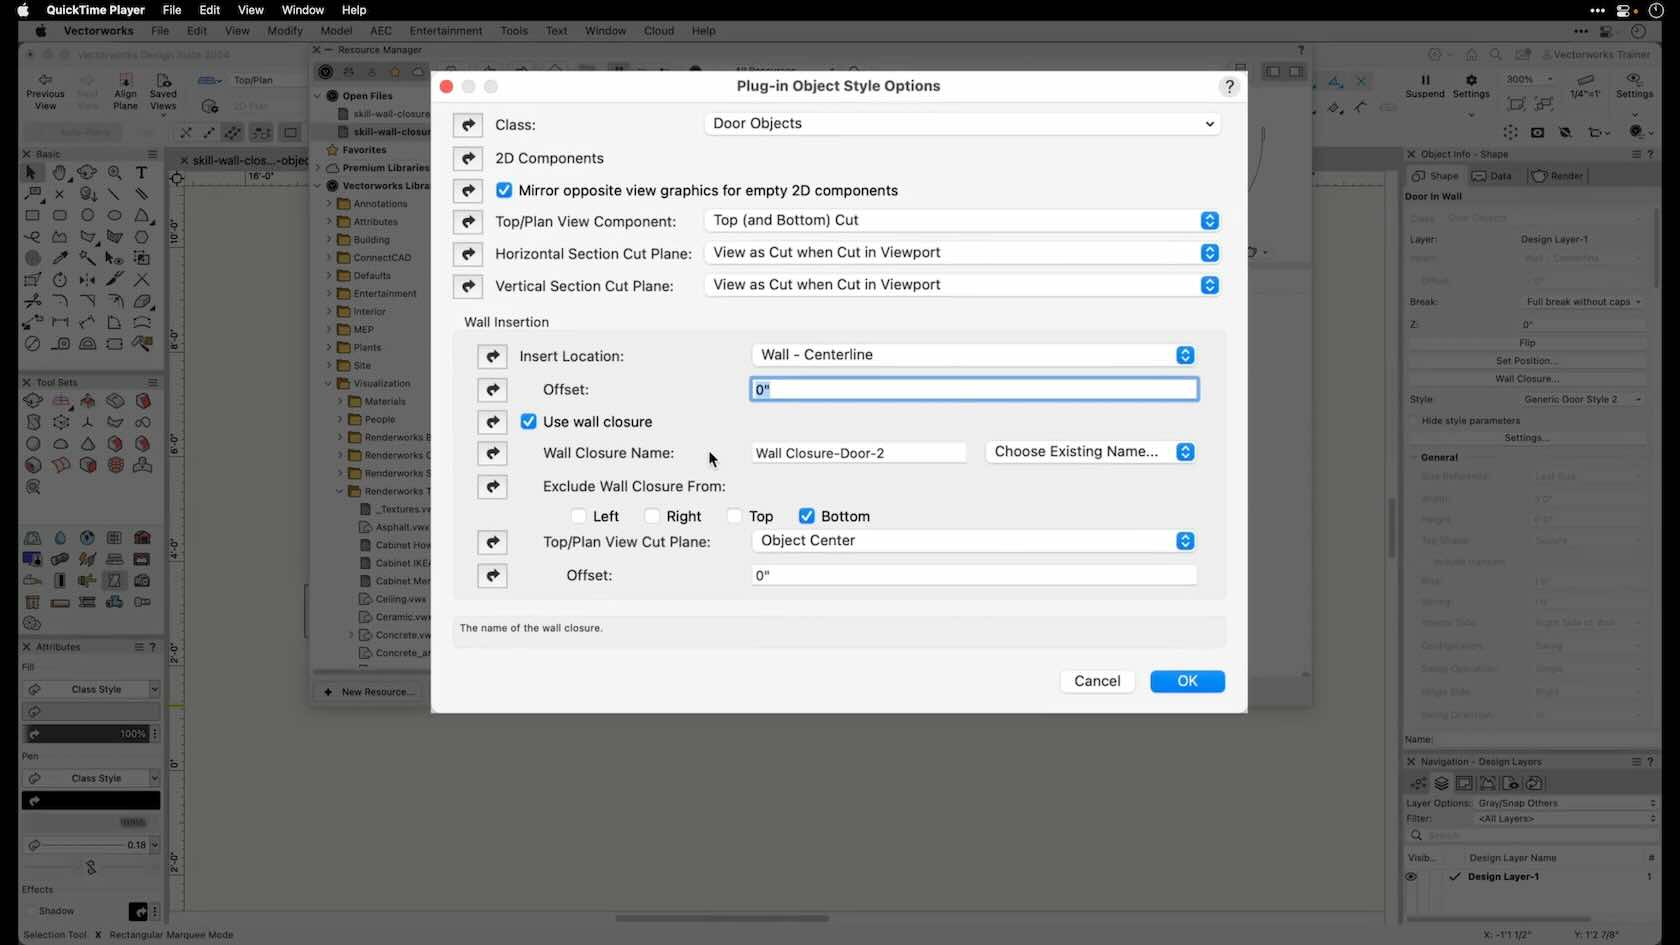
In this video, you will explore creating wall closures for styled objects. This video is part of a series dedicated to wall closures and related features.
Category: Skill
Requires Approval: No
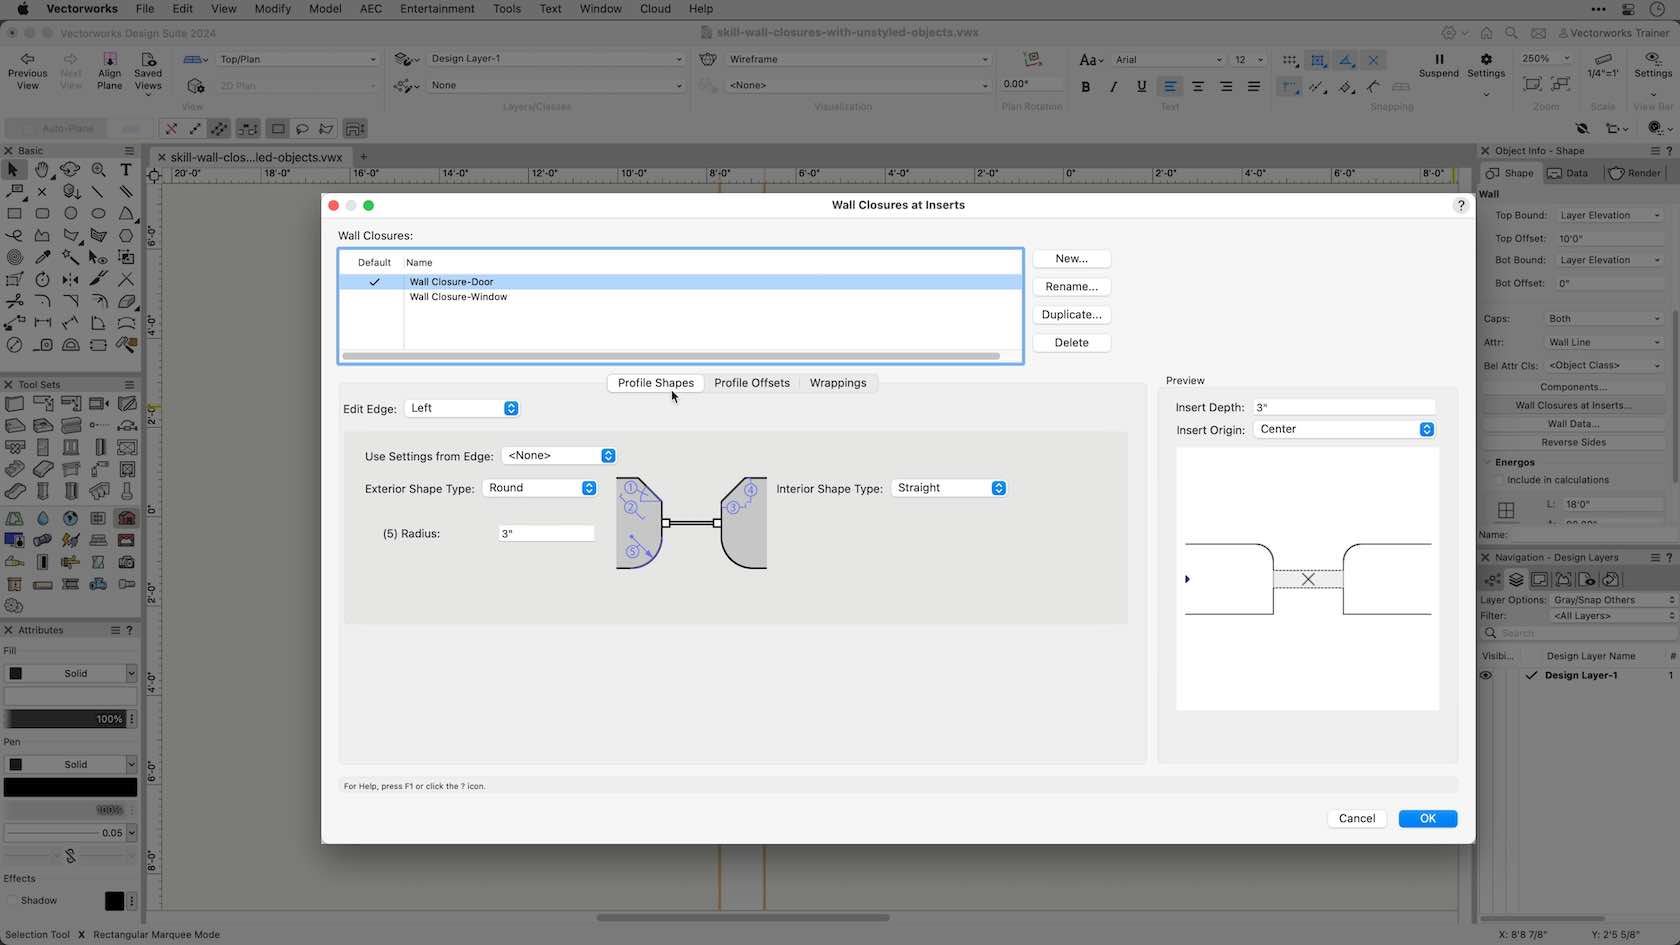
In this video you will explore creating wall closures for unstyled objects.
Category: Skill
Requires Approval: No
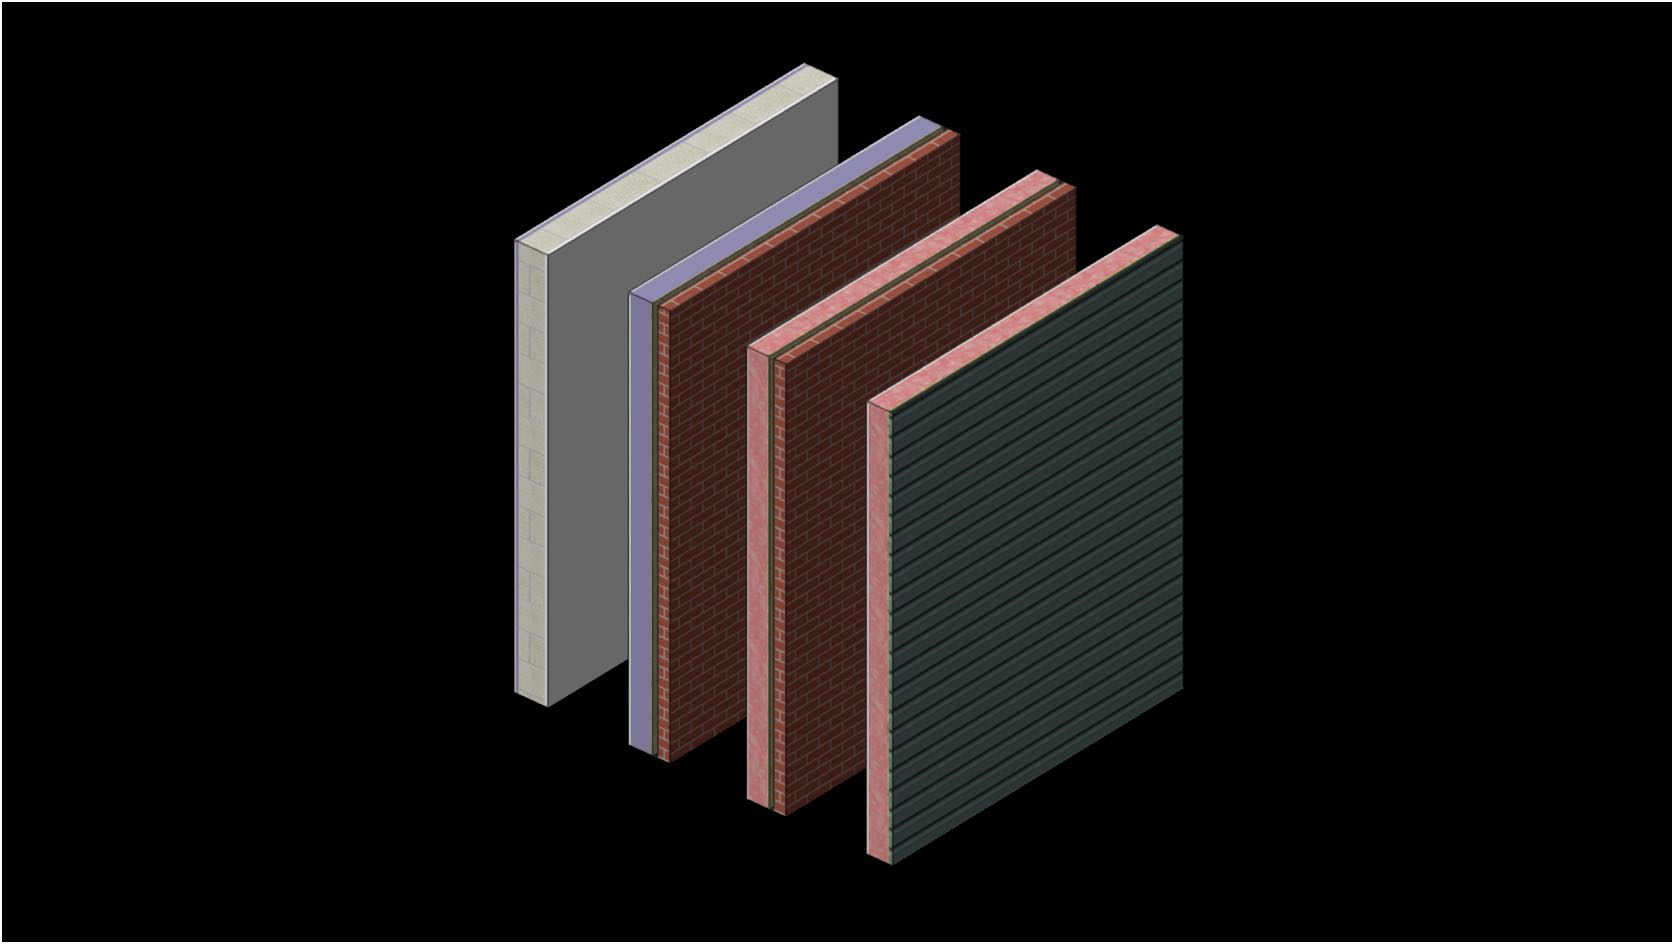
Walls, as with most building shell tools can be styled. Styled objects save you time as you can preset most of the options and in the case of walls means you can have your common wall build ups, with all the associated graphics and data pre-styled.
Category: Skill
Requires Approval: No
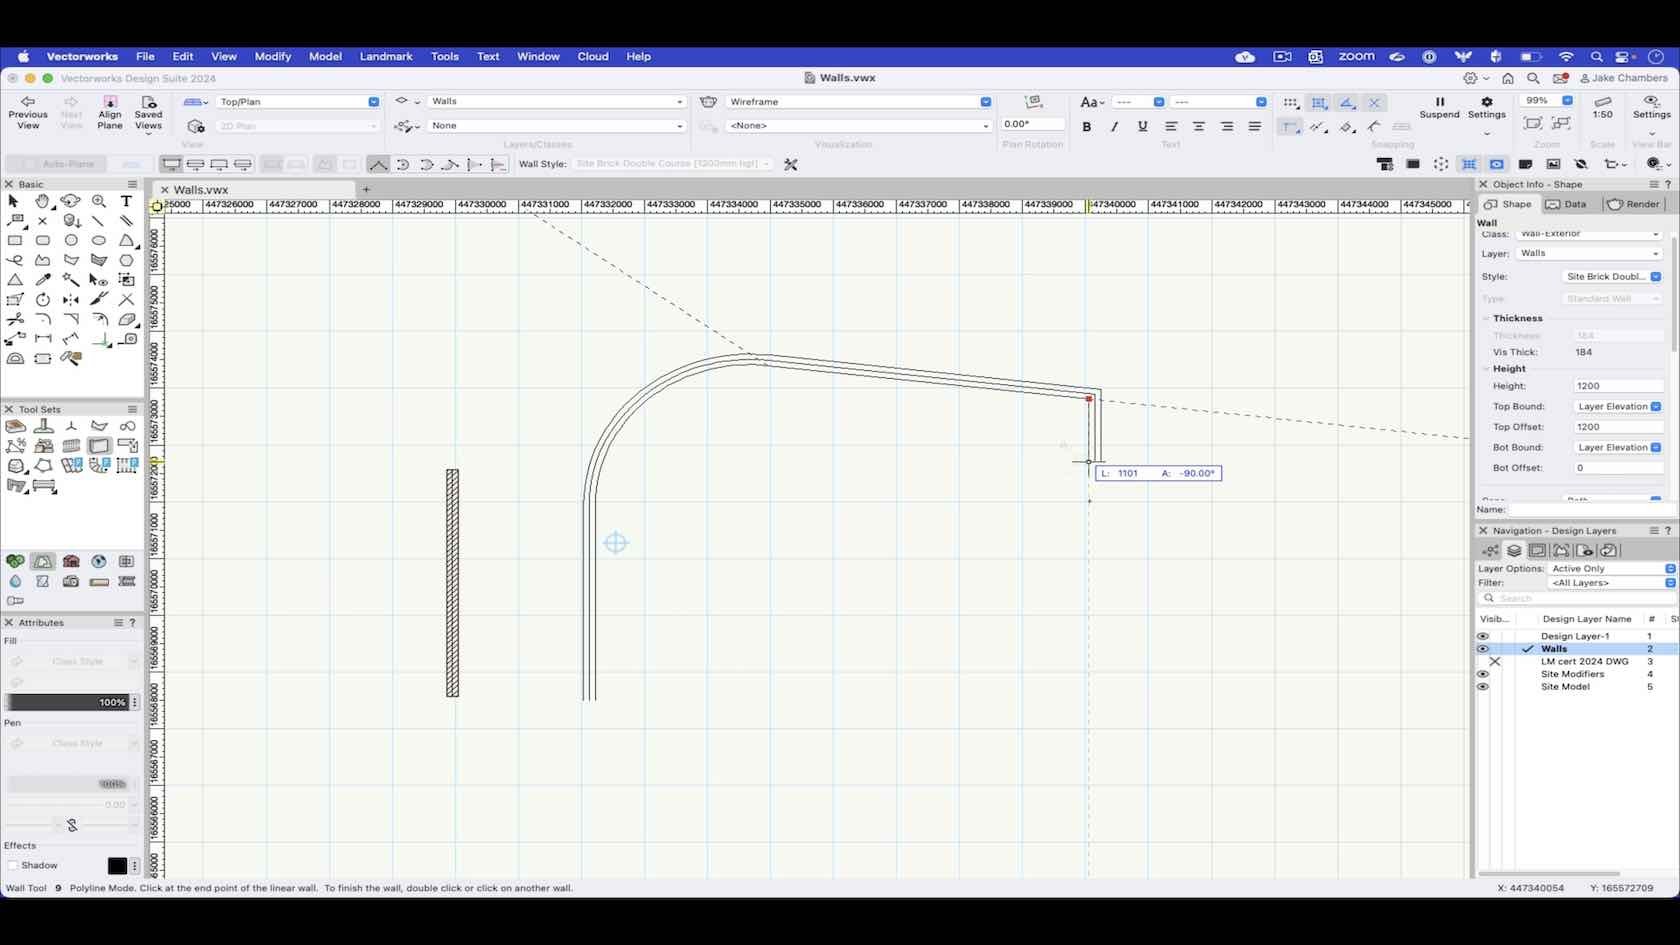
In this video we look at how to draw walls in Vectorworks using the drawing modes within the wall tool.
Category: Landmark 2024 Certificaiton
Requires Approval: No
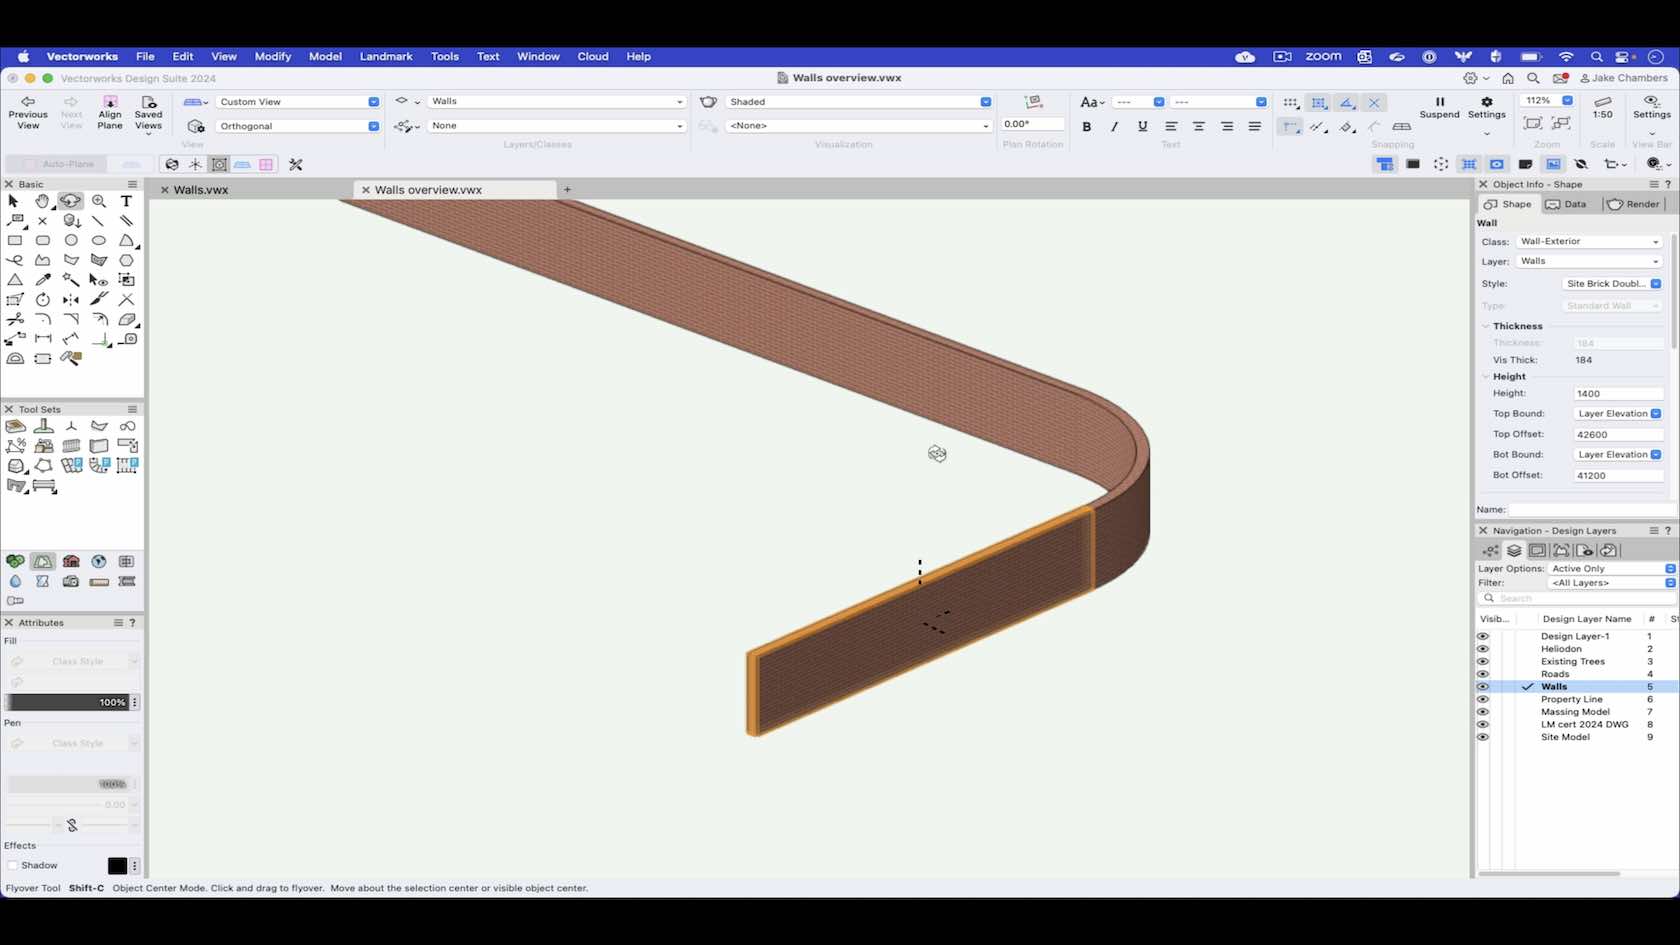
An overview of the wall tool outlining the topics covered in the following wall tool videos.
Category: Landmark 2024 Certificaiton
Requires Approval: No
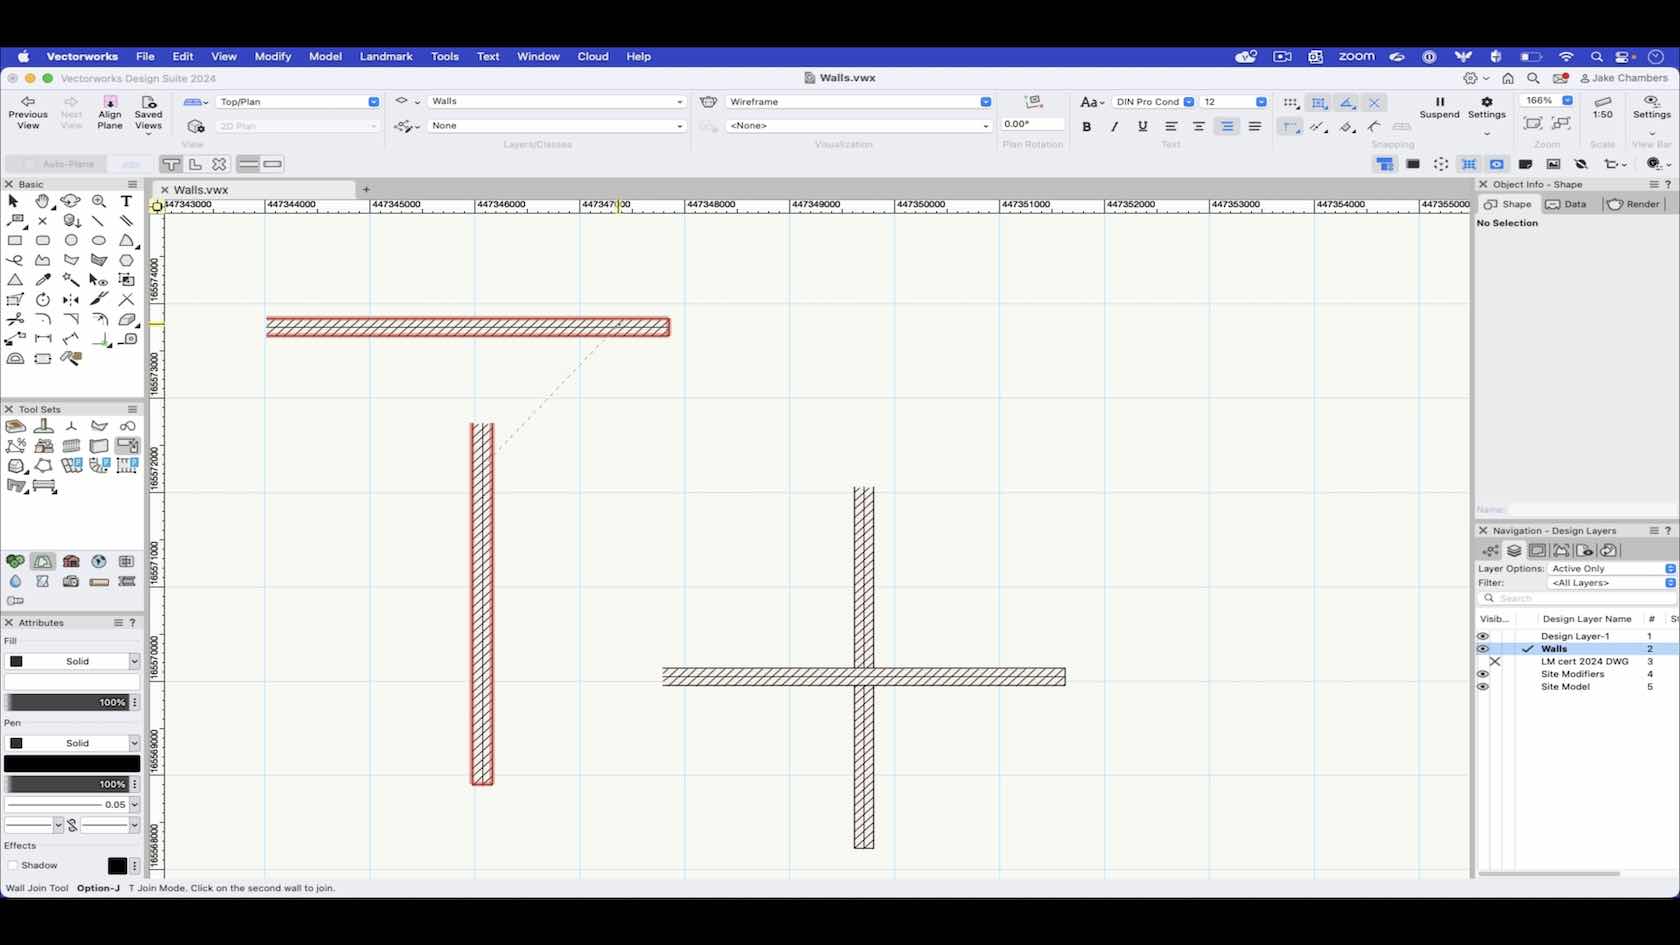
In this video we will look at how we can use the wall join tool to connect walls together.
Category: Landmark 2024 Certificaiton
Requires Approval: No
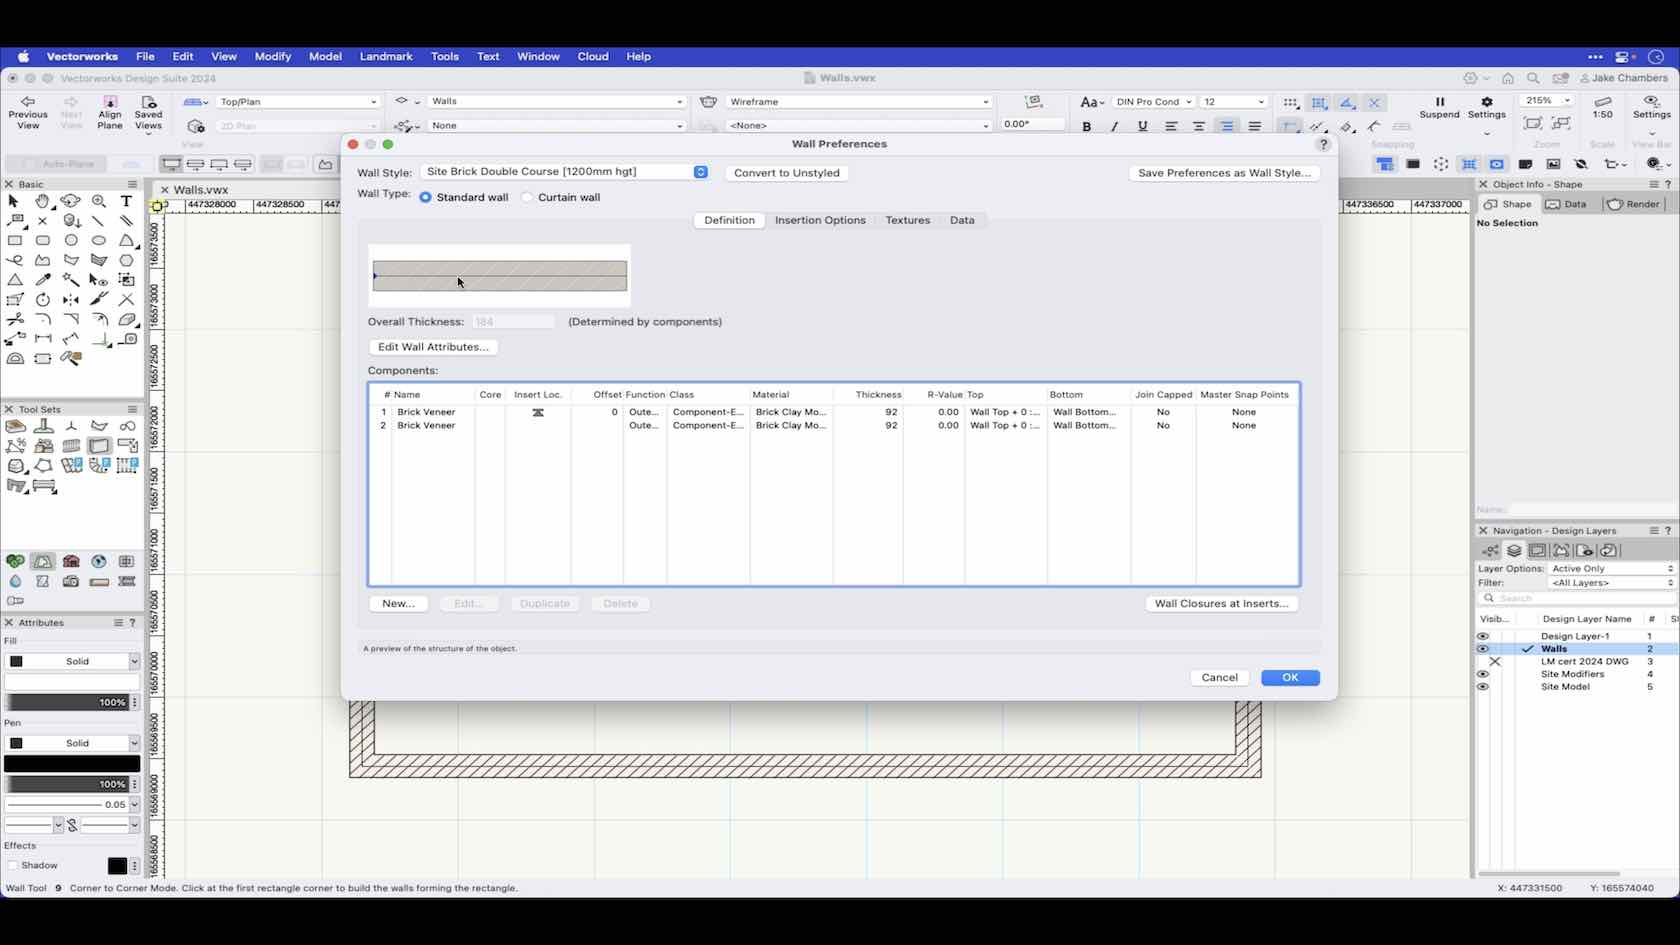
In this video we look at the wall tool preferences and how to create a wall style.
Category: Landmark 2024 Certificaiton
Requires Approval: No
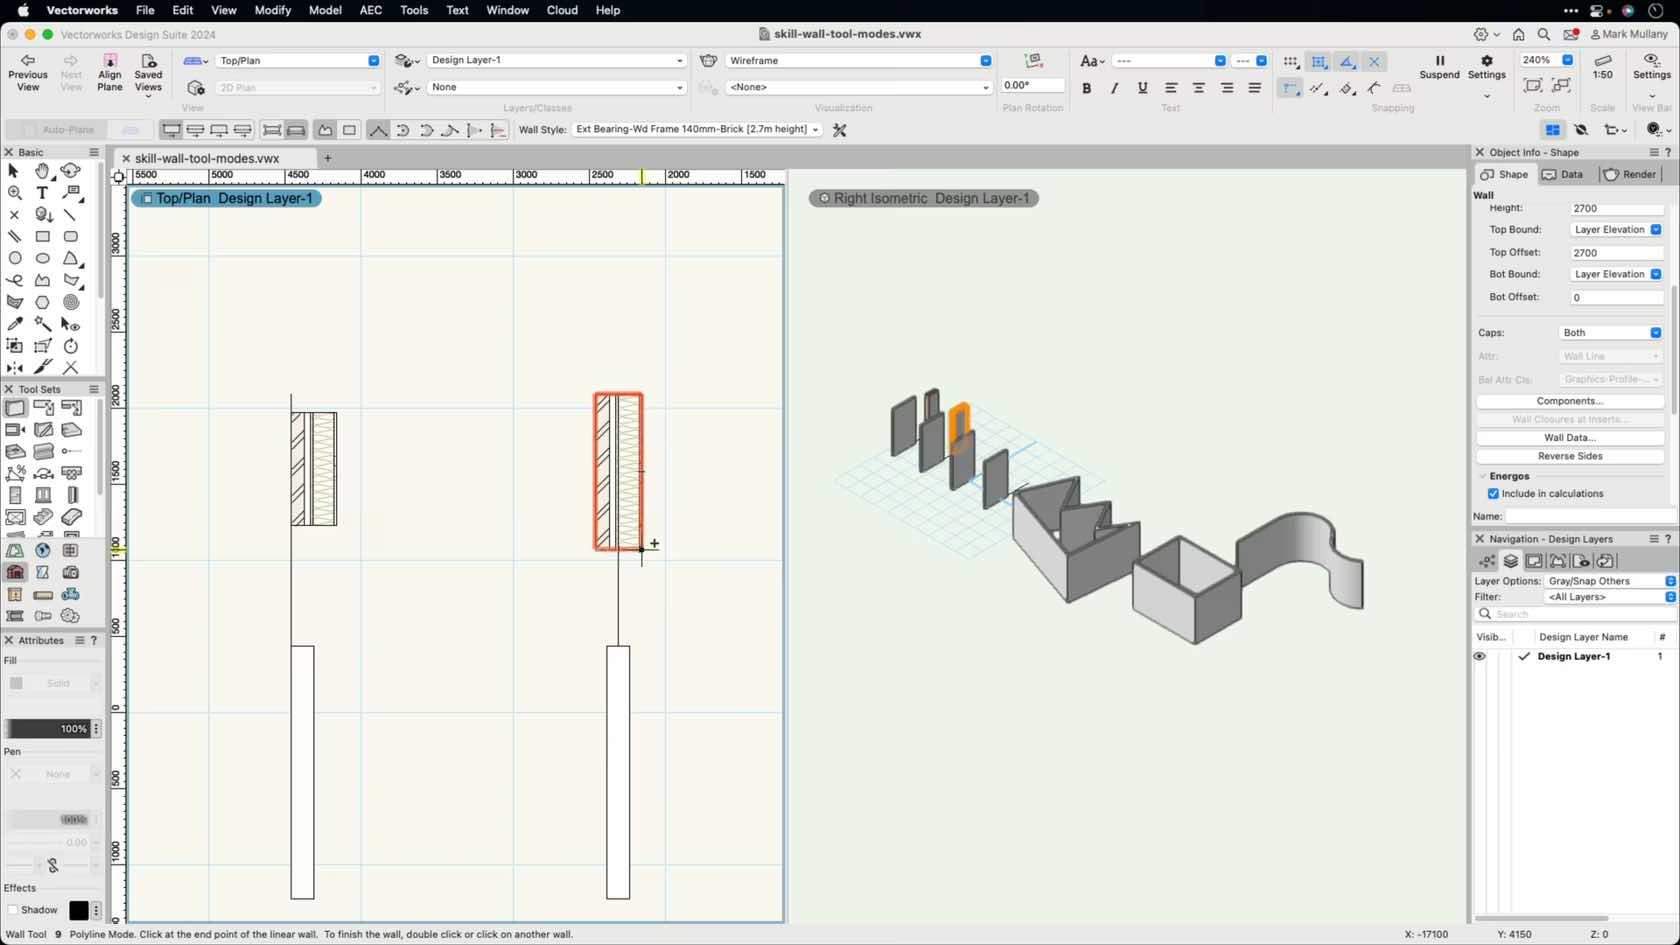

Story binding allows you to automatically set the heights for a wall and its components using level types leading to more accurate wall details.
This feature means that you can control the interaction between stacked wall types, as well as other wall top and bottom junctions with relative ease.
This feature means that you can control the interaction between stacked wall types, as well as other wall top and bottom junctions with relative ease.
Category: Architect Certification 2024
Requires Approval: No


Erfahren Sie, wie Sie Werkzeuge und Befehle zum Zeichnen von Objekten verwenden.
Category: Erste Schritte 2024
Requires Approval: No

Discover the cutting-edge tools and enhancements in
Vectorworks Landmark 2024. Unlock the secrets of navigating the sleek new user
interface and harness the power of industry-specific tools like the fence tool.
Explore how these innovative tools can transform your landscape designs into
sustainable masterpieces.
Category: Landscapes
Requires Approval: No
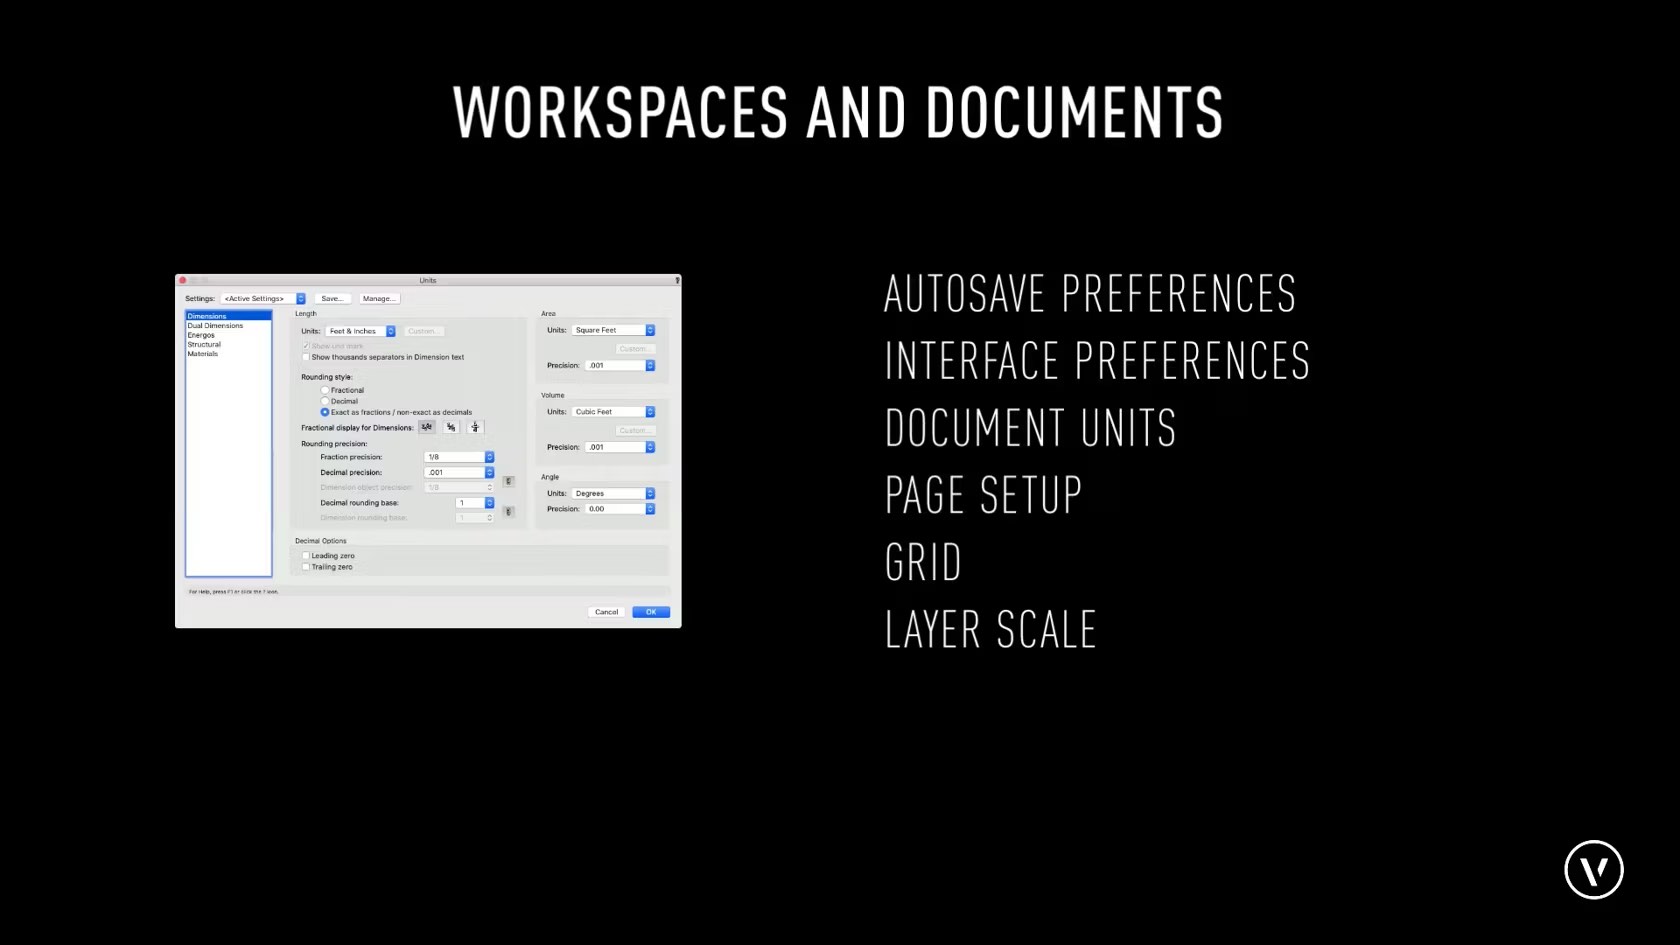
In this course, we will be providing an overview for the different main settings related to a workspace and document settings.
Category: Skill
Requires Approval: No

Lernen Sie Ansichtsbereiche und Schnitte beschriften.
Category: Erste Schritte 2024
Requires Approval: No

In this course, we will be discussing the basic zooming options found in Vectorworks. This includes the Zoom tool, scroll wheel, and trackpad zooming options.
Category: Skill
Requires Approval: No
Lernen Sie die Aufgaben des Zubehör-Managers kennen.
Category: Erste Schritte 2024
Requires Approval: No


デザインレイヤの機能や作成方法を紹介します。
※この動画は、Vectorworks 2024で収録しています。
Category: Getting Started
Requires Approval: No
Vectorworksには作業画面が複数用意されています。作業画面の違いについて紹介します。
※この動画は、Vectorworks 2024で収録しています。
Category: Getting Started
Requires Approval: No
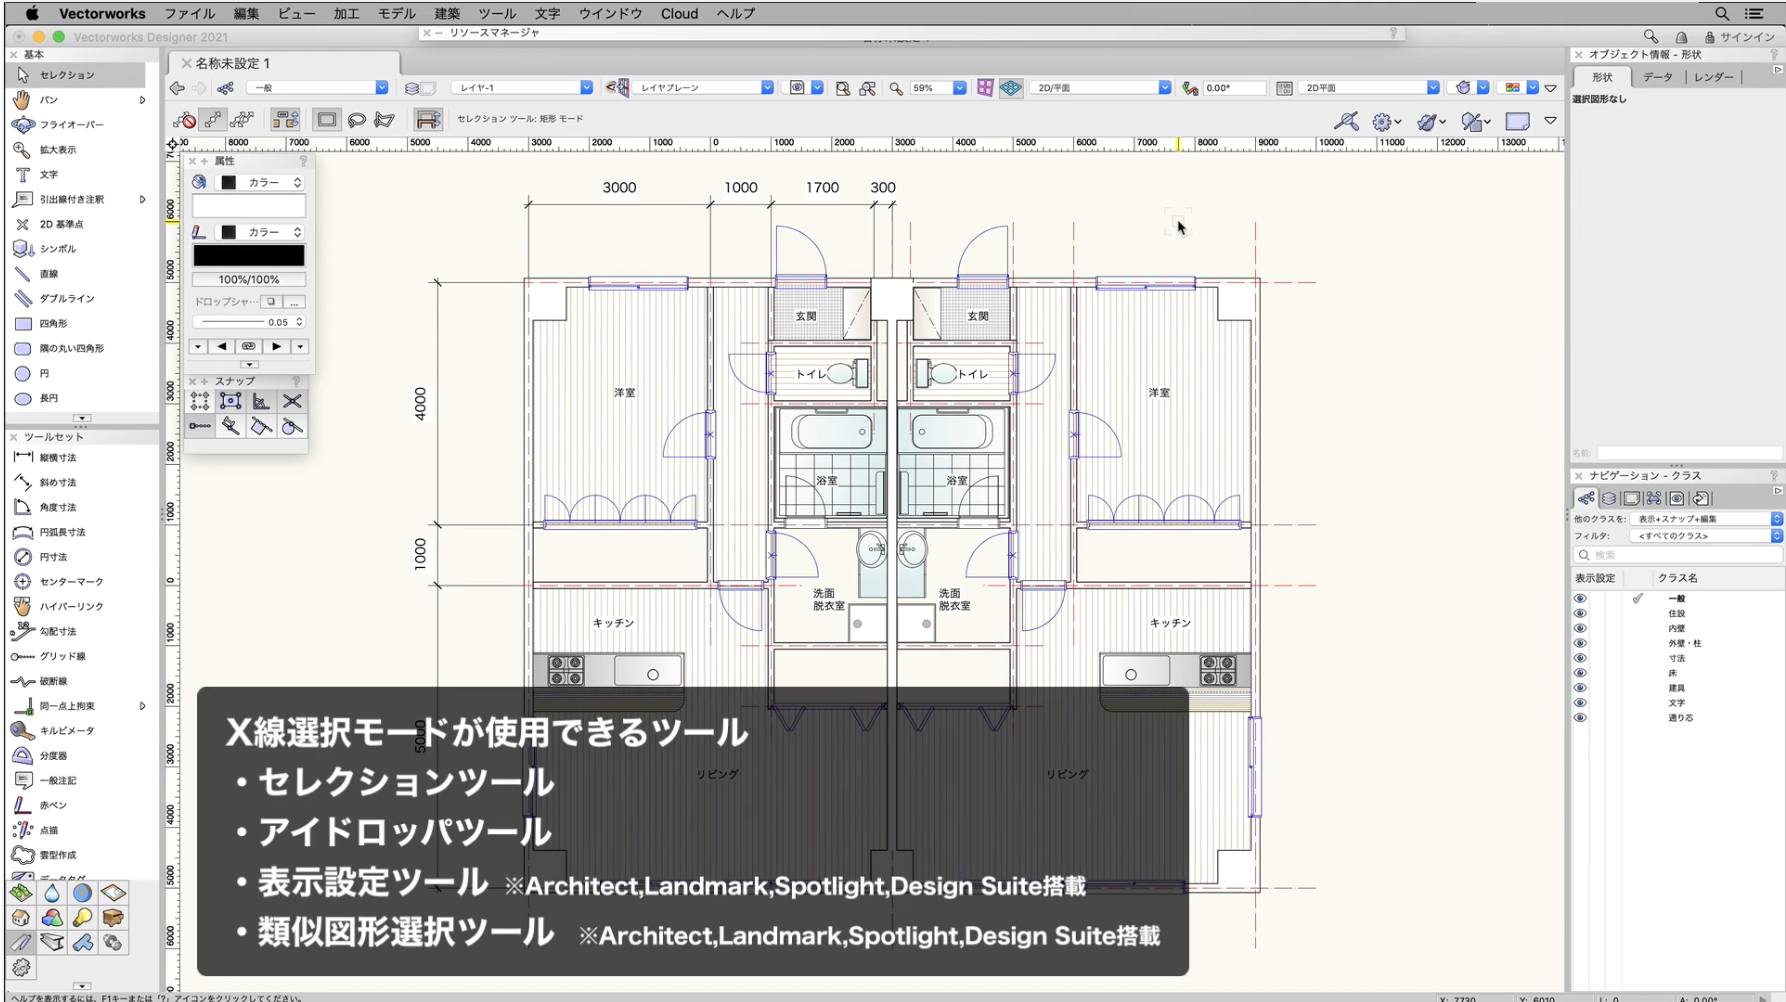
キーボードショートカットを利用した便利な機能を紹介します。
以下より【Vectorworksツール キーボードショートカット案内図】をダウンロードいただけます。
制作バージョン 2026 制作バージョン 2025 制作バージョン 2024
Category: Getting Started
Requires Approval: No
Vectorwoksの画面周りについて紹介します。また、パレットの表示方法を紹介します。
※この動画は、Vectorworks 2024で収録しています。
Category: Getting Started
Requires Approval: No